


What You Will Need to Draw an Ear
A standard HB or 2H pencil works well for light guide lines, along with an eraser, white drawing paper or a sketchbook, and an optional ruler for the first straight guide lines. If you want to ink the final drawing, keep a black pen or fine-tip marker nearby, and colored pencils Pencils or markers are optional for adding color at the end of your art lesson. None of these supplies need to be expensive, and you already have everything you need to begin.
How to Use This Step-by-Step Tutorial
Follow each step in order, since every line builds on the one before it. Start with light construction shapes because those first marks will be erased once the ear looks clean and complete. Small uneven lines early on are normal and part of learning. With this construction method, the ear becomes more recognizable at each stage, so stay patient and let the shape grow one step at a time.
1. Sketch The Ear Oval Guide Shape

Before we add any of the ear’s intricate curves, we start with a simple, foundational shape. This oval acts as the core volume for the ear, giving us a perfect guide for its size, angle, and placement on the head, particularly at the top of the ear. It is the most important step for getting the proportions right from the start. Lightly sketch a soft, tilted oval on your paper. Position it so the top aligns with the eyebrow line and the bottom sits level with the base of the nose. Make this oval about twice as tall as it is wide, with the top two-thirds being the widest part of the ear anatomy. Draw it with a gentle backward lean, so it’s not perfectly vertical. Keep your lines soft and rounded, especially at the lower end where we’ll later attach the earlobe. Remember, this is just a construction guide, not the final outline. Think of this shape as a soft cashew or a tilted teardrop lying on its side. This mental image helps you avoid drawing a stiff, geometric oval. A common mistake is making the front and back curves equally strong. Instead, let the back curve be a bit more pronounced. If you need more practice with foundational shapes, check out our guide on Here are some easy things to draw for beginners, including how to draw ears..
2. Draw The Outer Helix And Rim

Now we move from the basic shape to the ear’s defining outer edge. This step locks in the overall silhouette, giving us a solid frame before we add the inner details. Think of it as drawing the bowl before you sketch the pattern inside. Using your light construction shape as a guide, draw a single, flowing line for the outer helix. Start at the top of your ear shape and curve it down and around, following the C-shape you established. Keep your pencil pressure light and use a long, smooth stroke. Let the line taper slightly as it curves toward the earlobe. This line is not flat against the head; it should feel like a soft, three-dimensional fold wrapping around the form. For a more defined look, you can add a second, parallel line just inside the first to create the rim’s thickness. This double-line approach is great for cartooning or character Let’s incorporate design elements that reflect the ear anatomy. Remember, the thickness should vary, and it often runs a bit wider at the top and narrows as it flows down. Avoid making this outer contour perfectly smooth or symmetrical; a little organic wobble makes it look real. Pro tip: The most common mistake here is drawing a stiff, circular outline. Instead, focus on the natural, flowing curve of the antitragus. If you’re looking for more practice with organic shapes, check out our guide on easy pencil drawings of animals.
3. Add The Inner Antihelix In Y Form
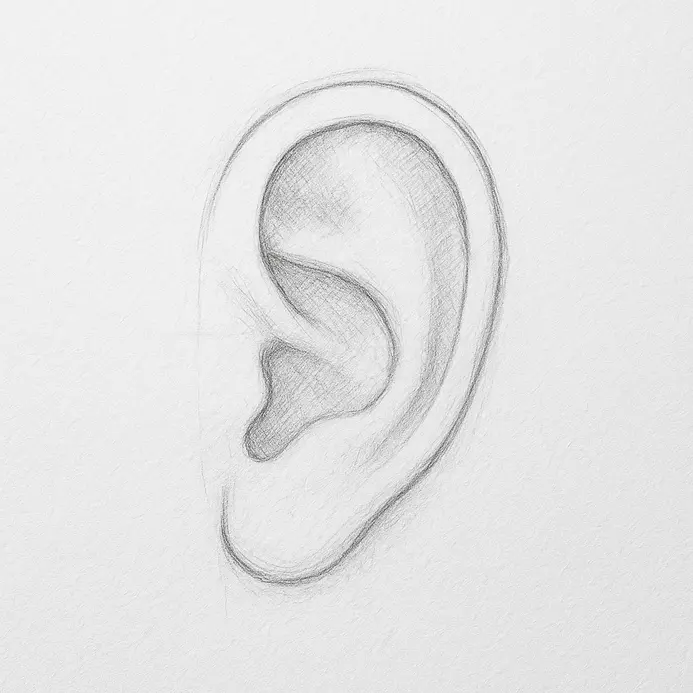
Alright, we’ve got the outer ear shape down, so let’s move inward. Adding the inner antihelix in a Y form is a key step because it defines the central cartilage structure that gives the ear its volume. When you’re figuring out how to draw an ear, this internal landmark is what separates a flat shape from a realistic one. Now, take your pencil and apply light, even pressure. Inside the ear cavity, sketch a simple Y shape. Start from the lower inner part, near where the ear attaches to the head, and draw a stem rising upward. From the top of that stem, branch out two lines, one curving slightly forward and the other back, aiming toward the upper inner ear. Make sure this Y is nestled within the outer helix you drew earlier; it should look like it’s sitting inside, not overlapping. Use continuous strokes to keep the lines smooth, and do not press too hard. We are just mapping out the form, so it is fine if it is faint. Position the branches so they follow the natural curve of the ear, and if it helps, imagine the cartilage ridges underneath as part of the ear. You can refine the lines later, but for now, focus on getting the placement right. This Y will serve as a guide for adding details like the concha and tragus in the next steps. Pro tip: To avoid a common pitfall, keep the Y asymmetrical and on the smaller side. A perfect, large Y can dominate the ear and make it look stiff, so embrace a little variation for a more lifelike result.
4. Shape The Tragus And Bowl-Like Concha

This is where we transform your ear sketch into a real three-dimensional form, highlighting its features. We’ve set up the outer helix and the main cavity, key components in drawing ears accurately. Now, let’s define the small cartilage flap in front and deepen that central bowl. First, locate the ear canal opening you sketched earlier. Right in front of it, draw a small, rounded projection, which is part of the ear’s anatomy. This is the tragus, an important part of the ear anatomy. Make its base thick where it connects, and taper it to a smooth, rounded edge. Curve its inner side inward toward the concha. Push the whole shape outward a bit so it partly overlaps your canal sketch. This overlap is key for depth. Now, focus on the large central area inside the helix. This is the concha. Use your pencil to shade the bottom of this space with soft, curved strokes, creating a gradient that gets darker toward the center. Think of carving a bowl shape, not just drawing an outline. Let your shading lines follow the curve of the bowl to show its concave form. Keep the cleft between the tragus and the front of the helix sharp and clear. This is the intertragic notch. Avoid smoothing it into a soft curve. A common slip is making the tragus look flat. Remember, it is a rounded piece of cartilage. Build its form with light shading on its outer curve and a darker line along its inner, concave edge. If you want more practice with foundational shapes, check out our guide on easy things to draw for beginners.
5. Refine The Earlobe Outline And Soft Edge

Now we refine that basic earlobe shape into something soft and real. This step is where you make the earlobe look like it belongs to the face, not like a separate sticker. We will take the simple outline you already drew and give it life. Look at your reference and identify the earlobe’s specific shape. Is it attached, free hanging, or more square? Use a light touch to redraw the silhouette, but this time, break the line. Instead of one continuous dark outline, use short, overlapping dashes. Let the line fade completely at the top where the lobe attaches to the face. Apply a bit more pressure on the lower curve to give it a subtle definition. To create a soft edge, stop relying on the outline alone. On the shadow side of the lobe, place a slightly darker tone just inside your broken line to suggest roundness. On the light side, let the outline disappear and allow the pencil tone to blend into the surrounding skin. This technique of lost and found edges makes the form feel three-dimensional. Pro Tip: A common mistake is drawing a hard, enclosed outline. Remember, the top attachment point should be the softest part of your drawing. If you are new to these shading techniques, practicing with ear anatomy can greatly enhance your skills. easy pencil drawings of animals Practicing these techniques can help you get comfortable with soft edges and form in portrait drawing.
6. Ink And Shade The Finished Ear Drawing
First, trace over your key outlines with a waterproof fineliner. Use smooth, deliberate strokes. Make the line for the outer helix a bit thicker to give it weight, and use thinner lines for the inner folds of the antihelix. Keep the line for the lobule soft and curvy. This variation in line weight instantly creates a sense of form. Now, let’s add shading to create depth and highlight the contours of the ear. Imagine your light source is coming from the top left. Use light, directional hatching to shade the opposite sides of the ear’s curves. Build up darker tones gradually in the deepest recesses, like inside the concha and behind the tragus. Follow the natural curves of the ear with your pencil strokes to keep the form from looking flat. A great pro tip is to use cross-hatching in the shadowed areas for richer, darker tones without pressing too hard. Remember, you can always add more darkness to your drawing, but it is tough to take it away when capturing the ear from the front. For more practice with building form through shading, check out our guide on easy pencil drawings of animals.
Tips to Improve Your Drawing
After finishing, try drawing the ear a second time from memory to see what you remember best. Practice the hardest section on its own, especially the inner folds, then draw the ear at a larger or smaller size to study how proportion changes. You can also test simple shading in the concha and under the folds, or place the ear against a plain background for clearer contrast. Each repeat makes the form easier to see and draw.
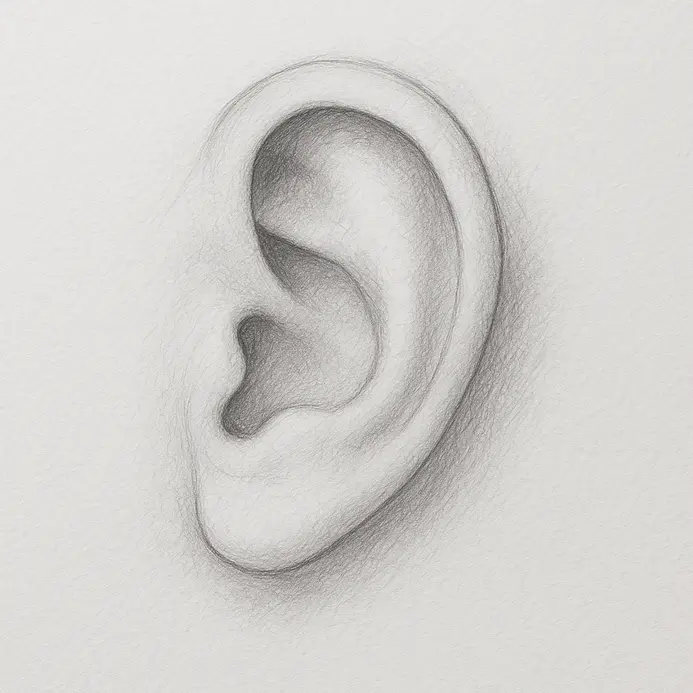
Conclusion
You have finished your ear drawing, and you now have a clean side-view study built from simple shapes, careful structure, and final detail lines. That process matters because it teaches you how to move from a light outline to a more natural form without guessing at the folds. If you want to strengthen the result, draw it again from memory, then try a larger version or a smaller version to test your control. You can also place the ear against a plain background, add a soft shadow, or turn it slightly to explore a new angle. A next good subject is a nose or eye, since both follow a similar step-by-step approach. Share your finished drawing and compare it with your next version. When you practice how to draw an ear again, the folds and curves become easier to place with confidence.
FAQs
Q: How do I simplify the basic structure when I want to draw an ear?
A: Start by reducing the ear to simple shapes: an outer oval for the outside of the ear, a y-shape or question-mark-like curve for the helix and anti-tragus, and a few lines for the valley and folds. Use an HB pencil to block in the entire ear in light strokes, establish reference points and overall location of the ears, then refine the basic structure step by step.
Q: What is the best order to draw an ear to make it look realistic?
A: The recommended order to draw is: establish placement with reference points and facial proportions, sketch the outer contour (front view or ear from the side), map major internal shapes (y-shape, concha, anti-tragus), define mid-tones and darkest areas with 2B or 4B, and finish with reflected light and softened edges. Work gradually so high contrast areas and darkest shadows don’t overpower the mid-tones.
Q: Which pencils and tools work best for shading the inside of the ear and darkest shadows?
A: Use an HB pencil for initial outlines, 2B for mid-tones, and 4B for the deepest, darkest values. Graphite sticks or softer pencils help with broader darks. Keep a kneaded eraser on hand to lighten highlights and create reflected light; use it also to lift graphite in the valley and inner folds.
Q: How do I draw the ear from the side versus a front view—what changes in shapes in the ear?
A: In a side view the outer rim and the helix silhouette dominate, and the question-mark-shaped curve is more pronounced; in a front view you see more of the concha and earlobe proportions. Use different angles to observe how the portion of the ear that faces forward reveals more of the anti-tragus and inner shapes, and simplify each view into recognizable shapes before adding details.
Q: How can I make my ear drawings look more realistic with shading and contrast?
A: Map out light sources first to find reflected light and highlights, then build mid-tones gradually with softer strokes and increase pressure for darker values. Preserve the lightest areas with a kneaded eraser, emphasize the darkest shadows with 4B, and blend subtly to avoid flattening. High contrast in the deepest folds and subtle transitions in the valley will make the ear look realistic.


