


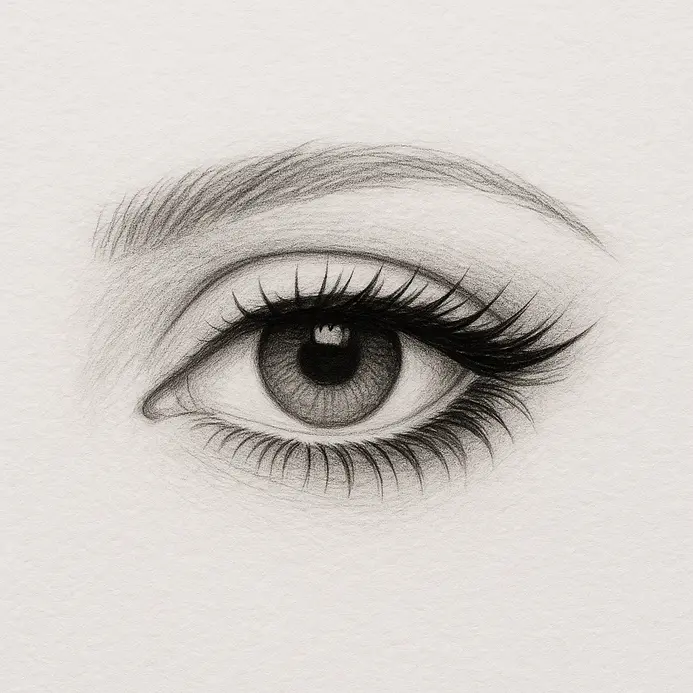
Essential Tools and Lead Preparation for Precision Drawing
You require a reliable drawing instrument, precision erasing materials, and archival paper to execute professional studies. A standard HB graphite core produces crisp guide lines with minimal indentation. You might employ a metal ruler for establishing initial straight reference boundaries and a sharp fine-tip pen for permanent line consolidation later. These drafting supplies do not require professional pricing to generate museum quality results. You possess every necessary component to get started with immediate practice sessions. Testing instrument sharpness against test stock reveals exact graphite density your chosen surface accepts. Light hand pressure yields transparent outlines that resist permanent engraving into paper grain. Rotating the barrel continuously maintains a uniform conical point across lengthy rendering passages. Securing your substrate with low-tack drafting tape prevents unwanted lateral shifting during detailed rendering stages. You will notice that understanding how to draw eyelashes correctly demands consistent substrate stabilization and tool calibration. Evaluating lighting conditions before starting prevents inaccurate value judgment throughout the shading phase. Maintaining an organized workspace eliminates distractions and supports sustained concentration during microscopic line work. Proper equipment preparation establishes an efficient workflow that accelerates skill acquisition across all facial feature studies. Disciplined material management reduces revision cycles significantly.
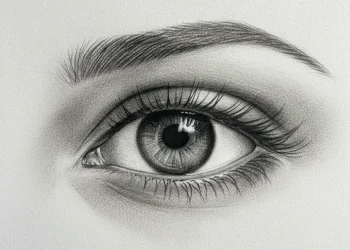
The Foundation: Establishing Correct Eyelid Anatomy
Sketching a precise almond curvature establishes accurate upper and lower margin positioning before hair placement begins. This preliminary mapping guarantees that subsequent strokes emerge from anatomically plausible growth zones. Rendering these boundary lines with transparent pressure maintains easy erase capability during structural refinement. Acting as a directional roadmap, these guides dictate precise strand alignment relative to the orbital socket. Constructing an accurate base ensures every individual hair follows natural skeletal contours seamlessly. Observing reference photography reveals subtle topographical variations across the tarsal plate and surrounding dermal tissue. You will observe that mastering how to draw eyelashes relies entirely upon accurate anatomical observation and proportional measurement. The superior margin frequently casts a subtle gradient shadow across the lateral iris boundary. Plotting these preliminary values early generates convincing three-dimensional spatial illusion on two-dimensional surfaces. Comparing ocular width against nasal bridge placement maintains global facial equilibrium during portrait execution. Aligning the lateral canthus slightly superior to the medial tear duct produces biologically accurate ocular orientation. Consistent measurement practice eliminates structural distortion across repeated portrait iterations.
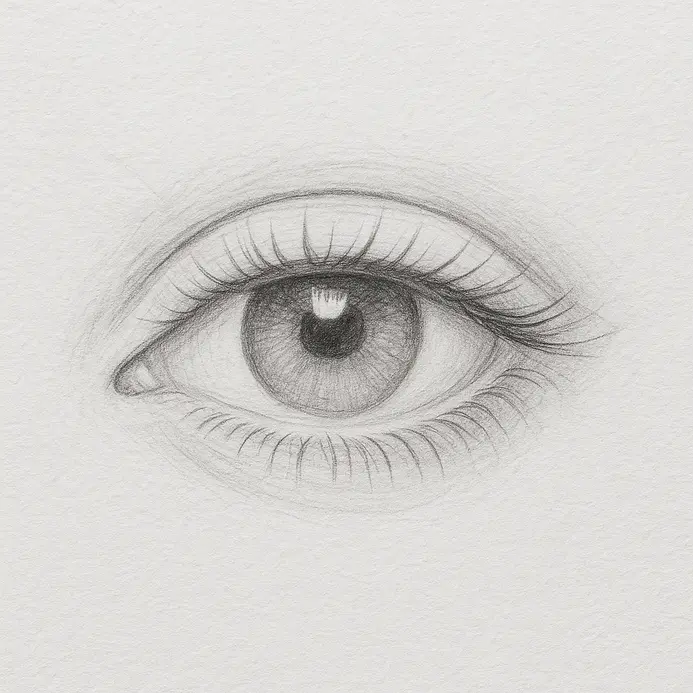
1. Outline the Basic Eye Shape for Your Canvas
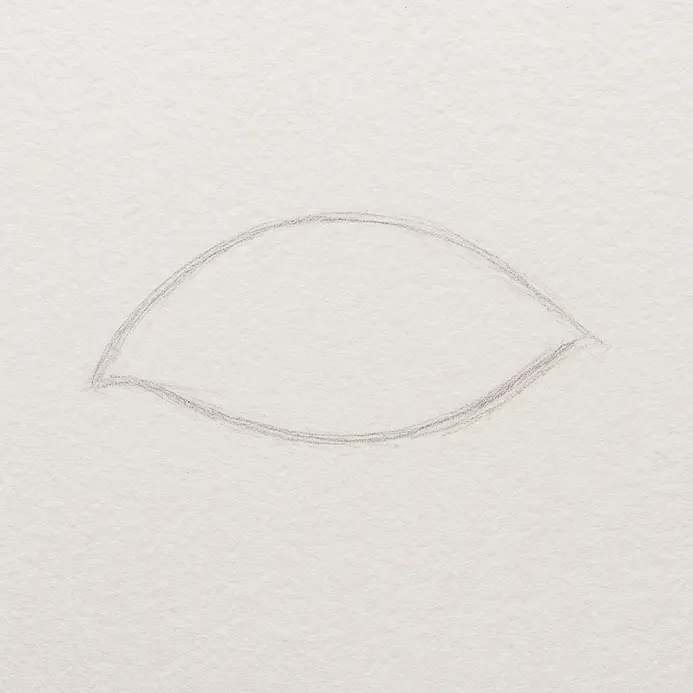
Constructing the foundational contour establishes a secure workspace before introducing individual texture strands. This mapping phase focuses exclusively on shaping the primary almond geometry so future strokes attach to anatomically accurate tissue in drawing an eye. Gripping your 2H graphite instrument lightly prevents accidental indentation during boundary tracing. Placing two distinct registration points defines the precise tear duct position and lateral termination edge. Remembering that the outer termination typically rests slightly elevated prevents flat, unnatural horizontal alignment. Connecting these reference markers with sweeping arcs generates fluid perimeter continuity. Executing each stroke in a single uninterrupted motion preserves consistent graphite density. Maintaining minimal downward pressure guarantees transparent lines remain easily removable later. Visualizing the perimeter wrapping around a convex sphere prevents flat, paper-like distortion. Verifying proportional relationships against reference material prevents structural collapse before permanent consolidation. Comparing orbital width to cheekbone prominence ensures harmonious facial geometry during full portrait rendering. You will discover that refining how to draw eyelashes depends heavily upon consistent spatial verification practices. Removing heavy preliminary outlines early eliminates hours of destructive correction cycles later. Establishing an accurately proportioned canvas directs every subsequent shading decision toward professional structural accuracy. Maintaining a clutter-free drafting environment supports steady wrist stability during extended micro-detail work sessions.
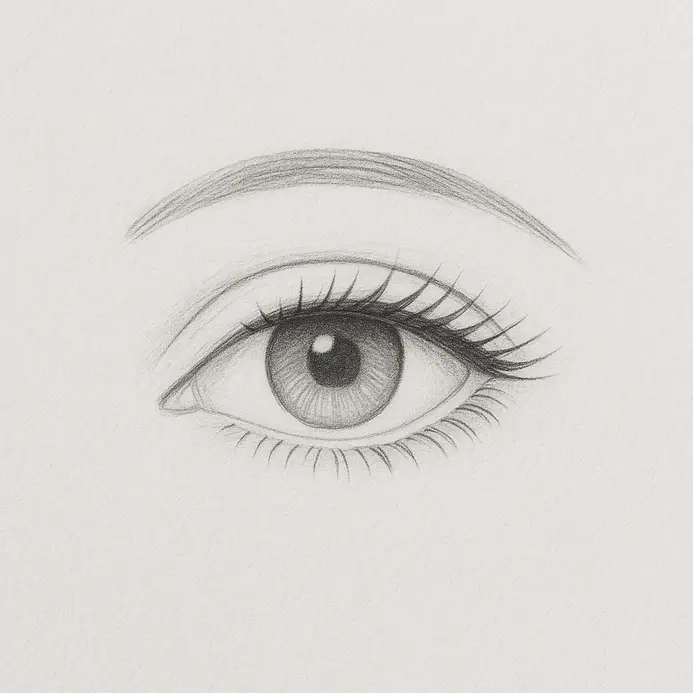
2. Direction Lines: The Foundation for Realistic Lash Angles
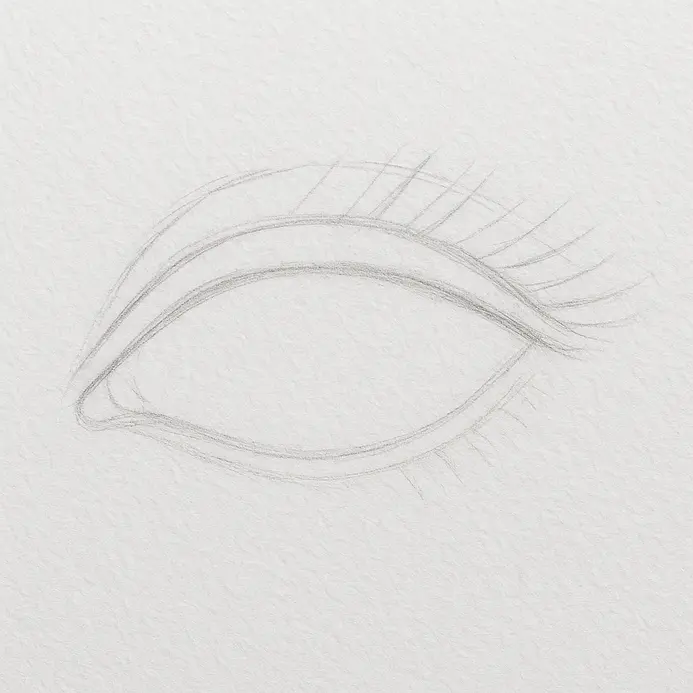
Mapping individual growth vectors prevents rigid, mechanical arrangements that destroy organic facial realism. This strategic planning stage serves as your primary defense against artificial fan positioning while establishing believable curvature flow. Selecting a hard graphite core generates delicate directional markers without compressing paper fibers. Initiating each pathway near the inner canthus creates natural outward progression along the superior ridge. Maintaining strict alignment with the previously established margin arc guarantees biological plausibility. Directing central vectors vertically while angling outer trajectories toward the cheekbone mimics authentic follicle growth patterns. Distributing these markers with irregular intervals prevents sterile geometric repetition. Lifting the drafting instrument completely at each terminal edge simulates authentic keratin tapering perfectly. Treating these preliminary pathways as temporary scaffolding maintains complete flexibility throughout later consolidation phases. You will recognize that studying how to draw eyelashes successfully requires disciplined patience during directional mapping. Applying identical vector logic to cartoon characters big eyes generates convincing volume within highly stylized portrait frameworks. Maintaining nearly invisible pressure guarantees these construction markers dissolve beneath confident permanent layers without visual interference. Establishing reliable directional habits here eliminates heavy digital cleanup requirements during final document processing.
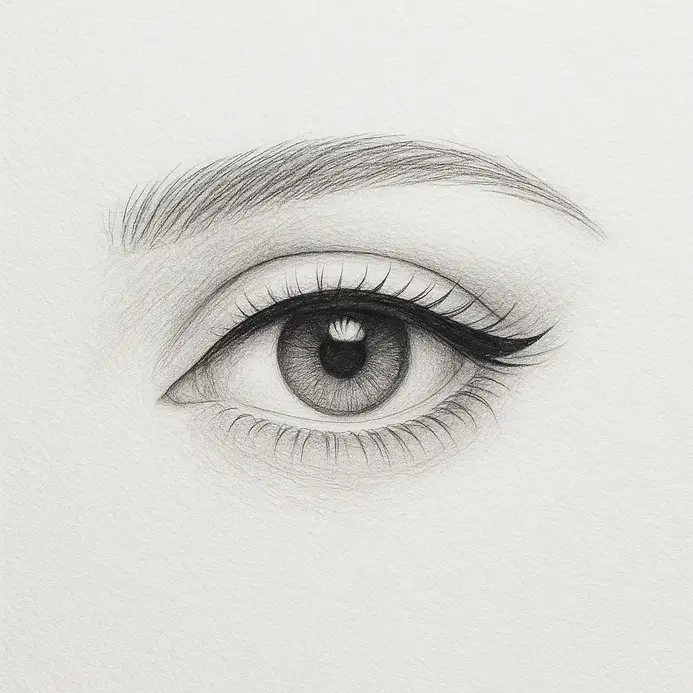
3. Sketch the Upper Tapered Flick Strokes Moving Outward
Activating the superior fringe transforms geometric outlines into dynamic, emotionally expressive facial components, particularly the upper eyelashes. This execution stage injects vitality and directional authority into the established mapping canvas. Anchoring the graphite tip firmly against the outer ridge initiates each primary trajectory. Executing a rapid upward sweep followed by immediate contact withdrawal generates authentic thinning at the terminal edge, crucial for defining eyelashes look. Repeating this precise motion along the entire margin demands constant angle adjustment to preserve anatomical alignment. Directing middle cluster vectors toward the ceiling while positioning corner trajectories toward the temple maintains natural growth logic. Observing high-resolution reference imagery confirms that varying root thickness establishes organic visual hierarchy. Engaging your entire forearm during sweeping execution produces significantly smoother curvature than isolated wrist articulation. Developing consistent muscle memory through repetitive execution drills guarantees uniform line quality across extended rendering periods. You will understand that perfecting how to draw eyelashes requires trusting confident continuous trajectories over hesitant mechanical tracing. Reviewing our comprehensive guide on how to draw eyes for beginners delivers targeted exercises specifically designed to master this essential flick release technique. Layering concentrated graphite gradually at each root cluster intensifies contrast without sacrificing delicate terminal definition. Maintaining steady pressure modulation delivers consistently professional stroke quality across every rendering pass.
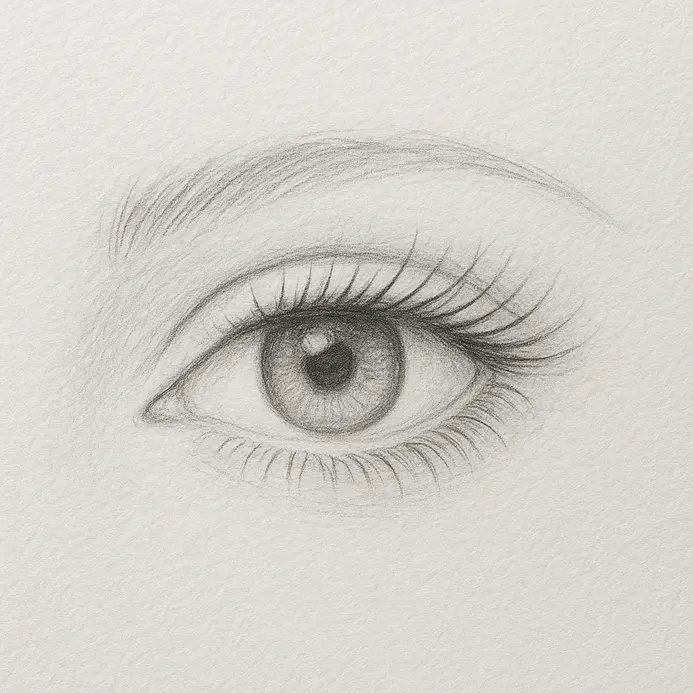
4. Lower Lashes: Short Sparse Strokes for Natural Balance
Establishing the inferior fringe anchors the complete composition visually and prevents floating, disconnected ocular appearances. Following the established superior contour maintains proportional equilibrium across both perimeter margins. Positioning your mechanical drawing instrument Directly against the lower boundary initiates each distinct fiber placement, contributing to the overall art composition. Pulling outward and slightly downward across the outer two-thirds creates authentic gravity-affected growth trajectories. Releasing applied pressure at each terminal point guarantees delicate thinning across the finest strands. Leaving the inner third nearly vacant respects biological anatomy while preventing heavy, unnatural clustering. Permitting occasional trajectory intersections introduces authentic biological randomness into the structural layout. Dragging a fresh eraser across dense graphite concentrations lightens unwanted tonal weight without disturbing primary architecture. This gentle lifting methodology perfectly mimics the translucent quality of fine peripheral facial hair. You will notice that mastering how to draw eyelashes demands deep comprehension of biological spacing variations across the entire orbital rim. Practicing fundamental facial proportion drills at how to draw eyes for beginners reinforces accurate inferior margin distribution habits. Maintaining minimal downward contact preserves expansive negative space directly beneath the pupillary region. Consistent execution repetition builds intuitive motor control for subtle anatomical detailing applications.
5. Erase Excess Construction Guide Marks for a Clean Finish
Clearing temporary structural scaffolding transforms preliminary practice sketches into refined professional exhibition pieces. This meticulous refinement stage separates casual drawing attempts from polished, portfolio-ready anatomical studies. Selecting a kneaded rubber compound enables precise graphite lifting without abrading delicate paper surfaces. Pressing gently onto heavy preliminary boundaries absorbs excess carbon material safely away from finalized contours, maintaining a lighter finish. Utilizing a clean synthetic brush removes loose particulate matter before it smears across freshly rendered layers. Applying a vinyl removal block with unidirectional friction permanently eliminates stubborn structural intersections. Anchoring your forearm firmly against the drafting table stabilizes hand positioning during delicate surface restoration. Avoiding aggressive abrasive scrubbing protects remaining paper texture and prevents irreversible fiber damage, ensuring the integrity of the art. Implementing repeated gentle lifting motions achieves complete removal while preserving underlying graphite density layers. You will discover that learning how to draw eyelashes at advanced levels frequently depends upon meticulous edge purification and shadow preservation. Retaining faint preliminary coordinates offers flexible options if you plan digital scanning and automated cleanup during post-processing steps. Exploring fundamental gradient exercises at simple drawings to practice reinforces proper debris management before final consolidation occurs. Maintaining patient execution guarantees crisp presentation standards across every completed portrait study.
6. The Lash Base Line That Adds Structural Definition
Establishing a defined basal margin supplies every individual hair strand with a secure anatomical attachment point. This detailing sequence eliminates disconnected visual artifacts while building cohesive structural foundation across the superior edge. Utilizing a sharpened 2B graphite core traces the previously established boundary with calculated application weight. Applying moderate pressure incrementally increases boundary thickness toward the lateral termination while permitting natural tapering near the medial corner. Implementing microscopic oscillating motions disrupts rigid mechanical uniformity and accurately simulates authentic dermal topography. Preventing mathematically perfect horizontal progression preserves organic biological realism throughout the entire marginal ridge. Resting your weight against the work surface ensures unwavering control during precision contour application. Implementing the dot-to-dash technique significantly enhances basal density before rendering primary individual strands. Compacting short vertical markers tightly together generates subtle volumetric mass without heavy artificial outlining. You will recognize that studying how to draw eyelashes successfully requires acknowledging that irregular concentration patterns mimic authentic follicular distribution. Applying this anchoring methodology consistently improves structural coherence across your complete portfolio of anatomical rendering samples. Preventing uniform boundary thickness eliminates cartoonish flatness from emerging within realistic character portraits. Controlled pressure modulation delivers professional marginal definition without introducing excessive visual mass or graphic harshness.
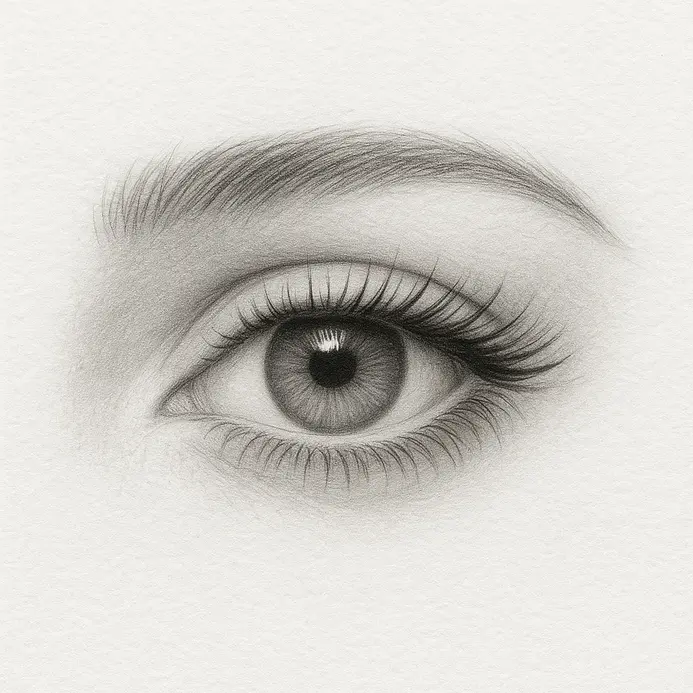
7. Shade Along the Upper Lash Line for Extra Dimension
Depositing soft tonal mass beneath the primary marginal ridge generates essential depth and grounded visual presence. This value layering stage prevents flat, lifeless surface impressions while securing convincing three-dimensional structural anchoring. Transitioning to a soft 4B graphite stick facilitates broader tonal application directly along the underlying skin fold. Depositing microscopic stippling marks precisely at the follicle base concentrates localized darkness exactly where biological attachment occurs. Tracing the natural orbital curvature maintains strict anatomical fidelity throughout the entire shading progression. Applying negligible downward force near the inner tear duct allows gradual density buildup toward the lateral termination point. Constructing gradient layers progressively produces seamless optical diffusion instead of harsh artificial demarcations. Maintaining a shallow instrument angle creates expansive transitional gradients across naturally convex surfaces. Tilting the barrel vertically restricts application width exactly where precise root definition requires concentrated attention. You will observe that advancing how to draw eyelashes techniques depends entirely upon controlled layer sequencing and pressure management. Executing identical gradient application principles within stylized character design improves overall volumetric rendering cohesion across your creative portfolio. Applying identical diffusion principles to exaggerated character studies strengthens fundamental anatomy comprehension significantly, especially in the context of the upper eyelid. Executing controlled wrist movements prevents heavy accidental smudging while preserving delicate peripheral gradient transitions.
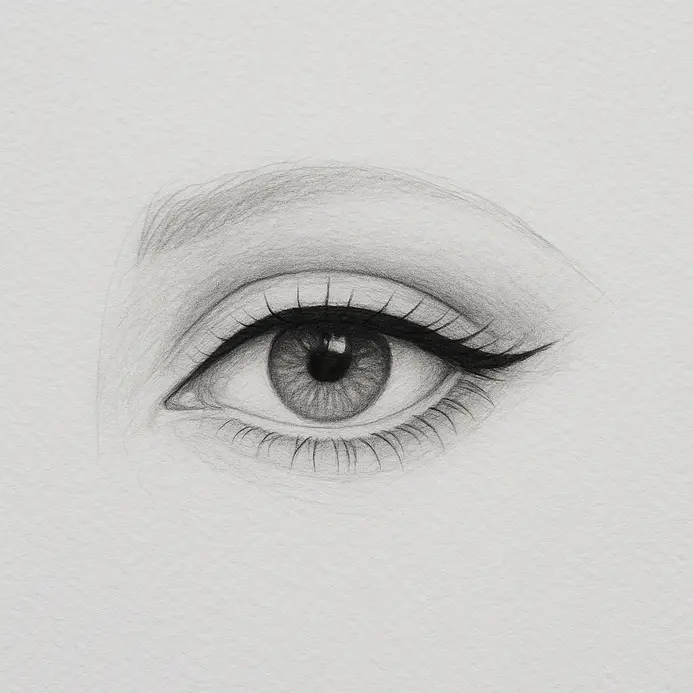
8. Ready for Impact? Apply Final Lash Darkening Color
Converting preliminary structural outlines into bold terminal features requires systematic value concentration and highly confident line consolidation to get the hang of the technique. This final rendering sequence transitions your anatomical study from working draft toward exhibition-ready portrait completion. Securing a freshly sharpened 6B graphite instrument concentrates maximum pigment density precisely at each follicular origin point. Applying decisive downward force at the base before initiating outward trajectory generates immediate tonal contrast and visual authority. Lifting physical contact completely at the terminal section preserves delicate thinning mechanics without artificial bluntness. Redeploying this precise motion sequence across the entire superior boundary deepens root concentration significantly while preserving individual strand isolation. Deploying overlapping hatching networks within thickened regions generates convincing volumetric mass and density. Rotating your entire drafting surface continuously aligns natural biomechanical trajectory perfectly with anatomical curvature progression. Eliminating solid dark perimeter borders around the complete orbital rim maintains strict biological plausibility within realistic character studies. You will recognize that mastering how to draw eyelashes at advanced levels relies entirely upon concentrated basal density application rather than continuous perimeter outlining. Maintaining needle-sharp instrument points prevents muddy texture buildup from compromising crisp hair fiber separation standards. Reviewing foundational layering exercises through how to draw a tree provides excellent crossover training specifically optimized for controlled graphite volume management application. Implementing precise pressure modulation consistently generates striking final contrast while protecting delicate structural integrity throughout every rendered phase.
Troubleshooting Common Lash Drawing Inconsistencies
Excessively rigid fiber trajectories frequently originate from aggressive downward pressing or isolated wrist articulation instead of coordinated shoulder engagement. Practicing expansive sweeping trajectories across disposable scrap material significantly reduces muscular tension while promoting fluid gradient tapering. Overcrowded margin boundaries emerge when artistic spacing adheres to rigid mathematical uniformity throughout the entire rendering process. Reducing total stroke count while deliberately expanding inter-strand intervals rapidly restores biologically accurate visual spacing. Misaligned growth patterns develop exclusively when ignoring fundamental orbital skeletal curvature beneath the skin surface. Aligning each individual trajectory perpendicular to the underlying dermal ridge completely prevents unnatural protrusion artifacts. You will observe that understanding how to draw eyelashes professionally resolves most structural anomalies through systematic reference evaluation and deliberate mechanical correction. Unintentional graphite dispersion across clean boundary lines drastically dulls final contrast separation between hair and skin. Positioning transparent overlay paper across finished anatomical studies protects completed tonal layers during aggressive gradient application phases. Uneven terminal thickness originates directly from prolonged instrument usage without periodic sharpening rotation. Rotating graphite cylinders continuously maintains razor-sharp contact points throughout extended rendering durations. Recognizing mechanical imperfections early accelerates technical refinement significantly while preventing entrenched bad habits. Implementing systematic error tracking ensures continuous measurable improvement across every subsequent anatomical study session.
Conclusion
Finalizing your portrait artwork demonstrates measurable advancement within delicate facial rendering techniques across all complexity levels. Your completed anatomical study validates steady progression toward comprehensive organic curve mastery and proportional accuracy understanding. This structured educational framework prioritizes foundational perimeter mapping before advancing toward microscopic textural detailing implementation. Securing transparent guide coordinates initially guarantees unwavering structural precision during permanent trajectory consolidation stages. Executing decisive terminal strokes establishes professional contrast separation alongside realistic spatial volume generation throughout the composition. Having integrated proportional mapping seamlessly with directional flow methodology positions you for advanced anatomical execution success. Reconstructing the identical facial composition exclusively from memory thoroughly tests spatial retention capacity and rapidly accelerates intuitive biomechanical control development. Altering overall dimensions substantially or shifting viewing perspective dramatically reveals how directional lighting alters surface topography perception directly. Modulating strand density variations directly alters perceived emotional tone significantly across diverse character expressions instantly. Attempting complex brow architecture structures subsequently expands your overall anatomical rendering capability considerably beyond isolated margin studies. Distributing completed character portraits among professional creative networks generates highly constructive technical criticism while motivating continuous advancement momentum. Selecting a pristine drafting sheet immediately following session completion reinforces freshly acquired techniques while motor memory pathways remain fully active and ready.
FAQs
Q: How do I start eyelash drawing if I’m a complete beginner?
A: Begin with a simple step-by-step approach: lightly sketch the eyelid and lash line, mark the outer corner and inner corner, then draw individual lashes emerging along the eyelid. Use short, varied strokes so the lashes look natural, and follow beginner drawing tutorials or a basic lesson from an academy-style instruction to build confidence.
Q: What technique makes lashes look natural rather than stiff?
A: To look natural, vary length and thickness: make lashes shorter and softer near the inner lid and gradually longer and thicker toward the outer corner. Draw them with slightly curved strokes that fall away from the eye, avoid perfect symmetry, and experiment with sparse lashes in places so they don’t appear overly uniform.
Q: Should I draw eyelashes dark or light when shading the eye?
A: Start lightly and build up darkness—lightly sketch the shape first, then fill in and darken the base where lashes meet the lid to create depth. Use darker, thicker strokes sparingly at the outer corner to suggest volume while keeping some lashes softer to preserve a natural look.
Q: How can I make eyelashes look thicker without overdoing it?
A: Instead of drawing every lash bolder, add layers: draw a first row of individual lashes, then add a few overlapping lashes with slightly darker strokes at the base and near the outer corner. Fill sparse areas selectively and avoid drawing every lash identical—this layered build-up gives a thicker appearance without looking artificial.
Q: Are there step-by-step drawing tutorials for different eyelash styles?
A: Yes—look for step-by-step lessons that cover natural, dramatic, and stylized eyelashes. Good drawing tutorials will teach you to lightly sketch eyelid placement, how lashes fall and curve, how to vary length and thickness, and how to critique your work so you can experiment and refine each style.


