


Mastering Water Control And Paper Integrity
Your paper weight is the single biggest factor in controlling water when exploring easy watercolor botanical painting ideas. You need at least 300gsm cold-press paper because thinner sheets buckle instantly with wet-on-wet washes, ruining your delicate leaf veins. Think of the paper as your co-pilot; a sturdy surface holds the water and pigment exactly where you place them, allowing for those soft, organic blends we love. Beginners often flood the page, which leads to colors bleeding outside the intended silhouette and a complete loss of luminosity. The good news is, with the right paper, you can practice blending on a damp surface without fear, building confidence for those perfect petal gradients.
Selecting Essential Brush Sizes For Details
A size 6 round brush is your workhorse for painting most leaves and medium petals. You want synthetic brushes with a sharp, resilient point that snaps back after each stroke, giving you control for fine stems and veining. Trust me on this, using a brush too large for the detail forces you to overwork the area, which damages the paper surface and creates muddy, undefined edges. Keep a tiny size 2 on hand for the tiniest stamens and leaf serrations, and a size 8 for laying down quick, loose background washes. This limited set prevents the paralysis of too many choices and lets you focus on the flow of your painting, not your tools.
1. Paint a Single Green Monstera Leaf Silhouette
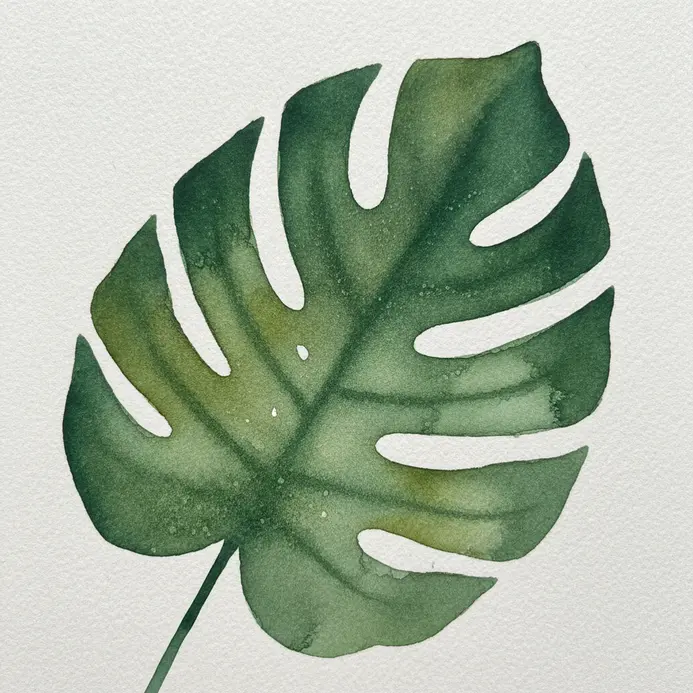
Who would have thought a plant so complex could be this simple to paint? A single Monstera leaf silhouette looks sophisticated, but it is all about that clean outline. Start with a clear reference photo to sketch the iconic heart shape and its distinctive holes. Then, carefully fill it in with a rich, even green using a detail brush for those crisp edges. This works because the plant’s natural form is so strong and instantly recognizable, making it perfect for beginners exploring easy watercolor botanical painting ideas. For a smooth finish, try using acrylic paint and apply it in thin layers. You will love the modern, minimalist result. Find more easy watercolor ideas to build your confidence.
2. Achieve Metallic Sheen: A Detailed Eucalyptus Stem with Silver Leaves
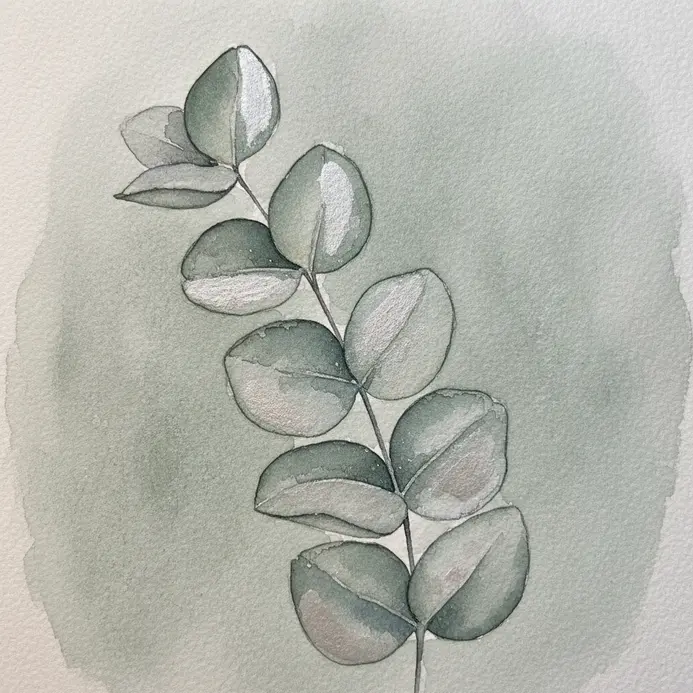
Ever wondered how to paint that soft, silvery glow on eucalyptus leaves? The secret is not a shiny metal paint, but capturing the powdery, waxy coating that scatters light. Start by laying down cool underlying green and blue tones on your sheet before introducing any metallic highlights. Then, add your iridescent or metallic pigment only to the very brightest highlights where the light hits. I love how this creates a delicate, frosted look instead of a flat shine. Build up the effect slowly with thin layers, letting the base colors show through in the shadows. This technique works because it mimics the natural optical effect of the leaf’s surface. Trust me, the subtle result feels so much more realistic and satisfying than slapping on glitter, especially when you practice these easy watercolor botanical painting ideas regularly.
3. Create a Delicate Pale Lavender Sprig Cluster with Soft Blending
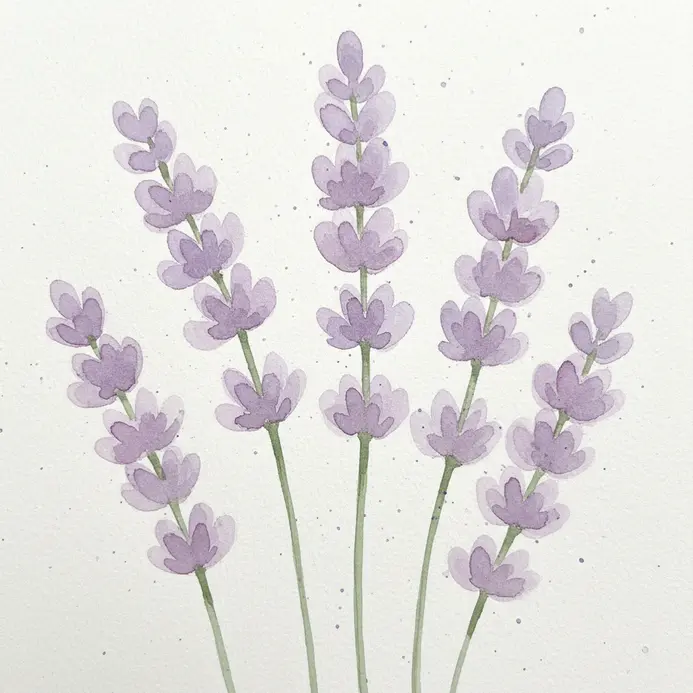
This one looks so elegant, but trust me, it’s built on a simple principle. Start with a very light pencil sketch to map your stems. Then, apply a pale lavender wash and let it guide you. The magic happens when you layer another slightly deeper shade while the first is still damp, letting them blend softly on the paper. That gentle gradient is what creates the ethereal, airy feel we’re after in our botanical watercolor art form. I love how forgiving this technique is. If you want to practice more easy watercolor botanical painting ideas alongside other easy flower painting ideas, this soft blending skill will serve you perfectly. Feel that sense of calm when your colors melt together.
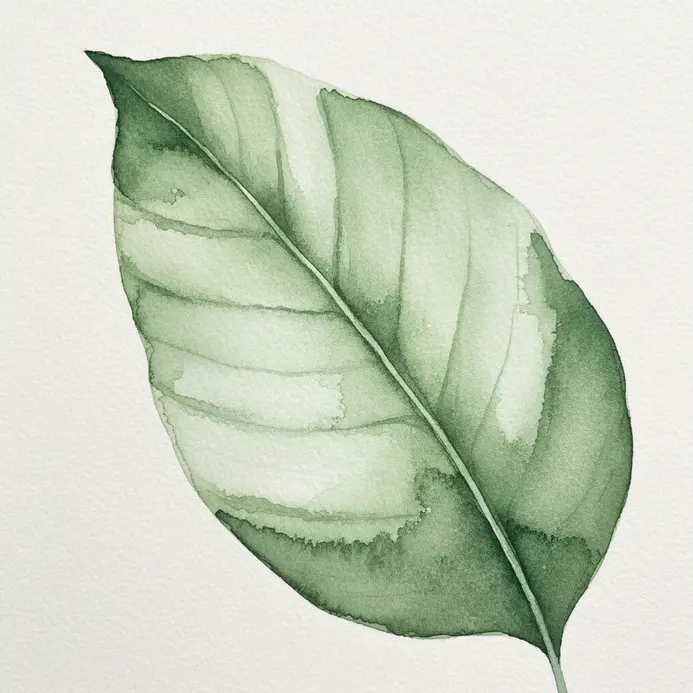
4. Capture Autumn Light: A Soft Maple Leaf Study in Warm Tones
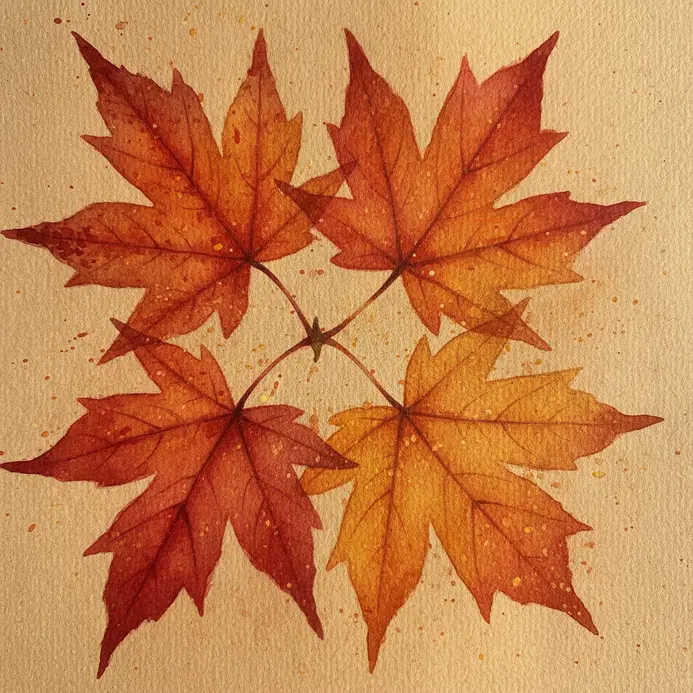
Ever notice how a single maple leaf can glow like a little lantern when the afternoon sun hits it just right? That is the magic we are after here. Instead of drawing every tiny vein, you will focus on the soft, hazy light that makes the leaf seem to float. I love starting with a simple wash of burnt orange and golden yellow are perfect colors to explore in your watercolor painting. for the leaf shape, letting the colors bleed together while the paper is still damp. Keep your edges feathery and your shadows warm, using a hint of muted purple or olive green in the background to make the leaf pop. This approach captures that feeling of warmth and quiet you get on a crisp autumn day, making it ideal for easy watercolor botanical painting ideas. Isn’t that a lovely mood to capture? For a different take on soft, luminous color, you might enjoy exploring some delicate pastel watercolor artwork. Feel that gentle, golden satisfaction when your wash dries.
5. Sketch a Minimalist Hanging Pothos Vine Stem with Clean Lines
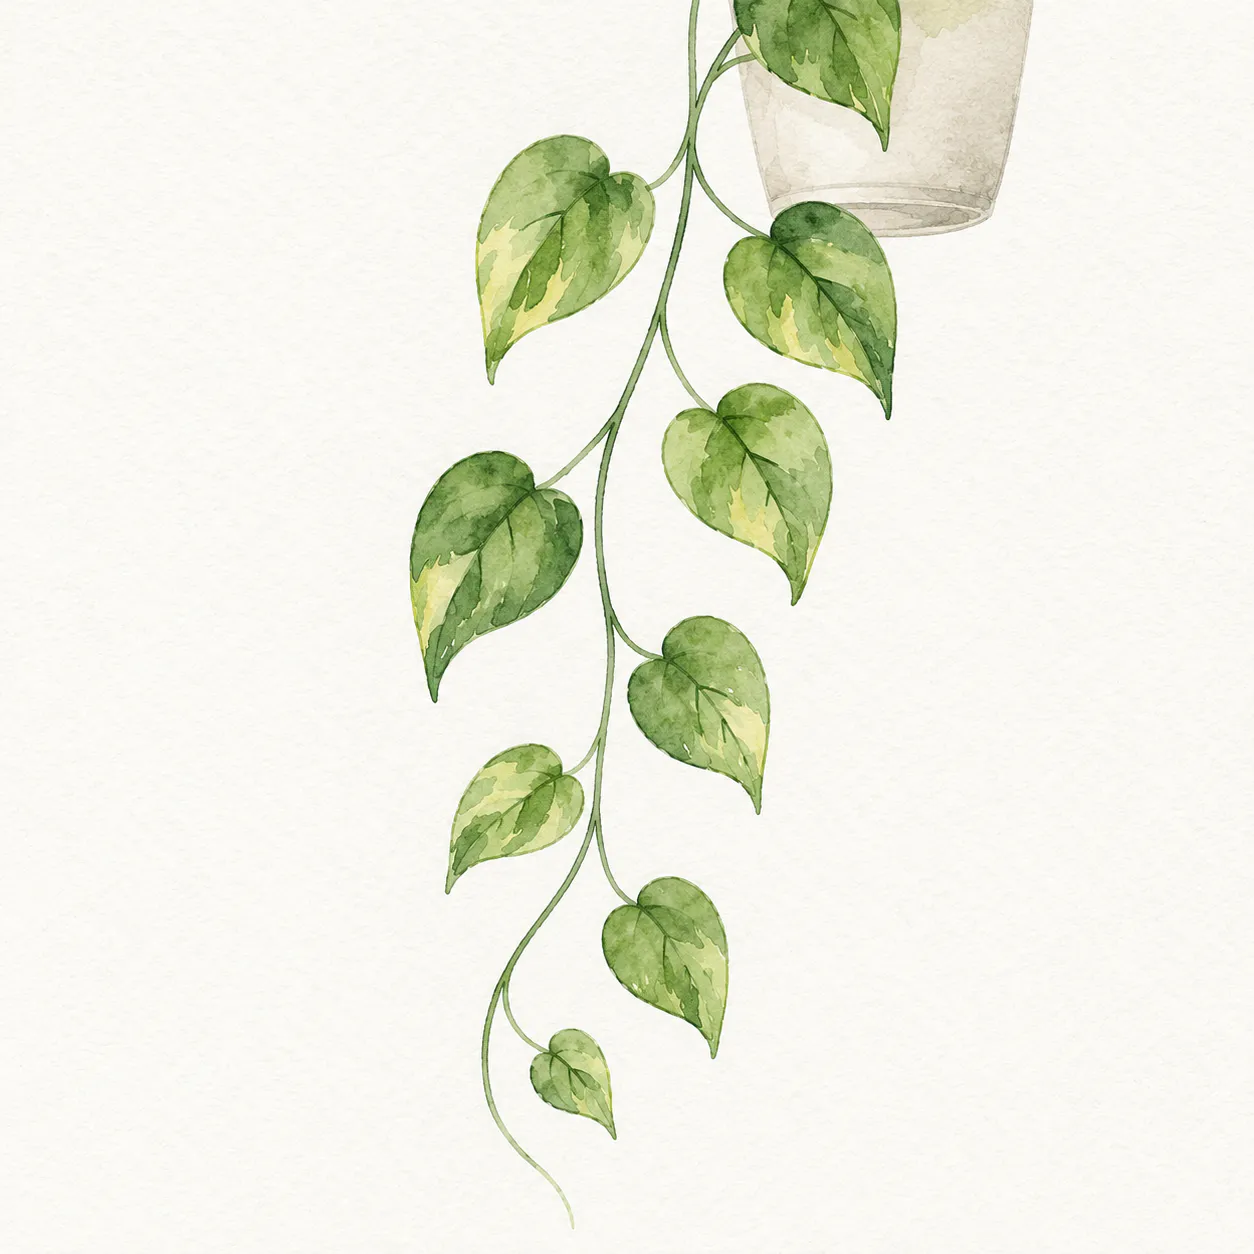
This one is a personal favorite. It looks so elegant, but the process is wonderfully straightforward. Ever feel overwhelmed by trying to draw every tiny detail? Minimalism is your best friend here. Start with a single, confident line for the main stem. Let it have a gentle, natural curve. From there, add short, clean strokes for the leaf stems. At the end of each, draw a simple, heart-ish shape for your watercolor painting for beginners project. I love keeping the leaf veins minimal, just a central line with one or two tiny branches. Trust me, those clean, unbroken lines make all the difference. Doesn’t that feel refreshingly simple?
6. Layer Deep Reds for a Bold, Lone Poppy Bloom

Ever wondered how a single flower can look so powerful? The secret is in building up those deep red layers carefully over time. Start with a dark wash for the shadows, then let it dry before adding brighter mid-tones and final highlights. I love how a dark, contrasting background makes that red pop. This technique transforms a flat shape into a vibrant, living flower and proves that bold color choices elevate easy watercolor botanical painting ideas instantly. For a deeper look at realistic watercolor approaches, the same principles apply beautifully to this project. Feel the drama come to life on your paper.
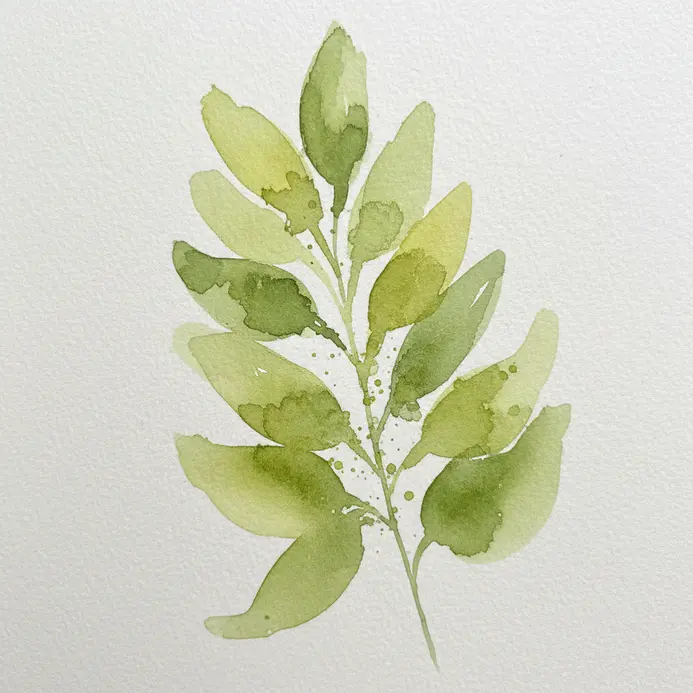
7. Build a Simple Three-Leaf Fern Frond with Graduated Greens
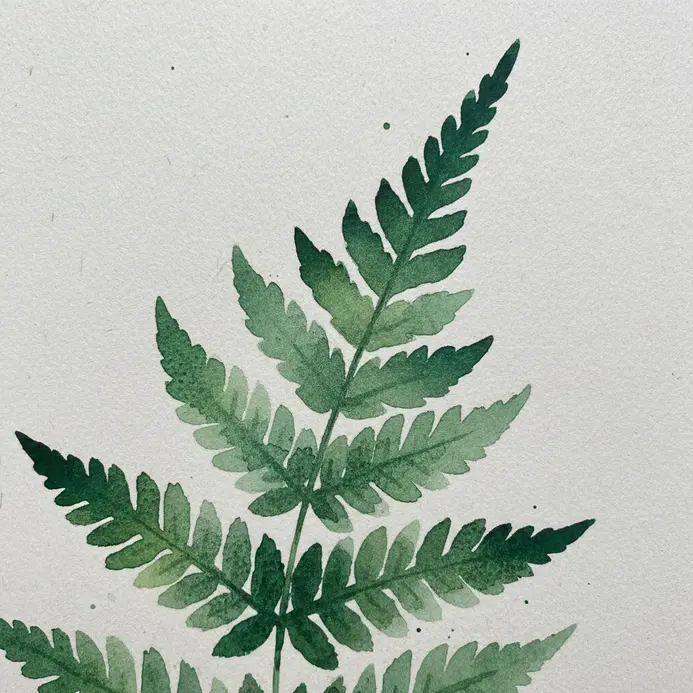
This one is a personal favorite. It looks so delicate, but the technique is wonderfully forgiving. You start by sketching a gentle curve for the main stem, then add three simple leaf shapes. The real magic is in your graduated greens. You will mix a few shades and layer them from light to dark, letting the colors blend softly to mimic natural light and shadow. Isn’t it satisfying to see that organic texture appear? Trust me, it is all about building up those layers gradually. Your frond will look fresh and realistic, and you will learn so much about blending colors for foliage. For a deeper understanding of blending methods, you can explore various watercolor techniques.
8. Add Texture to a Dried Brown Oak Leaf with Dry Brush Technique
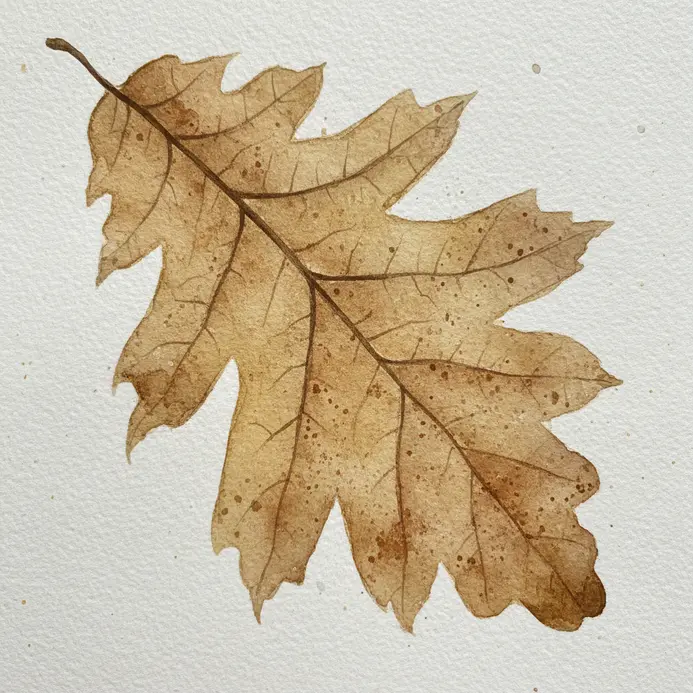
Ever wondered how artists capture the crinkly, papery feel of a dried leaf? The trick is using a dry brush technique. You load a stiff brush with a tiny bit of paint, wipe most of it off on a paper towel, and then lightly drag it across your textured paper. The pigment only catches on the raised fibers, creating broken strokes that perfectly mimic veins and high points. I love how this builds realism through layers. Start with darker browns in the recesses, then add lighter ochres on the leaf’s raised areas. Mastering this method gives your easy watercolor botanical painting ideas a wonderful tactile quality that flat washes simply cannot achieve.
9. Paint a Green Rosemary Herb Sprig with Fine Needle Details
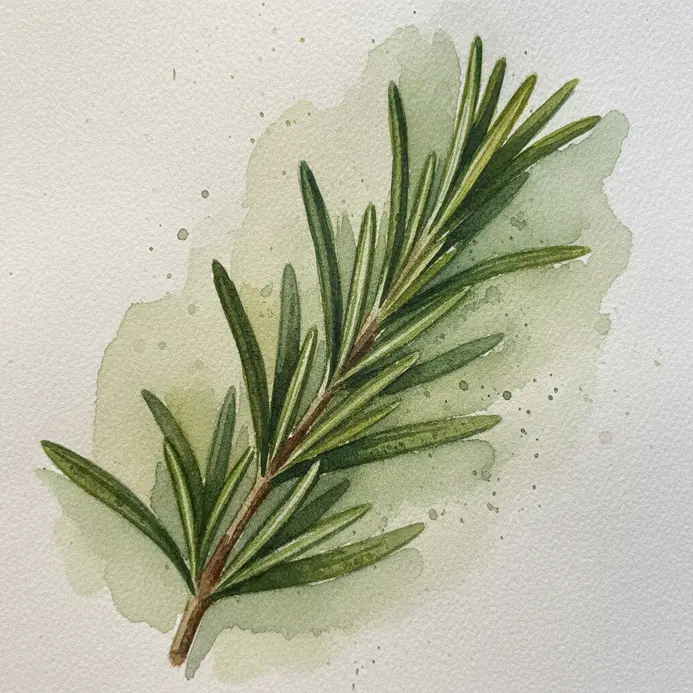
Ever felt intimidated by the dense, tiny needles of a rosemary sprig? It looks complex, but breaking it into simple washes and details makes it so approachable. Start with a light sketch of the main stem and leaf clusters, then apply a light green wash for your base color. Let that dry completely. Now for the fun part, using your finest round brush to paint the individual needles. Mix a few shades of green from your palette and paint them in small, quick strokes, following the curves and clusters you see. I love how this builds texture and life. Finish by adding the woody stem and a few darker shadows between the leaves. See how those fine details transform a simple wash into a recognizable herb? Isn’t that satisfying?
10. Block In a Wide Palm Leaf Segment for a Graphic Effect
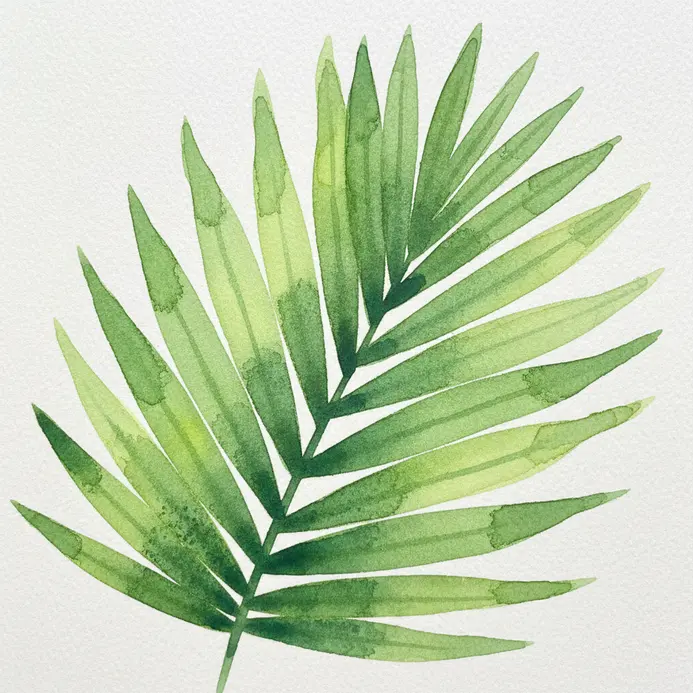
Ever wanted a botanical painting that looks modern and bold? This approach is all about simplifying the shape of a wide palm leaf segment into a strong, clean silhouette in a happy painting style. Start with a light pencil sketch of the overall fan shape. Then, use a flat watercolor brush to block in the color with confident strokes. Let each layer dry for crisp edges and that graphic look. I love how this focuses on the essence of the form, not fussy details, which keeps your early watercolor painting ideas feeling incredibly fresh and enjoyable. For a different kind of simple project, check out easy still life painting setups.
11. Mix Blue-Green Washes for an Elegant Olive Branch Spray
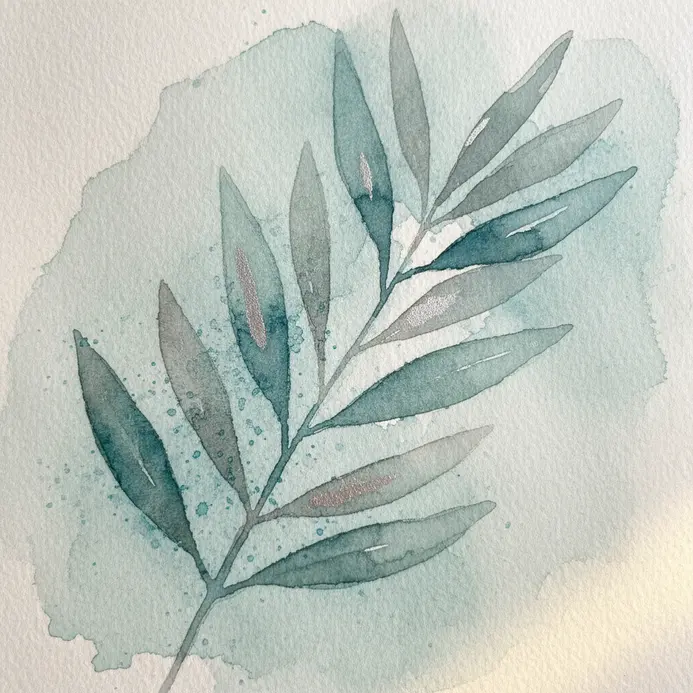
Ever wondered how painters capture that elegant, muted olive color? This technique surprised me because it looks so sophisticated but relies on a simple process. You will create several blue-green washes on your palette, mixing blues like Ultramarine with greens like Sap Green and a touch of Raw Sienna. Apply these as light, transparent layers to build the shape of each leaf, letting some areas dry for a subtle silvery effect. This works so well because it avoids a flat, artificial green, giving your painting a natural depth that every student of easy watercolor botanical painting ideas should aim for. Trust me on this one: always test your wash on scrap paper first to nail that perfect, transparent olive tone before you commit.
12. Create a Tiny Wildflower Blue Petal Cluster with a Fine Point

Who would have thought such a delicate cluster could be so beginner-friendly? You start by painting each tiny petal individually, focusing on that signature sharp point. Use a fine-tipped round brush to carefully layer shades of blue, from sky to sapphire, letting the colors blend wet-on-wet. The key is keeping your touch light and your pigment concentrated at the tip for that fine, wildflower look. It works because the simplicity of the shape lets the beautiful watercolor blending do all the impressive work. For a complete project that fits this scale perfectly, check out these watercolor painting tutorials. Trust me, you will feel a real sense of accomplishment when your little bouquet comes together.
13. Form a Single Succulent Rosette from a Top-Down View
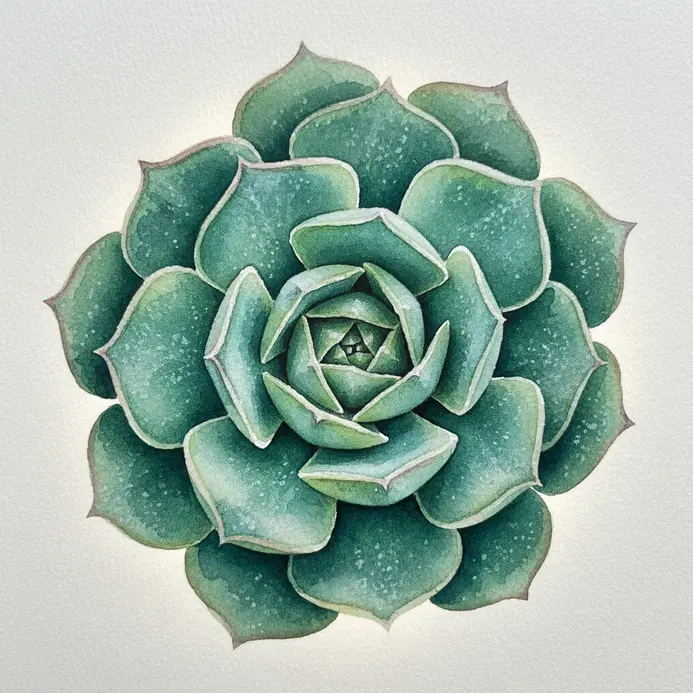
Ever felt intimidated by a succulent’s complexity? This top-down view is your friend. It looks intricate, but the secret is simple repetition. Start with your central dot and draw tiny, overlapping teardrop shapes around it. Keep adding layers of slightly larger leaves, always tucking each new leaf under the previous one. I love how this natural pattern builds depth almost by itself. Why does this work so well? The radial symmetry is inherently calming, and the overlapping creates such satisfying dimension for your botanical watercolor painting ideas. Trust me on this one, your biggest win is placing new leaves in the gaps of the old layer. Feel proud when that beautiful rosette shape emerges.
14. Apply Abstract Watercolor Washes to a Green Foliage Sprig
Ever feel like painting a leaf perfectly is too much pressure? This abstract approach is a freeing way to capture the spirit of greenery. You start by generously wetting your cold press watercolor paper in the area for your sprig. Then, drop in a very diluted light green wash and just let it bloom. The magic is in the soft, spontaneous shapes the paint makes on its own. I love this technique because it is all about feeling the form, not drawing every detail, a core principle behind the best easy watercolor botanical painting ideas. While that first wash is still damp, you can introduce deeper greens and even a touch of blue for shadow. Resist the urge to define individual leaves too soon. Let the layers build naturally, and you will be amazed at the vibrant, expressive foliage that appears. If you enjoy this loose style, you might also like exploring beginner abstract painting concepts for more inspiration.
15. Capture Light with a Bright Sunflower Petal Edge Detail
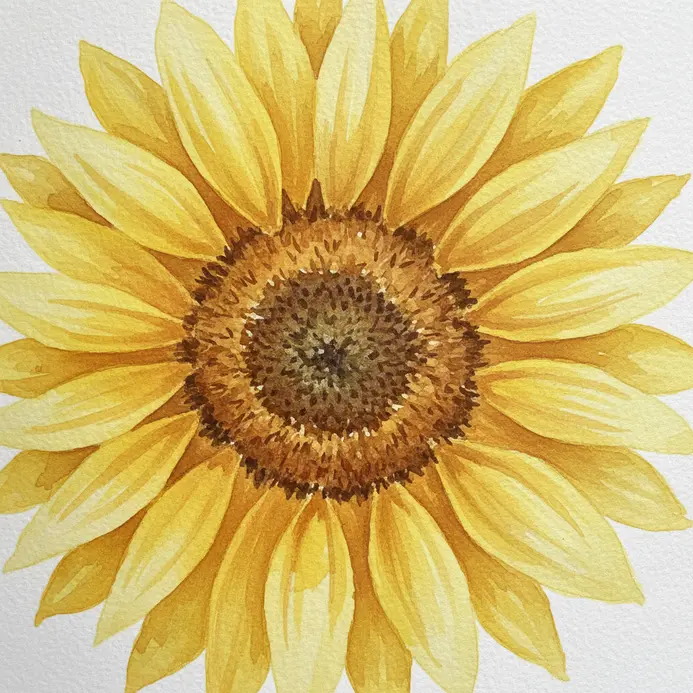
Ever noticed how a sunflower petal seems to glow at its very edge when the sun hits it just right? This effect is all about isolating that one brilliant detail. You will create a luminous rim by using a touch of pure white or lemon yellow right on the petal’s outer tip, letting it blend softly into your main yellow wash. This contrast makes the light feel real and pulls the viewer’s eye straight to that sparkling highlight. Trust me, focusing on this tiny detail adds so much life, transforming a simple flower study into a standout example of easy watercolor botanical painting ideas. It turns a flat petal into a beautiful play of light and color. For a different way to play with light and form, check out some beginner abstract painting concepts. Does that not feel wonderfully fresh?
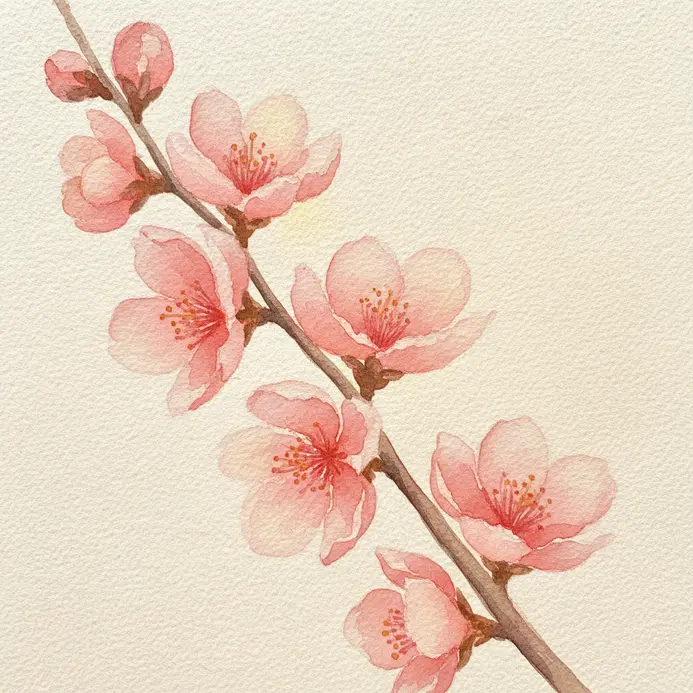
16. Paint a Loose Cherry Blossom Twig with Delicate Pink Buds
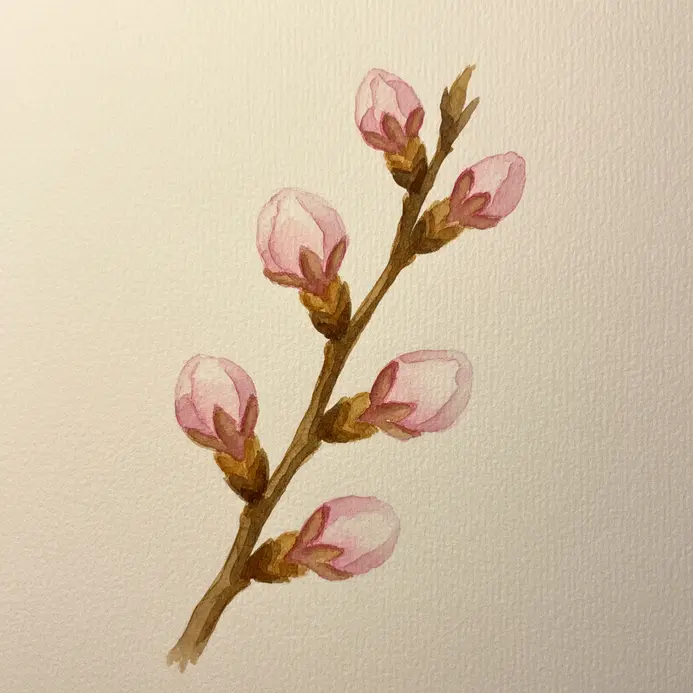
This one feels like pure springtime magic, doesn’t it? You start by painting the organic twig line with a medium round brush, letting it curve and vary in thickness. Then, use a small round brush to dot on those delicate pink buds with a light wash. I love how this loose, impressionistic style captures the feeling of fresh blossoms without needing perfect detail, proving that easy watercolor botanical painting ideas thrive on spontaneity. The payoff is a beautiful, airy painting that feels fresh and spontaneous.
17. Draw a Long Willow Leaf Branch with a Graceful Arch
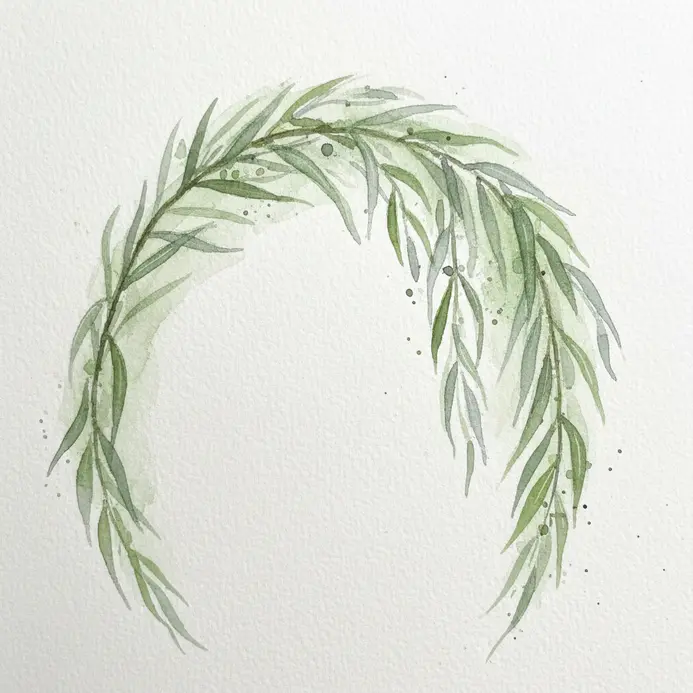
Who would have thought the classic weeping willow could be so approachable in a watercolor painting tutorial? Start with one light, sweeping line to define that signature graceful arch, like a soft ‘S’ shape. Then, add its slender parallel line for thickness, tapering it to a delicate tip. Now for the fun part. Draw those long, narrow leaves along the inner curve, letting them follow the downward sweep. Vary their direction and size, and overlap a few for depth. Trust me, this alternating pattern is what sells the realistic, weeping effect. Isn’t it satisfying to see such an elegant form come together? For more easy watercolor ideas, try this branch as a simple, standalone sketch first.
18. Layer Soft Pinks for a Simple Peach Flower Blossom Study
Ever wondered how to paint something so delicate without getting overwhelmed by detail? This study is perfect for that. You start with a very light sketch, then build up color using a step by step approach in watercolor painting. transparent watercolor layers. Apply a pale pink wash first for a luminous base, then add deeper pinks to shape the petals. I love this method because it teaches you to see form through light and shadow, not line, which elevates your favorite easy watercolor botanical painting ideas. Keep your layers light and let the paper glow through. Does that not feel satisfying?
19. Build an Elegant Tall Bamboo Stalk with Segmented Detail
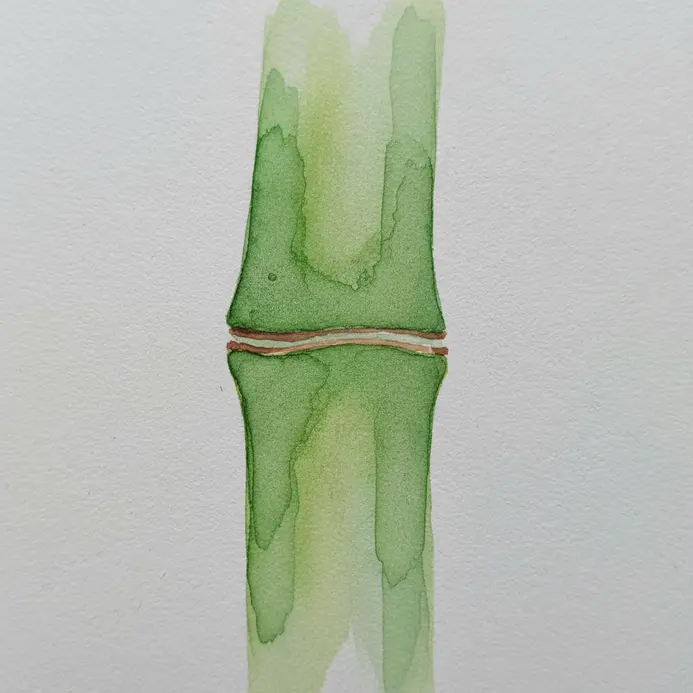
Ever tried to paint bamboo in a watercolor painting tutorial and felt it looked a bit flat? The secret is all in the segmented structure. Start by establishing the main stalk with a long, flowing stroke using a light green base coat. While that is still a bit damp, add the distinctive nodes with a darker, more concentrated pigment. I love using a fine brush to create those slightly raised rings that give it such a realistic look. Why does this work so well? It instantly adds that sense of strength and graceful height we see in real bamboo. Trust me on this one, letting the colors blend softly between the segments makes the whole piece feel alive and elegant.
20. Paint a White Daisy Flower Macro View with a Yellow Center

Ever wondered how to make a simple daisy look truly luminous? This project is all about painting white petals up close, which is surprisingly fun. The secret is to never use pure white from the tube. Instead, build up your petals with subtle cool undertones in the shadows, using hints of blue or gray. You will love how this creates instant depth and makes the flower glow. For the yellow center, do not just paint a flat circle. Build it up as a textured dome using tiny dabs of different yellows and a touch of ochre. Isn’t it satisfying to see that fuzzy, realistic detail emerge? I love finishing with a soft, blurred background wash to make the daisy pop. This focus on light and texture makes it feel wonderfully realistic. For a different but equally delicate look, you might enjoy exploring delicate pastel watercolor artwork.
21. Form the Spiky Shape of a Golden Thistle Flower Head
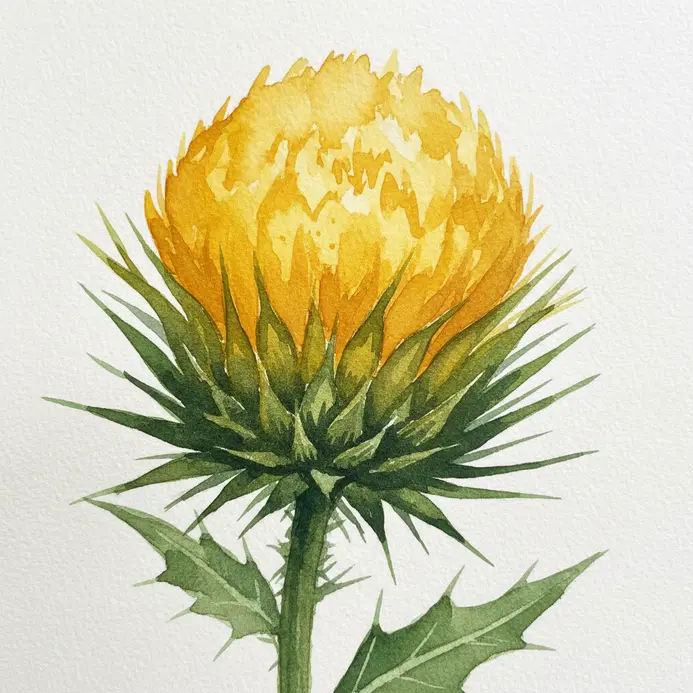
Who would have thought a thistle’s intimidating form could be so simple to capture? Start by painting a loose, irregular oval shape for the main flower head. Then, using a small round brush, tap in quick, sharp strokes all around its edge to create the signature spiky halo. I love how this instantly looks complex while being a series of simple, repetitive motions. To bring it to life, mix a sunny yellow with a touch of burnt umber for the center and a cooler green for the base. The contrast between the warm, fuzzy center and the cool, sharp spines is what makes it so satisfying to paint. For a more detailed take on this subject, you can explore realistic watercolor approaches.
22. Sketch a Rounded Mint Leaf Pair with Vein Emphasis
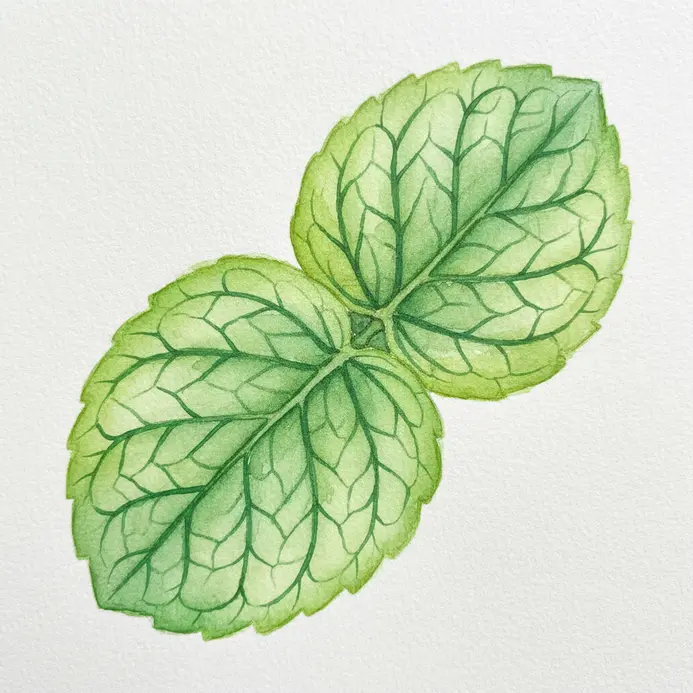
Ever wondered how to make a botanical sketch look truly alive? This one is all about capturing the simple, rounded charm of mint. Start with two light oval shapes in your sketchbook, then add those characteristic scalloped edges. The real magic happens when you build up the layers in your watercolor painting for beginners. delicate vein network, drawing a curving central midrib first and letting the secondary veins branch out organically. Trust me, embracing those little irregularities in shape and texture is what makes it feel real. Your drawing gains such lovely depth, and it is incredibly satisfying to watch those details come together in this art form.
23. Apply a Single Tulip Stem with a Light, Translucent Wash
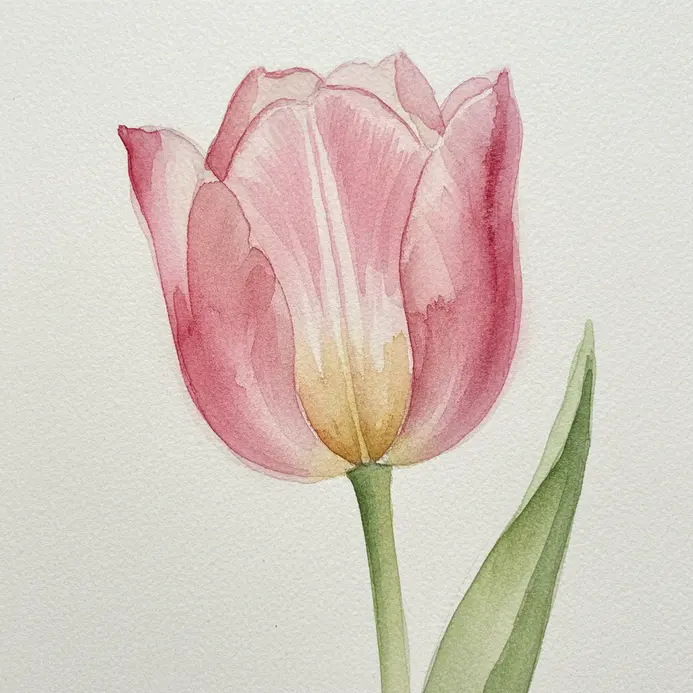
Ever wondered how to make a stem look fresh and natural? This is all about a light, translucent wash. You will load a round brush with a very diluted green and follow the graceful curve of your pencil guide. Let it dry completely, and you will see the paper glow through the color, giving that airy, delicate feel. I love this technique because it captures the stem’s natural elegance without any heaviness. Your key to success is mixing a pale wash and applying it smoothly. For more guidance on building your skills, you can always explore various watercolor techniques. Feel that satisfying freshness when your stem looks perfectly luminous.
24. Draw a Feathery Asparagus Fern Leaf Stalk with Fine Lines
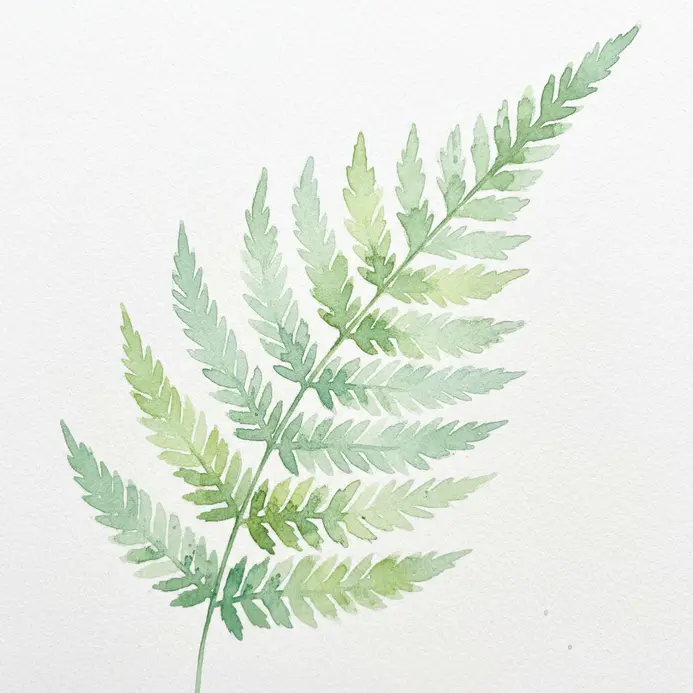
This one looks complex but is wonderfully simple once you know the trick. The secret is to think of the fern as a soft cloud of texture, not a collection of individual leaves. Use a hard 2H pencil to lightly sketch a graceful, curved main stalk, then add the shorter, alternating side branches. Now, build the feathery look with short, flicking strokes using an HB pencil for the tiny cladode clusters. Vary your pressure and direction to create that airy, overlapping volume. It feels so satisfying when that delicate, botanical texture appears on the page. If you love this light, whimsical style, you will enjoy exploring watercolor painting tutorials for beginners too.
25. Capture the Pattern of a Red Pansy Flower Petal
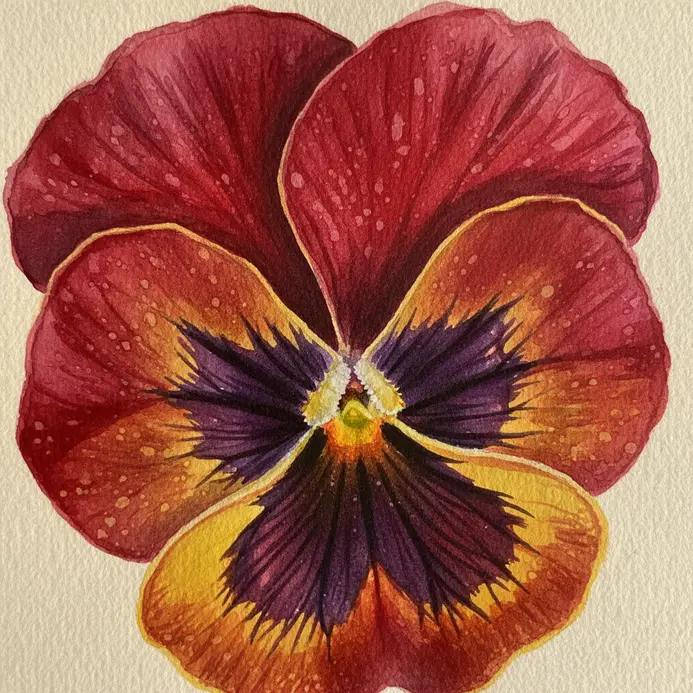
I love this one because it looks intricate, but the technique is surprisingly straightforward, making it perfect for painting for beginners. Start by laying down a very light wash of pink for the entire petal shape. Then, layer on richer reds, concentrating your small round brush towards the center to build that gorgeous gradient. Sound tricky? It is just about patience and thin layers. The real magic happens when you add that dark, velvety blotch at the base. Use a fine detail brush with a deep purple, letting it bleed softly into the red. This contrast instantly creates depth and makes the petal feel real. It is so satisfying to see that signature pattern emerge from your gentle washes. My go-to tip here is to practice your color mixes on a scrap first. Getting a feel for how your reds and purples layer will give you so much more confidence. You will be amazed at how a few delicate veins, painted last, pull the whole thing together. Does that not look stunning?
Preserving Botanical Artworks Behind Acid Free Glass
Direct sunlight will fade your watercolor pigments, so you must use UV-filtering glass when you frame your finished piece. Standard picture glass offers no protection from light damage, allowing those delicate greens and pinks to wash out over just a few seasons. You also need an acid-free matboard to prevent the paper from yellowing and degrading where it touches the frame. Here is the thing: even with UV glass, avoid hanging your work in a spot that gets daily direct sun. The final step is sealing the back of the frame with paper tape to keep dust and moisture out, ensuring your botanical study stays as fresh as the day you painted it.
Conclusion
Your connection to plants likely comes from quiet moments in a garden, a favorite houseplant on your windowsill, or the simple pleasure of bringing greenery indoors. Translating that feeling onto paper is a personal and rewarding practice. The best next step is to pick one subject you feel drawn to and paint it a few times, letting the watercolor do its own beautiful work each time. These easy watercolor botanical painting ideas are not about perfect replication but about finding your own rhythm with the brush and celebrating the natural variations that make each painting uniquely yours. Keep your water clean, your paper good, and enjoy the process.
FAQs
Q: How do I start painting an easy watercolor botanical painting if I’m a complete beginner?
A: Begin painting by choosing simple floral or leaf shapes, sketching lightly on hot pressed or cold pressed paper, and using a step-by-step approach: first layer with diluted washes, let the paint dry between layers, then add darker accents. For watercolor for beginners, get started with a limited palette (yellow and blue plus a warm like New Gamboge) and watch video tutorials as a way to learn basic wet on wet and wet in wet techniques.
Q: What brushes and brush strokes work best for botanical florals?
A: Use a round brush (sizes 6–10) and practice varied brush strokes for petals and stems. Start with lightest strokes for initial washes and reserve smaller brushes for details and the darkest accents. Smooth brush strokes and control of water create beautiful botanical shapes; experiment with wet in wet for soft blends and wet on wet for feathered edges.
Q: How do I plan composition for a simple botanical painting?
A: Composition matters even in easy watercolor painting: arrange florals and leaves to lead the eye, balance positive and negative space, and place darker tones strategically to anchor the piece. Consider a simple bouquet or single stem for a clear focal point, and test different placements in thumbnail sketches before you start painting.
Q: What is the best step-by-step routine for layering and avoiding muddy colors?
A: A reliable step-by-step routine is: 1) sketch lightly, 2) apply first layer with light washes and let the paint dry, 3) add mid-tones, 4) introduce the darkest accents and cast shadows, and 5) refine edges. Use clean water and avoid over-mixing different color pigments on the paper—lift or use an eraser for pencil lines before the final painting is complete.
Q: How can I mix hues effectively for petals and leaves using a limited palette?
A: Mix different color variations by combining yellow and blue to create greens, and add a touch of New Gamboge or a Winsor & Newton red to warm tones. Test hue mixtures on scrap paper to see how the nature of watercolors changes when diluted. Using a limited palette helps keep colors harmonious and simplifies decision-making for beginners.


