


Essential Drawing Supplies for Clean Geometric Shapes
Graphite implements remain the standard instrument for establishing accurate guidelines. An HB or 2H graphite pencil delivers consistent lead hardness suitable for temporary construction marks. Place a vinyl eraser and standard white drawing paper on your workstation before beginning. A transparent ruler assists with establishing initial straight boundaries. A fine-tipped black archival ink pen prepares you for permanent outlining steps, while optional colored pencils allow future tonal exploration. None of these materials require premium pricing tiers. Selecting reliable, standard-grade art supplies provides everything you require to begin mastering how to draw a cross without unnecessary preparation delays.
Establishing a Foundation: Understanding Structural Equilibrium
Constructing a reliable geometric form requires an understanding of visual weight distribution and axis alignment. The entire composition depends on two perpendicular lines meeting at an exact ninety-degree intersection. Maintaining extremely faint graphite marks during early stages prevents paper fiber damage and simplifies cleanup procedures. This measured approach guarantees symmetrical proportions before you introduce permanent contours. Minor measurement variations occur frequently during early development phases. Recognizing how to draw a cross with mathematical precision shifts once you accept that structural balance precedes decorative detailing. Each progressive step increases recognition and dimensional accuracy.
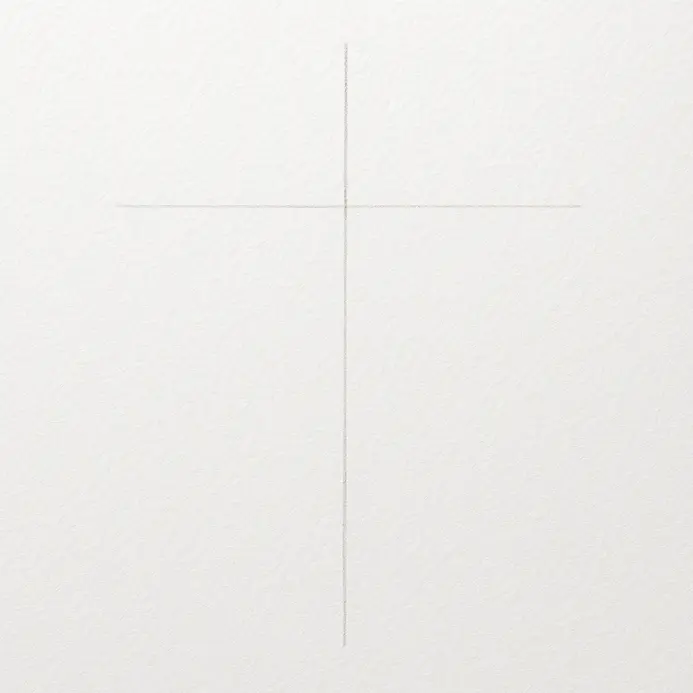
1. Establish Your Vertical Center Line Lightly
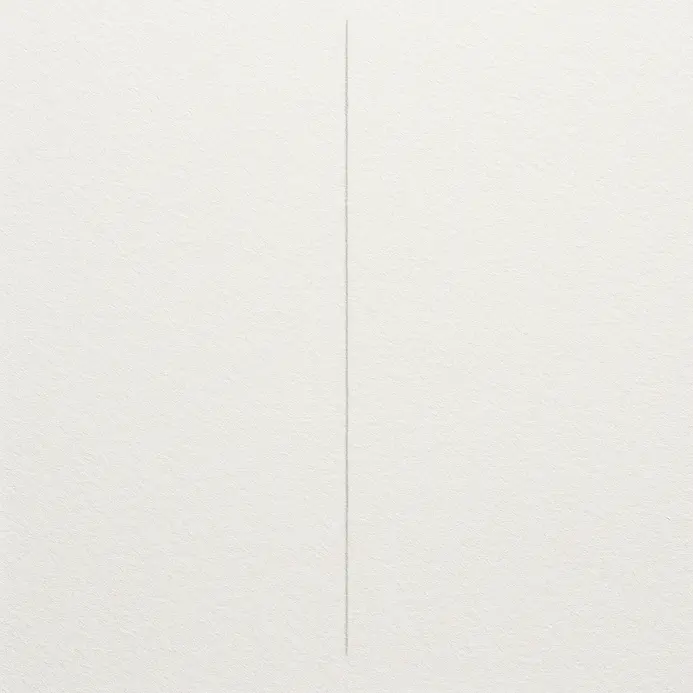
Begin by constructing a reliable spatial anchor for the entire composition. This initial reference mark serves as the backbone for every subsequent measurement, guaranteeing perfect bilateral balance across the sheet. Consider this temporary guide the invisible axis that maintains structural alignment throughout the entire process. Grasp a 2H graphite pencil near the wooden barrel to reduce downward pressure on the page surface. Position a minimal graphite point at the upper paper boundary and another matching point at the lower edge, then connect both marks using one continuous, feather-light stroke. Rotate your shoulder instead of your wrist to maintain consistent linearity and prevent unwanted curvature in your cross drawing. Understanding how to draw a cross demands recognizing that pressure control determines the quality of preliminary sketches. Avoid applying heavy downward force during this initial phase. Dark pressure leaves permanent grooves in paper fibers that resist standard eraser cleanup methods. Use a measuring tool if freehand execution introduces unwanted deviation, maintaining a whisper-light contact point. Consult simple drawings to practice step by step for creating a work of art. for additional axis-alignment drills before tackling advanced compositions. Mastering controlled stroke pressure ensures clean preliminary construction on every project.
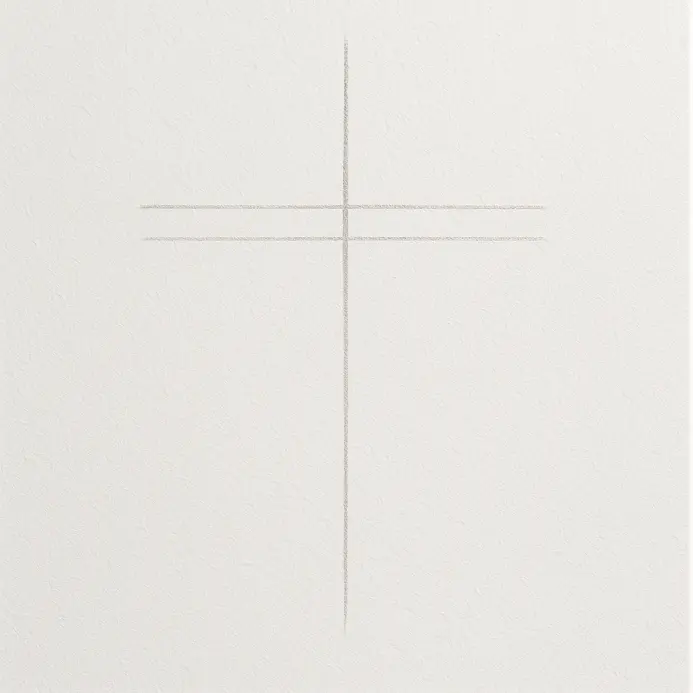
2. Add a Perpendicular Horizontal Center Line
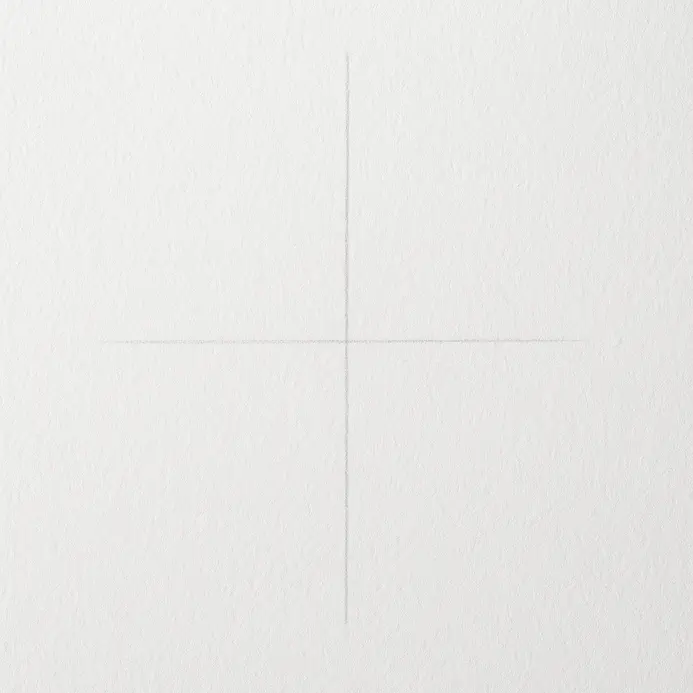
The vertical axis now requires a perpendicular companion to establish the core structural framework. Precision during this phase transforms abstract guidelines into a recognizable iconic silhouette. Locate the exact center point along your vertical reference and mark it with a minimal graphite tick using a straightedge measuring tool. Extend a horizontal line directly through that marked intersection using firm shoulder rotation instead of wrist articulation. Maintaining a strict ninety-degree relationship between both axes prevents skewed proportions that ruin overall symmetry. Practicing how to draw a cross demands verifying every angle before committing to permanent boundaries. Rotate your paper ninety degrees after completing the horizontal stroke. This physical check confirms perpendicular alignment without relying solely on visual estimation, which frequently deceives beginners. Repeating this rotational verification eliminates angled distortions that compromise geometric integrity. Rehearsing fundamental axis placement improves overall technical execution similar to methods detailed in simple drawings to practice. Securing this intersection correctly streamlines every subsequent outlining phase.
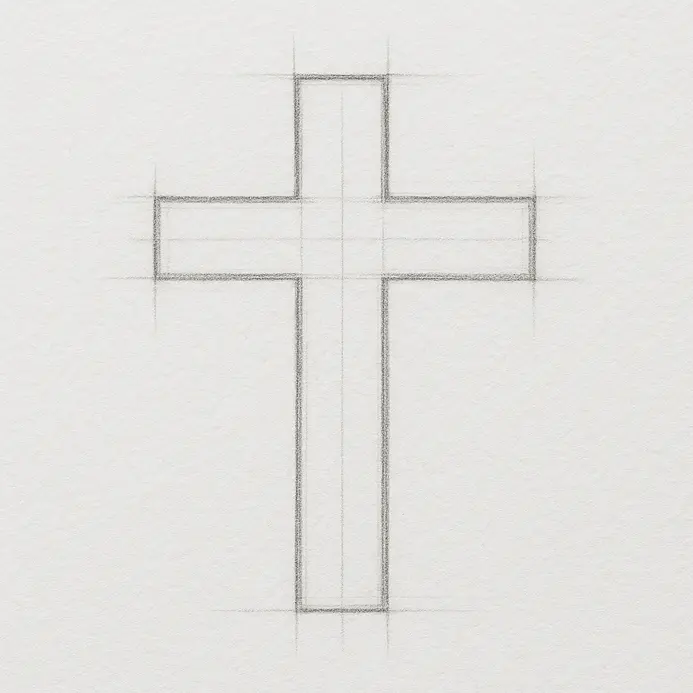
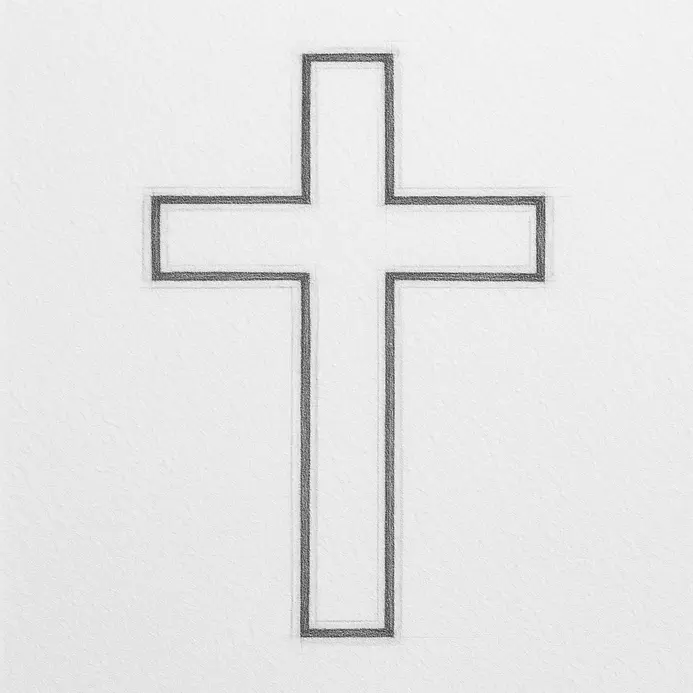
3. Outline the Main Blocky Shape of the Cross
Transform the faint intersection lines into a defined geometric silhouette using consistent spacing measurements. This phase establishes the recognizable exterior boundary that defines the final composition structure. Maintain light pressure while measuring equal distances outward from both the vertical and horizontal axes to ensure straight lines. Sketch a parallel line on the left side of your central vertical axis, then mirror that exact distance on the right side. Connect both vertical markers with horizontal termination lines at the top and bottom boundaries. Follow identical measurement logic for the horizontal bar, marking upper and lower boundaries equidistant from your central guide. Learning how to draw a cross requires understanding that proportional spacing creates visual stability. Verify symmetrical distances between the axis lines and your newly sketched boundaries before proceeding. Uneven spacing immediately signals structural imbalance that requires correction through gentle erasure and redrafting. Consistent proportional spacing guarantees a balanced, intentional appearance across all future design applications. Explore simple drawings to practice for structured measurement exercises that reinforce these foundational proportions. Measuring twice before outlining reduces revision time significantly.
4. Define Clear and Straight Exterior Edges
Shift from preliminary guidelines to confident, definitive boundary lines during this critical refinement stage. Defining exact perimeters establishes the visual separation between your geometric form and surrounding paper space. Select a harder pencil grade like 2B graphite to increase contrast against lighter preliminary marks. Rotate your shoulder joint while applying steady, consistent pressure to create dark, uniform strokes. Extend every line fully into each corner intersection to guarantee sharp ninety-degree termination points. Applying disciplined stroke pressure remains essential when learning how to draw a cross with structural authority. Execute the hovering rehearsal method before committing to the page surface. Practicing the trajectory above the paper builds muscle memory and prevents jagged line execution that ruins sharp corners. Repeating this preparation technique develops steady hand control essential for drawing tutorial execution. improve your drawing skills across advanced geometric projects. Committing to full, uninterrupted strokes eliminates hesitation marks that fragment clean silhouettes. A single confident pass produces cleaner results than multiple short corrections.
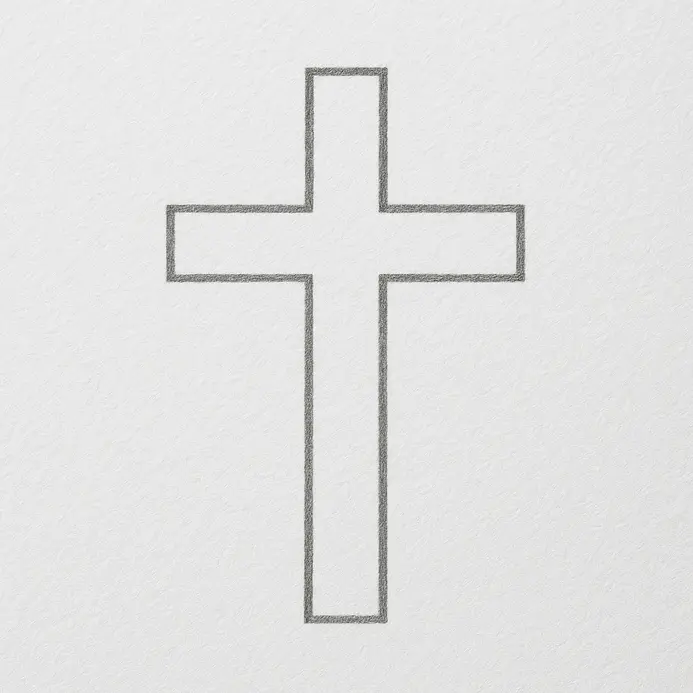
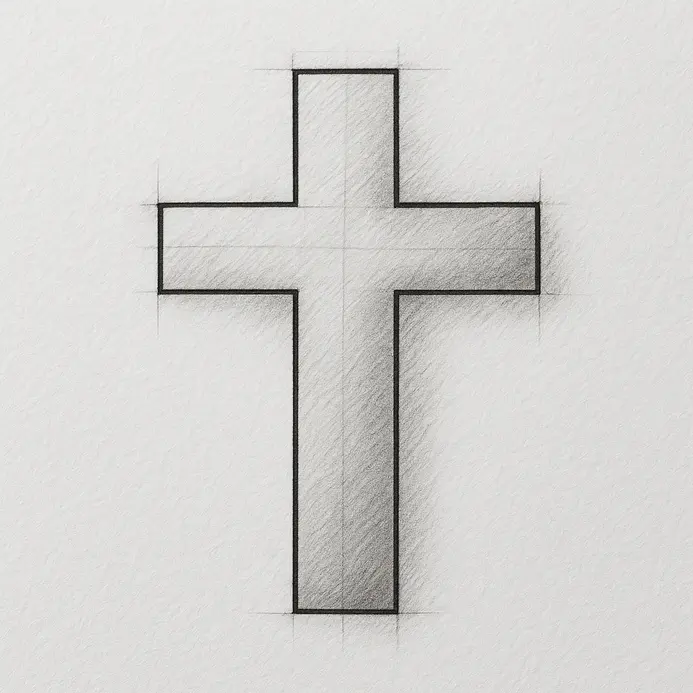
5. Erase All Internal Construction Guides Completely
Remove all internal scaffolding to expose the final structural form. This cleanup phase transitions your composition from a rough technical sketch into a polished geometric study. Select a kneaded eraser or soft white vinyl tool for graphite removal without damaging paper fibers. Work inside the outer boundaries using gentle, unidirectional sweeping motions rather than abrasive circular scrubbing. Rest your secondary hand directly over finished outline sections to shield them from accidental smearing. Mastering graphite removal techniques accelerates the process of learning how to draw a cross with professional finish standards. Apply minimal downward pressure while lifting graphite particles off the page surface. Use a rolling motion with a kneaded tool to pull residual marks from paper texture fibers. Inspect the composition from multiple lighting angles to detect faint residual guides that require additional cleaning in the background. Redraw damaged outline segments before continuing with cleanup if aggressive erasure removes permanent boundaries. Consulting improve your drawing skills resources reinforces systematic cleanup habits. Maintaining tool cleanliness prevents accidental graphite redeposition during sensitive refinement stages. Rub your eraser against scrap paper after every third sweeping motion. This maintenance routine guarantees consistent suction power throughout the entire cleanup sequence and preserves paper surface integrity. Dirty cleaning tools transfer gray residue back onto freshly cleared areas and compromise final presentation quality.
6. Trace the Final Outline with Crisp Ink Lines
Commit the graphite structure to a permanent archival medium using precision inking tools. Tracing prepared guidelines locks your geometric proportions into an unalterable final state. Select a fine-liner pen and rest your drawing hand directly on a protective scrap sheet to prevent palm contact with fresh ink. Trace the initial vertical boundary using one continuous downward stroke instead of fragmented short marks. Follow your prepared guide path exactly, rotating the paper surface when required to maintain comfortable pulling angles toward your body. Executing how to draw a cross demands recognizing that uninterrupted motion prevents wobbly ink deposits. Maintain consistent drawing velocity to avoid pressure fluctuations that create uneven line thickness or ink pooling at stroke terminations. Commit to each line path and maintain a steady, rhythmic execution pace while using a ruler for straight lines. Review examples of line drawing art for reference examples demonstrating confident stroke velocity and clean intersection management. A crisp, uniform outline immediately elevates technical execution quality across all geometric compositions.
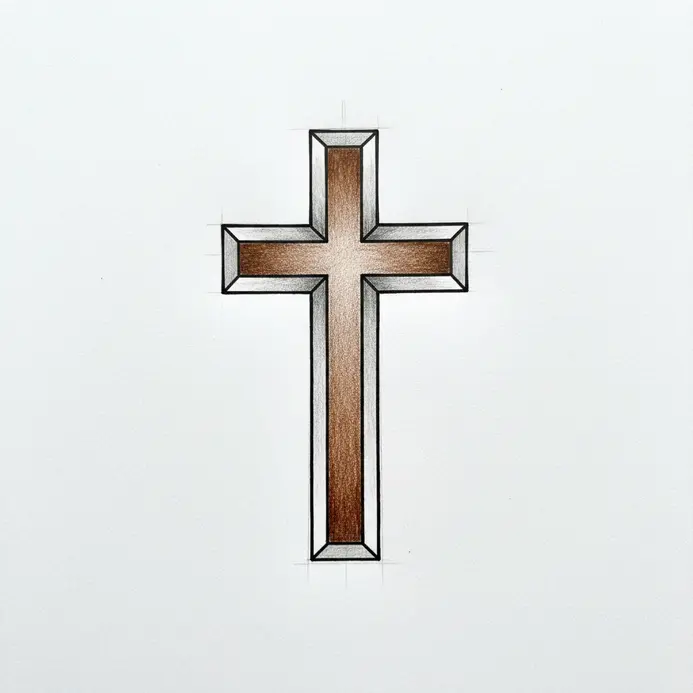
7. Apply Subtle Shading to One Side for Depth
Introduce three-dimensional volume using controlled tonal layering techniques on selected exterior planes, step by step. Assigning shadow values to specific boundaries transforms a flat geometric outline into a tangible structural object in your work of art. Designate an imaginary light source positioned at the upper-left quadrant of your workspace to establish consistent shadow direction. Apply shading exclusively to the right lateral edge of the vertical bar and the lower boundary of the horizontal arm. Tilting a 4B pencil barrel toward the page allows the graphite side to lay smooth, even tonal deposits. Understanding shadow placement remains critical when executing how to draw a cross with dimensional realism in this cross drawing tutorial. Build graphite layers gradually using minimal initial pressure to prevent premature tonal saturation. Squinting at your composition during shading application highlights uneven patchiness that requires additional blending intervention. Use a blending stump to smooth granular tonal inconsistencies between adjacent shading passes. Examining reference material for cross tattoo designs women reveals consistent shadow direction patterns across professional examples in the cross drawing tutorial. Layering tones slowly produces gradient transitions instead of harsh value boundaries.
8. Add a Neutral Grey Tone Across the Entire Form
Establish a foundational value uniformity across all interior boundaries before introducing contrast variations. Applying a consistent midtone base prevents white paper glare from disrupting shadow perception during final rendering. Hold your graphite instrument near the center barrel and angle the tip away from direct paper contact to maximize lead surface area. Execute long, overlapping strokes in one unified direction across the entire interior space while maintaining feather-light downward pressure. Applying minimal pressure guarantees transparent tonal coverage instead of opaque saturation in this drawing tutorial. Executing how to draw a cross with layered values requires recognizing that underlayer preparation determines final shading depth. Complete a secondary coverage pass using perpendicular stroke orientation to fill microscopic white gaps remaining after the first layer. Target a translucent grey finish rather than a dense, solid block of graphite. Gently smooth localized dark concentrations using a clean tissue or cotton pad before adding additional shadow layers. Review improve skills methodology sections to understand foundational graphite layering mechanics. Avoid heavy pressure during early stages to maintain erasure flexibility for subsequent corrections. Heavy initial application permanently compresses paper fibers and eliminates tonal adjustment capability later in the process. Layering graphite incrementally maintains structural control over value transitions and shadow boundary placement. Proceed only after confirming even distribution across all interior planes.
9. Place a Highlight on the Flat Front Face
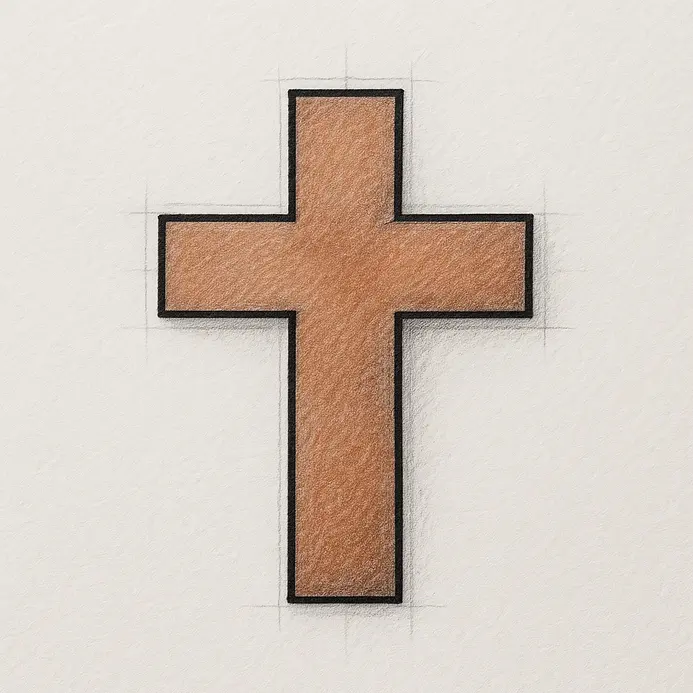
Reveal surface dimension by lifting graphite deposits along primary light-facing planes to expose underlying paper brightness. Removing material instead of applying white media preserves natural paper texture and prevents chalky artificial highlights. Identify the upper-left boundary edges where your designated light source strikes most directly. Shape a work of art by incorporating the bottom of the cross into your design. kneaded eraser into a narrow point and press gently against targeted boundary lines to lift graphite residue without disturbing surrounding tonal layers. Using a lifting motion instead of abrasive dragging guarantees crisp edge retention along illuminated corners. Recognizing subtractive highlight techniques separates amateur shading methods from professional geometric rendering when mastering how to draw a cross. Maintain sharp boundary definition at lifted edges to sell the illusion of rigid flat surfaces. Blending lifted areas into surrounding tones destroys hard-edge contrast and suggests curved cylindrical geometry instead of rectangular planes. Study how to draw a 3D cube to observe how precise highlight placement defines volumetric boundaries across geometric forms. Preserving hard illumination edges reinforces structural rigidity in technical drawings.
Refining Your Sketch: Tips to Improve Line Quality and Contrast
Enhance final composition clarity by reinforcing structural boundaries after completing initial shading passes. Trace over softened outline sections using deliberate, confident strokes to restore sharp geometric definition. Applying contrasting value blocks to two adjacent exterior boundaries intensifies the illusion of three-dimensional mass without requiring advanced rendering techniques. Repeat the entire execution sequence twice using identical proportional spacing measurements to build muscle memory retention. Testing varied scale dimensions and shadow angle adjustments reveals personal style preferences before advancing toward complex architectural studies.
Conclusion
You constructed a mathematically balanced geometric form through structured proportion verification, precise axis alignment, and systematic value layering. Mastering preliminary measurement routines prevents skewed symmetry and establishes reliable technical foundations for advanced architectural rendering projects. Practicing freehand execution without straightedge dependencies improves line confidence and accelerates overall workflow speed. Transitioning toward adjacent geometric studies such as simple cubic structures reinforces perpendicular angle recognition and linear perspective understanding. Archive your completed composition within a reference portfolio to track progression across technical rendering applications. Following this structured methodology for how to draw a cross prepares artists for complex geometric drafting and architectural visualization tasks.
FAQs
Q: How do I draw a cross step by step for a simple tutorial?
A: Start by drawing a vertical line from the top to the desired length, then draw a horizontal line that crosses it about one third down from the top to form a plus sign; this step-by-step approach — draw one vertical line, then draw two shorter horizontal arms of the cross — makes an easy cross drawing.
Q: What is the best way to make the arms of the cross evenly proportioned?
A: Measure the length of the vertical line and mark the midpoint where you want the horizontal arm to sit, then draw the horizontal line so both sides are the same length; using a ruler to help will ensure the arms of the cross sit evenly and the cross outline looks balanced.
Q: How can I draw a bold or thick cross without losing clean edges?
A: First draw a thin cross with straight lines, then draw parallel lines around each arm and fill between them to create a thick, bold cross; alternatively sketch the outline and then darken it for a more solid artwork effect.
Q: Can I draw a realistic 3D cross and what techniques help achieve depth?
A: To create a realistic 3D cross, start with a flat cross outline, add angled lines to represent depth on one side of each arm, then shade the faces to suggest light and shadow — experimenting with perspective and thickness will inspire a convincing realistic 3D result.
Q: Should I start drawing from the top or the center when attempting a precise cross?
A: Many artists prefer starting from the top for the vertical line and then adding the horizontal bar, but you can also begin with a small plus sign at the center to set proportions before extending each part of the cross; either method works as long as you measure lengths and keep lines straight.


