

Essential Drawing Materials for Floral Illustration
You will need a pencil, an eraser, and some paper to start when figuring out how to draw a sunflower. A standard HB pencil is perfect for light guide lines. A white sketchbook sheet is ideal. You might want a ruler for your first straight guide line. Later, a black pen helps ink your final lines, and colored pencils add sunny yellows. Don’t worry about fancy supplies; all you need is a pencil and some colors to draw sunflowers. You have everything you need right now to draw the sunflower beautifully.
Foundational Shapes for Botanical Drawing
Let’s start with simple shapes because breaking down how to draw a sunflower means seeing it as circles and teardrops. You will sketch a center circle first. Then you will add long teardrop shapes around it for petals. A straight line becomes the stem. Sketch these guide shapes lightly. They are your friendly map. You will erase them later as your flower becomes clear.
1. Establish Your Guide: Sketch the Center Circles
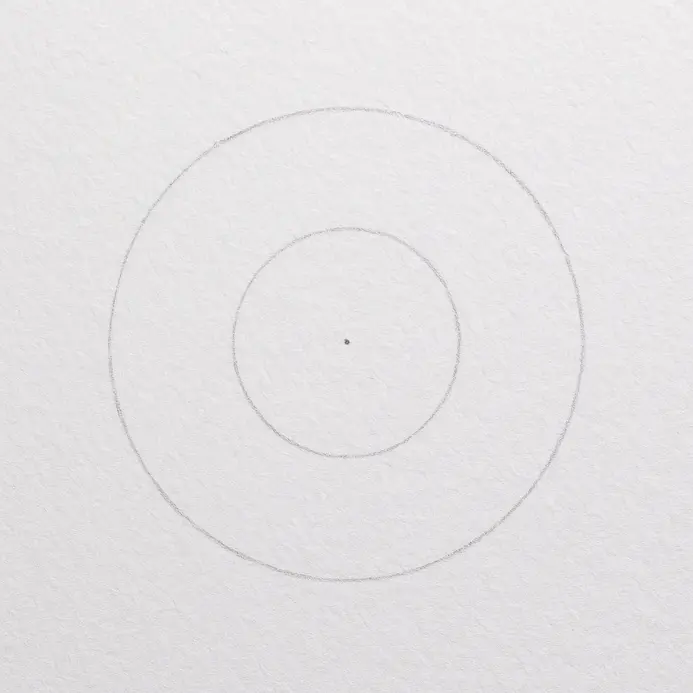
This first step shows exactly how to construct the middle base before you master how to draw a sunflower completely. You’re doing great for starting! Pick up your hard pencil like an H or 2H. Press lightly and make a tiny dot where you want the center of your flower to be. From that dot, draw a light, short line up and down. Then draw another light, short line crossing it left to right. These lines are your guides for how to draw a sunflower cleanly. Now, use those lines to help you draw a light circle around the center dot. Don’t draw the circle in one dark line. Make it with a few light, sweeping passes instead. This is a great way to practice your freehand circles. If you want more help with shapes, check out this general guide to drawing flowers while you work. Pro tip: If your circle looks wobbly, try rotating your paper as you draw to maintain steady hands. Keep your hand still and turn the page to make a smoother curve.
2. Define the Inner Petal Boundary
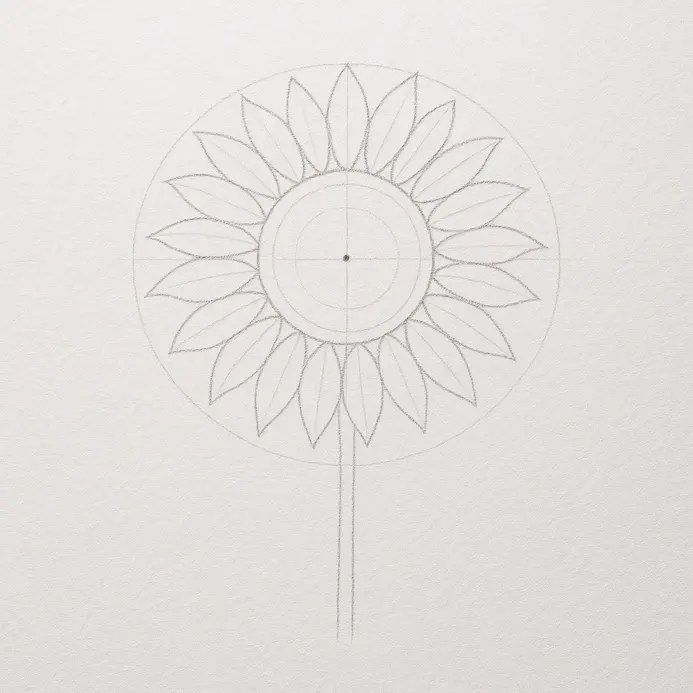
Now that you have a circle for the flower’s center, you’ll draw the first ring of petals around it as a key step in understanding how to draw a sunflower. This step gives your bloom its fluffy, layered look. Pick up your HB or 2H pencil. Press lightly on the paper. Draw a small, curved line coming out from the edge of your center circle. Make the curve gentle, like a smile. Add another curved line right next to it so you practice how to draw a sunflower with natural flow, ensuring they overlap a little. Keep adding these short, curved lines all the way around the circle. Let them point in slightly different directions. Don’t worry if they aren’t perfect. You’re just making a guide for the next step. Pro tip: If your petals look too stiff, use your wrist to draw the curves instead of your fingers for better movement. This helps you make smoother lines. For more practice, try this guide on other easy flower drawing ideas.
3. Draw the First Layer of Petals
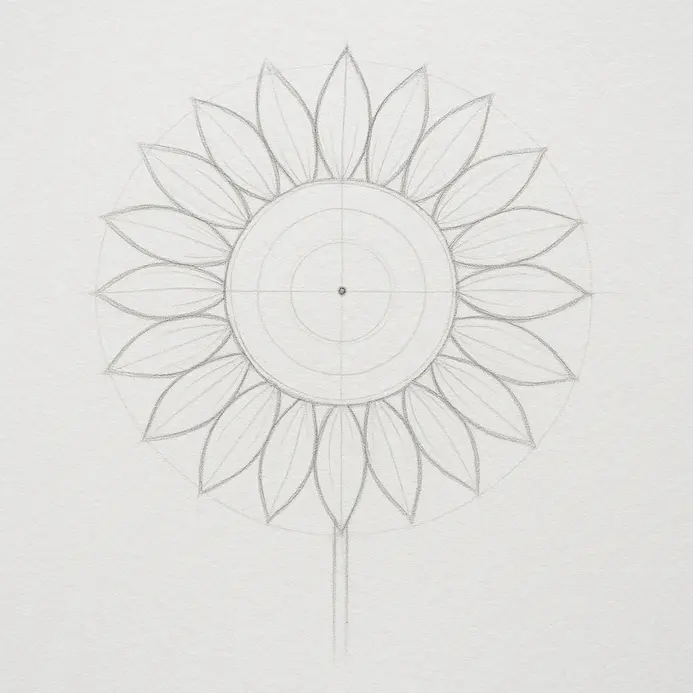
Now that you have your simple circle for the flower’s center, you’ll draw the petals that go around it while practicing how to draw a sunflower step by step. This gives your flower its happy, open shape. Use your HB pencil and press lightly. Draw a petal shape coming out from the top of your circle. Make it long and a little curved, like a teardrop. Add another petal right next to it, but let them overlap a bit so one looks in front as you figure out how to draw a sunflower with proper spacing. Keep going all the way around the circle, adding more petals. Let them be different sizes and point in slightly different directions. For more ideas after this, try this guide on more easy drawing ideas for beginners. Pro tip: Don’t try to make all the petals the exact same width or length. Variation makes it look real and relaxed on the page.
4. Add Depth with a Back Petal Layer
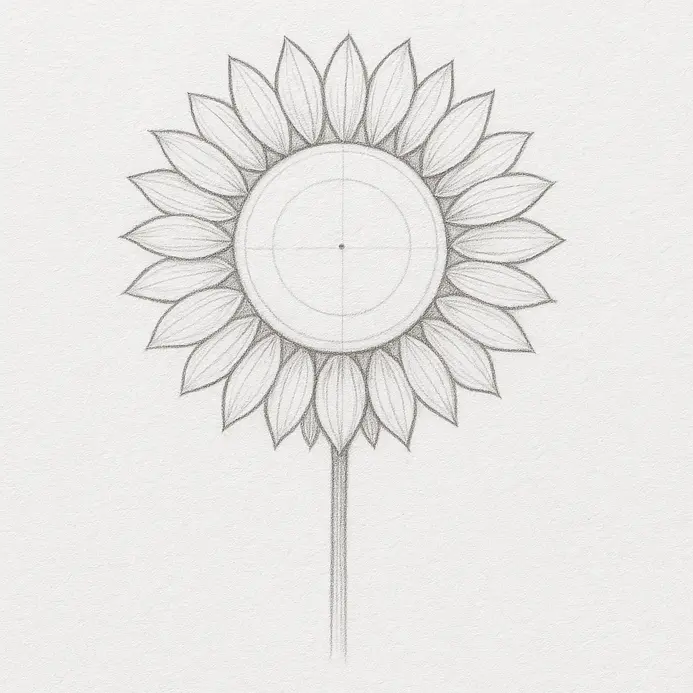
Now that you’ve got your first layer of petals, this step adds a back layer to make your sunflower look full and 3D when applying how to draw a sunflower volume techniques. It’s a great trick to make it pop off the page! Look at the gaps between your first petals. Use a light pencil line to draw new petals peeking out from behind them to show how to draw a sunflower with realistic depth. Make these back petals a little bit longer and have them curve outwards, just like in a sunflower drawing. Don’t worry if they overlap the front ones—that’s the whole point! You’re building depth. Pro tip: If your flower looks a little flat, try adding more back petals in the gaps for extra dimension. For more inspiration, explore simple drawings to practice your skills.
5. Anchor Your Flower: The Stem and Leaves
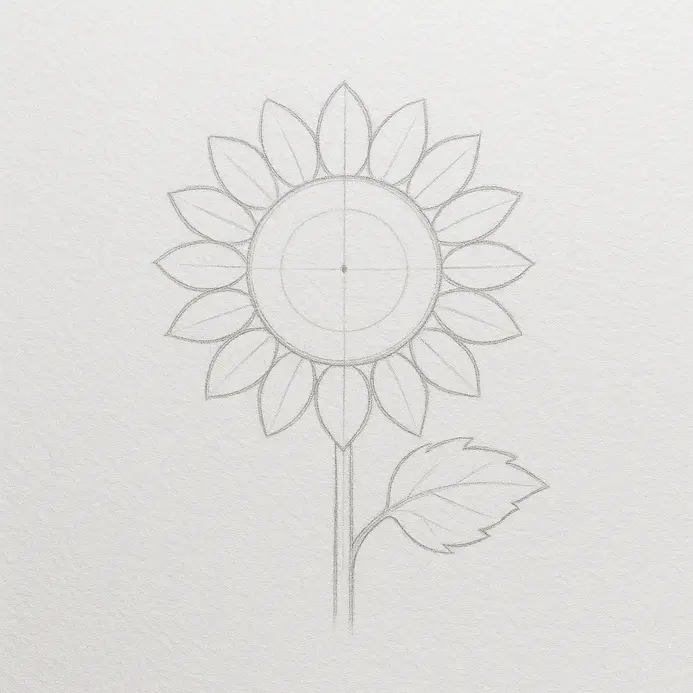
You have your big, beautiful sunflower head so anchoring it properly is essential for learning how to draw a sunflower that feels sturdy. Now let’s give it a strong stem and some leaves so it doesn’t float away, completing our step-by-step sunflower drawing! This makes your drawing look grounded and real. First, draw two lines down from the bottom of your flower head as a reliable method for how to draw a sunflower with proper balance. Make them a little bit apart and have them curve gently. This is your thick, sturdy stem. Now, add some big leaf shapes coming out from the sides of the stem. Draw them with a bumpy, jagged edge. Use a light pencil touch to create the inner circle of the sunflower drawing for these first shapes so you can fix them easily. For more helpful tips to improve your drawing skills, like making smooth lines, check out that link after you’re done here. Pro tip: Don’t draw your stem as a single, skinny line. Two lines close together makes it look strong enough to hold up that big flower.
6. What’s Next? Erase Your Guide Lines
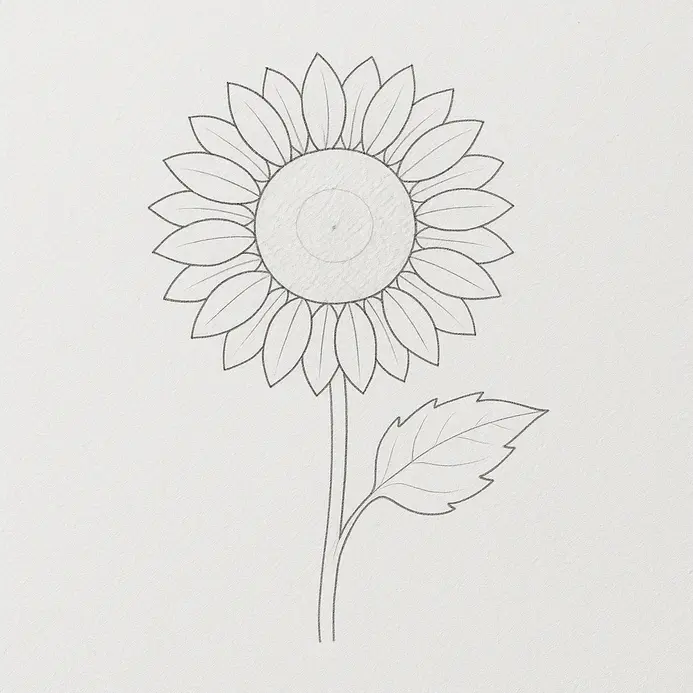
Now that you’ve completed the main outlines as part of mastering how to draw a sunflower, let’s clean it up by erasing those light guide marks. This makes your drawing look neat and finished. Pick up your kneadable eraser and gently dab it over the guide lines for the cleanup phase. Don’t rub back and forth. For lines close to your final drawing, be extra careful. Lift the eraser straight up after each dab. Keep going until all the guide lines are gone. Pro tip: If you don’t have a kneadable eraser, a soft vinyl one works too if you handle it gently while following the easy step-by-step instructions. Just use short, light strokes and clean it often to avoid smudges. For your next project, you could try this guide to learn how to draw a tree.
7. Ink Your Final Lines for Crisp Definition
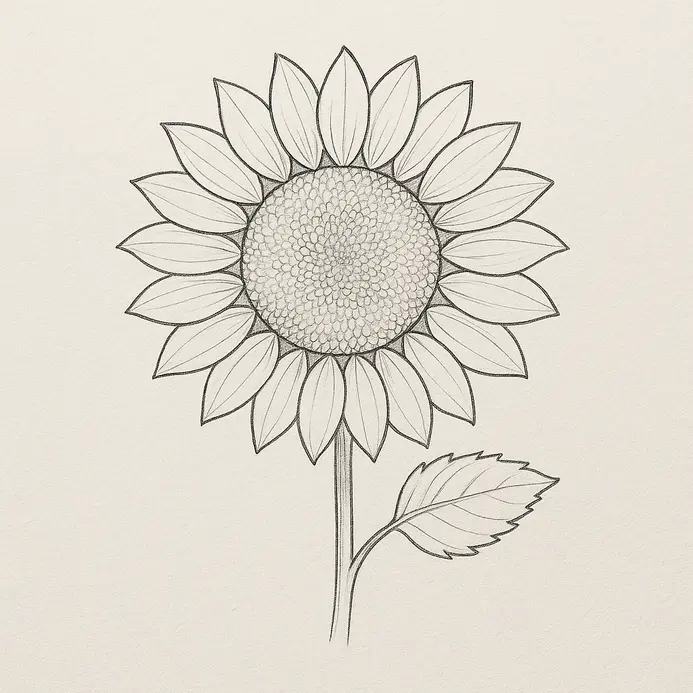
Now you’ll go over your pencil sketch with ink to lock in your lines while practicing how to draw a sunflower for crisp results. This makes your artwork look clean and finished. Grab a watercolor set to bring your sunflower drawing to life. fine-liner pen. Start by tracing over the main circle in the center of the flower. Go slowly and draw one smooth line. Next, trace the outline of your petals while keeping your focus sharp to apply how to draw a sunflower finishing steps. Try to draw each line in one smooth motion. If a line is long, move your whole arm from your elbow. Rotate your paper to find a comfortable angle for your hand. This helps you draw smooth curves. Don’t worry if a line wobbles a bit. That’s totally normal. Once you’ve inked the main shapes, add the little seeds inside the center circle with small dots. Your sunflower will look sharp and clear. For a fun next project, you could add your sunflower to some easy landscape drawing ideas for a step-by-step guide on how to draw sunflowers. Pro tip: If your pen skips on the paper, try drawing your lines a little faster. A confident, quicker stroke often makes a smoother line.
8. Shade the Base of Petals for Volume
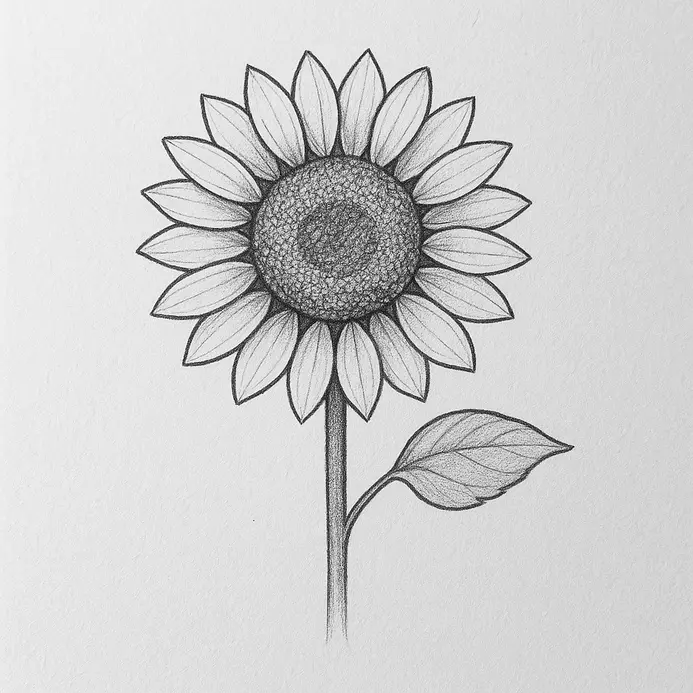
Now that you have your sunflower’s basic outline, adding simple shading is vital for mastering how to draw a sunflower with realistic volume. This step makes your flower look round and real instead of flat. Pick up your pencil and press lightly. Look at the bottom of one petal, where it connects to the center. Draw a short, soft line right at that spot to learn how to draw a sunflower with accurate lighting cues. Then, shade a little patch around that line, making it darker at the very bottom and lighter as you move up the petal. Do this for every petal. If one petal is behind another, shade a small, soft shadow on the lower petal right where they touch. This shows the petals are overlapping. You’re doing great; just keep following the step by step for beginners! Pro tip: Hold your pencil on its side and use the flat part of the lead for smoother blending. It makes a wider, softer mark that’s easier to control. For more practice on another nature subject, try this tutorial on drawing clouds.
9. Bring Your Sunflower to Life with Color
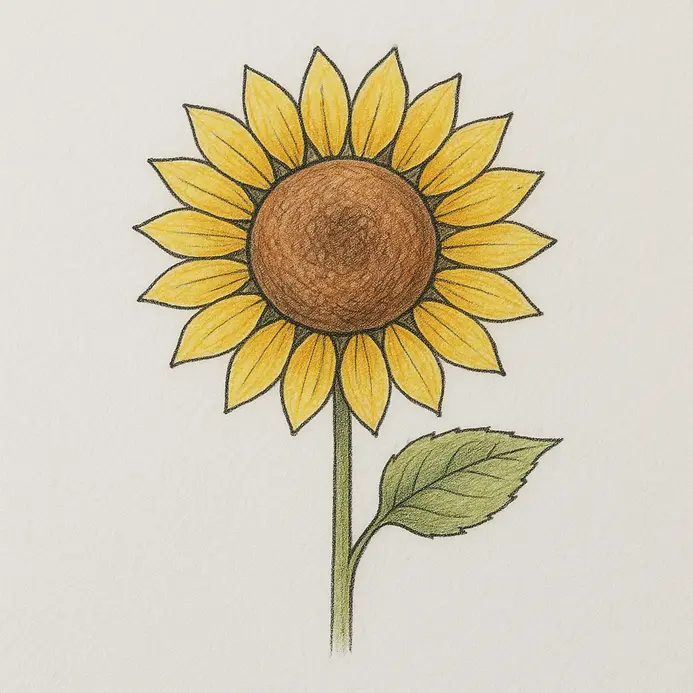
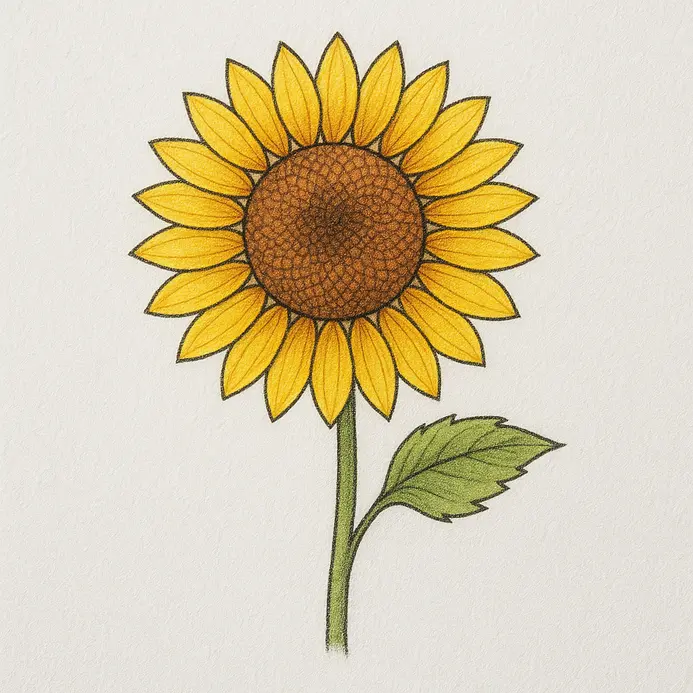
You’ve done such a great job sketching your sunflower! Now, let’s make it pop with some beautiful color to finish the project. Pick up your favorite coloring tools, like colored pencils or crayons. Color the center circle with a light brown. Press softly with your pencil. Next, take a darker brown and make lots of tiny dots and little circles all over the center. This makes it look bumpy and real. Now for the petals! Use a bright yellow to fill them in. Then, take an orange or a darker yellow to enhance the center of the flower. Press lightly to add a little color at the base of each petal, right next to the brown center. This gives your flower nice depth. You’re doing great! Pro tip: Don’t worry about making everything perfect and uniform across the page when following the step-by-step guide. A real sunflower has lots of little color changes, and that’s what makes your drawing look alive. For more color practice, try this guide to drawing a sunset.
Refining Your Sketch: Tips for Final Polish and Detail
Try drawing your sunflower a second time from memory after finishing this complete lesson on how to draw a sunflower successfully. Practice the seed head texture on a scrap paper first. Make a tiny version and a giant one to see how proportions change across scales. Add a soft shadow under a petal or a simple sky line to ground your composition. Each sketch teaches you something new. You are building your skills with every sunny flower you draw.
Conclusion
You did it! You’ve successfully followed this clear path on how to draw a sunflower from start to finish. Look at what you created—starting from simple circles all the way to a full, colored flower. You learned how to build a drawing with guide shapes and add layers for depth. If you want to practice more, try drawing another one from memory or make a whole bouquet! A daisy or a tulip would be great next projects using similar steps. I’d love to see your sunny artwork, so feel free to show it off wherever you display your creations. Keep drawing!
FAQs
Q: What is a simple step-by-step tutorial to start drawing a sunflower?
A: A simple step-by-step tutorial begins by using simple shapes: draw a large circle for the outer circle of the flower, add a second circle for the center of a sunflower, and sketch a third smaller ring or three circles if you like a more detailed floret area. Follow with easy steps to map the outer layer of petals, add the stem and the leaves, then refine petal shapes and veins in the leaves. Use an eraser to clean guidelines and finish with shading or color — these step by step instructions are designed for beginners and make learning to draw straightforward.
Q: How do I draw the sunflower petals so they overlap realistically?
A: Start by lightly sketching the outer circle, then block in petal placement using long teardrop shapes radiating from the center. To create a more realistic look, draw petals in two or three layers so petals overlap; the petals overlap near the bottom of the sunflower and on the left side of the flower add variation by changing lengths and angles. Finish the petal details with gentle curves and slight notches and use shading to suggest depth.
Q: Which drawing tools and pencils are best for this drawing and painting project?
A: For drawing, a 6B pencil is useful for rich darks and defining the center and petal outlines while lighter pencils map shapes. Use an eraser to soften guidelines and clean edges. For drawing and painting afterward, you can use watercolor paint for a soft, layered wash or acrylic and acrylic painting for bolder yellow petals and textured sunflower seeds. Choose materials based on whether you want an easy-to-follow drawing tutorial or a mixed media art project.
Q: How can I draw a realistic sunflower — what are the key steps?
A: To draw a realistic sunflower, begin with using simple shapes: draw a large circle for the outer boundary, then a second circle for the seed head and a third to suggest the floret area. Add a staggered outer layer of petals with different shapes and overlapping edges, then sketch the center with seeds and texture. Include a stem and the leaves with veins to the leaves and slight irregularities. Use step-by-step how to draw guidance: refine edges, add shadows, and consider using a 6B pencil or light washes of watercolor paint for subtle color gradations to create a more realistic look.
Q: What are easy steps to create your own sunflower painting using watercolor or acrylic?
A: Easy steps for painting start from your finished drawing: transfer the drawing to watercolor paper for watercolor paint or canvas for acrylic. For watercolor, lay down light washes for the yellow petals and darker washes toward the base of each petal; for acrylic, build layers from mid-tones to highlights. Use step-by-step instructions: paint the center floret in browns and add tiny sunflower seeds, then layer yellow petals and finally paint the stem and leaves, including veins to the leaves. Both mediums allow you to create a beautiful sunflower drawing and painting with practice.