
You’ll need a standard HB pencil, a kneaded or vinyl eraser, and a sheet of white drawing paper or sketchbook paper. Keep a black fineliner or ballpoint pen nearby if you’d like to ink your final lines.
Colored pencils or markers are optional for adding color later. This lesson suits beginner to intermediate artists and takes about 30 to 60 minutes with pencil. Adding ink and shading might take 1 to 2 hours.
You’ll draw light guide shapes first, then erase them after adding final lines, so each step builds cleanly on the last. Grab your supplies, take a relaxed breath as you learn how to draw a cat, and let’s begin!
What You Will Need to Draw a Cat
Gather a pencil, with a standard HB or 2H working well for light guide lines, an eraser, and white drawing paper or a sketchbook. An optional ruler helps with initial straight guide lines. You have everything you need to begin when figuring out how to draw a cat.
You might also enjoy a black pen or fine-tip marker for inking over pencil lines in the final steps. Plus colored pencils or markers are great for adding color at the end. None of these supplies need to be expensive.
How to Use This Cat-Drawing Tutorial
Each step builds on the previous one, so follow the tutorial in order. Sketch guide shapes lightly at first because you’ll erase them when your final lines look clean. Slight imperfections in the early steps are normal and belong to the process.
With this construction approach, your cat drawing grows more recognizable with every step as you master how to draw a cat. Take your time, and enjoy watching the shapes come together. Trust me on this.
1. Sketch The Head And Body Ovals First
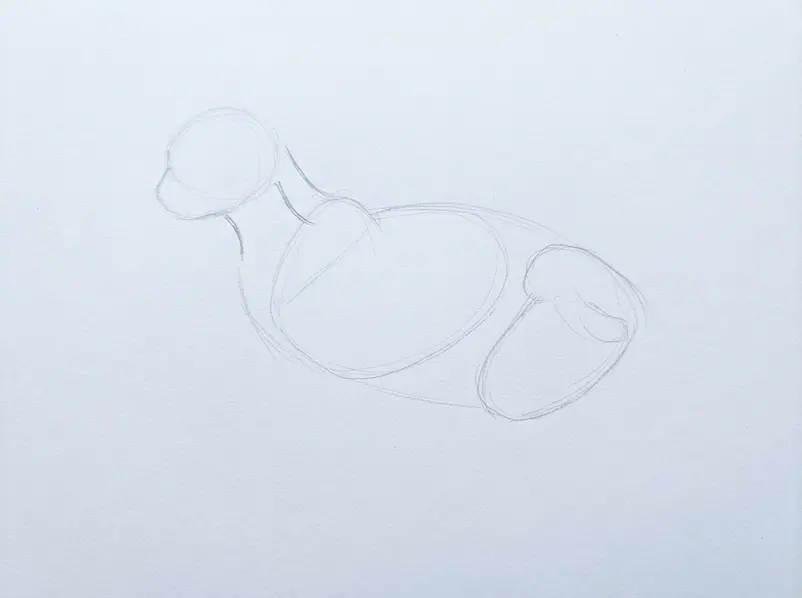
Start your light pencil lines with two simple ovals. These shapes give your drawing a clear base for how to draw a cat. You’re doing great, and this part is easier than it looks!
Draw a wide oval near the upper middle of the paper for the head. Keep the line soft and leave room above it for two ears later. Draw a longer oval below the head for the body, with its top edge slightly behind the head oval.
Let the body oval lean a little to one side, so the pose feels less stiff on paper. Add a small overlap where the two ovals meet, then erase the inside lines with an eraser if they look too dark.
Sketch two short guide lines across the head oval, one from top to bottom and one from left to right, using light pressure. Draw a small oval near the lower middle of the head for the muzzle. Add a short curved line below it for the chin, keeping both marks inside the head oval.
Check the body shape with your pencil tip, then redraw any weak curve with one smooth motion. Keep every line pale enough to erase later as you practice how to draw a cat. Nice work getting this far!
Pro tip: Hold your eraser at an angle and lift away only the darkest marks, so the head and body ovals stay easy to see.
Explore easy animal drawing tutorials to continue learning.
2. The Ear Triangles Shape Your Cat’s Expression
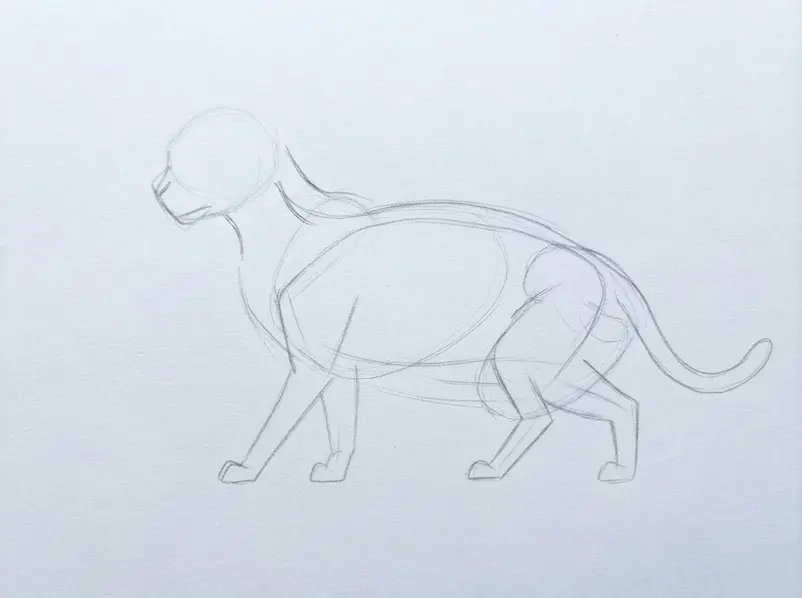
With the head shape from step one in place, add two light ear triangles at the upper sides. Their size and angle help set the cat’s expression before you add the face details.
Use a light pencil to draw one tapered triangle from each upper side of the head. Draw each long outer edge from the base to the tip with a smooth line, then lift your pencil as you reach the point.
Curve each outer edge a little instead of using stiff, straight lines. Add a smaller inner line inside each triangle, following the same direction and leaving a clear border. Compare both ears, then adjust their height or angle before making any line dark.
Use this step-by-step ear drawing to check each triangle while you work on how to draw a cat. Pro tip: Keep an eraser nearby and soften any ear line before it gets dark, so you have room to fix the angle.
3. Add Front Legs And A Relaxed Tail Curve
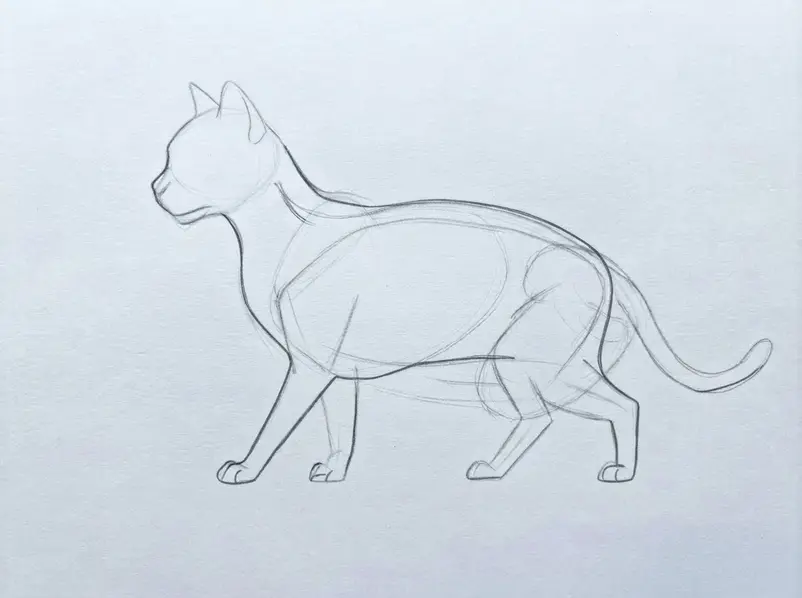
Now you have the first step in place, so this part of how to draw a cat adds the front legs and a soft tail curve. These lines help finish the lower part of your drawing with a calm, balanced shape.
Draw two light lines below the head, leaving a small gap between them for the chest. Curve each line down and slightly outward, then bring both lines back up to form the front paws.
Add two short lines across each paw to show the toes, using light pressure so you may erase any rough marks. Start the tail near the lower side of the body, then draw one smooth curve away from the body and back toward it.
Add a second curved line beside the first one, keeping the gap even from start to finish. Erase tiny overlaps where the legs or tail cross earlier sketch lines, then redraw any missing edge with a clean pencil line.
You’re doing great as you learn how to draw a cat! Pro tip: Keep the tail curve wide and smooth instead of making several sharp turns, and use an eraser to remove bumps before you darken the final lines.
Explore drawing faces for beginners to continue learning.
4. Refine The Cat Outline And Facial Features
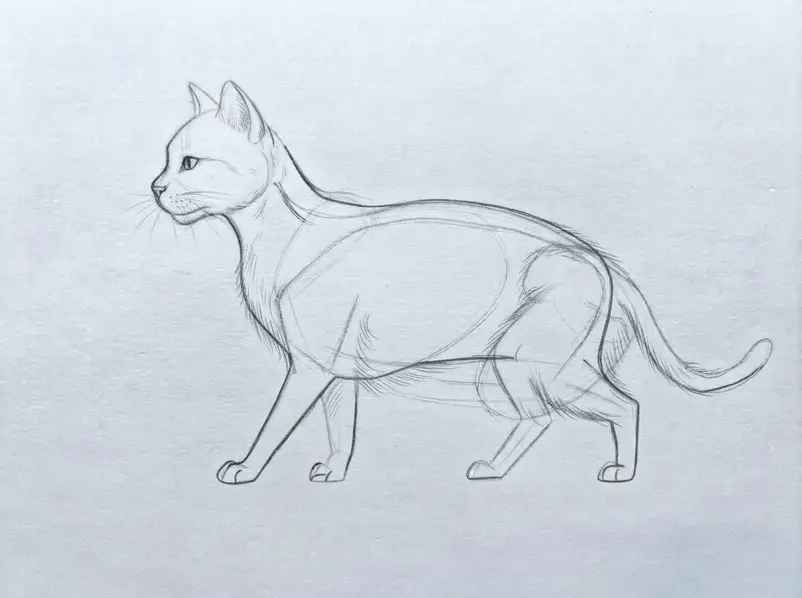
Now build on the first step by refining the cat’s outer line and adding clear face marks. For extra practice with eye and nose placement, use drawing faces for beginners before you add these marks.
Use a sharp pencil to trace over the head line with a smooth, light curve, keeping both ears joined to the top of the head. Erase stray lines outside the head, then redraw any broken edge with light pressure so the cat outline stays clean.
Draw two short slanted lines inside the ears, leaving a small gap between each line and the outer edge. Place two wide eyes below the ears, using one curved line above each eye and another curved line below it. Add a small upside-down triangle between the eyes, then draw two short lines below the triangle for the mouth.
Add short fur marks beside the nose, below the eyes, and along the cheeks, keeping each mark light and leaving open paper between the lines. Pro tip: Hold your eraser ready and lift away any line crossing an eye or ear before adding more marks.
Check the face by turning your paper sideways, then erase or soften any line that makes one side look too different from the other. You will soon master how to draw a cat perfectly.
5. Ink The Final Lines For A Clean Outline
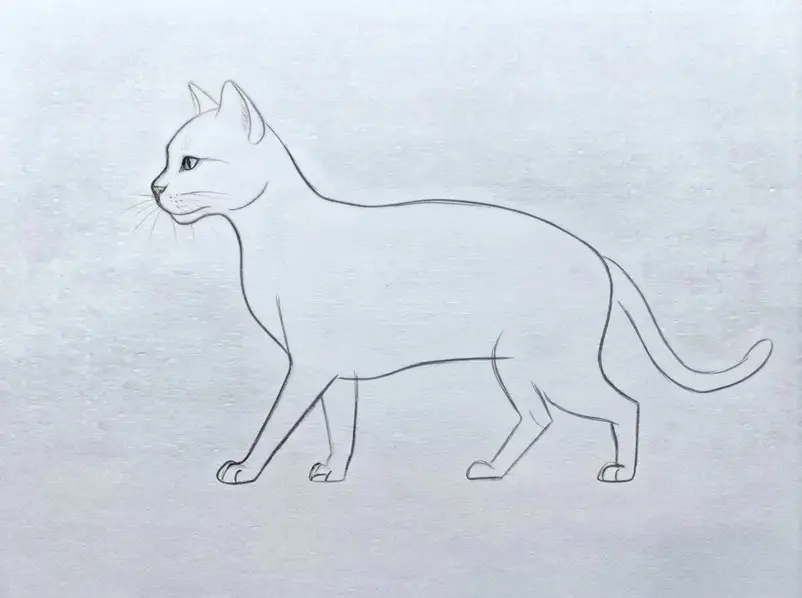
Now that your first step is on paper, you’ll turn the light sketch into a clear cat outline. This step keeps the best lines and removes extra marks for a neat finished drawing.
Place a fineliner beside your sketch and start at the top of the head. Trace the head curve with one slow line, then lift your hand at each ear tip. Draw the ear edges with short, smooth lines, and connect each line back to the head.
Follow the back, chest, legs, and belly with steady curves, pressing lightly near each turn. Add the face lines, paws, tail, and small fur marks with short strokes. Leave tiny gaps between fur marks, since too many lines will make the outline look busy.
Let the ink dry, then use an eraser to remove the pencil sketch below it. Erase with small passes, and stop once the paper looks clear around the ink as you finish learning how to draw a cat.
Pro tip: Trace each long line in one smooth movement instead of stopping in the middle, and use a fresh sheet under your hand to keep the ink from smearing.
Explore step-by-step ear drawing to continue learning.
6. Soft Pencil Shading Brings The Fur To Life
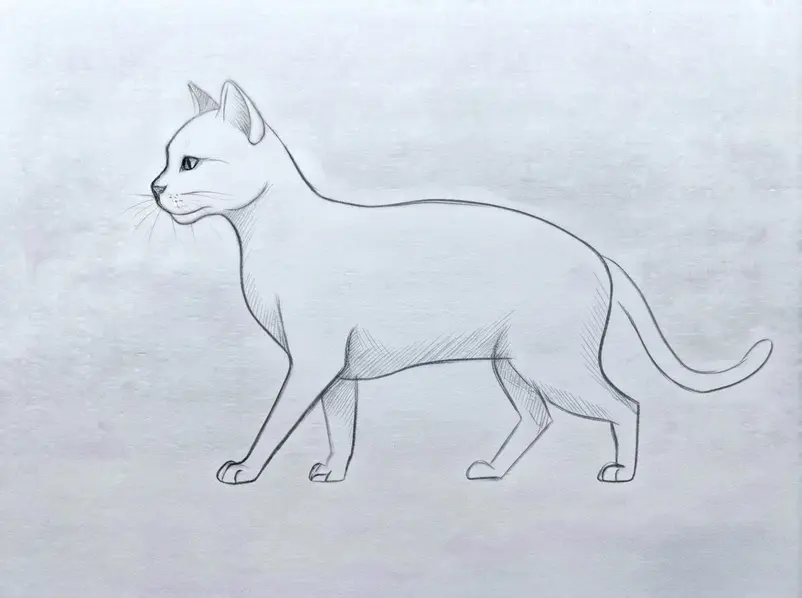
Now that you’ve finished the first step, you’ll add soft pencil marks to the cat drawing. These light marks will build the fur and help the face, body, and tail feel finished.
Soft pencil shading keeps each new line easy to change. Use a shading pencil to draw short lines along the head, neck, chest, back, and tail. Keep each line pointing away from the center of the cat’s body.
Press lightly in pale areas and press a little harder under the chin, beside the legs, and along the lower edge of the tail. Add a second layer of short lines in darker spots, leaving small patches of paper clear between them. Draw a few longer lines around the ears and tail, then add tiny lines near the cheeks and paws.
Use an eraser to lift a few thin marks across the forehead, chest, and side, so the paper shows through the shading. Pro tip: Keep the fur lines short and loose instead of making one dark block.
Eraser marks will help break up heavy shading, so don’t worry if the first layer looks too dark. Keep practicing how to draw a cat until you love the final shading.
Explore improve your drawing skills to continue learning.
Tips to Improve Your Cat Drawings
Once you’ve finished, try drawing the cat a second time from memory. Practice the most complex section separately, which is usually the decorative detail step. Draw the same cat in different sizes to see how its proportions change as you learn how to draw a cat.
You can also experiment with a simple background or extra shading. Each new attempt helps your lines feel more confident and your cat’s expression feel more personal. Try adjusting your grip for better control when you practice how to draw a cat again.
Conclusion
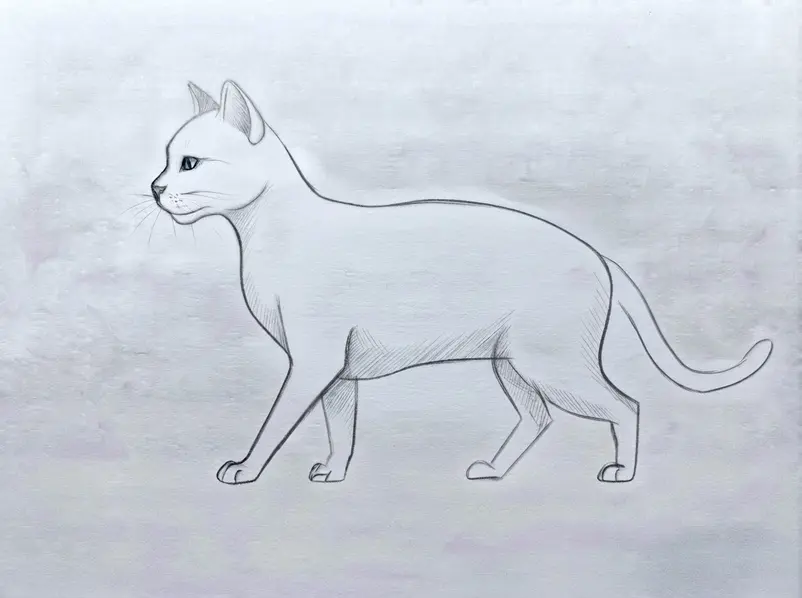
You’ve finished your cat drawing, and that’s a wonderful achievement. You began with simple guide shapes, added the main structure, built the face and pose, then cleaned the lines and added gentle shading. This method helps your drawing stay balanced while giving you room to fix small details along the way.
Look closely at your work and notice what you like most. Next time, try drawing the same cat from memory. Change the size, turn the head, or give the tail a different curve.
You could also try a kitten, a curled-up cat, or another small animal using the same shape-first method. Each attempt will help your lines feel more natural as you refine how to draw a cat. Display your finished artwork somewhere you’ll enjoy seeing it, or share it with someone who loves drawing.
Keep your pencil nearby, because practicing how to draw a cat means your next little sketch might become a favorite. You did it!
FAQs
Q: What pencil should I use for this cat drawing tutorial?
A: Use a standard HB pencil for light guide shapes, outlines, and gentle shading. This tool is essential when learning how to draw a cat.
Q: How do I keep the cat’s head and body in proportion?
A: Keep the head close to one-third of the body length, then compare both shapes before adding details. Maintaining balance is a core part of how to draw a cat accurately.
Q: Can I skip the inking step?
A: Yes. Leave the finished pencil lines clean and strengthen them with a darker pencil instead. Many beginners skip inking when they first try how to draw a cat.
Q: How long does it take to draw a cat?
A: A pencil drawing often takes 30 to 60 minutes. Ink and shading might take 1 to 2 hours.
Q: How do I add shading to my cat drawing?
A: Use soft pencil strokes beneath the chin, around the eyes, along the body, and near the legs to create depth. Consistent layering is the best way to finish any guide on how to draw a cat.