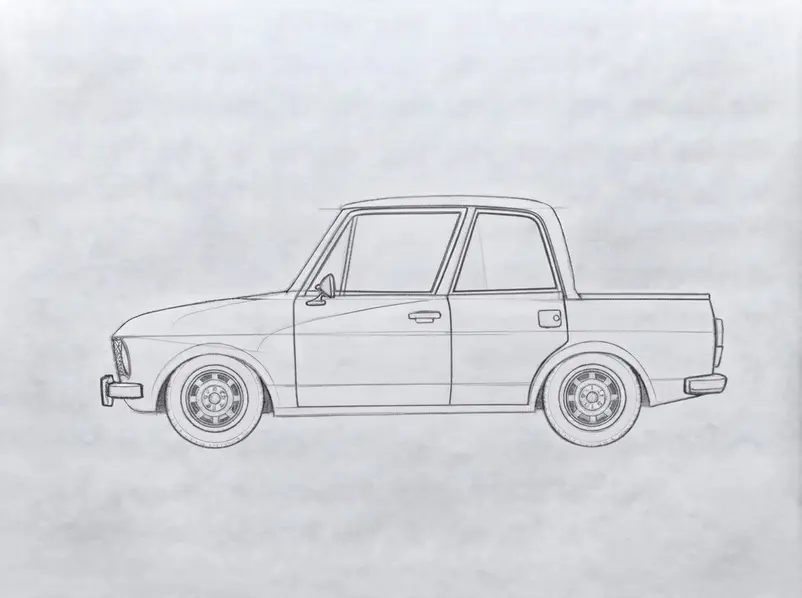

If you’d like to add color later, use colored pencils or markers. This easy tutorial suits absolute beginners and takes about 15 to 30 minutes, depending on how many details you add. Guide shapes are drawn lightly first, then erased after the final lines are ready, so each step builds cleanly on the last.
Take your time, enjoy each small shape, and let’s begin your project together.
What You Will Need to Draw a Truck
Before figuring out how to draw a truck, gather a pencil, such as a standard HB or 2H, for light guide lines, along with an eraser and white drawing paper or a sketchbook. An optional ruler helps with the first straight lines.
For the final steps, use an optional black pen or fine-tip marker to ink over clean pencil lines. Colored pencils or markers are also optional for adding color at the end. None of these supplies need to be expensive, so you already have everything you need to begin.
How to Use This Truck Drawing Tutorial
To properly understand how to draw a truck, follow each step in order because every part builds on the one before it. Sketch guide shapes lightly at first, since you’ll erase them after the final lines look clean.
Don’t worry if your early shapes seem uneven. Slight imperfections are normal and part of the process. With this construction approach, your drawing grows more recognizable with every step, so take your time and enjoy watching it come together.
1. Draw the Long Main Body Rectangle First

This first step sets up the long main body for how to draw a truck. A clean rectangle gives every later part a clear place, from the cab to the wheels. For a quick warm-up, try face drawing basics before you begin.
While exploring how to draw a truck, place your paper sideways, then use a pencil to mark a small point near the left side and another point near the right side. Keep both points at the same height, leaving space above and below for later parts. Draw a straight line through both points to make the bottom edge of the truck body.
Add a second straight line above it, keeping the two lines the same length. Connect the left ends with a short vertical line, then connect the right ends with another short vertical line. Use light pressure so each line stays easy to erase as you adjust the truck body shape.
Check the four corners, then erase any extra marks outside the rectangle. Add a tiny mark at the middle of the top edge to help place the cab in the next step. Nice work getting this far!
When learning how to draw a truck, use a ruler for the first rectangle, but press lightly so you can fix the lines without leaving deep marks. If the shape isn’t perfect, erase one edge and redraw it slowly. You’re doing great!
2. The Cab And Hood Set The Truck’s Proportions
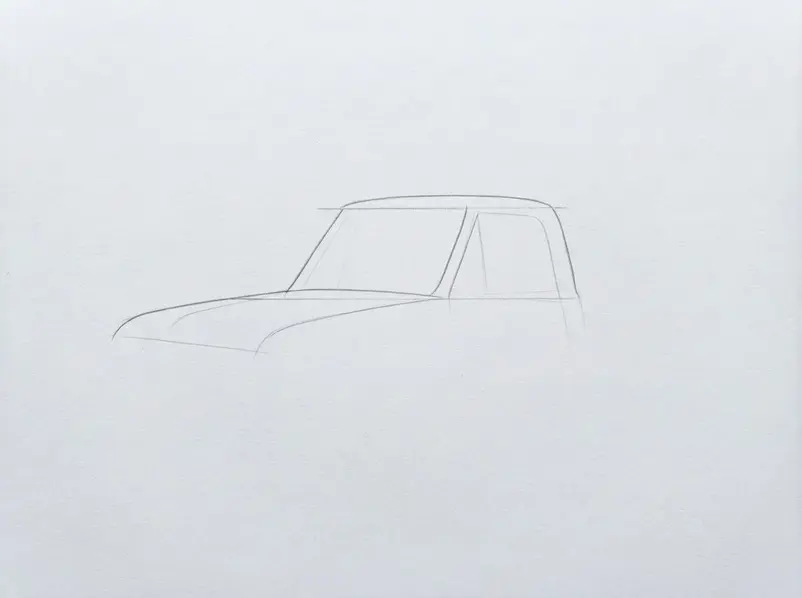
As you continue mastering how to draw a truck, add the cab and hood with a light pencil. These two large shapes set the vehicle’s length and height before smaller marks go in.
Knowing how to draw a truck means comparing the two boxes before adding windows, doors, or wheels, then shorten or lengthen the hood with an eraser until the front-to-rear balance feels right. Raise or lower the cab with light new lines if the vehicle sits too tall or too low on the paper. Keep both shapes inside the planned length.
Use the same size check when you draw a house. Add a faint line along the top of each box to check the height, then trace the better lines with firmer pressure after the cab and hood fit together. You’re doing great!
When practicing how to draw a truck, cover the small details with a scrap of paper, then check the cab-to-hood balance from front to rear before moving on.
3. Sketch Two Balanced Wheels Beneath The Body
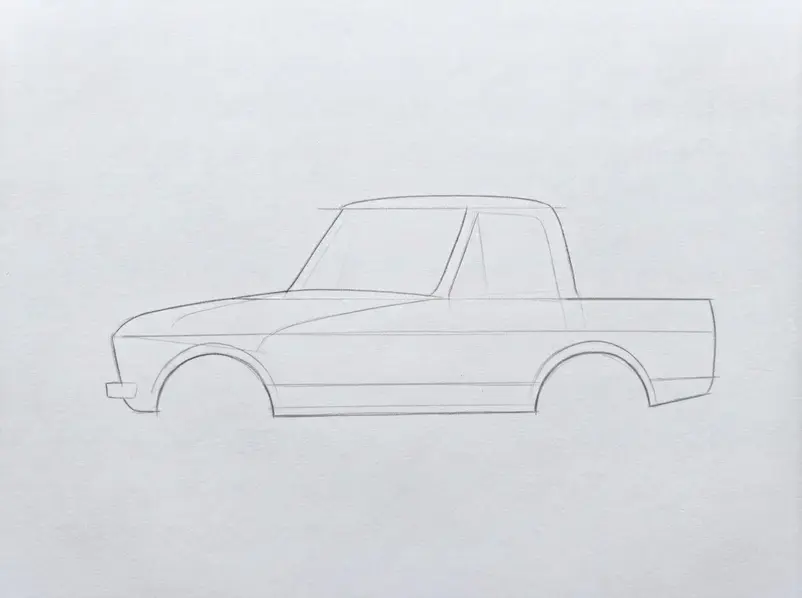
Once you see how to draw a truck, this step adds two wheels beneath it. Place them evenly so the body sits level on the page.
To really refine how to draw a truck, use a pencil with light pressure to draw a faint horizontal line below the truck body. Place one small mark near the front and another near the rear, leaving space below the body for each wheel.
Draw a loose circle around the first mark, then repeat the motion around the second mark. Use several light lines instead of one dark line. Add a smaller circle in the middle of each wheel, keeping both small circles centered.
Compare the two outer circles, then adjust the smaller or higher wheel with faint lines. If the vehicle is turned slightly, press the circles into soft ovals instead. Keep the lower edges of both wheels on the same ground line.
Check the space between each wheel and the body before you darken any edge. Nice work getting this far! Pro tip: Cover one wheel with a piece of paper when you learn how to draw a truck, then compare the other wheel with it to check the size and height.
Erase and redraw light guide lines if the wheels don’t match. You’re doing great!
4. Connected Shapes: The Truck Form Comes Together
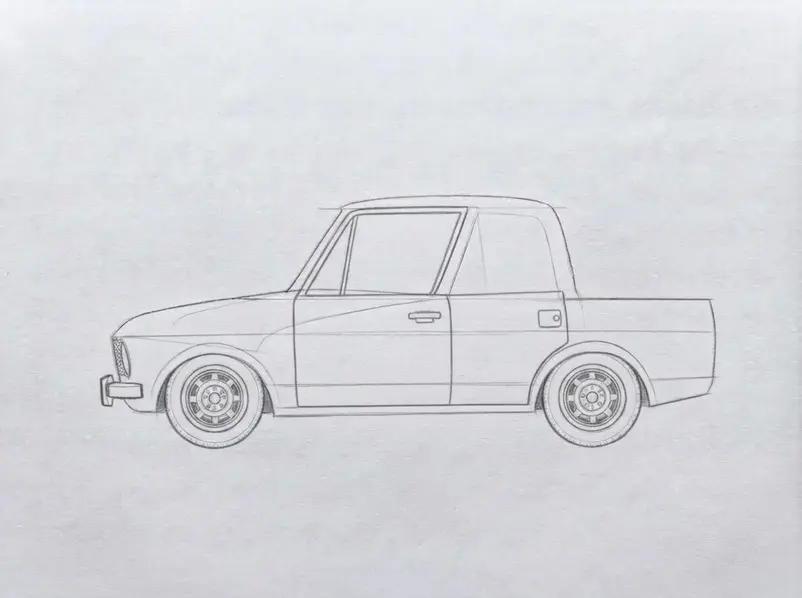
Since you are studying how to draw a truck, add the main connected shapes for the vehicle. Draw the body, cab, and wheels together so your light pencil sketch has a clear base for later details.
While figuring out how to draw a truck, use a ruler to draw a long, light rectangle in the middle of the page for the truck body. To the left of it, draw a shorter rectangle for the cab, letting its right edge touch or overlap the body by a small amount.
Keep the cab about half as tall as the body, and leave enough room below both shapes for the wheels. Add two smooth circles below the lower edge, with one near each end, and press lightly because you’ll move them if needed.
Draw a small rectangle between the cab and body, then add a short sloping line above the cab with a triangle if you want an angled shape. Connect any gaps with short lines, then check the wheels sit under the body and the main geometric shapes join into one form.
Pro tip: While practicing how to draw a truck, keep every line light while you check the shape placement, and try the same boxes and circles with easy landscape drawings if this step feels hard.
5. Refine Windows, Doors, Bumpers, And Side Mirrors
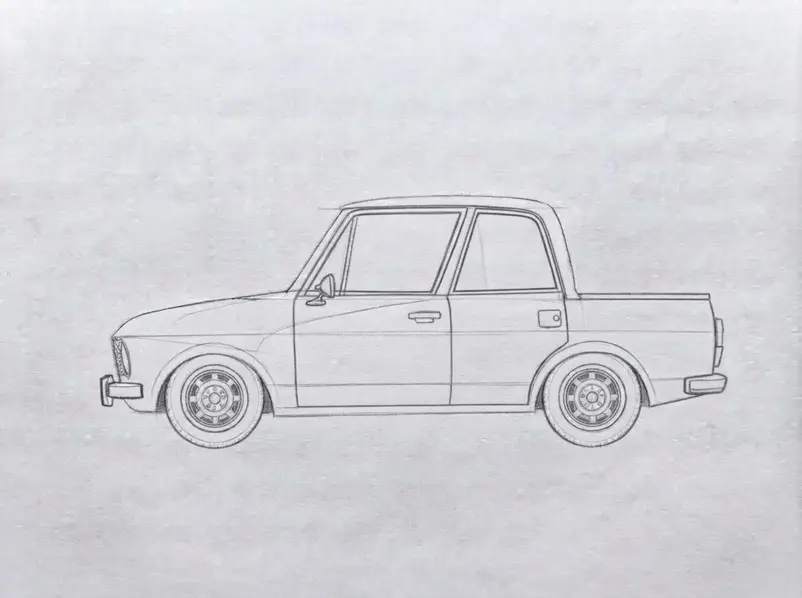
Now that your base is ready for how to draw a truck, add the windows, doors, bumpers, and side mirrors. These clean pencil marks will tie the vehicle’s cabin and body together. Try simple drawings to practice before refining these parts.
To polish your skills on how to draw a truck, use a pencil with light pressure to draw each window inside the cabin outline, leaving an even strip of body around every glass shape, and use straight or gently curved lines in the same direction as the vehicle’s outer frame. Add a small open space inside each window for a highlight, then keep the glass simple with a few light, parallel strokes instead of dark, heavy shading. Draw a second line inside the body for each door seam.
Follow the cabin and lower body angles, and add one short handle in the same direction as the door. Curve a broad line around the front or rear body for each bumper, connect its ends smoothly to the truck, and lift your pencil slowly at each end. Place a small oval, rounded rectangle, or tapered shape near the front edge of the cabin for each side mirror, connect it with a short support, and draw the far mirror smaller or partly hidden.
Erase lines crossing the windows, wheels, or body, then press more firmly only on the outer edges and keep seams, highlights, and construction lines light.
Pro tip: When studying how to draw a truck, keep an eraser nearby and turn the paper when a window or bumper curve feels awkward. Redraw the curve lightly, then make the far mirror smaller than the near mirror.
Tips to Improve Your Truck Drawing
Once you finish, try showing a friend how to draw a truck a second time from memory. Practice the most complex section separately, which is often the decorative detail step. Change the vehicle’s size to see how its proportions shift, then experiment with a background or gentle shading. Each new attempt helps you feel more comfortable and gives your artwork a little more personality.
Conclusion
You did it! You now know exactly how to draw a truck from a few simple shapes and turn them into a clear, finished vehicle. You started with light guides, built the body and cab, placed the wheels, added details, and cleaned the lines.
That step-by-step order helps your drawing stay balanced and easy to follow. For more practice, draw the same vehicle again from memory. Try making it smaller or larger on the page.
You could also sketch a van, bus, pickup, or delivery vehicle using the same shape-first method. Add soft pencil shading or color when you’re ready for another challenge. Display your finished artwork somewhere you’ll see it, or share it with a friend who enjoys art.
Every finished sketch gives you useful practice, so feel proud of this one.
FAQs
Q: What pencil should I use for this truck drawing tutorial?
A: An HB pencil is a good choice because it makes light guide marks and clear final lines.
Q: How do I keep the truck wheels balanced?
A: Place both wheels along the bottom edge of the body and leave a similar gap between each wheel and the truck ends.
Q: Should I erase the guide shapes?
A: Yes. Wait until the body, cab, wheels, and details look right, then erase the extra lines gently.
Q: How long does this truck drawing take?
A: Most beginners finish it in about 15 to 30 minutes, depending on the number of details and the amount of shading.
Q: How do I add shading to my truck drawing?
A: Use soft pencil strokes beneath the truck, inside the wheel wells, and along one side of the body for gentle depth.