
Optional colored pencils or markers are great for adding color after the shading steps. This guide suits beginners and early intermediate artists. Set aside about 30 to 60 minutes for a simple finished drawing.
You’ll draw light guide shapes first, then build the body, add details, erase extra lines, and finish with shading and fur marks. Every step builds on the last. Grab your supplies, take a relaxed breath, and let’s begin your project.
What You Will Need to Draw a Dog
Gather a pencil, such as a standard HB or 2H pencil, for light guide lines, an eraser, and white drawing paper or a sketchbook. Understanding exactly what supplies you need for how to draw a dog makes setup much easier. An optional ruler helps with the first straight guide lines.
For the final steps, use an optional black pen or fine-tip marker to ink over clean pencil lines. Colored pencils or markers are also optional if you want to add color at the end. None of these supplies need to be expensive, so you already have everything you need to begin.
How to Use This Dog-Drawing Tutorial
Each step builds on the previous one, so follow the order from start to finish. Sketch guide shapes lightly at first because you’ll erase them when your final lines are clean. Following a clear sequence for how to draw a dog keeps your workflow smooth.
Slight imperfections in the early steps are normal and belong to the drawing process. As you add each oval, feature, leg, and detail, your dog will grow progressively more recognizable. Take your time, keep your hand relaxed, and enjoy watching the picture come together.
1. Light Ovals: Build Your Dog’s Basic Body Shape
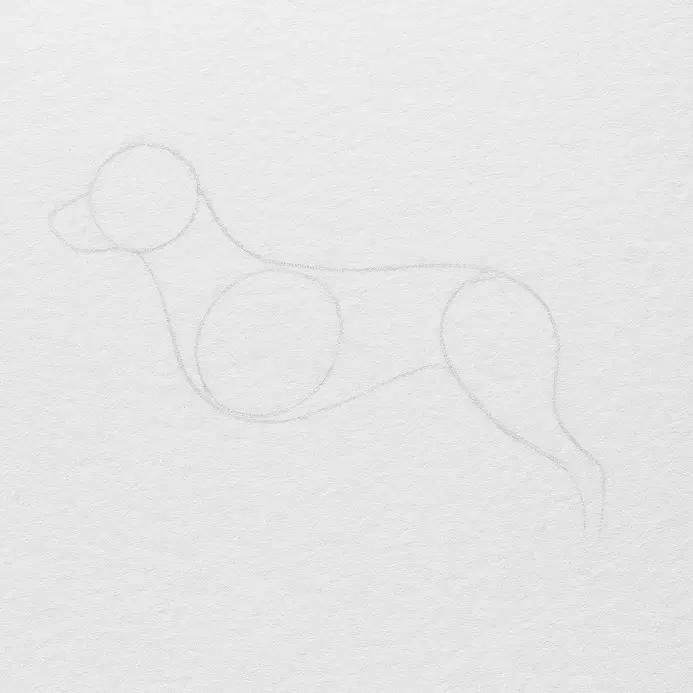
This first step builds the body with light ovals, so later lines have a clear place to go. When figuring out how to draw a dog, mapping these base shapes saves you time. For more practice, try these easy animal drawings.
Use a pencil with a light touch, and draw a large oval behind the head for the chest. Add a smaller oval below and slightly behind it for the middle of the body, then let the two ovals overlap. Draw a third oval at the back, tilted a little to match the pose, and overlap it with the middle oval.
Keep the ovals along a gentle curved line, and leave open space below them for the legs. If the dog sits or turns, tilt each oval in the same direction instead of keeping them flat. Make several loose passes with your arm, and place a better line beside a weak line instead of pressing harder.
Check the head and body together, then move any oval so the neck meets the front of the chest. Keep every mark pale enough to erase later. Make the chest oval wider than the rear oval, then keep the middle oval between them.
Use an eraser to remove only the darkest stray mark, then redraw it lightly. Turn the paper if a large curve feels hard to draw. Lift your pencil often, and keep each pass soft.
Pro tip: If the body feels stiff, turn the paper and redraw the ovals with your elbow, using loose arm movement and light pressure.
2. Add Leg And Tail Guides For A Balanced Stance
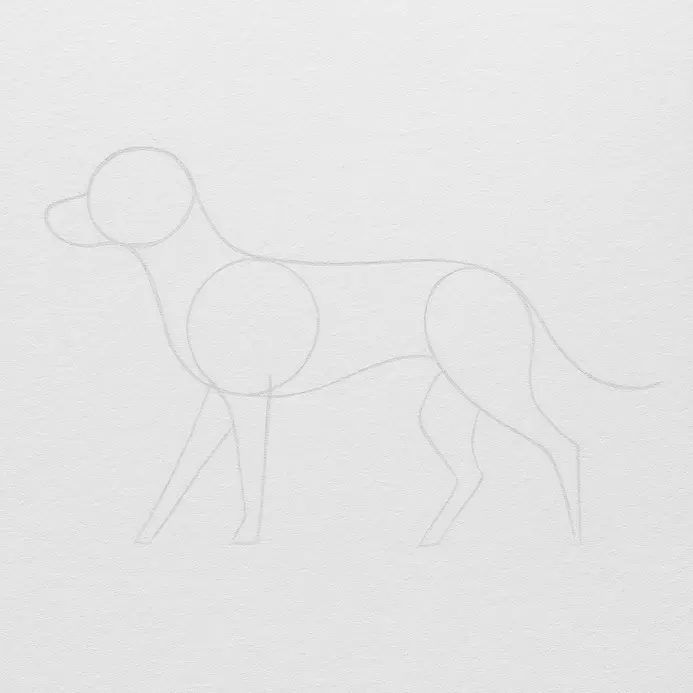
Your first basic shapes are ready from the last step. Now add light leg and tail guides so the body rests evenly on the page. Knowing exactly how to draw a dog means placing these supports with steady hands.
Start at the lower edge of the body shape. When you learn how to draw a dog, checking these alignments prevents wobbly stances. Draw two short, slightly slanted lines downward near the front, leaving a small gap between them.
Draw two more lines near the back, keeping both pairs close in width. Add a short line across the bottom of each pair to mark the feet. Keep all four foot lines close to one gentle level, and use a leg guide to compare the front and back pairs.
From the back edge of the body, draw one curved line for the tail, pointing it upward or sideways. Add a second light line beside the first tail line, leaving a small space between both lines. Keep the tail line clear of the back legs, and erase any mark crossing the body shape. Nice work getting this far!
Pro tip: If one leg guide looks longer, use an eraser to erase the extra part, then visit this guide on drawing dog faces before adding head details.
3. Shape The Snout And Ears With Simple Angles
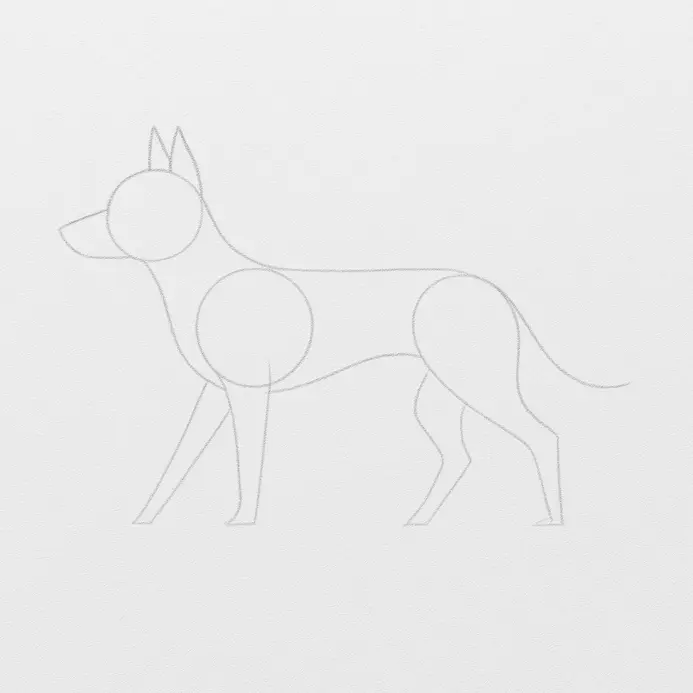
Now you’ve drawn the head shape in the first step, and you will add the snout and ears with simple angles. These marks set the size and direction of the dog’s face, so keep a light centerline ready for easy changes. Mastering how to draw a dog relies heavily on these early angle placements.
Draw a short line from the front-center of the head, then add two angled lines to form a short, gently tapered snout. Add a small, flat nose shape at the end, keeping it joined to the snout instead of placing it below. Start each ear where the side of the head meets the top, then draw two lines for each ear, using a wide base and a narrower tip.
Give a floppy ear an outward angle before dropping its lines beside the cheek, or draw an upright ear as a tall, tapered shape. Make the far ear a little smaller when the head turns to one side, and change its angle slightly from the near ear. Use this guide on drawing expressive eyes after you place these face guides.
Press lightly, and erase any line before redrawing it if the angle feels wrong. Understanding how to draw a dog facial features correctly ensures natural proportions. Pro tip: Hold your eraser close by, and check the snout length beside the head before pressing harder on the final lines.
4. The Body Outline: Turn Guides Into A Natural Silhouette
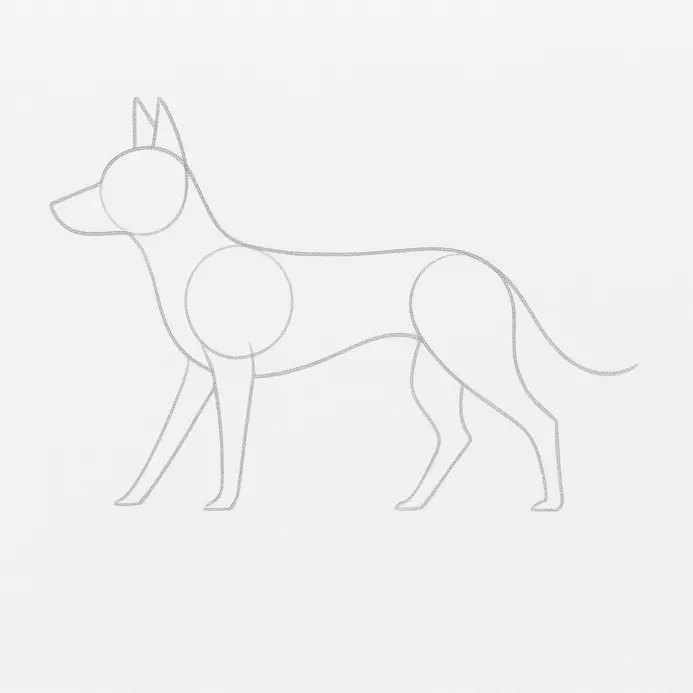
Now that you’ve finished the first step, you’ll turn its guides into a smooth body outline. This outline joins the head, chest, belly, and legs, while drawing animal noses comes later. The trick to learning how to draw a dog is connecting these curves smoothly without stiff edges.
Use a pencil with light pressure to check the chest and hip guides before you draw the outside edge. Begin at the base of the neck or the top of the shoulder, then draw one long, soft curve over the back. Continue the line around the chest, belly, and hip, letting it widen at the chest and narrow a little near the middle.
Add small bends at the shoulder, elbow, hip, and knee instead of making sharp corners. When planning how to draw a dog, respecting joint anatomy creates believable movement. Draw each leg from its place on the body, and let the leg line change width as it moves down.
Keep the far side simple and pale if the body turns to one side. Rotate the paper if a curve feels awkward, then use a few light, joined strokes to fix tricky spots. Leave the first outline pale while you compare the top and bottom lines.
Pro tip: Use elbow movement for the long back curve, then use your wrist for the short bends near the legs.
5. Give Your Dog A Friendly Face With Clear Features
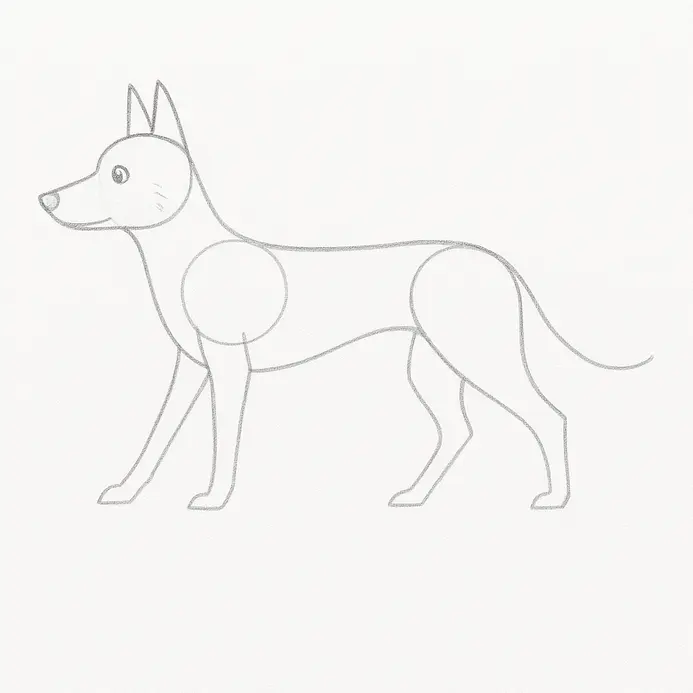
With the basic head shape from the first step on paper, use your pencil to add the eyes, nose, mouth, and ears. These clear marks give the face a friendly feeling and help the whole drawing come together. When figuring out how to draw a dog, these facial details bring the character alive.
Draw two small oval eyes inside the head, leaving equal space between them with light pressure. Add a dark dot near the middle of each eye, then lift your pencil to leave a tiny white spot. Sketch a rounded nose below the eyes, and fill its center with short, dark pencil marks.
Draw a short curved line from the nose, then add a gentle curve below it for the mouth. Add two floppy ear shapes above the head with smooth outer lines, then visit this guide on drawing dog ears. Use light pencil shading under the nose and below the mouth, then add three short cheek lines on each side.
Leave small open spaces around the eyes so each mark stays clear on the paper. Knowing how to draw a dog with balanced features makes the portrait feel expressive. Pro tip: Don’t press hard while adding the eyes and mouth, and keep an eraser nearby for lines sitting too close to the head edge.
6. Erase Construction Lines For A Clean Pencil Drawing
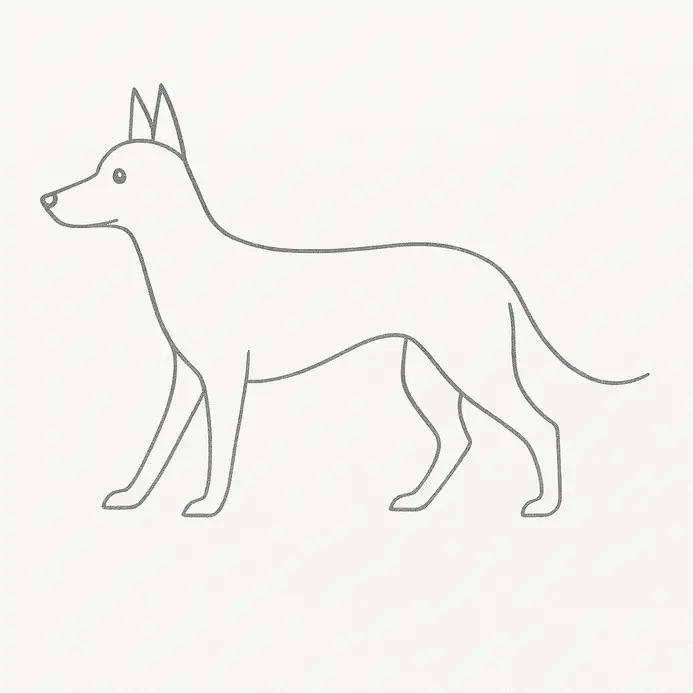
Now use the light starting lines from the first step to clean your dog drawing. Removing extra pencil marks keeps the main lines clear for the next step. For extra practice, use these realistic dog drawings.
Place a clean eraser beside the dog sketch, then touch it to the light lines outside the head, ears, body, and legs. Rub with short, gentle strokes, and press lightly so the darker outline stays on the paper. Lift the eraser often and check each small area before rubbing again.
Erase the lines inside the head and body only when they cross the final pencil lines. Keep the eyes, nose, mouth, paws, and small fur marks in place as you remove the extra lines. When you learn how to draw a dog, cleaning these construction marks reveals your true artwork.
Turn the paper slightly as you work, and stop when the dog sketch shows a clear outline with only the needed pencil marks. Pro tip: Use a soft eraser for small spaces, and press its corner onto one light line at a time. If a dark line starts to fade, stop rubbing there and redraw it with light pressure.
7. Add Gentle Shading To Show Form And Weight
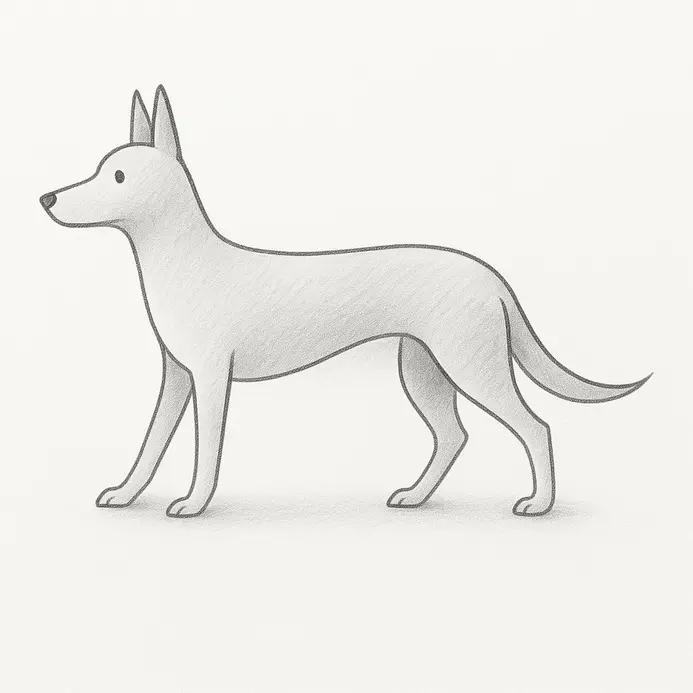
Now that you have the first outline in place, add soft pencil tones inside it to give the dog more weight on the page. Keep these marks simple as you improve your drawing one light layer at a time. Adding depth when you learn how to draw a dog makes the paper feel alive.
Choose one light direction, then leave the side facing it mostly white. Hold an HB pencil farther from the tip and draw pale, curved lines inside the muzzle, chest, back, shoulders, and legs. Start near the middle of each section, then move the lines outward in a gentle curve.
Follow the rounded parts with longer curves, and use short marks inside the ears, paws, and small spaces between the legs. Add a second light layer on the far side of the body, beneath the belly, under the muzzle, and where one leg crosses another. Press a little more firmly with a 2B pencil for the deepest spots, then ease your pressure as each shadow moves toward the lighter paper.
Draw a narrow contact shadow directly beneath the paws and belly, keeping the paper outside it white. Leave a small pale change between each light area and dark area, so the shading shifts slowly instead of forming a hard stripe. Pro tip: Test your pressure on a scrap paper sheet first. Several light layers are easier to fix than one dark patch.
8. Finish With Short Fur Lines In Natural Directions
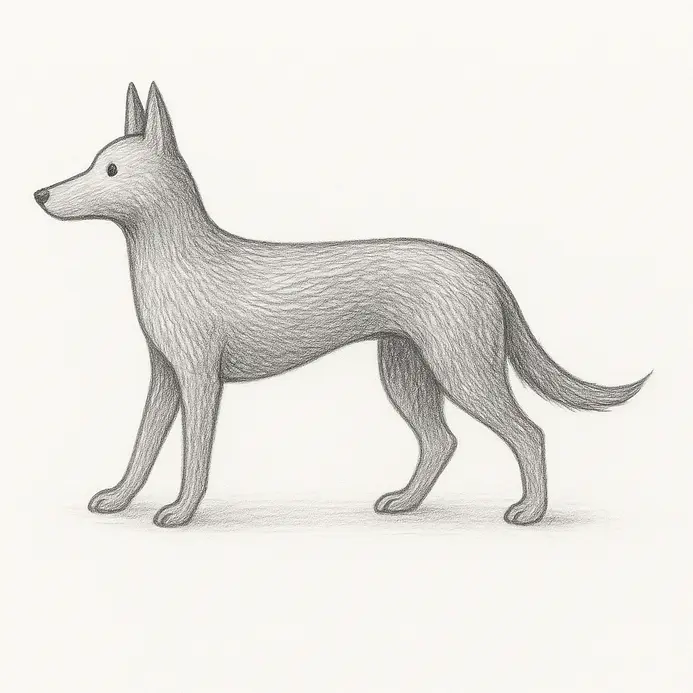
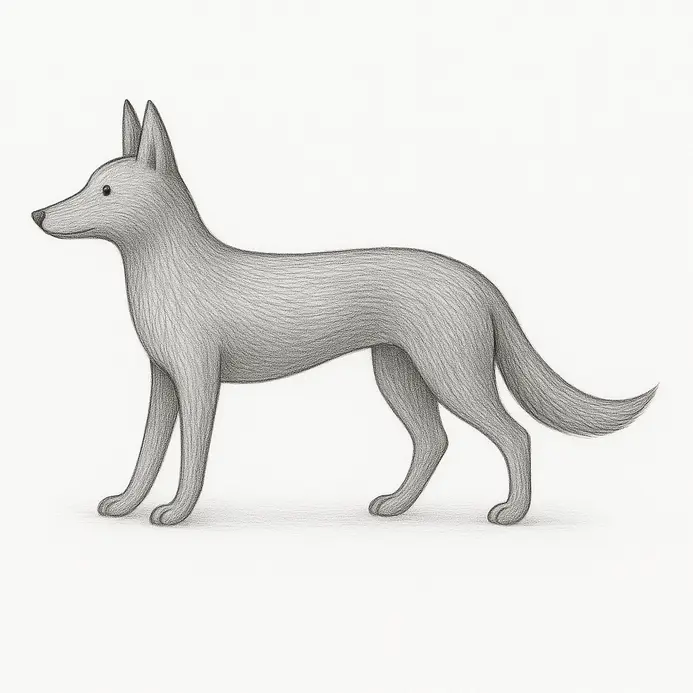
After the first step, build on the dog’s head, ears, neck, and muzzle shapes with short fur lines. These small marks soften the outline and join the shading into one clear drawing. The final stage of learning how to draw a dog relies heavily on these directional strokes.
Sharpen a graphite pencil, then use light pressure to add short, pointed lines along the outer edge of the head, ears, neck, and muzzle, with small gaps between groups. On the forehead, draw lines downward or slightly outward, then send cheek lines from the face toward the outer edge. Draw neck and chest lines downward, and follow the length of each ear with short curved marks.
Place a few darker lines where shaded areas meet, while leaving wider gaps in lighter areas. Change each line’s length, angle, and spacing, and lift the pencil at the end so every mark grows thin. Add two or three lines beside a shadow edge, then leave the next area mostly clear.
Use simple practice drawings to repeat short lines until your hand feels steady. Knowing how to draw a dog texture properly finishes the piece with realistic detail. Pro tip: Start with light pressure, then add a few darker fur lines only in shadowed spots, since heavy marks are hard to erase.
Tips to Improve Your Dog Drawings
Once you finish, try drawing the dog a second time from memory. Practice the most complex section separately, which is usually the decorative detail step, such as fur, paws, or facial features. Vary the drawing size to see how proportions change at different scales.
You might also experiment with simple backgrounds or extra shading. Each repeat will help your lines feel more confident, so keep your sketches and notice your progress. Applying these habits when you practice how to draw a dog accelerates your skill growth over time.
Conclusion
You’ve finished your dog drawing, and that’s a real achievement. You started with light ovals, built the legs and tail, shaped the face, and added the final lines with care. Then you cleaned away the guide marks and used shading to give the body more form. This shape-first method helps each part fit together without pressure.
For practice, try drawing the same dog again from memory. Make one version small and another larger. Change the ear shape, tail position, or body length to create a new look.
You could also try a puppy, wolf, fox, or another friendly animal with similar rounded forms. Your next drawing might be a sitting dog with folded legs. Keep your first version nearby so you can see how much you’re improving.
When you’re happy with your work, display it somewhere you’ll enjoy seeing it or share it with someone who loves art. Mastering how to draw a dog is a rewarding creative journey that keeps improving with every new sketch.
FAQs
Q: What pencil should I use for this tutorial?
A: An HB pencil is a good choice for light guides, clear outlines, and soft shading.
Q: Is inking required for this dog drawing?
A: No. A finished pencil outline works well, while a fineliner or ballpoint pen gives the drawing darker edges.
Q: How do I keep the dog’s body proportions balanced?
A: Keep the body about two to three times the shoulder height, and make the head close to one-third of the body length.
Q: How long does it take to draw a dog?
A: A beginner usually needs about 30 to 60 minutes for a simple dog drawing.
Q: How do I add shading to my dog drawing?
A: Use soft strokes beneath the chin, belly, and inside the legs, then add short fur lines that follow the body contours.