

What You Will Need for Drawing a Soda Can
You need a pencil, an eraser, and some white paper. A standard pencil works well for light guide lines. An optional ruler helps with initial straight lines. For final steps, a black pen is optional for inking over pencil lines. Colored pencils or markers are optional for adding color later. None of these supplies need to be expensive. You likely have everything you need to start.
How to Use This Step-by-Step Tutorial
Follow each step in order, as they build logically. Sketch your first guide shapes lightly, as you will erase them later. It is normal for these early shapes to look imperfect. This construction method helps your drawing become more recognizable with each step. Be patient with yourself and enjoy watching your soda can take shape.
1. Sketch the Central Vertical Line and Overlapping Ovals
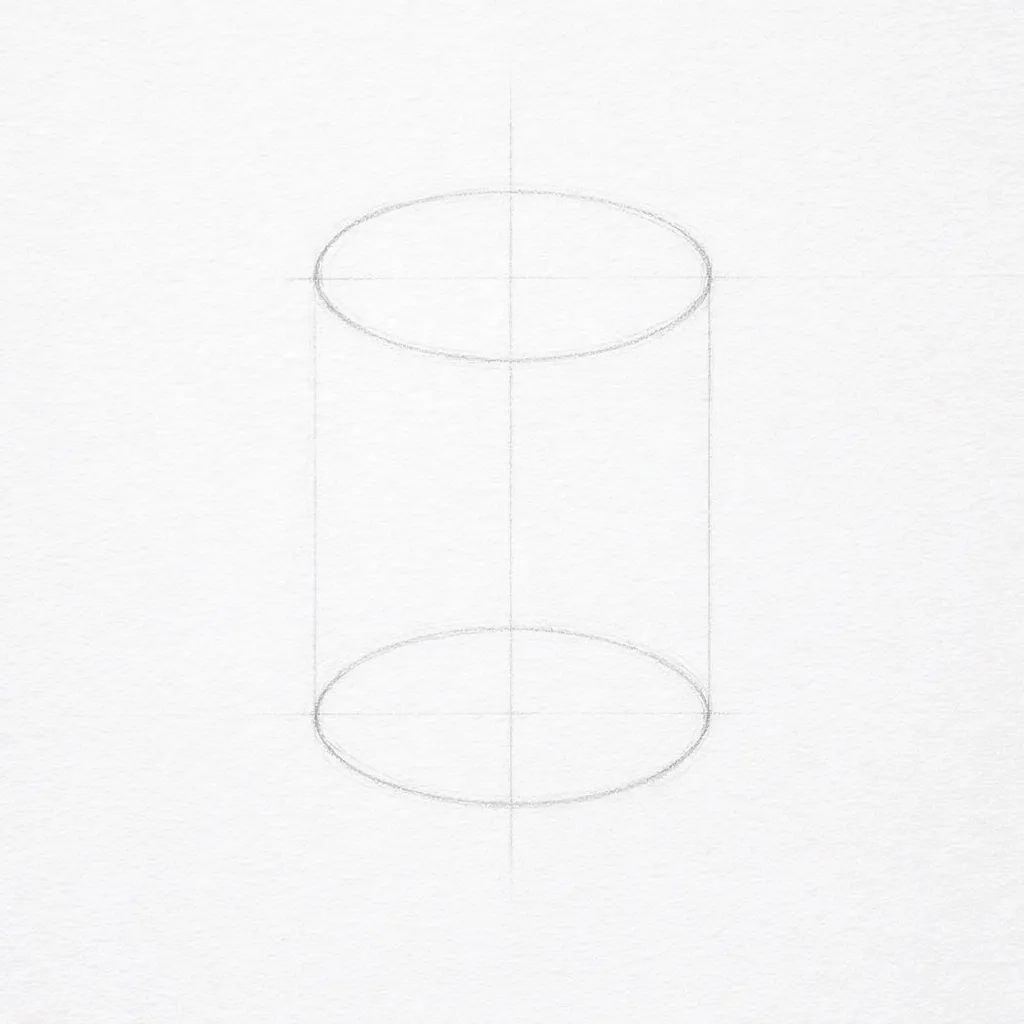
Let’s start with the first step of How To Draw A Soda Can. We’re sketching the central vertical line and overlapping ovals to build a solid foundation. This approach gives your soda can a balanced, three-dimensional form from the start. Start by lightly drawing a straight vertical line down the center of your paper. This line is crucial as it guides all subsequent shapes. Now, for the ovals: sketch a small, egg-like oval at the top of the line to represent the can’s curved lid in your finished drawing. Immediately below it, draw a larger, more elongated oval that overlaps the bottom of the first oval. Align the center of this larger oval with the vertical line so both halves are balanced. The overlap is key because it creates the smooth transition between the lid and the body, making the can look rounded rather than flat. Use confident, fluid strokes and keep your pencil pressure light so these lines are easy to adjust. If you’re new to this, practicing with easy things to draw for beginners will help build your confidence. Here’s a pro tip: avoid drawing these ovals as separate, touching shapes. Instead, let them merge organically where they overlap. This technique prevents a disjointed look and gives your soda can a more cohesive structure. Remember, these are just construction lines, so don’t worry about perfection yet!
2. Connect the Ovals to Form the Can’s Cylinder Shape
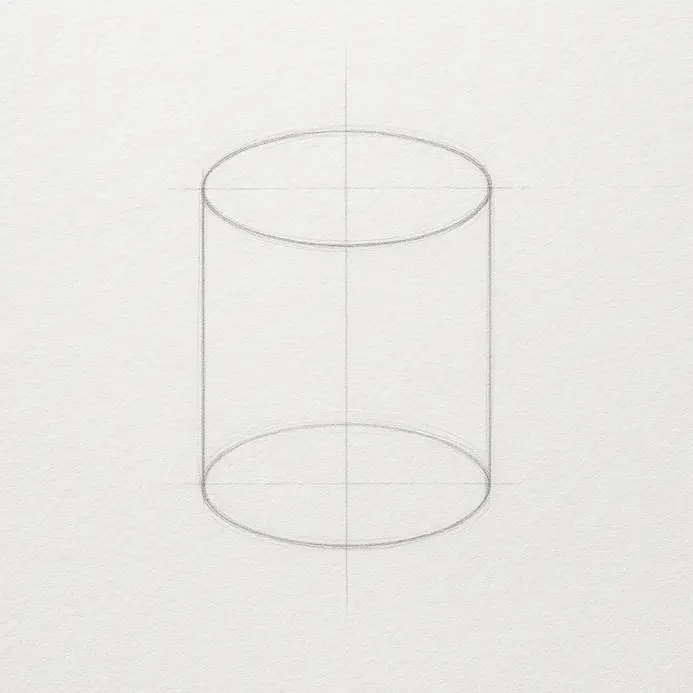
Now we’ll connect those two ovals to create the solid, three-dimensional form of the can. This is where your flat shapes turn into a convincing cylinder, giving your drawing real volume and weight. First, look at the leftmost and rightmost points on your top and bottom ovals. Using a ruler or a steady hand, draw two perfectly straight, vertical lines to connect these points. Make sure these side lines are parallel to each other; they should not curve in or out. This creates the straight wall of the can. Remember, your bottom oval should be slightly wider than the top one for proper perspective. This subtle difference is key to making the cylinder look grounded and realistic. Here’s a great pro tip for this step: use a light touch for these connecting lines at first. You can always darken them later in your drawing lesson. If your lines aren’t perfectly parallel, the whole can will look warped, so take your time. Once you’re happy with the straight sides, you can carefully erase the back half of the bottom oval, leaving only the front curve visible. This simple act of erasing completes the basic cylinder shape and makes it pop off the page. It’s a fundamental technique you’ll use whenever you learn How To Draw A Soda Can or any other cylindrical object. With your cylinder defined, you have a perfect foundation. Next, we’ll add the details that make it look like a real drink, starting with the pull tab and rim. If you enjoy building forms from basic shapes, you might love our guide on realistic soda drawings. easy things to draw for beginners for more foundational practice.
3. Define the Top Rim and Recessed Lid Area
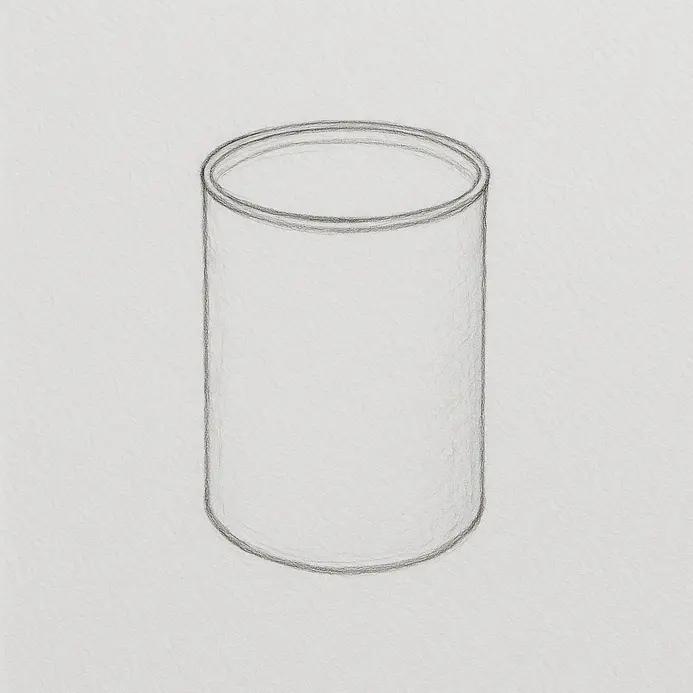
Now we get to define the actual opening of the can. This step locks in the perspective of your cylinder and creates the foundation for the pull tab we’ll add later. We’re focusing on two distinct parts: the thin, raised rim and the sunken area inside it for a more realistic soda appearance. Lightly sketch a narrow ellipse just inside the top guideline you drew for the can’s main body. This is the inner edge of the rim. Now, draw a second, slightly larger ellipse around the outside of the first one, keeping the distance between the two lines consistent all the way around. You’ve just drawn the top rim. To create the recessed lid, sketch a third ellipse inside the first one, but this time, press a bit harder to make it more defined. This new line should sit a few millimeters below your first ellipse, showing the depth of the recess. Connect this inner ellipse to your first one with short, gentle curves to suggest the sloping walls of the indentation. Pro tip: The most common mistake when learning How To Draw A Soda Can is making the rim a perfect circle. Remember, if your can is at an angle, that rim must be an ellipse. If you’re looking for more practice with basic shapes, check out our guide on easy things to draw for beginners.
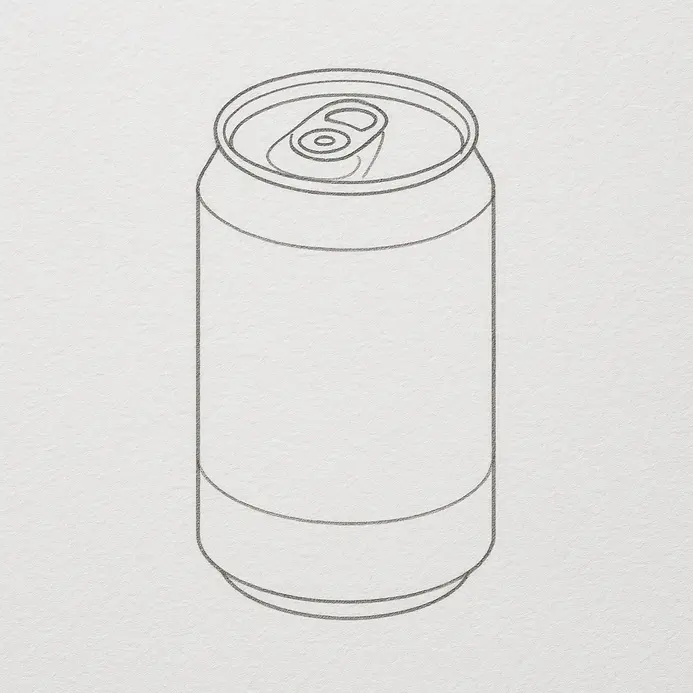
4. Draw the Curved Pull Tab on the Can’s Top
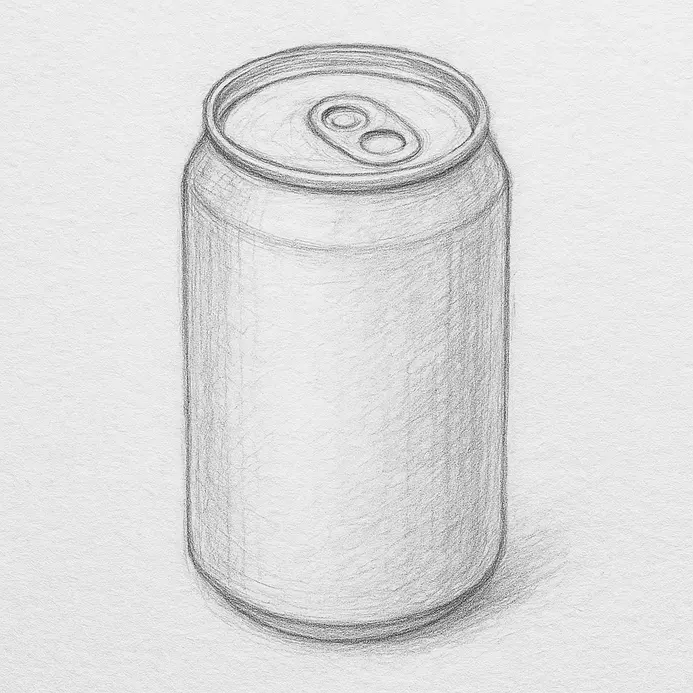
Let’s bring your soda can to life by giving it that iconic, mechanical pull tab. This step is where your drawing moves from a simple cylinder to a recognizable object. We’ll use the flat ellipse you drew for the can’s top as our anchor point. Find the small rivet circle near the edge of your can top. From the center of that rivet, lightly sketch a straight line that angles toward the center of the can. This is your tab’s spine. Now, draw a smooth, gentle arc that follows this line, making it highest at the rivet and curving downward. Think of a shallow banana peel resting on a table. On either side of this center curve, sketch two parallel lines to define the tab’s width, making it slightly wider near the rivet and tapering toward the tip. At the end closest to the rivet, draw the pull ring. This isn’t a perfect circle—make it a rounded, D-shaped hole. Keep the bottom edge of this ring very close to the can’s surface to show it’s ready to be lifted. At the far end, shape a small, rounded tip that presses down against the can. Go back over your lines with a confident stroke to define the final shape, adding a hint of thickness along the lower edge with a subtle parallel line in your colored pencil tutorial. Pro Tip: Avoid drawing the ring as a perfect circle. That subtle D-shape and the tilt where it almost touches the can are what sell the realism in your finished drawing. If you want more practice with everyday objects, check out our guide on easy things to draw for beginners.
5. Outline the Main Label Area and Brand Logo Space
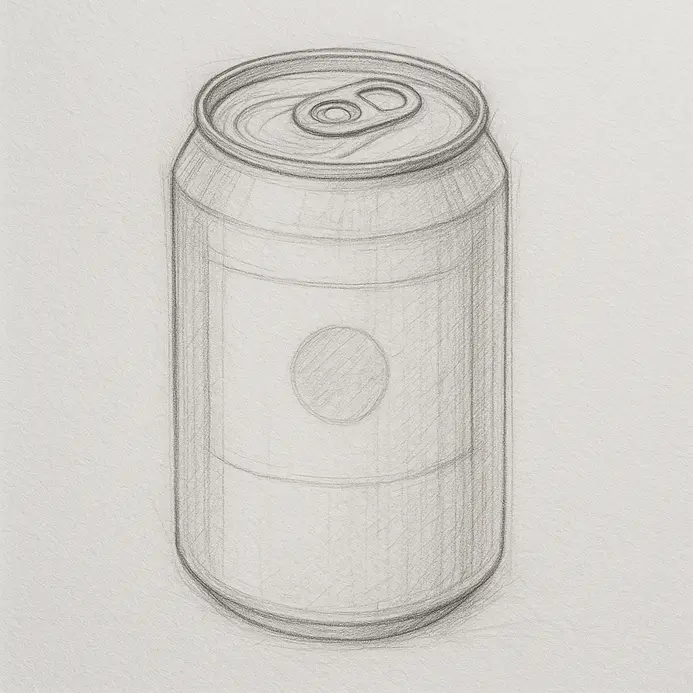
Perfect for any artist! Now that we have the sleek cylinder of our can down, let’s give it some personality by planning the label. This step is essential when you’re learning How To Draw A Soda Can that looks convincing and well-composed. We’re setting up the framework so all the details fit neatly later. Grab your pencil and let’s start with light, sketchy lines. First, define a safety margin by drawing faint boundaries about a finger’s width from the top, bottom, and sides of your can’s front surface. Inside this zone, outline the main label area as a tall rectangle that gently curves with the can’s shape—if you have a flexible curve tool, use it here for smooth arcs. Next, the magic happens: overlay a simple 3×3 grid with very light pressure across this rectangle. This grid is your best friend for organizing space. Now, for the star of the show: in the top-left or center-top cell of your grid, sketch a clean, reserved box or circle for the brand logo. Keep this logo space proportional, about one-third the label’s height, and make sure it doesn’t touch the grid lines. This establishes a clear visual hierarchy right from the start. Pro tip: Always use a ruler for those straight grid lines and keep every mark super light. That way, you can easily tweak the layout or erase the guidelines completely once you add color and details in your colored pencil tutorial.
6. Add the Can’s Seam and Bottom Curved Edge
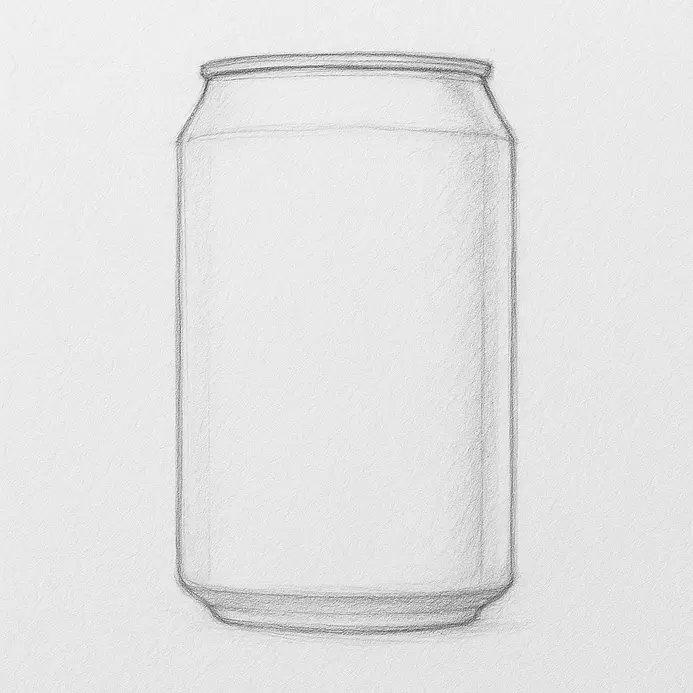
Now we transform our cylinder into a real soda can by adding the vertical seam and the bottom curve. These final details are what sell the object’s manufactured quality and give it that satisfying, solid feel. We’ll build on the main body shape you’ve already drawn. Find the side of your cylinder that will face slightly away from the viewer. Draw two parallel, vertical lines about 1-2mm apart running from just below the top rim down to the start of the bottom curve. Use a slightly firmer pencil pressure for these lines to suggest the seam’s thickness. Connect these lines at the top and bottom with tiny, gentle curves so the seam tapers smoothly into the can’s form. Next, define the bottom edge. Lightly sketch a soft, rounded curve that connects the vertical side of the can to its flat bottom base. This isn’t a sharp corner. It’s a gradual, rounded transition. Follow the perspective of your cylinder so the curve is consistent on both sides. Pro tip: To make the seam look raised, add a thin shadow along one of its edges. Keep this detail subtle. A heavy, dark line will make it look like a crack instead of a manufactured joint. Getting these small structural details right is a fantastic way to practice realism. If you’re looking for more easy things to draw for beginners to build your confidence, mastering simple objects like this is a perfect start.
7. Ink Your Final Lines and Erase All Construction Guides
Let’s make your drawing permanent. In this final stage, you’ll trace over the clean lines from your refined sketch with ink and then carefully remove all the pencil construction guides underneath. This is the moment your How To Draw A Soda Can sketch becomes a finished piece of art. Pick up your fineliner or brush pen. Look at your pencil drawing and identify the main, clean lines that define the can’s shape, like its outer contour and the top rim. Use confident, continuous strokes to ink these primary forms first. Apply a bit more pressure on the underside of the can and the outer edges to create a subtle line weight variation. Then, ink the smaller details like the logo and the tab. This is the most critical part: wait for the ink to dry completely. Give it a solid five to fifteen minutes. Test a small corner with your finger to be sure. Once it’s dry, take a kneaded eraser and gently work in one direction to lift away all the light construction lines and circles you drew in the first steps. Be patient and use light pressure to avoid smudging your beautiful new ink lines. Pro Tip: Rest the heel of your hand on a scrap piece of paper while you ink to prevent oils from your skin from smudging the pencil work underneath in this drawing lesson. If you need more drawing practice with simple forms, check out our guide on easy things to draw for beginners.
8. Shade One Side to Create Metallic Curvature and Depth
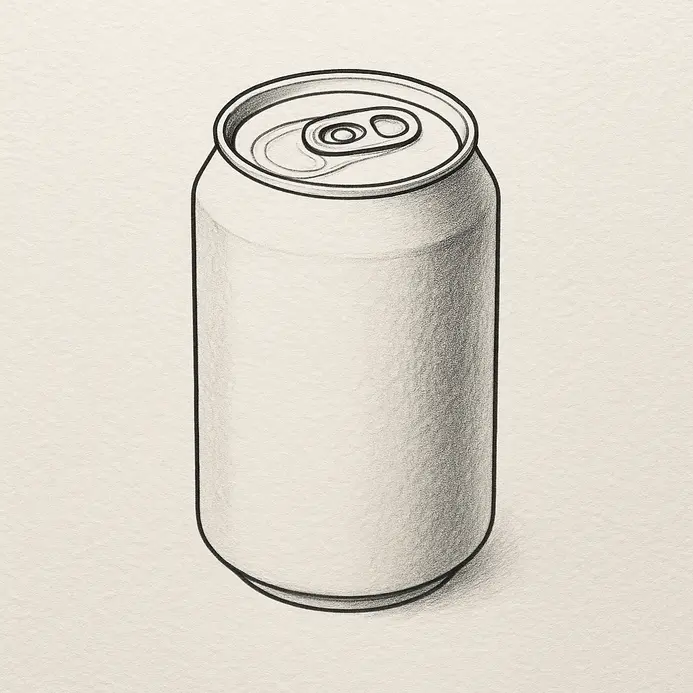
We’re about to make that flat cylinder pop right off the page. This step is where your soda can gains its solid, three-dimensional form, turning a simple sketch into a convincing metallic object. Identify the side of your can opposite your imaginary light source. Using the side of your pencil, start laying down a base layer of parallel curved strokes that follow the contour of the cylinder. Keep your pressure light and even. Build up the darkness gradually, making it darkest along a vertical line about one-third of the way across the curved surface from the edge. This is your core shadow. Leave a crisp, clean strip of white paper for the highlight right next to it. The trick is to make your pencil strokes curve, never go straight up and down. Now, let’s create the metallic banding effect. With a slightly softer pencil, reinforce the core shadow line, but keep its edge sharp. Right next to this dark line, on the side farthest from the light, use a kneaded eraser to lightly lift out a thin line of graphite. This creates the reflected light that makes the metal look rounded and real. Your strokes should all wrap around the form, like you’re drawing bands around the can. A common trip-up here is making the shading too soft and gradual. Remember, aluminum has sharper value changes than a matte surface. If your shading looks flat, check if you’ve forgotten that thin strip of reflected light along the shadow’s edge. For more practice with foundational shading on simple forms, check out our guide on easy things to draw for beginners.
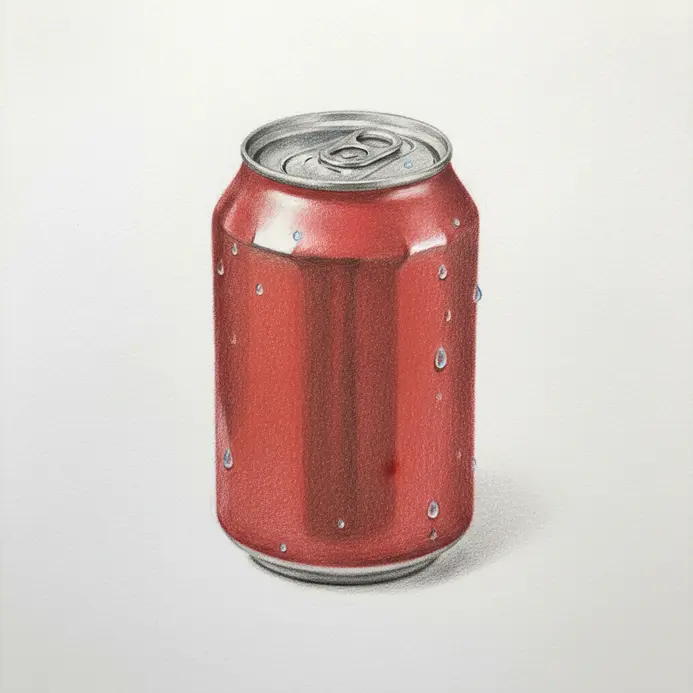
9. Add Color, Highlights, and Optional Condensation Drops
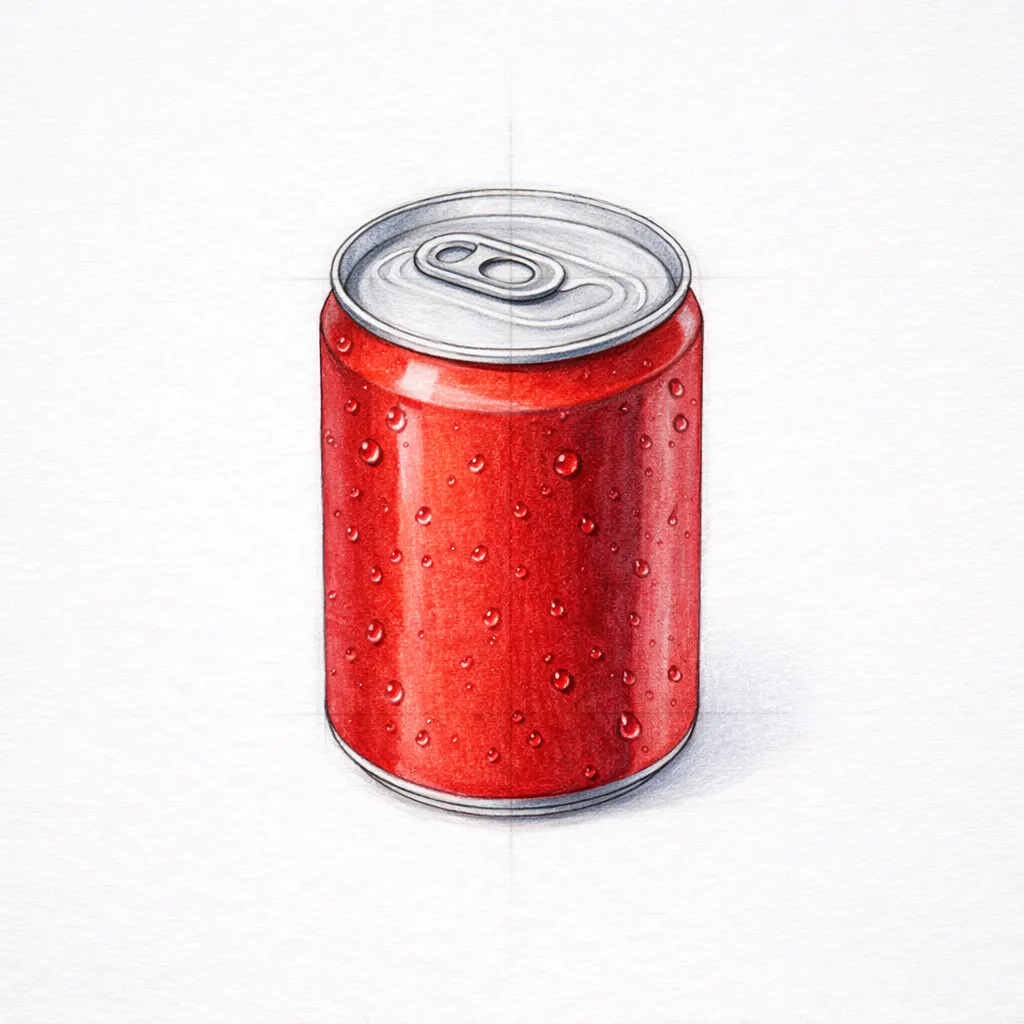
This final step is where your flat soda can drawing turns into a realistic, three-dimensional object with a cool, metallic sheen. We’ll add the convincing highlights and condensation drops that make it look like a real, refreshing drink in this drawing lesson. First, let’s make that metal pop. Remember our light source from earlier? On the side of the can closest to that light, draw a thin, vertical crescent shape using a very light version of your can’s color. Keep the top edge sharp and let the bottom fade softly into the base color. Add a tiny bright dot at the very top center of the lid and a small dash of white along the top edge of the pull tab. For a pro tip, avoid using pure white everywhere; a light tint of your base color creates a more natural metallic look. Now, for the optional but super fun condensation! Lightly sketch small circles and ovals scattered across the middle of the can, clustering a few more near the bottom to create a realistic soda effect. Make them different sizes for a natural look. Inside each drop, leave a tiny white spot on the side facing your light source to show its rounded, wet surface. This simple trick is a fantastic way to practice rendering texture, similar to techniques you might use in other projects like easy landscape drawing ideas for beginners where you’d draw dewdrops on grass. Take your time with these final details; they’re what sell the entire illusion of How To Draw A Soda Can.
Common Mistakes to Avoid in How To Draw A Soda Can
When practicing How To Draw A Soda Can, beginners often run into a few common pitfalls that can be easily fixed. Understanding these will help your How To Draw A Soda Can look more professional right away. One frequent issue is drawing the top ovals as perfect circles instead of ellipses, which ruins the 3D perspective. Another is making the pull tab too large or perfectly round rather than a subtle D-shape that sits close to the lid. Over-shading without leaving a sharp reflected highlight strip is also common and can destroy the metallic shine that makes the can look real. By being aware of these in your How To Draw A Soda Can process, you’ll avoid frustration and see faster improvement. Practice each part separately if needed, and refer back to the steps above for quick fixes. If you want to build stronger foundational skills to prevent these issues, revisit our guide on easy things to draw for beginners.
Tips to Improve Your Soda Can Drawings
Try drawing the soda can a second time from memory. Practice the pull tab or label separately to build confidence. Draw the can at different sizes to see how proportion changes. Experiment with adding a simple background or more detailed shading. Each drawing you finish builds your skill for the next one.
Conclusion
Congratulations on completing your soda can drawing by successfully completing How To Draw A Soda Can. You have successfully practiced a core skill by building a complex object from simple guide shapes. This approach of starting with ovals and a cylinder is a strong technique you can use for drawing bottles, cups, and many other objects. To improve, try drawing the can from a different angle or practice adding a more complex logo to the label area. Your next challenge could be drawing a glass bottle, which uses similar cylindrical construction but with transparent effects. You should feel proud of your work and consider displaying your finished piece. If you want another pass at How To Draw A Soda Can, repeat the steps with a new light source.
FAQs
Q: How can I teach a kid to draw a soda can step by step?
A: Start by showing a simple circular top and a slightly curved line for the body to create the can’s cylindrical look, then add the bottom ellipse and details like the tab and label; use a printable drawing or a basic example as an exercise so the kid can trace and practice, and finish by letting them color with crayon to engage their creative interest.
Q: What is the best way to draw the circular top and curved line to make the can look realistic?
A: Focus on drawing a smooth circular ellipse for the top and a parallel curved line that follows the same arc for the can’s side, then connect them with vertical curved lines for depth; practicing these circular and curved line shapes as separate drills will improve your hand control and overall artwork experience.
Q: Are there printable drawing templates or example sheets I can use for practice?
A: Yes, many blogs and art websites offer printable drawing templates and example sheets that include step-by-step outlines and labeled guides so you can trace the shapes, use them as an exercise, or photocopy for repeated practice to teach others or build a lesson plan.
Q: Can I use a video tutorial to learn techniques for shading and highlights on a soda can?
A: Absolutely — a good video tutorial will demonstrate how light reflects on the curved metal surface, show shading techniques to create a metallic look, and often provide close-up examples so you can pause and copy each step for a better learning experience.
Q: How do I make the artwork look creative rather than just a basic can sketch?
A: Add decorative elements like a unique label design, patterns, or stylized highlights; play with colors and textures, incorporate mixed media such as crayon over ink, or transform the can into a character to boost creative interest and engage viewers or students.


