What You Will Need
A standard HB or 2H pencil works well for light guide lines, along with an eraser, white drawing paper or a sketchbook, and an optional ruler for the first straight guide marks. You may also want an optional black pen or fine-tip marker for final inking, plus colored pencils can be used to enhance the details in your drawing of the top and bottom lips. or markers if you want to add color at the end. None of these supplies need to be expensive. You have everything you need to start.
How to Use This Step-by-Step Tutorial
Follow each step in order because each one builds on the last and helps the lips take shape little by little. Light guide marks are drawn first since they are meant to be erased once the final lines are clean. Small unevenness early on is normal and part of learning. With this construction approach, the drawing becomes more recognizable at each stage, so stay patient and keep going.
1. Sketch the Horizontal Mouth Guide Line

This first construction line is your secret weapon for perfect lip placement every time you learn how to draw lips. It gives you a solid, accurate foundation so the lips don’t end up looking crooked or floating on the face, which is essential for a tutorial on how to draw realistic lips. We need to get this right before we even think about the cupid’s bow or the corners. Start with your vertical centerline drawn lightly on the face. Find the spot for the mouth, roughly in the lower third between the nose and chin. Make a small, light dash right on the centerline to mark the mouth’s center point. Now, from that dash, sketch a straight, light line going left and right. Keep this line perfectly perpendicular to your centerline. This rule is key, even if the head is turned. Make the line just long enough to suggest the mouth’s width, and you can add tiny marks at the ends as a reminder. Here’s your pro tip: always use a light hand for this guide, especially in step 4 of your drawing process. Think of it as a temporary roadmap you’ll build over, not part of the final drawing. If you press too hard now, you’ll have a dark line fighting with your beautiful lip shapes later. For more foundational practice, check out our guide on easy steps to draw lips step by step. easy things to draw for beginners, such as drawing realistic lips.
2. Shape the Cupid’s Bow V-Curve
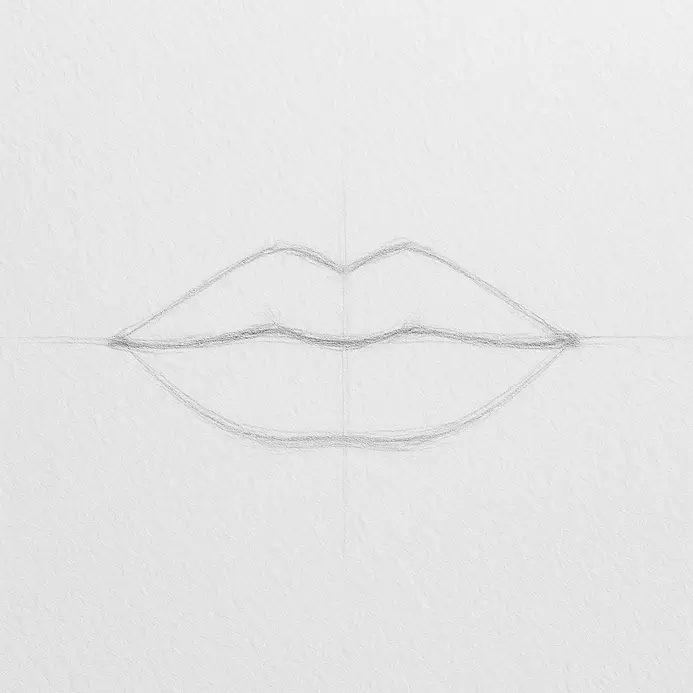
Now we move up to the top of the mouth. You’ve got your center line and lip width marked, so let’s define the most expressive part of the upper lip. This step locks in the character of your lips, whether you’re aiming for a soft, natural look or a bold, dramatic shape. Find the center point of your upper lip line. From that point, lightly sketch two short diagonal lines angling upward and outward. Think of them like the sides of a wide, shallow ‘V’. These lines mark the peaks of your Cupid’s bow, which are essential when you aim to draw realistic lips. Next, from the outer end of each peak line, draw a gentle downward curve that connects back to the corners of the mouth you established earlier. Keep your pencil pressure light. You’re not carving a permanent line yet; you’re building a symmetrical guide. Here’s a pro tip to avoid a common pitfall: don’t draw the ‘V’ too sharp or pointy unless you’re going for a stylized look. For a natural appearance, round off the bottom of the ‘V’ just a bit. This gives a much softer, more realistic curve. If you’re looking for more foundational practice on basic shapes and lines, our guide on easy things to draw for beginners is a great place to build confidence.
3. Draw the Upper Lip Outer Contour
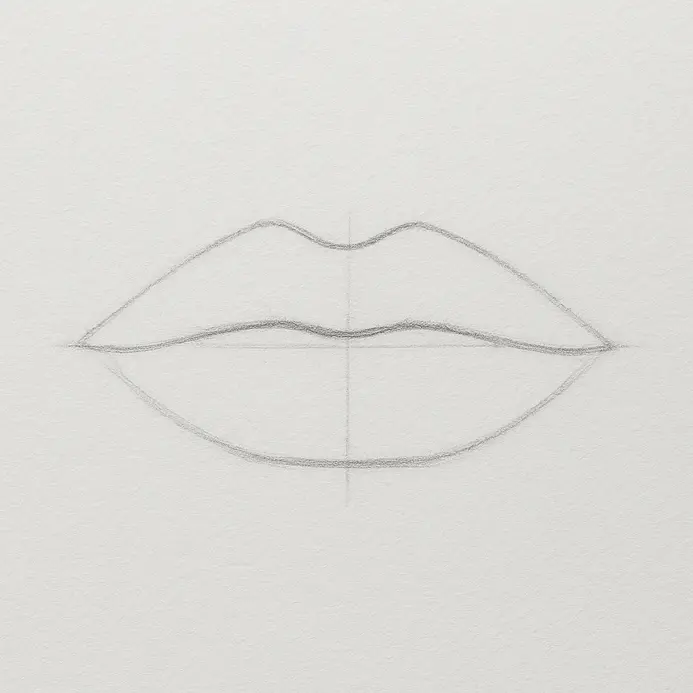
Now we get to the defining line of the mouth, the upper lip contour in our easy steps to draw lips step by step. This step locks in the shape you planned with your earlier marks, so we’ll move from a simple construction line to a refined, realistic outline. Connect the three marks you made for the Cupid’s bow with a light, sketchy line. Draw from the left corner up to the left peak, dip down into the center, come up to the right peak, and then go down to the right corner, as shown in step 2. This creates a soft, flattened ‘M’ shape. Keep your pencil pressure light here. We’re still building the foundation for how to draw lips. Next, refine that basic ‘M’ into a more natural curve. Soften the dip in the center so it’s a gentle valley, not a sharp ‘V’. Round off the peaks so they look like soft bumps, not pointed triangles. The most important part is the side contour. From the peak, let your line bulge outward just a little before it sweeps down in a long, smooth arc toward the corner. As it nears the corner, let it taper inward slightly. This outward curve is what gives the lip its full, pillow-like appearance. Pro Tip: Avoid drawing the sides of the lip as straight lines dropping straight down from the peaks. That flat shape is a common mistake. Instead, focus on that subtle outward bulge—it makes all the difference. If you need more practice with foundational shapes, check out our guide on easy things to draw for beginners.
4. Shape the Lower Lip Rounded Contour
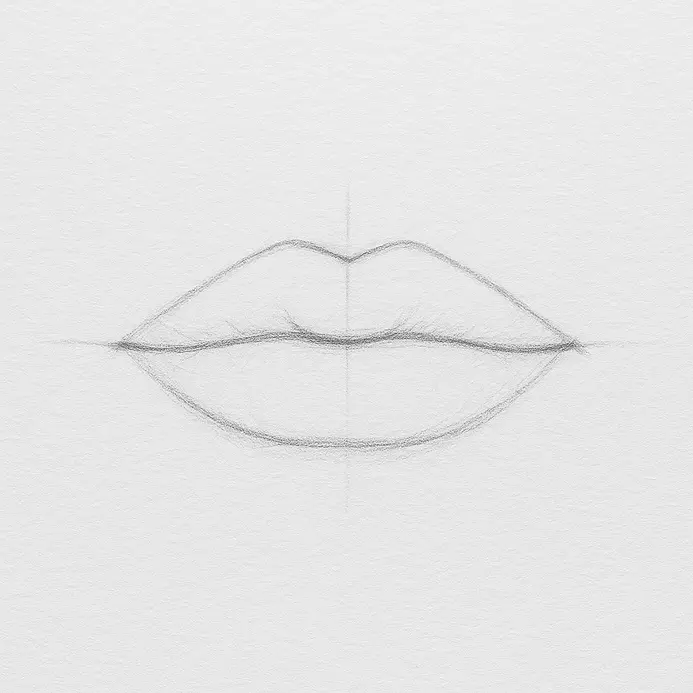
Now we get to shape the lower lip, and this is where we create that soft, plump look that makes lips look full and youthful. We’re moving from the basic outline we established and adding volume. This step is all about creating a gentle, rounded curve instead of a flat line. First, find the center point of your lower lip outline. This is your anchor. From that center point, sketch a new, very soft line that curves slightly outside your original outline, following the tutorial on how to draw realistic lips. Only do this for the center third of the lip. Keep your pencil pressure light. Connect this new rounded curve back into your original outline as you move toward the corners. The transition must be seamless, with no sharp angles. This is how you learn how to draw lips with dimension, not just a flat shape. Here’s a pro tip: avoid overlining the entire lip. The rounded contour is only for the center section. If you extend it all the way to the corners of the lips, the shape will look unnatural and drawn-on. For more practice with foundational shapes, check out our guide on easy things to draw for beginners.
5. Add the Mouth Corner Wedges

Now that we have the basic lip shapes sketched, let’s tackle the corners where the upper and lower lips meet. This step is all about adding those small wedge shapes that prevent your drawing from looking stiff or pinched, especially when you want to show a smile or open mouth, following the tutorial on how to draw realistic lips. It’s a subtle detail, but it makes a huge difference in learning how to draw lips that appear soft and expressive, particularly at the corners of the lips. First, locate the exact point where your upper and lower lip lines come together at the side of the mouth. From this corner, draw a short, soft line angling gently inward toward the center of the mouth. Add another line to create a small triangular or diamond-shaped patch right at the junction. Connect this wedge to the surrounding cheek lines with smooth, curved strokes to ensure everything flows naturally in your tutorial on how to draw realistic lips. Use light pencil pressure here so you can easily adjust the shape as needed. This little wedge acts as a buffer, redistributing the lines and preventing that crowded, awkward look at the corner. Keep it subtle—the wedge should be a small, integrated patch, not a large or isolated triangle. Avoid the temptation to make the corner too sharp or pointed; a soft, blended wedge gives you much more flexibility for different expressions.
6. Clean Up the Vermilion Border Lines

Now that we have our lip shapes lightly sketched and some basic values in place, let’s define those edges! This step sharpens the vermilion border, the clear line where lips meet skin, giving your drawing a polished, finished look. Take a sharp pencil or a fine eraser. Start at the peak of the cupid’s bow and lightly draw along the outer edge of the top lip to define its shape in easy steps. Use minimal pressure to keep the line thin and controlled. Follow the curve down to the corners, then repeat for the bottom lip, ensuring both sides are symmetrical. Erase any stray sketch lines or smudges outside this border. Focusing on this cleanup is essential when learning how to draw lips with precision. For foundational practice, our tutorial on easy things to draw for beginners can help build your skills in drawing realistic lips. Pro tip: if your outline looks too harsh, gently go over it with a kneaded eraser to soften the edge. This creates a more natural transition without losing definition.
7. Mark the Center Axis For Balance
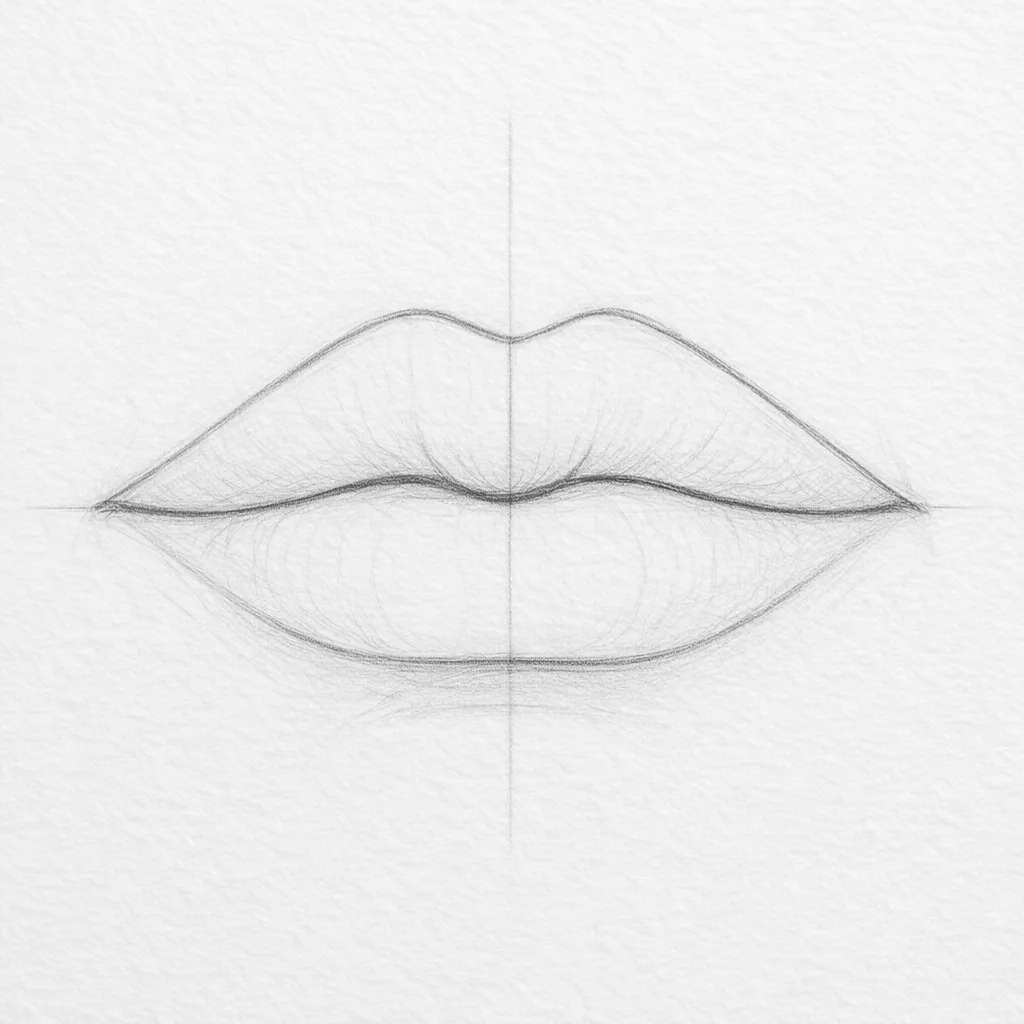
Let’s bring in the secret weapon for perfect symmetry. Right now, you have the basic lip shape on your paper. This next line is your guide to making sure both sides match perfectly. Think of it as the backbone for your lip drawing. Take your pencil and draw one very light vertical line right down the middle of your lip shape, following the steps in the lips step by step guide. Start at the center of the cupid’s bow at the top, and run the line straight down through the center of the bottom lip. Keep your pressure super light so this line is easy to erase later. This center axis is your main reference for everything else in the tutorial on how to draw realistic lips, so it needs to be accurate. Check that it splits the oval you drew in the last step right down the middle. Pro Tip: If you’re struggling to find the center, lightly mark the left and right edges of your lip shape first, especially at the corners of the lips. Your center line should sit exactly halfway between those two marks.
8. Place Soft Shadows Under the Upper Lip
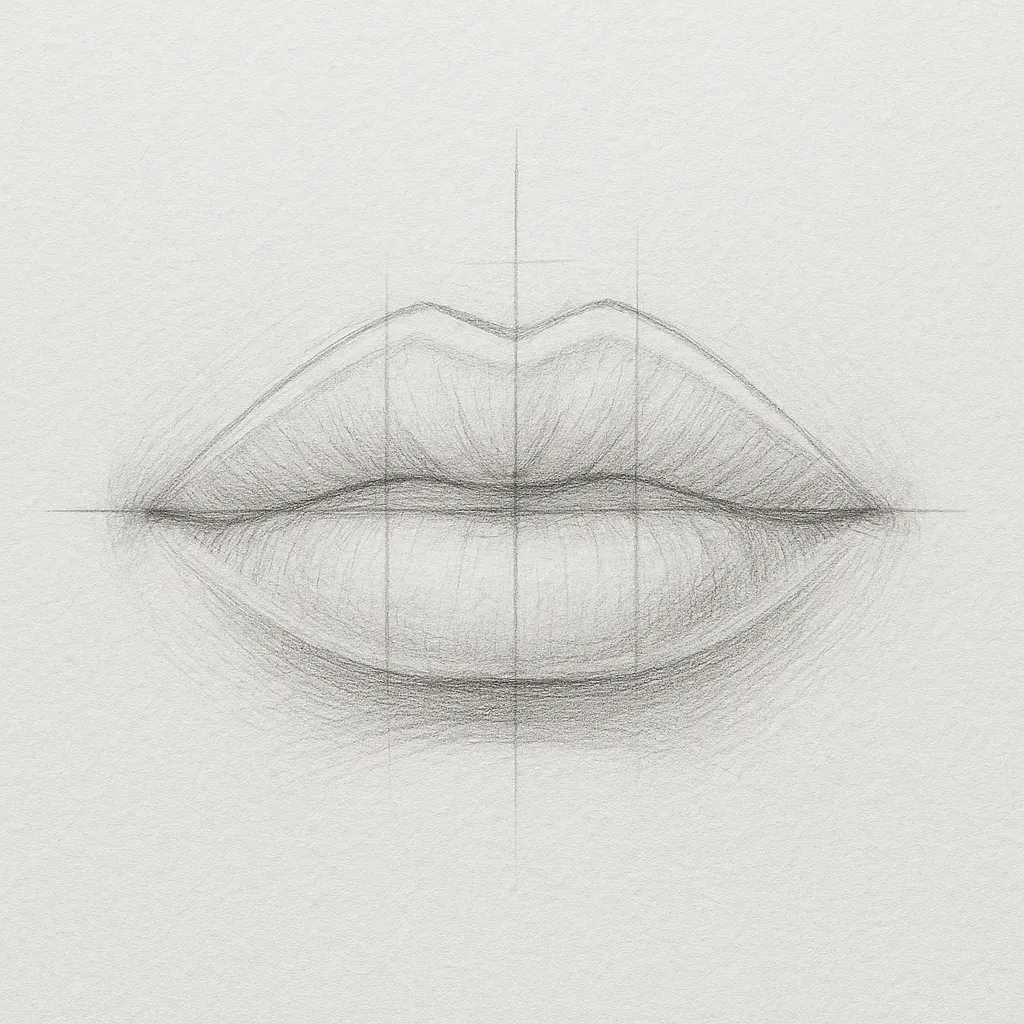
In this stage of our lip drawing, we’re focusing on placing soft shadows under the upper lip. This is where the magic happens to create depth and separate the lips visually, making them pop off the page, which is crucial for drawing realistic lips. Start by determining your light direction. Is it from above, the side, or front? This dictates where the shadow will be strongest. Grab an H or 2H pencil and lightly sketch a crescent-shaped shadow that hugs the curve of the upper lip’s underside. Don’t press too hard. We want this initial guide to be faint, as it is an essential step in the process of drawing lips step by step. Now, switch to a softer pencil like a B or 2B to gradually darken the shadow. Concentrate the darkest value in the center third, right beneath the Cupid’s bow, as this area usually catches the most shadow. Use gentle, controlled strokes to blend the lower edge of the shadow so it fades seamlessly into the skin, especially in step 2 of your lips step by step guide. The key is to follow the anatomy, letting the shadow shape reflect the lip’s form rather than drawing a rigid line. Mastering this step is essential when you’re learning how to draw lips that look realistic. If you’re new to shading techniques, practicing with easy things to draw for beginners can build your confidence. Here’s a pro tip to avoid common pitfalls. Keep the shadow thin and subtle to ensure a natural look when you draw realistic lips. Over-darkening or making it too wide can make the lips appear muddy or artificial. Blend with care, and always let the light source guide your values.
9. Ink Final Lines And Erase Guides
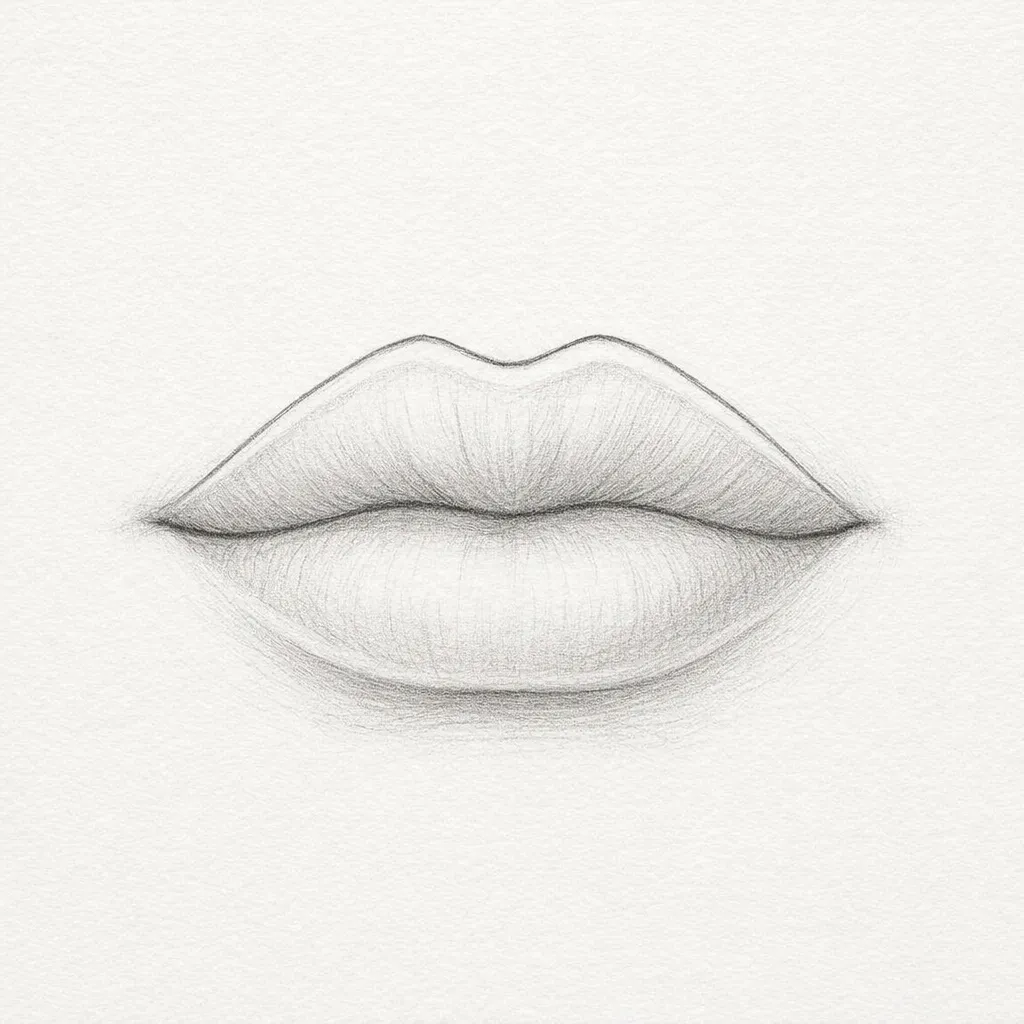
Now that our pencil sketch of the lips is complete, this step transforms it into a clean, finished piece. We’ll ink the definitive lines and remove the construction guides, giving our drawing a professional edge. When learning how to draw lips, this inking stage is where your artwork truly comes to life. Start by tracing the main outer contour of the lips with a smooth, continuous stroke. Draw from the shoulder for stability, avoiding wrist movements that can cause wobbles. Next, add interior details like the philtrum and the subtle curves of the vermilion border. Use thicker lines for areas closer to the viewer or in shadow, such as under the bottom lip, to create realistic depth in your drawing of the top and bottom lips. For receding parts, switch to thinner lines. If you’re using a technical pen, hold it perpendicular to the paper for consistent ink flow. Once all ink is down, let it dry completely—wait at least 30 seconds. After drying, take a soft eraser and gently remove all pencil guide lines, working from the outside in to avoid tearing the paper. Pro tip: Place a spare sheet of paper under your drawing hand to keep the page clean from skin oils and smudges. This simple trick saves you from frustrating ink smears and keeps your final lines crisp.
Tips to Improve Your Drawing
After finishing, try drawing the lips a second time from memory to help the shapes stick. Practice the hardest section on its own, then draw the lips again at a larger or smaller size to see how the proportions change. You can also test different shading styles or add a simple background to see how the lips sit in the page. Small repeats like these build confidence fast.
Conclusion
You finished the drawing, and now you have a clear lip sketch built from simple guide shapes, structure, detail, and final lines. That process is what makes the result feel clean and controlled. If you want to improve fast, learn how to draw lips again from memory, change the lip size, and try a different angle or background shape behind the mouth. You can also repeat the tutorial with lighter shading or a stronger contrast pass to see how the form changes. Next, try drawing a nose or a full facial feature study so you can keep building the same observation skills. Share your finished drawing where others can see it and compare how your style grows with each attempt.
FAQs
Q: How do I start an easy step by step drawing tutorial to show you how to draw lips?
A: Start by using an HB pencil and lightly draw a horizontal line to mark the center of the lips; step 1 is to draw an oval or light guideline for the mouth area, then step 3 is to sketch the basic shape of the lips before refining—this easy step by step method helps you know how to draw consistent results.
Q: What are the essential steps to draw a realistic mouth for a portrait?
A: For a realistic drawing, follow steps to add lips by marking the top and bottom of the lip, draw a horizontal line through the middle of the lips, sculpt the volume of the lips with shading in step 5 and step 6, and finish with accents of the lip’s outline and lip wrinkles to make the lips look natural in a realistic portrait.
Q: How can I create the right shape of the lips and connect the top and bottom correctly?
A: Begin by drawing the shape with light strokes: draw an oval for the mouth area, then indicate the top of the lip and bottom of the lip, use the center of the lips as a guide to connect the top and bottom smoothly, and adjust contours so different pairs of lips read correctly.
Q: What techniques help add volume of the lips and make them look three-dimensional?
A: Use gradual shading from the center of the lips toward the edges, add highlights at the top of the lip and middle of the lips, and plan your shadows around the lips to show volume; blending with a stump or light HB pencil layers will give a realistic drawing appearance.
Q: When should I add lip wrinkles and how many to include?
A: Add lip wrinkles after establishing the overall shape and shading—use subtle, short strokes radiating from the center of the lips and bottom of the lip; create some lip wrinkles sparingly to avoid over-detailing and to make the lips look natural rather than overly aged.