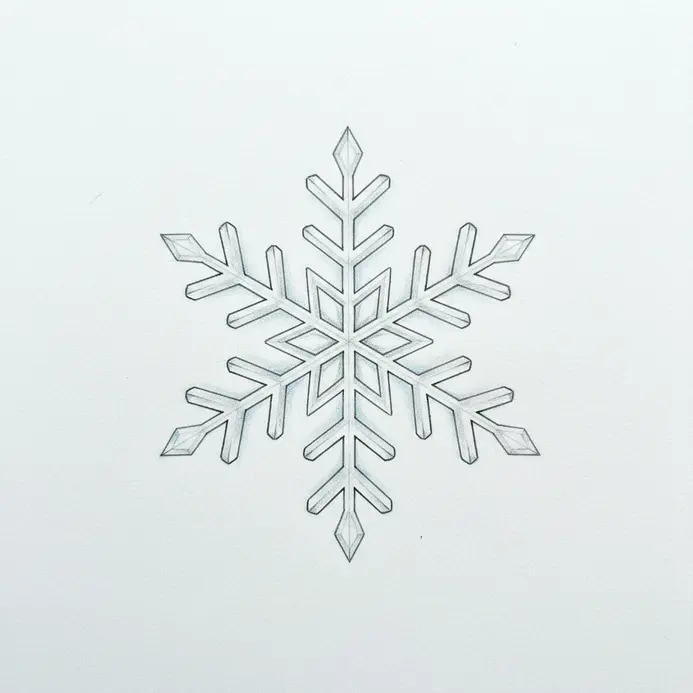


What You Will Need
A standard HB or 2H pencil provides optimal control for preliminary sketching because it deposits light pigment that lifts cleanly from paper surfaces. Pair this tool with a high-quality drafting eraser, a smooth sketchbook or heavy-weight drawing pad, and a small ruler for establishing angular guides. A technical fineliner or pigment pen ensures permanent line work that resists smudging during the final cleanup phase. Colored graphite or soft pastel pencils remain optional additions for artists wanting to simulate atmospheric shading effects. Standard classroom materials work perfectly for this exercise, which demonstrates that mastering how to draw a snowflake requires focused technique rather than expensive equipment.
How to Use This Step-by-Step Tutorial
Execute each instruction sequentially since every phase establishes the foundation required for subsequent detailing. Maintain extremely light pressure during early construction since you will erase these preliminary marks after securing permanent lines. Minor deviations during initial layout remain completely normal and serve as valuable reference points for understanding spatial distribution. This structured progression transforms complex geometry into manageable steps, allowing you to observe your skills developing in real time. Understanding how to draw a snowflake efficiently depends entirely on respecting the preliminary framework. Stay patient during construction, trust the mathematical spacing, and avoid rushing toward completion. Consistent practice will naturally improve your accuracy, spatial awareness, and overall confidence with radial symmetry.
1. The Essential First Step: Drawing a Precise Center Dot for Your Snowflake
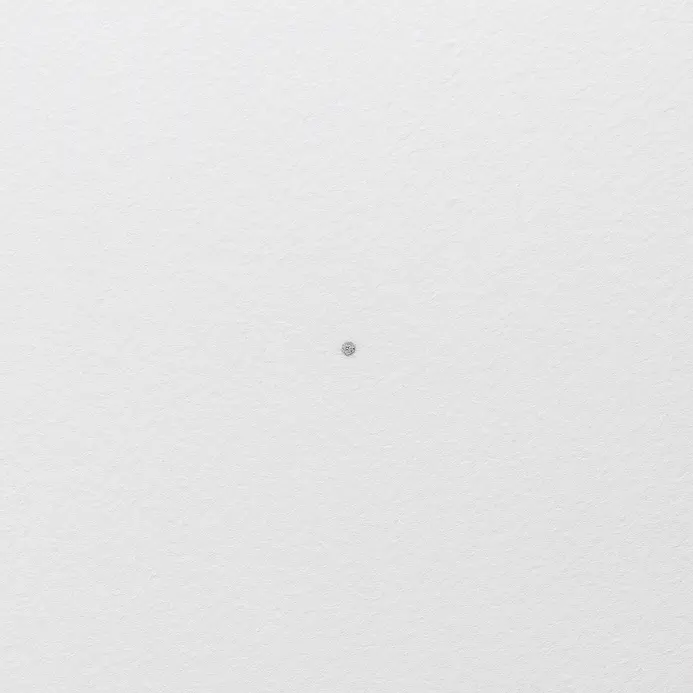
Begin the process of how to draw a snowflake by marking a single discrete point near the middle of your workspace. This small anchor dictates the exact origin of every extending branch and guarantees mathematical balance across the entire design. Position your pencil carefully before committing to the mark, treating this step as the foundational heartbeat of your composition. Locate the precise geometric center by sketching two extremely faint diagonal lines from opposite corners of your page. Rest your sharpened pencil tip directly at the intersection point and apply minimal downward pressure. Lift the tip immediately after contact to prevent creating a heavy, smeared blotch. Digital creators should generate a fresh layer, select a hard round brush, set opacity to one hundred percent, and execute a single centered click without dragging. Many beginners apply excessive force or skip preliminary guidelines entirely, resulting in misaligned foundations and compromised symmetry. Employ light diagonals consistently in your snowflake tutorial, and clean excess graphite with a kneaded eraser to maintain a pristine working surface. Establishing this perfect origin point remains absolutely critical when studying how to draw a snowflake with professional precision.
2. Sketch The Six Main Arms
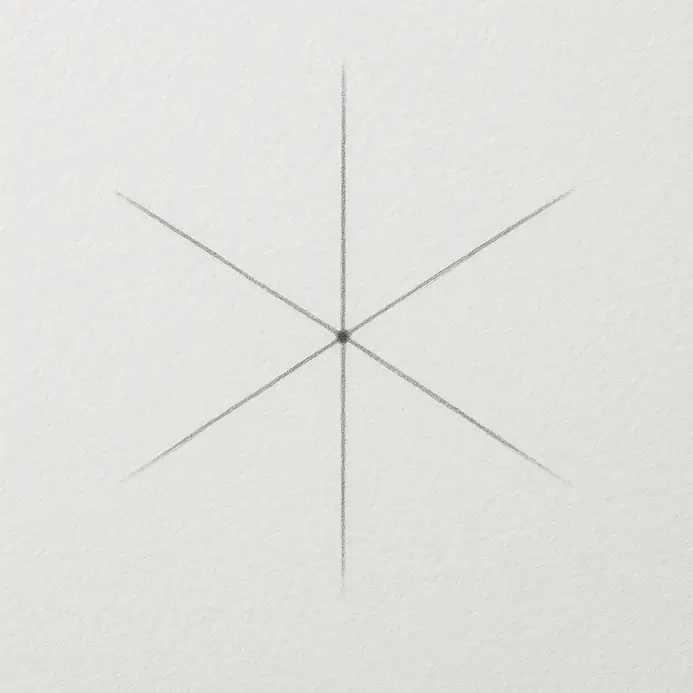
Transition outward from your established anchor toward a fully symmetrical skeletal structure, crucial for creating an effective simple snowflake. This phase builds the primary framework that supports all subsequent crystalline detailing, making accurate execution highly beneficial to the final visual impact. Sketch six straight extensions radiating evenly from your center point toward the outer margins. Maintain consistent angular spacing between each line, resembling a perfectly balanced six-pointed star, which is essential in any easy snowflake drawing. Keep pencil pressure gentle while applying confident, uninterrupted strokes to ensure uniform length across all branches. Treat this foundational grid as a clean geometric asterisk where every stroke converges flawlessly at the origin. Rotate your paper after completing each new extension to maintain identical hand positioning and angular consistency. Verify alignment visually before reinforcing any lines, and correct deviations immediately using your eraser. Mastering this radial distribution technique provides the structural clarity required to understand how to draw a snowflake with mathematical accuracy.
3. Add Tiny Branch Marks
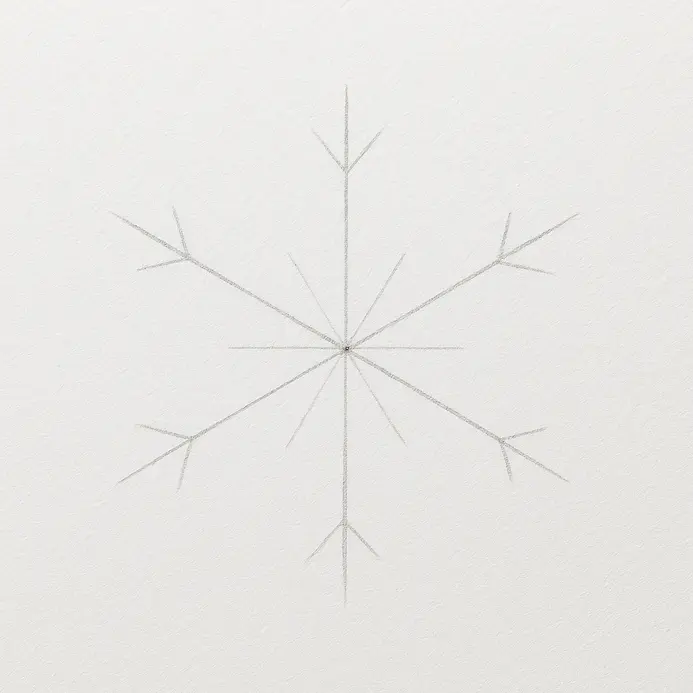
Shift attention from primary structural arms toward delicate supplementary details that enhance visual realism. You previously established six main extensions, which now require subtle offshoots to replicate natural crystalline growth patterns. Observe the existing branch lines carefully before introducing any new marks to your page. Begin approximately halfway along each primary line and sketch short, angled offshoots extending toward both sides. Execute these additions quickly and lightly, tapering your pencil pressure slightly as each stroke terminates. Space these micro-branches unevenly, mixing compact clusters with wider intervals to simulate authentic ice formation. Vary the incoming angles marginally so no two offshoots align perfectly, creating an organic yet controlled appearance. Keep your wrist anchored firmly against the table while moving only your fingers to maintain precision. Heavy pressure during this phase produces rigid, unnatural lines that compromise the delicate appearance of your work. Repeating this controlled stroke technique across all sections teaches you exactly how to draw a snowflake with intricate yet manageable detail.
4. Mirror The Branches On Every Arm
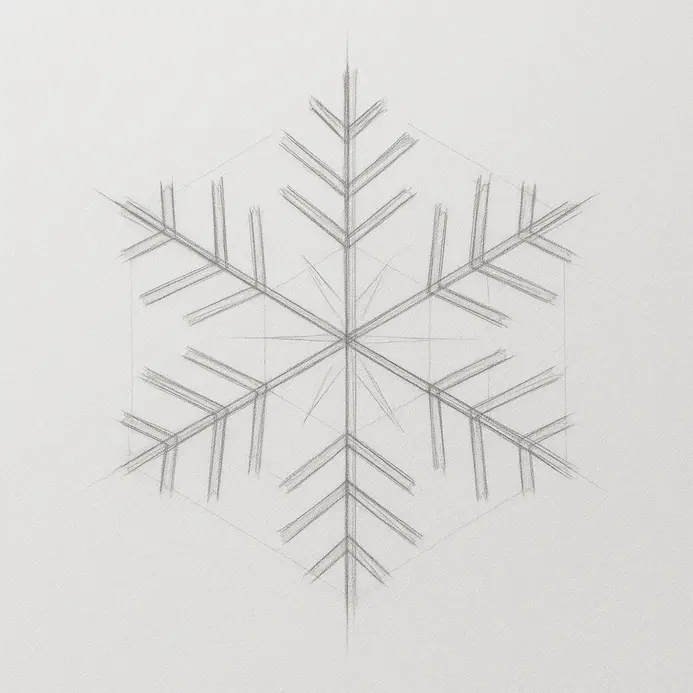
Replicate your established branching pattern across every remaining section to unify the overall composition. This stage transforms isolated linear elements into a cohesive radial design that mimics natural winter geometry with structural integrity. Select your first completed arm as the exact reference template for all subsequent additions. Apply extremely light pencil strokes while sketching identical side branches on the directly opposite arm, matching every original angle and spacing measurement. Progress clockwise around the page, duplicating this precise layout for each remaining section while keeping construction marks faint for effortless correction. Begin every new offshoot at the exact distance from the center, and mark placement guidelines using tiny dots when necessary. Step away from your workspace after outlining all six sections of your snowflake, then return to compare opposite pairs for strict alignment in your easy snowflake drawing. Use your eraser to adjust asymmetrical areas before committing to darker values in your snowflake design, ensuring visual balance across the entire plane. Turn your paper frequently to maintain comfortable drawing angles, which preserves consistent hand motion and reduces wrist fatigue. Following this systematic replication process significantly improves how to draw a snowflake while maintaining flawless radial symmetry across complex layouts.
5. Refine The Outer Crystal Tips
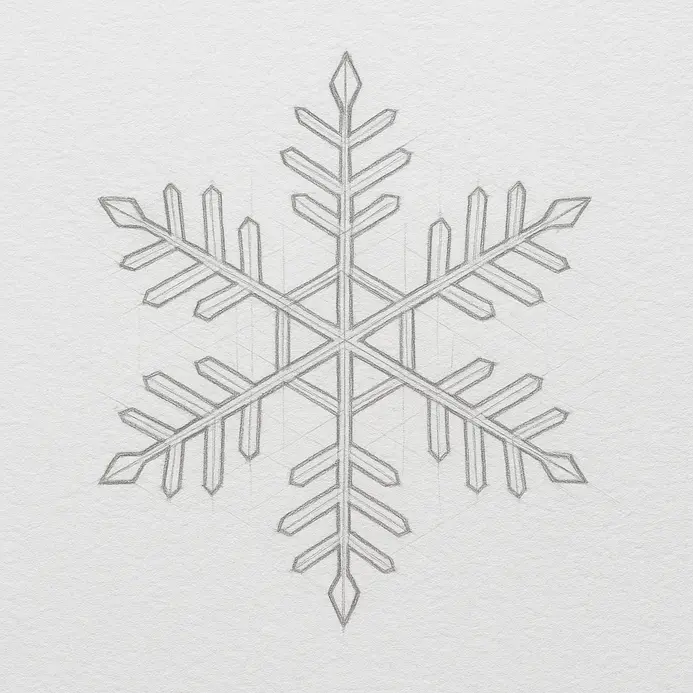
Elevate your preliminary framework into a polished artistic statement by carefully refining every terminal point. You have already established the primary branching network, positioning you perfectly to sharpen outer edges for maximum structural definition. Examine the perimeter of your existing design closely before applying any corrective marks to the paper surface. Remove bumps, wobbly curves, or uneven graphite deposits along the outer boundaries of each extension. Redraw each terminal point using single, confident strokes that form sharp angular endpoints in your snowflake design without overlapping messy preliminary lines. Work methodically around the entire shape, verifying uniform length and pointed termination across every single section. Focus exclusively on reinforcing your strongest existing lines rather than sketching new geometry from scratch. Rotating the page during this phase allows complete visual inspection from multiple viewpoints while supporting natural wrist mechanics. Maintaining sharp, precise endpoints instead of rounded or faded edges guarantees a professional finish. Practicing these boundary refinement techniques consistently demonstrates exactly how to draw a snowflake with crisp, gallery-quality definition.
6. Ink The Clean Snowflake Lines
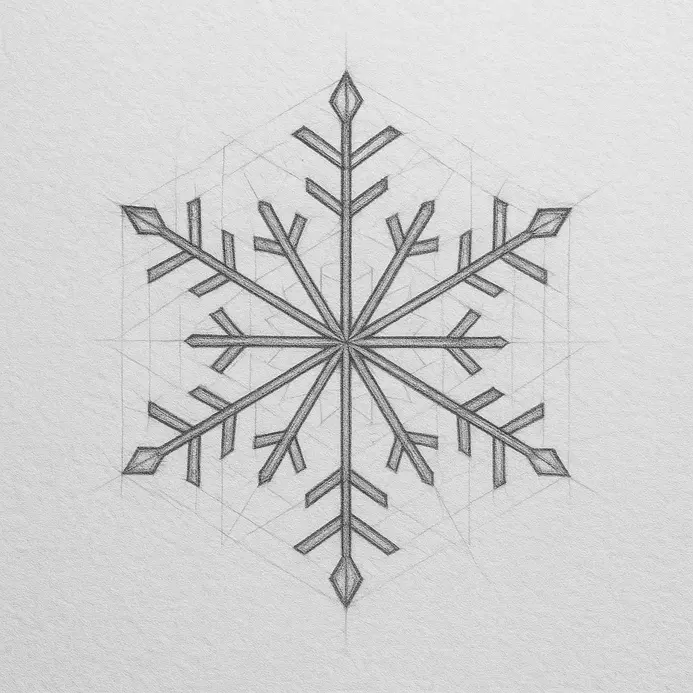
Transition your carefully planned design into permanent line art using a steady technical pen or fine liner. This phase locks your composition onto the surface, preventing accidental smudging during subsequent erasing and shading stages. Position the pen tip firmly against your strongest preliminary guideline before executing a single smooth stroke. Maintain uniform pressure while allowing ink to flow steadily along each designated path of your easy snowflake, without hesitation or backtracking. Work systematically around the entire radial structure, tracing every primary extension and crossbar with absolute consistency. Ignore faint construction marks entirely and concentrate solely on final geometric contours that define the core shape of your simple snowflake drawing. Permanent ink establishes striking contrast against remaining graphite, instantly elevating the visual sharpness of your entire composition, particularly in the context of a snowflake drawing. Rotate your paper regularly to pull the pen naturally toward your dominant hand for optimal line control. This deliberate motion eliminates wobble, preserves stroke consistency, and reinforces professional workflow habits. Exploring additional aesthetic drawing ideas further expands your understanding of how to draw a snowflake with refined line art mastery.
7. Erase The Pencil Guides
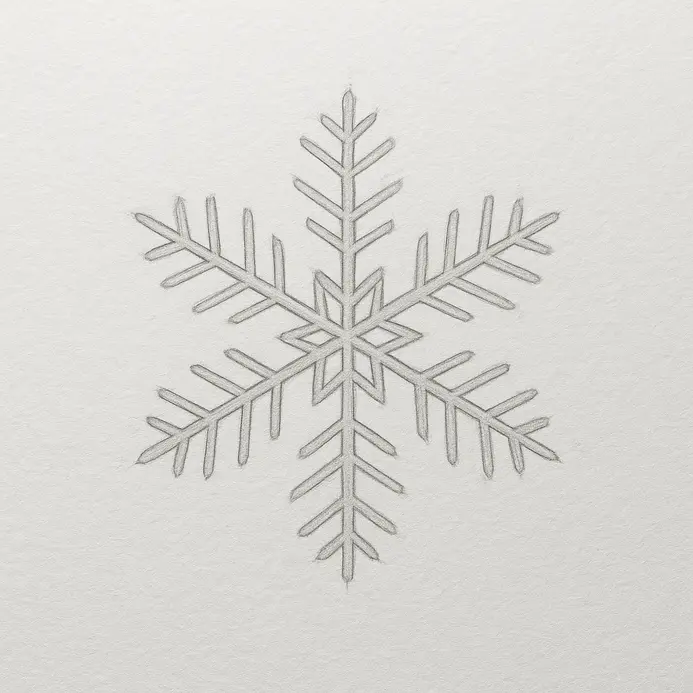
Remove all temporary construction marks to allow your finalized composition to emerge cleanly. You successfully established symmetrical branching networks and secured permanent ink pathways, leaving only preliminary graphite ready for safe removal. Select a gentle kneaded eraser for optimal pigment absorption without damaging paper fibers or leaving residue behind, especially when working on your snowflake drawing. Press lightly against stray guidelines instead of scrubbing aggressively, which prevents surface abrasion and maintains pristine paper texture. Lift remaining eraser crumbs frequently using a soft drafting brush or a gentle stream of air, since grinding graphite fragments back into the page causes severe smudging. Textured paper requires a lighter touch, as complete removal often proves impossible without disturbing the finished inkwork. Focus your efforts on lowering graphite density until preliminary marks blend seamlessly into the background rather than attempting absolute perfection. Always verify inked sections achieved full dryness before initiating any erasure sequence. Following this controlled cleanup routine guarantees professional results and reinforces essential safety protocols when learning how to draw a snowflake without compromising delicate line quality.
8. Shade The Snowflake For Depth
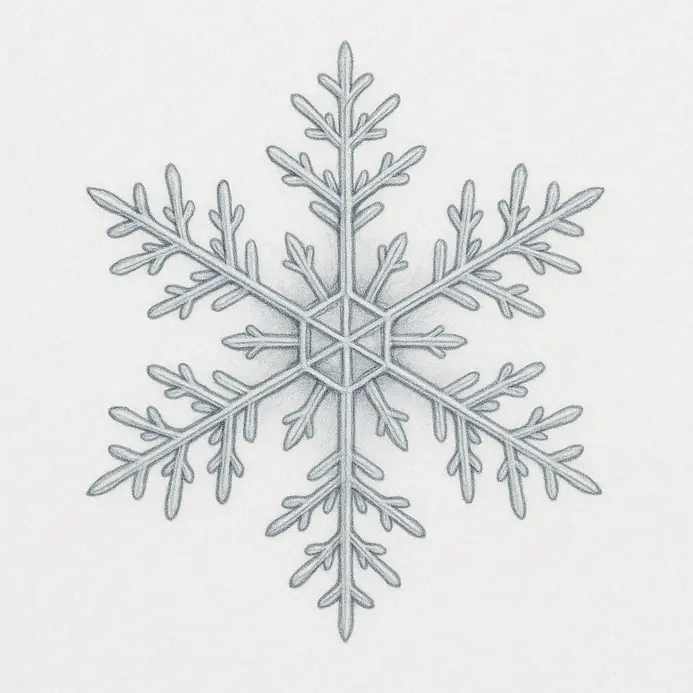
Introduce realistic volume and spatial depth by applying carefully planned graphite shading. This final enhancement transforms flat geometry into a three-dimensional composition that visually captures light interaction with crystalline surfaces. Establish a consistent illumination source immediately before applying any pigment, and maintain that directional choice throughout the entire process. Assume light originates from the upper left corner of your page, which dictates shadow placement across all subsequent branches. The left side of every branch and inner hexagon center will appear noticeably darker than opposing illuminated areas. Apply the graphite side lightly along these designated zones using gentle, controlled pressure to layer subtle tonal values. Avoid heavy initial application, as aggressive pigment deposition limits correction options and flattens overall visual contrast. Complete one entire section before replicating identical shadow patterns across all remaining segments to guarantee perfect symmetry. Gradual value building preserves flexibility, allowing precise intensity adjustments as the composition evolves. Keep illuminated regions completely untouched, relying purely on pristine white paper to generate natural highlights. The dynamic tension between shaded recesses and untouched highlights creates convincing volume and realistic surface texture. Practicing this deliberate layering method builds essential observation skills that directly improve how to draw a snowflake with atmospheric depth and dimensional realism.
Tips to Improve Your Drawing
Recreate the entire composition from memory immediately after finishing your first attempt to identify weak points requiring additional practice. Dedicate extended training sessions specifically to branching symmetry, since motor control improves markedly through targeted repetition. Scale the identical layout dramatically larger or smaller to observe how proportion shifts affect visual balance and line weight. Introduce dark construction paper or subtle background gradients to test contrast management and edge definition under varied lighting conditions. Each repetition strengthens spatial reasoning and accelerates technical fluency, reinforcing exactly how to draw a snowflake with increasing accuracy and artistic confidence.
Conclusion
Completing your geometric crystalline composition demonstrates successful application of structured drafting methodology. You constructed the artwork correctly by establishing preliminary guides, forming a stable radial framework, applying matched branching patterns, and finishing with refined lines followed by controlled graphite layering. This sequential workflow ensures manageable execution for artists across all experience levels while preserving structural integrity throughout every stage. Strengthen your current results by repeating the full process from memory, altering scale dimensions, or testing darker paper surfaces to increase contrast intensity. Experiment with extended terminal points, varied branch counts, or softer initial pressure settings to customize your signature style while maintaining foundational accuracy. Explore adjacent subjects like frost-covered botanical elements, geometric mandalas, or complex crystal formations when preparing for your next artistic challenge. Display your polished artwork in your preferred gallery space, and remember that mastering how to draw a snowflake depends entirely on patient planning, measured repetition, and consistent attention to geometric symmetry.
FAQs
Q: How do I draw a snowflake step by step for beginners?
A: Start with a small circle in the center, draw a vertical line through it, then add two lines intersecting the vertical line at 60-degree angles to create six sides or six arms; from each arm add simple V shapes and straight lines to build a basic shape—this easy step-by-step method makes a super simple snowflake and serves as an easy guide for beginners.
Q: What is the best way to make the snowflake have six points?
A: To get six points, draw a straight vertical line, then draw two more lines that cross it to form a star shape with 6 points or six-sided layout—this six-sided structure ensures every snowflake has six arms and six points because of the natural snowflake form you are mimicking.
Q: Can you give a snowflake drawing tutorial that’s also a coloring page?
A: Yes: follow a snowflake drawing tutorial that leaves a clear snowflake outline on white paper, creating a printable snowflake coloring page suitable for kids—this snowflake coloring page can be used as a free printable and later colored to make a beautiful snowflake or fun snowflake design.
Q: How do I create variations so every snowflake looks different?
A: Start with the same basic shape of six arms, then get creative by changing the lengths, adding intersecting lines, diamonds, small circles, V shapes, or doodle-style branches—there are many different ways to draw snowflakes so you can create your snowflake with unique patterns and types of snowflakes.
Q: What tools and basic steps are in an easy guide to draw a snowflake?
A: Use pencil, eraser, ruler for straight lines, and a compass or bottle cap for the central circle; follow an easy guide: draw a small circle, add the vertical line, draw two lines to make six arms (draw two additional angled lines if needed), then decorate—this snowflake step by step process is like other drawing tutorials but focused on winter drawing and the snowflake shape.