


Surface Preparation and Component Weight Distribution
The fastest way to ruin your project is painting over grease or a glossy laminate without sanding it first. You must wipe every blade with a degreaser, then lightly scuff the surface with 180 to 220 grit sandpaper to create a mechanical bond. A universal bonding primer is your non-negotiable next step; it prevents wood tannins from bleeding through and stops paint from peeling off that slick composite material. The real trick for a quiet, wobble-free ceiling fan blade art setup is keeping the paint layers thin and even. A thick, gloopy coat adds uneven weight that throws the entire assembly off balance, causing noise and strain on the motor. We tend to want full coverage in one pass, but trust me, multiple mist-light coats are the secret to both beauty and function.
Design Patterns for Kinetic Visual Appeal
Your painted design will look completely different when the fixture is spinning at high speed, which is the whole point. Intricate, tiny details simply blur into a muddy mess. When planning your ceiling fan blade art, you want to think in terms of bold, high-contrast shapes and repetitive motifs. Strong geometric lines, like chevrons or stripes that follow the piece’s length, create a stunning hypnotic effect in motion. A simple ombre fade from one color to another looks dynamic as it rotates. Even a basic two-tone split, with one bold hue on the leading edge and another on the trailing half, makes a huge visual statement from across the room. The movement itself becomes part of the piece, so design for the spin, not just the static view.
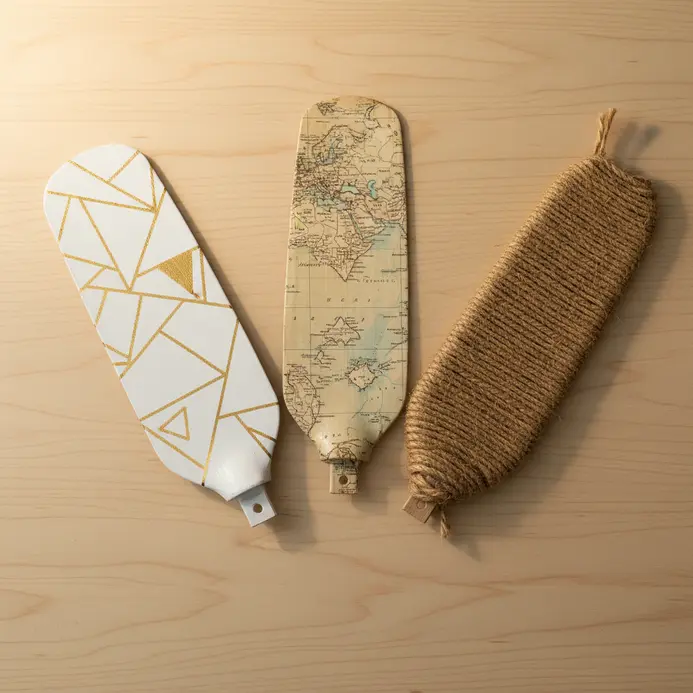
1. Paint a Geometric Gold Leaf Pattern for Modern Glamour
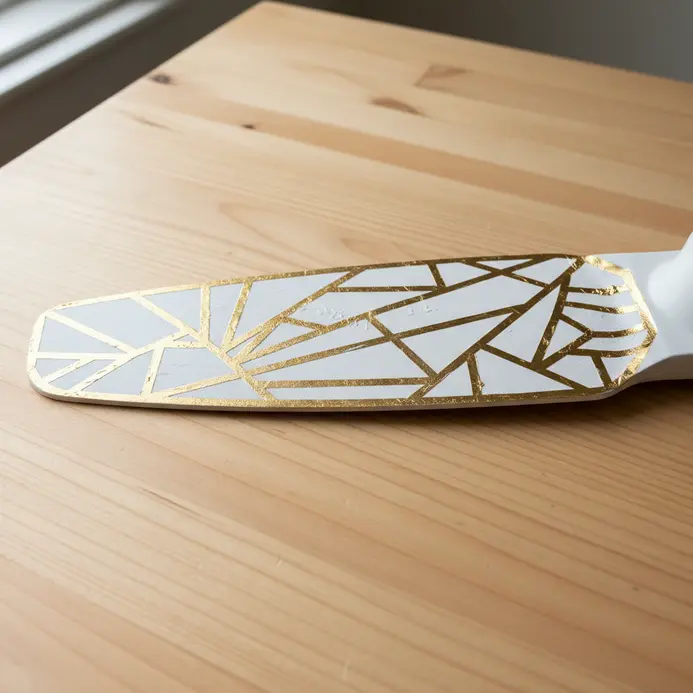
Who says glamour cannot have clean lines? This technique looks high-end, but it is all about patience and precision, making your ceiling fan blade art stand out without needing innate talent. You start by painting your fixture a deep, rich color and letting it dry completely. Then, use low-tack painter’s tape to map out your geometric design, like sharp chevrons or a honeycomb grid. Apply a thin coat of gold leaf adhesive within the taped areas and wait for it to get tacky. That is your cue to gently lay on the sheets of gold leaf, pressing them down softly. Brush away the excess, peel off the tape, and behold the magic of your old ceiling fan transformation. For a similar touch of hand-painted charm in other areas of your home, check out these painted flower pot ideas.
2. Create a Vintage Map Decoupage Collage Finish

Want a finish that looks like it has a story? This one is a personal favorite for its instant character. Seal it all with a few coats of matte decoupage medium to protect your ceiling fan blade art from dust. You will be adhering torn pieces of vintage maps directly onto your surface, overlapping them to create a textured, travel-inspired collage. Working from the center out helps avoid bubbles and keeps the aged typography crisp. I love how the colors come together to create a nostalgic vibe. Trust me, the final look is so rich, you will feel like you have made a little piece of history.
3. Apply a Minimalist Monochrome Matte Striped Design
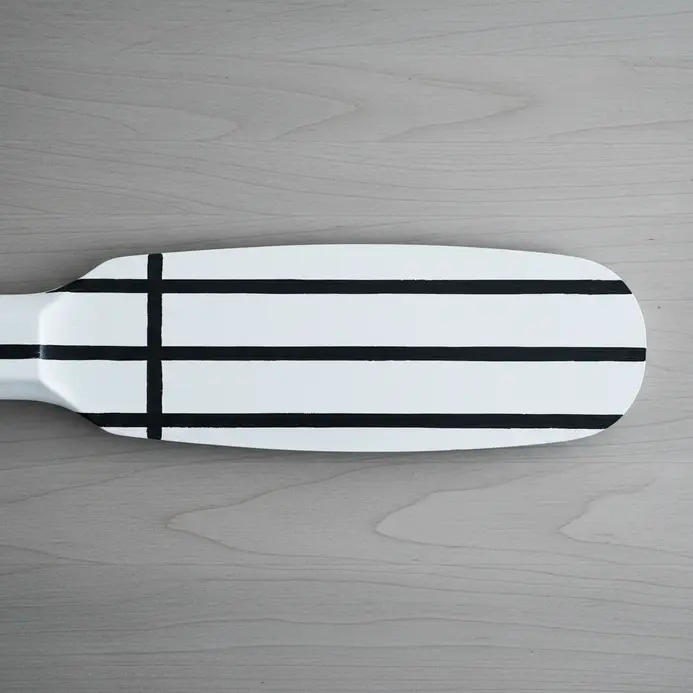
This look feels sleek and modern, but trust me, the process is wonderfully straightforward. You will start by painting your fixture with a solid base coat in a matte finish paint. Once that is dry, the magic happens with careful measuring and painter’s tape to lay out your crisp, even stripes. Apply your darker shade within the taped-off sections, and peel the tape while the paint is still a bit wet for those clean lines. The result is a calm aesthetic that feels fresh and uncluttered. For another project with a similar clean, decorative vibe, explore creative glass painting designs.
4. Stencil a Botanical Floral Art Overlay
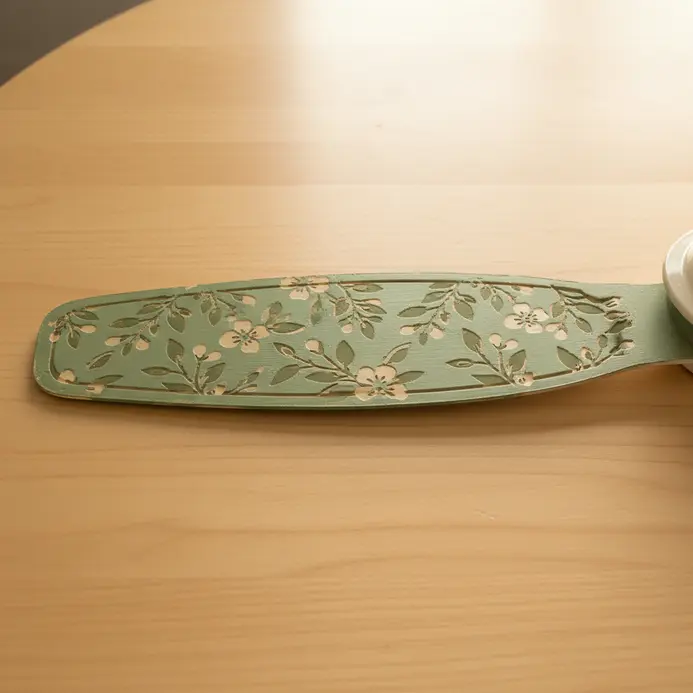
Ever wondered how to get those perfect, crisp floral patterns on a flat surface? You start by securing your mylar stencil with painter’s tape. This method lets you add intricate, nature-inspired detail to your ceiling fan blade art without needing to be a master painter. Then, use a dabbing motion with a stencil brush to apply your paint, which keeps the edges sharp and prevents messy bleed while repurposing. It feels like magic when you lift the stencil to reveal a clean, beautiful design. For another fun way to personalize your space, check out these easy crafts for home decor. Feel proud of your new botanical touch!
5. Achieve a Shabby Chic Distressed White Wash Look
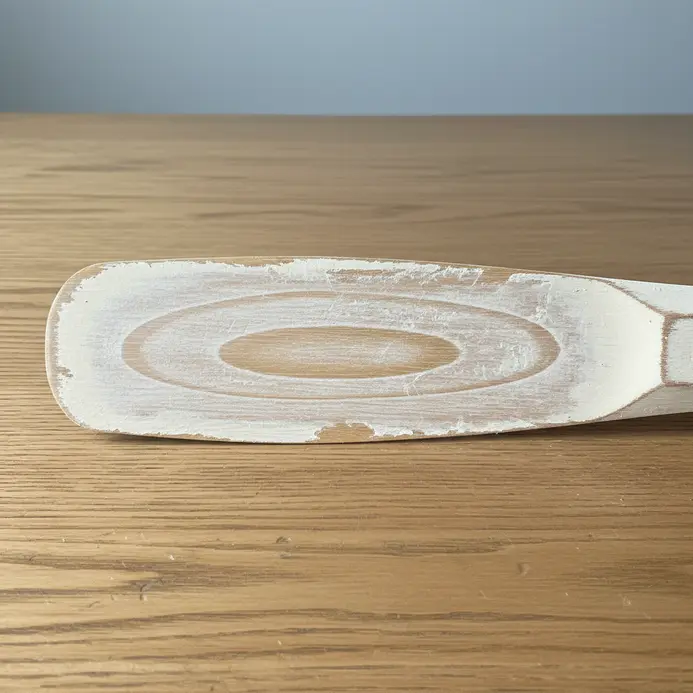
This look feels like it came from a charming French flea market, but you can create it yourself. The secret is in the whitewash mixture—thin your white latex or chalk paint with water until it becomes translucent. Wipe it on your clean piece, then immediately use a rag to wipe some back, letting the original finish peek through. Once dry, the real magic happens. Gently sand edges and raised areas with fine-grit sandpaper to reveal subtle layers underneath. I love how this technique embraces imperfection, giving your ceiling fan blade art a soft, romantic character. Feel that wonderful sense of creating a piece with history.
6. Blend an Abstract Pastel Watercolor Gradient Wash
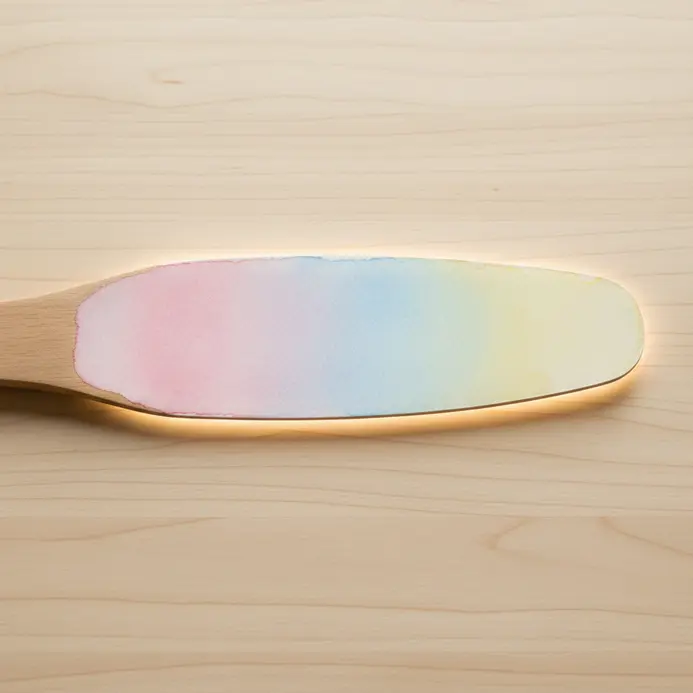
This technique looks like a soft, dreamy sky, but it is surprisingly simple to pull off. You will start by using a wall. large wash brush to wet your entire watercolor paper. Then, while the surface is still glistening, quickly drop in your two or three highly diluted pastel colors and watch them bleed together naturally. The wet-on-wet technique does all the hard work for you, creating those seamless, ethereal blends. Trust me, seeing those soft colors merge is incredibly satisfying. Once it dries, this beautiful ceiling fan blade art backdrop would look fantastic paired with a DIY plant stand project for a complete room makeover.
7. Wrap a Nautical Jute Rope Blade for Texture
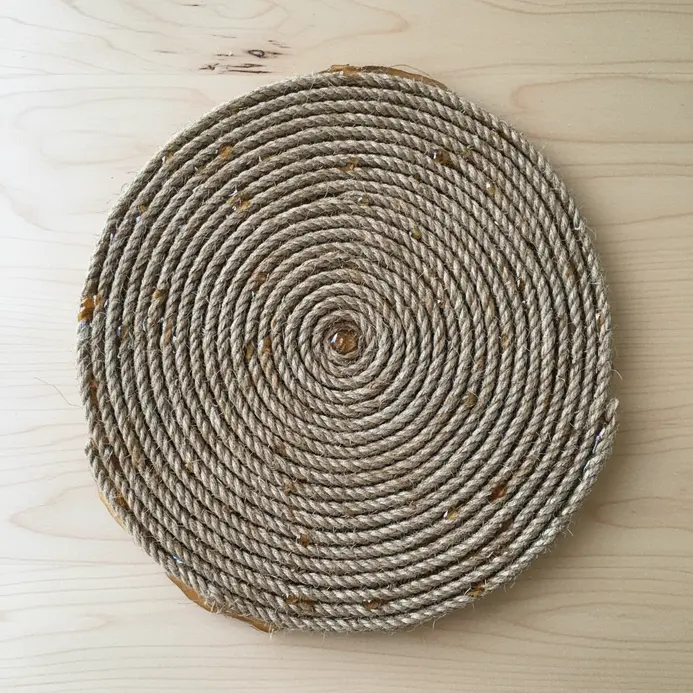
This one looks intricate, but the process is wonderfully straightforward and adds so much rustic character. You simply wrap natural jute rope tightly around the piece, securing it with adhesive as you go. I love how the warm, fibrous texture completely transforms your ceiling fan blade art into a coastal accent. Isn’t it satisfying to create such a unique tactile surface?
8. Apply a Chevron Pattern Vinyl Decal Accent
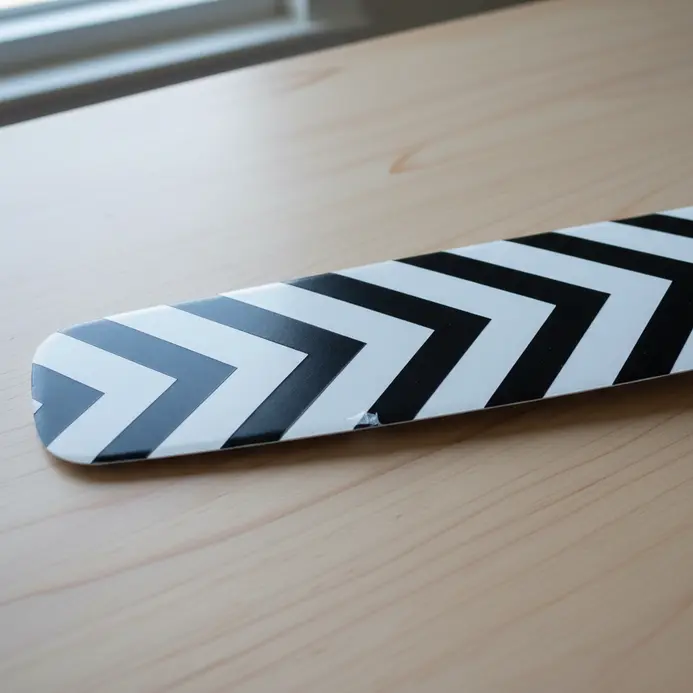
Ever worried a chevron decal would be tricky? Trust me, it is one of the easiest ways to get a modern look. The key is thorough surface preparation. You will clean the fixture with soap, then degrease it with rubbing alcohol for a perfect bond. I love using the dry application method here. You create a tape hinge, position your decal, and use a squeegee to press it down smoothly. This prevents air bubbles and keeps those sharp V shapes looking crisp. It is a fantastic way to add dynamic ceiling fan blade art elements without any paint. Your piece will have a custom, professional finish that feels totally fresh.
9. Paint a Midnight Blue Faux Marble Finish
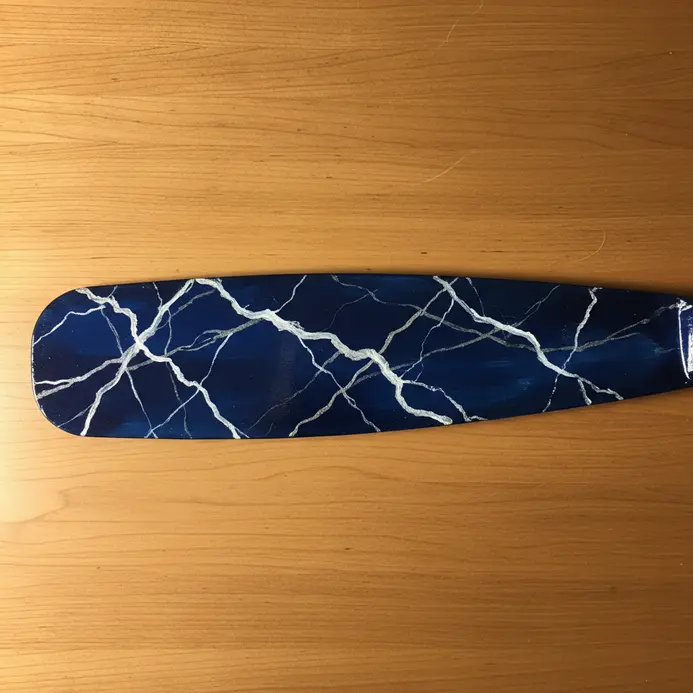
Ever wondered how to get that dramatic, high-end stone look on a budget? This technique creates a stunning illusion of depth and luxury. The payoff is a sophisticated ceiling fan blade art finish that transforms ordinary fixtures. The key is your slow-drying glaze medium. Mix it with lighter blues and white, then paint those irregular, organic veins onto your midnight blue base coat. Soften them with a dry brush or feather for a perfectly natural look. I love how building up these translucent layers adds such rich dimension. It is a fantastic way to create unique home decor, much like the charm of upcycled wine bottle crafts.
10. Add a Playful Polka Dot Confetti Design
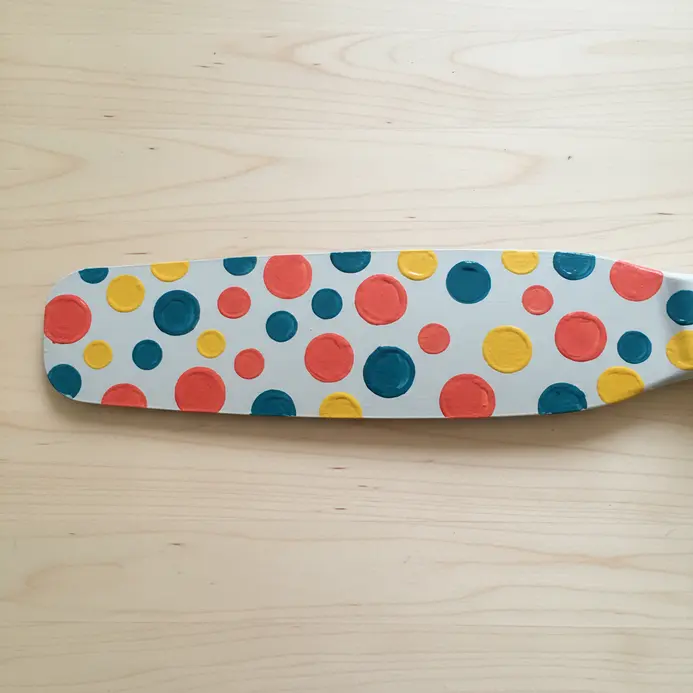
Who says confetti is just for parties? This design brings that joyful, lighthearted feeling right to your space. You will start by dotting a few large circles in your chosen colors, placing them randomly across the wall. I love how the non-uniform placement gives your ceiling fan blade art a sense of dynamic movement, making the design feel alive and playful. Fill in the gaps with medium and small dots, letting some overlap for a fun layered effect. It is a wonderfully forgiving project, perfect for practicing your dot work. For a fun extension of this playful painting style, explore these creative craft ideas for kids.
11. Stencil a Classic Damask Pattern Motif
Ever wondered how to get that elegant, wallpaper look without the mess? Stenciling a classic damask pattern is your answer. You simply secure a mylar stencil to your prepared surface and dab paint through the cutouts. The key is using a dry brush to prevent paint from bleeding underneath. I love this technique because it feels so luxurious yet is totally approachable, making it perfect for a commission. The repeating floral or geometric design creates a continuous motif that elevates simple ceiling fan blade art into a classic statement. Trust me, letting your base coat cure fully before you start makes all the difference. You will adore the timeless, high end result. Does that not sound satisfying?
12. Create a Rustic Reclaimed Wood Grain Effect
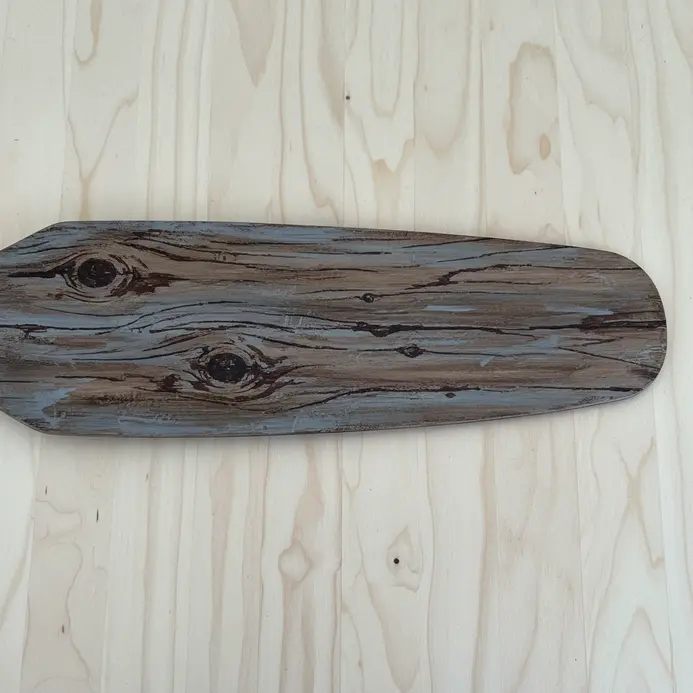
This is one of my favorite tricks for adding instant character. Sound complicated? It is all about layering a few simple digital filters. You start with a base brown layer, then apply the Fibers filter to create your initial grain lines. A Motion Blur smooths them out, and a touch of noise adds that essential grit. Next, you create individual plank shapes on a new layer, arranging them with slight gaps and rotations for that authentic, uneven look, perfect for an old ceiling. The magic is in using desaturated color palettes to give your ceiling fan blade art a weathered feel. It works because those subtle imperfections tell a story of age and reuse. For a great way to practice your color mixing for effects like this, check out these beginner acrylic painting projects.
13. Paint a Children’s Room Glow Star Mural
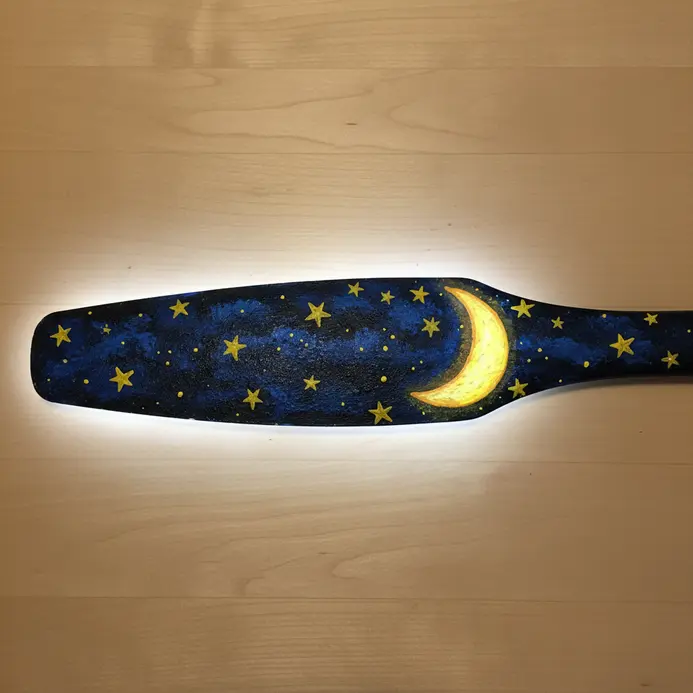
Ever wanted to give a kid’s room a magical nighttime feel without any wiring? This project creates a whole starry sky that glows softly after lights out. The trick is using a UV flashlight to check your work as you paint. Dab on the glow-in-the-dark paint, then shine the light to see exactly where your stars are and how bright they will be. Trust me, this step is what makes the mural look professional and evenly lit. It works because the glow paint charges from daylight and releases that energy at night, creating a soothing, imaginative atmosphere perfect for bedtime stories. I love how it turns a plain ceiling into an immersive wonderland. Feel the magic when you turn off the lights and see your own constellations come to life.
14. Layer a Traditional Sheet Music Decoupage
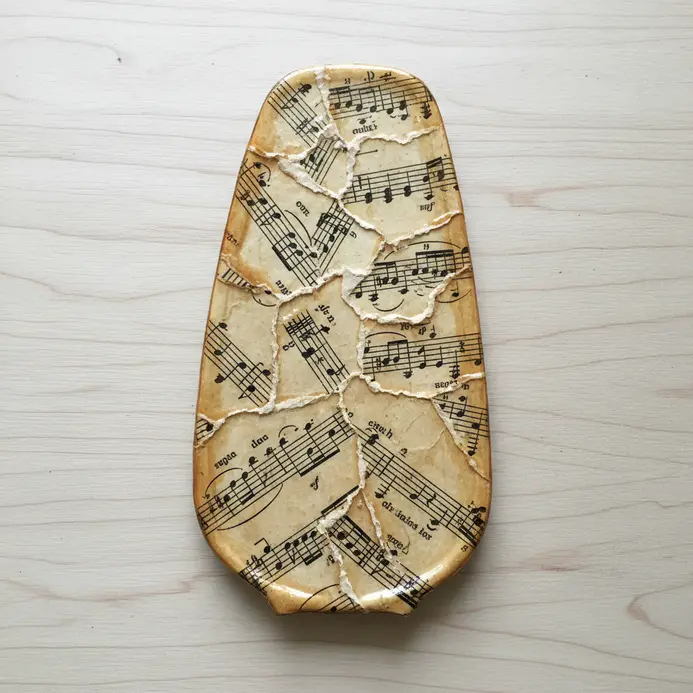
Ever wondered how to add instant vintage charm to a plain surface? This technique looks intricate, but it is beautifully straightforward once you get the hang of it. You will adhere pieces of sheet music to your surface using a decoupage medium, then seal it with multiple smooth layers. The key is applying thin, even coats and letting each layer dry so your ceiling fan blade art avoids unwanted wrinkles. The process involves cutting or tearing your music, applying adhesive, and carefully smoothing everything to remove any air bubbles. I love this one because the final result looks like an expensive, inlaid design full of history. For another great way to add artistic flair to your home, check out these simple oil painting ideas.
15. Stencil a Graphic Tribal Triangle Print

Ever thought those bold, geometric prints were too advanced to try yourself? Trust me, they are not. The secret is a stencil brush and a good dabbing motion to get those sharp, clean lines without any bleed. I love how this technique transforms a plain surface with a simple, repeatable pattern. You can easily cut your own design from an old ceiling. mylar sheets to make your ceiling fan blade art perfectly match your decor theme. Position it with low-tack tape and build up the paint in thin layers. The result is a striking, graphic statement that feels modern and intentional. Does that not look stunning with the new holiday colors?
16. Blend a Shimmering Metallic Copper Ombre
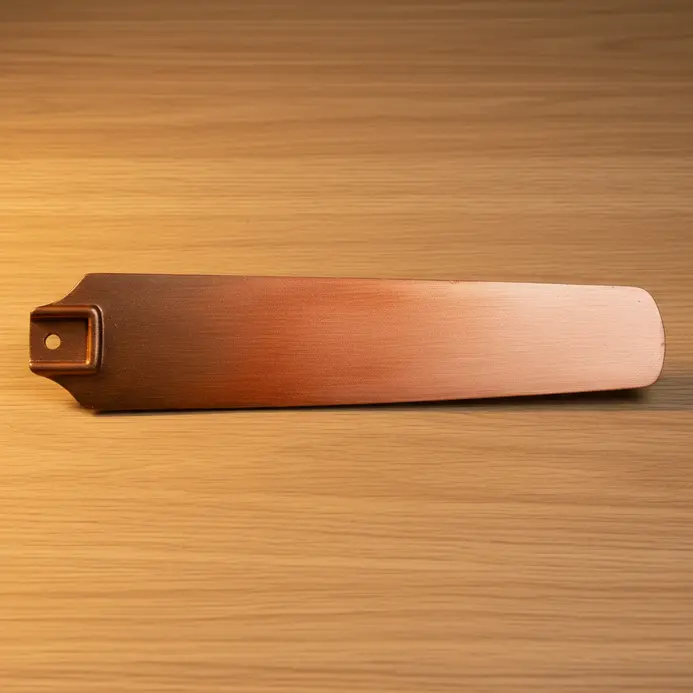
Ever wondered how to get that gorgeous, molten-metal effect? This one is all about creating a smooth transition of warm copper tones. You will apply a deep copper shade at the base of your old ceiling fan. fan blade, then layer a lighter, shimmery copper toward the tip. The ombre catches the light differently as your ceiling fan blade art spins, creating a dynamic and radiant look. The magic happens when you blend the two colors with a soft brush until the line disappears completely. I love this technique because it adds incredible depth and a feeling of luxury. Trust me on this one, the final shimmering result will absolutely transform your room’s whole vibe.
17. Apply a Botanical Pressed Leaf Decoupage Style
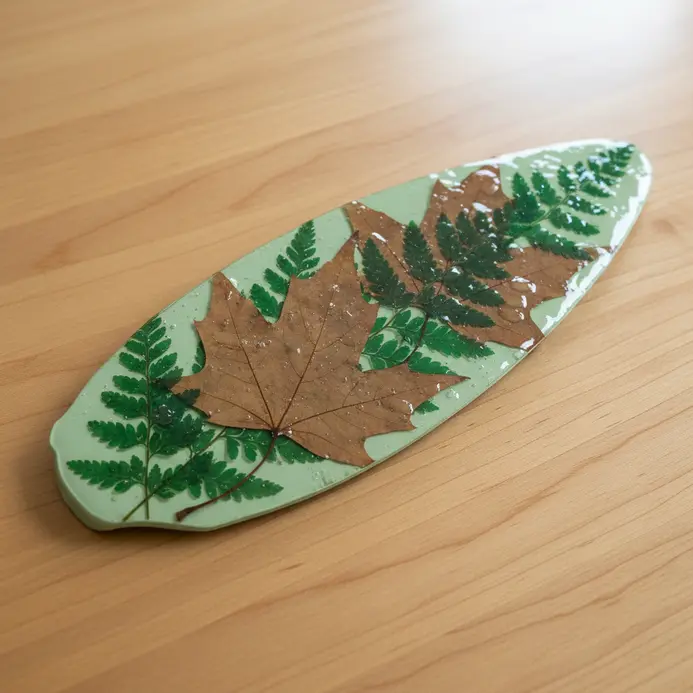
This style looks so intricate, but the process is wonderfully simple and relaxing. You will arrange your dried leaves or botanical prints onto the piece, then secure them with a decoupage medium like Mod Podge. Smooth everything out carefully to avoid air bubbles, and let each coat dry completely before attaching the next. I love how the final result feels both vintage and fresh. It works because it brings a genuine, delicate piece of nature into your room. For a beautiful, durable finish, consider sealing your ceiling fan blade art with a clear varnish. You can find more inspiration for similar decorative techniques in these creative glass painting designs.
18. Paint a Bold Rainbow Color Block Design
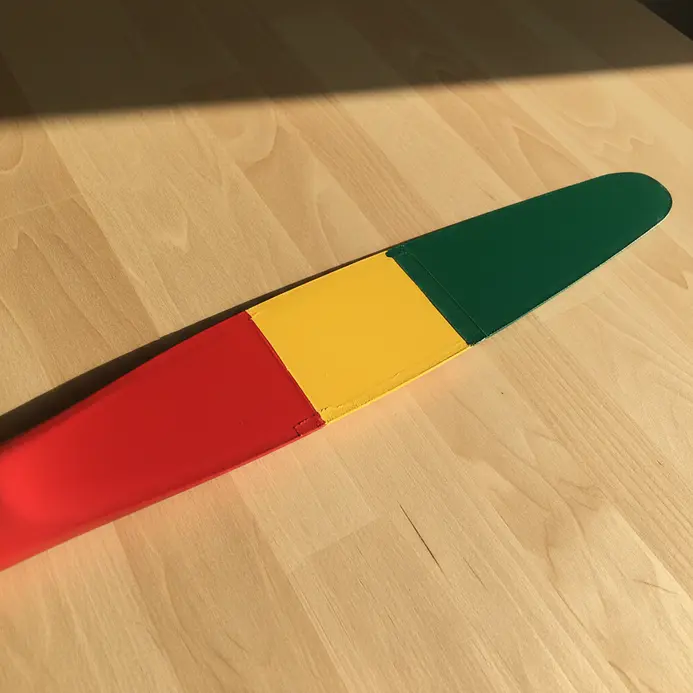
Does your room need a jolt of pure joy? This design delivers exactly that. You will create sharp, geometric blocks of the most saturated colors you can find. The secret is using high-quality painter’s tape for those clean, crisp lines. I love how it feels like hanging a modern art piece right on your fixture. The result is a vibrant ceiling fan blade art statement that energizes the entire space. Plan your blocks, tape carefully, and paint each bold color with a dedicated roller. Removing the tape while the paint is slightly tacky gives you that perfect, sharp edge. It pairs wonderfully with other easy crafts for home decor for a cohesive, playful look.
19. Wrap an Elegant Black Velvet Fabric Blade
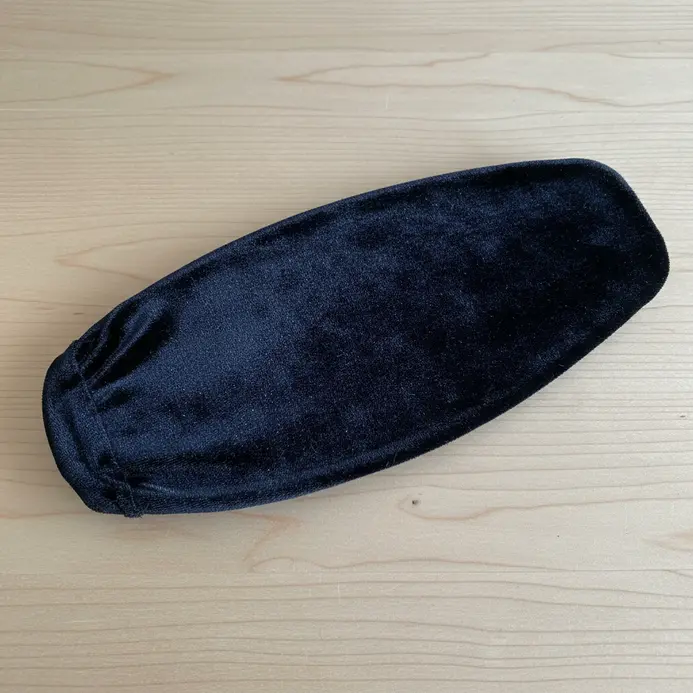
This idea is all about pure tactile luxury. Who would have thought a fixture could feel so elegant? You will create a black velvet covering that absorbs light and adds a soft, plush texture to the room. Start by tracing your surface to make a cardboard template, then use it to cut your velvet. The key is applying a thin, even layer of flexible fabric glue, smoothing the material from the center outwards to avoid wrinkles. Wrap the seam allowance over the edges for a clean finish and let it dry completely. It works because the rich texture and deep color instantly elevate the fixture into a sophisticated statement piece for your ceiling fan blade art display. Trust me, the feeling of running your hand over that soft surface is its own reward.
20. Apply Textured White Linen Contact Paper
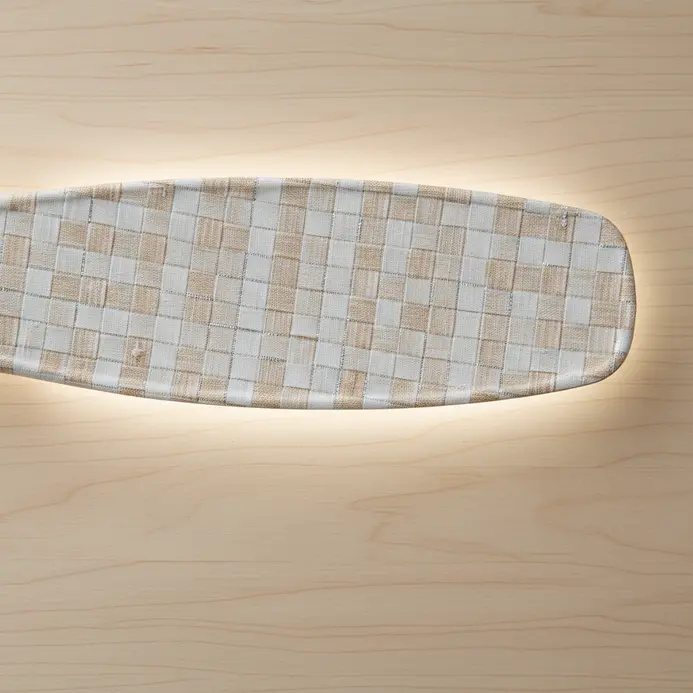
Who would have thought a simple roll of paper could offer such an elegant refresh? I love this one because it feels so tactile and bright. First, you need to clean the surface impeccably with rubbing alcohol and let it dry completely. Then, measure your piece, cut the paper with a generous overlap, and slowly peel the backing while smoothing from the center outwards with a squeegee. Isn’t it satisfying to see those air bubbles disappear? This technique works because the pressure-sensitive adhesive bonds perfectly to a clean surface, giving you that crisp, custom look. For a clean finish, trim the excess with a sharp utility knife guided by a metal ruler. This kind of surface transformation is a fantastic way to upcycle, giving it a whole new life and a wonderfully fresh feel for your ceiling fan blade art project.
21. Add a Whimsical Butterfly Silhouette Decal Set
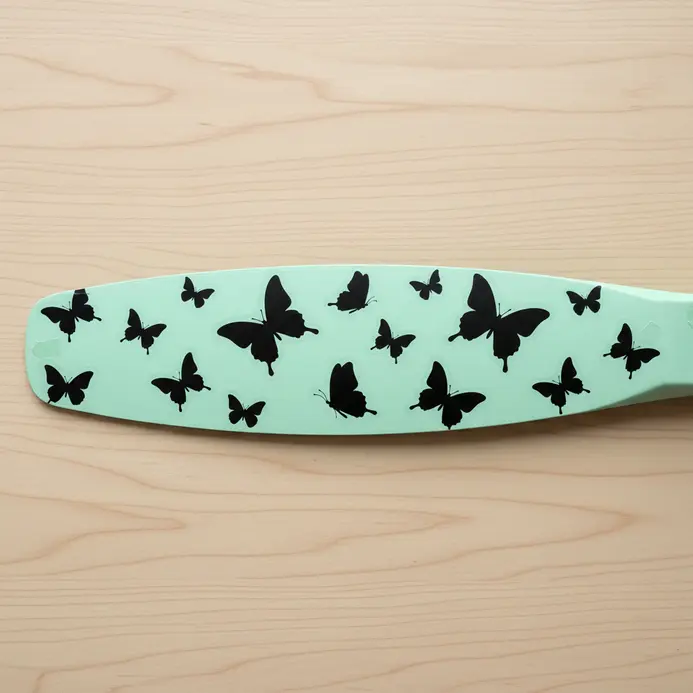
Ever wanted a touch of nature that feels magical and light? This project is perfect for that. You will apply a collection of self-adhesive vinyl decals featuring butterfly outlines in a playful arrangement. Use masking tape to plan your layout first, then smooth each one down from the center to avoid bubbles. I love how this instantly brings a sense of freedom and transformation to a room. It is a wonderfully simple way to personalize your space, and you can find more creative DIY art ideas here. The delicate silhouettes complement the spinning motion beautifully.
22. Paint an Industrial Charcoal Concrete Texture
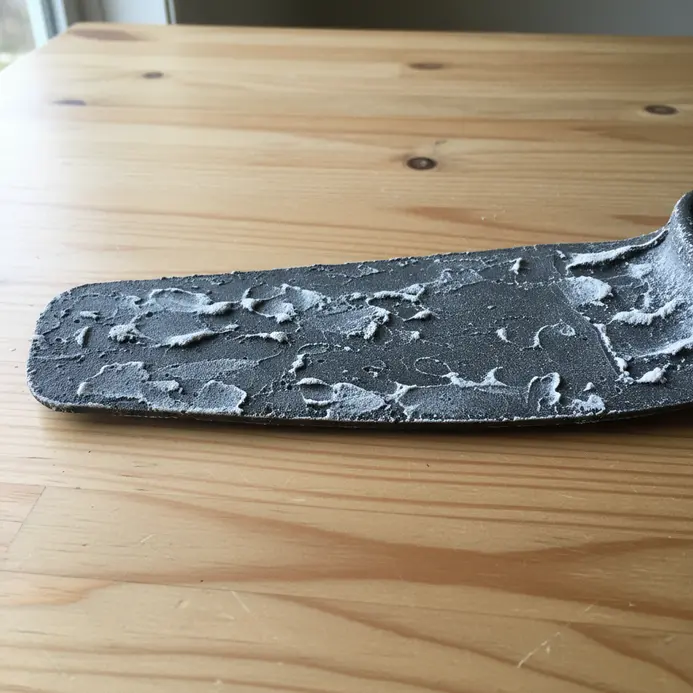
This one looks intimidatingly gritty, but trust me, it is a wonderfully forgiving technique. Start with a dark charcoal gray base coat on your clean surface. Then, dab on patches of lighter grays with a ribbon. natural sea sponge to build up that mottled, porous look. Add tiny cracks with a fine brush and maybe mix in a bit of sand for real grit. Why does this work so well? It gives your fixture that raw, urban edge that feels both modern and timeless. The key is to embrace the imperfections. I love how a matte sealant at the end locks in the authentic, low-sheen concrete feel. Does that not look stunning?
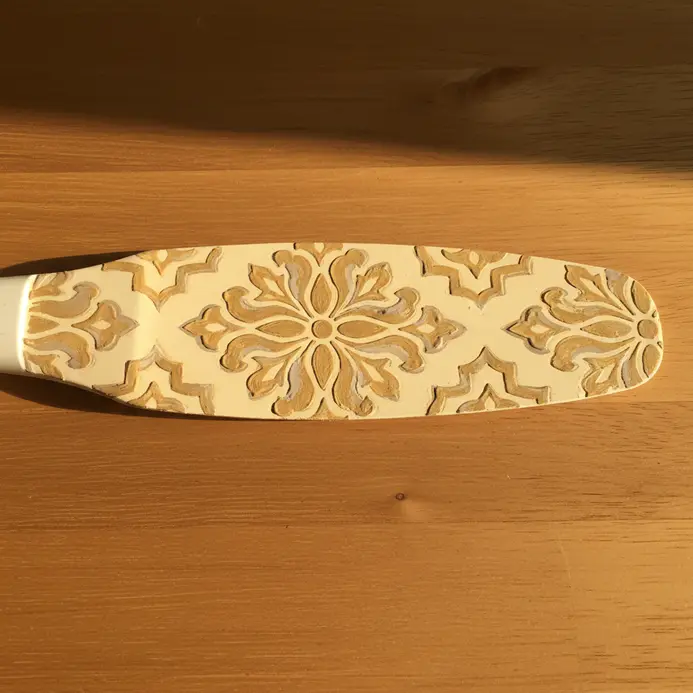
23. Stencil Intricate Mandala Pattern Art
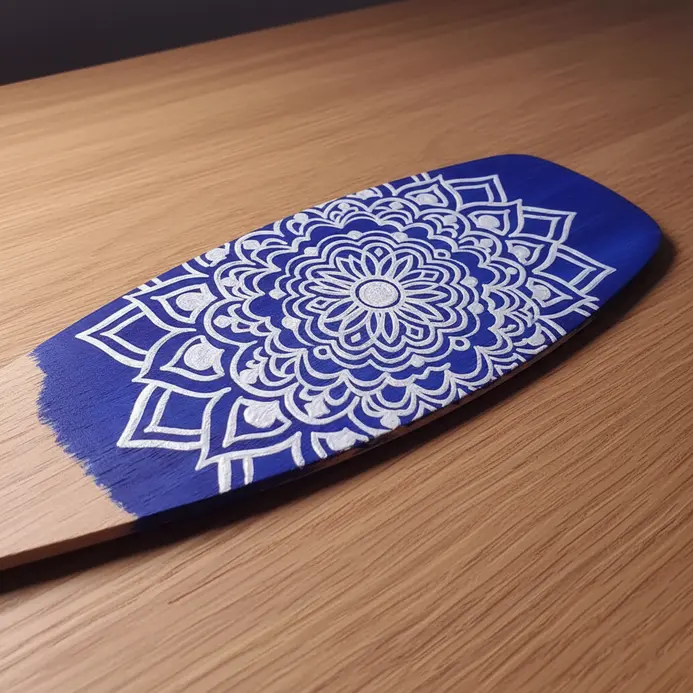
Who would have thought you could create such intricate, symmetrical designs with a stencil? It looks complex, but this technique makes it wonderfully accessible for those looking to repurpose. You secure a detailed mandala stencil with repositionable adhesive, then gently dab paint through the openings. The result is a crisp, perfectly repeated pattern that feels professional. This works because the stencil does all the hard work of precision for you. My go-to tip is to always dab off excess paint first to prevent bleeding. For a different kind of upcycled project, you might enjoy these upcycled wine bottle crafts. Does that not look stunning?
24. Create a Pop Art Inspired Comic Print
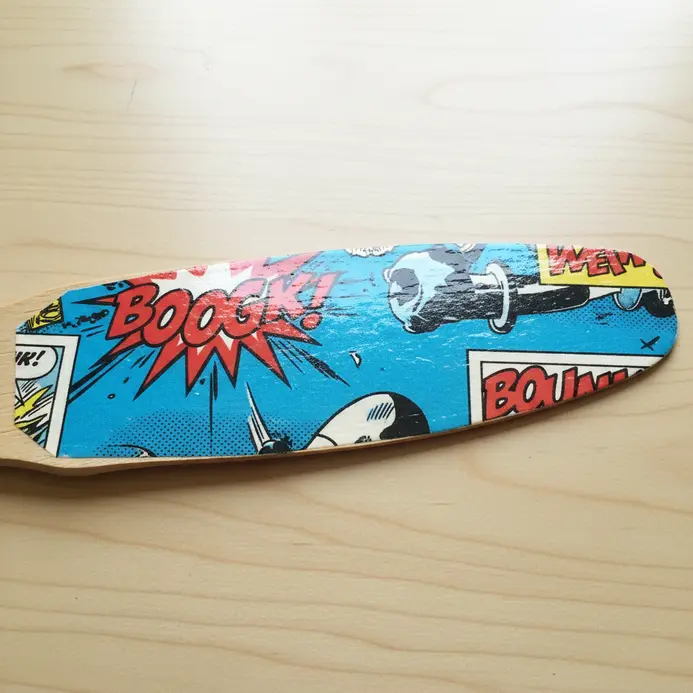
This one is all about bold, graphic fun. Start by sketching a dramatic, exaggerated figure reacting to something simple, like a giant donut. Then, bring it to life digitally using a limited color palette of vibrant primaries and bold black outlines to enhance your holiday decor. Trust me, sticking to those flat, unshaded blocks of color is what gives it that classic comic book punch. Add a speech bubble with big, sans-serif text for the final touch. It works because it mixes nostalgic comic style with modern, ironic pop art. It is a fantastic way to make a statement, and it is also a great project to try if you are looking for creative craft ideas for kids who love drawing. Does that not look stunning?
25. Apply a Soft Grey Chalkboard Paint Finish
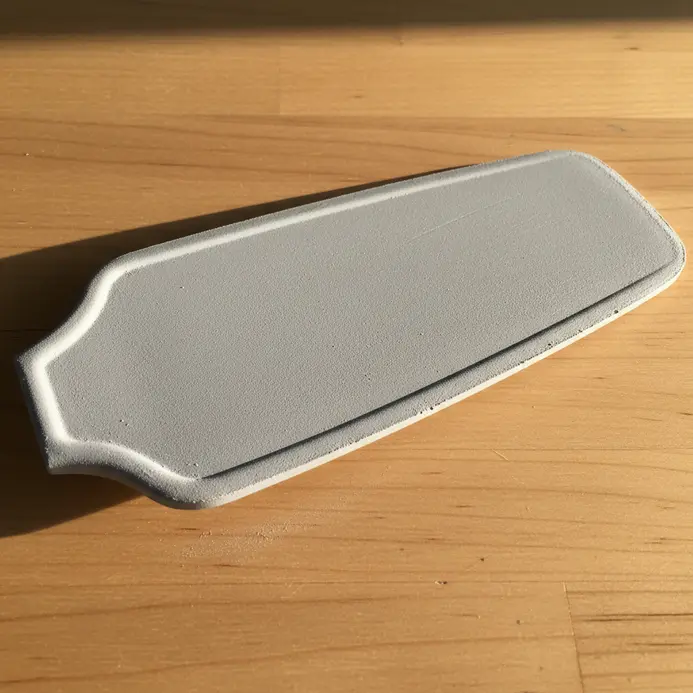
Ever wanted to add a modern, functional twist to a fixture? This soft grey chalkboard finish is your answer. You will start by thoroughly cleaning and lightly sanding the surface for the best adhesion. Then, apply thin, even coats of your soft grey chalkboard paint with a foam roller, letting each layer dry fully before repurposing. I love how this finish looks sophisticated while giving you a reusable surface for notes or doodles. Feel that creative satisfaction when you make your first chalk mark on your own custom board. The interactive nature brings a fresh, dynamic energy to overhead decor.
Clear Topcoat Selection for Dust Resistance
Skipping the sealant is the one mistake that will undo all your hard work in a matter of months. A proper topcoat does more than add shine; it creates a hard, smooth surface that repels dust and allows you to wipe the pieces clean without damaging the paint. For this high-vibration environment, you need a durable product like a furniture-grade acrylic enamel or a spray lacquer formulated for cabinetry. These cure to a tough finish that handles constant motion and air friction perfectly. Apply two or three thin, even coats, letting each dry completely, to build a protective shield. This final step locks in your colors and ensures your kinetic art piece stays vibrant and easy to maintain for years.
Conclusion
Looking at your fixture and seeing potential is the first step to a truly personalized space. That desire to create something unique for your home is what makes these projects so rewarding. The most important advice is to always consider the weight of your materials and use a strong, clear sealant to protect your work from constant movement. Your perfect ceiling fan blade art is waiting to be made, blending your personal style with the joy of a successful upcycle. It is a wonderful way to put your own signature on a room.
FAQs
Q: What is ceiling fan blade art and why should I consider it when I repurpose old fan blades?
A: ceiling fan blade art is a creative, recycled craft that transforms old fan blades into decorative pieces like wall art, table accents, or seasonal displays. Repurposing old fan blades helps with recycling, gives a handy crafter a unique material to work with, and reduces waste compared with replacing the entire fan.
Q: How do I purchase or find old fan blades for DIY ceiling fan blade craft ideas?
A: You can purchase used blades from online marketplaces, local thrift stores, salvage yards, or ask friends who replace fans. Some sellers list single blades as parts; otherwise repurpose a ceiling fan blade from an old unit. Look for blades in good condition without large holes or warping for easiest crafting.
Q: What are some simple how-to’s for turning a ceiling fan blade into wall art?
A: Start by sanding and priming the blade, then paint or decoupage a picture, pattern, or seasonal theme (like spring flowers or a pumpkin for fall). Add hooks or a small sawtooth hanger on the back to tie it to the wall. For a more advanced project, attach multiple repurposed blades together to create a round, wing-like tableau.
Q: Can I repurpose ceiling fan blades into cute seasonal crafts like Easter or Halloween decorations?
A: Yes. For Easter, paint blades pastel colors and add a tied ribbon, small painted eggs, or a dragonfly motif. For Halloween, make a pumpkin or spooky fence scene by painting and adding cutouts. These creative ideas let you switch decor seasonally while using the same repurposed materials.
Q: Are there ideas for making functional items from repurposed blades, such as a table accent or shelf?
A: Absolutely. Mount a single blade horizontally as a narrow shelf for lightweight items, or arrange several blades radiating from a center to create a tabletop or small coffee table surface. Reinforce with brackets or a central support to ensure stability when used as furniture.


