


Critical Respiratory Safety and Ventilation Setup
The single biggest mistake you can make is working with resin inside your home without a respirator. Trust me on this. That chemical smell contains monomers that are harmful to inhale. Your setup must include a respirator with organic vapor cartridges and a fan pushing fresh air directly across your workspace toward an open door. We tend to skip this step thinking a brief project is fine, but proper ventilation remains non-negotiable for mastering diy resin crafts for beginners.
Epoxy Mixing Ratios and Room Temperature Requirements
Your resin stays sticky forever if you do not measure the two parts with absolute precision. Those little lines on mixing cups are your best friend, and using separate vessels for each part before combining them prevents sticky spots. The chemical reaction that creates the hard, glass-like finish relies on exact measurements, meaning precise ratios define successful diy resin crafts for beginners. You also need to check your room temperature before starting. If your workspace falls below the minimum listed on your bottle, the mixture cures cloudy or fails entirely. Mix slowly to avoid excess bubbles, scraping the sides thoroughly for a complete blend.
1. Create Dried Pressed Flower Resin Coasters
 pressed flowers suspended within.” width=”800″ height=”600″>
Doesn’t it feel like magic to capture a bit of springtime beauty forever? This project is my absolute favorite, making it a standout example of accessible diy resin crafts for beginners. You will arrange your delicate pressed flowers in a silicone mold, then pour clear resin over them in a simple, measured pour. The resin locks everything in a crystal-clear finish that protects your floral design. Trust me, using a heat gun to pop bubbles right after pouring guarantees a flawless, professional look. The real satisfaction arrives when you demold the piece and see those petals perfectly suspended.
2. Gold Flake Ocean Wave Keychain: Capture a Miniature Seascape

Ever wondered how those tiny, perfect ocean scenes get made? This keychain looks like a complex layered painting, but trust me, it is a fantastic entry point for diy resin crafts for beginners. You create it by pouring thin layers of differently shaded blue resin into a mold, letting each one cure to a tacky state before adding the next. I love how the gold flakes get sprinkled between layers to catch the light like sun on water. The magic happens when you drizzle white resin on top and swirl it with a toothpick to make frothy waves. Pro tip: patience between layers keeps colors distinct. Let that material get tacky so your gold stays suspended.
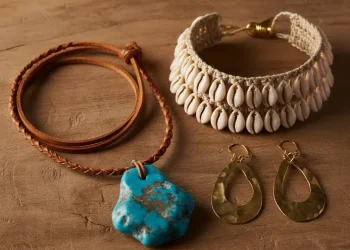
3. Make a Geometric Rose Gold Pendant Necklace
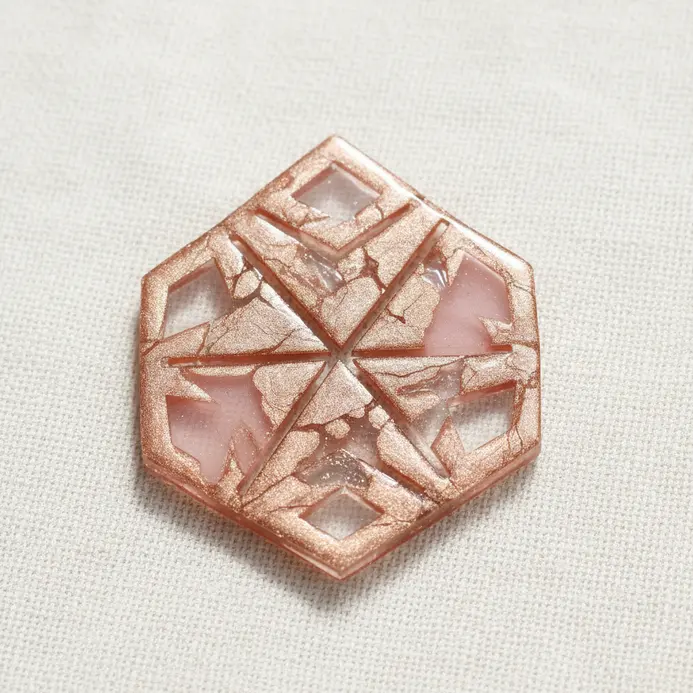
This one surprised me by looking like boutique jewelry while demonstrating why diy resin crafts for beginners yield professional results. You create it yourself using rose gold metal clay can add a luxurious touch to your projects for beginners when combined with resin., rolling it flat and using a geometric cutter for a perfect shape, is one of the tips and tricks for crafting with resin. Carefully punch a hole for the chain before it dries completely. The magic happens when you fire the piece, either in a small kiln or with a butane torch. This burns away the binder, leaving solid metal ready for polishing. My go-to tip is ensuring the clay is completely dry before firing to prevent cracks.
4. Iridescent Mica Powder Tray Dish: Add a Shimmering Finish

Who would have thought a plain tray could achieve a magical shimmer through diy resin crafts for beginners? You dust iridescent mica powder onto a prepared adhesive layer on your dish. I love using a soft, fluffy brush to gently press the powder into the surface for even coverage. The key is that light bounces off mineral particles at different angles, creating that beautiful color shift. It is incredibly satisfying to watch the light play across the finished piece. Trust me, applying a final clear resin topcoat locks in all that shimmer for daily use.
5. Build a Clear Resin Initial Letter Paperweight

Ever wondered how to make those gorgeous personalized paperweights? You will mix two-part epoxy resin is essential when you want to pour the resin for a durable finish. and pour the resin into a letter-shaped silicone mold for a unique project. Embedding special items inside proves the customization potential at the heart of diy resin crafts for beginners. The clarity preserves your choices like a tiny snow globe. My top tip is working on a perfectly level surface to avoid a sloped finish. Pop surface bubbles with a quick heat gun pass, and you will have a professional piece ready for display.
6. Make a Deep Blue Alcohol Ink Ring

Ever wanted jewelry that looks like a swirling galaxy? Fill a bezel ring blank with clear base liquid, then add drops of deep blue and white alcohol ink. Use a toothpick to swirl the colors, watching lacy patterns form right before your eyes to experience the unpredictable beauty of diy resin crafts for beginners. The magic is in how the inks react, creating unique designs every single time. For a flawless finish, make sure your mixture is thoroughly mixed and work on a level surface to prevent pooling.
7. Glitter Infused Star Shaped Hairclip: Sparkle with Every Step

Ever wondered how to get that perfect trapped-in-ice sparkle? Mix your favorite fine glitter into clear resin and pour it into a star-shaped mold. Because the particles stay permanently suspended, you avoid flaking, proving the durability of reliable diy resin crafts for beginners. My go-to tip is using a toothpick to gently stir and pop any tiny air bubbles after pouring. It guarantees a crystal finish and makes for a whimsical accessory that catches light beautifully.
8. Build an Embedded Sea Shell Photo Frame

This project brings the coast right into your home decor. Start with a plain, sturdy photo frame, removing the glass and backing completely. Doing a dry layout before glue touches anything teaches the spatial planning essential for diy resin crafts for beginners. Trust me, arranging the shells first guarantees a balanced look. Once you love the design, use strong craft adhesive to secure each piece permanently. A clear sealant adds protection and a finished glow.
9. Make a Matte Finish Resin Bookmark Tassel
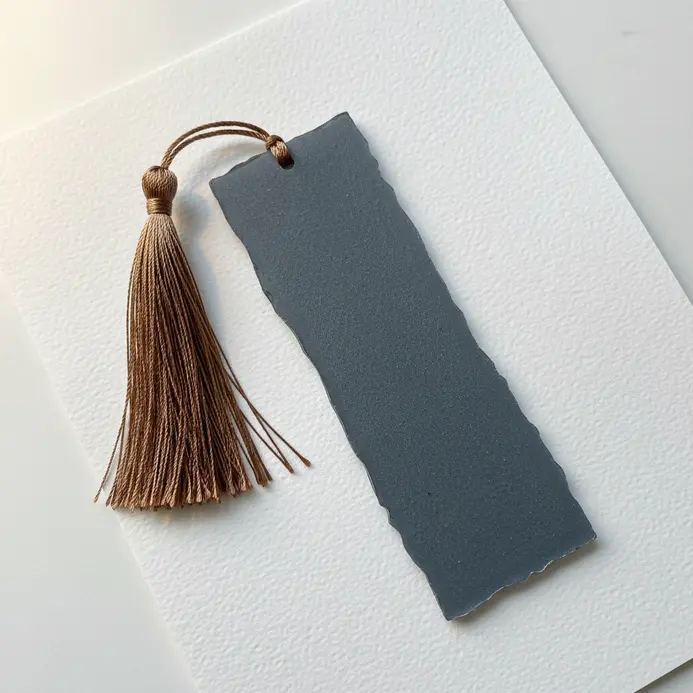
This project looks incredibly elegant but follows a straightforward process. Bundle your threads, mix two-part epoxy resin, pour the resin into a silicone mold, and insert an eye pin for the hanging loop, following these tips and tricks. Securing the knot after curing highlights the refined edge of diy resin crafts for beginners. To achieve the beautiful non-glossy finish, lightly spray the cured piece with matte acrylic varnish can be used as a topcoat for projects for beginners that involve resin.. It feels sophisticated and makes a perfect personal gift.
10. Translucent Neon Purple Dice Set: Roll with Custom Color

This setup feels like you are bottling magic. Mix your casting resin, add that electric neon pigment, and pour it into silicone molds to cure. Painting the white numbers afterward sharpens the details, showcasing a precise finishing step for diy resin crafts for beginners. Why does it work so well? That translucent color holds incredible depth, catching light every roll. A pressure pot removes stubborn air bubbles efficiently. Wiping away excess paint reveals clean, sharp digits.
11. Build a Sparkling Celestial Motif Trinket Box

This looks magical but remains highly approachable. Paint a simple wooden box with a rich night sky base coat, then dab lighter colors for soft nebulae. Using tweezers for tiny rhinestones demonstrates the steady hand practice central to masterful diy resin crafts for beginners. Let each paint layer dry completely before moving forward. Apply strong craft glue for heavier charms, then finish with a clear sealer to lock in the sparkle permanently.
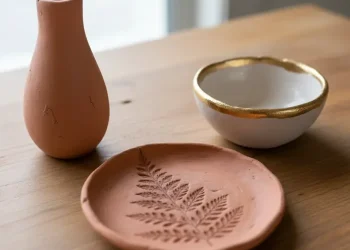
12. Modern Farmhouse Pressed Fern Coaster: A Natural Touch

Who would have thought a forest piece could look so chic on your table? Arrange the dried fern and carefully seal it in place. I love how the delicate veins of the pressed fern can be embedded in resin to create stunning wall art. become a permanent, natural artwork. Mix clear liquid to encase everything, using a heat tool to pop any bubbles. If you prefer a wood base, sealing with mod podge is a great step-by-step tip and trick. clear varnish works beautifully. The result brings a calm, organic touch to any room.
13. Make Encapsulated Beetle Wing Statement Earrings

These earrings capture incredible iridescence, suspended like jewels in clear liquid. Pour a thin base layer into your mold, place the delicate wings with precision tweezers, and seal them with a top coat. The process intensifies natural blues and greens. Working in layers prevents floating inclusions. Trust me, taking your time with careful resin mixing and passing a heat gun over the surface guarantees clarity. Your finished pieces stay lightweight and absolutely stunning.
14. Build a Multi Colored Confetti Resin Spoon Rest

This project adds a fantastic burst of color to your kitchen workspace. Pour clear epoxy resin into a silicone mold, then play with your chosen pattern. Sprinkle glitter, paper punches, or dried petals before the next layer cures. Remove any trapped air with a heat gun or torch before the final pour. After curing, you have a durable functional piece that captures a little celebration inside.
15. Holographic Film Geometric Pyramid Paperweight: Catch the Light
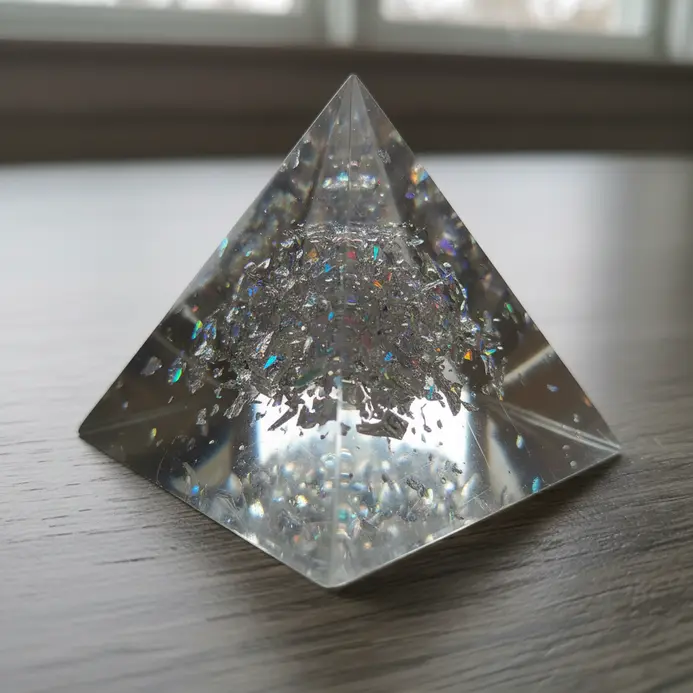
This looks incredibly complex, but the steps remain wonderfully straightforward. Apply pre-cut film sections to an acrylic pyramid, working slowly with a soft cloth. Smoothing out every air pocket guarantees a flawless, glassy exterior. The material diffracts light into a living rainbow on your desk. Trust me, watching it transform into a captivating optical display brings pure satisfaction.
Sanding and Polishing Finished Resin Edges
You will likely need to sand the bottom edges after demolding to remove sharp lips or drips. Start with 400 grit wet/dry paper, keeping it damp to reduce dust. Progress through 800, 1000, and 2000 until the surface feels perfectly smooth. The final step polishes the sanded area back to a high-gloss shine. A dab of non-gel toothpaste works in a pinch, but a dedicated compound on a buffing wheel delivers a seamless finish.
Conclusion
Starting your journey means you are not following steps, but capturing moments and colors in a form you can hold. That first successful demold delivers a memory that stays with you forever. The best advice is to begin with the design that excites you most. Every bubble popped teaches you something new. These diy resin crafts for beginners serve as your perfect foundation, building confidence through hands-on practice. Your next creation waits patiently in your imagination, ready to become your favorite project.
FAQs
Q: What are some beginner-friendly resin craft ideas for someone new to epoxy?
A: If you’re new to epoxy and want beginner-friendly DIY projects, try resin keychains, photo resin coasters, simple geode coasters, resin tray edges, or making a paperweight. These fun and easy projects let you learn how to make small pieces, practice mixing resin and hardener, and experiment with glitter resin, dried flowers, or gold leaf without committing to larger projects like a table top or deep pour epoxy.
Q: How do I mix resin and hardener correctly for epoxy resin projects?
A: Always follow the manufacturer’s ratio—common resins require a 1:1 or 2:1 mix of resin to hardener. Stir slowly to avoid bubbles and scrape the sides and bottom of the cup so resin is mixed completely. Resin is mixed thoroughly when the liquid is clear and consistent; improper mixing can prevent the piece from fully curing. Check the instructions on the resin products for cure times and working time.
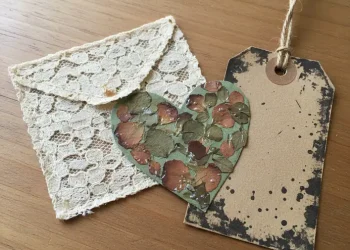
Q: Can I use dried flowers or gold leaf in myself resin projects like frames and coasters?
A: Yes—flowers in resin and gold leaf are popular inclusions. Use completely dried flowers to prevent moisture from causing cloudiness, and add them after a thin seal coat or embed them in a poured layer. For delicate items like dried flowers or gold leaf, pour a thin base layer, place the items, then pour a final layer to encapsulate. This method reduces trapped bubbles and keeps pieces like a resin frame or photo resin coasters looking beautiful.
Q: What safety tips should beginners follow when working with epoxy and resin?
A: Working with epoxy resin requires proper ventilation, nitrile gloves, and eye protection. Avoid skin contact and wash immediately if resin touches skin. Keep resin away from food surfaces unless the product is explicitly labeled food safe. Read the safety data sheet for your resin products and follow instructions like temperature and humidity recommendations to ensure your project will fully cure and be durable.
Q: How do I pour epoxy for clear layers versus deep pour epoxy for larger jobs?
A: For thin items like coasters, pour epoxy resin in 1/8″ to 1/4″ layers and allow to cure between pours if adding inclusions. For deep pour epoxy, use a product formulated for thicker pours and pour in controlled increments to manage heat build-up. Deep pour epoxy is ideal for larger projects like river tables or table top epoxy but requires specific resin designed for larger volumes and careful attention to curing and heat management.


