


Why Make Your Own Wooden DIY Plant Stands for Your Home Decor?
Making your own wooden plant stands allows for customization and personalization, enabling you to tailor your plant display to fit your home decor and style. By choosing the type of wood, design, and size, you can create a unique piece that complements your indoor space and elevates your greenery.
Benefits of Elevating Your Plants and Greenery
Elevating your plants on a wooden stand can significantly enhance their display and overall health. By lifting them off the floor, you improve air circulation around the plants, which can help prevent fungal diseases. A taller planter stand can also help smaller plants get more sunlight, especially in rooms with limited natural light. Moreover, elevated plants are more visible, making them a great way to showcase your favorite indoor plants. This can add a decorative element to any room, creating a more welcoming and lush atmosphere. Elevating plants also makes them easier to care for, as they are more accessible for watering and pruning. This simple adjustment can make a big difference in the overall appearance and well-being of your plants.
Cost Savings of DIY vs. Store-Bought Plant Stands
Creating your own wooden plant stands can result in significant cost savings compared to buying pre-made stands. By sourcing materials yourself, you can avoid the markup associated with retail prices. Additionally, DIY projects allow you to repurpose or reuse materials you might already have, further reducing costs. When you choose to make your DIY plant stands, you can also avoid the limitations of store-bought options, selecting materials and designs that fit your budget and style. This flexibility is a major advantage of the DIY approach, making it an attractive option for those looking to enhance their indoor plant display for smaller plants without breaking the bank. There are many free DIY plans available that make it even more accessible.
Beginner-Friendly DIY Plant Stands for First-Time Builders
If you’re just starting out with DIY projects, a beginner-friendly plant stand is a perfect way to build your confidence. Building a plant stand can be a fun and rewarding experience, especially when you choose a project that fits your skill level. For first-time builders, it’s essential to start with simple designs that require minimal tools and expertise.
No-Drill Plant Stand Options for an Easy DIY Project
One of the easiest ways to create a plant stand without any drilling is to use pre-cut wood or repurpose existing furniture. You can find pre-cut wood at most hardware stores, which comes in various sizes and types, making it ideal for easy DIY projects. No-drill plant stands are perfect for renters or those who prefer not to make permanent changes to their space. This approach is perfect for a crafty and quick home decor makeover.
Simple Designs Using Pre-Cut Wood
Using pre-cut wood simplifies the building process, as it eliminates the need for measuring and cutting. Simple designs like a three-tiered plant stand or a minimalist wooden shelf can be achieved with pre-cut wood. These simple designs not only save time but also ensure that your first DIY project is both fun and successful. You can further customize your plant stand with paint, stain, or decorative items to match your home decor and make it a designer piece.
Creative Upcycling: From Stair to Plant Stand
Think outside the box by upcycling old items into unique plant stands. An old wooden stair ladder can be transformed into a charming, rustic ladder plant stand perfect for displaying multiple potted plants. Similarly, wooden crates can be stacked or mounted to create a modular plant display. This is a fantastic way to create a free DIY planter stand with character, adding a personal touch to your patio or living room.
Essential Tools and Materials for DIY Plant Stands
The foundation of a great DIY plant stand lies in choosing the essential tools and materials. Building a plant stand that’s both functional and aesthetically pleasing requires careful planning and the right equipment. Having the correct materials and tools on hand before you begin your woodworking project will ensure a smooth process.
Basic Tools Every Plant Stand Builder Needs
To start your project, you’ll need some basic tools. These typically include a saw for cutting wood, a drill for making holes for screws or dowels, a hammer for tapping pieces into place, sandpaper for smoothing out the wood surfaces, and a measuring tape to ensure accuracy. For beginners, simple tools are often enough, but as you tackle more complex plant stand plans, you might consider investing in power tools. Additionally, having clamps on hand can be very helpful for holding your project together while the glue dries. Investing in quality tools can make a significant difference in the outcome of your project. While it might be tempting to opt for the cheapest options, better tools usually mean more precise cuts, easier assembly, and a more professional finish.
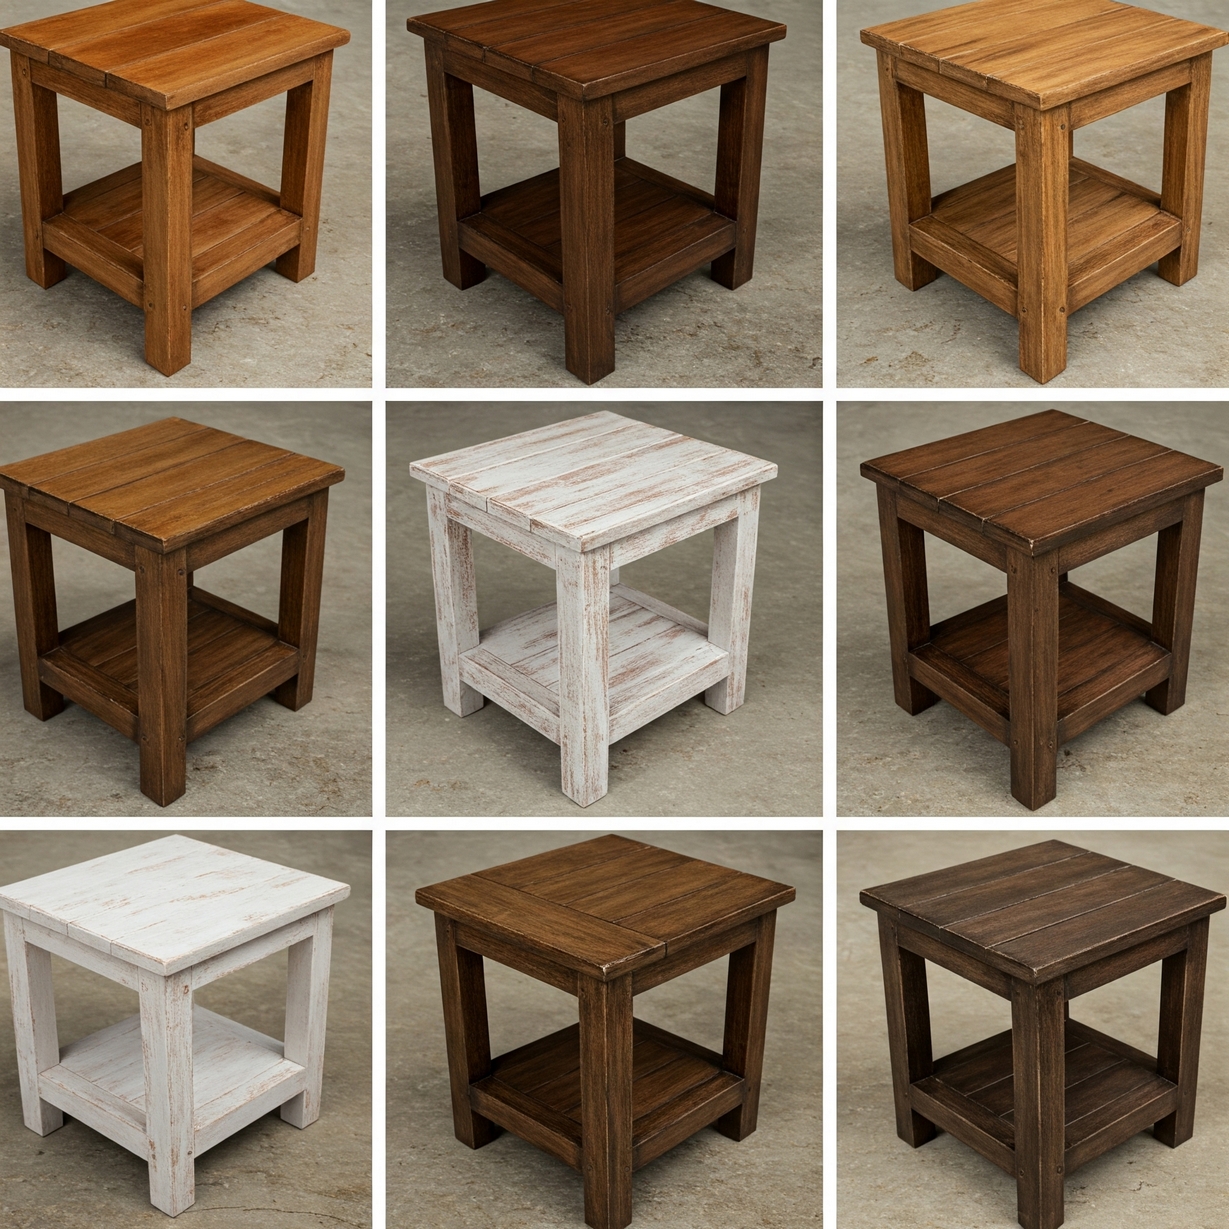
Recommended Wood Types for Wooden Stands
The type of wood you choose can greatly affect the durability and appearance of your plant stand. Pine and cedar are popular choices for DIY projects because they are relatively inexpensive and easy to work with. For a more premium look, consider using walnut or oak, which offer a rich, luxurious appearance. Softer woods like spruce are also a great option for indoor plant stands. Wooden dowels are also a versatile material for creating the frame or supports of your plant stand. When selecting wood, consider factors like durability, resistance to moisture, and the overall aesthetic you want to achieve. Different types of wood can complement various home decor styles, from rustic to modern.
Safety Considerations When Building DIY Plant Stands
As you embark on building your own wooden plant stands, safety considerations are paramount to prevent injuries and damage. Ensuring a safe working environment and a stable final product requires attention to detail and adherence to safety guidelines.
Power Tools and Safety Tips
Tool safety is a critical aspect of any DIY project. To minimize risks, always wear protective gear such as safety glasses and gloves when handling power tools or sharp objects. Familiarize yourself with the operation manual of each tool, and ensure you’re using the correct tool for the task at hand. When you drill holes, secure the wood properly to prevent it from slipping. Regularly inspect your tools for damage or wear, and maintain them according to the manufacturer’s instructions. Additionally, keep your workspace clean and organized to avoid accidents caused by tripping or misplaced tools. By following these tool safety tips, you can significantly reduce the risk of injury during your DIY plant stand project.
Ensuring Stability for Your Potted Plants
A stable plant stand is essential to prevent your plants from tipping over, potentially causing damage or injury. To ensure stability, design your plant stand with a low center of gravity by using a wide base or adding weight to the bottom. Use sturdy materials and construction methods to support the weight of your plants, and avoid overloading your stand with too many or too heavy plants. For taller plant stands, consider securing them to a wall. By prioritizing stability in your DIY plant stand design, you can enjoy your plants without worrying about accidents. Consider the size and weight of your plants when building your stand, and take necessary precautions to secure it firmly on the floor.
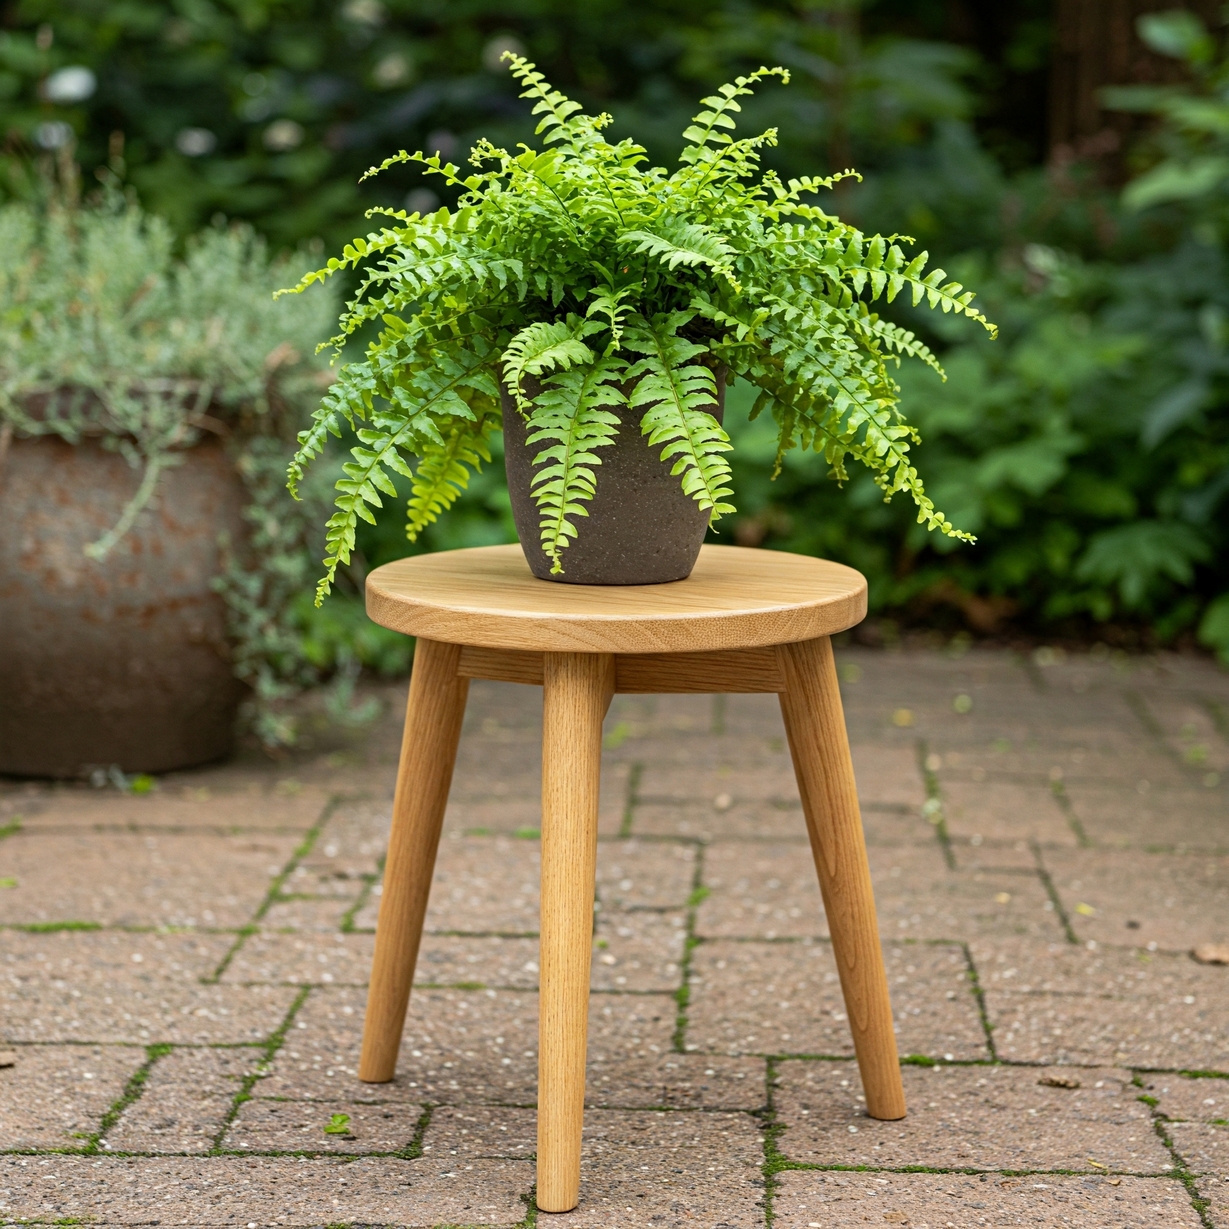
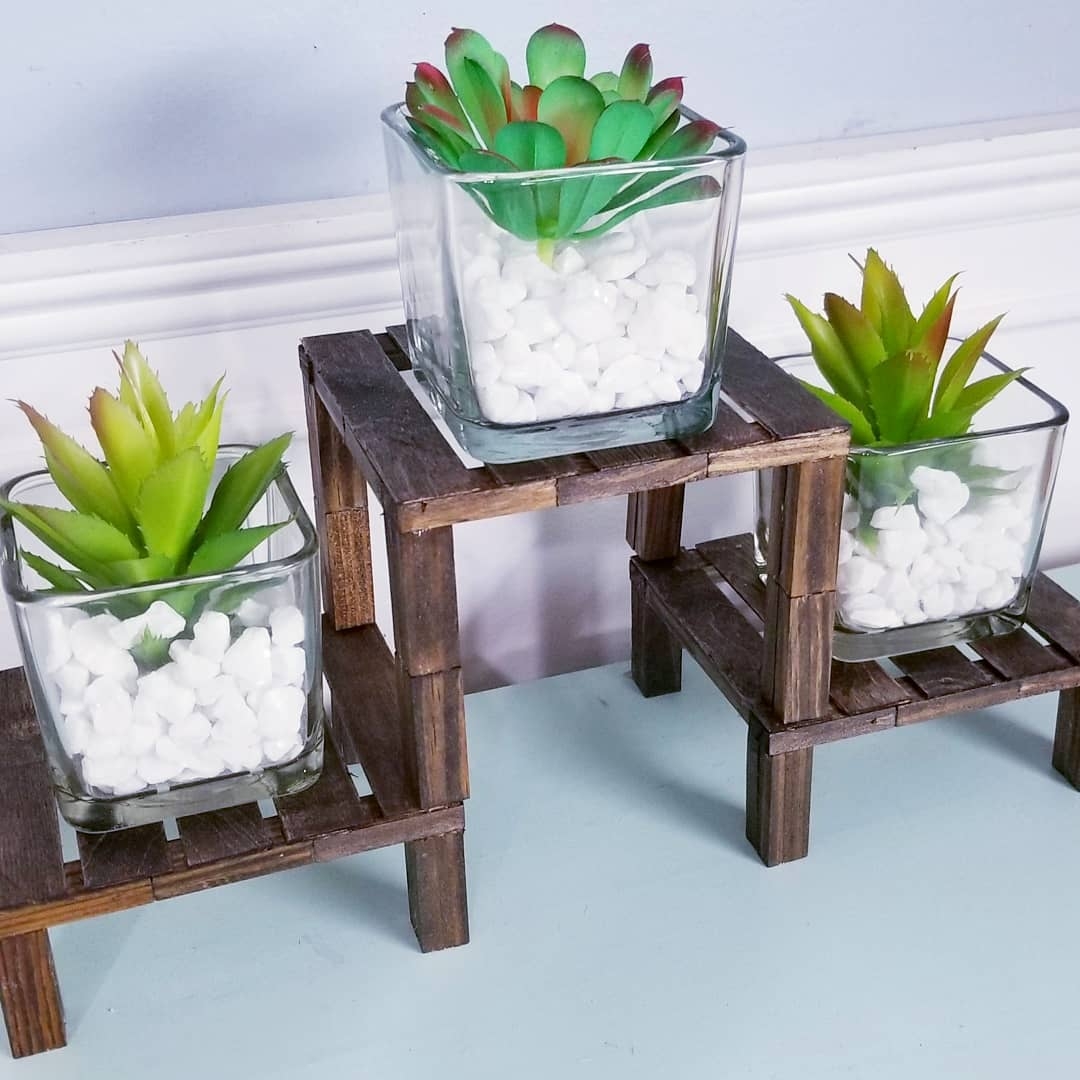
1. Simple Three-Legged Wooden Plant Stand
With just a few basic tools and materials, you can craft a beautiful three-legged wooden plant stand to elevate your plants. This project is perfect for beginners and experienced woodworkers alike, offering a great way to add some greenery to your home decor. This simple design is incredibly versatile and works well on a patio, front porch, or as a corner accent indoors.
Materials and Tools Needed
To start, you’ll need the following materials:
- Three wooden legs (e.g., oak or pine)
- One wooden top (matching the leg material)
- Wood screws
- Wood glue
- Sandpaper
- Optional: stain or paint for finishing
The necessary tools include a saw, drill, screwdriver, and sandpaper. Ensuring you have all the required materials and tools before starting will make the process smoother.
Step-by-Step Building Instructions
Follow these steps to build your simple three-legged wooden plant stand:
- Cut the three legs to the desired length, ensuring they are even.
- Cut the wooden top to the desired size.
- Assemble the legs by attaching them to the top using wood screws and glue.
- Sand the entire stand to smooth out any rough edges.
- Optional: Apply stain or paint to match your home decor.
This step-by-step guide will help you create a sturdy and stylish plant stand.
Finishing and Customization Options
Once your stand is assembled, you can customize it to fit your style. Consider applying a stain or paint to match your existing decor. You can also add decorative elements, such as metal brackets or carvings, to give your stand a unique touch. The customization options are endless, allowing you to personalize your plant stand to suit any room or even your front porch.
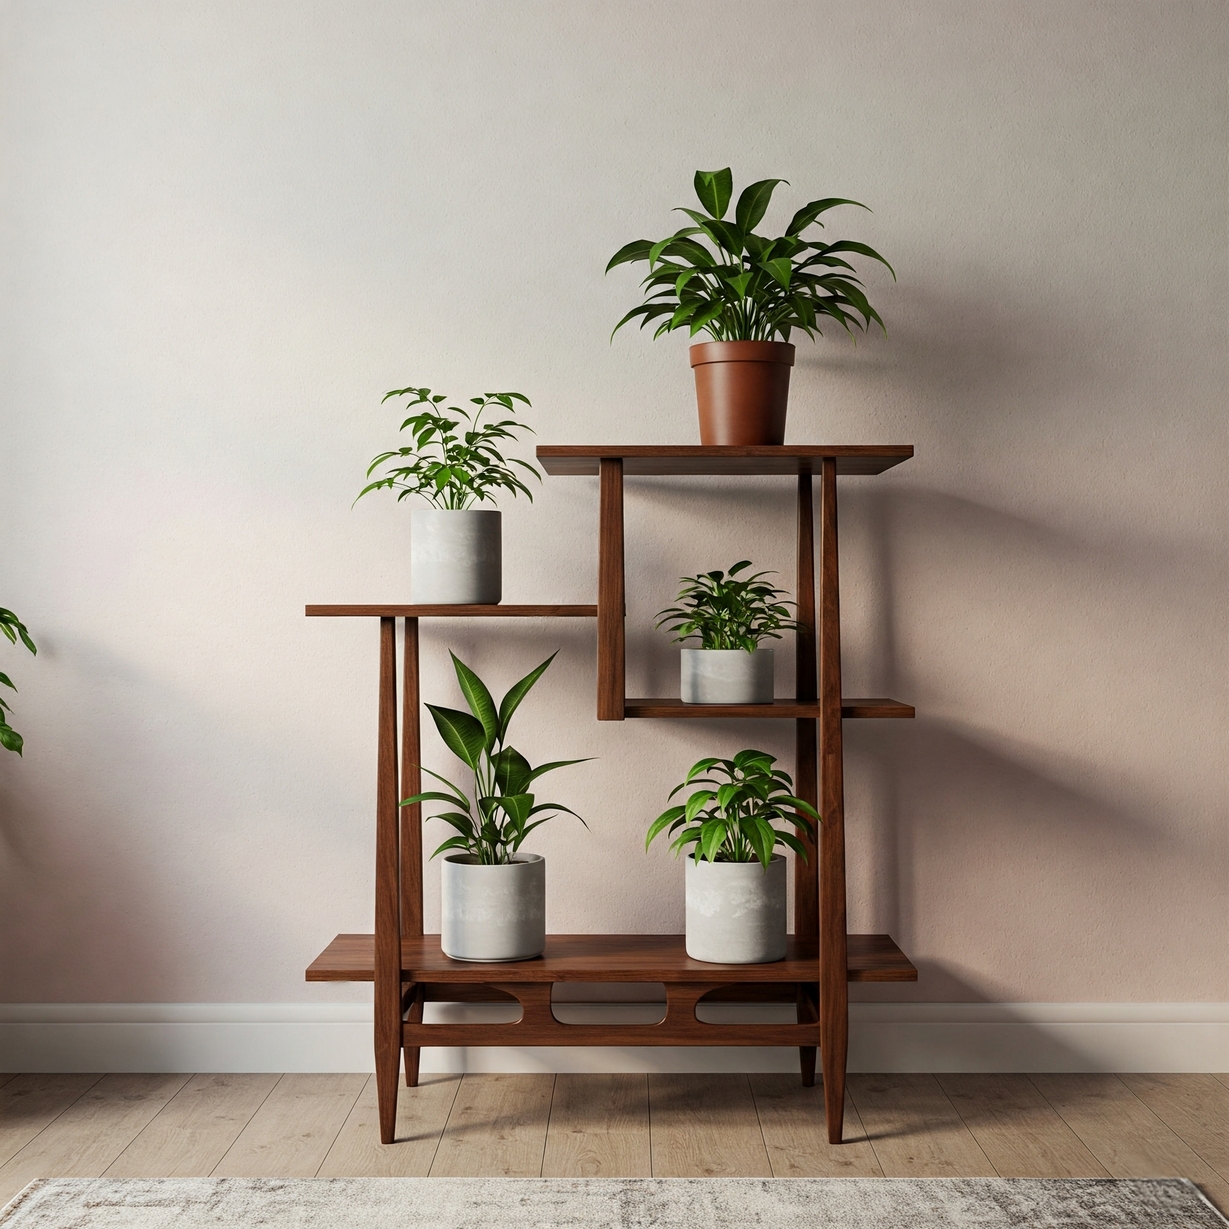
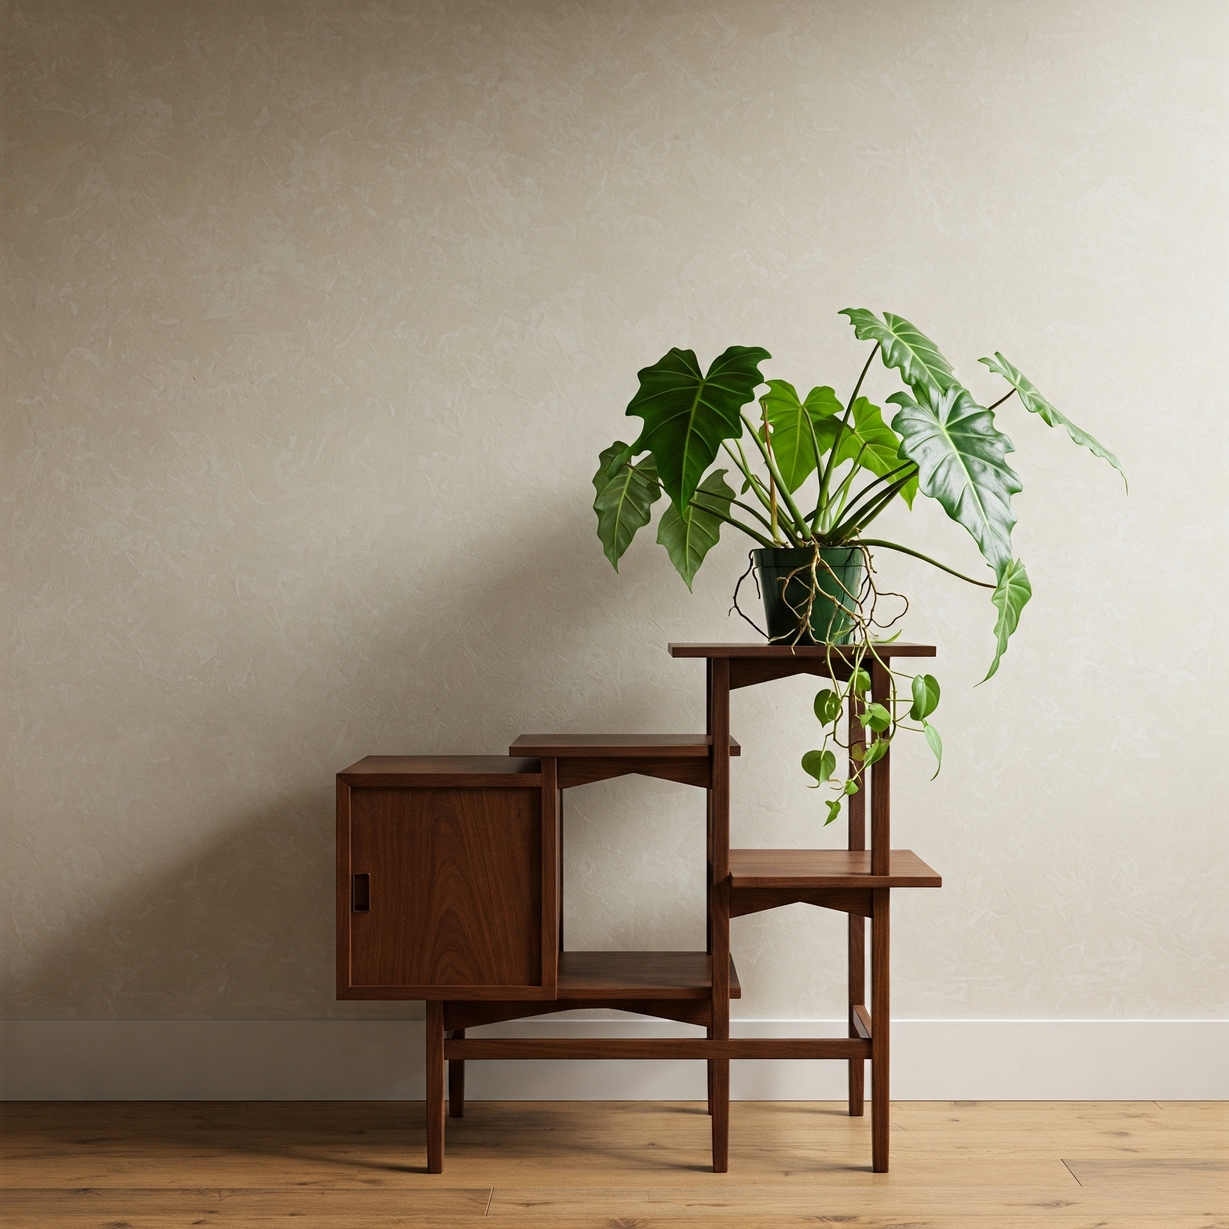
2. Mid-Century Modern Style Plant Stand
For those who appreciate the clean lines and organic shapes of mid-century modern furniture, building a plant stand in this style can be a rewarding DIY project. This design combines simplicity with functionality, making it perfect for indoor spaces and giving your decor a sophisticated, designer feel.
Materials and Tools List
To start, you’ll need high-quality wood such as solid oak, teak, or walnut, which are characteristic of mid-century modern furniture for their durability and aesthetic appeal. The necessary tools include a table saw, drill press, and sandpaper. For finishing, consider using Minwax wood stain to achieve the signature look.
- 1″ thick solid wood (oak, walnut, or teak)
- Table saw
- Drill press
- Sandpaper
- Minwax wood stain
Construction Process
The construction process involves cutting the wood into the required pieces for the stand’s legs, frame, and shelf. Precision cutting is crucial to achieve the clean lines associated with mid-century modern design. Assemble the pieces using wood glue and dowels for added strength. An easy build can consist of two interlocking pieces that form an ‘X’ shape to hold the pot.
- Cut the wood according to your design plan.
- Assemble the legs and frame.
- Attach the shelf.
Staining and Finishing Tips
To achieve the mid-century modern style, focus on staining and finishing techniques that enhance the wood’s natural beauty. Apply Minwax wood stain evenly and consider a matte or satin finish to maintain the understated elegance of the design. By following these steps, you can create a beautiful mid-century modern plant stand that adds a decorative touch to your home.
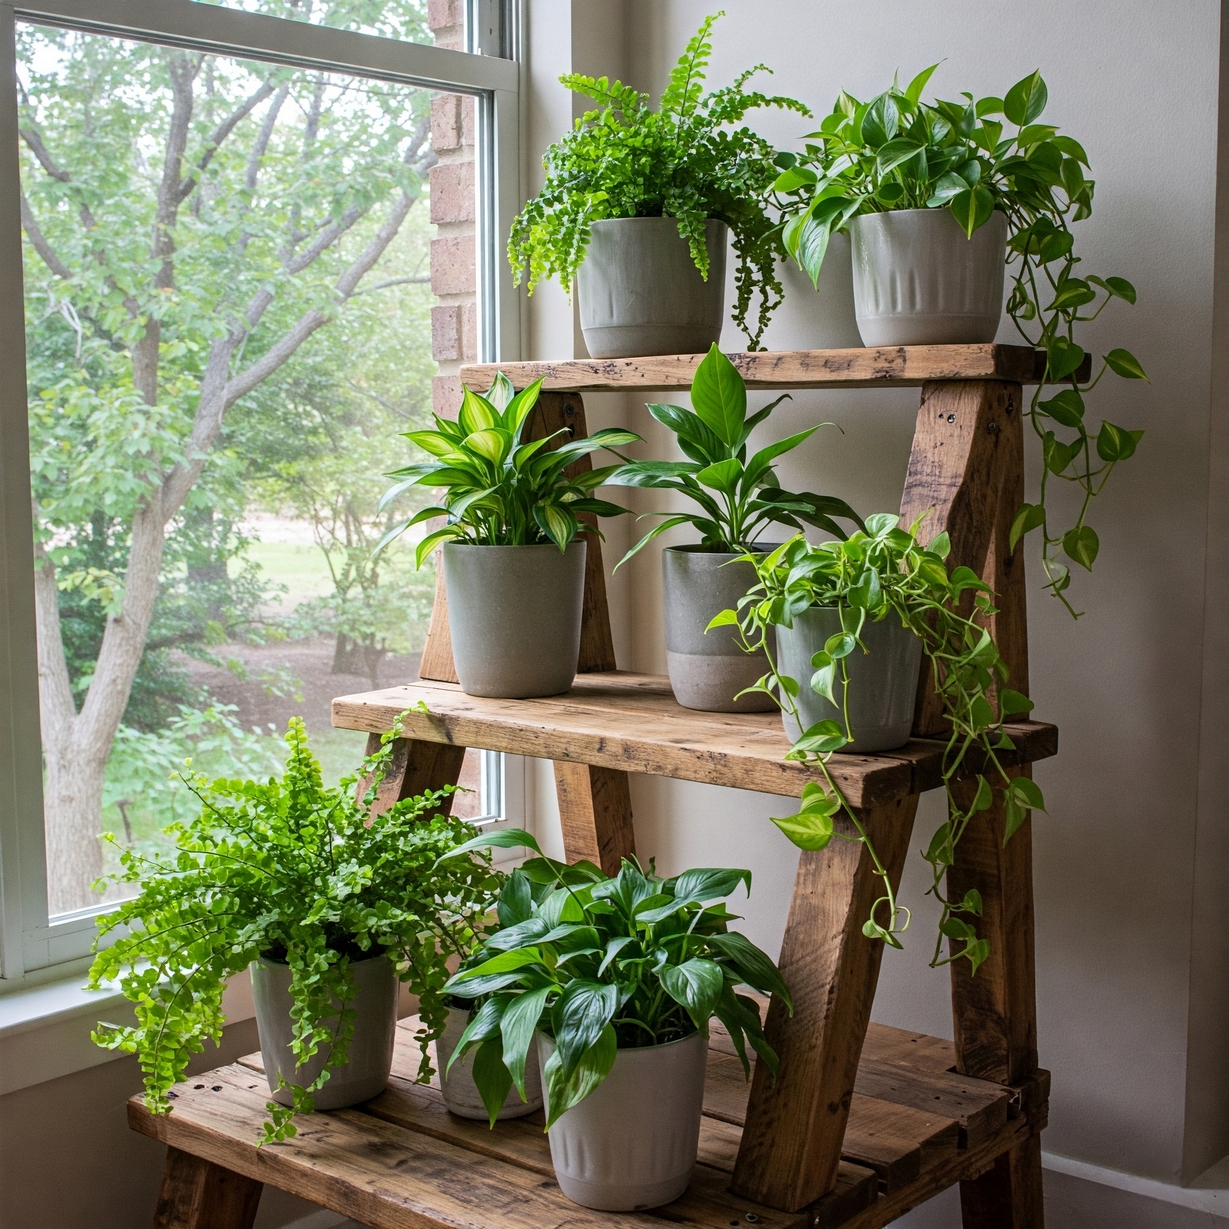
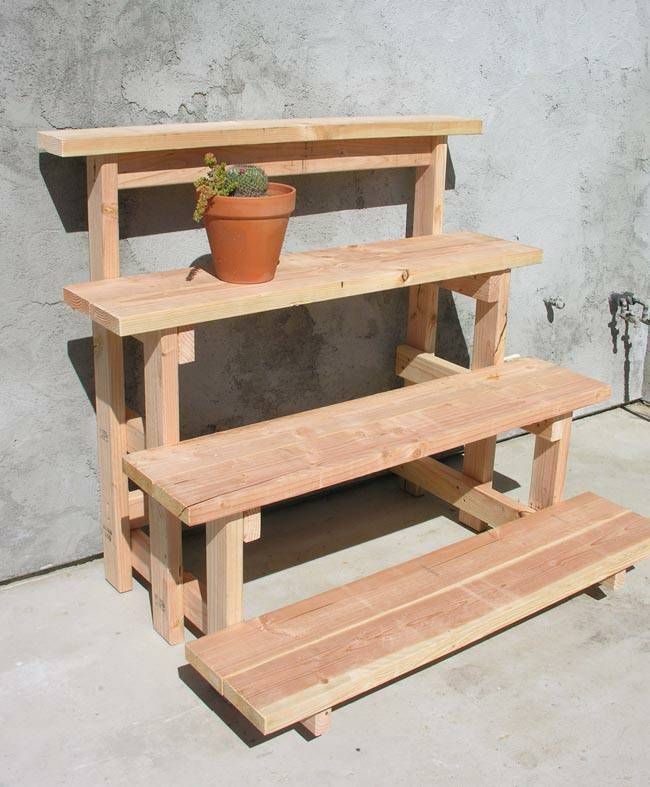
3. Tiered Wooden Plant Display Shelf
Building a tiered wooden plant display shelf is a fun DIY project that can enhance your home decor. This type of plant shelf is perfect for displaying multiple plants, adding a touch of greenery to any room. You can even use one tier to create a small, accessible herb garden. By elevating your plants, you not only create a visually appealing display but also make the most of your space.
Materials and Tools Required
To start your project, you’ll need a few basic materials and tools. The essential materials include wooden planks or boards, wood screws, and wood glue. For tools, you’ll need a saw, drill, and sandpaper. You may also want to have wood stain or paint on hand to finish your shelf.
Assembly Instructions
Assembling your tiered wooden plant display shelf involves several straightforward steps. First, cut your wooden planks to the desired length for each tier. Next, assemble the frame using wood screws and glue. Then, attach the tiers to the frame, ensuring they are evenly spaced. Finally, sand the entire shelf to smooth out any rough edges.
Placement and Styling Ideas
Once your tiered shelf is assembled and finished, it’s time to place it in your home and style it with your plants. Consider placing it in a corner or against a blank wall to add visual interest. You can also use it to create a free DIY plant stand that showcases your favorite display plants. A tiered plant stand is also perfect for creating a lush green wall by placing multiple plants on each tier. Experiment with different plant sizes and types to create a unique display that reflects your personal style.
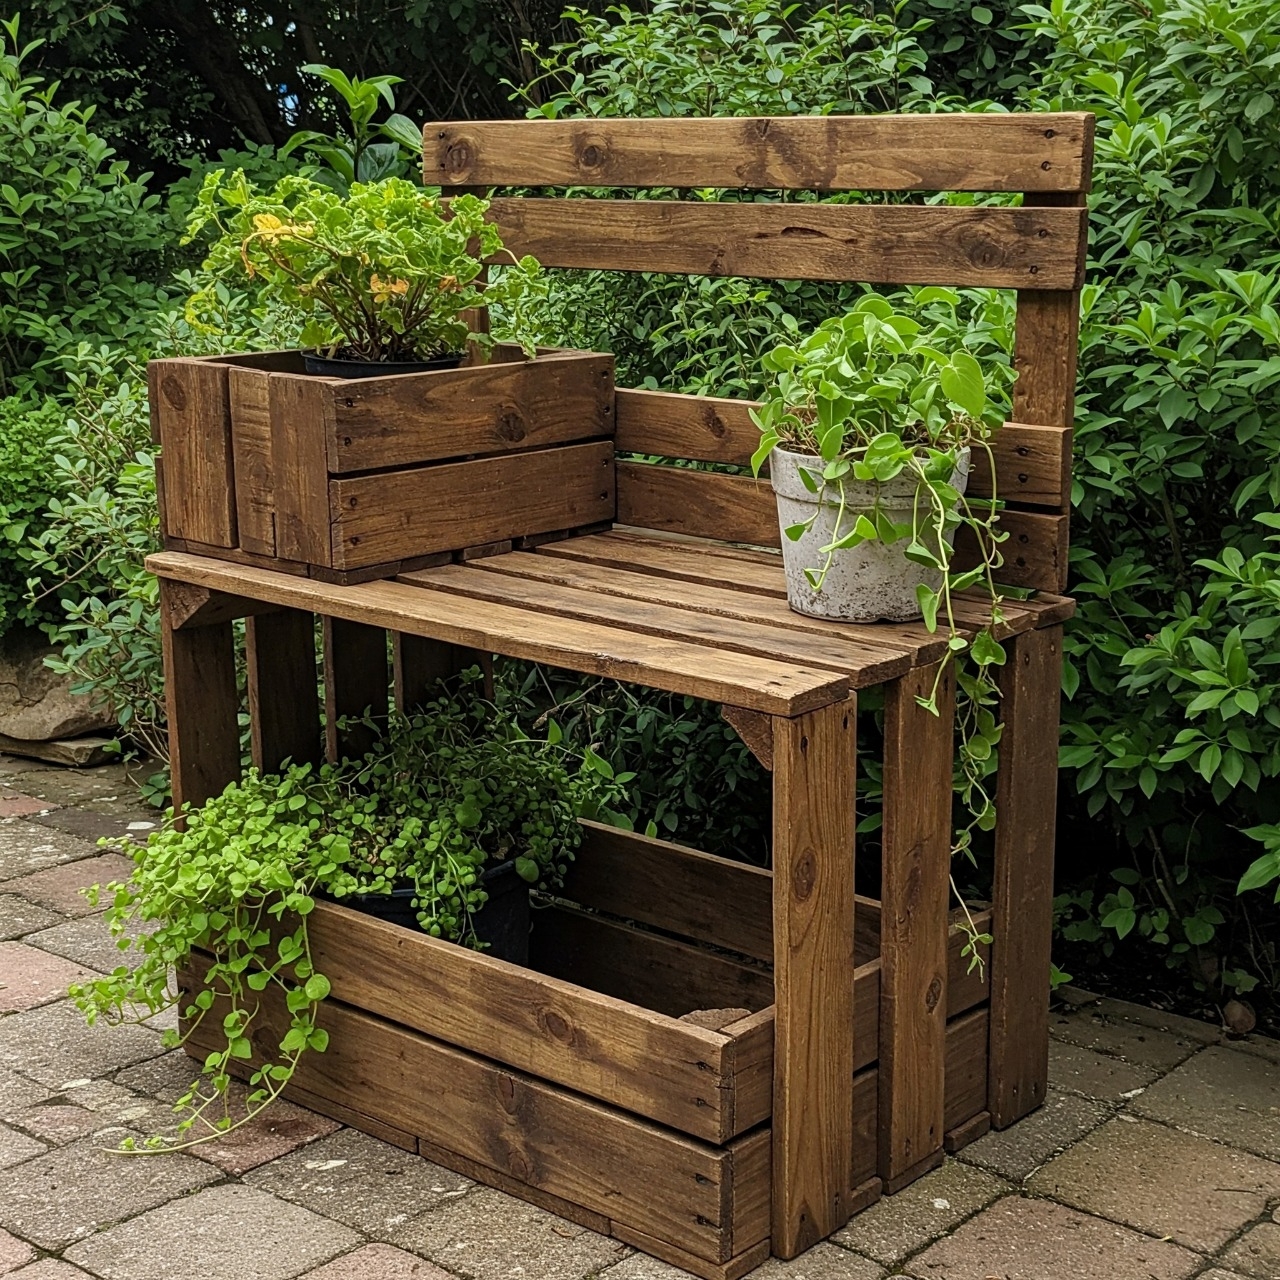
4. Rustic Crate Plant Stand
Creating a rustic crate plant stand is a fantastic way to add a touch of countryside charm to your patio or garden. This DIY project is perfect for those who love upcycling and giving old materials a new life. By repurposing wooden crates, you can create a unique and functional piece that not only holds your plants but also adds a decorative element to your outdoor space. Give the crate a makeover with a pop of color to turn it into a designer feature.
Materials and Tools List
To start your project, you’ll need a few basic materials and tools. The primary material is a wooden crate, which can be sourced from local stores or online marketplaces. You’ll also need a drill, screws, a hammer, and some weatherproof glue. Depending on your design, you might want to add some decorative elements like nails or metal straps.
- 1 wooden crate
- Drill and drill bits
- Screws
- Hammer
- Weatherproof glue
- Optional: decorative nails or metal straps
Building Process
The building process involves disassembling the crate, if necessary, and reassembling it into the desired form. You can choose to keep the crate’s original structure or break it down and use the wood to create a more complex design. Measure carefully to ensure your plant stand is sturdy and level. Use screws to secure the pieces together, and apply weatherproof glue to reinforce the joints. Once you have the basic structure, you can add any decorative touches, such as nailing on metal straps or adding a wooden topcoat.
Weatherproofing for Outdoor Use
To make your crate plant stand suitable for outdoor use, apply a weatherproof sealant to protect the wood from moisture and UV damage. This step is crucial for extending the lifespan of your plant stand and ensuring it remains in good condition despite exposure to the elements. Proper sealing makes the wood durable and ready for your outdoor plants.

5. Ladder-Style Plant Stand
Create a visually appealing display with a ladder-style plant stand that adds a touch of modernity to any room. This type of planter stand is not only functional but also serves as a decorative piece, making it perfect for indoor spaces. A ladder plant stand is an excellent choice for displaying a variety of smaller plants and creating a lush, vertical garden effect. If you want to enhance your display plants, consider building this stylish wood plant stand.
Materials and Tools Needed
To build a ladder-style plant stand, you will need the following materials and tools:
- 2″ x 4″ lumber for the frame
- 1″ x 2″ lumber for the shelves
- Wood screws
- Drill
- Saw
- Sandpaper
- Paint or stain (optional)
Construction Steps
Follow these steps to construct your ladder plant stand:
- Cut the 2″ x 4″ lumber into the required lengths for the frame.
- Assemble the frame using wood screws.
- Cut the 1″ x 2″ lumber for the shelves and attach them to the frame.
- Sand the entire structure to smooth out any rough edges.
- Optionally, paint or stain the plant stand to match your desired color and style.
Decorating Your Ladder Plant Stand
To enhance the aesthetic appeal of your ladder plant, consider these decorating ideas. Use a mix of plant sizes and types to create visual interest. Add decorative pots or planters to complement the stand. You can also incorporate other decorative elements like candles, vases, or artwork around the stand.
| Material | Quantity | Description |
|---|---|---|
| 2″ x 4″ lumber | 4 pieces | Frame |
| 1″ x 2″ lumber | 6 pieces | Shelves |
| Wood screws | 1 pack | Assembly |
| Drill | 1 | Tool |
| Saw | 1 | Tool |
| Sandpaper | 1 pack | Finishing |
| Paint or stain | 1 can | Optional |

6. Rolling Plant Stand with Casters
If you’re looking for a way to easily move your plants around, consider building a rolling plant stand. This project is perfect for those who want to add some greenery to different areas of their home or office without the hassle of heavy lifting. This mobile planter is especially useful for large, heavy concrete planters or for outdoor plants on a patio that need to be moved to follow the sun.
Materials and Tools Required
To build a rolling plant stand, you’ll need a few basic materials and tools. These include a wooden top, four wooden legs, casters (preferably with brakes for stability), screws, a drill, sandpaper, and a wood finish (optional).
| Material/Tool | Quantity/Purpose |
|---|---|
| Wooden Top | 1 piece for the stand’s surface |
| Wooden Legs | 4 pieces for the stand’s legs |
| Casters | 4 units for mobility |
| Screws | For assembling the stand |
| Drill | For drilling screw holes |
| Sandpaper | For smoothing the wood surface |
| Wood Finish | For protecting and enhancing the wood |
Building Instructions
Building your rolling plant stand involves several straightforward steps:
- Cut the wooden legs to the desired height.
- Attach the casters to the bottom of the legs.
- Assemble the stand by attaching the wooden top to the legs using screws.
- Sand the entire stand to smooth out any rough edges.
- Apply a wood finish if desired to protect the wood and enhance its appearance.
Best Uses for Mobile Plant Stands
Mobile plant stands are ideal for indoor spaces where you want to move plants around seasonally or to different rooms. They’re also great for outdoor spaces, allowing you to easily relocate plants to optimize sunlight exposure.

7. Outdoor Cedar Plant Stand for Multiple Pots
For those looking to organize their outdoor space, a cedar outdoor plant stand for multiple pots is a practical solution. Cedar is renowned for its durable and attractive qualities, making it an ideal choice for outdoor furniture. It naturally resists rot and insects, ensuring your planter stand lasts for years.
Materials and Tools Needed
To start your project, you’ll need the following materials and tools:
- Cedar wood planks
- Wood screws
- Weather-resistant wood glue
- Saw
- Drill
- Sandpaper
The exact quantities will depend on the size of your plant stand. A typical project requires 2-3 cedar wood planks, depending on their width and the design’s complexity.
| Material | Quantity | Purpose |
|---|---|---|
| Cedar Wood Planks | 2-3 | Main structure |
| Wood Screws | 1 pack | Assembly |
| Weather-resistant Wood Glue | 1 bottle | Reinforcing joints |
Construction Guide
The construction process involves cutting the cedar wood planks to the desired length, assembling the frame using wood screws and weather-resistant glue, and sanding the surface to smooth out any rough edges. Pre-drilling screw holes can help avoid splitting the wood. If your pot will sit directly on a solid shelf, consider drilling a few holes for drainage to prevent water from pooling and damaging the wood or the plant’s roots.
Weather Protection Techniques
To protect your outdoor cedar plant stand from the elements, apply a weather-resistant sealant after your easy build is complete. This will help maintain the wood’s integrity and appearance over time. Regular maintenance, such as reapplying sealant as needed, will ensure the stand remains durable and continues to support your plants effectively.

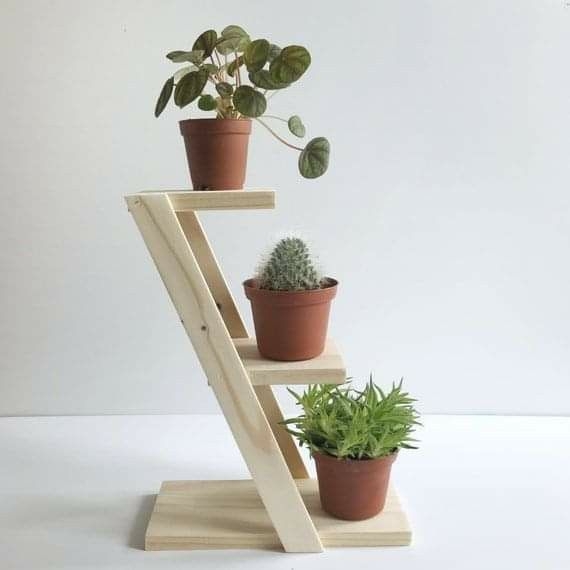
8. Creative Wooden Dowel Plant Stand
With just a few simple materials, you can create a beautiful wooden dowel plant stand that adds a touch of modern elegance to any room. This crafty DIY project is perfect for DIY enthusiasts looking to elevate their plants and their interior design skills. The open, airy design is great for showing off a stylish pot.
Materials and Tools Required
To start, you’ll need a few basic materials and tools. These include wooden dowels, a drill press, a saw, sandpaper, and a wooden base or top. You may also want to have a measuring tape, clamps, and a wood finish of your choice. The beauty of this project lies in its simplicity and the ability to customize it to your needs.
Step-by-Step Instructions
Begin by cutting your wooden dowels to the desired length for your plant stand. Use a drill press to create holes in the base and top for the dowels. Sand the dowels and the base to smooth out any rough edges. Assemble the stand by inserting the dowels into the holes, and secure them with clamps until any adhesive dries. Finally, apply a wood finish to protect your stand and enhance its appearance.
Customization Options
One of the best aspects of this project is its customization potential. You can adjust the height and number of dowels, choose different types of wood, and apply various finishes to match your decor. Consider adding a personal touch with decorative items or painting certain elements to create a unique look. You can make it taller for trailing plants or wider for a large pot.

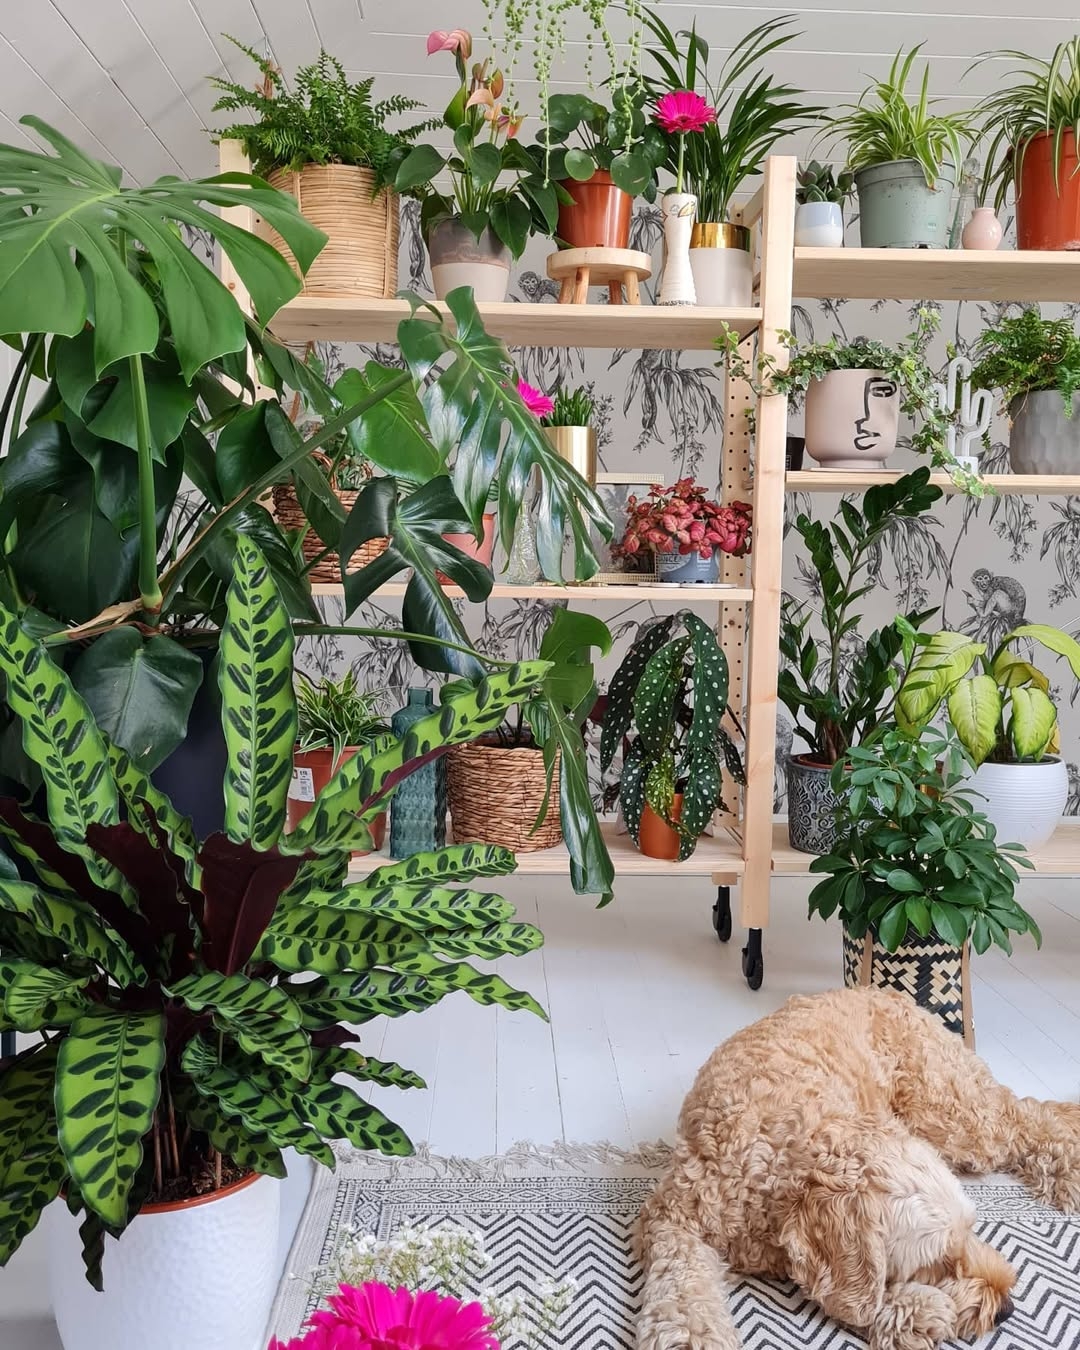
9. Space-Saving Plant Stands for Small Homes
For homeowners with limited space, creating a lush indoor garden can be a challenge, but with the right plant stands, it’s entirely achievable. Small homes require thoughtful furniture choices, and plant stands are no exception. By opting for space-saving designs, you can enjoy the benefits of indoor plants without cluttering your living space.
Corner Plant Stand Design
A corner plant stand is an excellent way to utilize the often-wasted space in corners. These stands can be custom-made to fit snugly into corners, holding multiple plants and adding a touch of greenery to your home. When designing a corner plant stand, consider using a triangular base to maximize space efficiency. This is one of the most effective creative DIY plant stand ideas for compact areas.
Wall-Mounted Plant Shelf & Pegboard Ideas
Wall-mounted planter stands and shelves are another effective way to save space while showcasing your plants. These shelves can be mounted at various heights, creating a visually appealing display. You can choose from a variety of materials, such as reclaimed wood or modern metal frames, to match your home’s decor. For a truly crafty and customizable option, consider a pegboard plant display. You can move shelves and hooks around to accommodate different sized pots and plants.
Window Sill Plant Stand Options
Window sills offer a perfect spot for plants, providing natural light and a beautiful view. A window sill plant stand can be as simple as a wooden plank or as elaborate as a multi-tiered stand. By elevating your plants to window sill height, you can create a stunning display that enhances your home’s ambiance. By incorporating these space-saving plant stand ideas into your small home, you can enjoy the benefits of indoor gardening without sacrificing valuable space.
10. Finishing Techniques for Wooden Plant Stands
Applying the right finishing techniques is crucial for enhancing the look and longevity of your DIY wooden plant stands. A well-finished plant stand not only beautifies your space but also protects the wood from wear and tear. A good finish can take your project from homemade to designer.
Staining Options for Different Wood Types
The type of wood you’re working with will dictate the best staining option. For instance, oak and pine woods take stain differently due to their grain patterns. Consider using a wood conditioner before applying a wood stain to achieve a uniform color, especially on softwoods.
- For softwoods like pine or spruce, a pre-stain conditioner is recommended.
- Hardwoods such as oak or walnut can directly take on a variety of stains.
- Always test the stain on a small, inconspicuous area first.
Protective Sealants for Indoor and Outdoor Use
Protective sealants are vital for safeguarding your wooden plant stand against moisture, UV rays, and other environmental factors. For indoor plant stands, a water-based polyurethane is often sufficient, while an outdoor plant stand requires more robust protection, such as oil-based polyurethane or varnish.
- Apply a thin coat of sealant, allowing it to dry completely before applying the next coat.
- For outdoor stands, consider using a sealant with UV protection to prevent fading.
Adding Decorative Elements and Personal Touches
Adding decorative elements can personalize your plant stand and make it stand out. Consider using metallic paints, decoupage, or even a bold pop of color to add a unique touch. For an industrial-modern look, you could place concrete planters on your finished wooden stand. These final details are what truly customize your piece.
- Use metallic paint to highlight the stand’s design elements.
- Decoupage can add a vintage or artistic flair.
- Intricate carvings can give your stand a handmade, bespoke feel.
More DIY Plant Stands


Conclusion: Bringing Your DIY Plant Stands to Life
As we’ve explored the world of DIY plant stands, it’s clear that creating your own wooden plant stands can be a rewarding and stylish way to enhance your home decor. By elevating your plants, you not only add a touch of greenery but also bring a sense of life to your living spaces. With the various designs and projects outlined in this article, you’re now equipped to start your DIY journey. Whether you’re a beginner or an experienced builder, these projects offer a chance to get creative and add a personal touch to your home.
DIY plant stands are not just functional; they’re also a way to showcase your style and flair. By choosing the right wood type, design, and finishing techniques, you can create a truly unique piece that complements your home decor. So, get started on your DIY plant stand project and watch your plants thrive in their new stylish homes. You can find many plant stand plans online, but the best ones are those you customize.
By bringing your DIY plant stands to life, you’ll not only be enhancing your home’s aesthetic but also enjoying the satisfaction of creating something with your own hands. So, gather your tools, drill holes for stability, pick your favorite design, and start building your way to a more beautiful and greenery-filled home.
FAQs
Q: Where can I find good DIY plant stands plans to get started?
A: You can find many free diy plant stand plans online on woodworking blogs and sites like Pinterest. The key is to find plant stands you can make with the simple tools you have. Look for a step-by-step guide to make your first easy build successful.
Q: How do I give my plant the best support with a DIY stand?
A: To give your plant the best support, ensure your wooden plant stand is sturdy and has a wide, stable base, especially for a taller potted plant. When you assemble the stand, use both wood glue and screws, and drill holes carefully to avoid weakening the structure.
Q: What’s an easy way to give my old wooden plant stand a quick makeover?
A: A quick makeover for an old wooden plant stand can be achieved with a fresh coat of paint. Adding a pop of color or a new wood stain can completely transform its look. You can also decorate it by adding stylish new pots or arranging a lush display of greenery.
Q: Are there any unique plant stands I can build besides using wood?
A: Absolutely! While wooden stands are popular, you can get creative with materials like copper pipes, cinder blocks, or even create unique plant stands from upcycled items like an old stair or drawers. A pegboard plant shelf is another crafty and modern option.
Q: Can I use one of these designs for an herb garden?
A: Yes, a tiered plant shelf or a ladder plant stand is perfect for creating a compact herb garden. This setup allows you to keep different herbs like basil, mint, and rosemary organized and gives each potted plant enough space and light, whether on your kitchen counter or patio.


Discussion about this post