

Selecting Optimal Cotton Cord Weights And Textures
A 4mm single-twist cotton cord gives you the ideal balance of soft drape and easy knotting for your first projects. This specific weight holds the shape of your square knots beautifully without feeling stiff or bulky in your hands. You will notice the unbleached, natural color adds that essential organic warmth to your finished piece right from the start. Trust me on this, the cord’s texture is key, and exploring easy macrame for beginners means choosing the right materials first. A single-twist construction frays perfectly when you want that lovely brushed fringe at the end, but it stays neat and tidy while you work. Beginners often pull knots too tight, but this forgiving cord lets you adjust your tension without losing the soft, flowing look we all love in macrame. The fiber stays manageable through long practice sessions, keeping your hands comfortable as you learn.
Preparing Your Workspace With Proper Anchoring Points
A sturdy wooden dowel clamped securely to your table is the best foundation for learning consistent knot tension. This setup keeps your work from sliding around, so you can focus on making each loop uniform. You want to avoid any wobble in your anchor point, as that uneven pull is what distorts your pattern and creates frustrating gaps. We tend to underestimate how much physical space a simple wall hanging needs, so give yourself plenty of room to let the cords fall straight. Setting up a proper anchoring point is essential when you tackle easy macrame for beginners, and that clean vertical alignment prevents knots from drifting diagonally across the work.
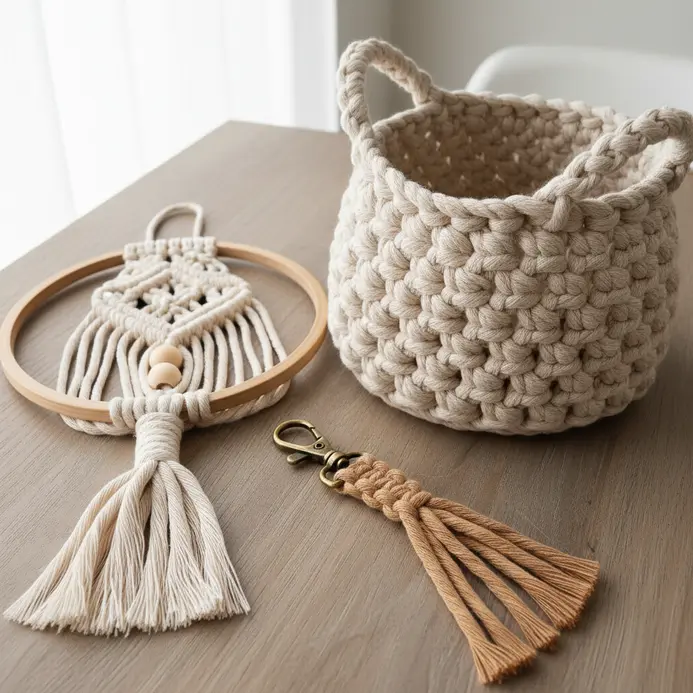
1. Build a Minimalist Natural Cotton Key Chain
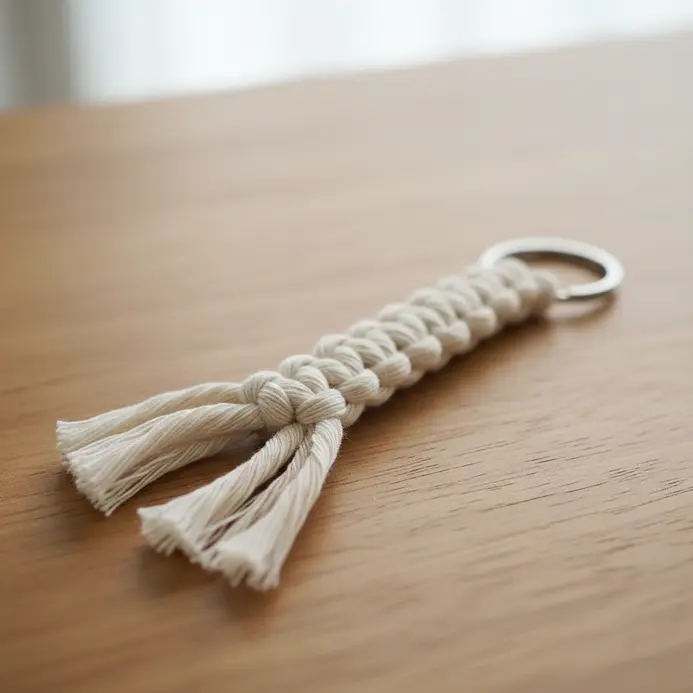
Ever wanted a keychain that feels clean and personal, perhaps inspired by simple macrame designs? This project is your perfect start because it introduces you to foundational knotting without overwhelming your hands. Grab a piece of natural cotton cord, fold it in half, and attach it to a key ring with a simple Lark’s Head knot. Then, just tie a single overhand knot with both strands to form the body. Pull it tight and trim the ends for a neat finish, just like in any first macrame project. This project is the perfect introduction to easy macrame for beginners because it relies on a single overhand knot. I love how this one feels in your hand, acting as a perfect little anchor for your keys. It works because the cotton is durable and softens over time, making it both sturdy and lovely to touch. For a clean look, lightly singe the trimmed ends with a lighter if you are confident. You can explore other easy crafts once you have mastered this knot.
2. Create a Tapered Succulent Macrame Plant Hanger
This one looks so elegant, but it is built from the simplest macrame knots you already know. You start by attaching your cords to a wooden ring and grouping them to make a wide top section. Then, you create staggered rows of square knots to form that gentle taper that perfectly hugs your little succulent pot. That gradual narrowing creates a beautiful, modern silhouette that makes any succulent look like a piece of art, which is exactly what makes this piece ideal for easy macrame for beginners looking to try plant hangers. Your key to success here is maintaining consistent tension on every single knot, keeping your hanger symmetrical as it narrows. What I love about this design is how the shape does the work for you, securely cradling the pot without any fuss. Give it a try and feel proud when you hang up your first handmade piece of plant decor.
3. Assemble a Boho Wooden Ring Wall Hanging

This one looks intimidating, but trust me, it is all about playing with shapes and textures. You will start by laying out your wooden rings on a flat surface, arranging them in a pleasing, slightly asymmetrical cluster. Then, use lengths of macrame cord to tie the rings to a top dowel rod and to each other, leaving some tails dangling for fringe. Arranging these shapes on a flat surface simplifies the entire process, proving that easy macrame for beginners really relies on planning before you start tying. This is where you get to personalize your piece completely. Slide on some natural wood beads or tie in a few ethically sourced feathers for extra charm. I love adding a small, dried floral bundle for a soft pop of color. You can find great seasonal crafting inspiration to keep your creative momentum going. The beauty of this project is its forgiving, organic nature, making it a great introduction to basic macrame, so you can relax and enjoy the process.
4. Make a Geometric Square Knot Coaster Set
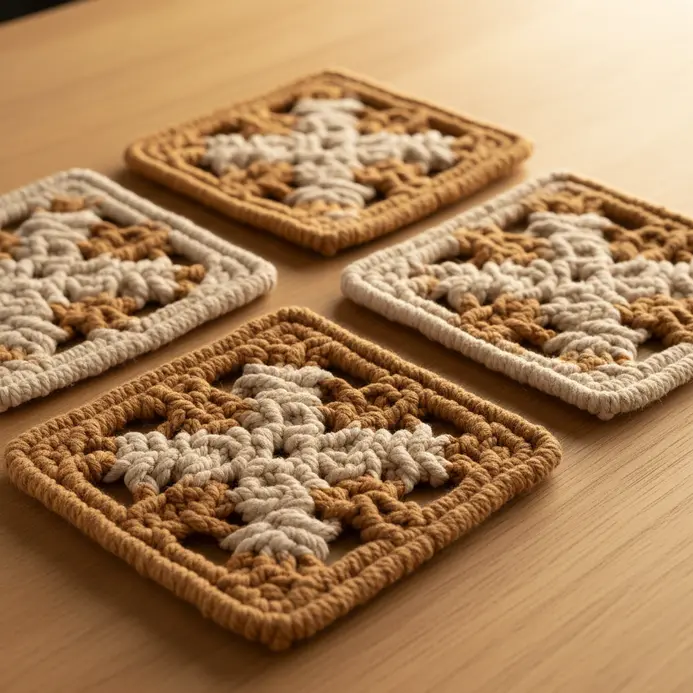
This one looks intricate, but trust me, the pattern is built on one simple knot repeated. You will create a flat, functional coaster by tying square knots over two straight filler cords while keeping the geometric shape crisp and even. I love using soft 3mm cotton cord for this specific application since it remains forgivable for newer hands and gives a lovely texture. You will be amazed at how quickly a set comes together once you get the rhythm down. Practicing that rhythm will quickly show you how easy macrame for beginners truly becomes once your muscles memorize the movement. If you enjoy this kind of hands-on making, you might also like these Simple home craft projects like DIY macrame can be both fun and rewarding. for more creative fun. Give those knots a firm, even pull and feel proud of your new, handmade decor. Isn’t it satisfying to make something both beautiful and useful?
5. Build a Textured Fringe Tassel Wall Banner
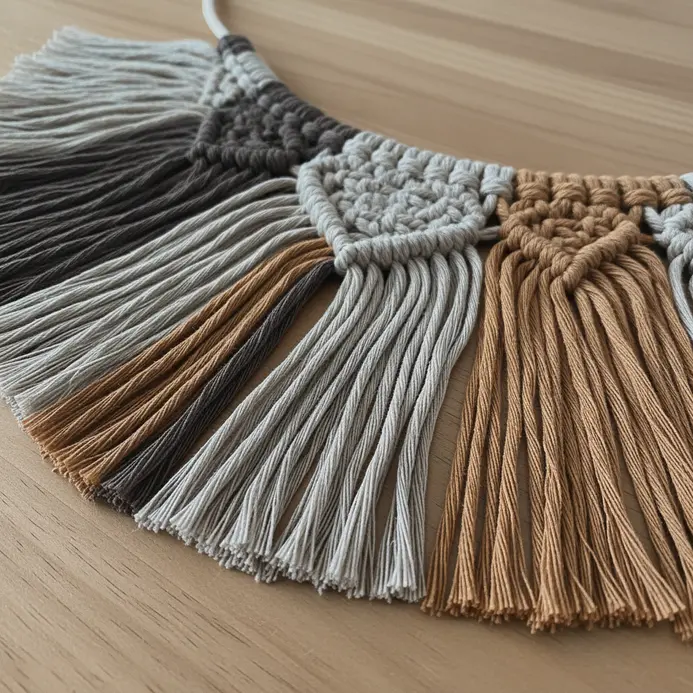
Ever wondered how those gorgeous, boho-chic banners get their amazing depth? The secret is all in the mix of materials you gather at the start. You will begin by collecting a wild variety of yarns and fibers like chunky wool, smooth cotton, fluffy roving, or even some jute ribbon. Then, you will cut them into long strands and attach them to a simple dowel rod, layering the different textures together to build volume. Layering these different fibers together creates depth fast, which is a favorite trick in easy macrame for beginners tutorials looking for quick visual impact. This approach works because the contrast between shiny and matte, thick and thin, is what creates that rich, inviting look. My favorite part is brushing out some of the unspun wool with an old comb to make it extra fluffy and wild. Trust me, you will love how this personalized piece adds instant warmth and character to your space.
6. Wrap Macrame Cord Around Driftwood for a Mobile

Who would have thought a piece of driftwood could become a stunning piece of art? This project is my favorite way to bring a natural, boho vibe indoors without complex tools. You will start by securing your macrame cord directly to the wood using a simple Lark’s Head knot, and then let the cords hang down to create your knotted patterns. Securing the first knot properly to the wood demonstrates a core technique of easy macrame for beginners that applies to dozens of other hanging projects. What makes it so effective is the combination of the unique, organic driftwood base with your handmade knots. The result is a one-of-a-kind mobile that feels personal and artistic. For a different kind of natural decor, you can also discover simple painting crafts. Does that not sound wonderfully satisfying?
7. Braid a Simple Three Strand Bracelet
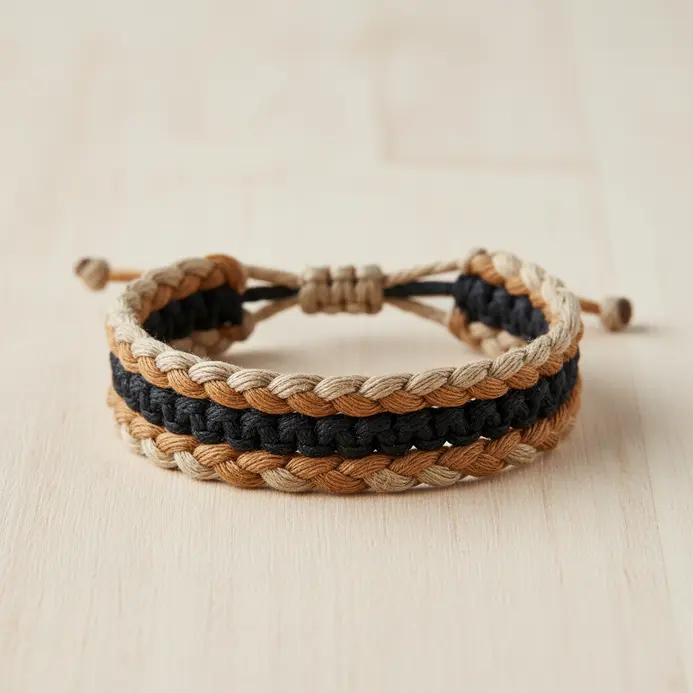
Ever feel like you want a quick win with a beautiful result? This three-strand braid is your perfect first project because it builds muscle memory fast. You gather your three lengths of cord, secure them with a simple knot, and then follow the classic over-under pattern. It is that rhythmic, repetitive motion that creates a lovely, textured accessory in minutes. Following that classic over-under pattern gives you instant confidence and fits perfectly into any plan for easy macrame for beginners who want wearable results. Your main task is to maintain consistent tension as you work, keeping your left, middle, and right strands organized. Remember to cut your strands two to three times longer than your desired finished length because braiding shortens them a lot. You can use this same technique with different materials to transform your walls easily with coordinated handmade decor. Isn’t it amazing how such a basic method yields such a pretty piece? Try it and feel the pride of making your first jewelry item.
8. Add Beads to a Macrame Hanging Plant Holder
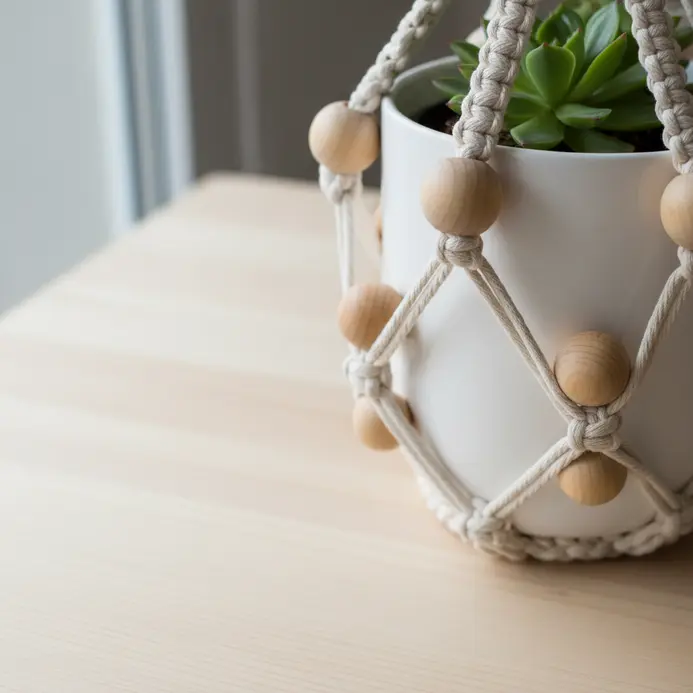
This is the step where your plant hanger truly becomes your own. Have you ever seen a plain one and wished for a pop of color or texture? Adding beads is your answer, providing a simple way to inject personality and visual interest into your design. The key is planning your bead placement before you start knotting, thinking about where they will sit along the main cords. Planning your bead placement before you start knotting is a smart habit that every guide for easy macrame for beginners recommends to avoid frustrating mistakes. The most important thing is to check the hole size of your chosen beads to ensure they slide easily onto your cord. For synthetic cords, you can melt the tip with a lighter to create a stiff point for threading. This works well because it lets you play with color and material, from wooden beads for a boho feel to glass for a little sparkle. Try it and feel the satisfaction of creating a piece that is uniquely yours.
9. Form a Miniature Triangle Shape Wall Tapestry

This one surprised me. Those geometric shapes look so modern, but the process of creating them is wonderfully simple, especially in basic macrame. You will create each triangle by gathering a bundle of yarn, folding it in half, and attaching it to your wooden dowel with a simple Lark’s Head Knot. Your main task is planning the dimensions carefully to avoid running out of material halfway through. Deciding your triangle height, then cutting your yarn strands to about three times that length ensures accuracy. Cutting your yarn strands to three times the height of the triangle is a standard measurement for easy macrame for beginners projects that rely on folded bundles. I love how you can then trim the bottom fringe to perfect the triangle point, enhancing your first macrame project. It works because the knot and fold create the top angle of the shape instantly. This makes a fantastic, quick project to create crafts for special occasions. Try it and feel proud of your instant modern decor.
10. Build a Chunky Knotted Macrame Storage Basket

Who would have thought you could knot your way to stylish storage? This project looks complex, but trust me, it is wonderfully repetitive and meditative once you start. You will begin by attaching thick cords to a pre-drilled wooden base using simple Lark’s Head Knots. From there, you build the basket walls by repeating rows of Square Knots, stacking them up to your desired height. The rhythm of knotting is satisfying, and the thick cord creates a beautiful, textured look quickly. Repeating those rows of Square Knots up the sides creates a sturdy wall, making it a favorite in easy macrame for beginners workshops focused on functional decor. I love that this gives you a custom storage piece for blankets or toys. The key is to measure your cord generously to avoid running short. You will feel so proud when you finish your first functional project, especially if it showcases your new macrame skills, and you can always check. beginner-friendly gift crafts for your next idea.
11. Create a Spiral Knot Glass Jar Cover
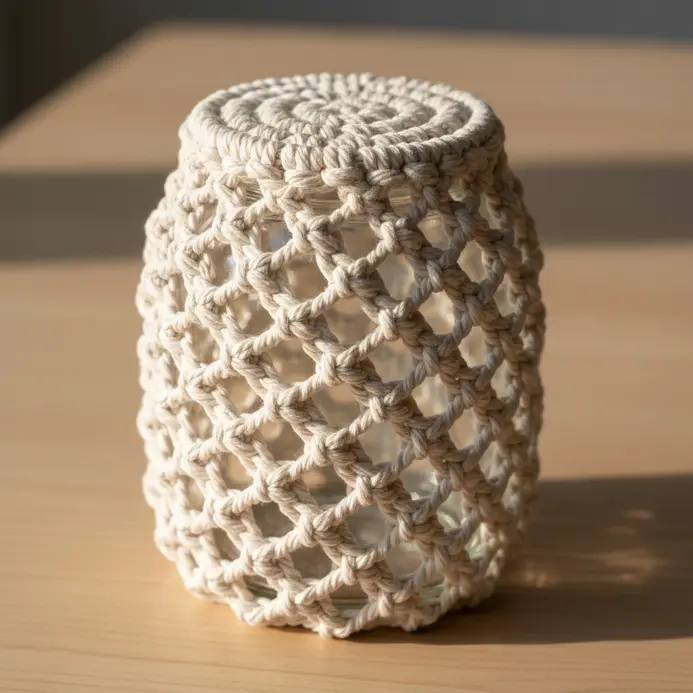
Ever thought a knotted jar cover looked too intricate to try? This project is your perfect starter because it uses one continuous motion from start to finish. You will attach cords to the jar’s rim and then work your way down, tying the same basic macrame knots throughout. half knot over and over in one direction. This repetition is what creates that beautiful, twisted rope effect that wraps tightly around the glass, reminiscent of intricate macrame wall hangings. Maintaining even tension as you knot is the key to a uniform spiral that stays symmetrical, a crucial lesson in basic macrame knots. For materials, grab a straight-sided glass jar and some soft cotton cord around 3mm thick. Cut your cords about three times the jar’s height before you begin. Trust me, once you get into the rhythm, it becomes almost meditative. You will feel the satisfaction of wrapping your jar in a cozy, handmade hug that protects the glass while looking beautiful.
12. Assemble a Natural Wood Bead Window Hanging

This project looks like a high-end decor piece, but its assembly is wonderfully straightforward. You will cut your jute or cotton cord to your chosen lengths and slide on a mix of wood beads. I love letting the pattern emerge naturally as I string them, watching the pieces come together without strict planning. Does that not feel meditative? Planning is your best friend here, so measure your window first and lay out your bead strands to visualize the final look. This prevents a lopsided hanging and makes the process smooth from start to finish. For more easy macrame projects, check out our website. simple craft material ideas, check out that guide. Once your strands are ready, simply gather them and tie them securely onto a wooden dowel or a found branch. The final touch is adding texture and a soft, diffused light to your room. Feel that instant sense of rustic calm as the pieces sway.
13. Make a Single Layer Macrame Table Runner
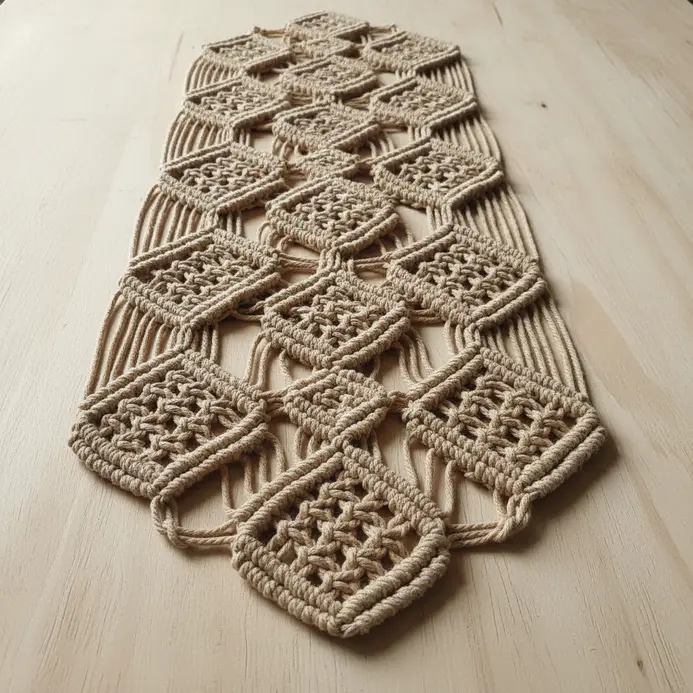
Ever thought a macrame table runner looked too intricate to make yourself? Trust me, this single-layer version is your perfect entry point. You’ll start by attaching your long working cords to a main anchor cord with simple Lark’s Head knots. Then, you’ll create the entire pattern using just the square knot, repeating it across the row until your runner reaches the perfect length for your table. My top tip is to keep your tension consistent as you tie each knot. Why does this project work so well for newcomers? It gives you focused practice on one fundamental knot that builds real skill and confidence. You get to see a beautiful, textured piece grow right under your fingers, which is incredibly satisfying. I love how it adds a cozy, bohemian touch to your dining space without any fuss. For your next creative adventure, you might want to explore other easy crafts to keep that momentum going.
14. Form a Macrame Feather Style Wall Decor
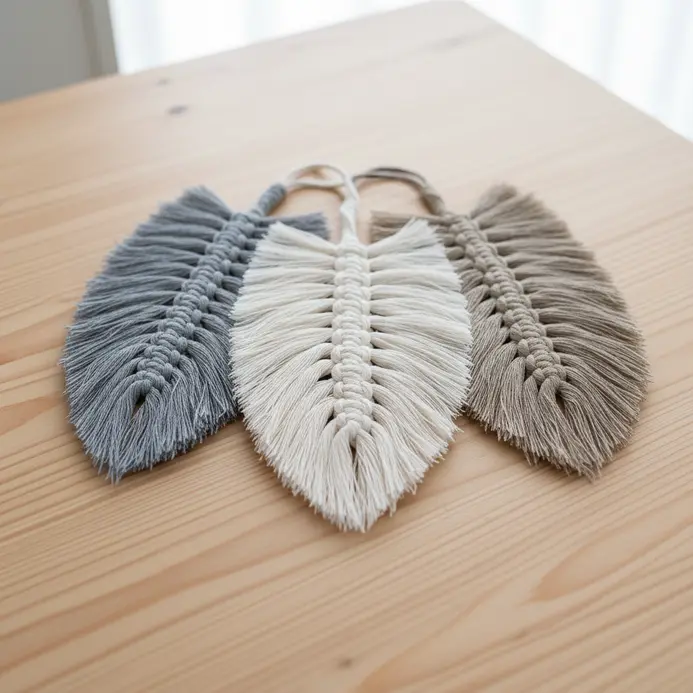
Ever wondered how those beautiful feather wall decorations are made? It is surprisingly simple once you know the exact trick. You will start by attaching your single-twist cotton cords to a central core using a Lark’s Head knot variation. Arrange them symmetrically down both sides of the core cord to build your feather’s shape and establish the width of the piece. After all your fringe cords are knotted, the real magic happens. You get to trim the whole piece into a feather silhouette. Then, grab a pet slicker brush and meticulously brush out every single cord until the fibers separate completely, a technique used in basic macrame. This unravels the twist and creates that soft, fluffy texture we all love. I love this part because it transforms knotted string into something delicate and natural.
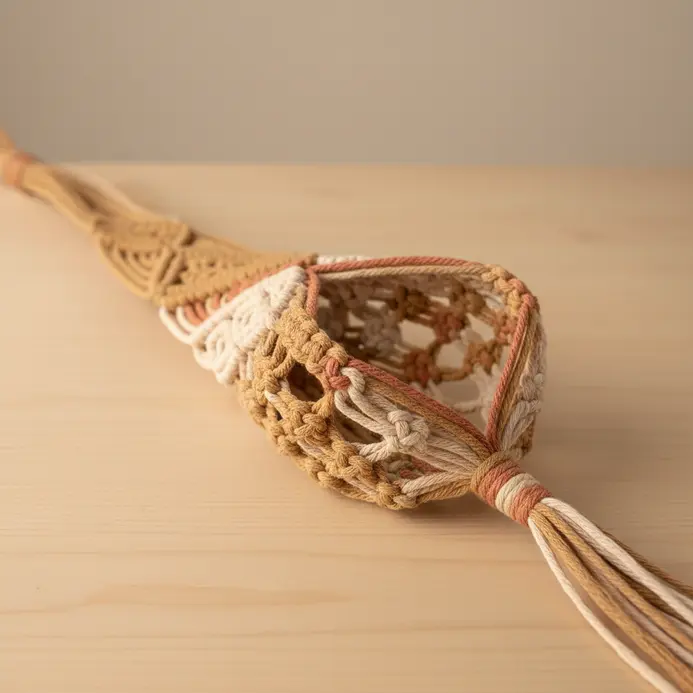
15. Build a Nested Decorative Macrame Trinket Pouch
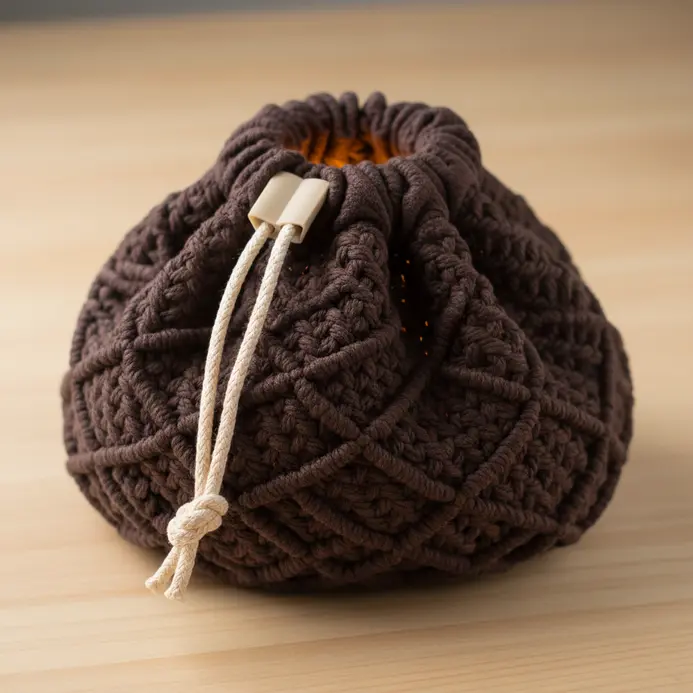
A nested pouch set looks so elegant, but honestly, it is just two pouches made to fit together perfectly. You start both pieces the same way, securing your cords to a dowel rod or ring with a simple Lark’s Head Knot. Then you build the bodies using Square Knots and maybe a Spiral Knot pattern for added texture. The key is planning the sizes so the smaller pouch slips inside the larger one perfectly, a fundamental skill in making macrame. I love using a tighter knot pattern for the inner pouch to keep small trinkets secure. Trust me, seeing the finished, layered piece is incredibly satisfying. You can always check seasonal crafting inspiration when you want to make themed versions later.
Techniques For Trimming And Combing Decorative Fringe
Sharp fabric scissors make the cleanest cut for a polished fringe that won’t fray unevenly. After you trim, take a wire pet brush or a wide-tooth comb and gently work through the ends to separate the individual cotton strands. This brushing step transforms a blunt cut into that soft, wispy texture that defines the macrame aesthetic. You will notice the fringe gains volume and a beautiful, organic flow as you complete it. The good news is this final touch hides any minor inconsistencies in your cutting line, giving your piece a professional finish. Brushing out the ends to separate the strands is a simple finishing method that completes any easy macrame for beginners creation. Just remember to comb in sections from the middle outwards to prevent tugging on your carefully tied gathering knots.
Conclusion
The best part about starting with macrame is seeing a simple length of cord transform into something you can hold, hang, or give. Each finished piece, no matter how small, is proof that you can do this. Your hands learn the rhythm of the knots, and that initial hesitation melts away. For your next step, pick the project that made you smile the most. Gather your 4mm cotton cord, find a quiet spot with good light, and just start. The repetition is calming, and the result is uniquely yours. This collection of easy macrame for beginners is your starting point, but your own creative touch is what will make each piece special. I cannot wait to see what you knot next.
FAQs
Q: What is easy macrame for beginners and why is it perfect for beginners?
A: Easy macrame for beginners refers to simple, step-by-step projects that teach the basic knots and techniques without overwhelming detail. It’s perfect for beginners because many patterns are easy to follow, use only two knots to start (like the square knot and a double half hitch), and result in beautiful macrame pieces for home decor such as plant hangers and wall hangings—making your macrame journey fun and rewarding.
Q: What basic materials do I need to start my macrame adventure?
A: To start your macrame adventure you’ll need a roll of cord (macrame cotton is a popular choice), scissors, a measuring tape to get desired length, and a simple dowel or ring for mounting. Everything you need for beginner projects can often be sourced as an easy DIY kit or from craft stores; choose a cord to use that feels comfortable in your hands and is tight to secure knots well.


Q: Which knots and techniques should I practice first?
A: Beginners should practice the square knot and the alternating square pattern, plus the double half hitch and basic lark’s head (often taught as cord in half to start). These form the foundation for many projects for beginners and help you become comfortable with the knots. Regular practice of two knots at a time will build your macrame experience quickly.
Q: Are there free macrame resources or a video tutorial that are easy to follow?
A: Yes—there are many free macrame patterns and a video tutorial series available online that are easy to follow and perfect for those who are new to macrame. Look for beginner playlists that demonstrate knots slowly, show how to fold one cord in half and how to measure cords for plant hangers and wall hangings, and offer projects like a feather wall hanging or simple leaf pattern tutorials.
Q: What are some simple projects for beginners that still make a statement?
A: Simple projects for beginners that make a statement include small plant hangers, chic wall hangings, a feather wall hanging, or a leaf pattern banner. These beautiful projects are trendy and let your creativity shine—mix and match cords, textures, and colors for a chic, modern look that enhances your home decor.


