


Mastering Water Transparency And Pigment Ratios
When gathering easy watercolor ocean painting ideas for your sketchbook, remember the secret to that clear, luminous ocean look is a simple pigment-to-water ratio trick. You want your initial large washes for the sky and open sea to be mostly water with just a hint of color, like a whisper of ultramarine or cerulean. This creates the atmospheric depth we see on the horizon. For the powerful blues closer to shore, you need more pigment on your brush but still a fluid consistency. The mistake beginners make is using paint straight from the tube, which looks heavy and opaque. Trust me, you will notice a huge difference in the transparency of your water when you start with a very diluted wash and build up color in specific areas. This approach lets the paper’s white glow through for sunlit sparkle on the waves.
Essential Brush Selection For Coastal Motion
Before trying easy watercolor ocean painting ideas that require motion, your number one tool is a large, soft mop brush. It holds a ton of water and pigment, perfect for laying down those big, sweeping wet-on-wet washes for the sky and distant water without leaving harsh strokes. For the sharp, crisp edges of breaking waves, you need a completely different tool. A small, pointed round brush gives you the control to define those white foam lines against the darker water. Keep a clean, damp flat brush nearby too. You use it to quickly lift or blot pigment for softer foam textures and spray, which is easier than trying to paint around every white shape. Having these three brushes ready lets you capture both the soft masses and hard details of coastal motion.
1. Paint a Soft Sunset Gradient Horizon Line with a Wet-on-Wet Wash
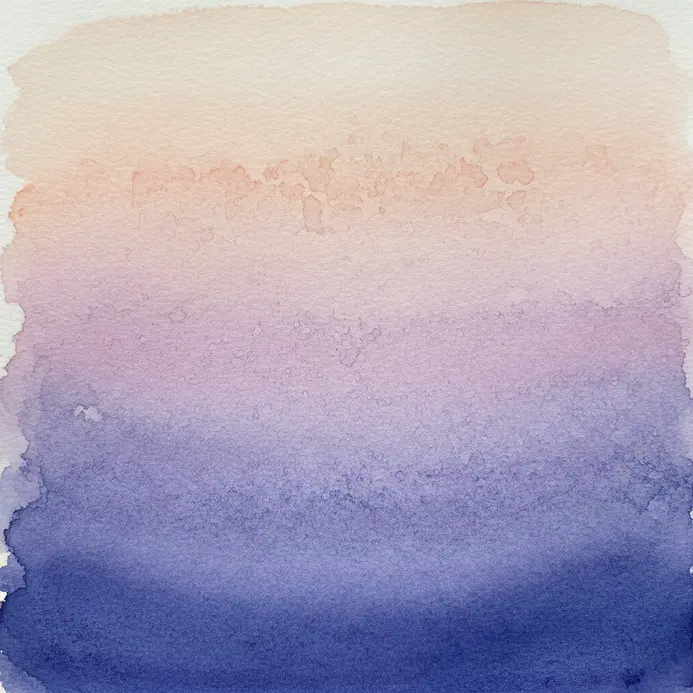
If you want to include soft light in your easy watercolor ocean painting ideas, this technique looks magical but is wonderfully straightforward. The secret is applying your paint onto a uniformly damp paper surface. You start with a clean yellow at the top, then introduce orange, pink, and purple while the paper is still wet, letting them bleed together naturally. It works because the water does all the blending for you, creating that seamless, atmospheric transition. I love how forgiving this method is. Try it and feel the satisfaction when those colors melt together. If you enjoy this lesson, you might find more tips on how to paint. Explore more easy watercolor ideas in our video series. inspiring for your next project.
2. Create a Minimalist Silhouette Sailboat Ocean Scene: Focus on Simple Shapes
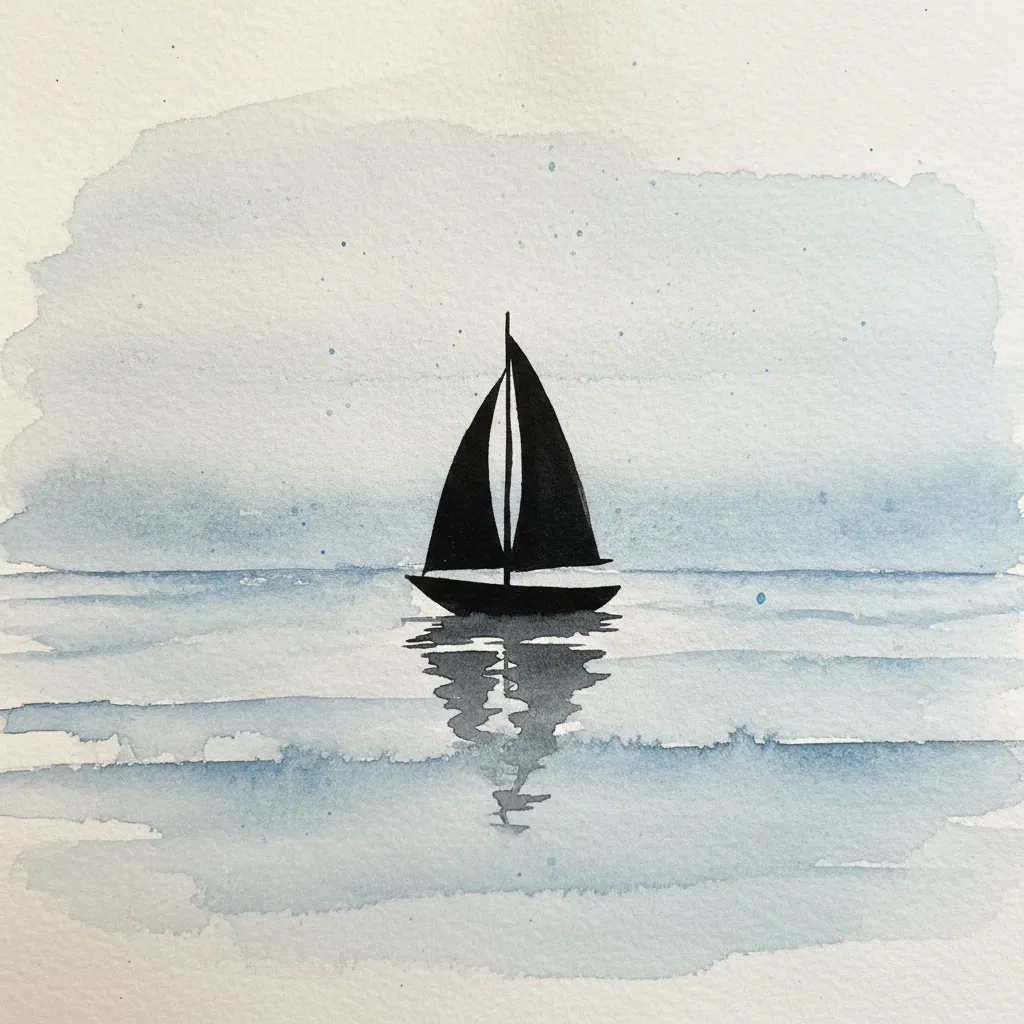
Adding minimalist shapes to your easy watercolor ocean painting ideas, you start with two flat rectangles for the sky and water, using a limited color palette to set a calm mood. Then, you build the boat using basic shapes like rectangles and triangles. The key is to unite them into a single, solid silhouette against that soft background. Ever wondered how to make something look so striking with so little? It works because your brain fills in all the lovely details, creating a serene and balanced composition. Trust me on this one, the satisfaction of seeing that crisp, clean shape appear is fantastic.
3. Apply Vibrant Turquoise Layers for a Tropical Cove Watercolor
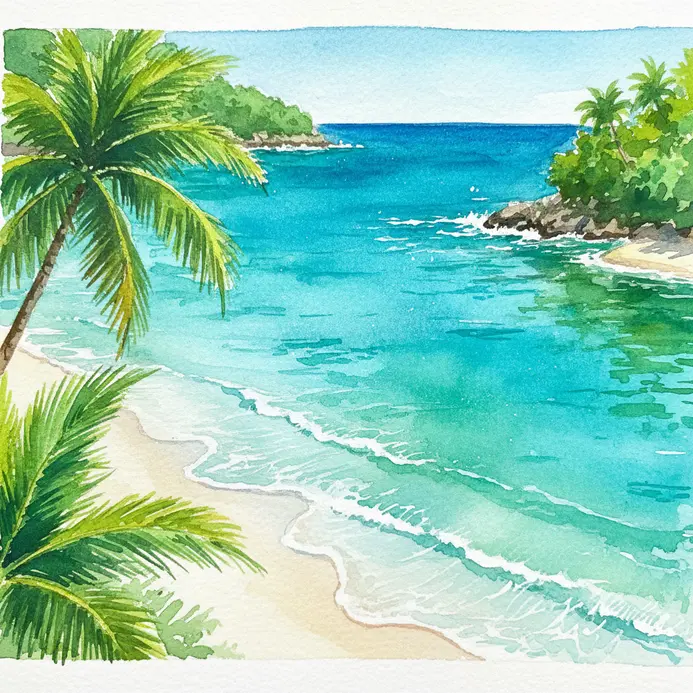
To capture clear water in your easy watercolor ocean painting tutorial, you start with a very light, luminous wash of Aqua or Light Turquoise across your water area. Once that’s dry, you add deeper, richer turquoise in the spots where the water would be deepest, softening the edges so it blends naturally into the lighter areas. This layering creates incredible depth and that magical glow of tropical water. I love how a simple wet-on-dry technique gives you so much control over the final look. For a softer, more blended effect, you can also explore the gentle washes used in easy pastel watercolor paintings in this tutorial. Try it and feel the scene come to life.
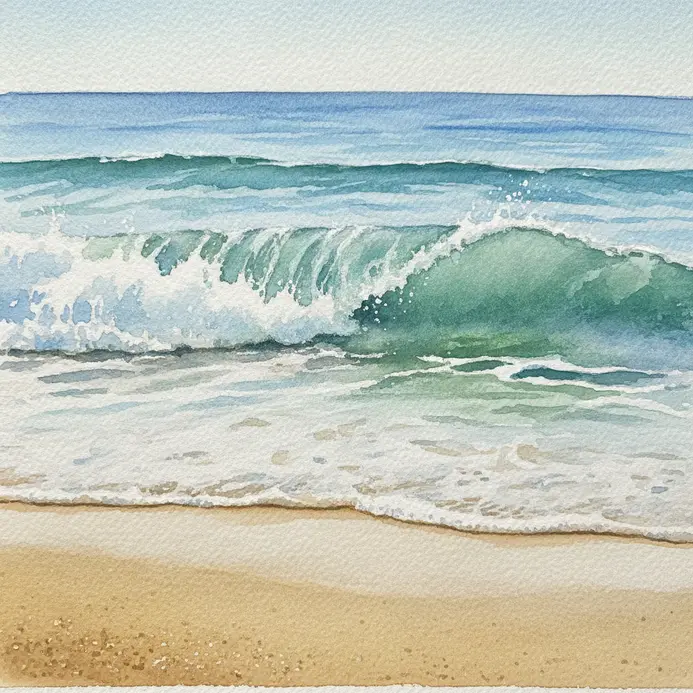
4. Capture Crashing White Foam in a Dynamic Wave Study
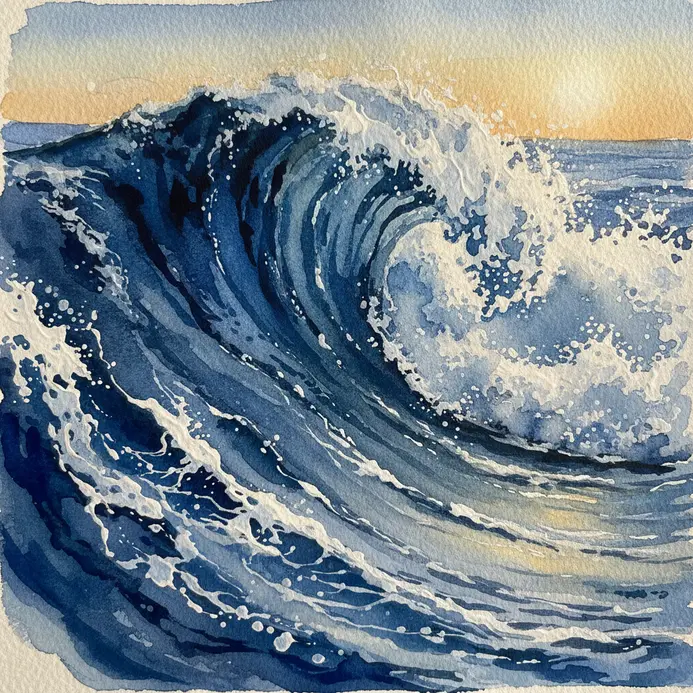
Another dynamic option in our easy watercolor ocean painting ideas focuses on freezing that intense, fleeting moment. Ever watch a wave break and wish you could pause that explosion of white foam to paint it? Focus on the foam’s translucent, reflective quality. Use a dry brush technique on damp paper to suggest swirling lace and explosive bursts. I love how this method lets you capture motion with simple, energetic strokes. Try it and feel the power you can create. For a fun change of pace, you might also enjoy some whimsical watercolor art projects.
5. Build a Moody Stormy Grey Seascape with Layered Washes
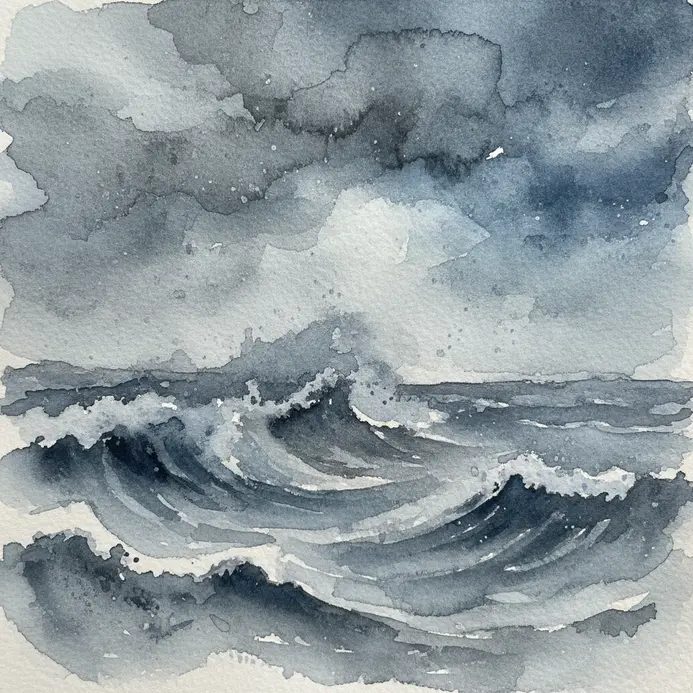
When collecting easy watercolor ocean painting ideas for dramatic weather, you build it with layered washes, starting with a very light sketch on your taped-down paper. I love this technique because it is all about patience and subtlety. Wet the sky area completely and drop in diluted Payne’s Grey or Indigo, letting the colors bloom and blend for those heavy clouds. Let it dry fully. Then, use a large round brush to glaze another thin wash over just the darkest cloud areas to build that deep, brooding atmosphere. This works because each transparent layer adds depth without turning the painting muddy. Trust me on this one, letting each wash dry completely is the secret to a luminous, moody sky. For the water, use the same grey palette with horizontal strokes to suggest churning waves. A final touch of white gouache for seafoam spray makes the whole scene come alive. Feel the power of that restrained, stormy palette.
6. Achieve a Golden Hour Reflective Ocean Wash with Warm Tones
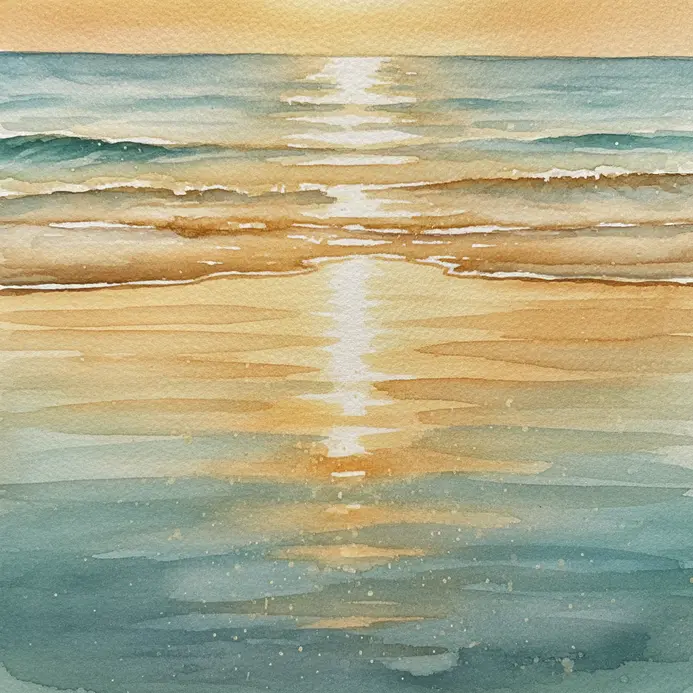
Capturing warm light is a staple in easy watercolor ocean painting ideas. The trick is in the wet-on-wet technique. Wet your paper first, then drop in those warm yellows and oranges, letting them blend for a soft, glowing sky. For the ocean, use the same method with a hint of warm blue, keeping the horizon line beautifully blurred. I love how this method mimics the light’s natural diffusion perfectly. Why does it work so well? This approach creates those seamless transitions that make a sunset over the water feel so serene and real. Remember, water reflections are distorted and elongated, not perfect mirrors. For a more detailed approach to capturing light on water, explore this watercolor painting tutorial. realistic watercolor painting. Feel the warmth and peace when your wash comes together.
7. Outline a Solitary Coastal Lighthouse Silhouette Against a Sky Wash
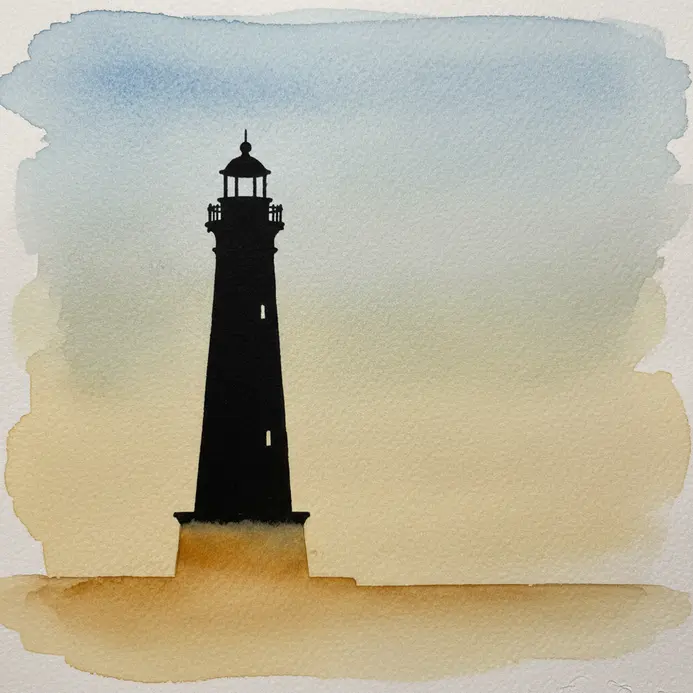
This dramatic choice tops many easy watercolor ocean painting ideas lists, relying on letting your wet-on-wet sky wash dry completely first, then laying down the lighthouse shape in your artwork. You will paint a soft gradient of sunset colors, then define a stark, dark tower against it. It is all about that beautiful contrast. I love how this approach focuses on mood over detail. Keep your horizon line low and position the lighthouse off-center for a balanced composition. Feel that sense of quiet, resilient beauty when you are done.
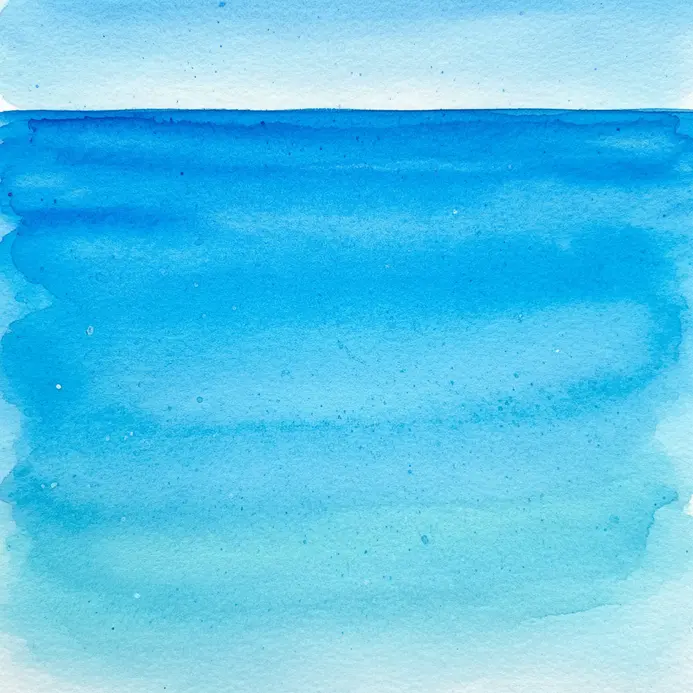
8. Create Abstract Blue Watercolor Swirls to Suggest Ocean Currents
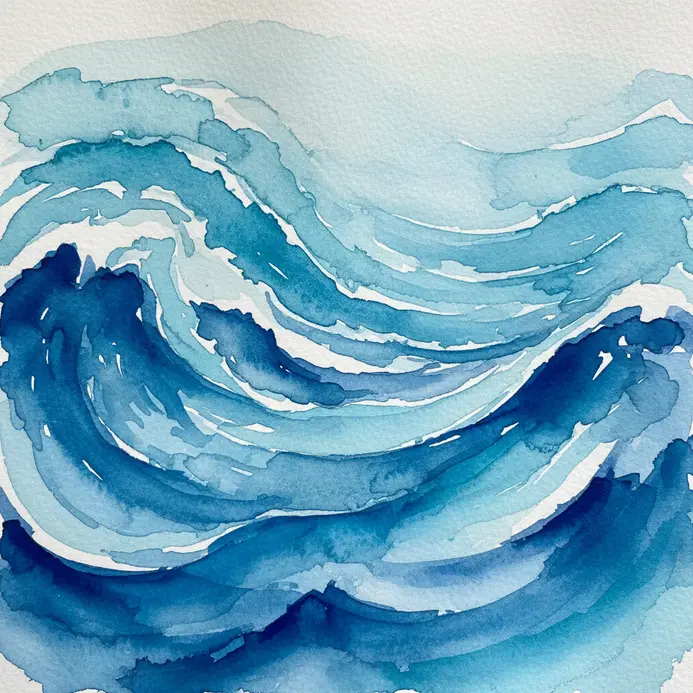
Trying fluid abstracts in your easy watercolor ocean painting ideas means letting go and letting the water do the work. This technique looks complex, but it’s all about that approach. You’ll start by completely saturating your cold press watercolor paper with clean water. Then, drop in a variety of blue washes and guide them into flowing swirls with your brush. The wet-on-wet method creates those beautiful, soft blends that perfectly mimic moving water. I love how this approach captures the ocean’s energy without needing to draw a single wave. The key is using a variety of blue shades from light cerulean to deep indigo. This creates incredible depth and movement in your abstract piece. Try it and feel the calming, fluid satisfaction of watching those colors merge.
9. Paint a Calm Teal Beach Shoreline with Gentle Ripple Details
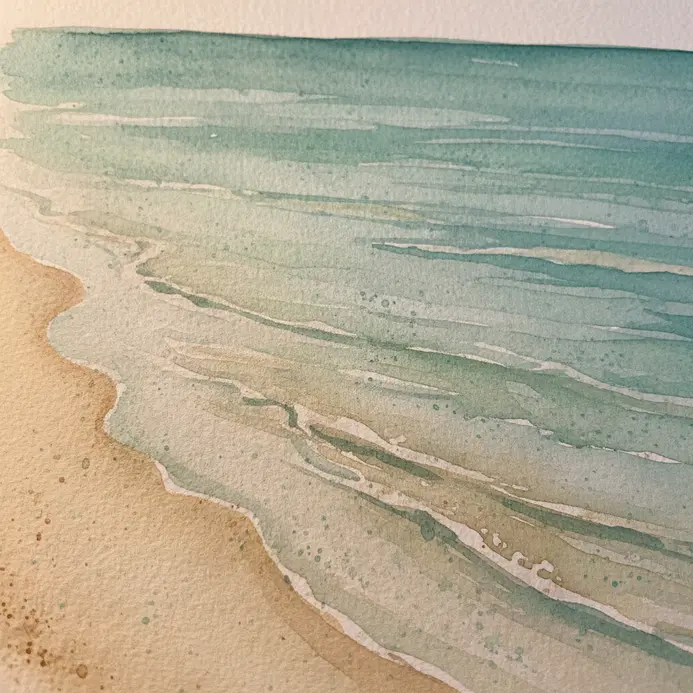
Doesn’t a peaceful teal shoreline sound like the perfect escape? If you are listing easy watercolor ocean painting ideas, this one is all about capturing that serene mood with a muted teal color for the ocean. I love starting with a big wash for the base, then letting it dry before adding any details. Your main focus is on those gentle, wavy lines on the water’s surface. Use a small round brush to paint thin, translucent ripples, building them up in soft layers instead of one dark stroke. This approach keeps everything looking calm and natural, not choppy. The payoff is a beautifully tranquil piece that feels like a quiet morning by the sea. If you enjoy blending soft colors, you might also like painting watercolor galaxy scenes for a similar ethereal effect.
10. Layer a Simple Deep Sea Gradient from Surface to Depth
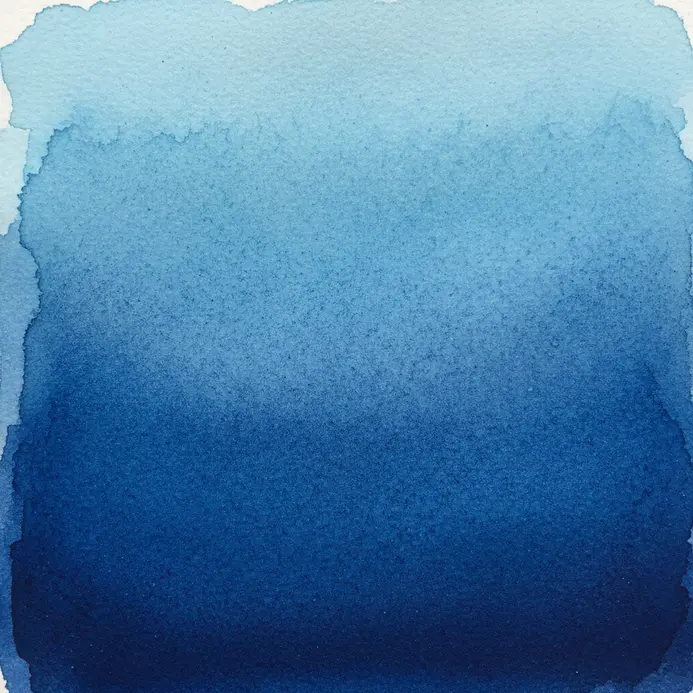
Ever wondered how artists capture that endless ocean feeling? Adding depth studies to your easy watercolor ocean painting ideas, you will layer washes of color from a bright surface blue down to a mysterious, dark depth. This technique looks complex, but trust me, it is surprisingly simple to pull off. Start with a wet-on-wet wash of light turquoise at the top of your paper. While that is still damp, blend in a mid-tone ocean blue, then a deep navy, and finally a near-black blue at the very bottom. The magic happens because water naturally absorbs light, so your colors should get darker and less saturated as they go down. It is so satisfying to watch the ocean’s depth appear right on your page. For a different take on using these fluid color blends, you might also consider watercolor tattoo designs.
11. Sketch a Distant Island Mountain Over a Calm Ocean View
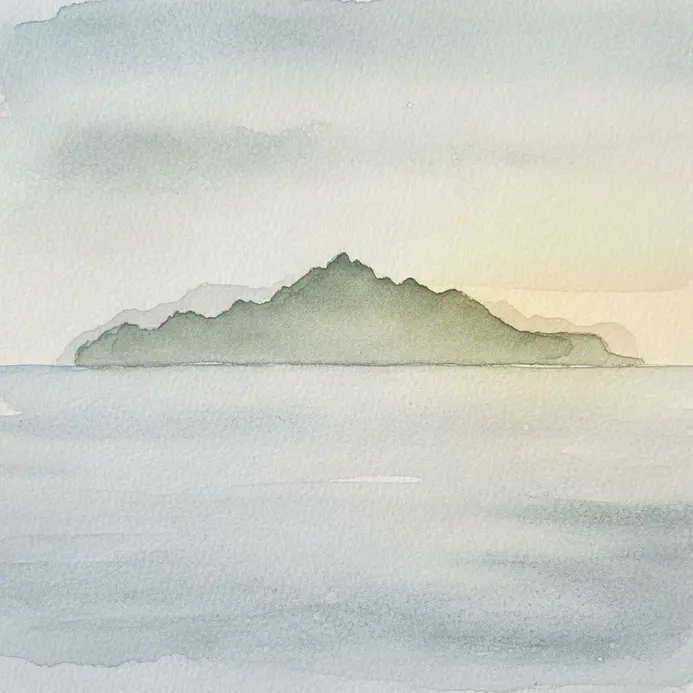
Ever feel the need to draw something that feels like a deep, calming breath? If you want atmospheric scenes in your easy watercolor ocean painting ideas, this sketch is exactly that. You will start by lightly drawing a straight horizon line across your paper. Then, just above it, sketch a soft, undulating mountain silhouette, keeping it small and smooth to show it is far away. The real magic is in the subtle shading. Use a light, even tone on the mountain, making it a tiny bit darker at the base. For the water, add a few faint, horizontal lines to suggest a vast, calm surface. This simple use of atmospheric perspective creates incredible depth and a peaceful mood. Trust me, you will love how this minimalist approach makes your scene look so realistic and serene.
12. Capture a Nighttime Moonlight Ocean Reflection with Dark Blues
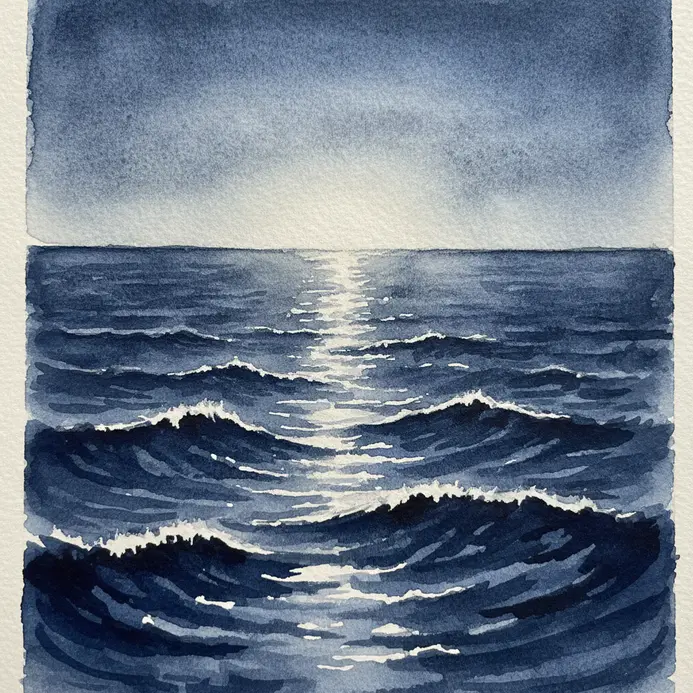
Ever feel that a moonlit ocean is too tricky to paint? Including nighttime scenes in your easy watercolor ocean painting ideas is simpler than you think once you focus on the light. The magic is all in the contrast. Start by laying down rich, layered washes of dark blue watercolors like Indigo to create a deep night sky and sea. Then, use a nearly dry brush to lift out a shimmering path for the moonlight’s reflection. That stark difference between the dark water and the glowing light is what makes the scene feel vast and real. I love this approach because it lets you practice essential watercolor painting skills like glazing and lifting. You build up the dark tones slowly, letting each wash dry, and then create the light by taking color away. It is a wonderfully satisfying process that teaches you to paint with light instead of just adding it. For a great foundation in these techniques, essential watercolor painting skills. Try it and feel the quiet drama you can create with just a few colors.
13. Add a Pier Post Silhouette Over Rippled Water for Strong Composition
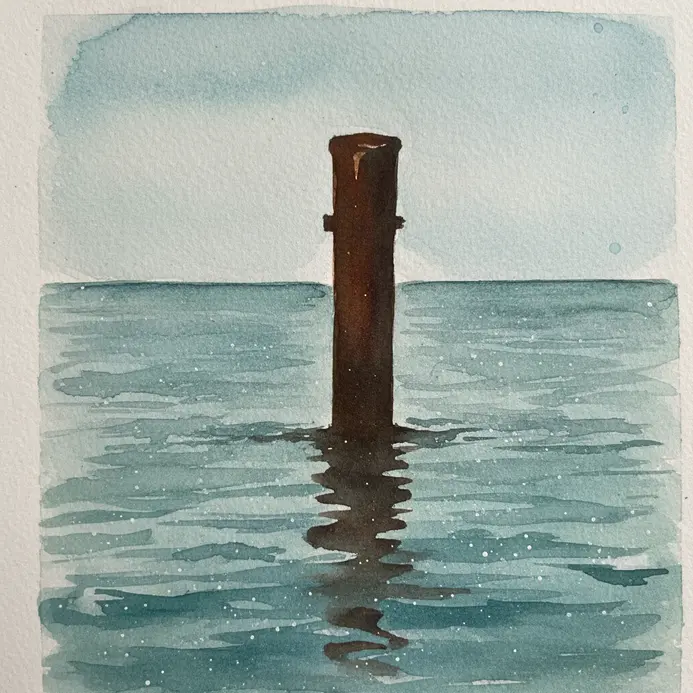
Ever wondered how to make a simple ocean scene feel dramatic and deep? This composition trick from our easy watercolor ocean painting ideas collection is a personal favorite of mine for creating instant visual impact. You paint a dark, solid pier post silhouette against a softer, brighter background, like a sunset sky or illuminated water. The key is to keep the post simple and let the ripples in the foreground do the work of adding texture and movement. Trust me, the magic happens when that strong vertical shape interacts with the gentle horizontal lines of the water. Your composition feels balanced and purposeful. For the best effect, try painting during the golden hour when the light comes from behind your subject. Does that not look stunning?
14. Paint a Sandy Shoreline with Gentle Waves Using a Dry Brush
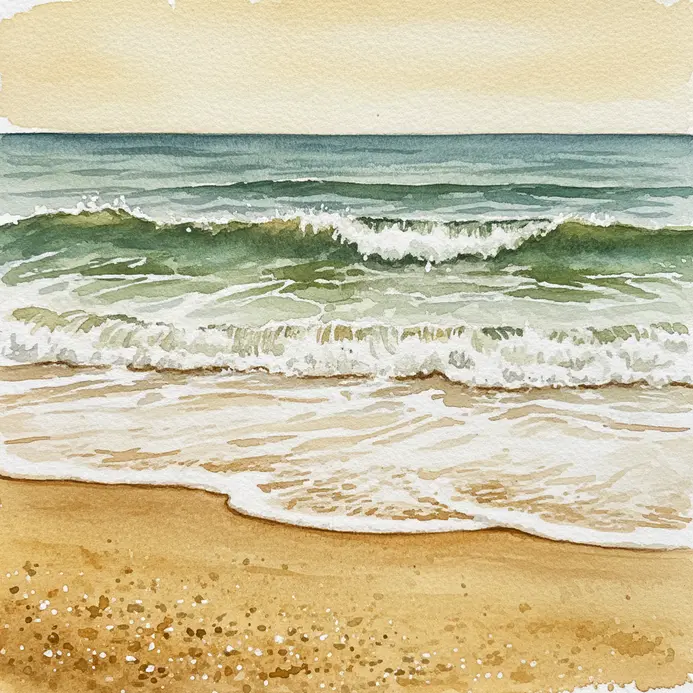
Ever wondered how to get that perfect grainy sand texture? The dry brush method ranks high in easy watercolor ocean painting ideas because it delivers instant realism. Your secret weapon is the dry brush technique. You start by loading your brush with a sandy color like Yellow Ochre, then wipe almost all the paint off on a paper towel. Drag that nearly dry brush lightly across your paper, letting the texture peek through for a beautifully granular look. I love using this same light touch to suggest the foamy edges of gentle waves lapping the shore. It feels so satisfying because you are building realism through texture, not just color. For a whole collection of other great starting points, check out these easy things to paint.
15. Achieve High Contrast Navy Wave Crests Against a Pale Sky
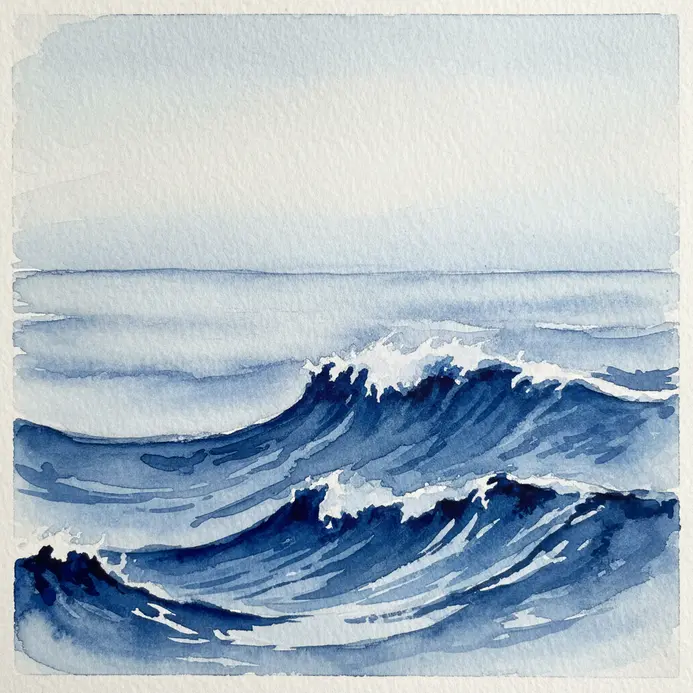
Ever wondered how to make those crashing waves look so powerful? Mastering bold contrasts in your easy watercolor ocean painting ideas relies on drama through opposites. You start with a highly diluted wash of Cobalt Blue for the sky, applied wet-on-wet for a soft, luminous glow in this lesson. Let it dry completely, then layer a deep navy mix of Ultramarine Blue and a touch of Burnt Sienna for the wave crests. I love how sharp edges define the crests against that soft sky. That stark value contrast is what makes the ocean look alive and moving. For a great next step, try these easy acrylic painting ideas to build your confidence with bold colors.
16. Mix a Watercolor Sea Glass Color Palette for a Translucent Effect
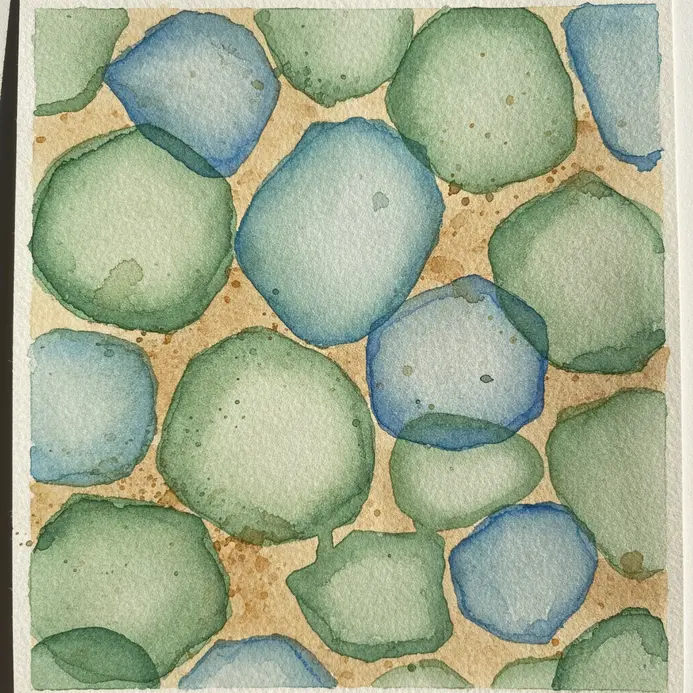
Ever wondered how to capture that soft, worn look of glass tumbled by the sea? Translucent layers are a must for easy watercolor ocean painting ideas focusing on textures. The secret is all in your water-to-paint ratio. You will want to start with a very diluted wash, focusing on transparent colors like Viridian for cool greens or a touch of Raw Sienna for amber. I love using the wet-on-wet technique to let these pale washes blend naturally on the paper. Once a layer dries completely, you can glaze another thin wash over it to build that beautiful depth without losing light. This layering process is what creates the true translucent effect, mimicking how light passes through real sea glass. Trust me, the payoff is a wonderfully ethereal and realistic texture in your beach scenes.
17. Form a Whale Tail Silhouette Breaking the Ocean Surface

Adding marine life to your easy watercolor ocean painting ideas brings power and serenity together. This whale tail silhouette is a perfect example. It might look complex, but it is all about contrast. Start with a light pencil sketch to get the shape of the flukes and peduncle right. Then, lay down a soft wet-on-wet wash for your ocean and sky background and let it dry completely. That dry background is your canvas for the main event. Mix a dark, rich color like Payne’s Gray and paint the entire tail shape with clean, sharp edges. I love how the bold, dark form instantly pops against the soft watercolor washes. Add a few irregular splashes at the base to suggest motion. The magic is in that dramatic contrast, which watercolor handles beautifully. It feels so satisfying to see the graceful shape emerge. For your next project, find more easy watercolor ideas to keep that creative momentum going.
18. Sketch a Seagull Silhouette Above a Clean Horizon Line
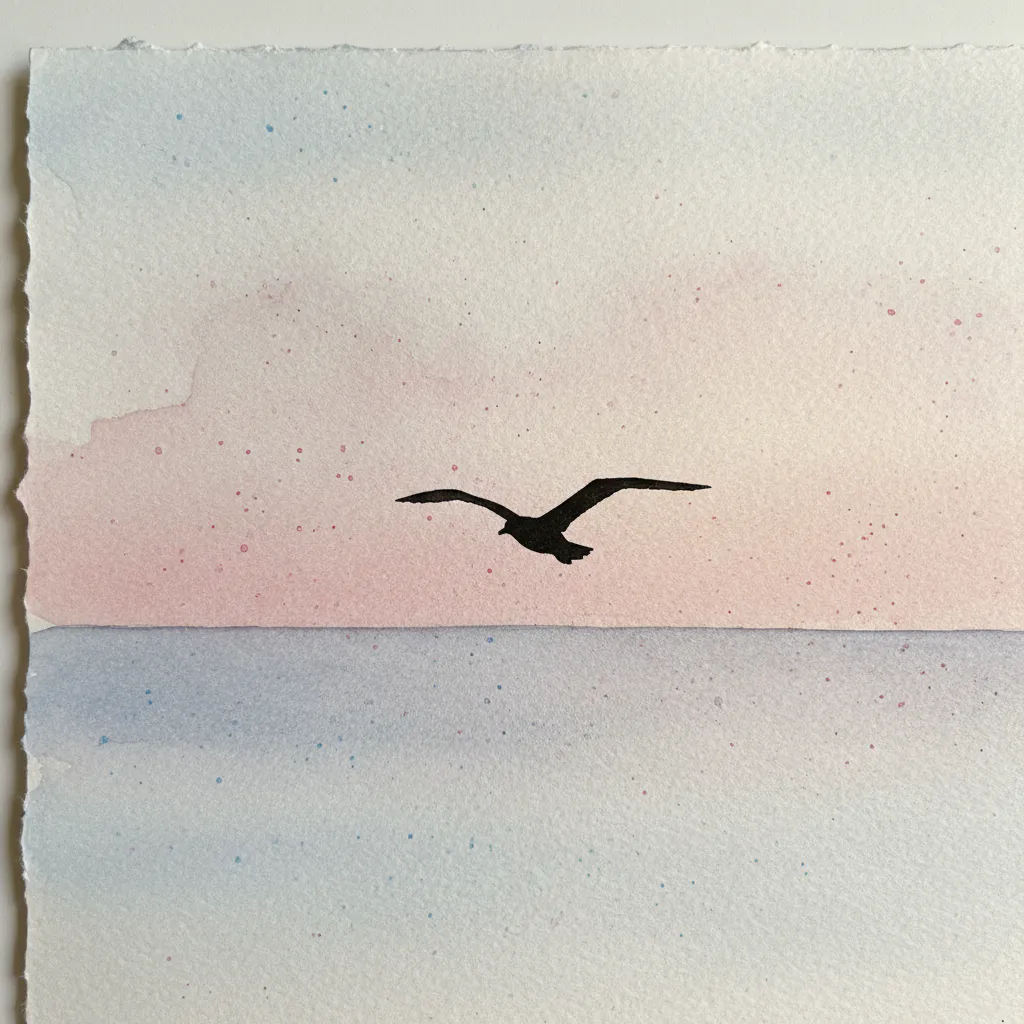
Who would have thought a single dark shape could bring a whole seascape to life? You start by drawing a confident, straight line across your paper for the clean horizon. Then, above that line, you sketch the iconic outline of a seagull in flight. The trick is that classic “M” shape for the wings, a small teardrop body, and a little fan tail. It works because our brains instantly recognize that simple, graceful form against an open sky. I love this one for adding instant scale and atmosphere to a painting without any fussy details. For a softer, complementary look, you might enjoy exploring some easy pastel watercolor paintings next.
19. Use Abstract Salt Texture to Suggest an Ocean Surface Sparkle
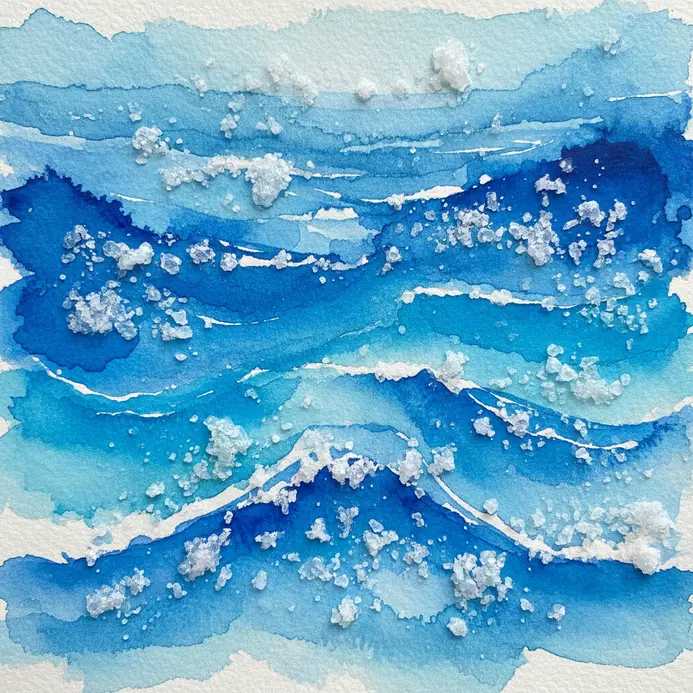
Who would have thought a kitchen staple could create such convincing sparkle? The trick is timing your application perfectly. While your watercolor wash is still wet with those lovely ocean blues and greens, sprinkle your salt. I love using a mix of fine and coarse sea salt for the most natural effect. The crystals push the pigment away as they dry, leaving behind those magical, lighter spots that catch the eye. Isn’t it satisfying to see such an organic texture appear? The key is to let the piece dry completely before you gently brush the salt away. You’ll be left with a surface that truly glimmers, mimicking light dancing on water. Feel the surprise and delight when you reveal your sparkling sea.
20. Paint a Bright Mediterranean Blue Bay with a Single Wash
Ever felt intimidated by painting deep, vibrant water? This single-wash method is your secret tip. It looks complex but relies on a simple tilt and two blue mixes. You will wet your cold press watercolor paper first, then apply a deep Ultramarine from the bottom up, blending into a brighter Cerulean as you move higher. Let the tilt do the work, guiding the pigment to create a natural depth gradient. The magic is in trusting the water and paint to interact. You get a luminous, serene bay scene with just one application, which is incredibly satisfying. It is a fantastic exercise in watercolor control that yields stunning results. If you love this loose, luminous style, you will also enjoy these whimsical watercolor art projects.
21. Add a Driftwood Piece on Wet Ocean Sand for Natural Detail
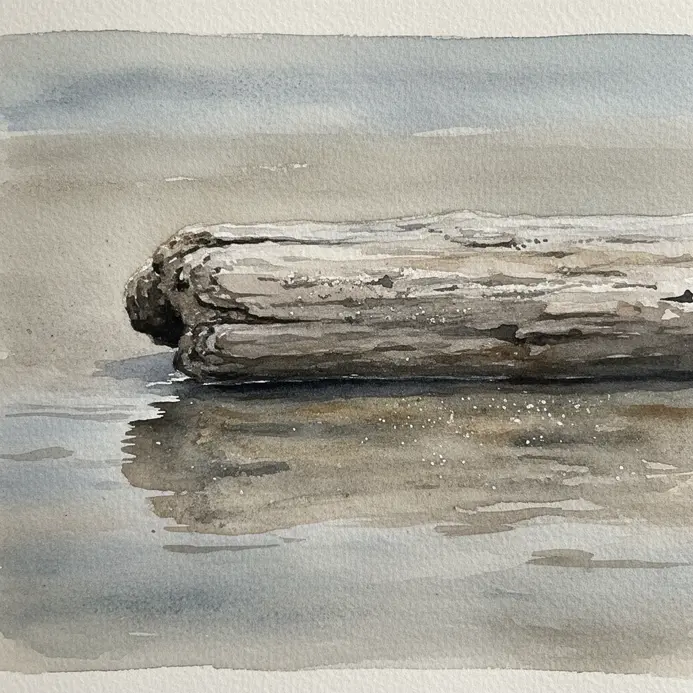
Ever wondered how to add instant storytelling to your coastal scene? This simple trick involves placing a weathered piece of driftwood onto the wet, reflective sand. I love how the gnarled, bleached wood creates a beautiful contrast against the smooth, darker surface, and you can hint at a subtle reflection underneath. It works because it grounds your painting with a natural, organic focal point that feels authentically coastal. For a deeper dive into realistic textures, check out these realistic watercolor painting techniques.
22. Build Summer Storm Clouds Over a Choppy Ocean View
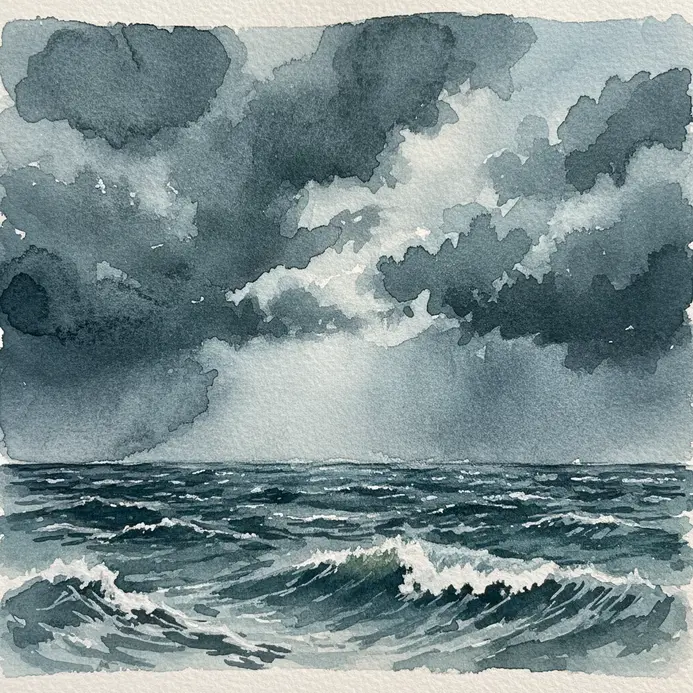
Ever wanted to capture the electric drama of a summer storm at sea? This scene is all about that humid, powerful energy. Start by placing your horizon line low to make the sky feel huge and imposing. For the clouds, think of them as massive three-dimensional shapes. I love blocking them in with deep grays and blues first, then adding lighter, warmer edges where your hidden light source hits. That interplay of dark and light is what gives them their dramatic volume. For the choppy water, use those same stormy colors in your wave reflections. Remember, the key is to show how the sky and sea interact. Try it and feel the thrill of bringing all that wild energy to your watercolor painting lesson.
23. Capture Underwater Kelp Forest Light Rays with Layered Greens
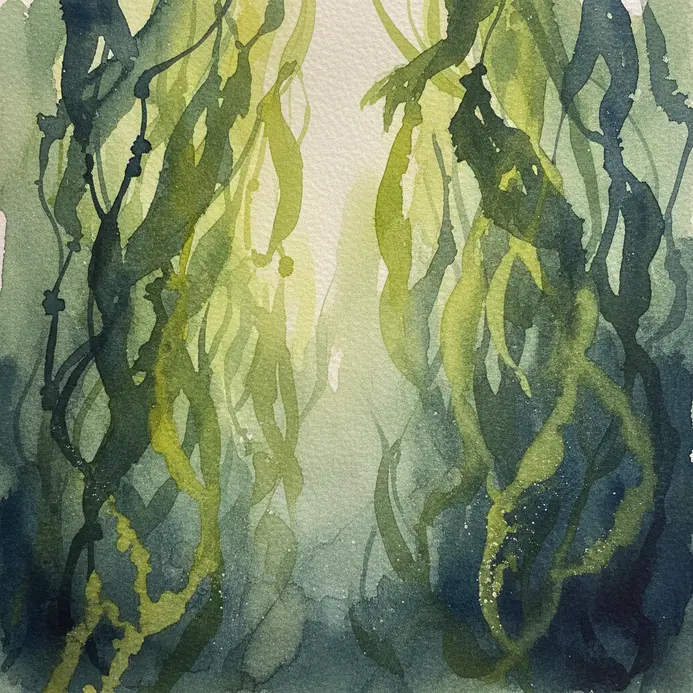
Ever wondered how to paint those magical, shimmering light rays you see in underwater photos? This one is all about creating that ethereal glow. You will start with thin washes of Cerulean Blue for the water, then build up layers of different greens for the kelp fronds, letting each wash dry completely to avoid muddiness. I love how the warm yellow light rays cut through all those cool, layered greens, creating such beautiful depth. The key is to keep those rays soft and diffused by using very diluted washes, as you’ll learn in our tutorial. For another great project featuring dramatic light against water, try these easy lighthouse painting ideas. Does that not look stunning?
24. Create a Circular Watercolor Ocean Horizon Study for Composition
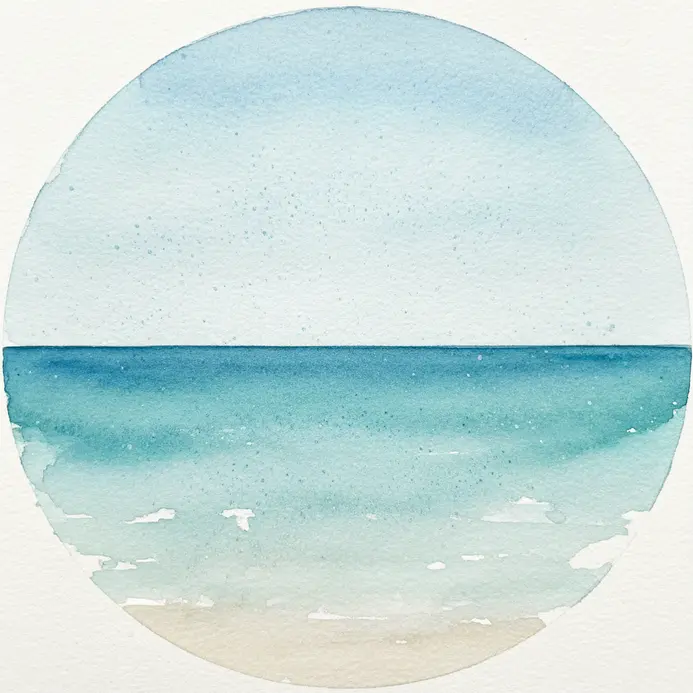
Ever felt stuck in the rectangle? This study breaks you out. First, you draw a perfect landscape circle on your paper using a compass for precision in your artwork. Inside it, you will paint a simple ocean horizon, but you will think differently about where to place that line. A high or low horizon often works better than a centered one within the round frame. I love how this makes you see composition in a new way. You are not just painting water and sky, you are guiding the eye around a curved edge. It is a fantastic exercise for understanding balance. For another subject that plays with shape and color, try painting watercolor galaxy scenes.
25. Paint a Minimalist Starry Night Ocean Scene with Tiny Specks
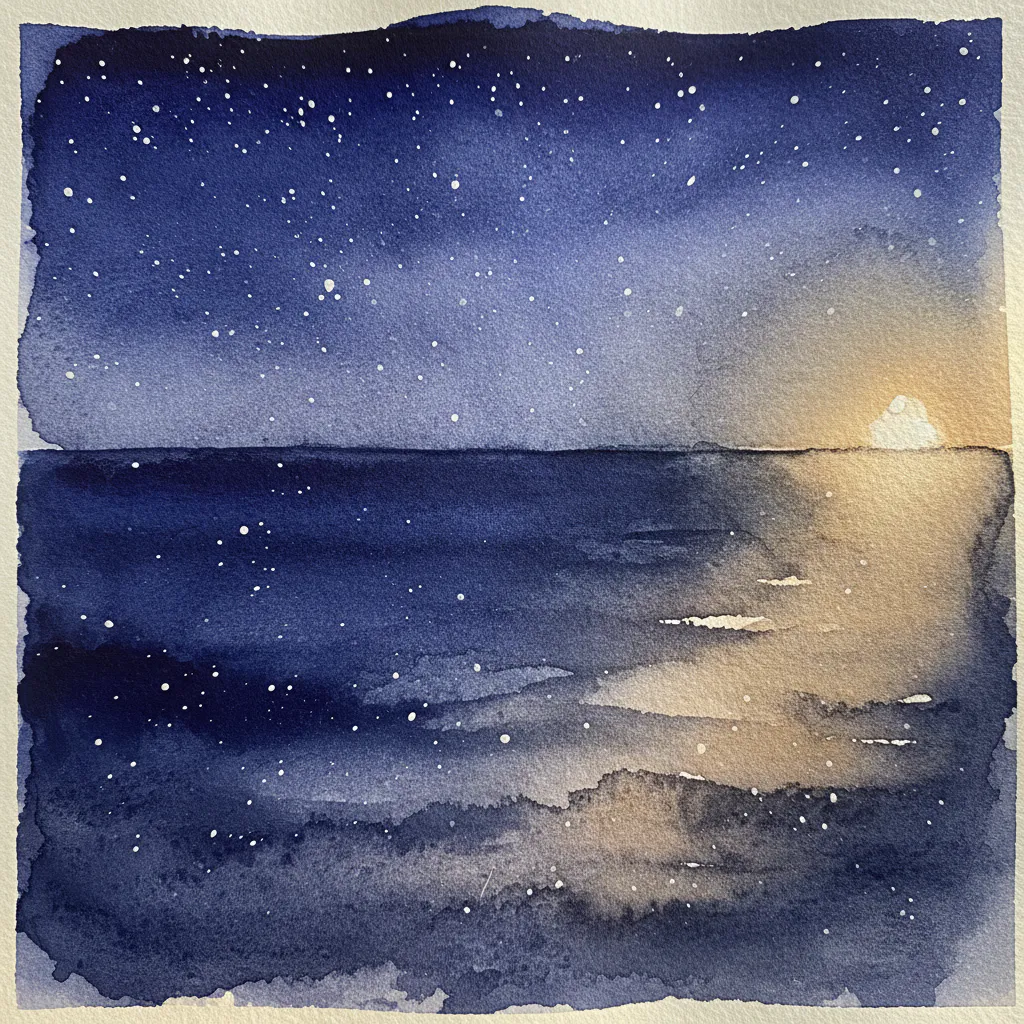
Who would have thought a minimalist painting could feel so vast? This scene is all about restraint. You will start with a deep blue base for both sky and ocean, using a large flat brush to lay down those broad, calming washes. Then, you will softly blend them at the horizon to create that perfect, seamless transition. The magic happens when you add the stars. Instead of painting them individually, try flicking a bit of diluted white paint onto the dry canvas with an old toothbrush. This creates those beautiful, random specks that make the night sky feel truly infinite. Trust me, that subtle texture is what makes the whole piece sing. Resist the urge to overwork it. The power lies in the quiet simplicity and those tiny, sparkling details. You will love the peaceful, contemplative mood it creates.
Framing And Preserving Coastal Art Works
When sharing your finished easy watercolor ocean painting ideas, remember that watercolor paper is fragile, so the best protection is a frame with Consider using UV-protective glass to preserve your artwork.. This special glass filters out the sunlight that causes pigments to fade over years, keeping your blues vibrant. You must use a mat or spacer to keep the glass from touching the painting surface, as moisture can get trapped and cause mildew. For a more casual look, a quality matte fixative spray creates a permanent, non-yellowing barrier. Apply two light coats in a well-ventilated area, letting each dry completely. This seals the paper and prevents smudging, allowing you to display the work without glass while still offering good protection from dust and incidental moisture.
Conclusion
Your connection to the ocean is personal, and capturing that feeling with paint is a wonderful way to celebrate it. We hope these easy watercolor ocean painting ideas gave you a clear starting point and the confidence to keep going. For your next project, pick one element you loved from these scenes—like the way light reflects on water or the shape of a distant sail—and make it the sole focus of a new piece. The best paintings often come from following that simple spark of inspiration.
FAQs
Q: How do I learn how to paint a watercolor ocean if I’m a complete beginner?
A: Start with a simple guide to watercolor focusing on fundamentals: choosing the right material and supply (paper, brushes, paint, thinner), basic brushstrokes, and simple color mixing. Follow a paint an easy watercolor ocean tutorial that demonstrates horizon placement, wet-on-wet washes for the sky and sea, and adding ocean waves with controlled brushstroke techniques. Consider short watercolor lessons or a beginner-friendly watercolor seascape tutorial to build confidence.
Q: What basic supplies and material do I need to paint an easy watercolor ocean?
A: Essential supplies include watercolor paper (cold-pressed 140 lb recommended), a range of brushes (rounds for details and flats for washes), quality watercolor pans or tubes, a palette, clean water, and a thinner or water for dilution. Extra material like masking fluid and a sponge can help create texture for waves. Choosing the right supply influences brushstrokes and the final appearance of your beautiful ocean landscape.
Q: Can you recommend a step-by-step watercolor seascape tutorial to paint the ocean waves?
A: Look for a tutorial on how to paint that breaks the process into steps: sketching the composition, laying a light wash for the sky and sea, developing midtones, lifting highlights for cresting ocean waves, and finishing with crisp brushstroke details for foam. Many tutorials include variations for calm seas or stormy surf and explain how thinner or more diluted paint affects transparency and softness.
Q: How can brushstrokes and brush strokes create realistic ocean wave effects?
A: Use varied brushstroke lengths and pressure to mimic the movement of water: long, horizontal strokes for distant bands of color and shorter, curved strokes for breaking waves. A dry brushstroke can suggest spray, while softer, blended strokes made with a damp brush create smooth water surfaces. Practicing different brushstroke patterns is a fundamental part of improving your watercolor ocean painting technique.
Q: Are there specific watercolor lessons or online classes you recommend, such as Skillshare or artists like Jenna Rainey?
A: Yes—Skillshare hosts many watercolor lessons and classes, including beginner-friendly guides and advanced seascape tutorials. Artists like Jenna Rainey offer step-by-step courses and approachable tutorials on how to paint florals and landscapes that translate well to seascapes. Search for watercolor seascape tutorial or watercolor ocean painting classes taught by experienced instructors to find structured guidance.


