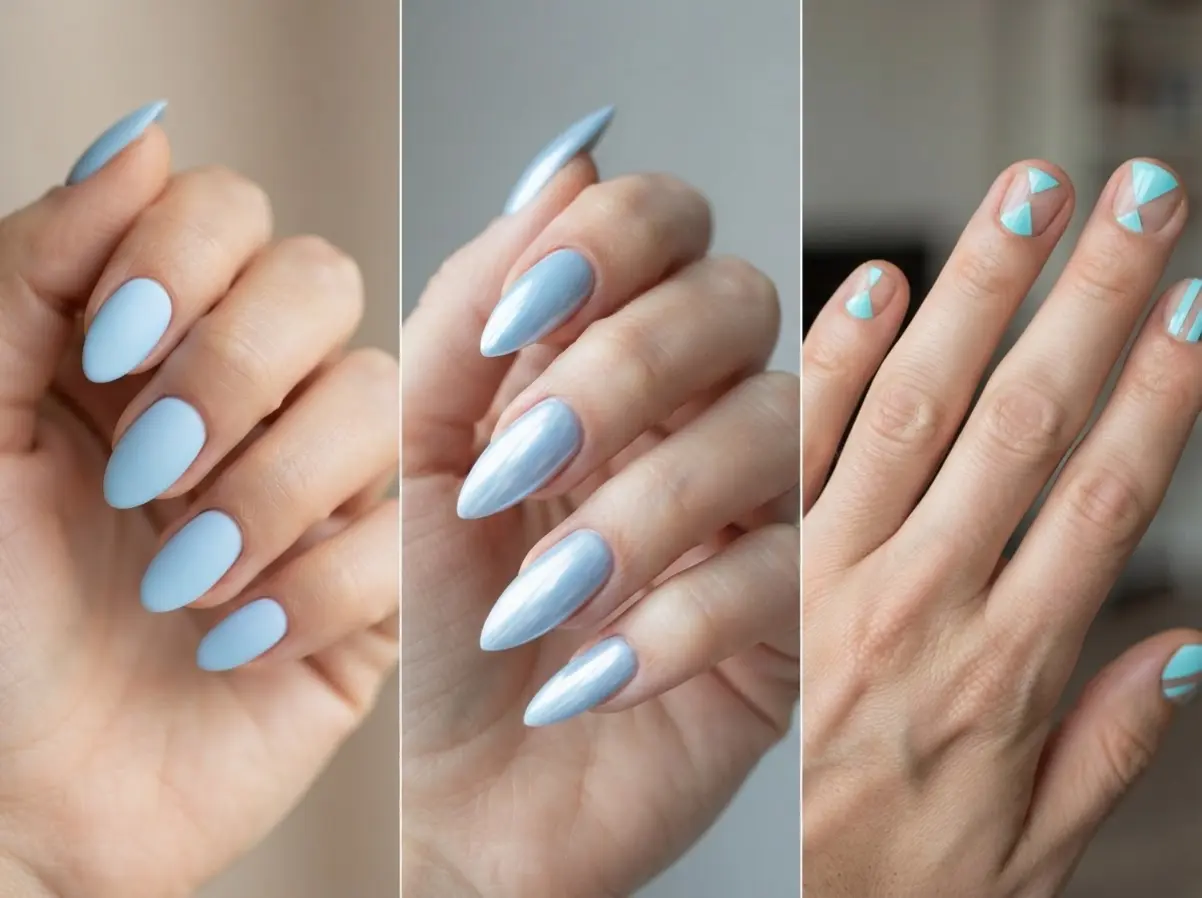


Sheer Base Layering For Pale Blue Polish
Use two thin coats of pale blue polish rather than one thick coat when you want an even, glassy finish. A sheer white polish beneath the color softens visible ridges and keeps the shade airy without turning it opaque. Letting each layer dry fully prevents brush marks and patchy pooling near the cuticle. A milky nude base suits a translucent jelly effect, while a white base makes powder blue look cleaner on short squoval nails. Keep the polish away from the skin, since pale shades show flooding more clearly than deeper blues. Thin coats also support chrome, aura, and glossy finishes without adding bulky height. A ridge-filling base coat helps the final surface look smooth, especially on nails with shallow vertical lines, which matters greatly for Light Blue Nails.
Detail Brush Control For Fine Nail Lines
Choose a 00 or a liner brush with short, springy bristles for clouds, stars, and narrow swirls on pale blue nails. A fine detail brush gives you more control than a wide art brush, especially around the cuticle curve and sidewalls. White polish creates crisp contrast, while royal blue adds definition without making tiny motifs look heavy. Load only a small amount of polish, since excess liquid spreads into ridges and blurs fine lines. Rest your painting hand on a table to steady the wrist, and rotate the finger instead of forcing the brush through a curved path. A dotting tool or bobby pin suits small flower centers and evenly sized dots. Keep negative space around each mark so delicate details stay readable, and this careful spacing elevates Light Blue Nails.
1. Pastel Baby Blue Matte Almond Nails
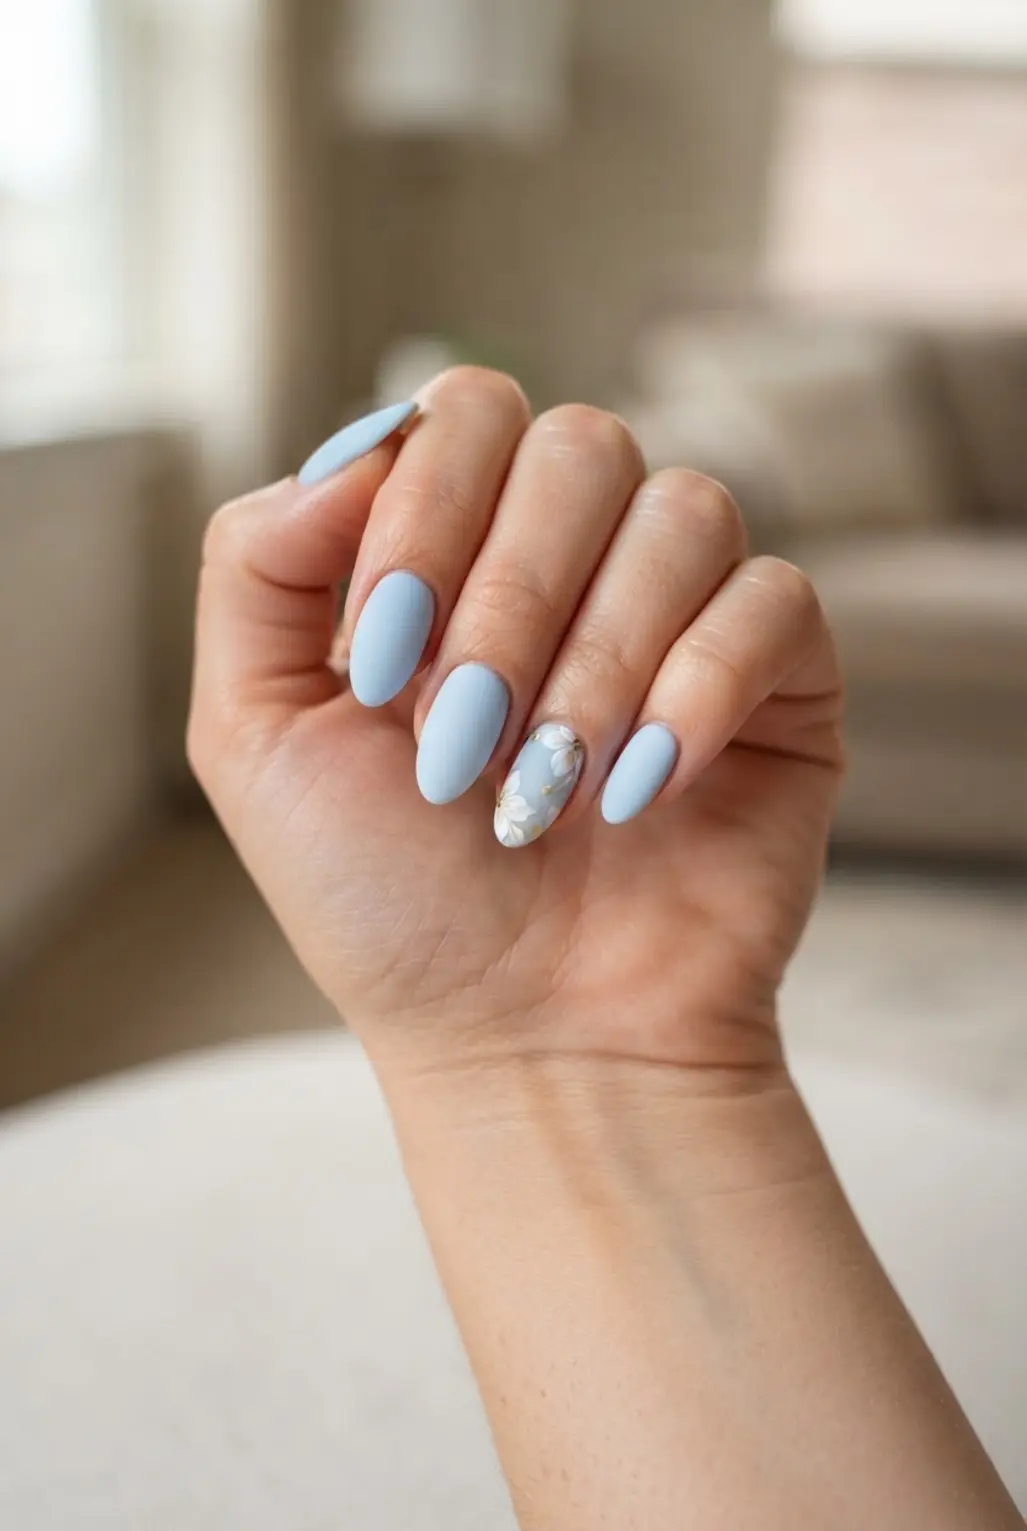
Want a soft manicure with a polished shape and zero fuss? Start by filing each nail into a slim almond silhouette, keeping both sides even and the tip gently rounded. Apply two thin coats of pastel baby blue polish, allowing each layer to dry before the next.
Seal the color with a matte top coat for a smooth, velvety surface without shine. I love how the pale blue feels fresh for daytime yet refined enough for dressier plans. Keep the base plain for a clean look, or add tiny white swirls, a floral detail, or a touch of micro-glitter near the cuticle. Trust me, light decoration keeps the almond shape and calm color in focus, making Light Blue Nails a standout choice.
2. Light Blue Chrome Stiletto Glazed Nails
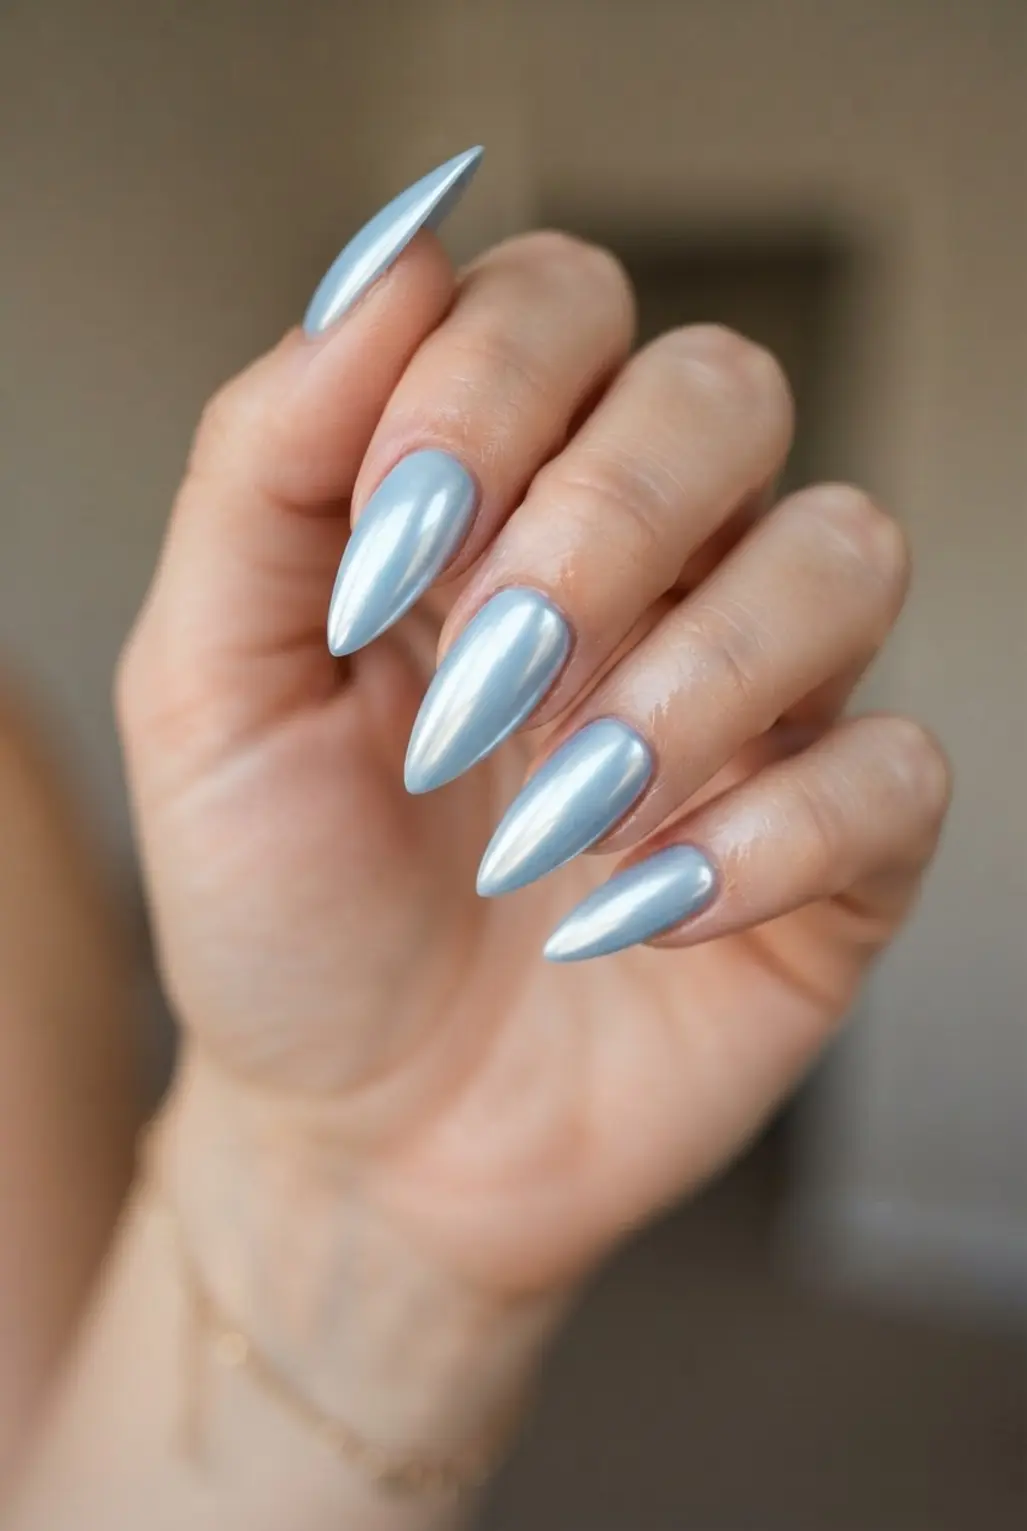
This look brings icy color, mirror shine, and a long pointed profile together in one polished set. Start with a pastel blue or sheer pink base, then press blue chrome powder over the cured surface for a metallic glaze. The finish shifts between silver-blue reflection and a soft pool-like tint.
Sound complicated? It is not. Shape the nails into a stiletto point, smooth the edges, and seal them with a glossy top coat. Press-on nails offer a quicker application, while reusable handmade sets keep the style ready for another wear. Light Blue Nails truly shine when paired with this reflective finish.
I love how the sharp silhouette makes the pale shade feel dramatic without extra decoration. Chrome should look reflective rather than like ordinary glitter, and medium stiletto sets give less length than long ones. Trust me on this one: choose the base first, since sheer pink gives a translucent aquatic effect while solid blue looks more opaque. This approach guarantees Light Blue Nails maintain their icy elegance.
3. Sky Blue Jelly Finish Square Nails
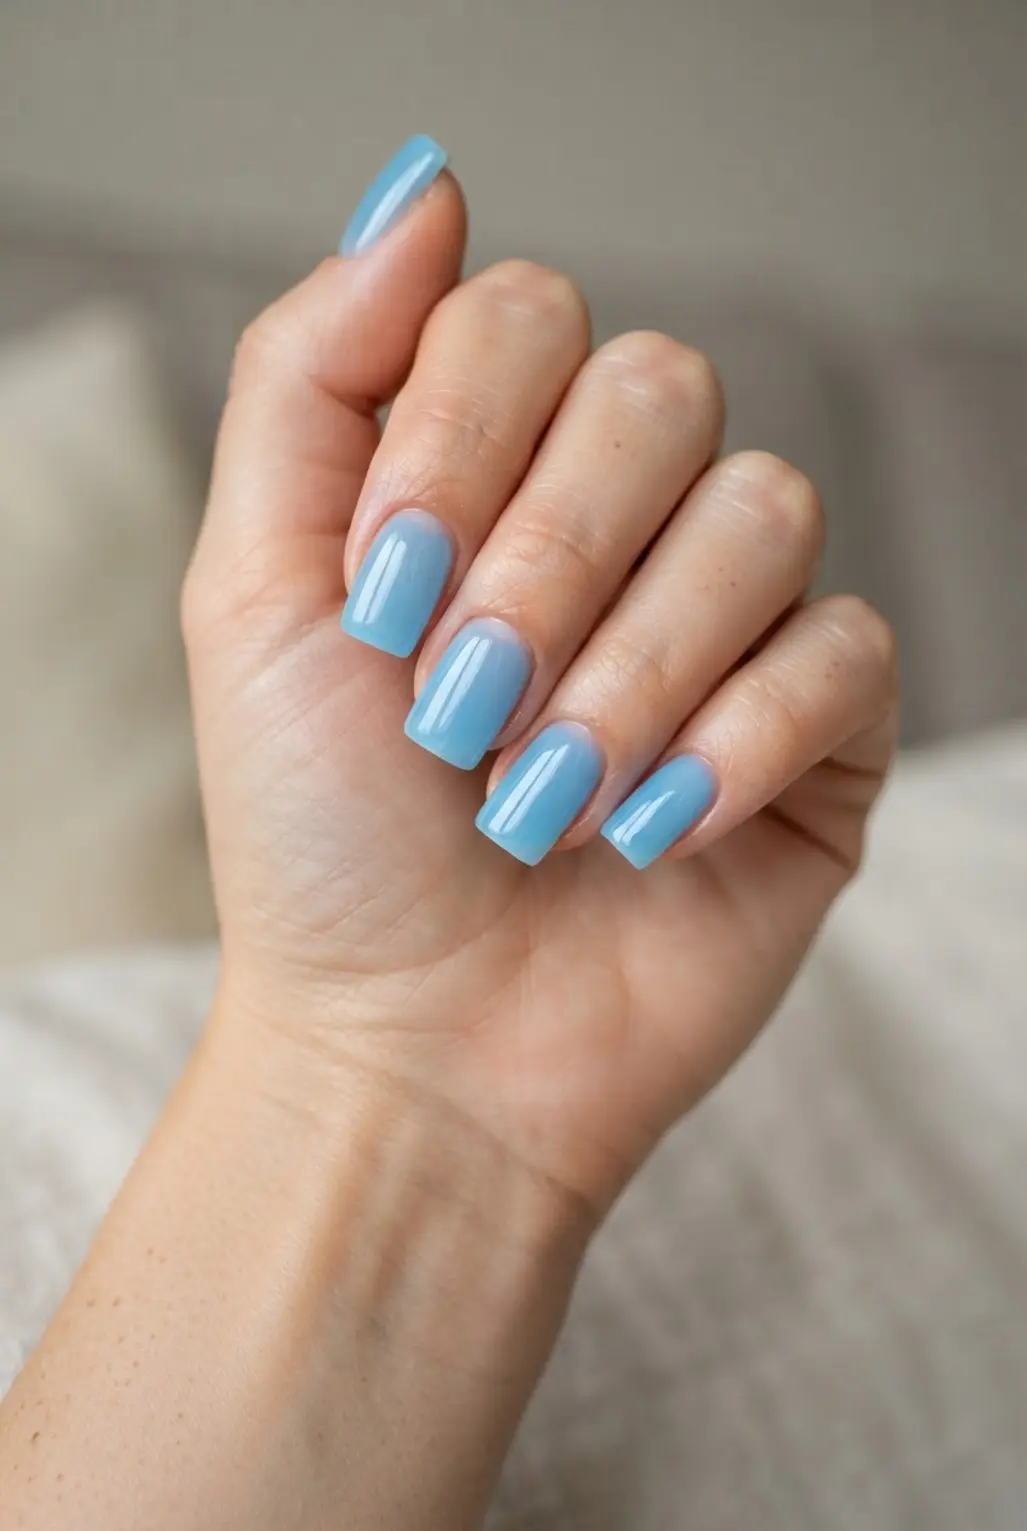
This one is a favorite of mine because the color looks soft, glossy, and fresh without feeling flat. Want a manicure with a little extra depth? Start with clean nails, then brush on a thin jelly polish coat and let it dry fully before adding another. Each layer deepens the pale blue while keeping a hint of the natural nail visible.
For a ready-made version, choose square press-ons sized from sidewall to sidewall, then prep with an alcohol pad before using glue or adhesive tabs. Glue often gives 7 to 14 days of wear, while tabs suit shorter, 1 to 3 day plans. The straight tips keep the look neat, and the translucent finish gives a softer glazed effect. Trust me, thin layers make the shine feel clean and dimensional, and Light Blue Nails benefit from this method.
4. Light Blue French Tip Coffin Nails
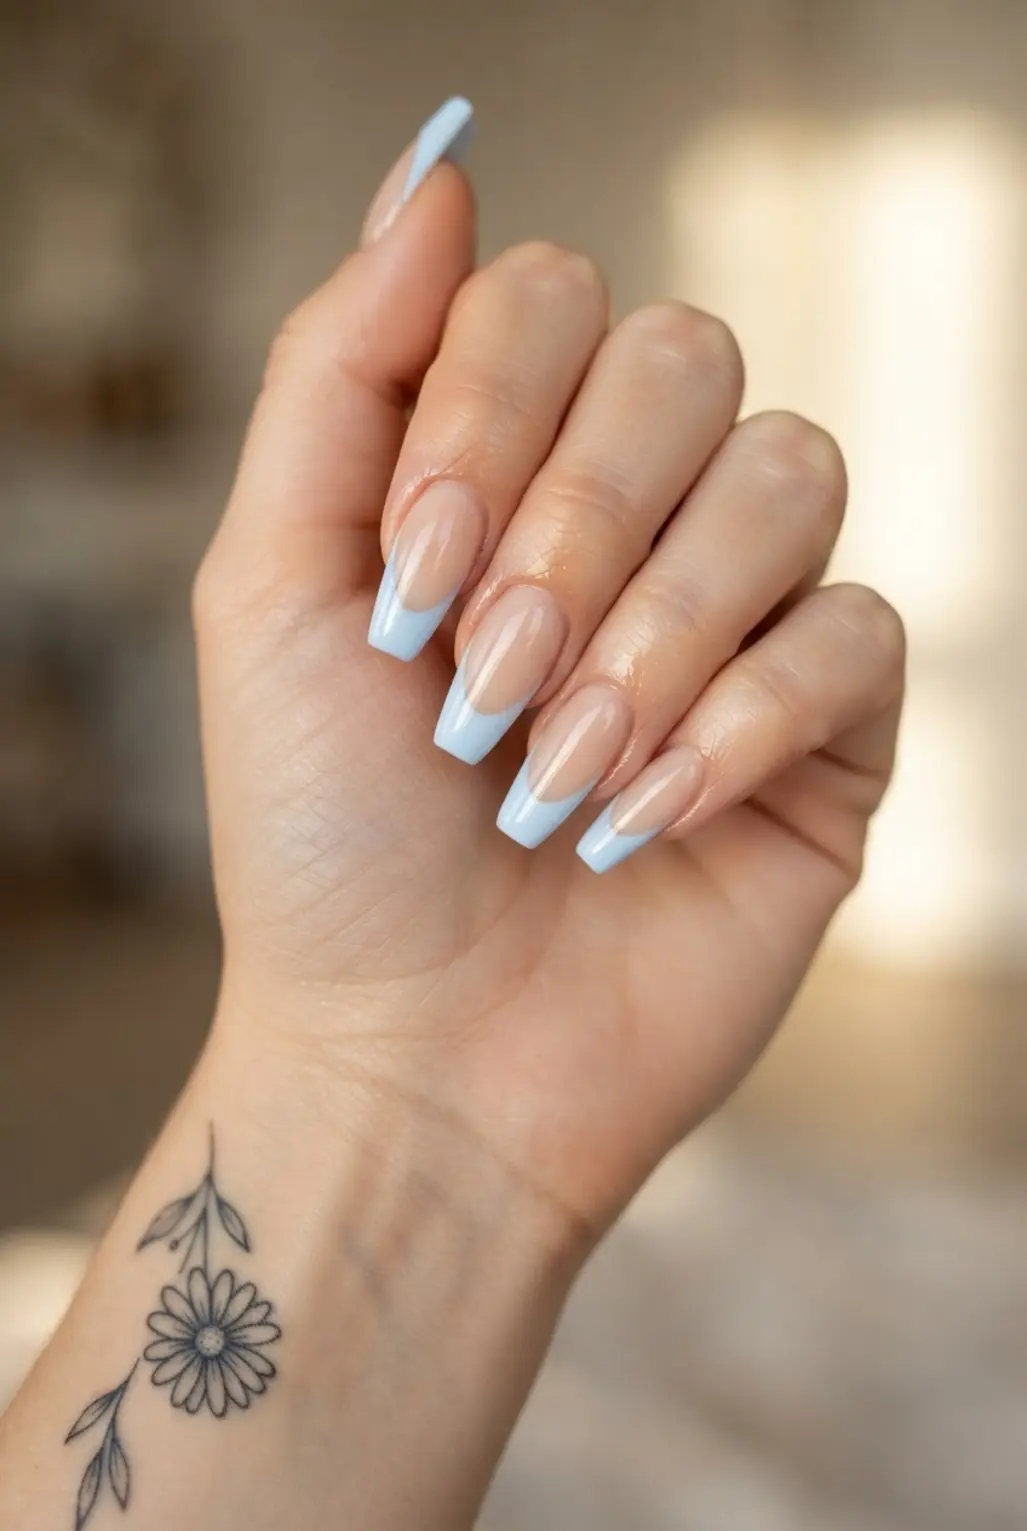
Glossy nude bases and icy blue edges give these nails a crisp, polished look, while the squared coffin ends add sleek length. Isn’t that satisfying? I love how the blue feels fresh without taking over the whole manicure.
Shape each nail with tapered sides and a straight edge, then smooth on a neutral base. Paint a light blue French tip across the free edge, keeping the curve even from side to side. A thin micro-French line feels delicate, while a double line or diagonal edge brings extra detail. Finish with a glossy top coat for a glassy surface. Light Blue Nails always gain structure from this precise layout.
Baby blue and milky shades feel soft, while icy or sky blue looks sharper. The coffin silhouette gives the design its glamorous structure, so neat filing matters as much as polish placement. Trust me on this one: a steady brush and short strokes make the tips look refined. Feel proud when the fresh color catches the light, which perfectly complements Light Blue Nails.
5. Dusty Blue Marble Swirl Accent Nails
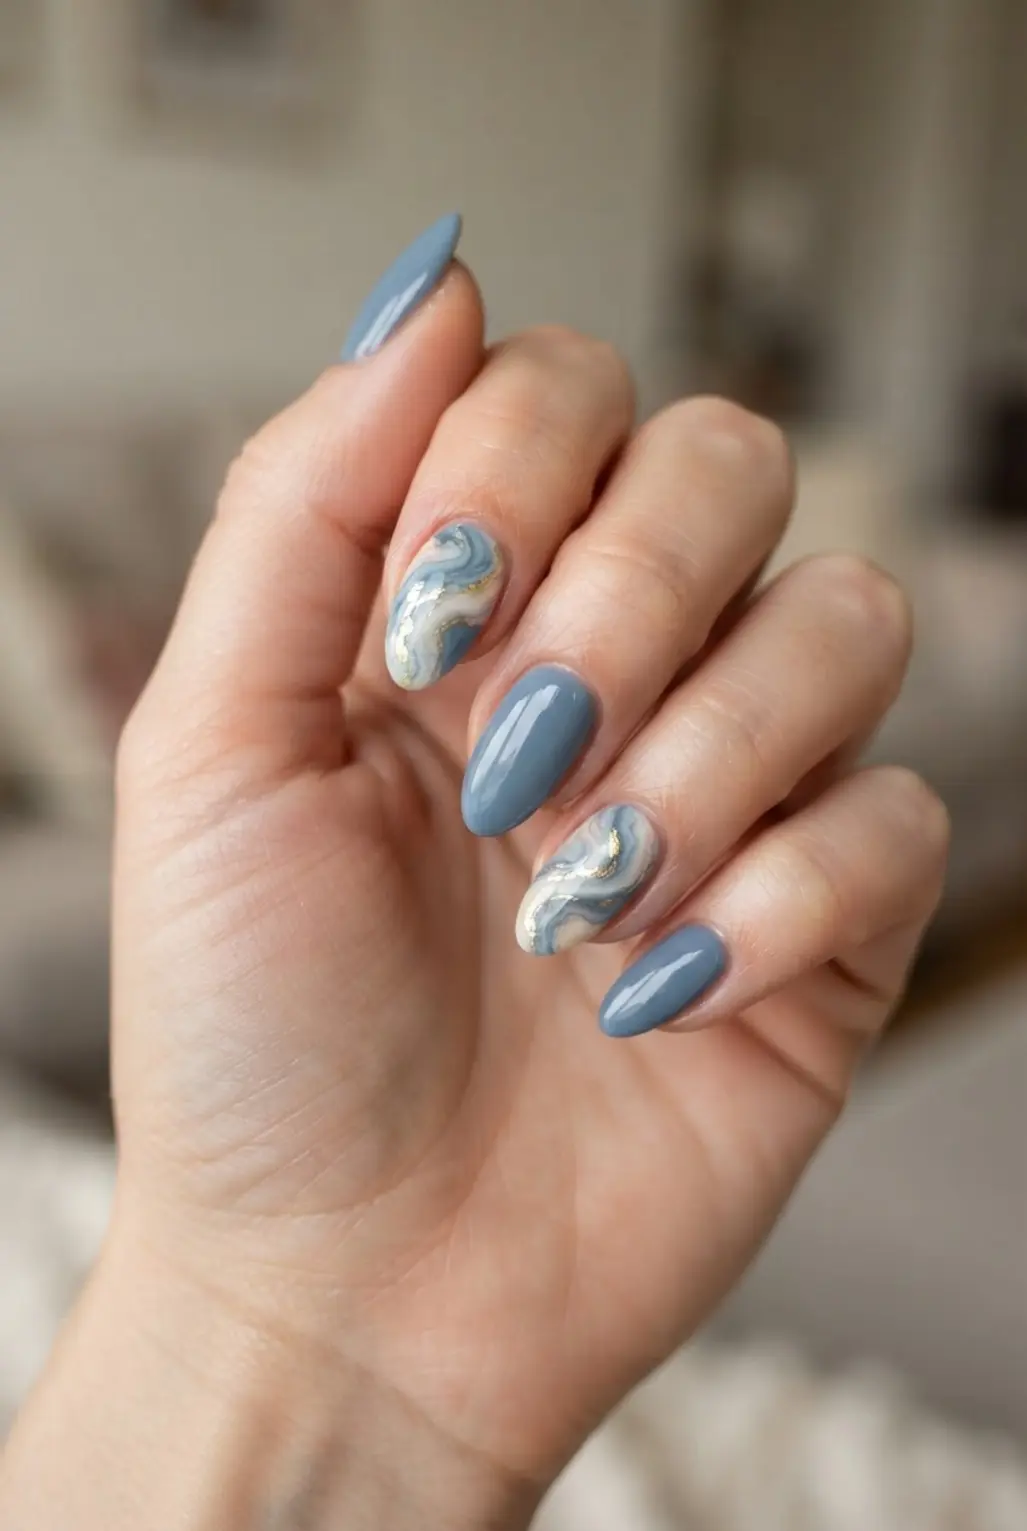
Dusty blue marble nails do not need perfect swirls, and trying to make every line match often makes them look stiff. Start with a muted blue base, then add thin white and deeper blue curves while the polish is still soft. A fine detail brush lets you pull each line into loose bends across one or two accent nails.
Keep the remaining nails in the same dusty shade so the swirled fingers stay the focus. Sound complicated? It is not. I love how the milky lines soften the cool blue and give each accent nail its own pattern. Work with a light touch, then seal the surface with a glossy top coat once the lines settle. Trust me on this one, slightly uneven curves make the finish feel hand-painted and relaxed, proving why Light Blue Nails remain so versatile.
6. Ice Blue Shimmer Oval Nails
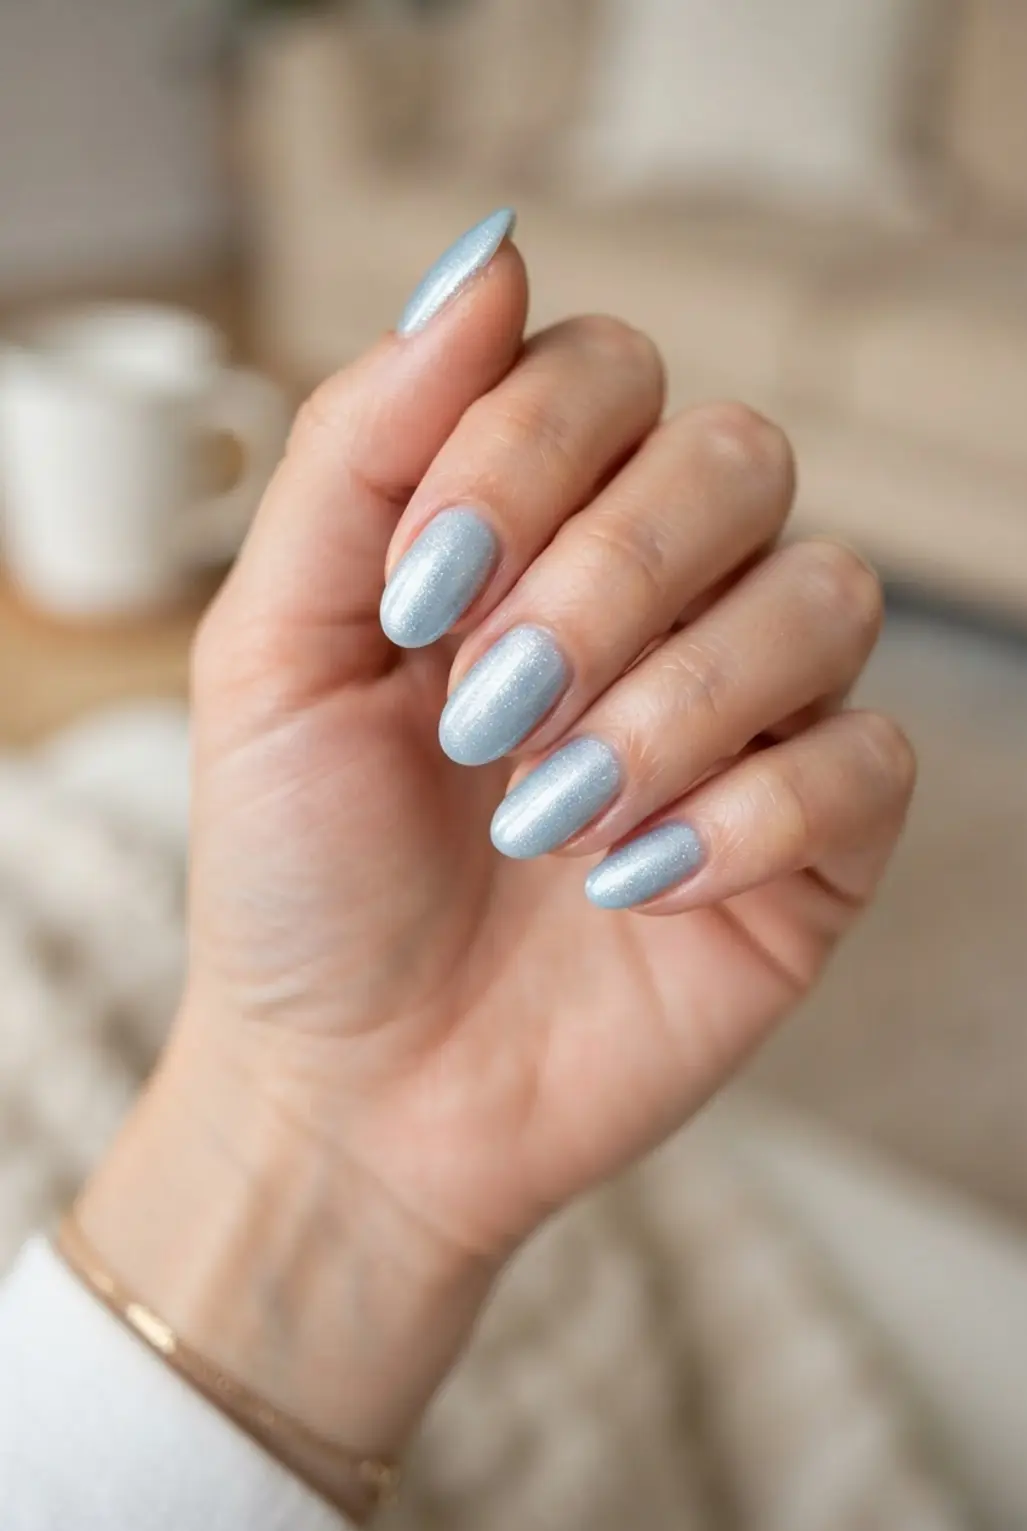
Start by sizing oval press-on nails against each natural nail, checking both sides before adding adhesive. Clean and dry your nails, then lightly buff away shine so the surface feels fresh. Press each nail firmly into place, holding it still for a few seconds. Sound complicated? It isn’t, especially with a ready-made set. Light Blue Nails pair beautifully with this straightforward application.
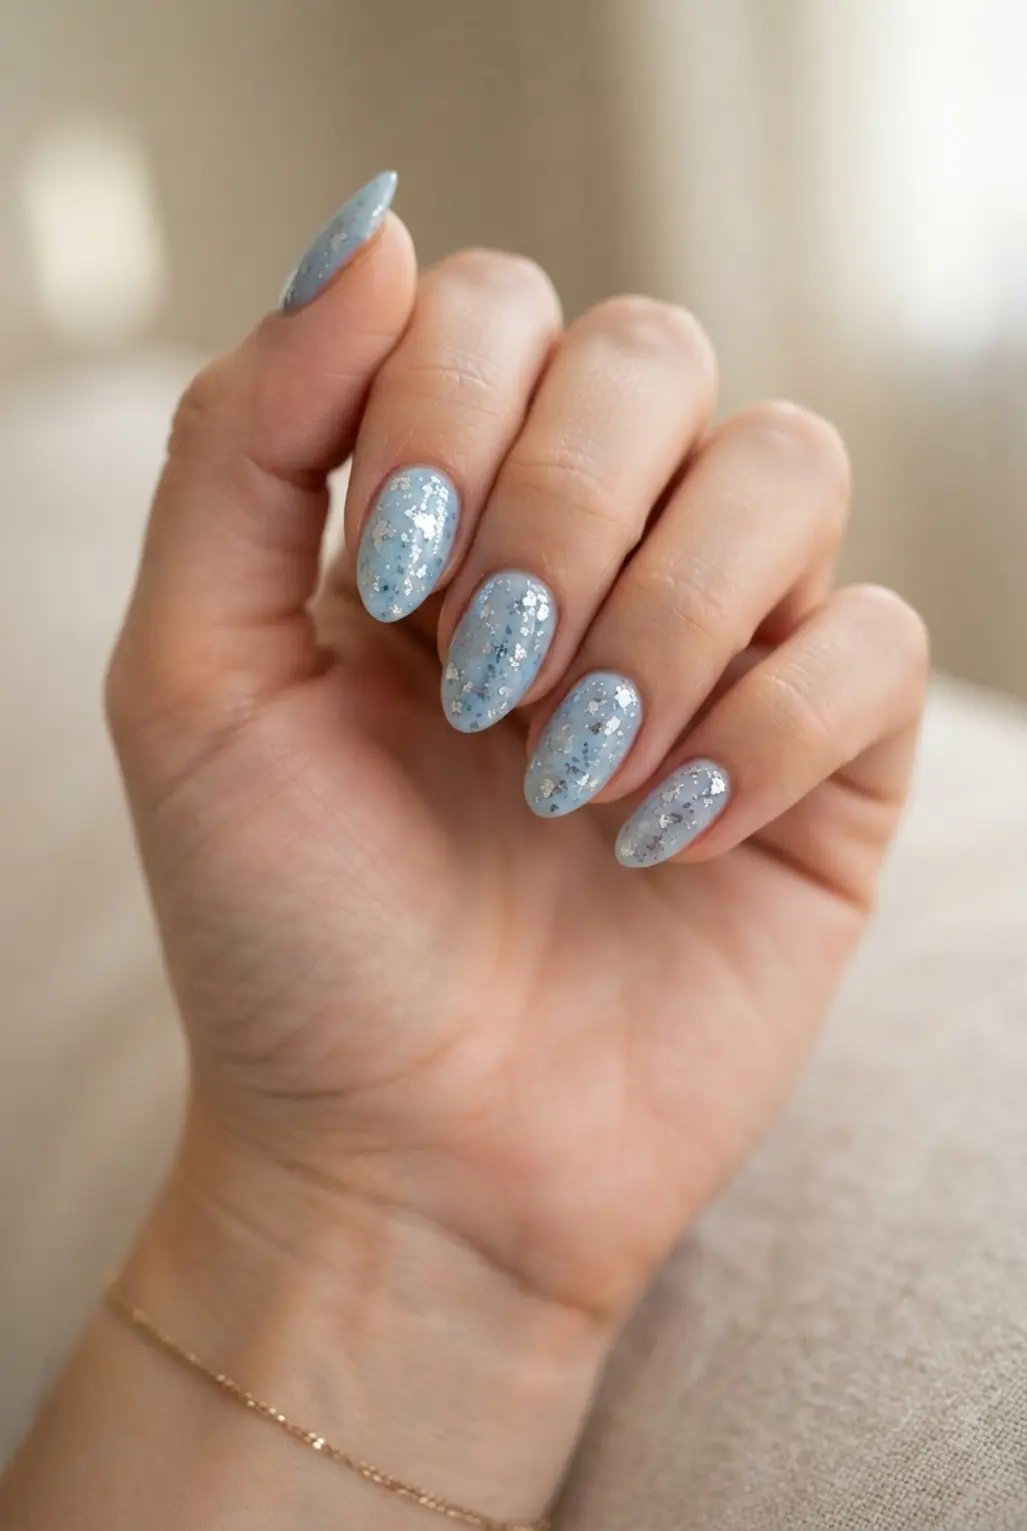
Look for a pale blue base with silver chrome, tiny snowflakes, or a few crystals, while keeping the shimmer visible across each nail. The oval edge softens the look, and a short length keeps it comfortable for everyday tasks. I love how the glossy finish catches light without feeling heavy. Pro tip: file side edges gently instead of forcing a size, and keep the nails dry during the first few hours, ensuring Light Blue Nails stay secure.
7. Light Blue Floral Hand-Painted Details
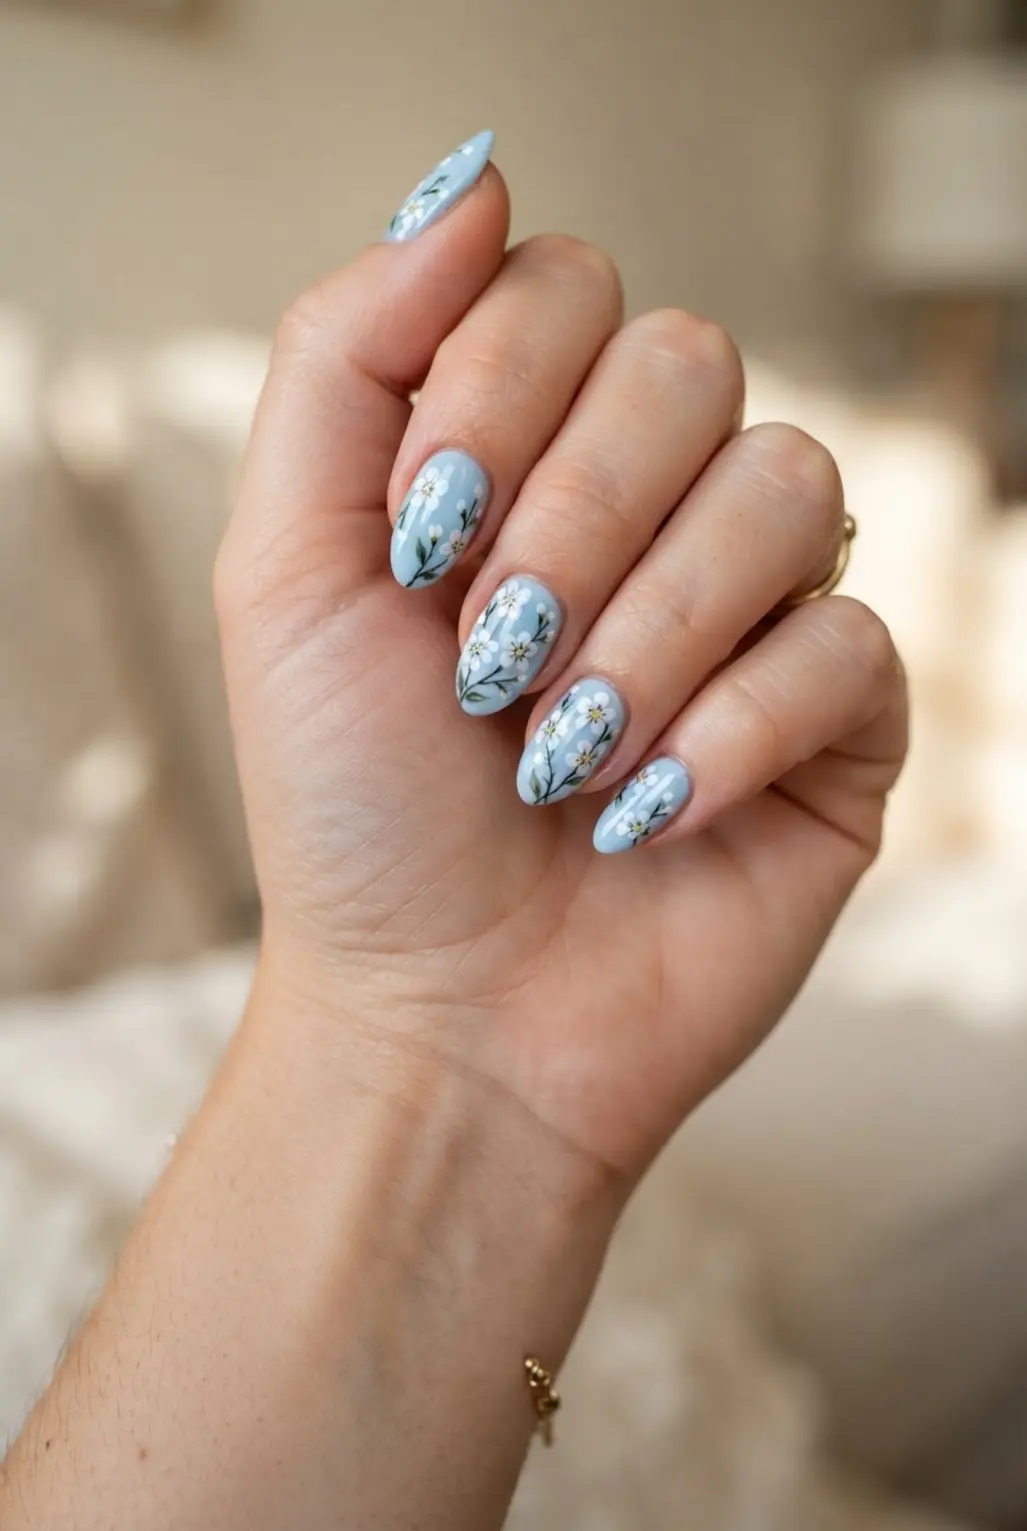
Ever tried painting tiny flowers over a pale blue base? Start with a fine detail brush, using white or soft cream polish for slim petals arranged around a small center. Add a few green leaves with short, curved strokes, then vary the flower size so each nail feels personal rather than copied. Light Blue Nails offer the perfect canvas for this botanical art.
I love how the gentle contrast keeps the manicure fresh while the hand-painted marks give it a sweet, artistic finish. Use a dotting tool for neat flower centers, and let each layer dry before adding the next one. A thin top coat smooths the surface without hiding the delicate details. Feel proud when those little blooms come together, which adds charm to Light Blue Nails.
8. Aqua Blue Negative Space Geometric Nails
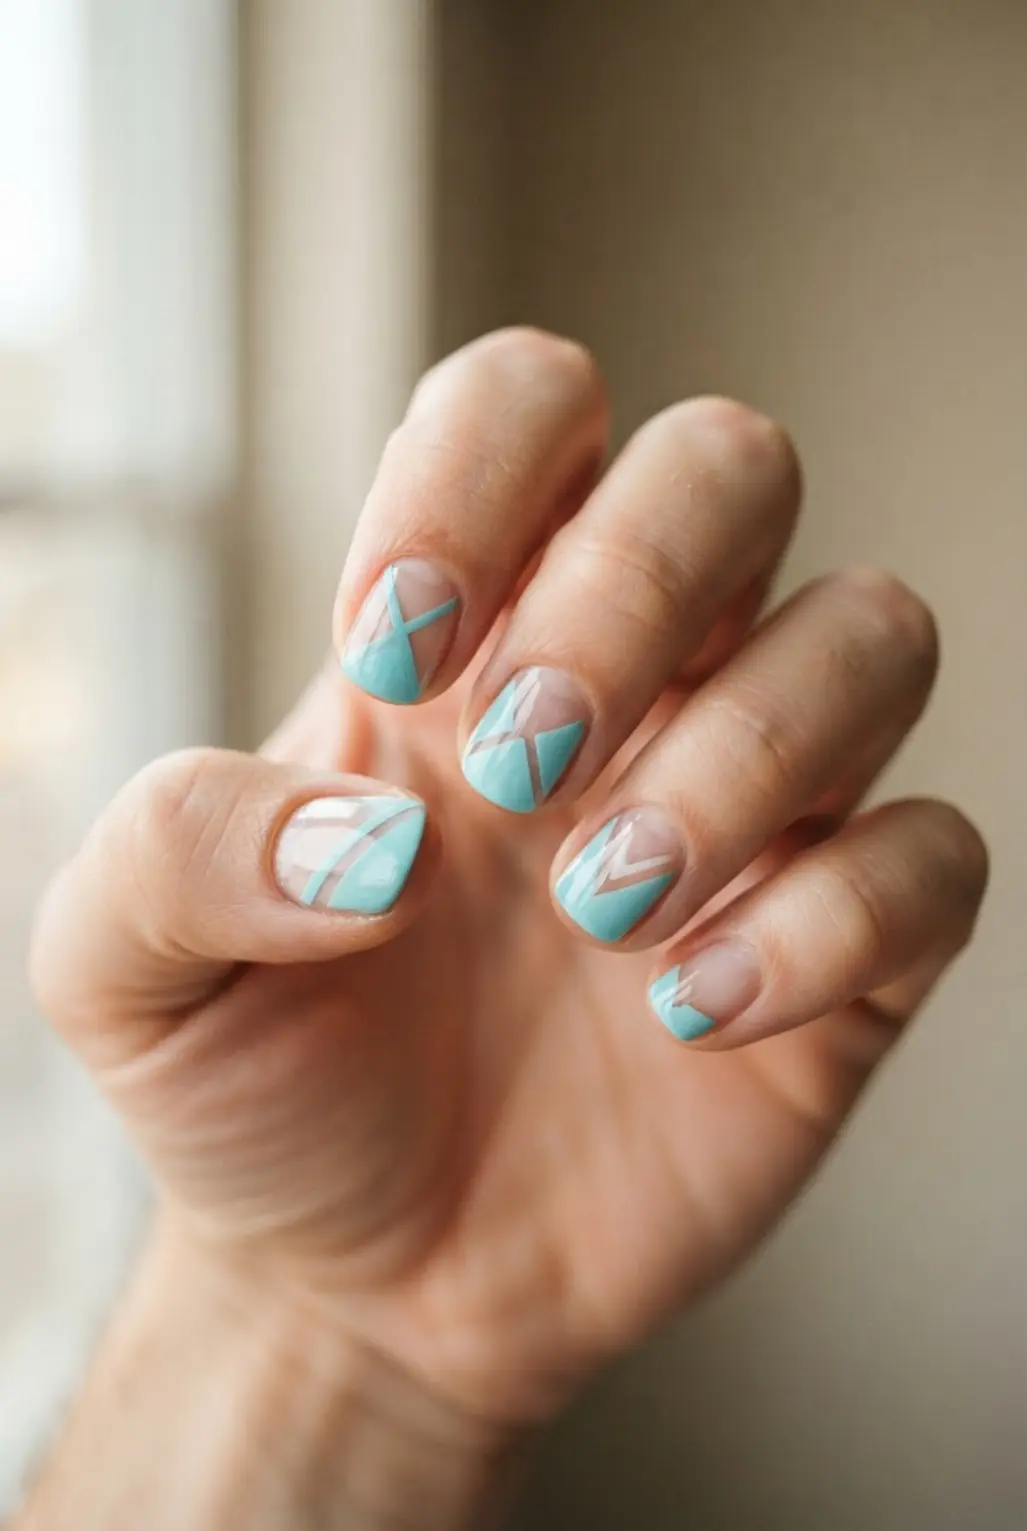
This design looks polished and modern, yet the bare nail keeps it fresh. Start with a base coat, then map triangles, diagonal stripes, or small cutouts before placing nail art tape. Light Blue Nails often incorporate this modern geometric approach.
Paint aqua blue over the masked sections and lift the tape while the polish is slightly wet. Sound complicated? It is not, and crisp lines appear with far less fuss.
I love how the uncovered areas give each color-blocked shape room to stand out, especially beside white, charcoal, or deep blue. Keep the layout simple, clean polish near the cuticle with a small brush, and seal with a glossy top coat for a fresh finish. This precision elevates Light Blue Nails to a gallery-worthy standard.
9. Periwinkle Blue Glitter Gradient Nails
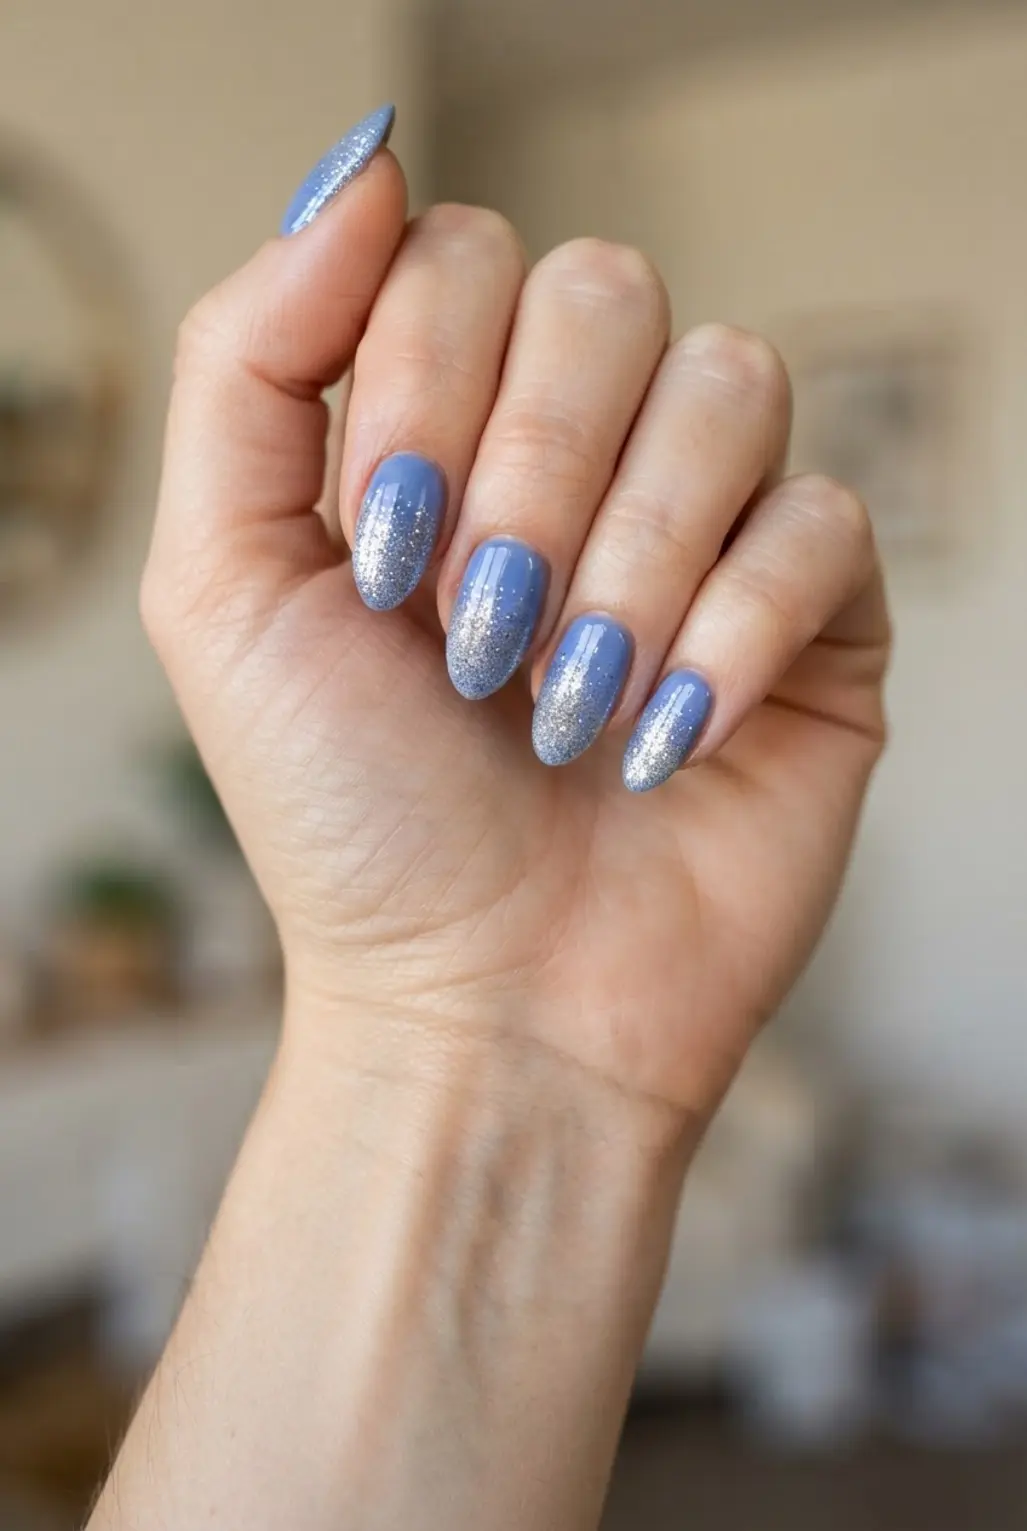
This one is my favorite because soft periwinkle feels dreamy while the sparkle stays refined. Ever tried a glitter fade instead of covering every nail in shine?
Start with a periwinkle-blue base and let it dry fully. Brush holographic glitter from the free edge toward the center, using less polish as you move upward. A makeup sponge gives the tip a soft fade, while thin layers keep the blue visible. Light Blue Nails shine brightest when the gradient remains subtle.
I love how the gradient adds depth without making the manicure feel busy. Seal it with a glossy top coat, or cure gel products under a UV lamp according to product directions, and build the glitter slowly for a clean, sparkling finish. Trust me, this technique keeps Light Blue Nails looking polished.
10. Light Blue Rhinestone Embellished Nails
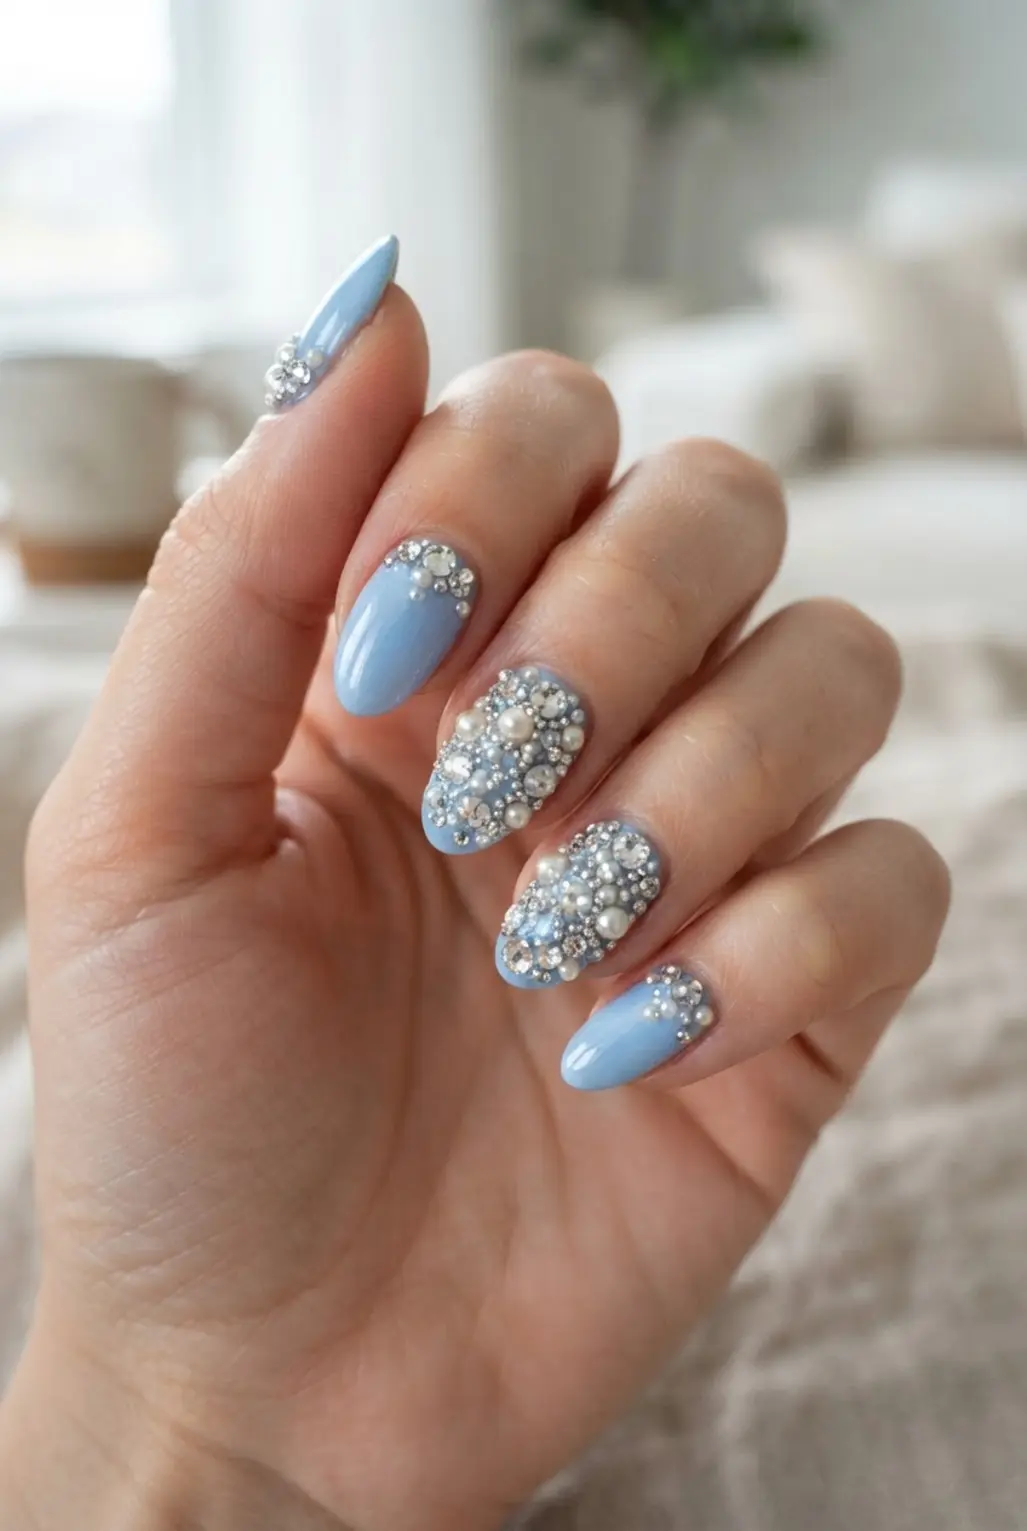
Soft blue polish catches the light while tiny rhinestones sparkle across each nail, giving the set a cool, polished finish. Glossy light blue polish creates the smooth base, and a thin layer of top coat keeps the color even. Isn’t it satisfying when every fingertip flashes as you move?
After the base dries, place small rhinestones near the cuticle, along a curved tip, or in a neat accent cluster. Use a fine-tip wax pencil to pick up each stone, then press gently into nail glue or tacky gel. I love mixing clear stones with a few icy blue ones, since the soft contrast adds detail without making the set feel heavy. This placement works perfectly with Light Blue Nails.
Finish with gel top coat around the stones, leaving their raised surfaces uncovered so they keep their sparkle and texture. Keep the clusters smaller on short nails, while longer nails give you room for a graceful line or scattered arrangement. Trust me, this look feels fresh, dressy, and easy to personalize, especially when styled with Light Blue Nails.
11. Soft Blue Ombre Square Nails
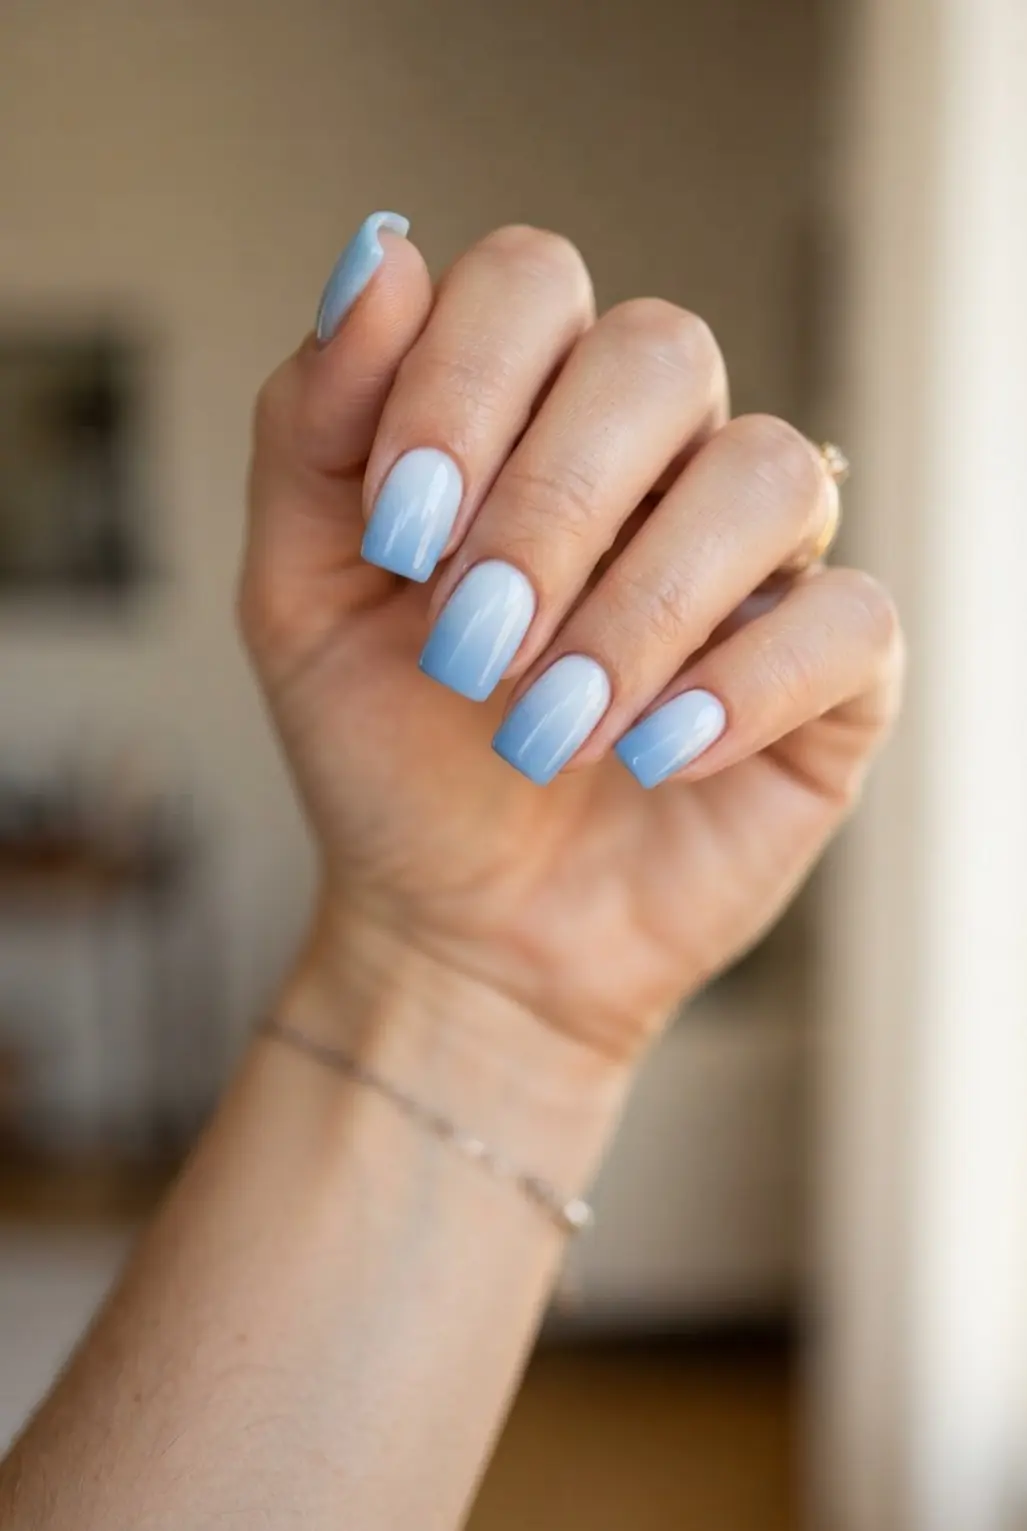
Soft blue ombré does not mean a sharp line between white and blue. Sound complicated? It is not. Start with a square shape, then lay down a milky white base before softly sponging baby blue toward the tips, keeping each pass light so the shades fade into one another. A glossy topcoat gives the surface a smooth, glass-like finish, while a faint iridescent glow adds interest without hiding the gradient. Light Blue Nails naturally embrace this gentle transition.
I love how the straight edges give this gentle palette a neat, structured look. Keep decorations small, with a shell detail or a subtle cat-eye glow on one or two nails rather than every finger. Trust me, close shades create the prettiest soft blue ombré effect, and your finished manicure will feel fresh, polished, and beautifully calm. This approach guarantees Light Blue Nails maintain their elegance.
12. Cornflower Blue Minimalist Line Art Nails
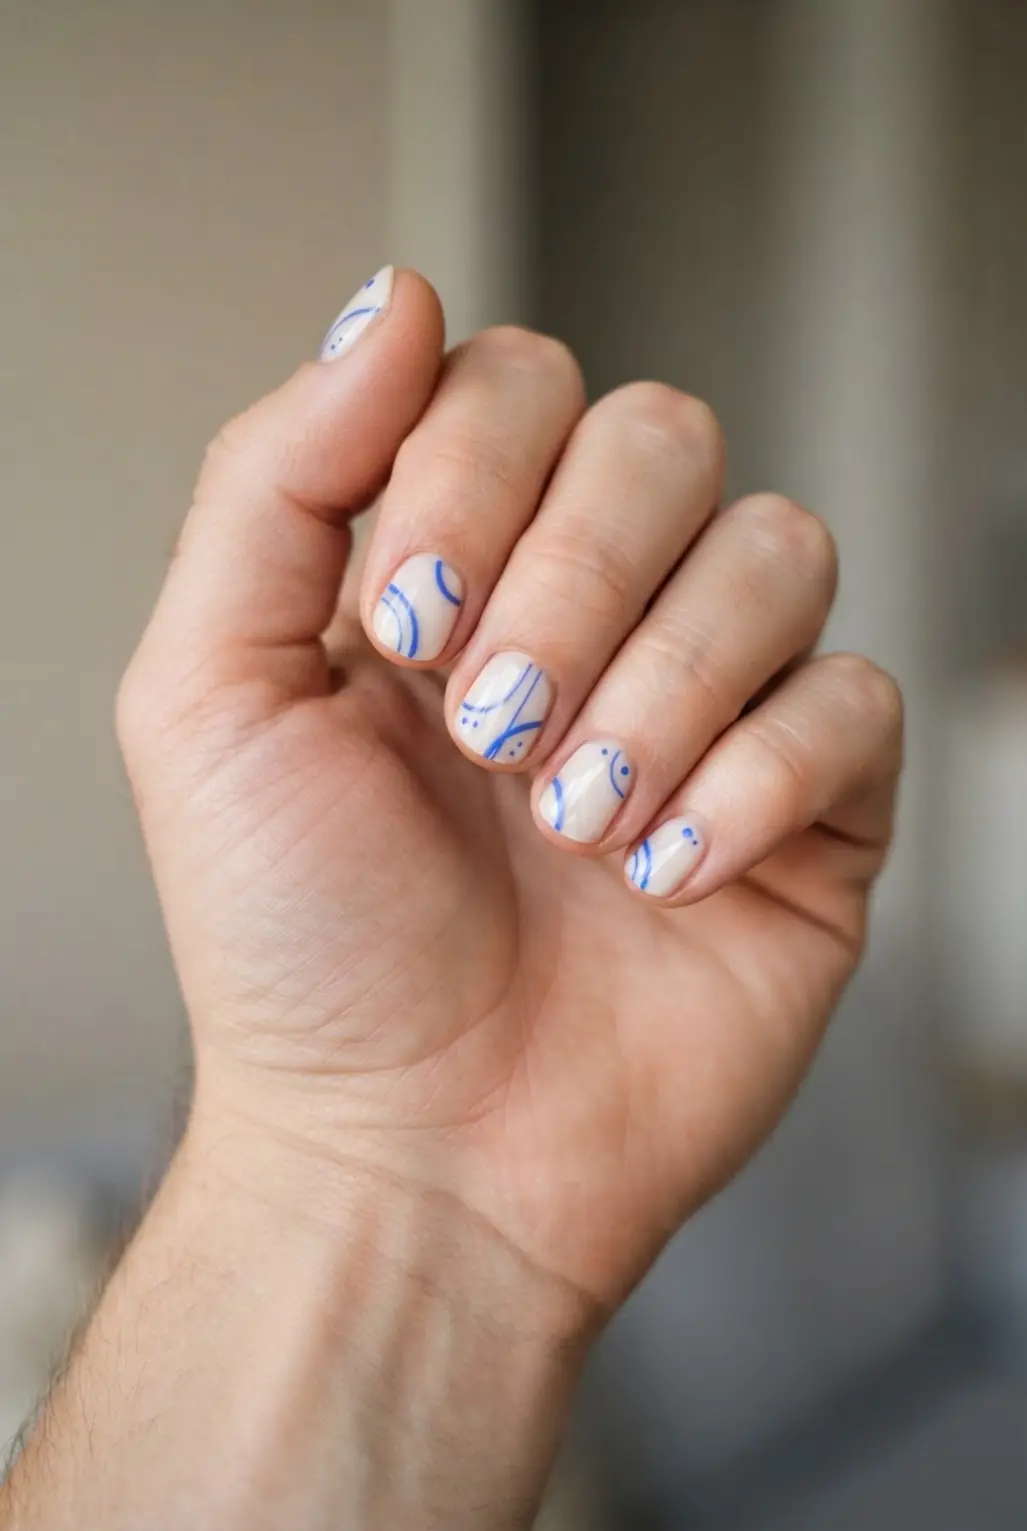
Prep each nail for gel application, then smooth the surface before reaching for a fine-detail nail art brush. Keep your base layer even and fully cured, so each blue stroke has a clean surface beneath it. Light Blue Nails respond well to this careful preparation.
Load the brush with high-pigment cornflower blue gel paint, wiping away excess before drawing. Add slim arches, tiny geometric shapes, or simple abstract outlines across the nail. Sound complicated? It isn’t, especially when you work with short, steady strokes.
The open spacing keeps the manicure neat while the soft blue shade gives every detail a fresh finish. I love how minimalist line work feels polished without looking busy.
Cure the design beneath a UV or LED nail lamp according to the paint instructions. Add a gel top coat when needed, then cure again for shine and protection. Trust me, light pressure makes the lines look far more refined, which perfectly frames Light Blue Nails.
13. Light Blue Foil Speckle Detail Nails
Ever wondered how soft blue polish gets those tiny flashes of metal? Start with a light blue base, then scatter small foil flecks across one or two nails for a delicate speckle effect. Transfer foil gives a more graphic finish, while a flake polish builds the reflective pieces right into the color. Keep the coverage loose so the blue still leads. Light Blue Nails often feature this metallic speckle technique.
I love how the flecks catch light without making the manicure feel busy. For transfer foil, cure the base, add foil transfer gel, press the foil with firm fingertip pressure, then seal everything with a compatible top coat. Marble-print foil often creates patches and gold-dust details instead of separate dots, so a light touch keeps the finish airy. Semi-cured gel strips offer an easy shortcut. This method ensures Light Blue Nails stay lightweight and striking.
14. Electric Light Blue Abstract Swirl Nails
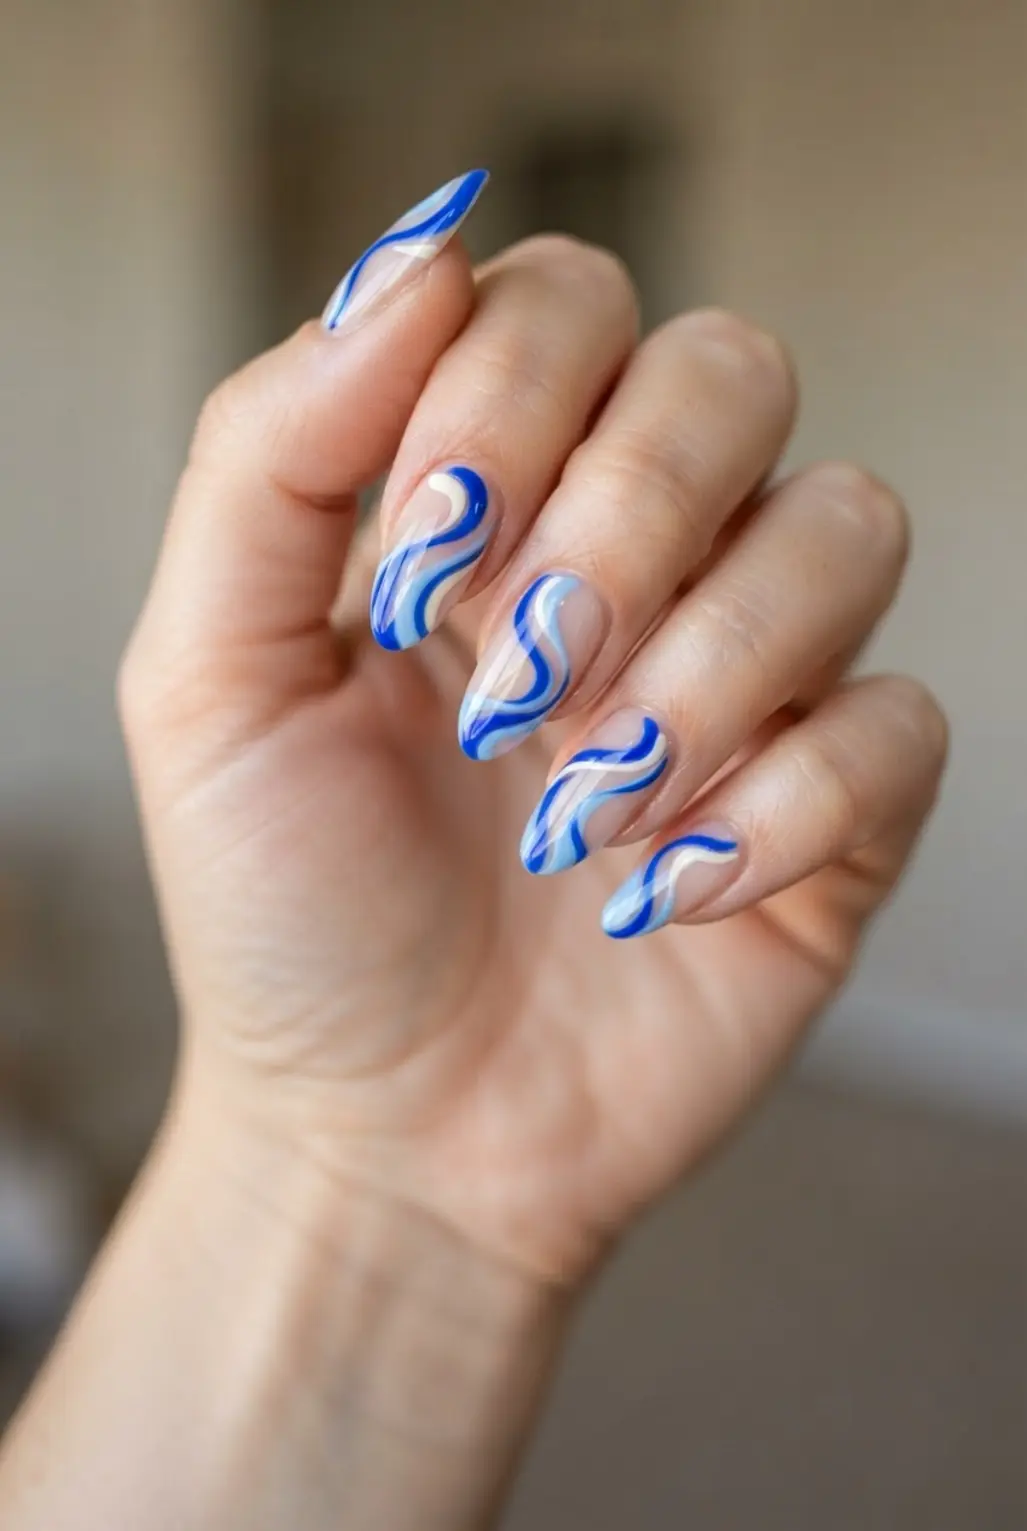
This design looks high-energy, yet the loose lines keep it friendly for a relaxed nail session. Start with a sheer or pale periwinkle base, then use a fine liner brush to sweep uneven electric-blue curves across each nail. Keep the strokes varied, with some narrow bends and a few open loops. Sound complicated? It is not. Light Blue Nails absorb this vibrant energy beautifully.
Add white, powder blue, or tiny glitter touches where the lines need more separation. A shimmering periwinkle background gives dark blue squiggles extra depth, while a softer base creates a calmer finish. I love how the mismatched swirls make each fingertip feel personal without demanding perfect symmetry. Cure each layer according to your gel system, then seal the surface and enjoy the fresh, lively finish, which perfectly complements Light Blue Nails.
15. Light Blue Gold Leaf Accent Nails
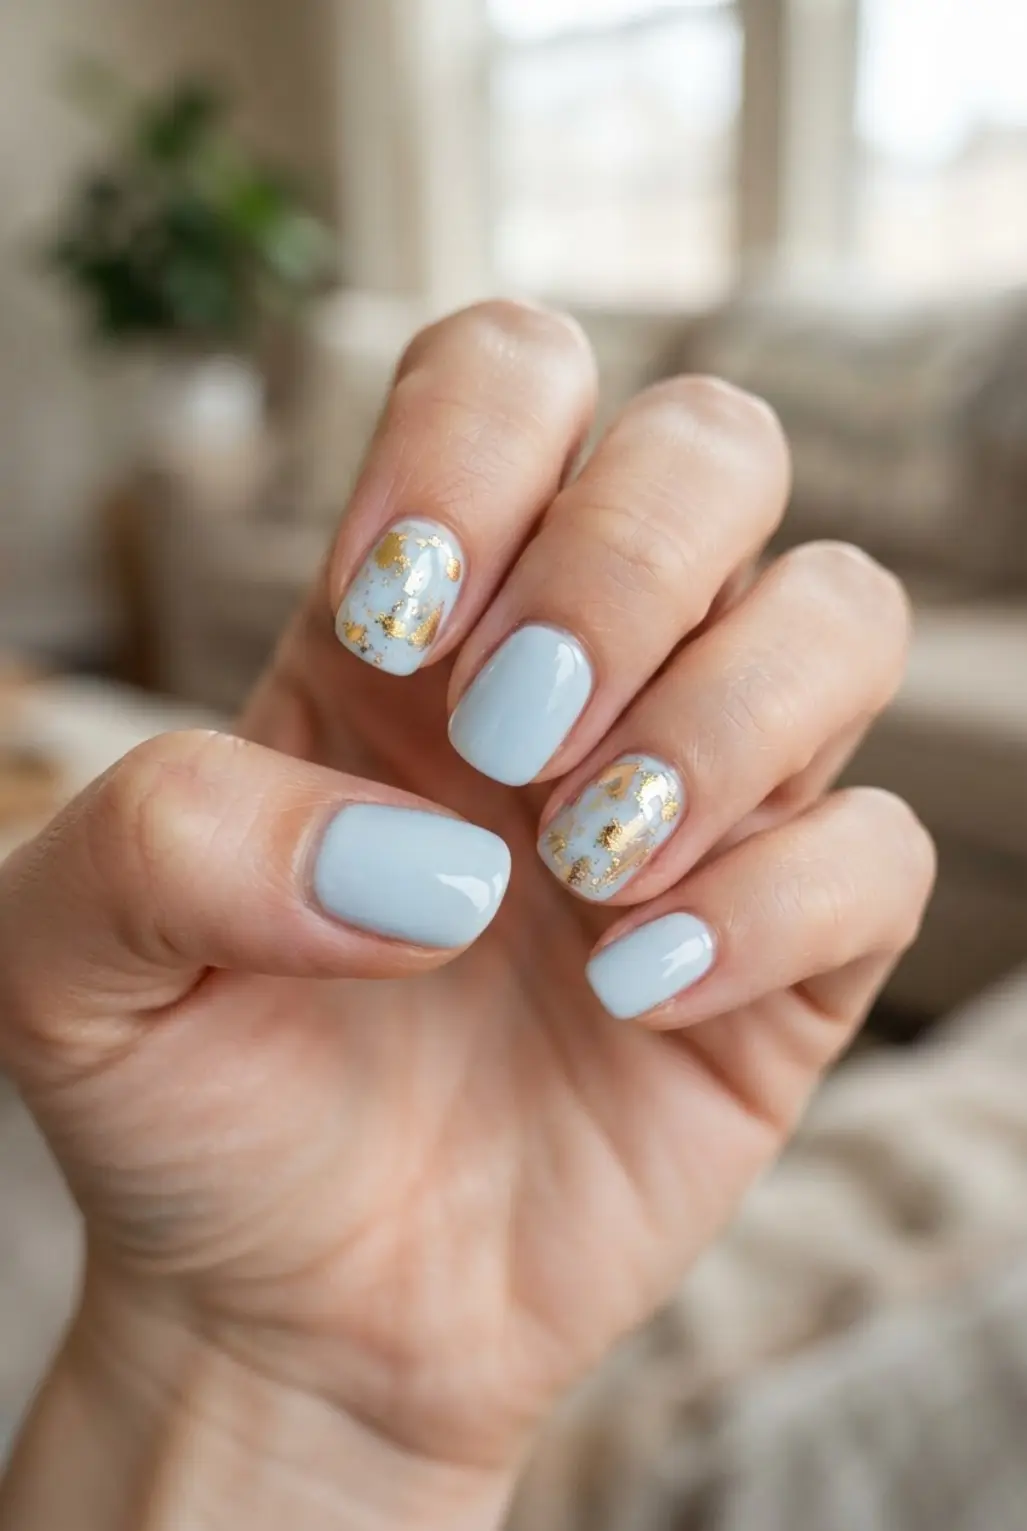
This is one of my favorite soft glam looks because it feels fresh without looking plain. Start with a smooth pale blue polish across each nail, leaving one accent nail ready for the gold detail. Two thin coats give the color a clean, airy finish.
Press small pieces of gold leaf flakes onto the accent nail while the surface is slightly tacky, placing them near the cuticle or along one side. Sound complicated? It is not. Keep the pieces uneven for a relaxed finish, then brush away loose edges with a soft, dry brush. Light Blue Nails pair effortlessly with this metallic touch.
The cool blue and warm metallic touch work so well together because each shade stays visible without competing. Seal everything with a clear top coat, paying attention to the edges, and enjoy the polished little flash each time your hands move. Trust me, this contrast highlights Light Blue Nails perfectly.
16. Cloud Motif Soft Blue Design Nails
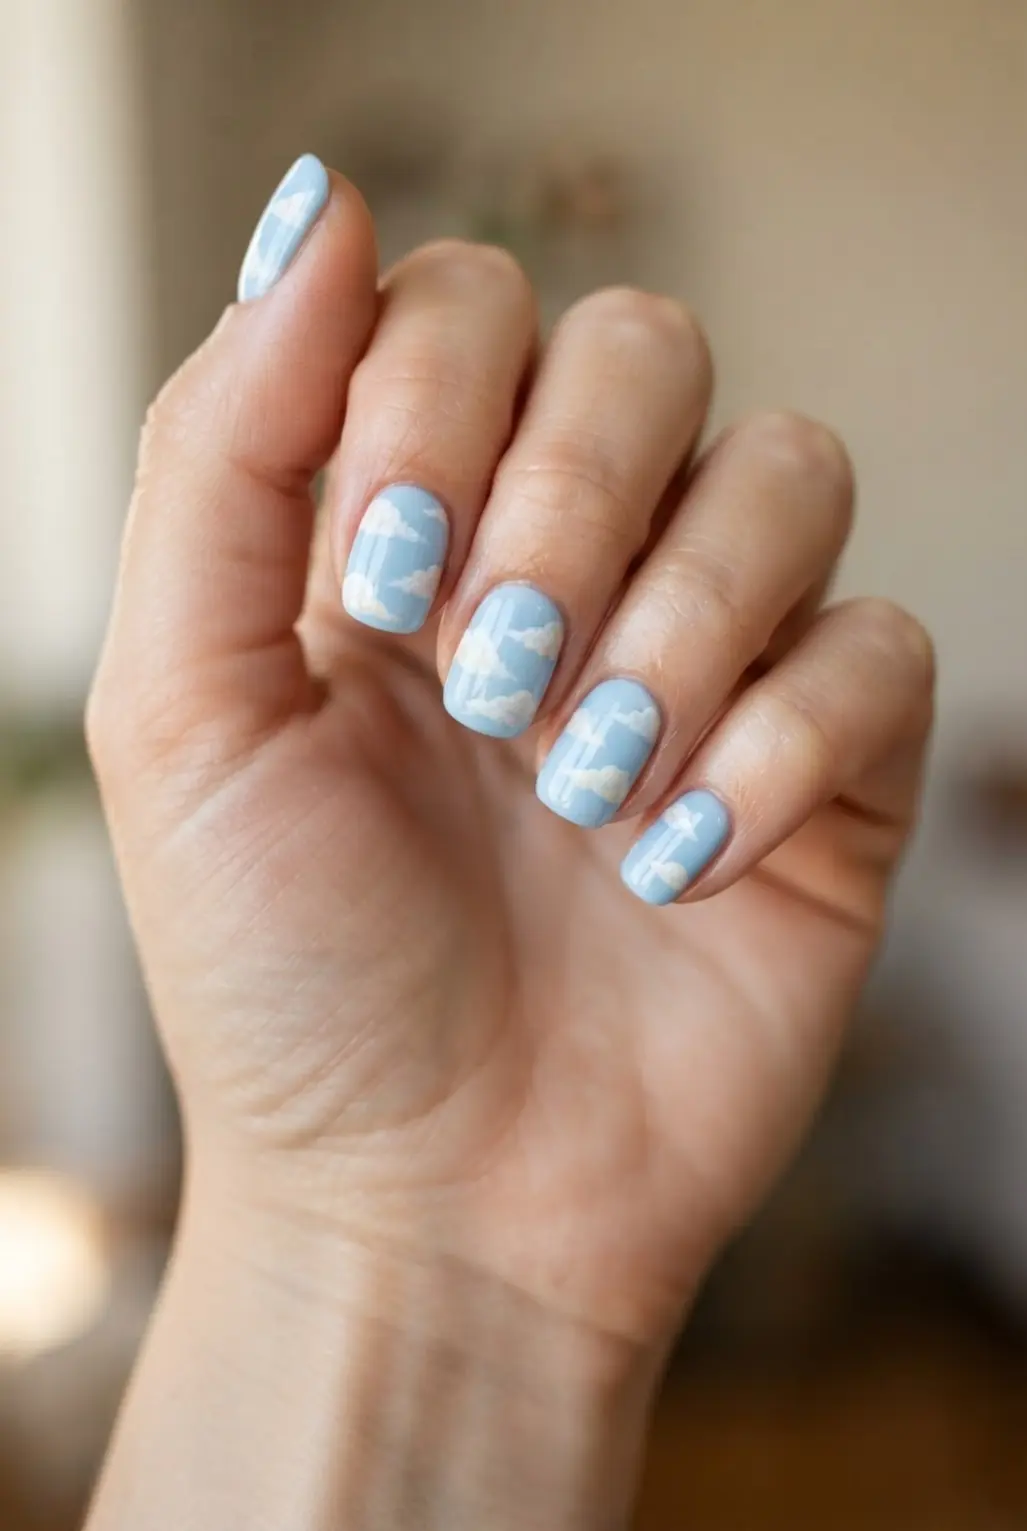
Soft blue nails with milky white clouds look smooth, airy, and softly luminous, like a tiny sky across each fingertip. I love how the uneven shapes feel playful without needing perfect lines. Start with a pale blue base, then let it dry before adding small cloud bumps in white or a lighter blue. Use a fine brush for swirls, a bobby pin for rounded marks, or a makeup sponge for hazy edges. Sound complicated? It is not.
Build the white polish in thin dabs rather than laying down one heavy coat, so each cloud keeps a little depth. Blend the edges gently, then finish with a glossy top coat for shine or a matte top coat for a soft, velvety surface. This look works because irregular shapes make the design friendly for beginners, while the sky-inspired palette stays calm and wearable. Trust me, gradual layering gives the prettiest finish. Feel proud of those tiny clouds! Light Blue Nails always capture this dreamy aesthetic.
17. Light Blue Polka Dot Retro Nails
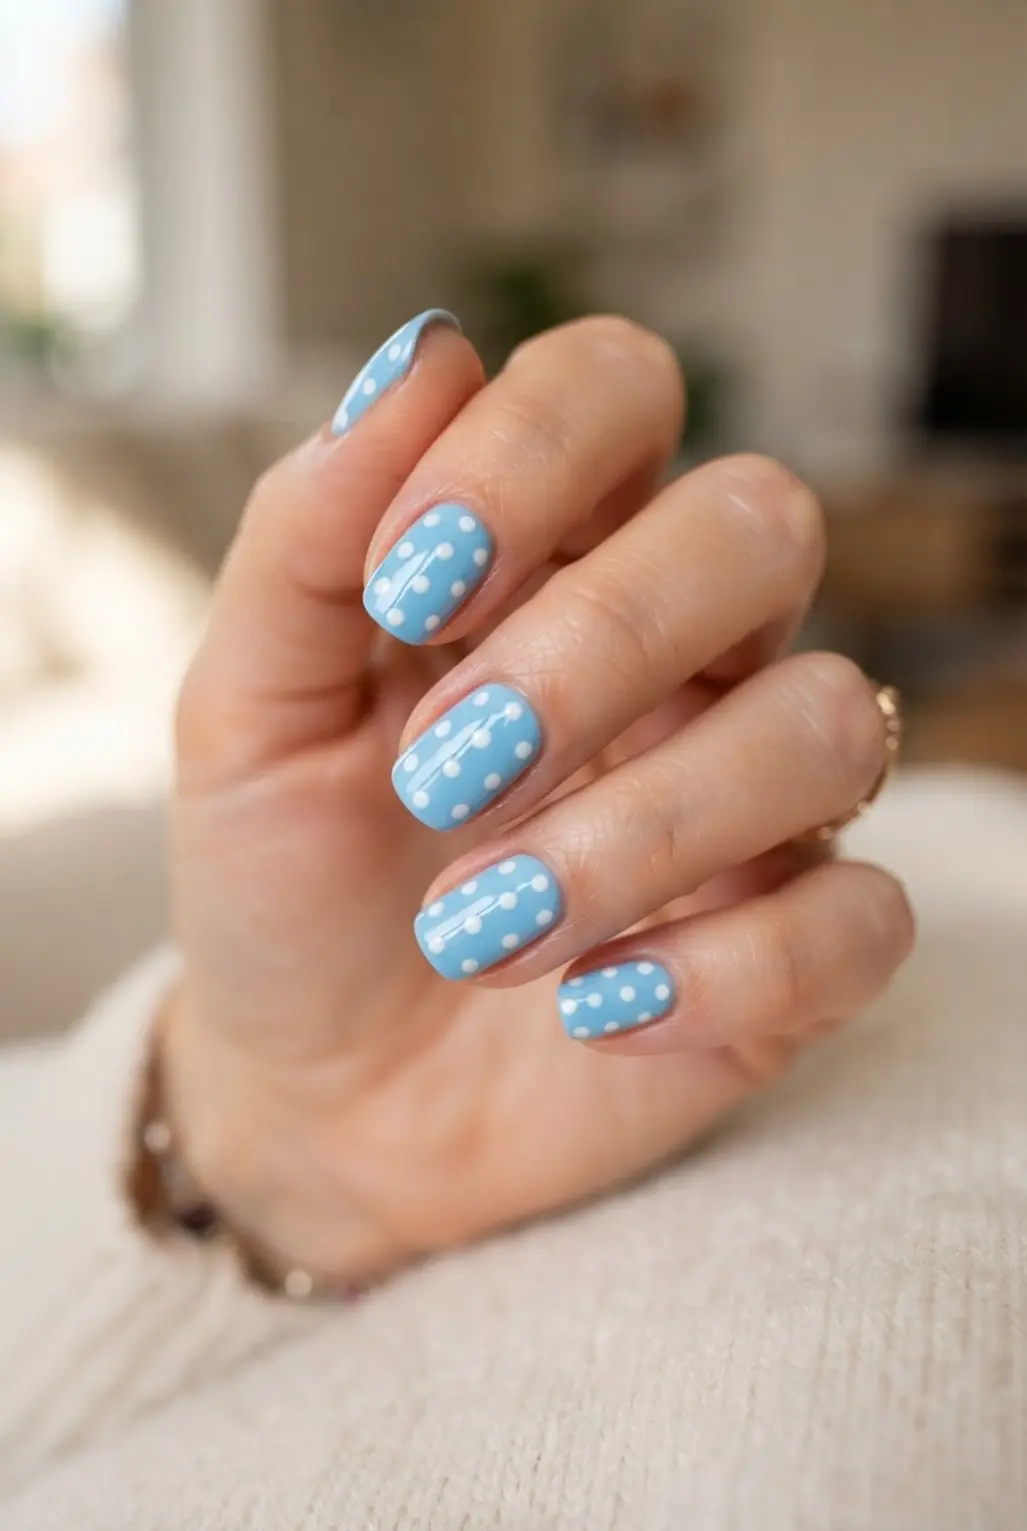
Polka dots don’t need perfect salon equipment. A rounded bobby pin gives you neat circles, so this look feels beginner-friendly. Start with base coat and an even baby-blue layer, then let it dry fully before placing white dots. Sound complicated? It isn’t, especially when you keep each dot small and evenly spaced. Press, lift, and repeat across the nail instead of dragging the tool, which keeps every circle round. Light Blue Nails thrive with this playful pattern.
I love how the soft blue and crisp white create a sweet vintage finish without looking fussy. Almond or oval nails suit the playful pattern, while square nails give it a sharper graphic feel. Seal everything with a glossy top coat once the dots are dry, using a light stroke to avoid streaks. Trust me, careful spacing near the cuticle makes the whole manicure look tidy and polished. This retro style naturally elevates Light Blue Nails.
18. Frosted Blue Textured Winter Nails
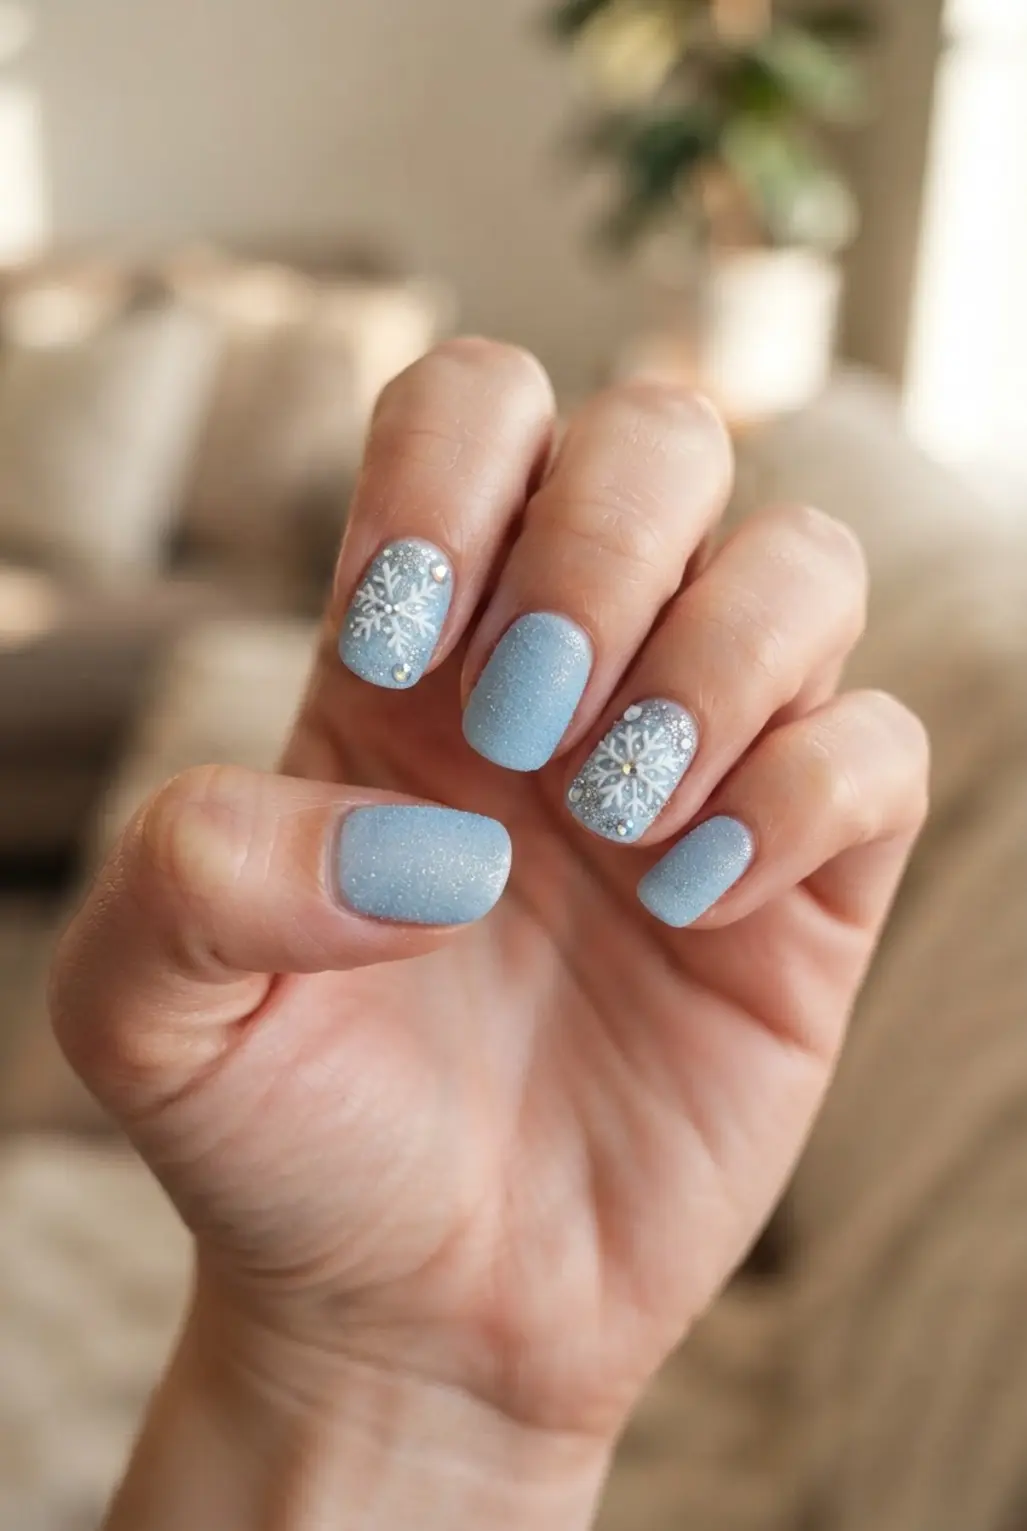
Brush on an icy blue base, then choose a soft matte, pearl, or glossy finish. Add thin white frost lines, silver streaks, or a few shimmer flecks while the surface is still tacky. For a cozy accent, pipe raised knit lines with gel on one or two nails, then cure and seal everything carefully. Light Blue Nails adapt seamlessly to this frosty theme.
Ever tried mixing a frosted finish with blue sweater texture nails? Sound complicated? It is not. The contrast between smooth color and raised detail gives the manicure its wintry depth, while selective texture keeps short nails neat. I love adding a milky white ombré beneath icy blue for extra softness. Keep reflective accents sparse so the frost effect stays clean. This technique ensures Light Blue Nails remain seasonal yet timeless.
19. Light Blue Chrome Heart Detail Nails
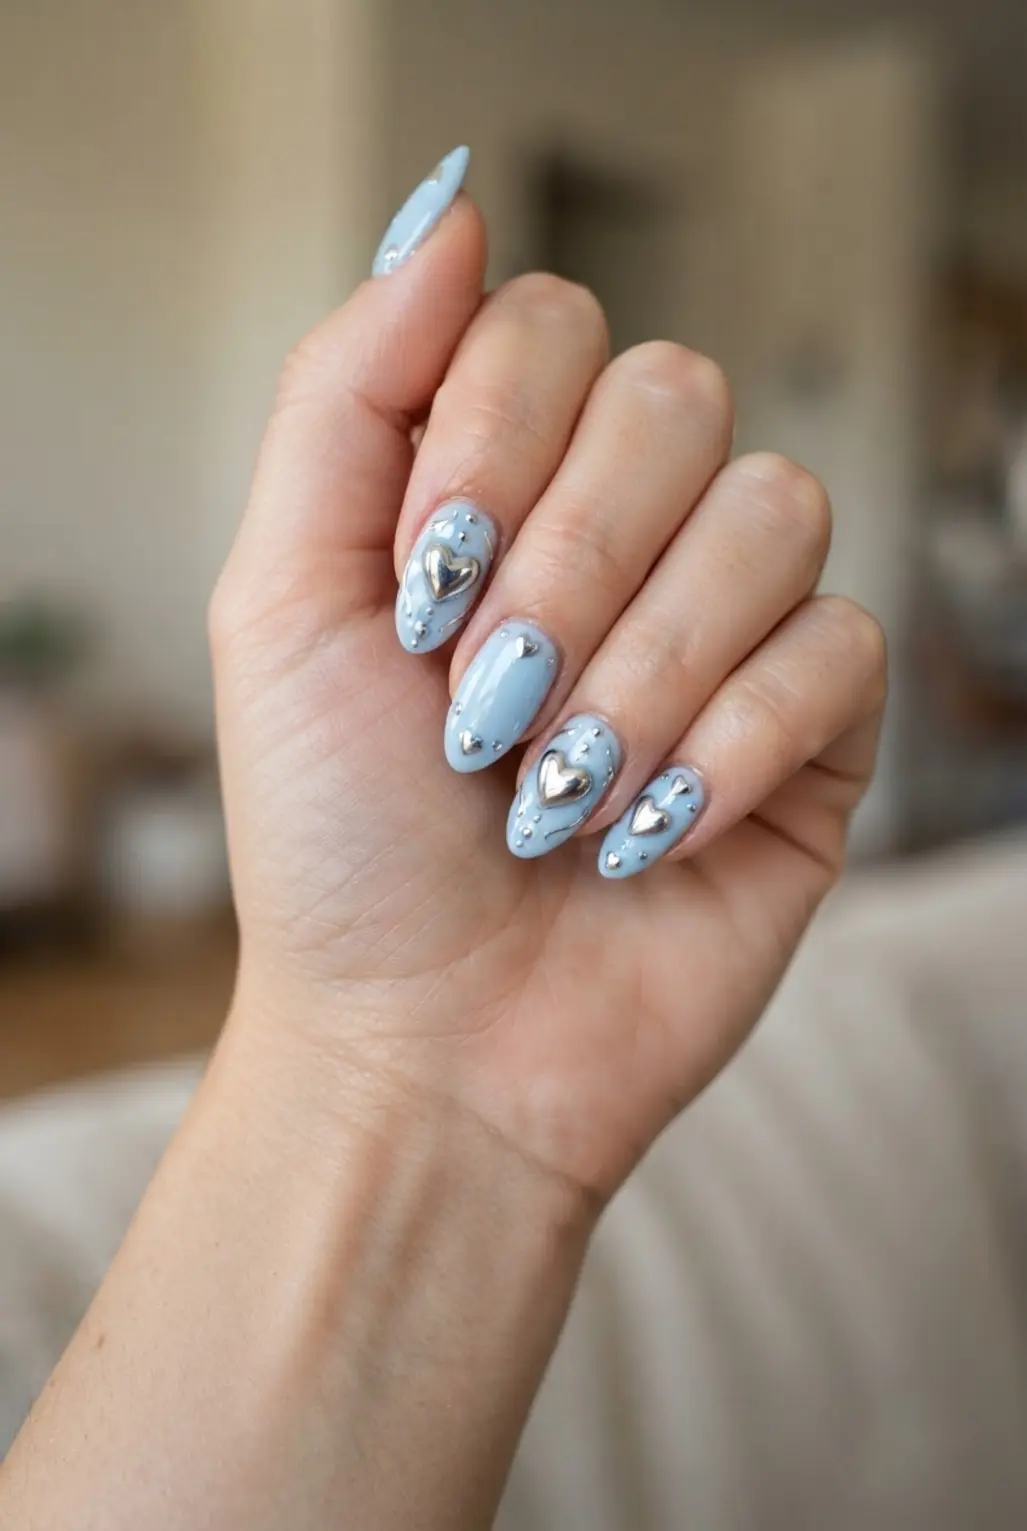
Want a cool manicure with a little sparkle and shape? Start with a smooth light blue gel base, then rub light blue chrome powder over the cured surface for a glossy, icy finish. I love how the reflective color keeps the look soft while still giving your hands a polished focal point.
Paint small hearts with gel, choosing outlined hearts, raised hearts, or heart-shaped French tips before adding silver chrome powder. Keep each shape crisp so it stands apart from the blue reflection, and choose white chrome for a gentler finish. Pro tip: practice the heart size on paper first, then repeat the pattern across short or long nails for a neat, balanced result. Feel proud when every tiny heart catches the light. Light Blue Nails beautifully frame these romantic accents.
20. Pastel Blue Butterfly Decal Nails
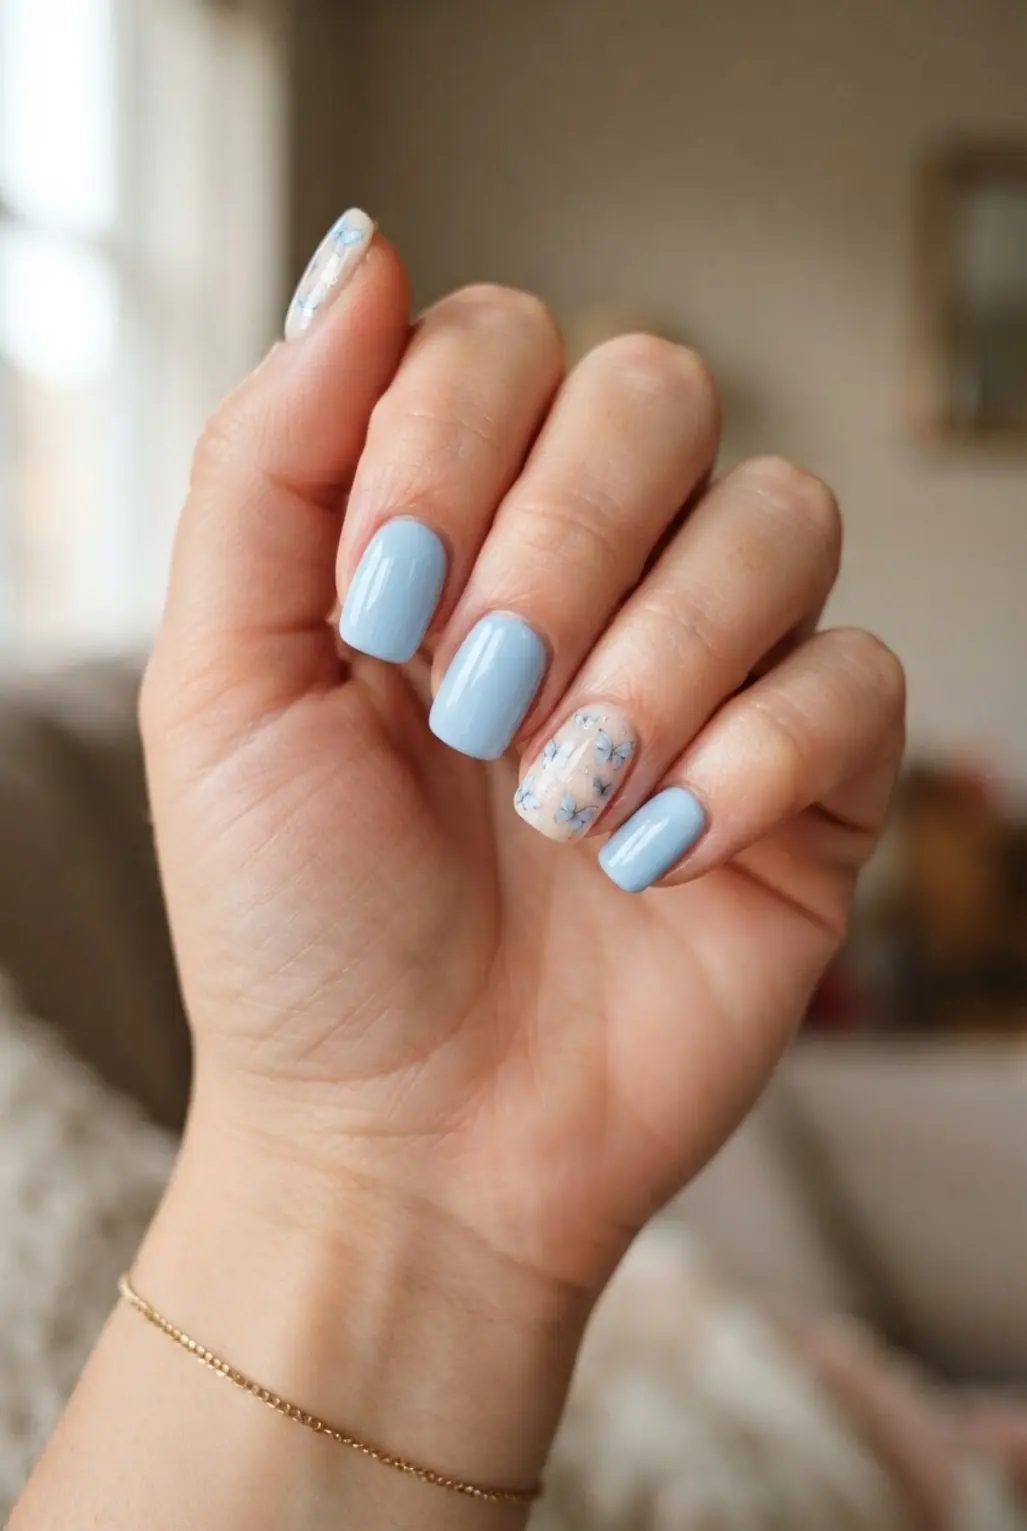
This one looks sweet and detailed, yet the application stays wonderfully simple. Start with a dry pastel blue base, then place soft butterfly decals across one nail or several. Waterslide designs need a short soak in warm water before sliding onto the nail, while peel-and-stick options go straight onto the polish. Is there anything more satisfying than a neat butterfly accent without hand-painting every wing? I love how clear-backed artwork lets the blue polish show around the edges. Light Blue Nails provide the ideal backdrop for this delicate art.
Use tweezers for placement and smooth each decal gently from the center outward. A white-backed design gives the butterfly a stronger, opaque finish, while a raised 5D sticker adds texture you will notice by touch. Finish with a clear top coat to hold the artwork in place. Trust me, letting the base dry first makes the whole design look cleaner and feel far less fussy. This method keeps Light Blue Nails looking pristine.
21. Light Blue Cat Eye Magnetic Nails
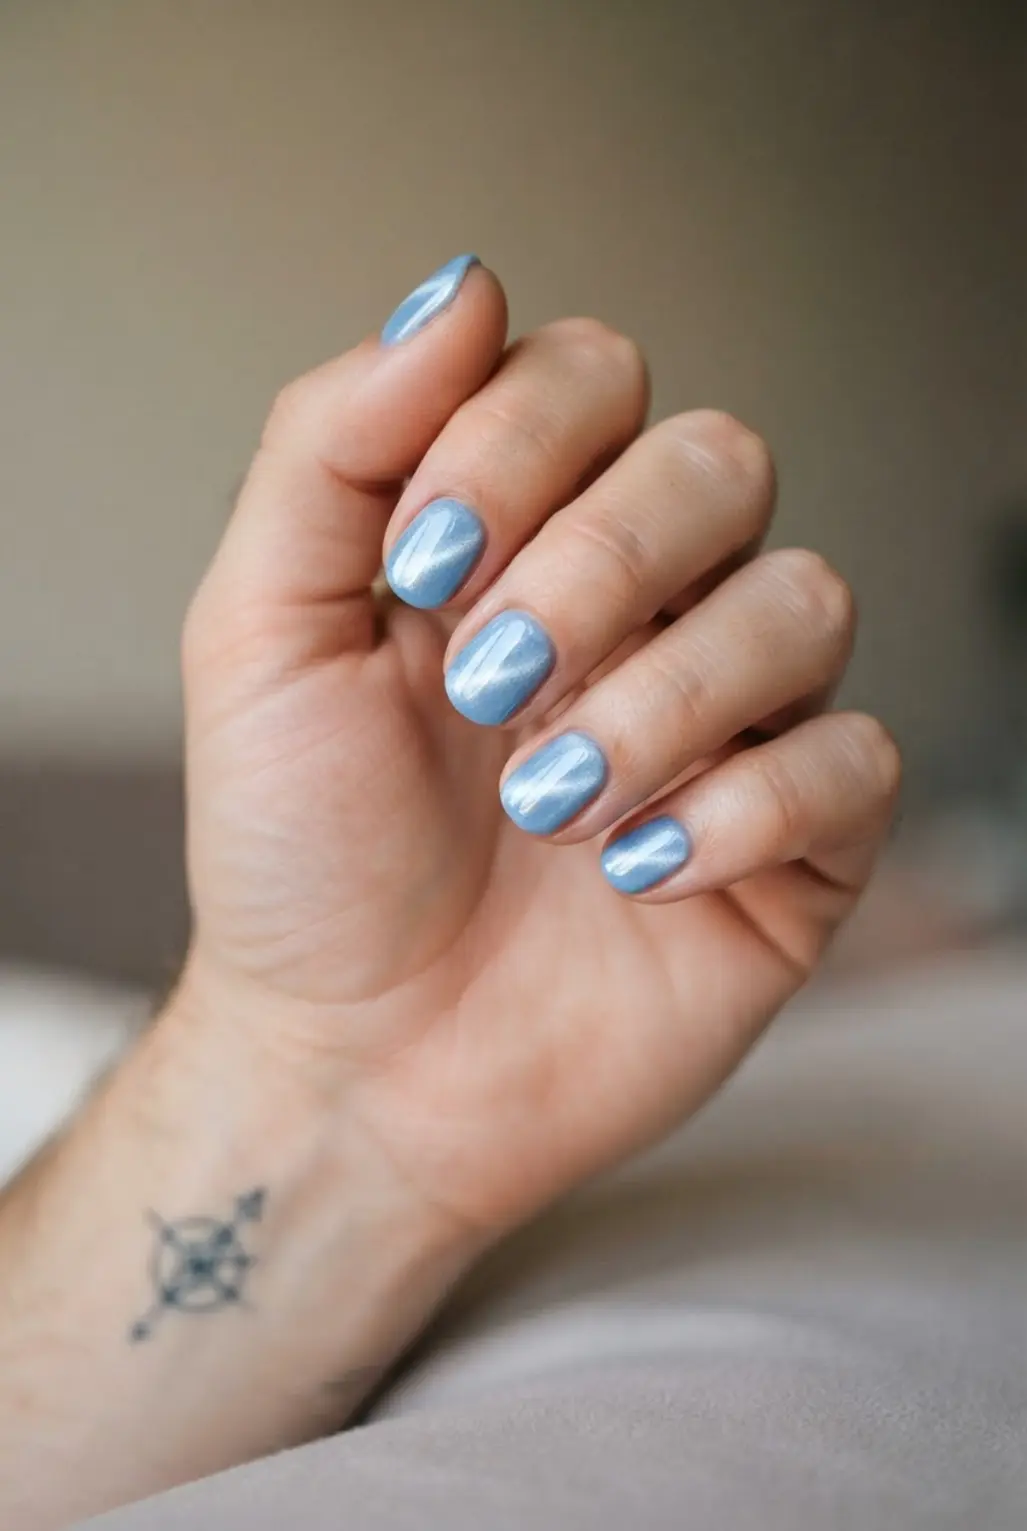
I love this one because a soft blue base turns into a sleek, reflective look with one small tool. Isn’t it satisfying when the bright streak shifts as your fingers move? The metallic shimmer gives the manicure depth without painted details. Light Blue Nails naturally showcase this dynamic shift.
Apply base coat, then brush on the magnetic gel polish. Before curing, hold a nail magnet close to the wet layer, guiding the particles into a narrow cat-eye line or leaf-like texture. Cure each nail while the pattern is in place, since the particles stop moving after curing.
Finish with a glossy top coat for a smooth high-gloss finish and added protection. Keep the magnet close, but avoid touching the polish, and work one nail at a time. Trust me, this light blue manicure feels polished, playful, and full of movement. This magnetic technique perfectly defines Light Blue Nails.
22. Soft Blue Pearl Finish Rounded Nails
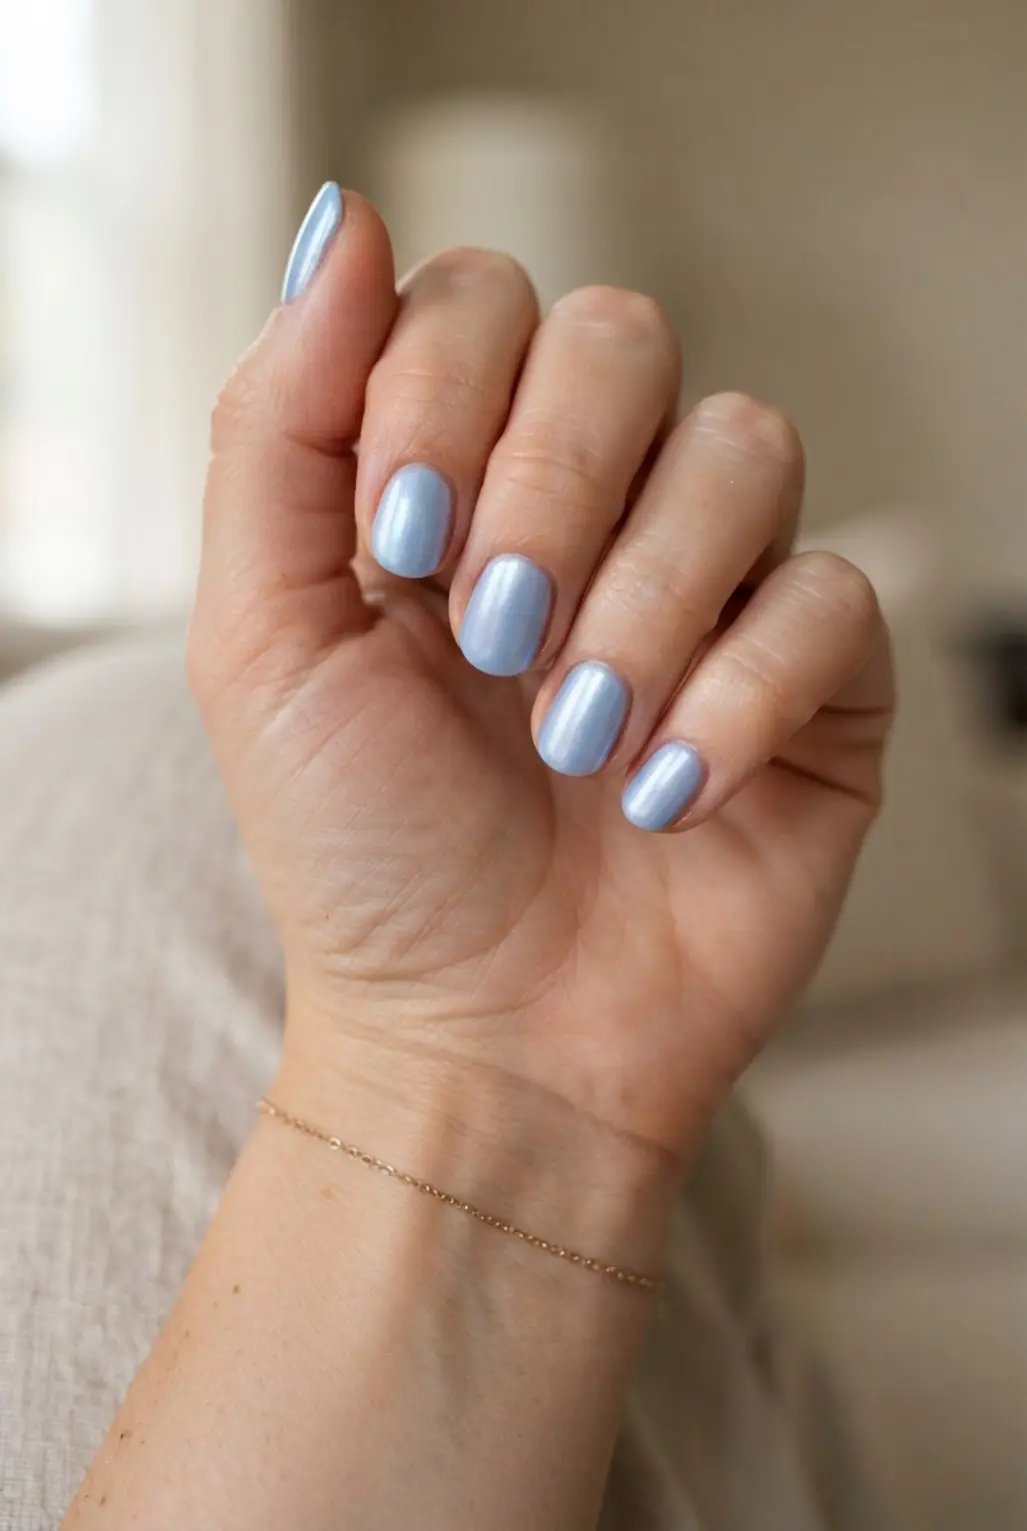
A pale blue surface with a pearly glow catches light softly, while rounded tips keep the look neat and gentle. I love this idea for anyone drawn to calm color and a polished finish, though the source material describes the effect in skincare packaging rather than nail applications. Treat it as a visual direction, not proof of a specific polish formula or wear result. Start by sharing the soft blue pearl finish with your nail professional, then ask which available products suit your preferred service and care routine. The appeal comes from the contrast between cool blue color and a luminous surface, giving the set a fresh ocean-inspired feel. Sound dreamy? Keep the shape even and enjoy the clean, pearly result. Light Blue Nails truly embody this luminous style.
23. Light Blue Starry Night Sky Nails
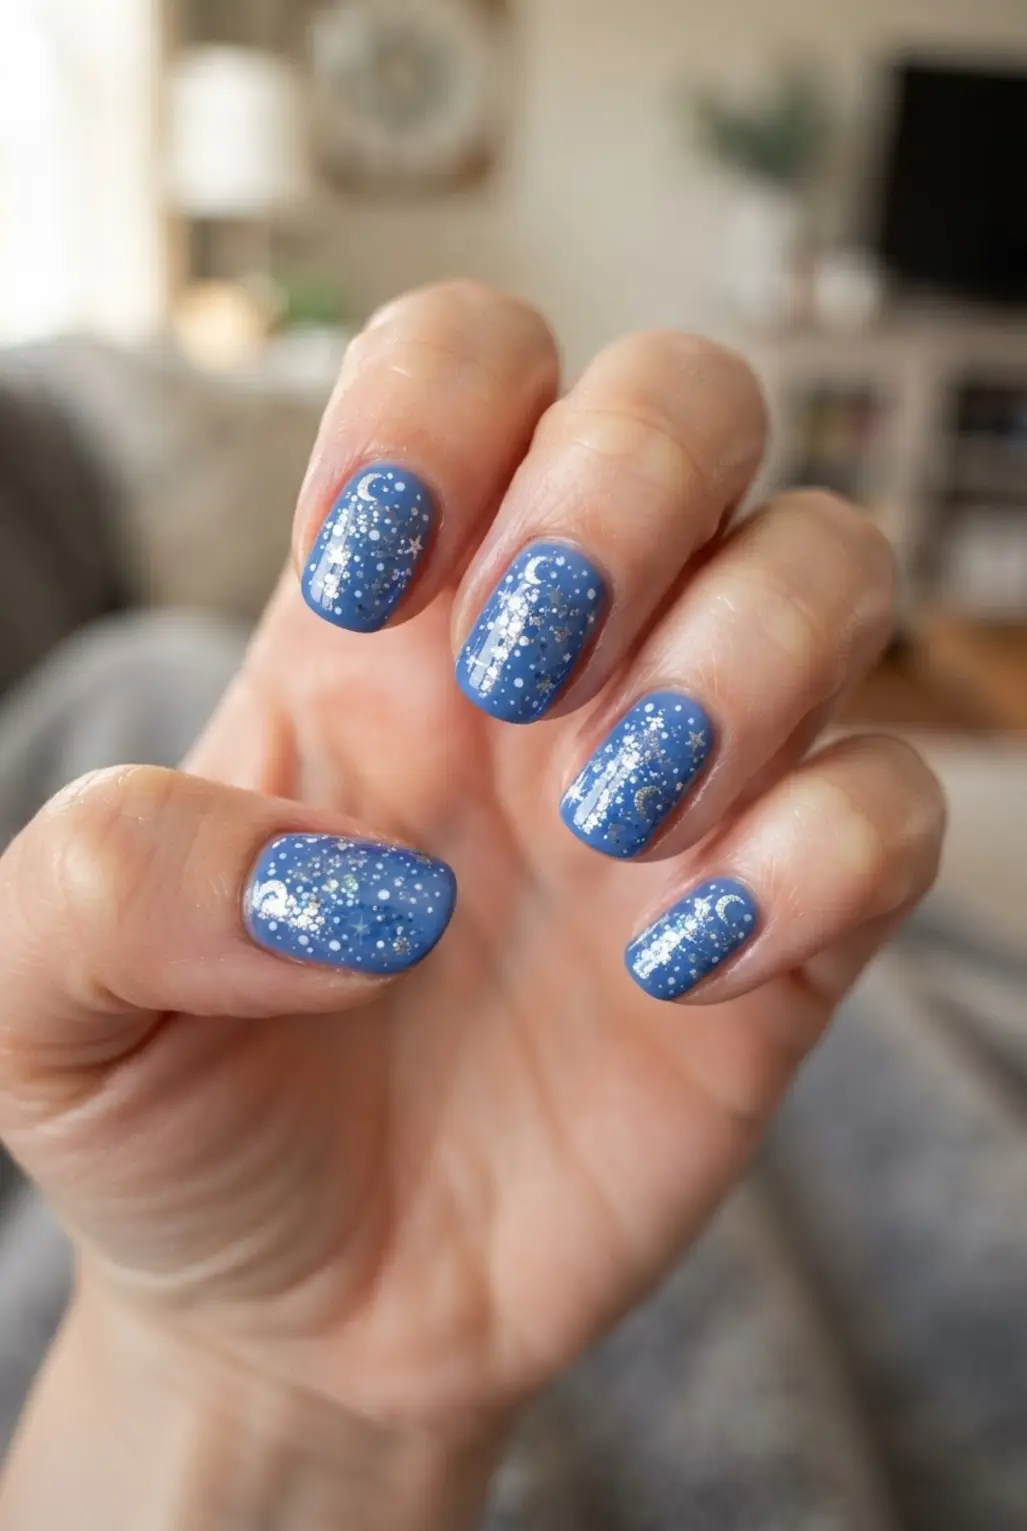
It doesn’t need a dark base to feel like midnight. A soft blue polish gives you a clean starting point, then add tiny white stars with a fine dotting tool. Place a few dots in clusters and stretch two or three into small four-point stars, leaving open space between them. Sound complicated? It’s far easier than painting full constellations. Light Blue Nails capture this celestial vibe perfectly.
For extra depth, brush a thin milky-blue haze near the tips, or leave the base clear around each star for a crisp finish. A glossy top coat helps the little details catch the light and keeps the surface smooth. I love this look because every nail feels different while the repeated stars keep the set connected. Keep your dots small, and enjoy the calm, dreamy finish, which beautifully highlights Light Blue Nails.
24. Light Blue Plaid Pattern Seasonal Nails
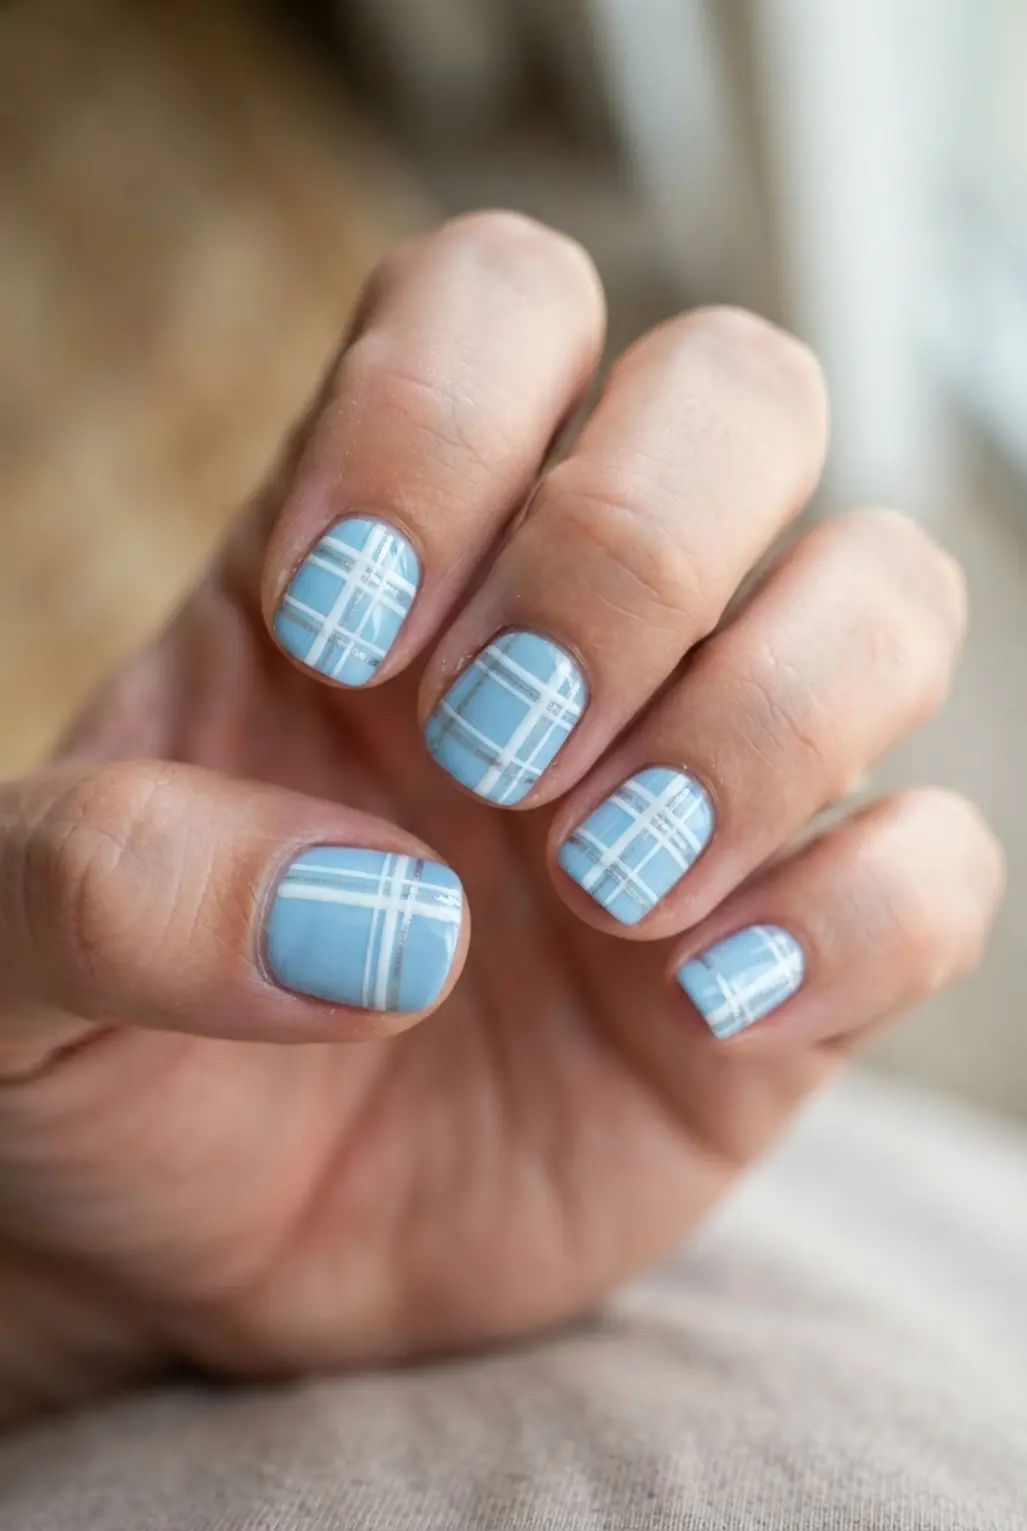
Paint each nail with a soft blue base, then let it dry fully before adding the lines. Use a thin striping brush to draw two or three crisp white lines across the nail, followed by matching vertical lines for neat plaid squares. Keep the spacing loose on shorter nails, since crowded lines lose their clean shape. Sound complicated? It isn’t. I love how the pale base gives the pattern a fresh seasonal feel without making the manicure look heavy. Light Blue Nails naturally balance this structured design.
Add a deeper blue line through the center of a few squares for extra definition, or leave every stripe white for a softer finish. Work with a steady hand and reload the brush often so each stroke stays even. Seal the design with a clear top coat after the polish sets, taking care around the tips. This pattern feels cheerful in spring, crisp in winter, and easy to adjust for any outfit. Try it slowly and enjoy those tidy little squares, which consistently elevate Light Blue Nails.
25. Light Blue Silver Glitter Tip Nails
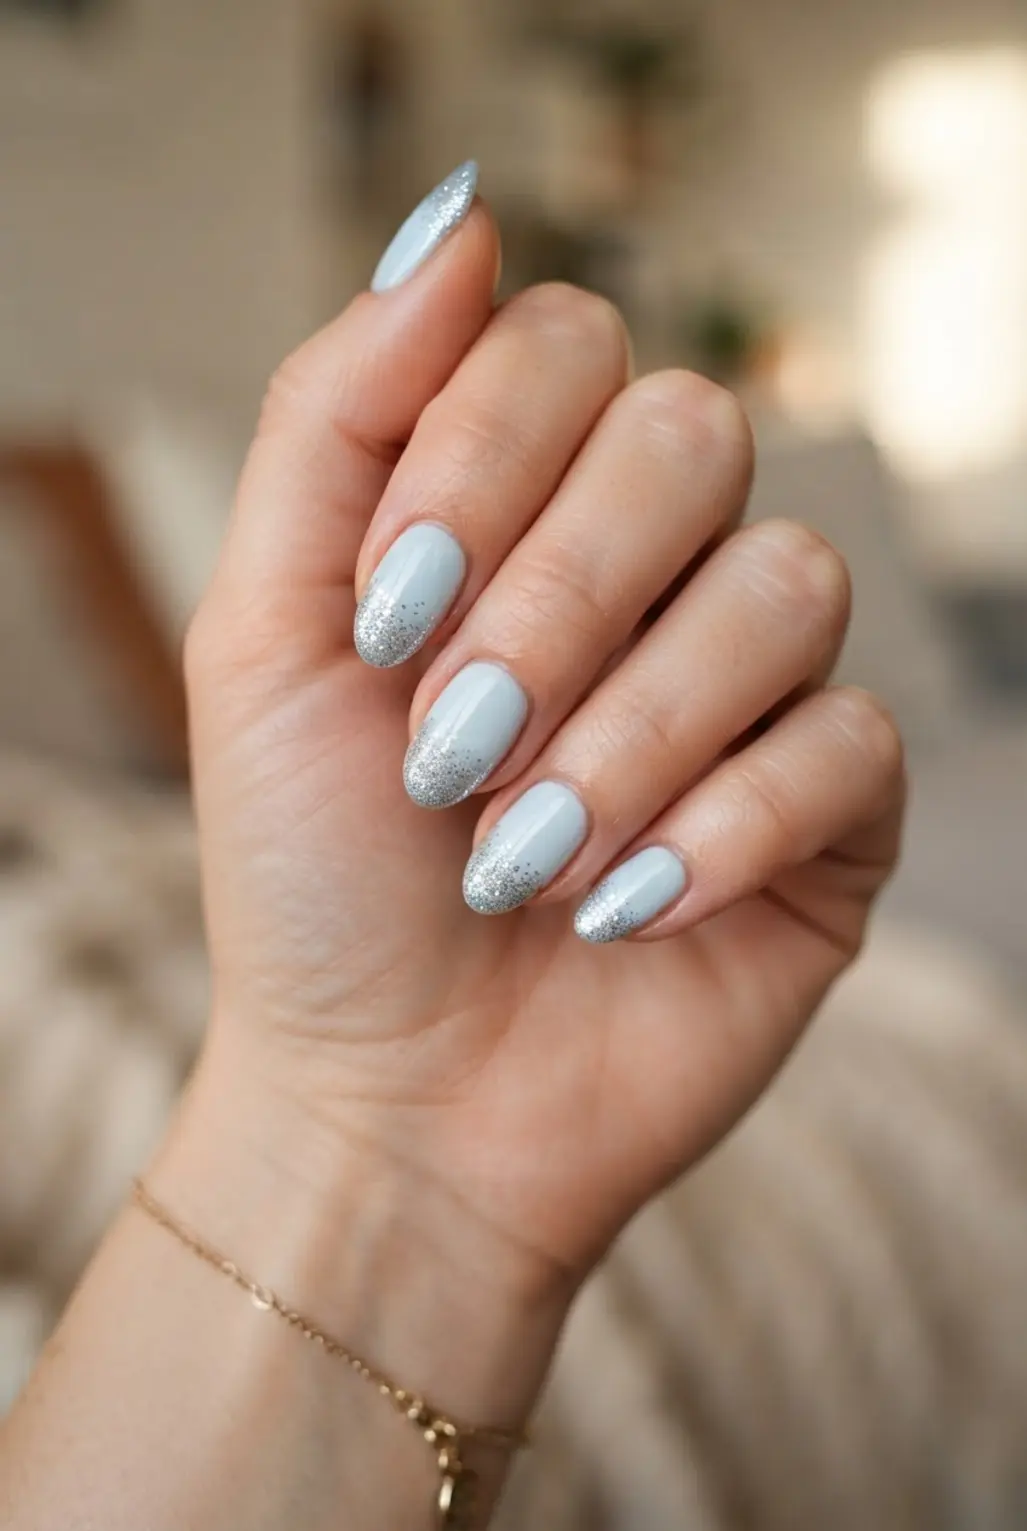
Want a polished shimmer without losing the soft charm of pale blue? Start with a light-blue base coat, then sweep silver glitter across the free edge in a neat French-tip band. Build coverage in thin layers so the tip stays smooth rather than bulky. For a softer finish, tap less glitter toward the centre and let it fade into the blue. Light Blue Nails shine brightest with this delicate sparkle.
I love how the cool silver catches light while the blue keeps everything fresh and wearable. Seal the design with a glossy top coat to smooth the texture and hold each sparkle in place. Cure every gel layer under your lamp, or let regular polish dry fully before sealing. Try it on square, almond, or coffin nails for a clean finish with a little sparkle. This technique guarantees Light Blue Nails stay elegant.
Free Edge Capping For Longer Wear
Cap the free edge with a thin sweep of top coat, since exposed polish chips first at the nail tip. A gel top coat creates a hard, glossy surface suited to longer almond, coffin, and stiletto shapes, where the edge meets more friction. Keep the layer slim at the tip, because excess product rounds the shape and makes a pale manicure look bulky. Seal the side corners without touching surrounding skin, which helps prevent lifting after hand washing. Cure gel formulas for the time listed by the lamp maker, while regular polish needs a compatible quick-dry top coat instead. Check the edge after curing and smooth any sharp ridge with a fine file. Fresh top coat also protects chrome powder, tiny charms, and painted details from early wear. This simple step ensures Light Blue Nails remain durable and pristine.
Conclusion
Light Blue Nails work beautifully for everyday wear, special events, and playful seasonal looks. The finish, shape, and small details can completely change the mood of the manicure. Compare your favorite references in daylight, consider your undertone, and choose the design that keeps catching your eye. A tiny flower, clean line, chrome accent, or single gem can make the final set feel uniquely yours, proving why Light Blue Nails deserve a permanent spot in your rotation.
FAQs
Q: Which light blue shade suits warm skin undertones?
A: Aqua, turquoise, and blue shades with a soft green base pair well with warm undertones. Gold details also complement this color family, making Light Blue Nails a versatile choice.
Q: How do I keep light blue polish from looking streaky?
A: Use a smooth base coat and apply two thin color layers. Allow each layer to dry before adding topcoat, which prevents uneven streaks on Light Blue Nails.
Q: Which nail shape suits light blue designs best?
A: Almond and oval shapes give soft designs a graceful look. Square and coffin shapes suit French tips, plaid, and geometric details, ensuring Light Blue Nails always maintain their intended style.
Q: How do I apply chrome powder over blue gel polish?
A: Cure the color layer fully, apply a no-wipe topcoat, and cure it according to the product directions. Rub chrome powder over the surface, brush away excess, then seal the free edge. This process creates a flawless mirror finish on Light Blue Nails.
Q: How long do light blue nail designs last?
A: Gel designs often stay neat for around two weeks with careful wear. Lacquer tends to last longer when nails stay dry during cleaning and the tips receive fresh topcoat, keeping Light Blue Nails looking fresh.