


The 5 Essential Techniques for Mixed Media Success
1. Organize Your Studio: The Mise-en-Scène Strategy
Before you even unscrew a tube of paint or peel a stick of pastel, you need to marshal your supplies. This isn’t just about tidiness; it’s about flow. When you are in the middle of a wash, you can’t afford to hunt for a specific color.
Keep all materials by your side before you start. Arrange your soft pastels or oil pastel sets by color families—keep your green can be introduced in your lesson about mixing colors. hues together and your warm tones separate. If you are planning a specific composition, like a landscape, use charcoal or a light lesson on color theory. pencil to sketch the main shapes first.
Pro Tip: Use masking tape to secure your paper to a board. This creates a crisp white border and prevents buckling when you apply liquid washes are a key lesson in watercolor techniques.
Actionable Takeaway: Spend 10 minutes prepping your lesson plan for the painting session. studio space. Mask off the edges of your paper and lay out your three main colors to eliminate decision fatigue during the painting process.

2. Prioritize High-Pigment Tools for Maximum Vibrancy
There is a myth that beginners should start with cheap supplies. Seriously, don’t do that. Go for quality, rather than anything else. Cheap materials often lack pigment density, leading to muddy results that can discourage you.
You need a sturdy surface that can handle water and friction. Cold press watercolor paper is ideal because its textured “tooth” grabs onto the pastel pigment while holding the water. When choosing pastels, consider Nupastels for harder, precise lines, or high-end soft pastels for buttery blends.
By investing in quality, you elevate the vibrancy of your work immediately. Good paper allows you to scrub, lift, and layer without tearing the fiber.

3. Manage Your Water Supply for Clean, Crisp Colors
Watercolor relies entirely on the clarity of your water, a crucial lesson for artists. If your water is muddy, your violet sky will turn a gross grey. Have loads of water to keep changing throughout your session, remember to incorporate lessons on brush techniques.
Segregate your lesson topics to enhance understanding. your water containers: use one jar specifically to rinse the dirty brush and a second jar solely for picking up clean water to dilute fresh paint. This simple habit ensures you maintain the richness and hue of your colors.
Actionable Takeaway: Refresh your water jars every 20 minutes. If the water looks like tea, it’s time to change it. This guarantees your watercolor paintings remain bright and fresh.

4. Master the “Wet on Wet” Technique for Soft Backgrounds
To create a dreamy, atmospheric sky or background, you need to master the wet on wet technique. This involves wetting the paper with clean water before adding pigment, allowing the colors to bleed and diffuse naturally.
Saturate your brush with water and cover the area you want to paint. Then, drop in your watercolor. Watch how it spreads. Once this soft layer dries, you can come over it with a lesson on blending techniques. pastel to define edges. This contrast between the fluid background and the textured foreground is the hallmark of great mixed media.

5. Layering Pastels Over a Watercolor Wash
This is where the magic happens: Painting on a wash. The watercolor and pastel combination works best when you use watercolor for the underpainting—establishing the general colors and values—and then use pastel to add texture and detail.
Wait for your watercolor layer to be bone dry. Then, take your soft pastels and scumble (lightly drag) them over the surface. The pastel will catch the high points of the watercolor paper, allowing the paint color to peek through the valleys, which can be a lesson in layering techniques. This creates an incredible visual vibration, which can be a lesson in the emotional impact of color.
You can also try oil pastel and watercolor paintings using the resist method. Draw with oil pastel first; the waxy texture will repel the water, leaving your drawn lines intact while the paint settles around them.
Actionable Takeaway: Paint a simple lesson on the basics of watercolor techniques. flower arrangements can be a lesson in composition. shape with a loose watercolor wash. Let it dry completely. Then, use a dark pastel to outline the petals and a white pastel to add white highlights. The mix of textures will pop instantly.

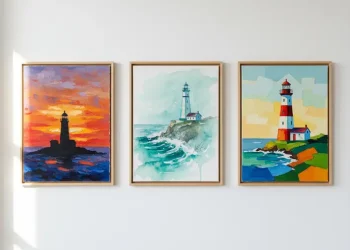
More Easy Pastel Watercolor Paintings Gallery for Inspiration


Conclusion
Creating easy pastel watercolor paintings is about embracing the freedom to experiment. By combining the fluidity of paint with the texture of pastel, you open up a world of creative possibilities that neither medium can offer alone.
Remember, the goal isn’t perfection; it’s expression. Whether you are blending a sunset or sketching a one color study, these tools are there to help you interpret the world around you can be an important lesson in observation and inspiration.
Ready to start? Grab a sheet of cold press paper, paint a simple blue wash, and once it dries, draw a cloud with white pastel. It’s that simple.
FAQs
Q: What is pastel mixed technique and how does it work with watercolor?
A: Pastel mixed refers to combining pastel painting with other media, commonly watercolor. In watercolor and pastel painting, you start with a watercolor underpainting to establish broad strokes can be a lesson in mastering the fundamentals of painting. and layers of color, then apply pastel over watercolor once dry. This allows the soft texture of pastel to reveal highlights and details while the watercolor provides transparent depth.
Q: How do I choose colors—should I use analogous colors when working in pastels?
A: Using analogous colors (colors next to each other on the color wheel) creates harmony and lovely transitions in pastel and watercolor pieces. Analogous schemes simplify decisions for layers of color and help indicate where shadows and light will fall without harsh contrast.
Q: Can you explain the role of underpainting in pastel over watercolor works?
A: An underpainting gives structure and value relationships early in the process. With pastel over watercolor, an underpainting in watercolor sets tonal values and broad strokes; later pastels can overlap and refine details, deepen shadow areas, and reveal textures that boost the final composition.
Q: What techniques help avoid muddy colors when layers overlap?
A: To avoid muddiness, plan your layers of color and limit heavy overlap in the same area. Use demonstration pieces to practice layering: lay down a watercolor underpainting, let it dry, then apply pastel with lightly pressure. Indicate midtones and shadows first and build up gradually instead of pressing too hard at once.
Q: How do I create convincing shadows in pastel painting combined with watercolor?
A: Shadows are indicated by cooler or desaturated tones and lower value. Use the watercolor underpainting to block in shadow shapes with broad strokes, then refine edges and subtle transitions with pastel. Layering transparent watercolor beneath and opaque pastel on top can produce deep, lovely shadows without losing luminosity.


