
Botanical Preparation and Dehydration Techniques
The single biggest difference between a messy result and delicate, professional-looking diy floral nail art is the thickness of your dried botanicals. Trust me on this, you need those petals and leaves to be paper-thin and completely moisture-free before they ever touch your nail. We tend to skip this step, but a thick stem will create a dome under your topcoat that catches on everything. The good news is, you can press flowers properly at home with a heavy book and parchment paper for about a week. The goal is a brittle, translucent piece that lies perfectly flat. For pressed flower designs, this dehydration is your most important prep work, ensuring nothing lifts or traps air later. Following these steps guarantees a smooth surface for the next layer.
Selecting Compatible Base and Top Coat Formulas
Your base coat color directly determines whether those tiny diy floral nail art details pop or get completely lost. Here is the thing: you want a high-contrast background. A sheer nude or a crisp opaque white makes every petal texture and fine-line leaf stand out. But the formula matters just as much as the color. For painted designs, you need a high-pigment gel or acrylic paint instead of standard nail polish for crisp linework that will not run. Your top coat needs to be a high-strength, thick formula that can fully encapsulate any 3D elements without creating a bulbous look. This compatible system locks your art in place and provides the visual clarity your design deserves.
1. Paint a Minimalist White Daisy Stamping Accent
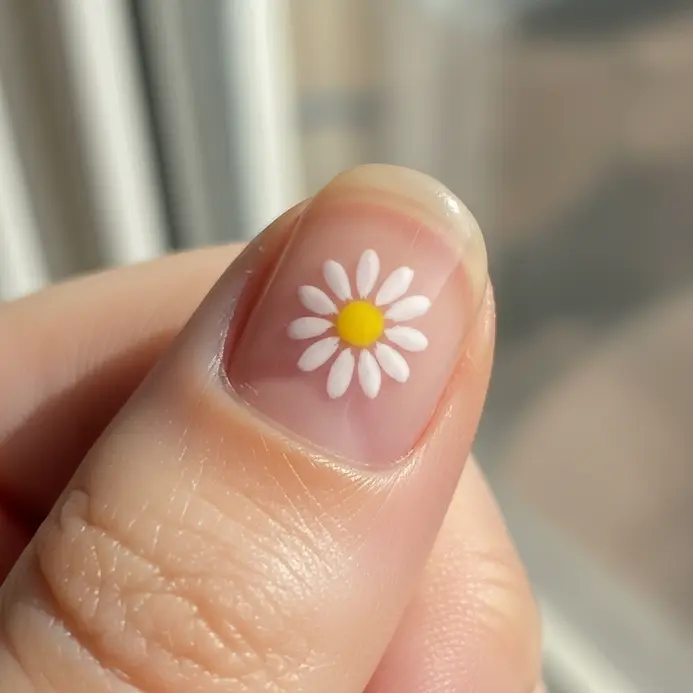
Who would have thought such a clean, elegant diy floral nail art look could be so beginner-friendly? The key is a Create a simple daisy outline as part of your nail look. on your stamping plate. You will apply white stamping polish, scrape it clean, and quickly press the image onto your nail for a crisp, delicate accent. I love how the white daisy pops against a sheer or pastel base, giving you that fresh, understated look. For a lovely finishing touch, add a tiny yellow dot in the center with a dotting tool. This technique delivers a polished result with minimal effort. You can find more inspiration for floral designs in these creative flower painting ideas. Try it on a weekend and enjoy the process.
2. Create a Pressed Pansy Gel Encapsulation Design
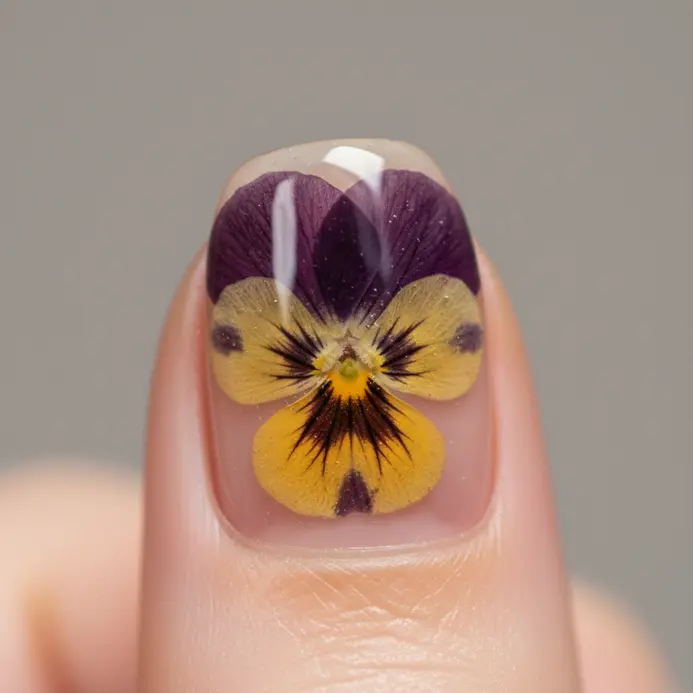
Ever wondered how to preserve a favorite pansy forever for your diy floral nail art? This technique encases dried flowers in a clear, glossy block, turning them into lasting jewelry or keepsakes. You start by arranging your completely dried pansies in a mold or on a base. Then, you mix and pour a two-part epoxy resin over them, letting it cure into a solid, protective layer. It is satisfying because the resin captures every delicate detail, locking in that springtime beauty. My top tip is to ensure your pansies are paper-dry to prevent any rot or unsightly bubbles in the final piece. The payoff is a stunning, personalized keepsake that feels truly magical.
3. Achieve a Soft Watercolor Rose Petal Design
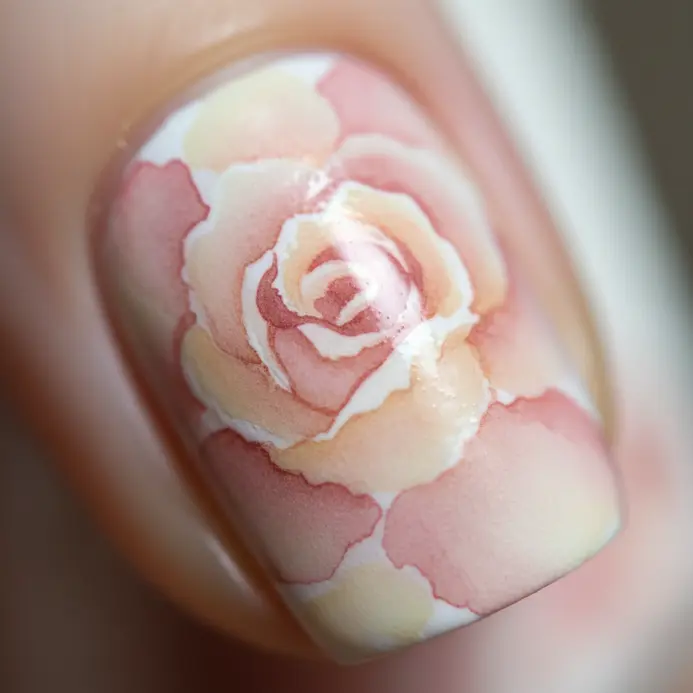
This diy floral nail art design looks intimidating, but it is all about letting the paint do the work for you. The key is using the wet-on-wet technique. You will drop your diluted pink and rose colors onto a damp nail surface, watching them bloom and blend into soft, dreamy petals. It is a forgiving process that creates beautiful, translucent layers. I love how this method mimics the delicate look of a real rose. Keep your colors light and avoid overworking the area to prevent a muddy look. For a perfect starting point, check out these simple flower painting designs. Try it and feel how relaxing this watercolor approach becomes.
4. Outline Fine Line Lavender Stem Details
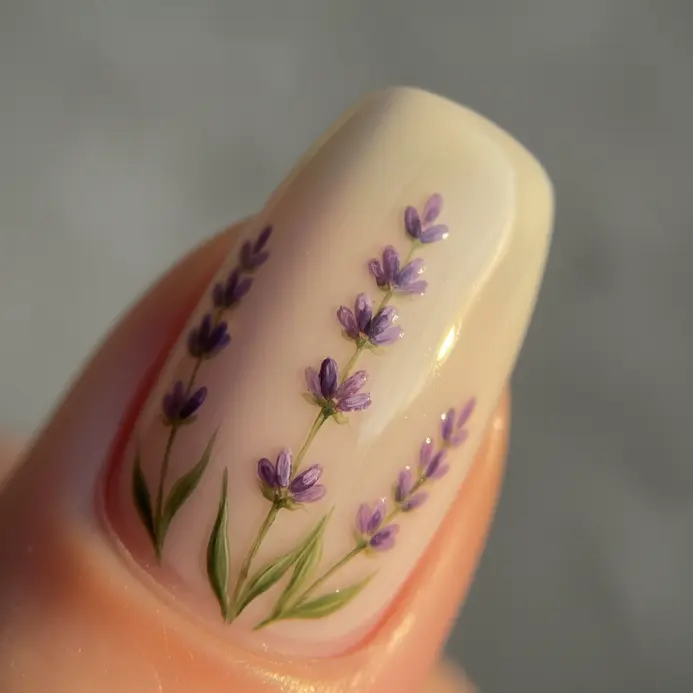
Does drawing a realistic flower stem for diy floral nail art seem tricky? It is about capturing its strength and shape. Use a fine detail nail brush to paint a thin, vertical line for the main stalk. I love adding a few subtle, upward side branches to show that bushy, upright growth. The result feels fresh and botanical on your nail. To keep the look neat, let that first line dry before you add any leaves for your floral nail design. This crisp outline gives your lavender a structured, elegant base. Explore easy watercolor flower techniques for additional practice tips.
5. Build Neon Sunflower Dotting Tool Art
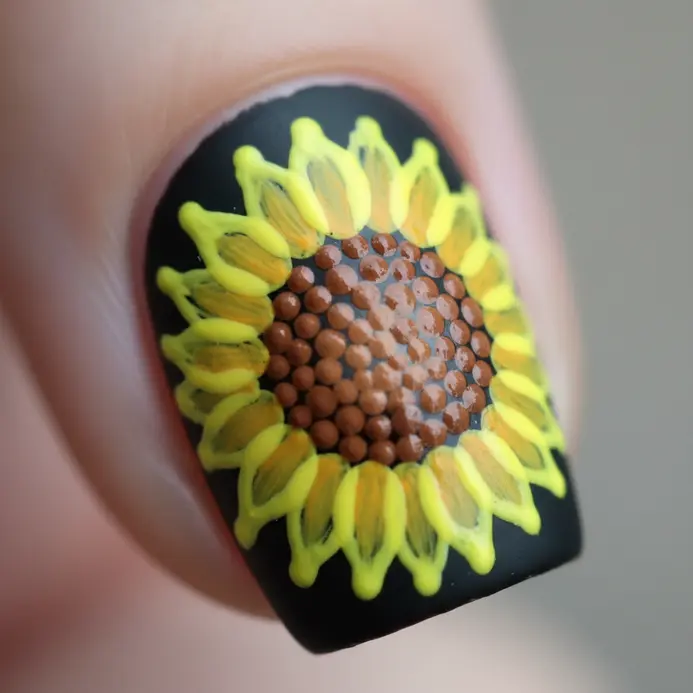
Ever wondered how those glowing dot patterns for diy floral nail art are made? This one is a joy because it looks so detailed and executes smoothly. You will create a vibrant sunflower by placing uniform dots of nail design. neon acrylic paint onto a dark surface. Start with the black center, then build outward with layers of yellow and orange petals for a stunning flower nail art. Holding your dotting tool straight up and down gives you perfect, crisp circles every time for your floral nail design. I love how the neon colors seem to light up against the black background. Trust me, you will feel a real sense of accomplishment when your radiant sunflower comes together.
6. Apply a Negative Space Cherry Blossom Branch
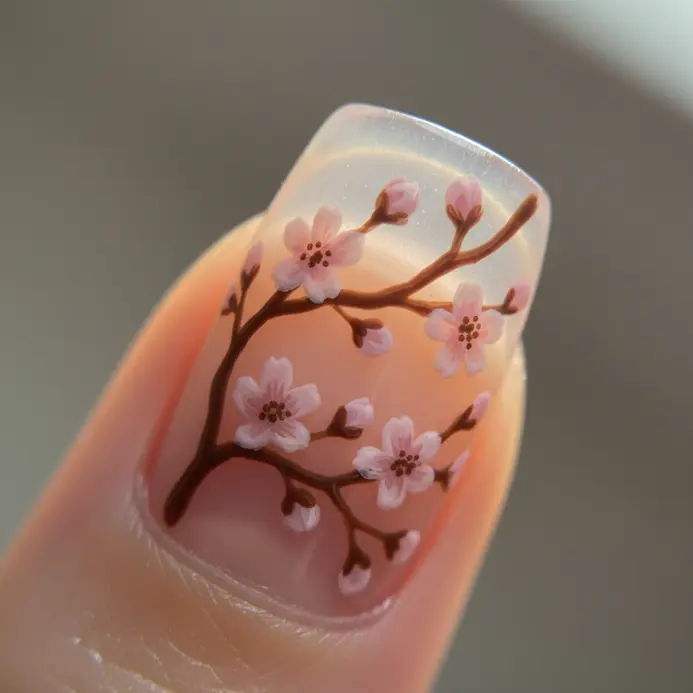
This diy floral nail art look seems so delicate and complex, but the secret is in what you leave out. You are not painting a solid branch. Instead, you let your base color show through to define the shape. Use a light pink dotting tool to create loose clusters where blossoms would be, leaving the center of each cluster empty. Connect them with thin, wispy brown lines for the branch. Why does it work so well? Your eye naturally connects the dots and gaps, completing the airy image for you. It is a wonderfully subtle way to add a floral touch. If you love this elegant look, you will find more inspiration for acrylic painting floral designs too. Does that not look stunning?
7. Add Gold Foil to a Wildflower Stem Design
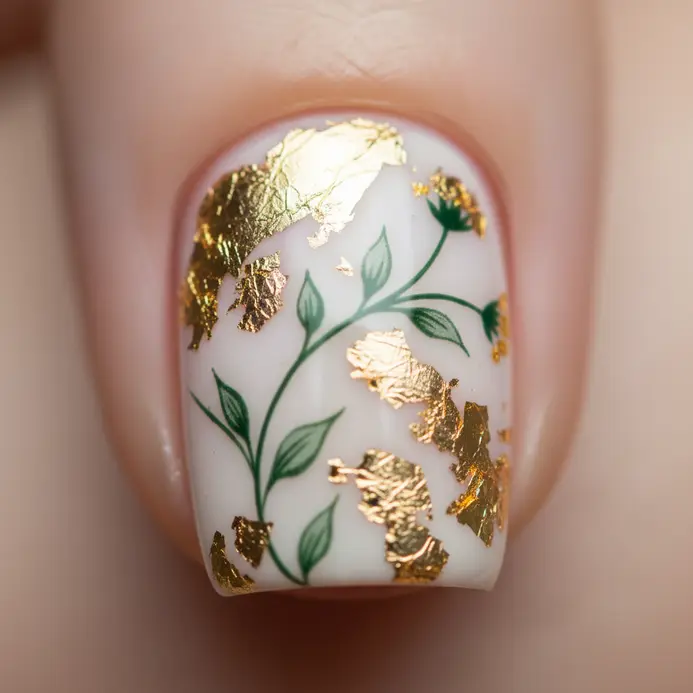
This diy floral nail art step feels like adding a secret treasure to your work. You apply a Use specialized foil glue to enhance your floral manicure. to the parts you want to shine, like a stem outline or leaf veins, and let it dry until it is tacky. Then, you press on a sheet of gold foil and rub it firmly before peeling it away to reveal the magic. The metallic sheen makes your wildflower design look incredibly precious and sophisticated, perfect for a special gift or a floral nail design. I love how this technique instantly elevates a simple piece. For a different kind of elegant inspiration, you might also enjoy romantic nail art designs.
8. Layer a Matte Pastel Tulip Bud Arrangement
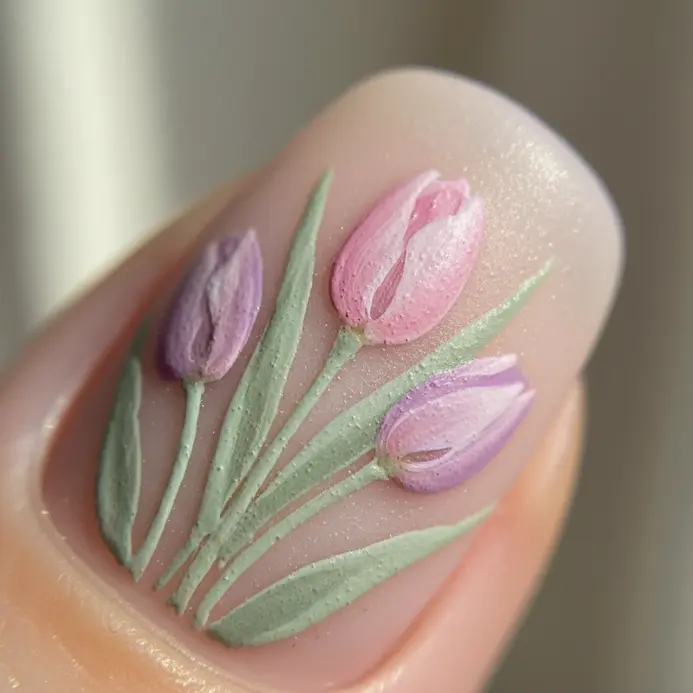
Ever wonder how a lush diy floral nail art arrangement gets that professional depth? It is about intentional layering. This technique uses stems at different heights to build a soft, architectural look. I love starting with a matte ceramic vase filled with water and placing your shortest tulip buds around the edges, then adding taller ones towards the center. Trust me, using a floral frog or tape grid is the secret to holding those perfect positions. Why does this work so well? The varying levels create incredible visual interest and make your bouquet feel abundant. A few sprigs of silvery dusty miller add lovely texture without stealing the show. Feel that quiet, artistic satisfaction when your layered masterpiece comes together.
9. Capture an Abstract Bluebell Speckled Floral Pattern
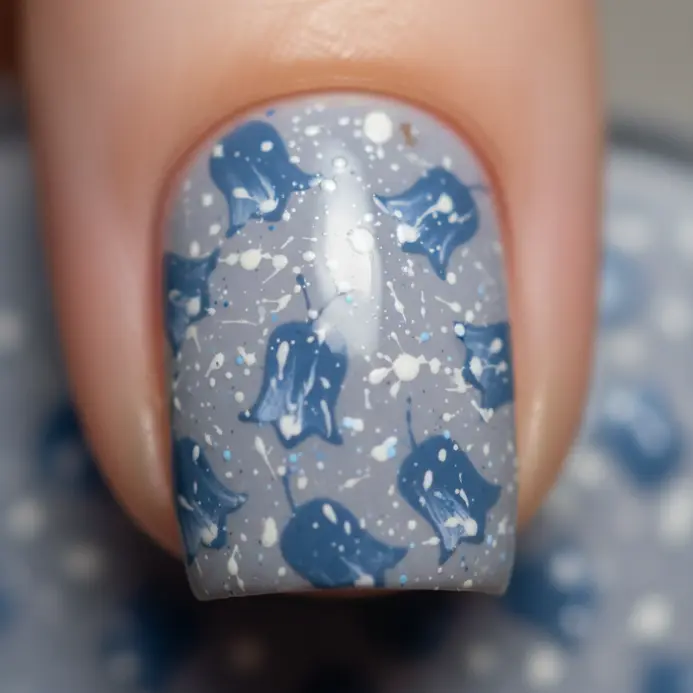
This abstract diy floral nail art pattern is all about evoking that feeling with soft, drooping shapes and playful speckles. Start by laying down washes of periwinkle and lavender Use the dotting tool to create your dreamy base for a beautiful floral manicure. Then, tap in those tiny, irregular dots with a loaded brush or a digital tool to add magical texture and depth. I love how the speckled part keeps the design from feeling flat, giving it an organic, shimmering quality. The real payoff is in the freedom, there is no wrong way to interpret these bell-like forms. For a similar burst of color inspiration, check out some vibrant summer nail art ideas. Feel that fresh, whimsical energy come to life on your canvas.
10. Style a Vintage Brooch Rose Cluster
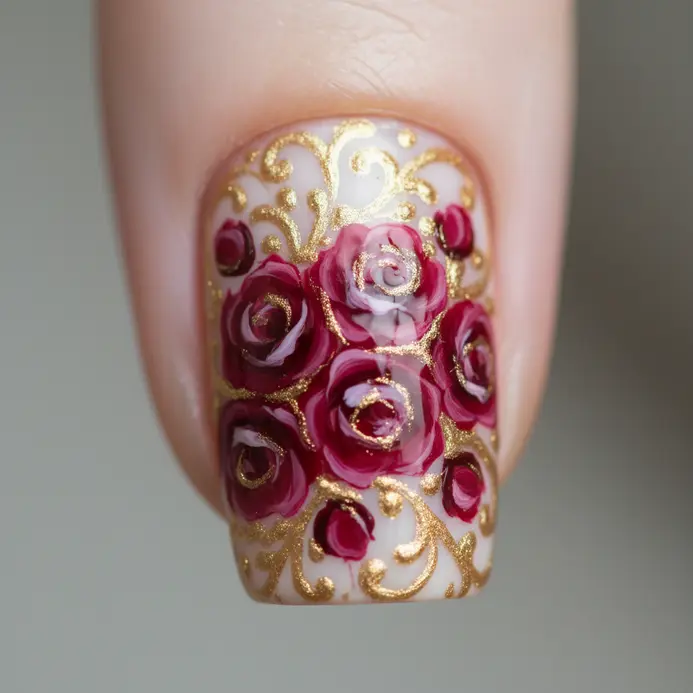
Ever feel like your diy floral nail art outfit needs a touch of classic charm? A vintage brooch rose cluster is your secret weapon. Start by understanding its metal and gemstone details Choose colors to match your garment’s era and color for a cohesive nail look. Pin it on a simple blazer lapel or the corner of a scarf for instant elegance, just like a nail artist would. This works because it adds a focal point of timeless personality. I love using these clusters as a hair accessory too. Secure it to a plain hair comb with a few bobby pins for a romantic updo. It transforms your look with a whisper of old world glamour. You can find more petite floral tattoo inspiration to spark other delicate design ideas. Try it and feel wonderfully polished.
11. Form Dainty Forget Me Not Clusters
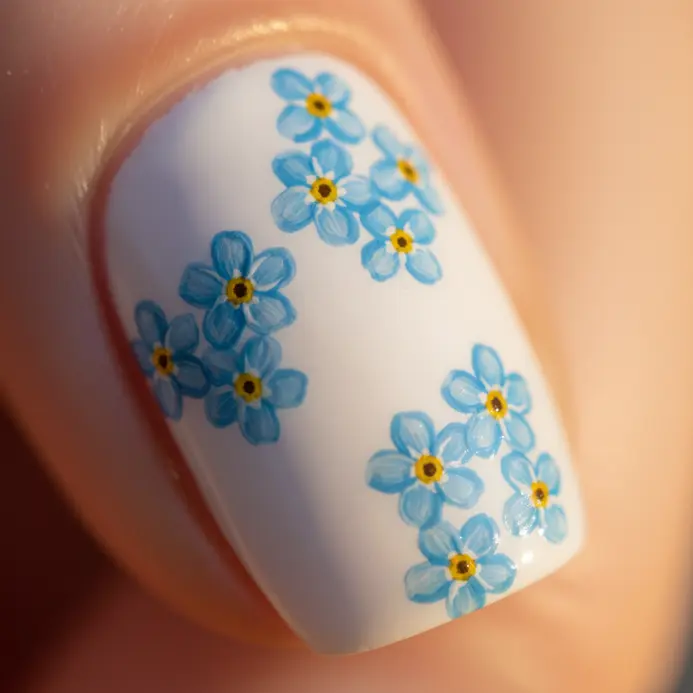
Ever wondered how those tiny diy floral nail art clusters come together? This one surprised me, it looks detailed but is built from simple shapes. You will form a small group of three to seven flowers, each with five blue petals and a tiny yellow dot in the center. Connect them with thin green lines for stems and add a few wispy leaves. I love this one because the small scale creates such a delicate, charming look. Remember, the key is to keep everything petite for your flower nails. Use only one or two strands of embroidery floss or roll your clay quite thin. This ensures your cluster stays dainty and realistic. Try it and feel the satisfaction of creating this nostalgic little bloom.
12. Build a Botanical Fern and Lily Manicure
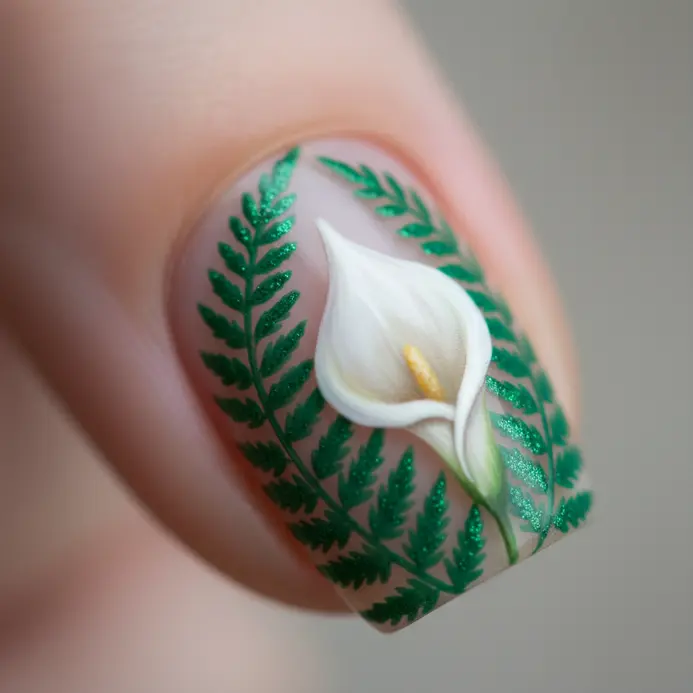
This diy floral nail art design looks structured, but trust me, you can master it by focusing on one layer at a time. Start with a light base coat and let it dry completely. Then, using a fine liner brush, paint your feathery fern fronds with different greens for depth. Add your lilies next, painting the petals with a main color and a slightly darker shade for definition. Is it not fun to see a little garden bloom on your nails? The key is to keep your brush strokes light and let each color dry to avoid smudging. I love finishing with a glossy top coat to make the colors pop and protect your work. If you enjoy floral themes, you might also like exploring heart nail art designs for more romantic inspiration.
13. Paint a Hibiscus Tropical Flower Bright Accent
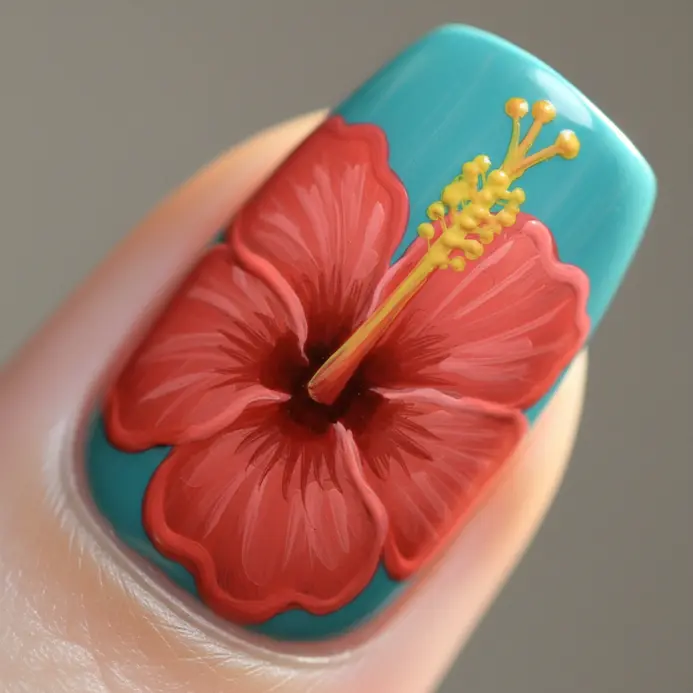
Who would have thought a few key shadows could make this look so luminous? This one is about capturing that vibrant, velvety texture. Start with a light wash of your most saturated red for the petals. Then, use a deeper shade for the shadows where petals overlap, which instantly creates that three-dimensional pop we are after. It works because you are not only painting a shape, you are painting light. Explore beautiful flower tattoo ideas.
14. Create a Potted Cactus Succulent Nail Art
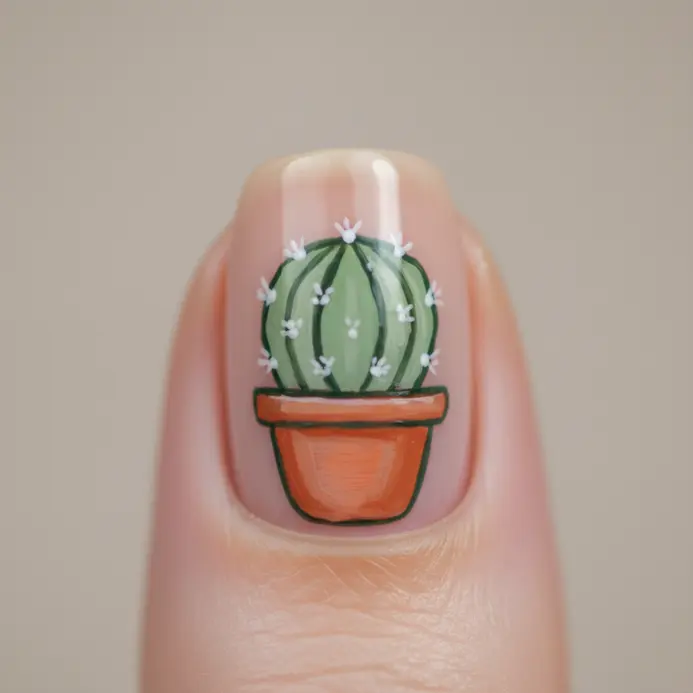
This piece looks so detailed, but it is surprisingly simple to layer up. You start with a light base, then paint a small terracotta pot shape at the nail base. Add a dark soil line above it, and then build your green cactus or succulent shapes on top for a unique nail design. I love using a fine detail brush for the spines and tiny flower dots. It works because you are painting a charming, recognizable miniature scene. Trust me, the feeling when you seal it with a top coat and see your tiny garden is pure joy.
15. Outline a Delicate Poppy Stem Design
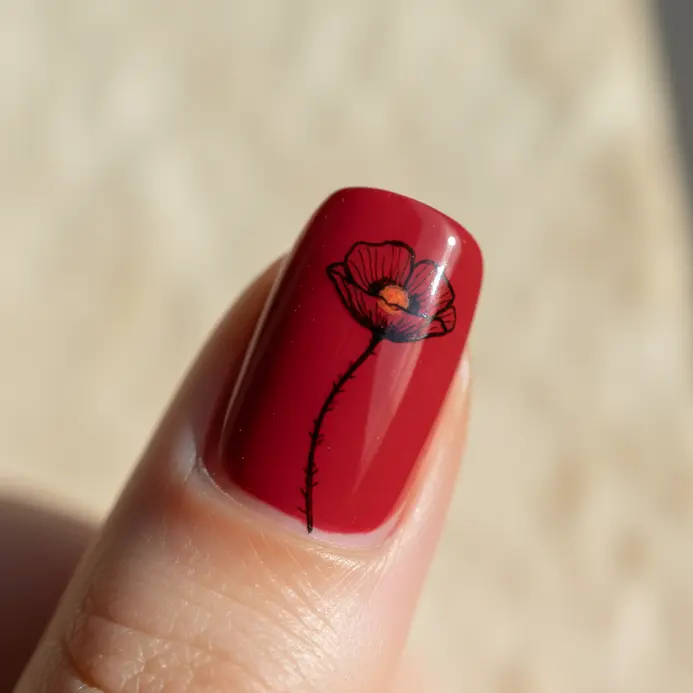
Ever wondered how to make a painted flower for diy floral nail art look truly alive? The secret is in the stem. Start with a light, flowing S-curve using your fine-tipped nail brush and a thin green polish, letting it taper naturally. Add tiny dots or short lines to suggest delicate fuzz, and use a slightly darker shade to hint at ridges. I love how this captures the flower’s gentle, drooping posture. It works because that soft, organic curve creates a sense of movement and fragile beauty. Check out creative flower painting ideas. Feel the elegance when your design comes together.
16. Blend a Chic Marigold Petal Gradient Effect
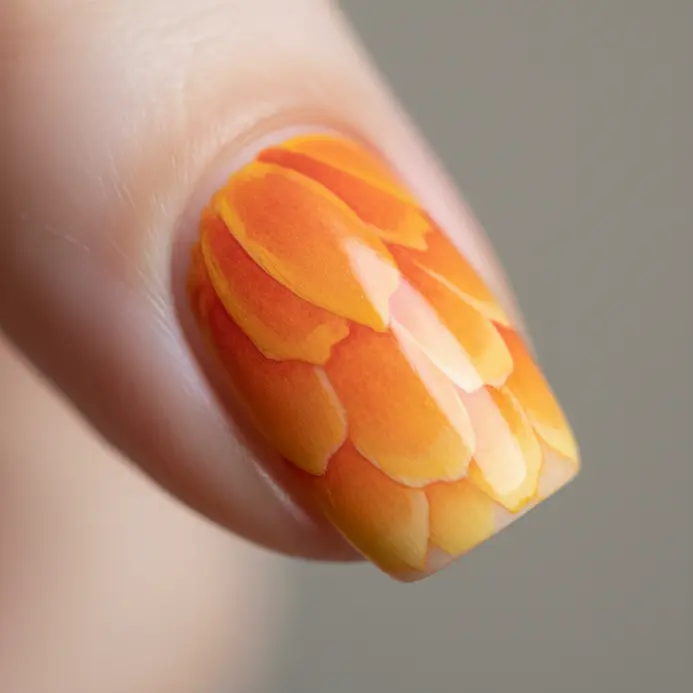
Ever wondered how to get that smooth, warm-to-bright transition on your diy floral nail art? It is all about blending those marigold colors from a deep orange out to a creamy yellow. I love using a digital gradient tool to place my color stops, making sure the shift is seamless without any harsh lines. This works because it captures the natural joy of the flower in a super sophisticated way. simple flower painting designs.
17. Add a Springtime Daffodil Yellow Floral Motif
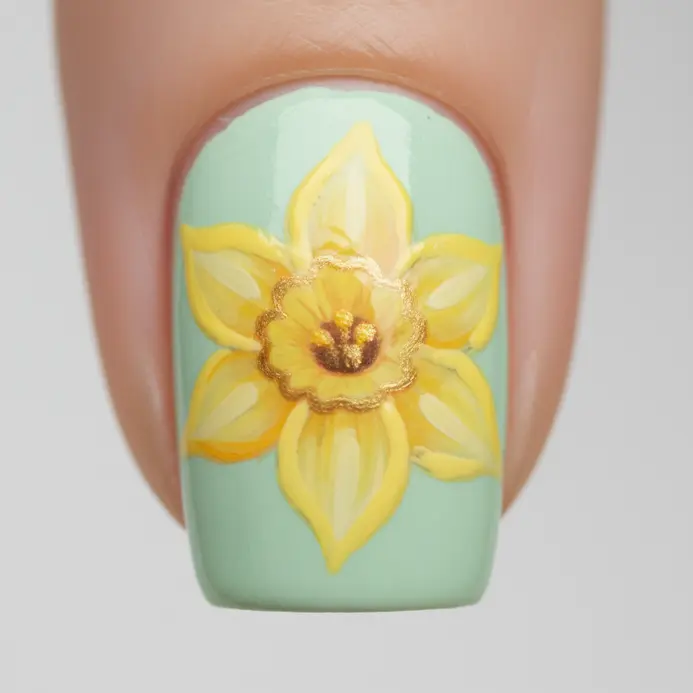
Who says a bright spring flower is too tricky for a tiny canvas? Start with a base coat, then use a fine-tipped nail art brush to paint six slightly overlapping petals in a cheerful daffodil yellow. Add a tiny orange or deeper yellow dot in the center for that iconic trumpet. I love how this simple shape instantly feels like a fresh garden on your fingertips. Finish with slender green stems and a glossy top coat for a design that feels like pure sunshine.
18. Apply an Ethereal Dried Flower Leaf Collage
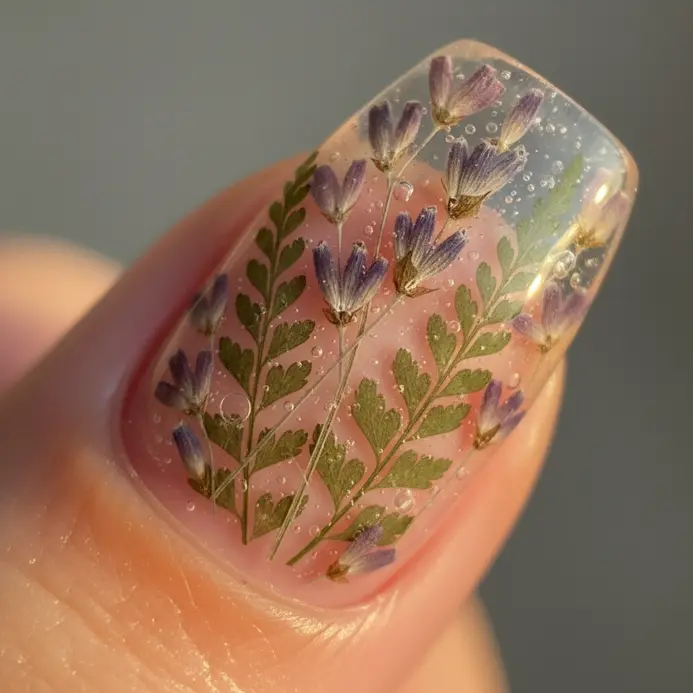
Ever wondered how those delicate, translucent botanical artworks are made? This technique transforms thin, pressed petals and wispy leaves into a collage that feels light and airy. You will arrange them on a sturdy base like watercolor paper, focusing on layering and leaving plenty of negative space to keep the look ethereal. I love how this preserves a bit of nature’s fleeting beauty. For a different way to paint florals, check out easy watercolor flower techniques. Use a clear-drying glue applied sparingly with a small brush or tweezers to gently adhere each piece. The key is a soft, muted color palette with lots of transparency, letting light create depth. This works well because it captures a serene, almost fragile aesthetic that feels personal and handmade. Try it and feel the quiet satisfaction of creating something unique.
19. Stamp a Double Lotus Flower Design
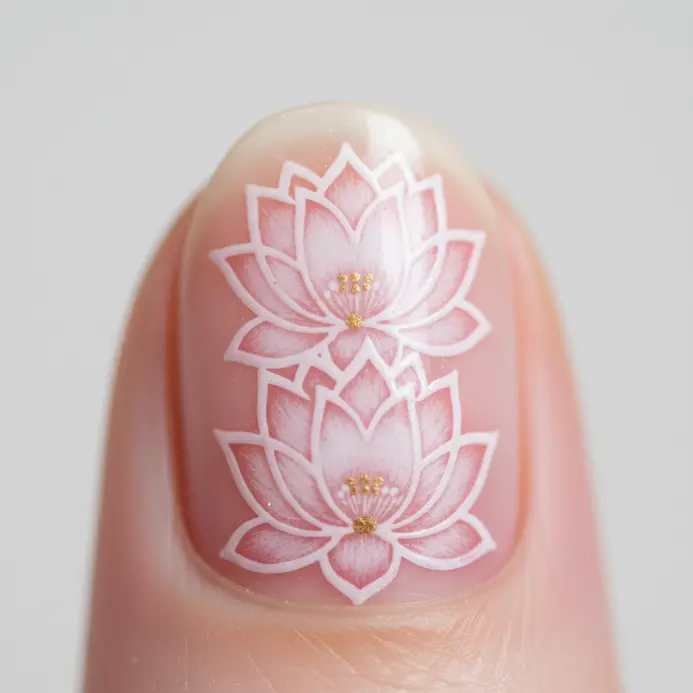
Who would have thought a stamp could create something this detailed? This double lotus looks complex, but with a clear stamp and acrylic block, you get perfect placement every time. Press it evenly onto a pigment ink pad for a bold, opaque image. I love that this layered design gives you instant depth and beautiful symmetry. Trust me, the satisfaction of pulling up that crisp, detailed flower is amazing. acrylic painting floral designs.
20. Mix a Boho Style Meadow Wildflower Design
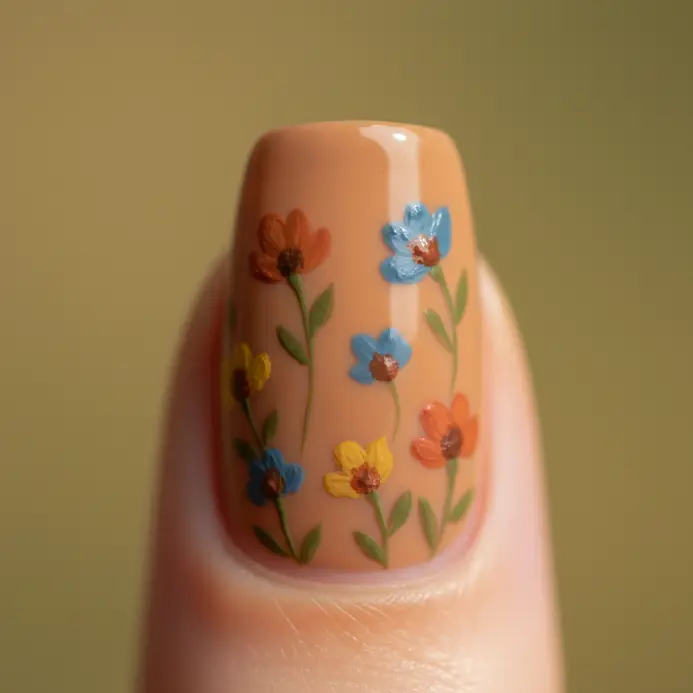
Ever wanted your nails to look like a tiny, whimsical meadow you just strolled through? This design is all about that free-spirited, natural charm. Start by painting your nails with a soft, earthy base color. Then, use a Use a tiny dotting tool for precise details in your flower nails. to create a loose cluster of wildflowers in muted purples, creams, and dusty pinks. Add some delicate green stems and a few scattered dots for texture, letting them overlap and flow naturally. I love how it captures that imperfect, foraged beauty right on your fingertips. Try it and feel that boho freshness.
Encapsulation Methods for Long Lasting Botanical Manicures
The only way to prevent your delicate pressed flowers from peeling up at the edges is to fully seal them under multiple layers of clear product. You will notice that a single swipe of topcoat is never enough. For real durability, especially with any raised elements, you need to use a builder gel as your encapsulation layer. This thicker, viscous gel flows around each tiny botanical edge and cures into a solid, protective dome. Apply it carefully to avoid trapping those dreaded air bubbles. Then, finish with your usual strong topcoat to complete your flower nail art. This two-step sealing process is what turns a pretty design into a manicure that lasts for weeks without chipping or lifting.
Conclusion
Your nails are a wonderful, small space to express the same care and creativity you put into your other projects. The best part about diy floral nail art is how it lets you carry a piece of that personal artistry with you every day. My advice is to pick one design that makes you pause, gather your favorite polish shades, and give yourself the time to enjoy the process. The goal is not perfection, but a little bloom of creativity at your fingertips. I hope these ideas give you a starting point for your next beautiful, handcrafted manicure.
FAQs
Q: What is the easiest way to create simple floral nail art at home for beginners?
A: The easiest approach to DIY floral nail art is to start simple: apply a base color, then use a dotting tool or the end of a bobby pin to make dotted flowers (dotted flowers) and tiny floral accents. Focus on one nail at a time and keep the flowers minimal floral or dainty daisies for a clean, elegant flower nail designs at home look. Top with a clear topcoat to adorn and protect your mani.
Q: How can I make daisy nail designs and other simple flower nail designs with limited art skills?
A: For daisy nail designs, paint a white flower center or small white flowers and add yellow or contrasting hue dots for centers using a bobby pin or dotting tool. Polka and polka dot tips can pair nicely—make a few dainty daisies on one or two accent nails while keeping the rest minimal floral. This simple DIY technique works well even if you have minimal art skills.
Q: What tools do I need for floral mani at home: dotting tool, bobby pin, or nail sticker?
A: Basic tools include a dotting tool (or bobby pin) for dotted flowers and tiny floral details, a thin brush for petals if you want more intricate nail art, and nail stickers for quick floral looks. A dotting tool or the end of a bobby pin is great for easy to create daisies and polka accents; nail stickers are perfect for fast floral nail art inspo without much practice.
Q: Can I create elegant flower nail designs like peony or romantic floral motifs on long nails?
A: Yes—long nails give you more canvas to create intricate nail art like peony blooms and romantic floral arrangements. Use layered petals in varying hues and add shading for depth. If you prefer less complexity, adapt peony shapes into simple flower shapes or a garden on your nails with one detailed flower per nail to keep it manageable.
Q: How do I incorporate a french manicure or french tips into floral nail art?
A: Combine french manicure style with floral accents by painting classic french tips and adding tiny floral clusters or a single bloom at the base or corner of the nail. White flowers or baby blue and purple flowers look lovely against a neutral french manicure. This take on floral nails balances elegant flower nail designs with modern mani trends.