

Achieving Organic Forms Through Petal Shaping Techniques
The fastest way to ruin finished paper flower centerpiece ideas is skipping petal curling — it’s the single technique that transforms flat paper into a blooming form. Trust me on this, we all know a paper bloom looks manufactured when the petals are stiff and static. You want to mimic nature’s soft curves and ruffles by using a ball stylus tool on the back of each petal cut from Italian crepe paper. The good news is that varying the pressure creates different textures, from gentle cups to dramatic rolls. Apply a low-temperature glue to attach these pre-shaped pieces, which prevents warping the delicate material. This method builds the layered, dimensional character that makes guests do a double-take, wondering if your arrangement is real. The right paper weight supports this shaping process beautifully.
Selecting Supporting Foliage And Armature Materials
Your arrangement looks unfinished without a calyx and leaves, which are the secret to unifying most paper flower centerpiece ideas into a cohesive display. Beginners often overlook these details, focusing only on the big blooms. The supporting structure starts inside the stem with a floral wire armature wrapped in tape, giving you the control to pose every branch naturally. You then build out with foliage cut from matte vellum or textured cardstock, attaching it with tacky glue for precise, strong connections. This framework is what allows your oversized cardstock blooms to stand tall without drooping. It also fills the visual space between flowers, creating that lush, garden-gathered look. Selecting greenery in a complementary color palette ties the whole piece together.
1. Build an Oversized Cardstock Rose Table Arrangement
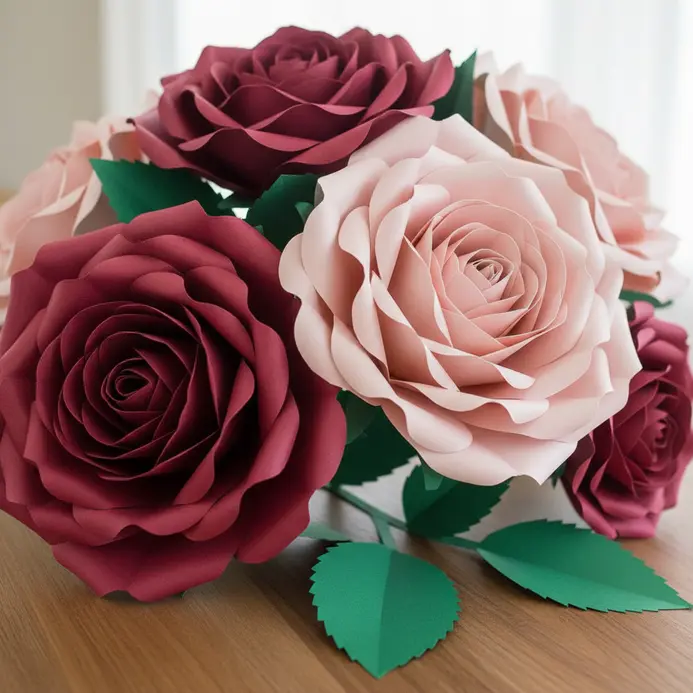
Does an oversized bloom sound intimidating? Trust me, it’s far simpler than you think, and the result is stunning. The secret is using heavy cardstock so the large petals hold their dramatic shape. You’ll cut petals in graduated sizes, curl their edges with a dowel, and layer them from a small center bud outward. I love how exploring paper flower centerpiece ideas lets you create a permanent, custom piece that’s perfect for a party or your dining table. creative paper craft ideas can also inspire your next workspace decor.
2. Assemble a Rustic Mason Jar Wildflower Bundle
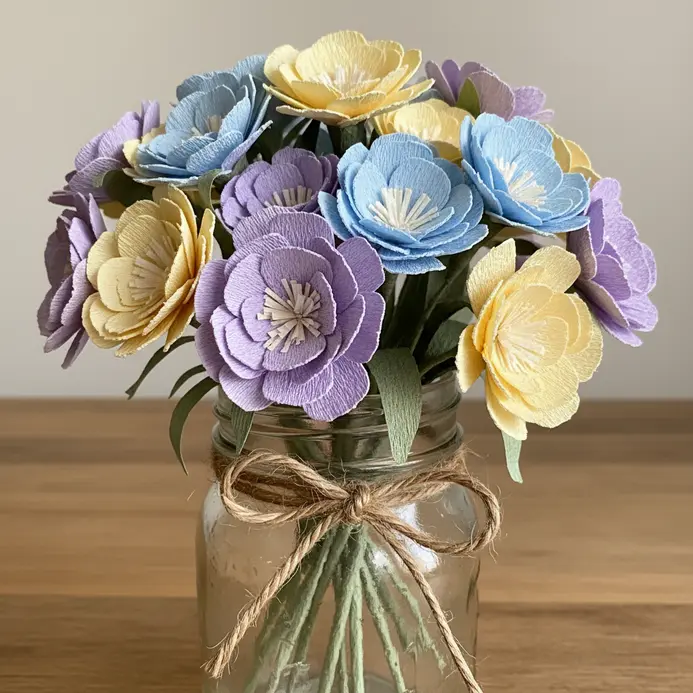
Ever wanted to bring a little wild meadow inside? This rustic approach to paper flower centerpiece ideas is all about embracing natural, effortless charm. You start by placing some greenery base in your clean jar, then add your favorite ‘star’ blooms like daisies or zinnias. Fill in the gaps with filler flowers and maybe a spiky grass for texture. I love this because it feels like you just gathered a cheerful handful from a garden. Trust me, do not overthink it. The slightly wild, asymmetrical look is the whole point, making your table feel instantly fresher.
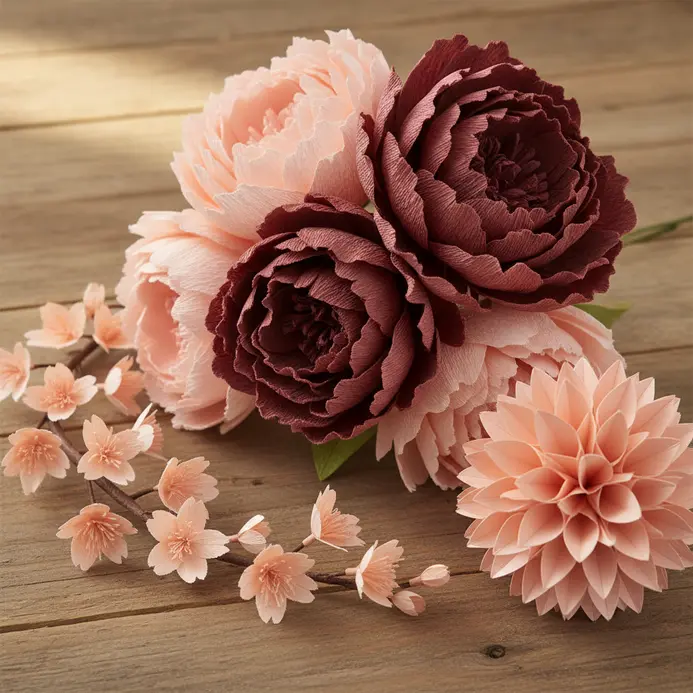
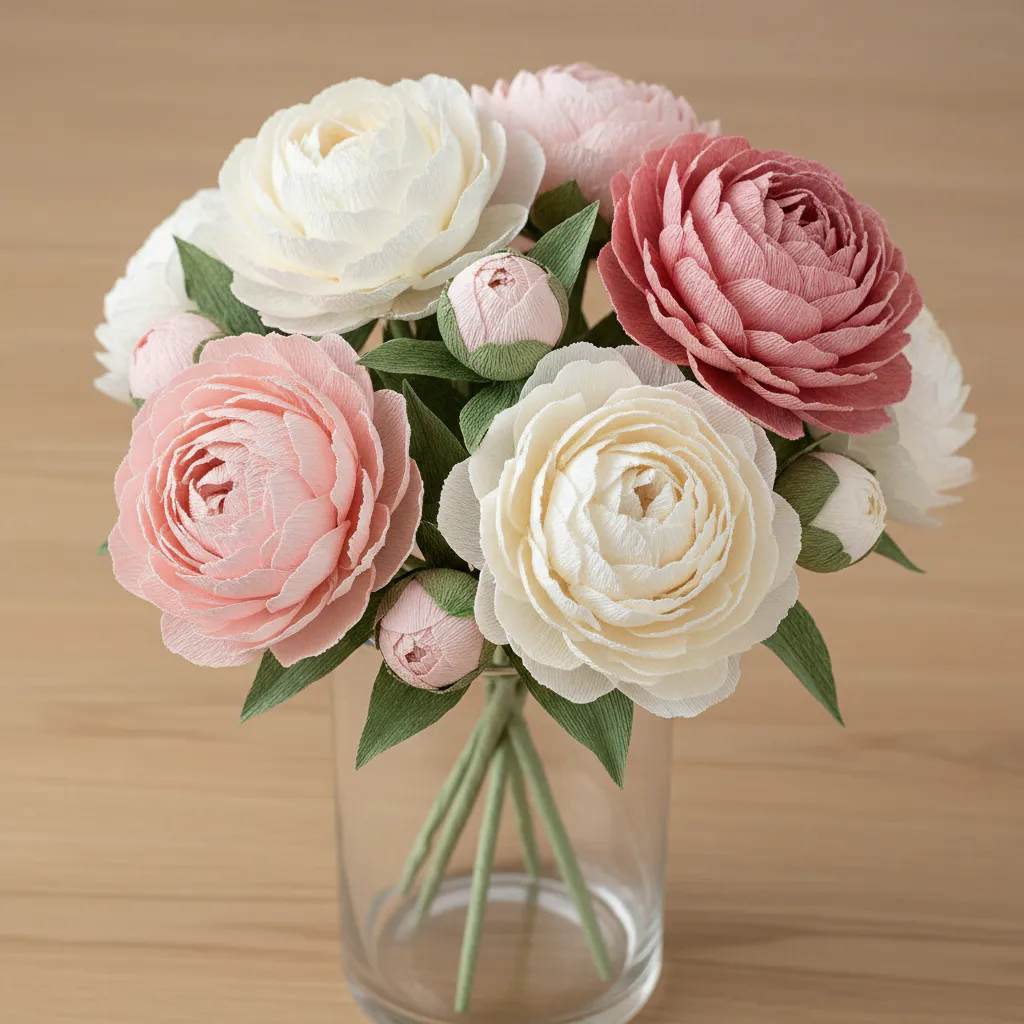
3. Create an Elegant Crepe Paper Peony Bouquet
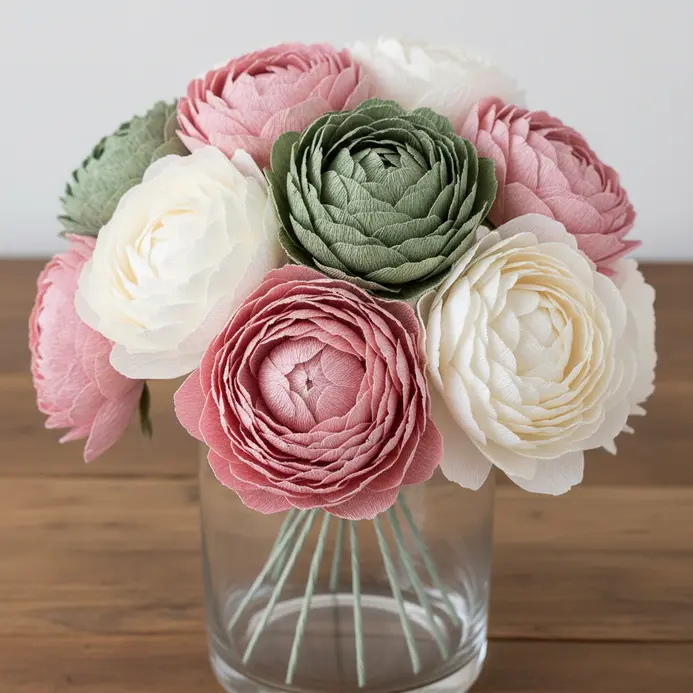
Ever wondered how those lush, ruffled blooms in paper flower centerpiece ideas photos are made? This one surprised me with how realistic it looks. You start by creating a frilly center from fine crepe paper, then build the flower outwards with layered petals cut from a heavier weight. The magic is in stretching the paper with the grain to get that perfect cup shape. It works because the texture mimics real petals so well, giving you a lasting bloom. My go-to tip is to always cut your petals with the grain running vertically for the best stretch.
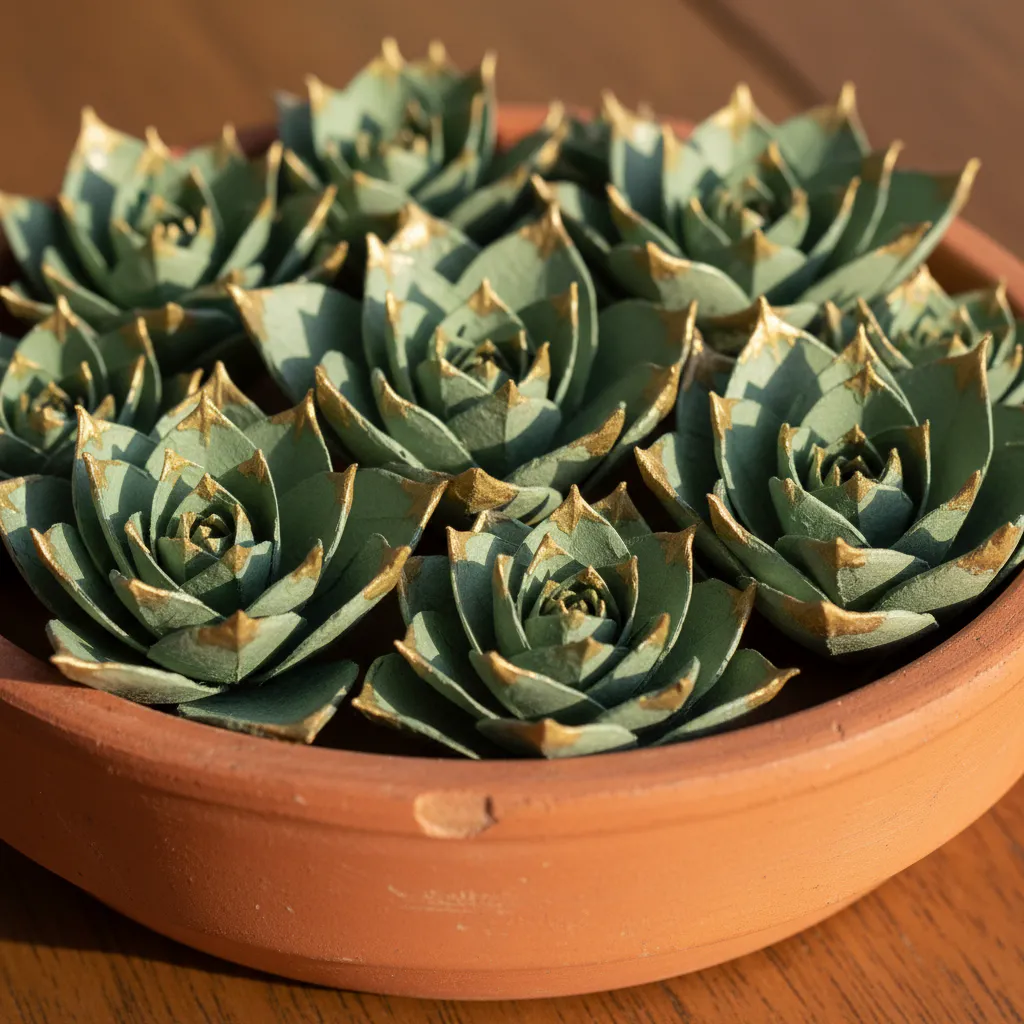
4. Make a Miniature Terracotta Paper Succulent Garden
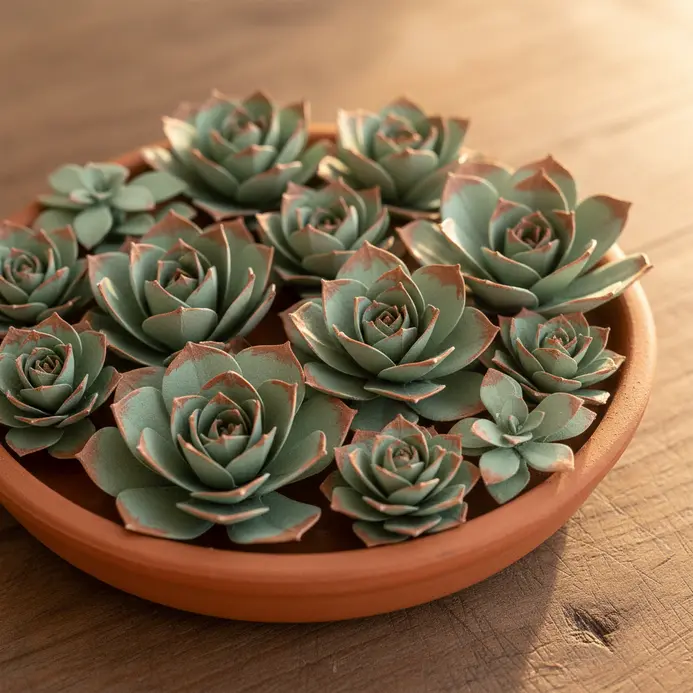
Who would have thought paper could look so convincingly alive? This project proves that simple paper flower centerpiece ideas can create a tiny, maintenance-free garden. First, shape your petals with a bone folder to give them realistic curves. Then, assemble them into little rosettes and secure them into small pots filled with floral foam. It is so satisfying to see those flat sheets transform into a lush, three-dimensional scene. For more inspiration on DIY craft projects, this technique is a fantastic place to start.
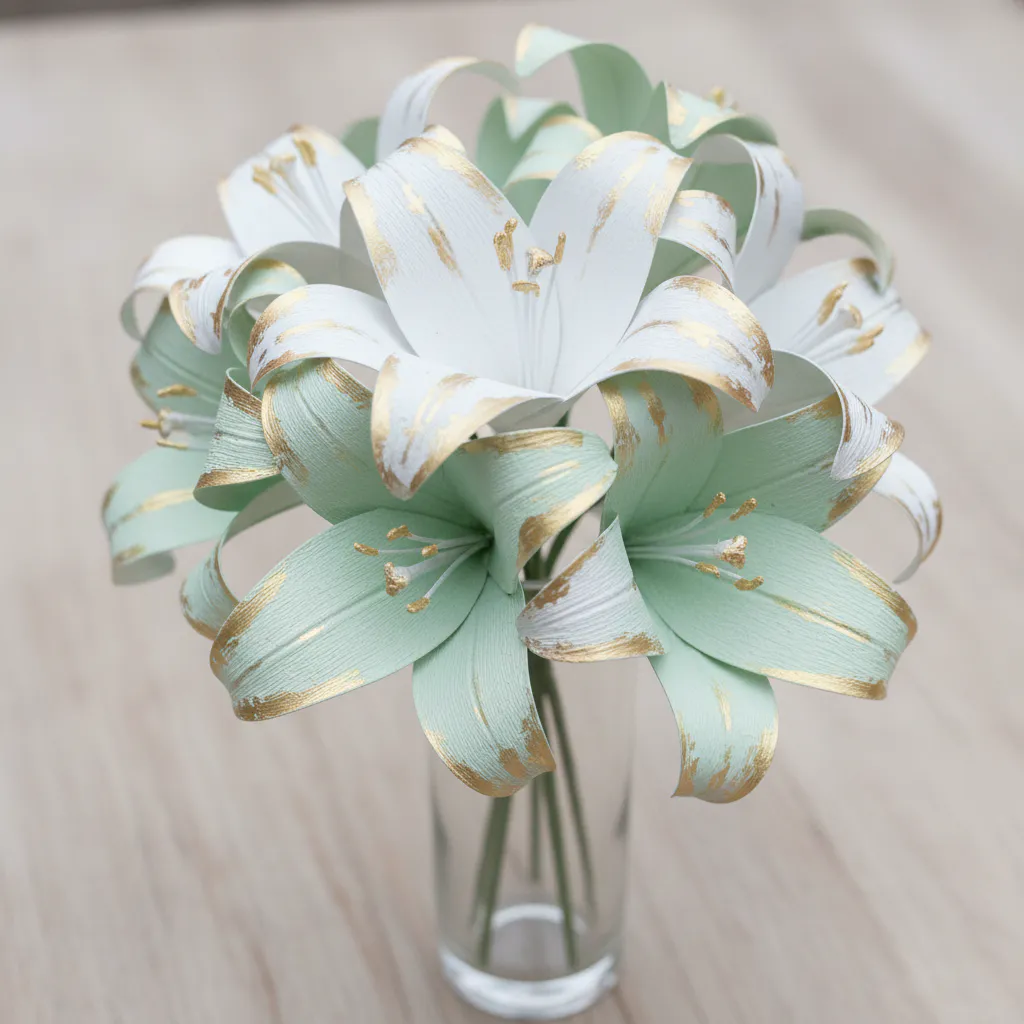
5. Apply Gold Paint for a Metallic Paper Lily Centerpiece
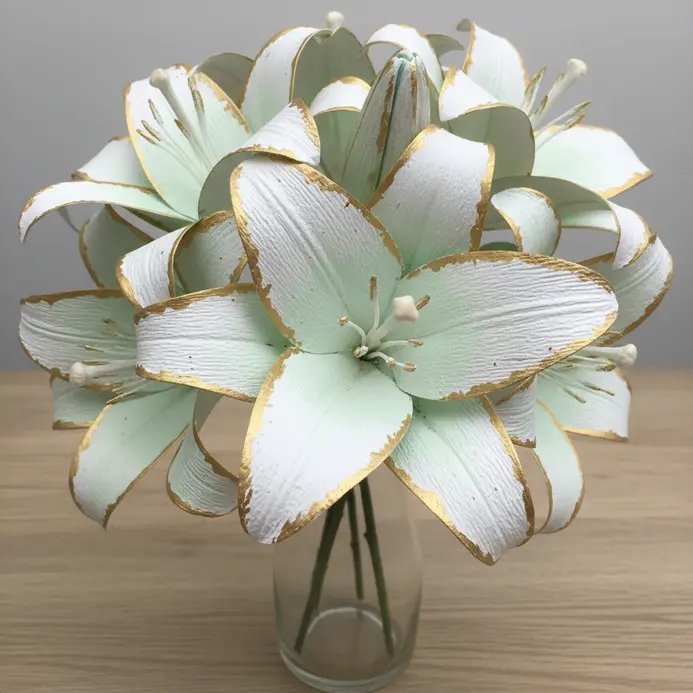
This step feels like a magic trick, turning a plain design into one of the most striking paper flower centerpiece ideas available. I love using a small detail brush to carefully apply the paint to the stamen and inner parts. Work with light coats, letting each one dry fully to prevent warping the material and to build a rich, even finish. Why does this work so well? That touch of gold adds incredible realism and a luxurious sparkle, making your display look professionally designed. Try it and feel that rush of satisfaction when your creation suddenly looks ten times more expensive.
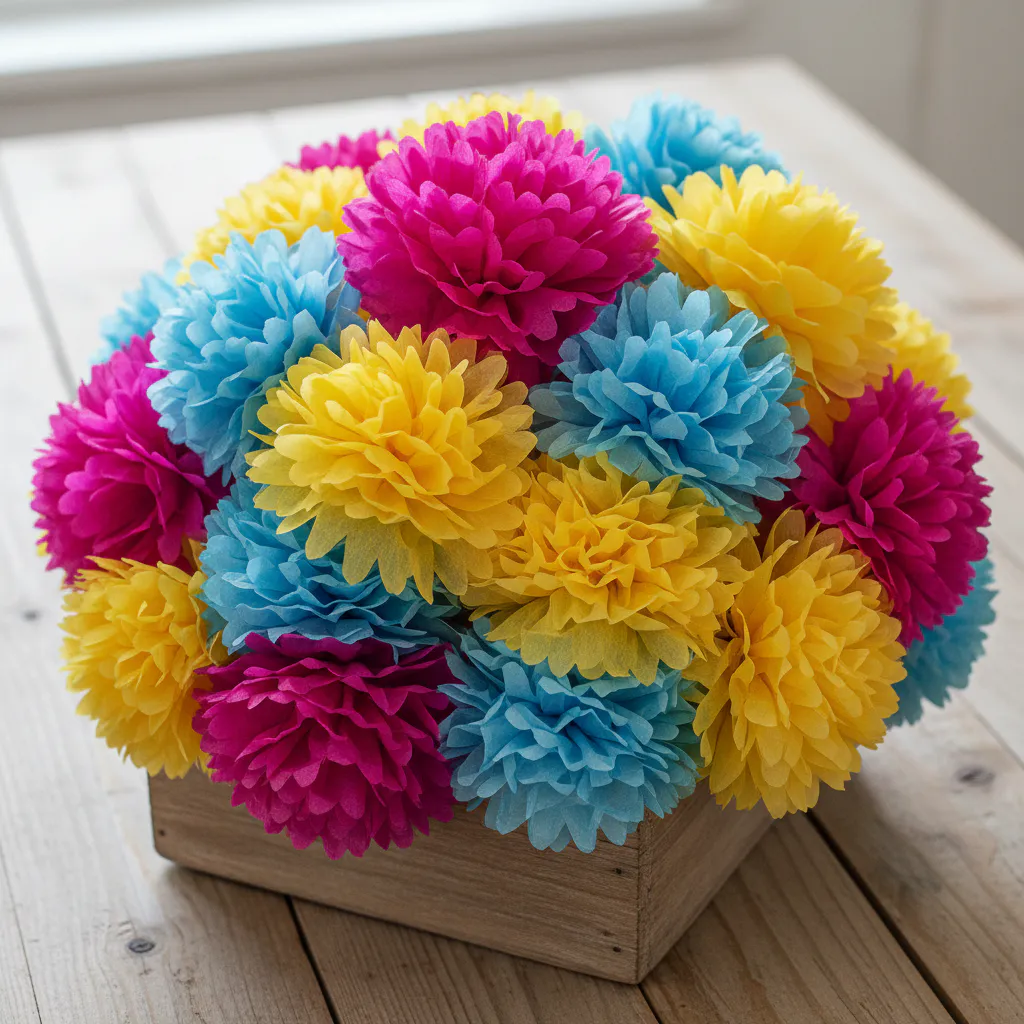
6. Craft Whimsical Tissue Paper Pom Pom Clusters
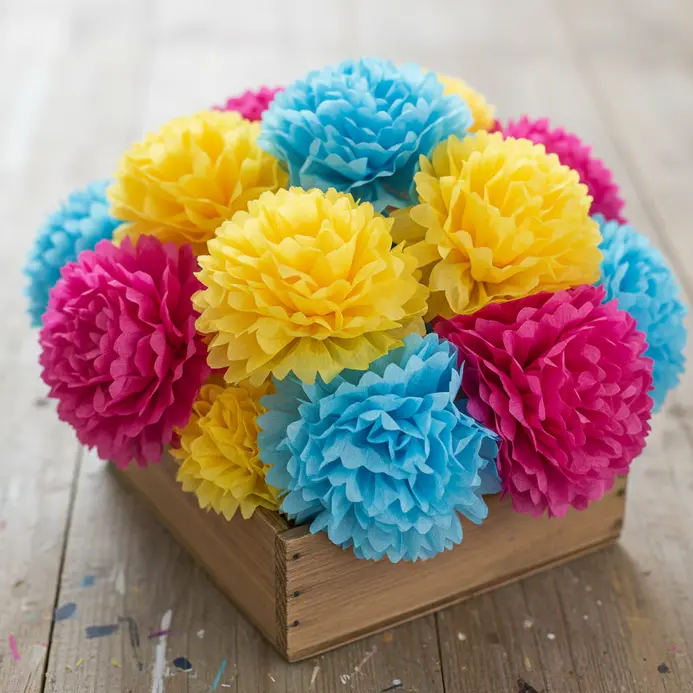
Does crafting seem intimidating? These fluffy clusters are the perfect beginner entry into playful paper flower centerpiece ideas. All you do is stack and accordion-fold your tissue paper sheets, secure the center, and gently fluff each layer. The magic happens when you group a few together, creating a soft, cloud-like display full of color. I love how this instantly adds a joyful, celebratory vibe to any table. For a more structured 3D look, check out some inspiration from sculptural paper art techniques.
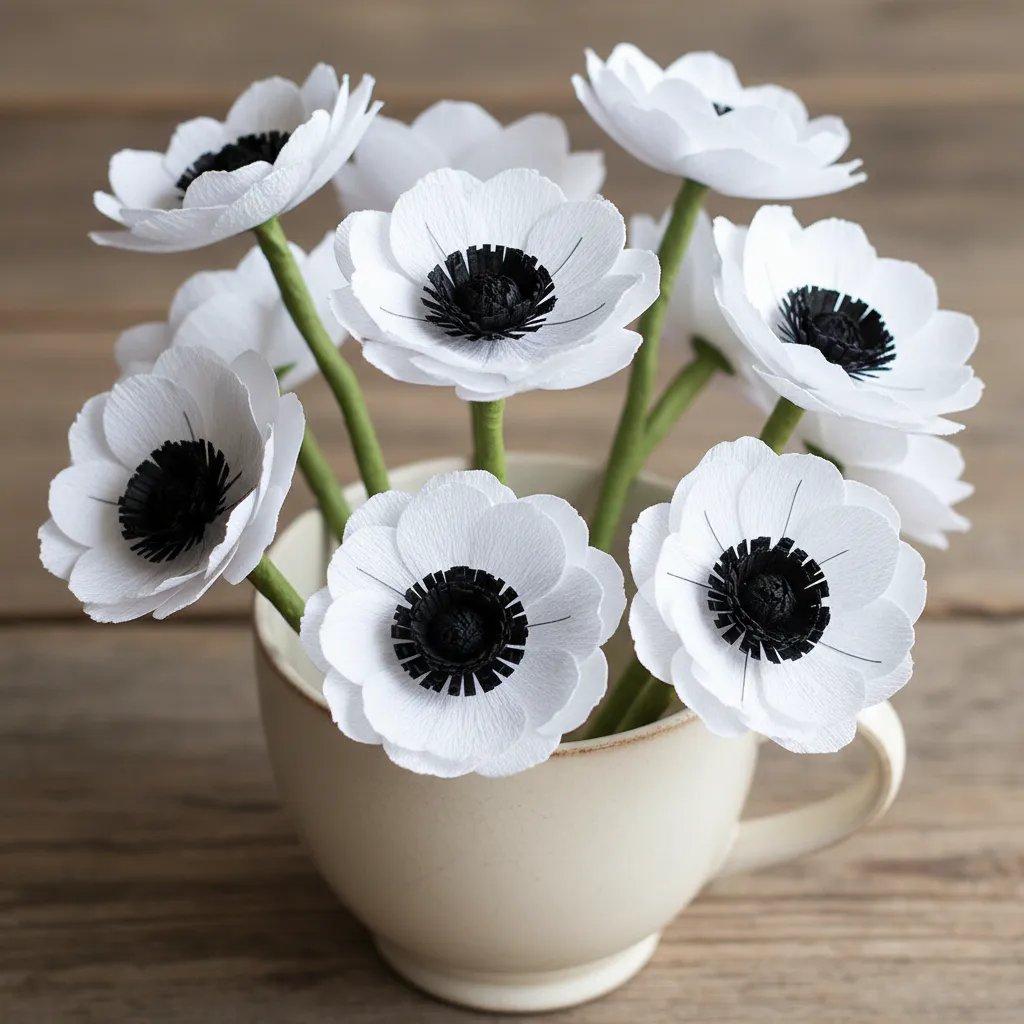
7. Style a Vintage Teacup Paper Anemone Centerpiece
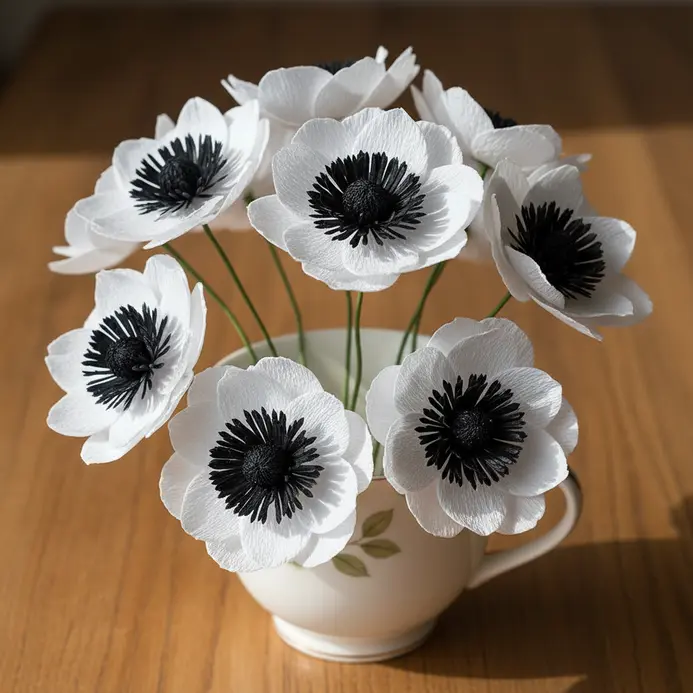
This one looks so delicate, but trust me, it’s wonderfully simple to put together, making it one of my favorite paper flower centerpiece ideas. You start by gathering an An odd number of vintage teacups can make a charming addition to your wedding floral centerpiece., mixing up their patterns and sizes for charm. Trim the wire stems on your paper anemones so each flower nestles just above a cup’s rim. I love how this creates a layered, whimsical look with everlasting beauty. It’s perfect for a bridal shower or your dining table, and the best part? You get to play with color and texture. Isn’t that a lovely way to add a personal touch?
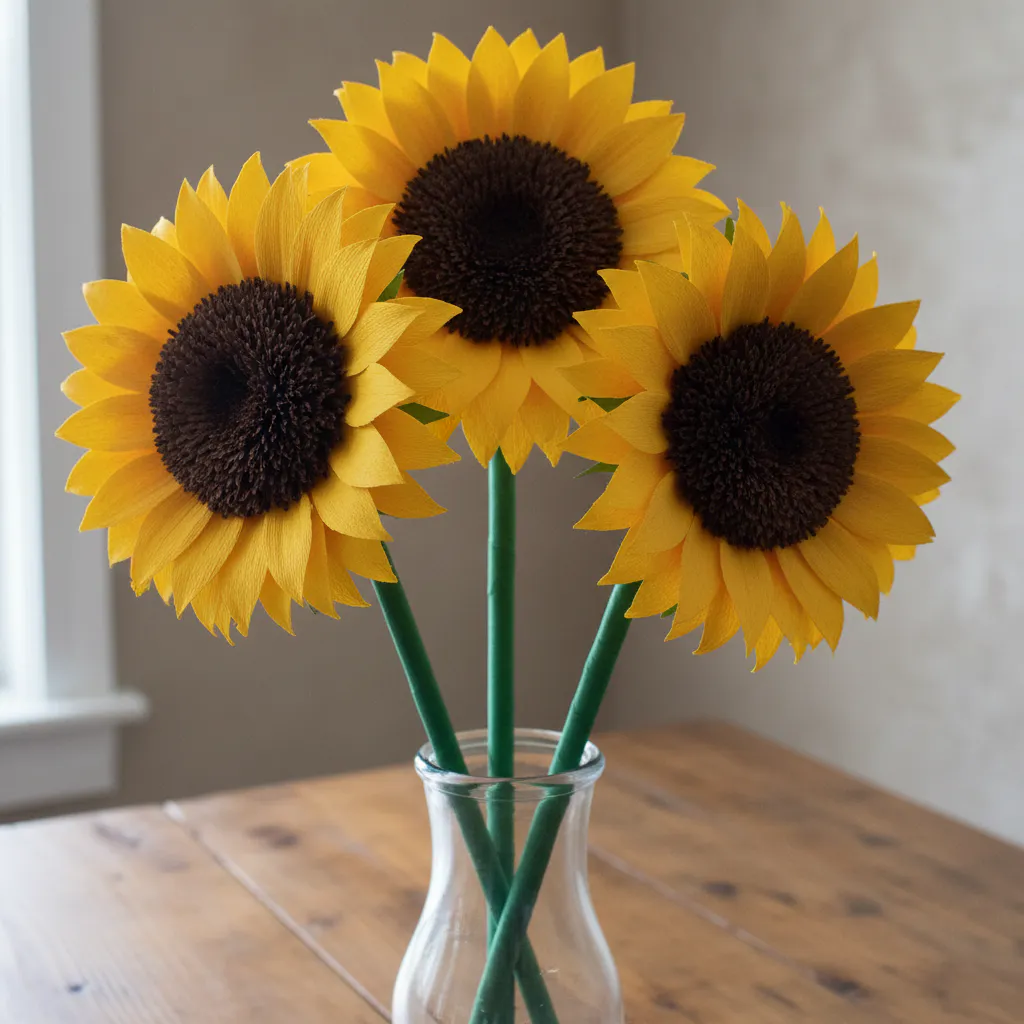
8. Build a Stalked Paper Sunflower Tall Vase Display
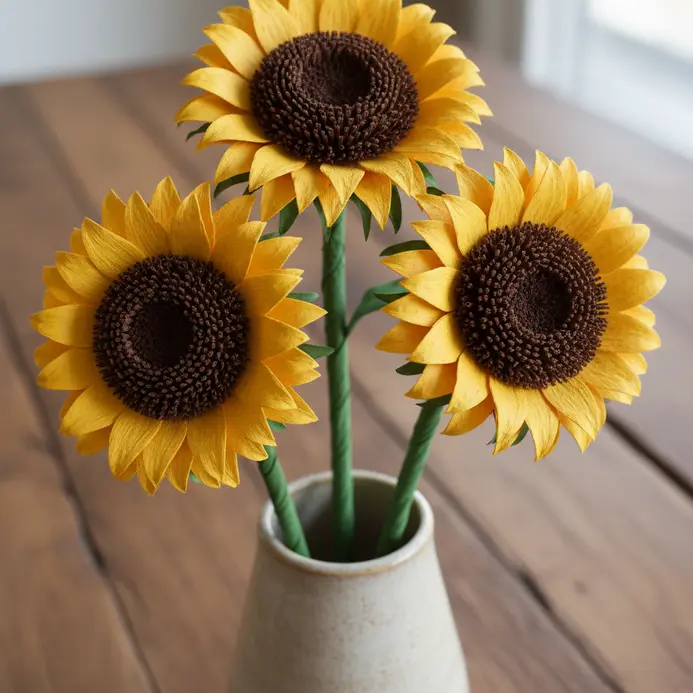
This one looks impressive but is totally achievable, proving that tall paper flower centerpiece ideas don’t have to be complicated. You will cut several sizes of teardrop-shaped petals from yellow cardstock and curl them gently with a bone folder. Then, you attach them in layers around a dark brown center, building up that signature look. For a stable display, you need a sturdy stalk. I always use thick floral wire wrapped in green tape, which lets you pose each stem perfectly in your tall vase. The payoff is a bright, cheerful arrangement that never wilts. Feel that handmade pride every time you see it.
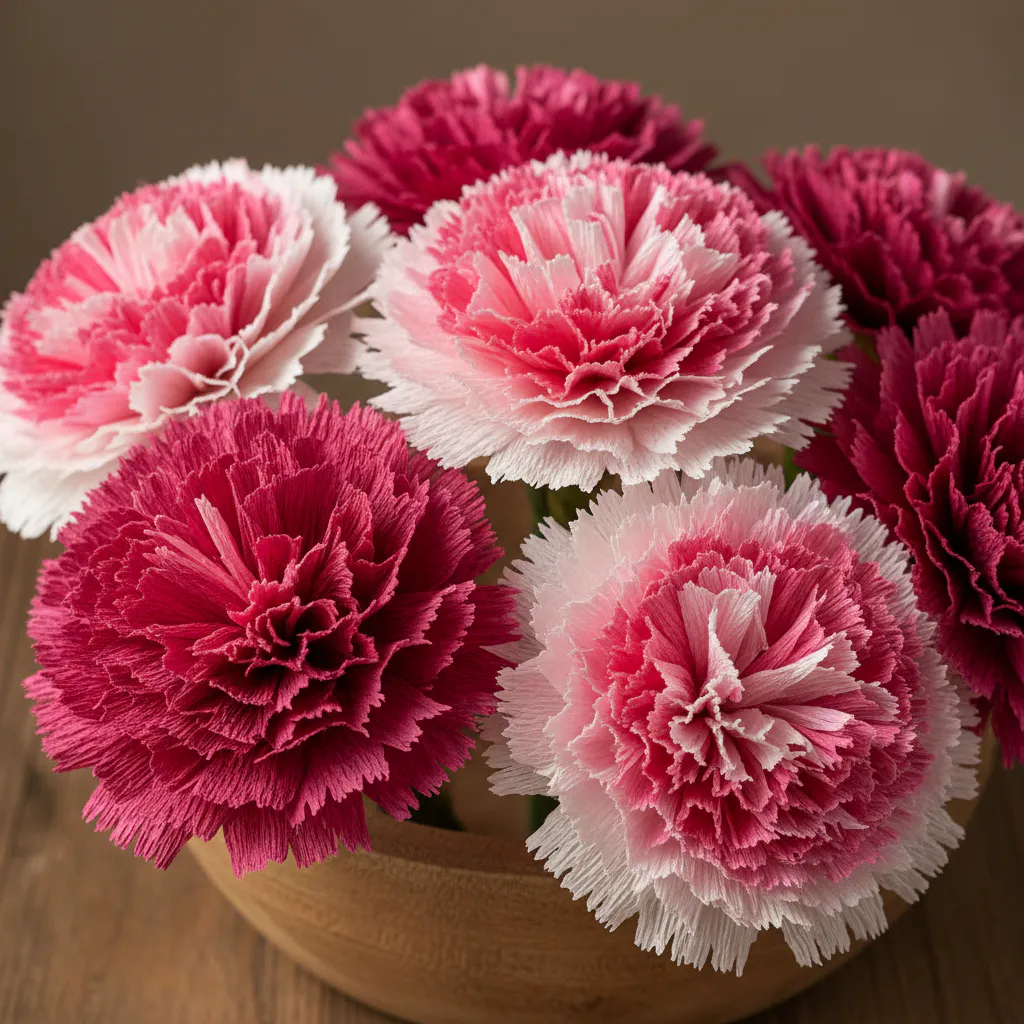
9. Layer a Gradient Ombre Paper Carnation Centerpiece
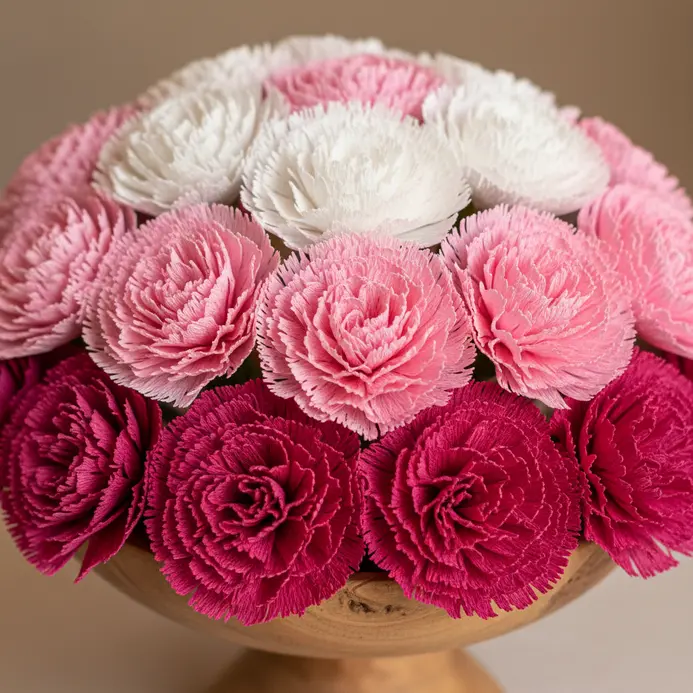
Doesn’t a smooth color fade feel magical? I love how this project looks complex but is wonderfully straightforward, showing that layered paper flower centerpiece ideas are wonderfully achievable. You’ll select three to five shades of crepe paper in one color family, cut your ruffled petals, and build each bloom from the center out. Then, arrange them from lightest to darkest in your vase for that stunning gradient effect. It’s so satisfying because the blend of shades creates a depth that looks professionally designed. For more inspiration on making beautiful decorative paper artWhen it comes to flower arrangements, the possibilities are endless.
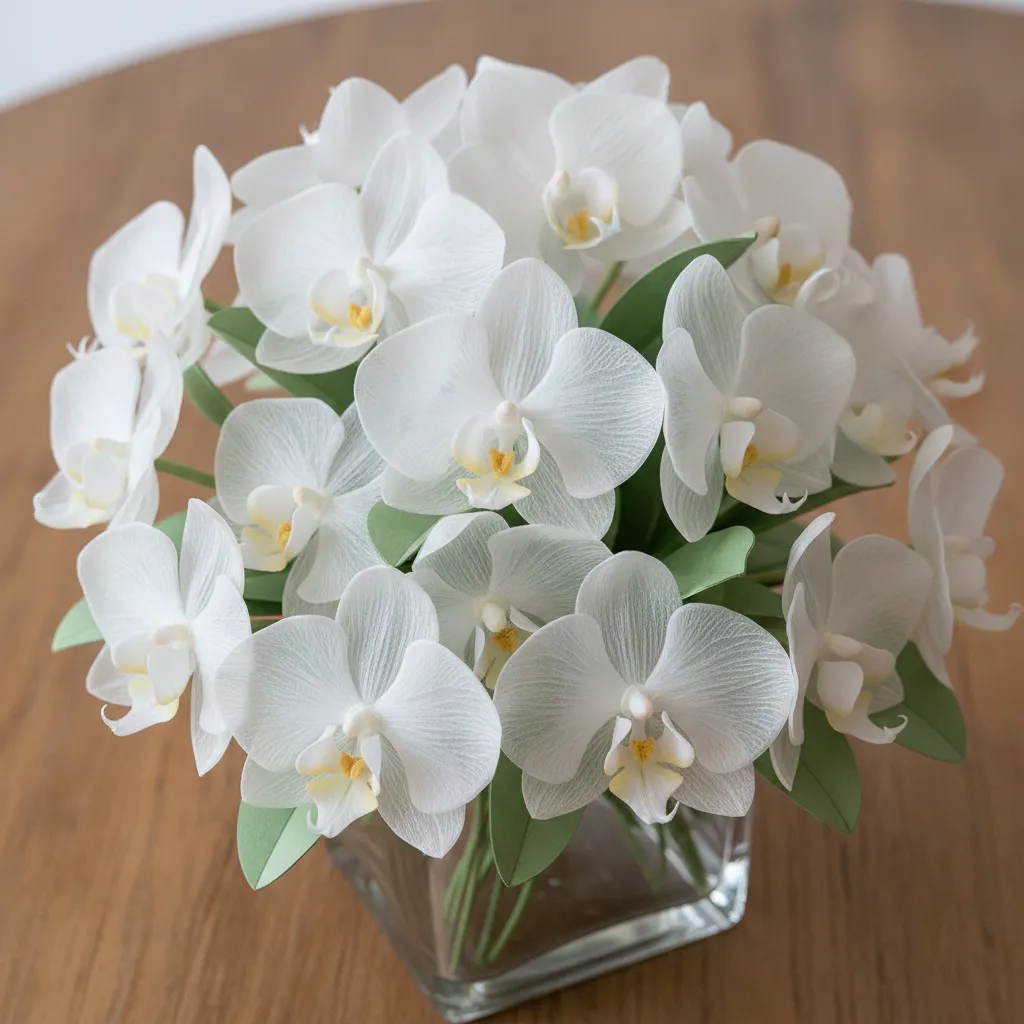
10. Fold a Frosted Vellum Paper Orchid Arrangement
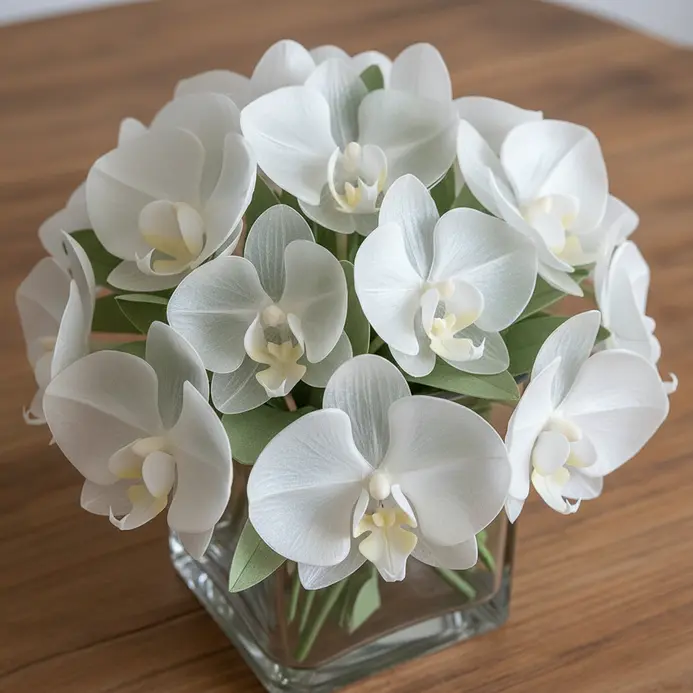
This one looks delicate and complex, but trust me, it is incredibly satisfying to build, standing out among elegant paper flower centerpiece ideas. You start by cutting your shapes from frosted vellum paper, then use a stylus on a foam mat to gently curve each piece into realistic, natural forms. Wiring each piece gives you control to pose your bloom perfectly before assembling the whole piece. The payoff is a stunning, ethereal display that lasts forever without a drop of water. I love how the translucent paper catches the light just like a real petal would.
11. Form a Geometric Paper Dahlia Orb Centerpiece
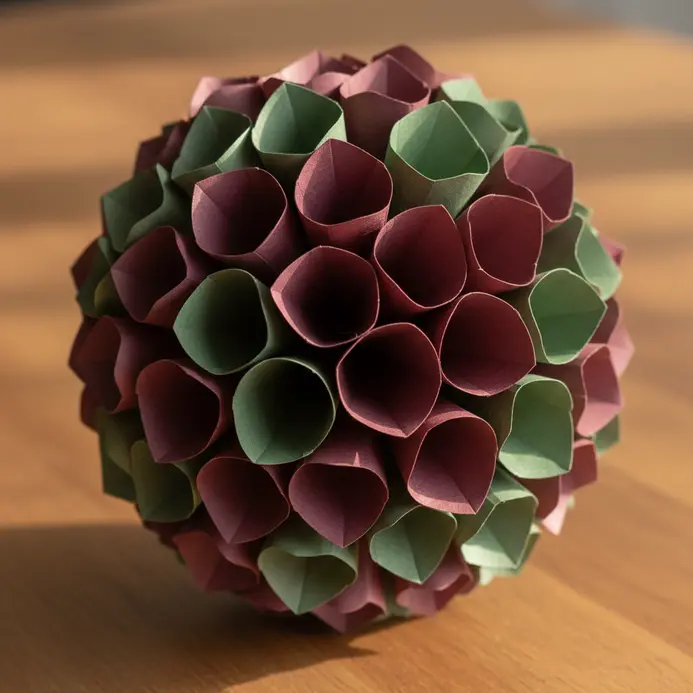
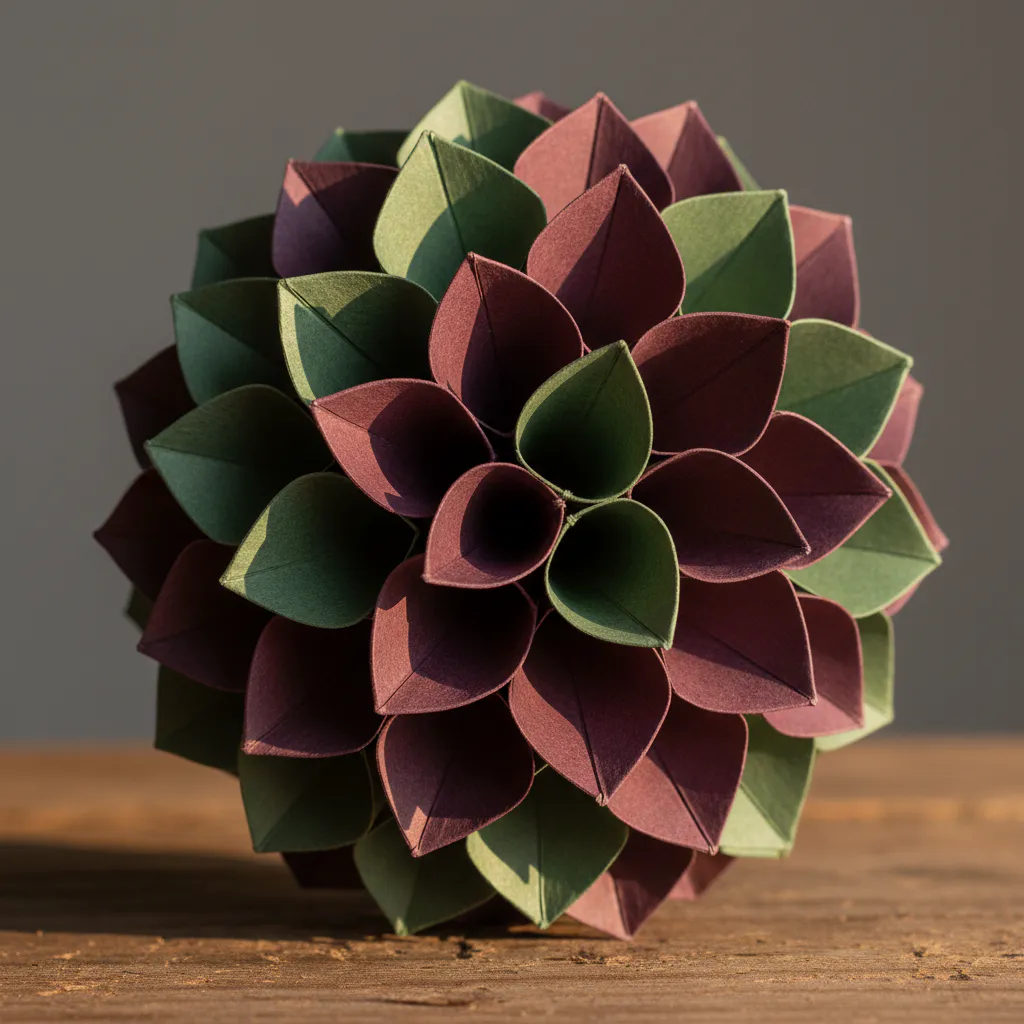
This one looks intricate, but trust me, the DIY paper flower making process is wonderfully methodical. You will cut dozens of cardstock squares, then score and fold each into a precise petal unit. Why does it work so well for modern paper flower centerpiece ideas? The geometric repetition creates a mesmerizing texture that feels both elegant and handmade. The key to a flawless orb is using a scoring board for those crisp, clean folds every single time. creative paper craft ideas. Does that not look stunning when finished as a wedding decoration?
12. Frame a Paper Fern and Eucalyptus Centerpiece
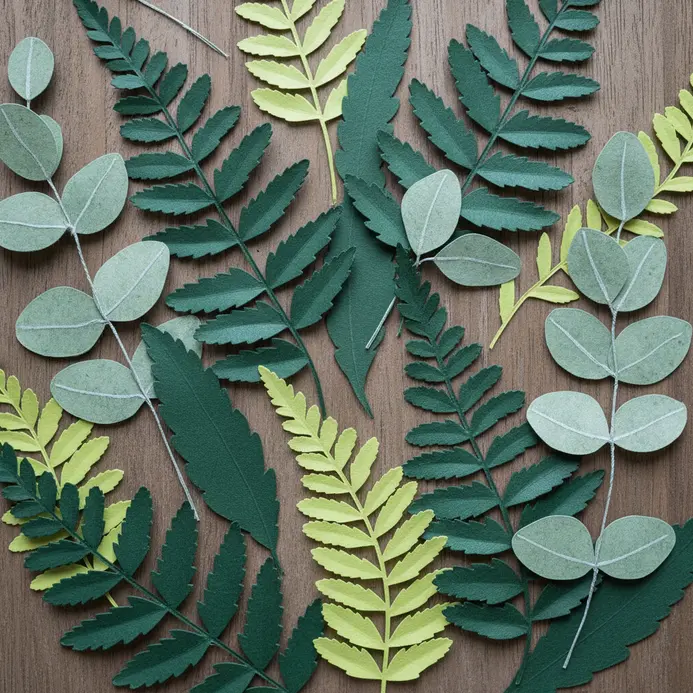
This one surprised me with how elegant framed paper flower centerpiece ideas can be when turned into lasting wall art. You will create delicate ferns and eucalyptus, then arrange them inside a To create a floral centerpiece, consider using a shadow box frame for depth.. This turns your botanical arrangement into a decorative display. Cut your leaves from green cardstock using a template, then shape them with a ball stylus for a natural look. Secure everything to the backing with acid-free adhesive. Does that not look stunning against any wall color?
13. Cluster Soft Blush Ranunculus Blooms
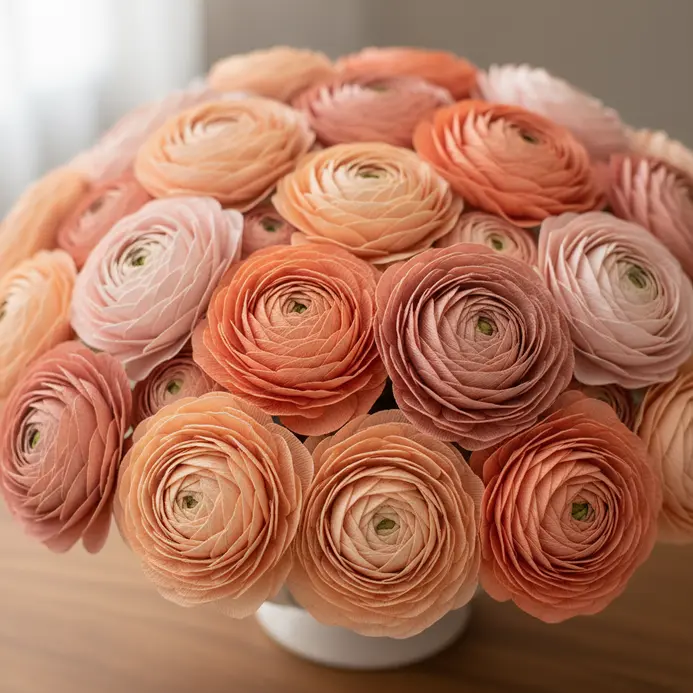
Ever thought ranunculus looked too complex to make from paper? Why does this bloom style work so well for romantic paper flower centerpiece ideas? The soft color feels elegant and timeless, and a cluster looks incredibly lush. You will cut many petal shapes from soft blush crepe paper, then gently curl each one to give it a natural, ruffled look. Building the flower from the center out, layer by layer, creates that full, romantic appearance. My go-to tip is to spend extra time shaping each piece. That attention to detail is what makes your creations look stunningly real.
14. Arrange a Bright Rainbow Paper Poppy Display
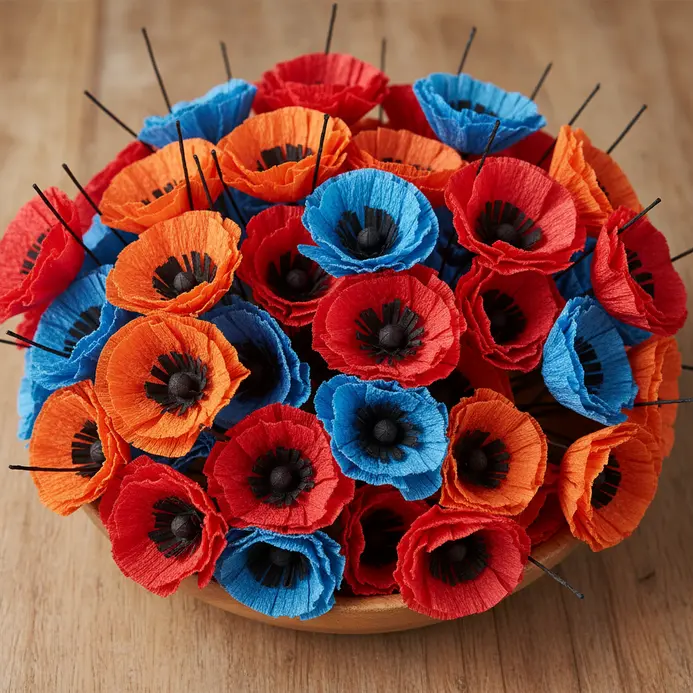
Ever wondered how to get that lush, full look for vibrant paper flower centerpiece ideas? The secret is making a lot of poppies. Trust me, I love this one. Cut and gently curl your paper petals from a full rainbow of cardstock, then assemble them with a hot glue gun for speed. The vibrant colors create a joyful impact that brightens any room. Find more inspiration for your next creative session with these DIY craft projects.
15. Create a Botanical Paper Mushroom Woodland Centerpiece
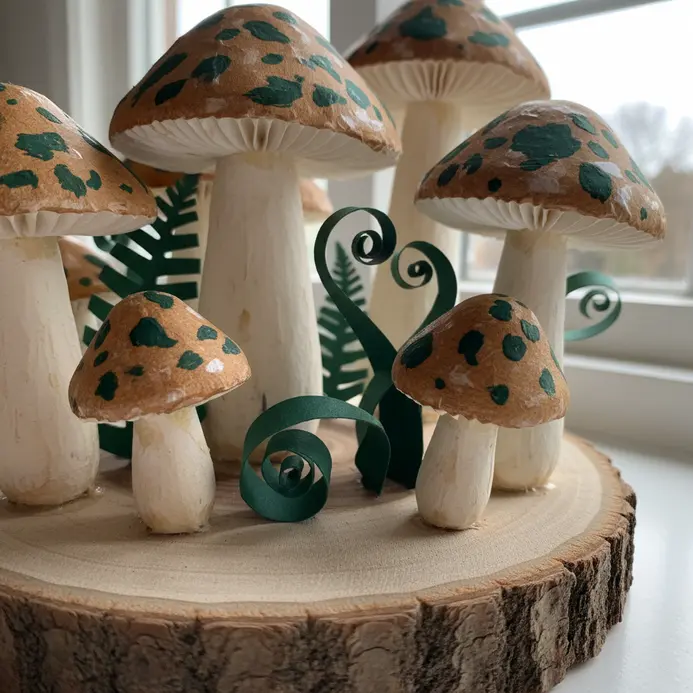
Ever wanted to bring a little fairy-tale forest indoors? It works so well because you can customize every detail when building woodland-themed paper flower centerpiece ideas. This whimsical display is my absolute favorite for its enchanting feel. You will build your own paper mushrooms from textured cardstock, shaping the caps and attaching them to floral wire stems. Then, arrange them on a mossy wood slice with twigs and pinecones to create a complete scene. Trust me, the finished look is pure magic and makes a stunning focal point for any table.
16. Craft a Textured Crepe Paper Hydrangea Centerpiece
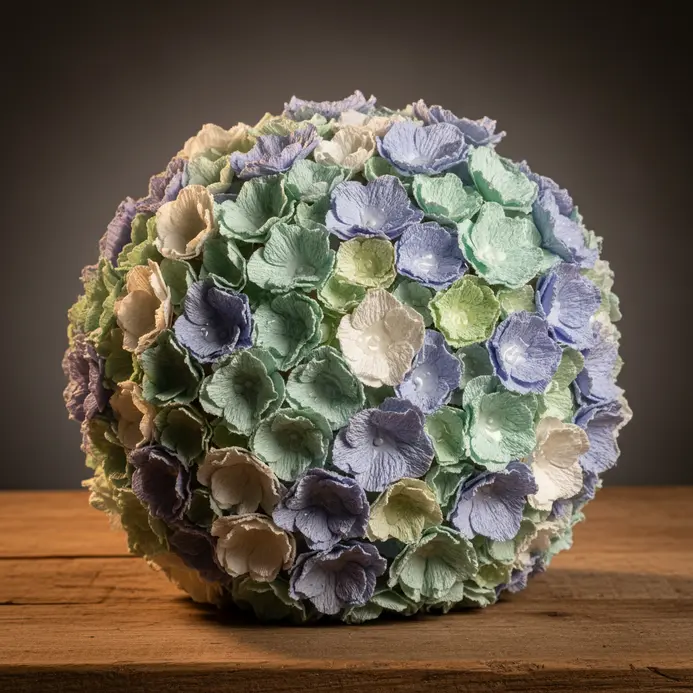
Who knew crepe paper could look so lush and real? The secret is cutting each petal across the grain and then gently stretching the center to cup it. I love how exploring these textured paper flower centerpiece ideas creates incredible depth, making this a stunning and permanent arrangement. You will layer dozens of shaped petals around a wire stem, building up that full, clustered look we all love. The natural texture of the material makes the final result incredibly convincing. sculptural paper art techniques pair beautifully with this approach.
17. Design a Modern Black and White Paper Tulip Arrangement
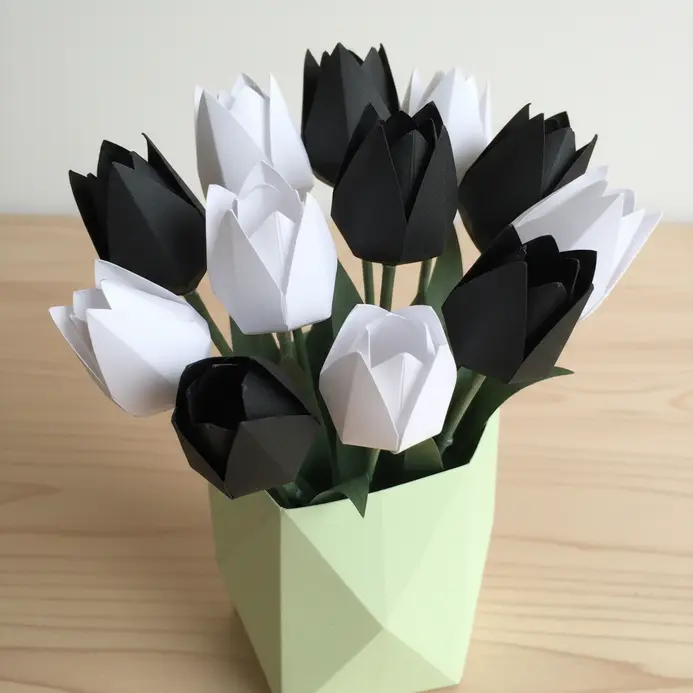
This project looks chic, but it is all about clean lines and simple shapes for modern paper flower centerpiece ideas. You will trace and cut your simplified tulip petal shapes from crisp black and white cardstock. Then, gently curl the petals and assemble them into striking blooms. Focus on the sculptural form of each piece in your DIY paper flower arrangement. I love how the high-contrast palette creates such dramatic impact. The minimalist aesthetic makes it a perfect fit for contemporary decor. Pro tip: use a sharp craft knife on a cutting mat for the cleanest edges. Trust me, it makes all the difference for that polished look.
18. Float Paper Blossoms in a Bowl Centerpiece
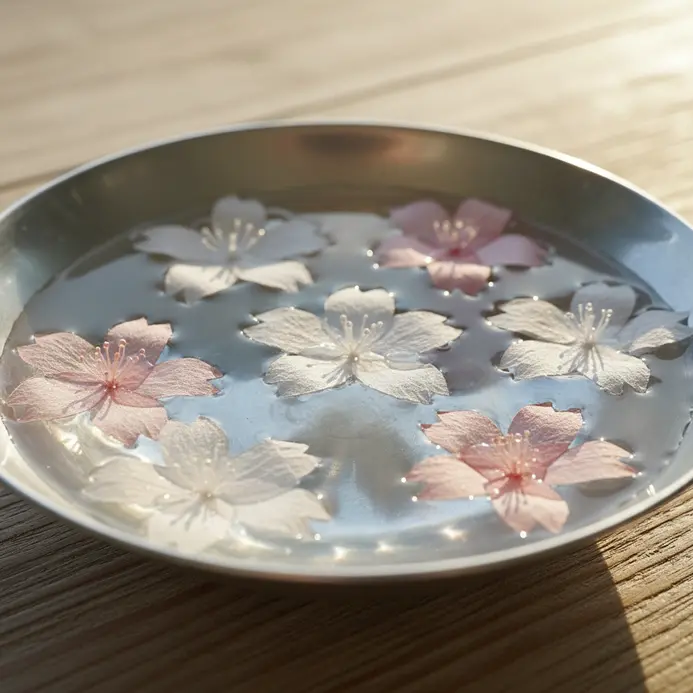
Ever wanted a display that feels elegant and incredibly simple, like a round floral centerpiece? This floating approach is my go-to for creating a serene focal point. You craft your blossoms, seal them with a clear acrylic sealer, and float them on water in a pretty bowl. It works because the water reflects light and makes this floating style of paper flower centerpiece ideas look magical. I love using distilled water for the clearest look. Try it and feel the calm it brings to your table.
19. Layer an Intricate Paper Lotus Centerpiece
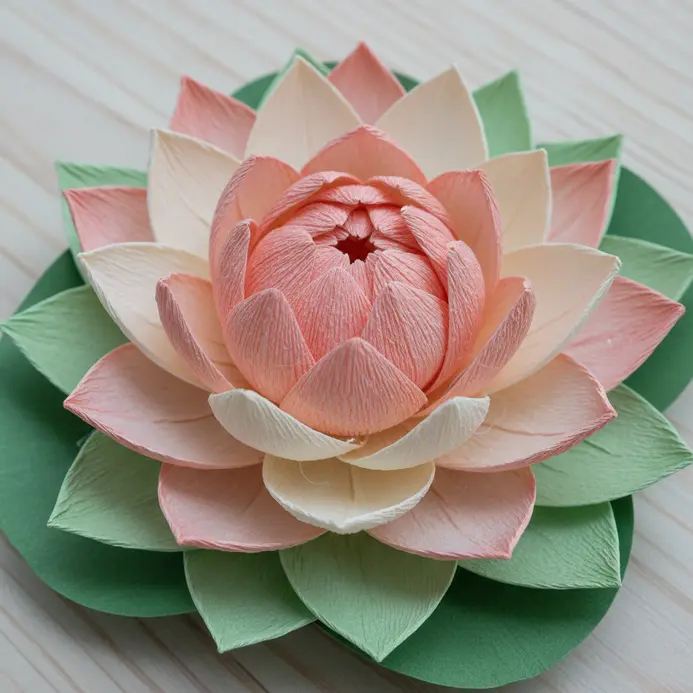
This one looks intricate, but trust me, the secret is all in the layers. You will cut petals in multiple sizes, from tiny to large, and curl each one with a stylus or dowel rod to give them a natural curve. Why does it work so well for layered paper flower centerpiece ideas? The overlapping petals create incredible depth and fullness, making your lotus look elegantly realistic. For a truly stunning piece, try using two or three shades of the same color for a gradient effect in your flower arrangement. The result is a serene focal point, perfect for any table. You can find more inspiration for your next project in our guide to decorative paper art.
20. Style a Dried Look Brown Kraft Paper Centerpiece
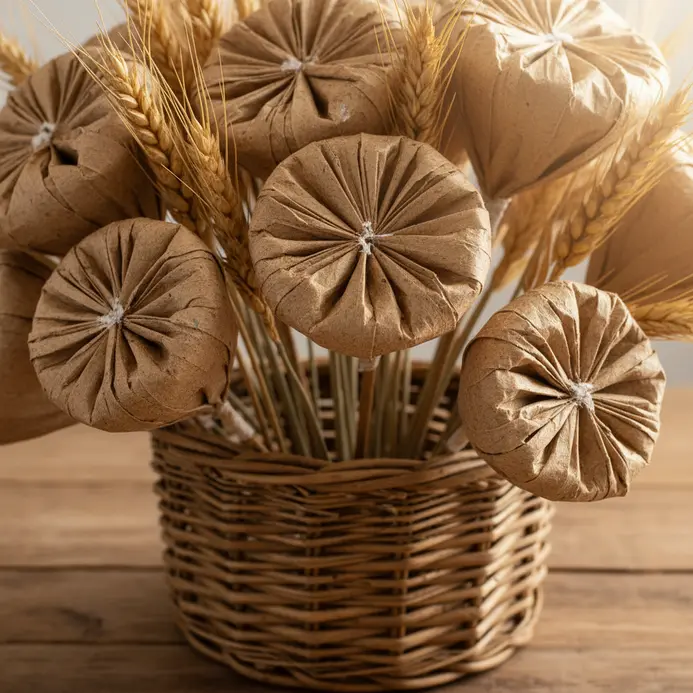
Ever wondered how to get that rustic elegance without fresh flowers? I love wrapping a simple glass jar in crinkled kraft paper and securing it with twine, a hallmark of rustic paper flower centerpiece ideas. This style leans into the natural beauty of DIY paper flower centerpieces. dried botanicals Consider using flowers like pampas grass and lavender, set against warm, earthy tones in your wedding decor. Start by placing your largest elements to create height in your flower arrangement, then fill in with smaller textures. The key is to avoid overcrowding and let each delicate piece shine. Trust me, the muted colors create a stunning, sustainable floral centerpiece that feels wonderfully inviting.
21. Add Glittered Edges to a Cosmos Centerpiece
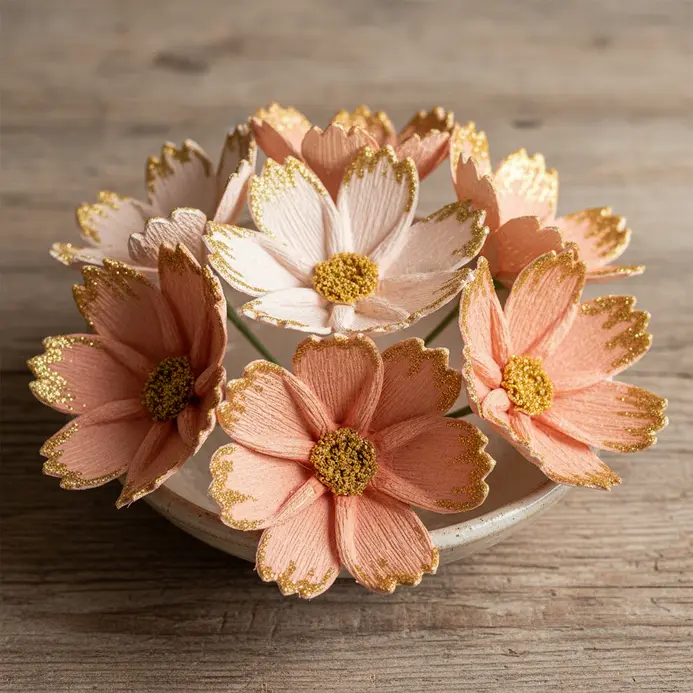
Who would have thought a little sparkle makes such a difference? The glitter catches light, adding a luxurious outline that instantly elevates simple paper flower centerpiece ideas. Use a fine-tipped paintbrush to carefully trace the edge of each petal with a thin line of craft glue. Immediately sprinkle on your chosen glitter, tap off the excess, and let it dry. It is a fantastic way to personalize your decor for any event. For more inspiration on creative paper craft ideas, this technique is a great addition to your skills.
22. Cascade Paper Wisteria for a Table Centerpiece
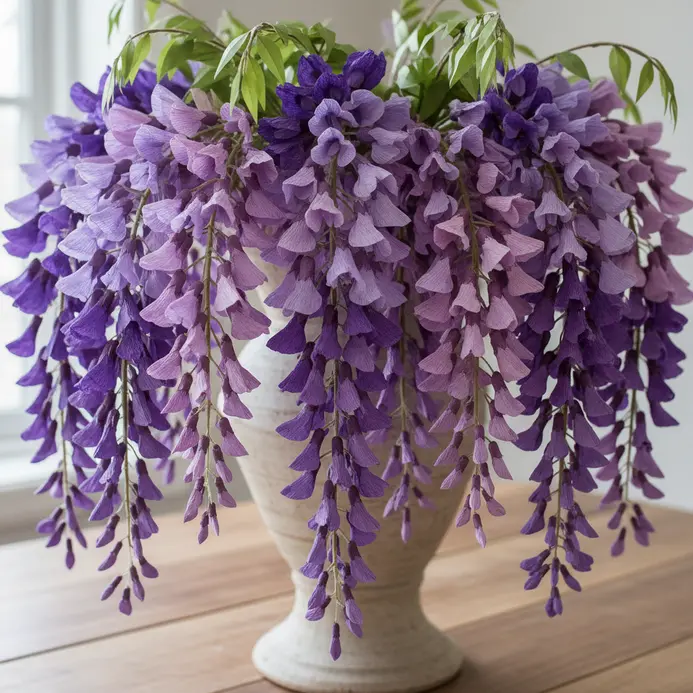
Ever wanted a display that feels like a soft, blooming waterfall? This project creates exactly that. You will build delicate blossoms on thin floral wire and attach them along longer wires to form drooping strands. The key is cutting your crepe paper across the grain so the petals stretch and curl naturally. I love mixing two or three shades of purple to add depth. It works because the cascading effect is so romantic and whimsical, perfect for a special setting. Trust me, the moment you drape those first strands, you will feel like a floral designer.
23. Fill a Rustic Wooden Crate with Zinnias
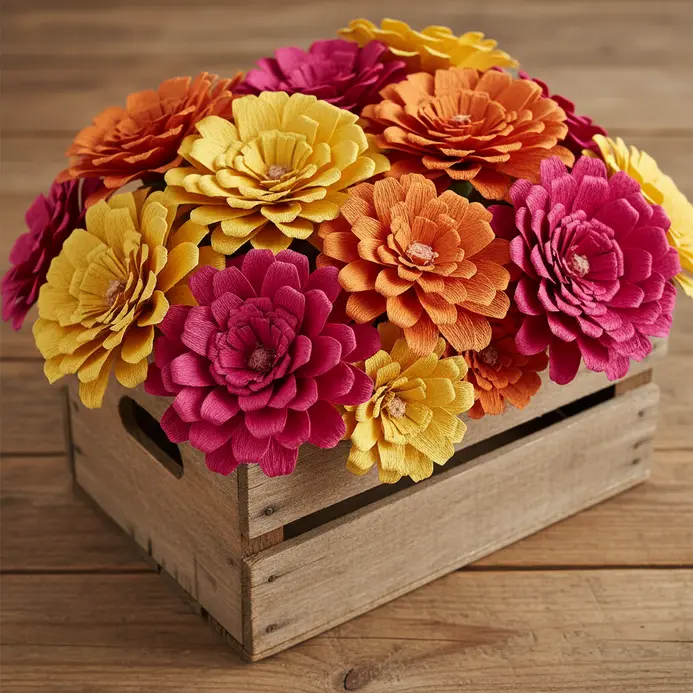
This project looks complex, but the tutorial is surprisingly forgiving. You will fill a rustic wooden crate with vibrant zinnias you make yourself. Start by cutting and layering colorful cardstock petals, then add a pom-pom center for a cheerful touch. I love how the natural wood texture makes the bright blooms pop. Vary your stem heights when you arrange the flowers to create a dynamic, natural look. Trust me on this one. The final payoff is a stunning, long-lasting display that brings a handmade feel to any table.
24. Place a Minimalist Single Stem Bird of Paradise
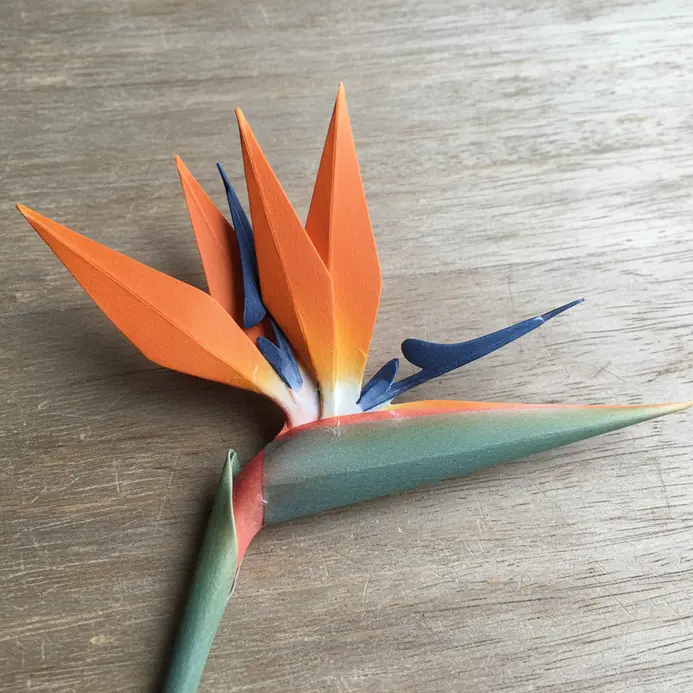
Ever feel like a space needs one bold statement instead of a bunch of little things? This is it. The sculptural form of a single Bird of Paradise becomes the clear focal point against a clean backdrop. I love how it brings a touch of vibrant, organic elegance without any clutter. For more inspiration on DIY craft projects, a simple vase with clean lines is your best friend here.
25. Craft a Pastel Cherry Blossom Centerpiece
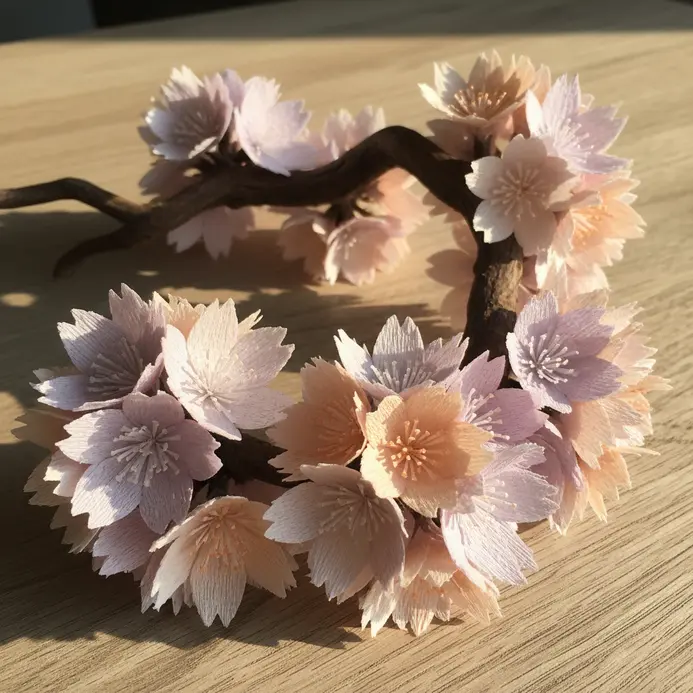
Who would have thought you could capture spring’s fleeting beauty with paper? The magic happens when you layer and shape those soft pastel petals. Use a stylus or ball tool on a foam pad to gently cup each petal, creating a delicate, natural curve. Then, glue your layers from largest to smallest, adding a tiny yellow center. This works because the meticulous shaping transforms flat material into a dimensional bloom. Trust me, putting on some music while you cut makes this DIY paper flower making step feel wonderfully meditative.
26. Fold a Structured Origami Geometric Lily
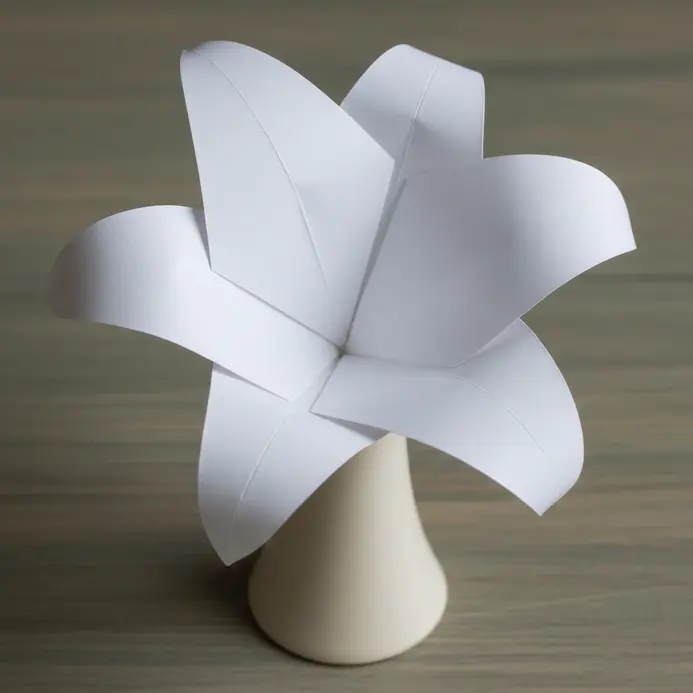
This one looks intricate, but I love how the methodical folds build into such an elegant shape. You start with a square of duo-colored paper, creating crisp diagonal and horizontal creases to form the preliminary base. Then, you perform a series of squash folds and petal folds to shape each pointed piece. The structured form gives it a beautiful quality perfect for a modern table. For another take on dimensional paper art, explore sculptural paper art. Trust me, the satisfaction of unfolding that final geometric lily is unbeatable.
27. Repurpose a Wine Bottle for a Stemmed Lavender Bouquet
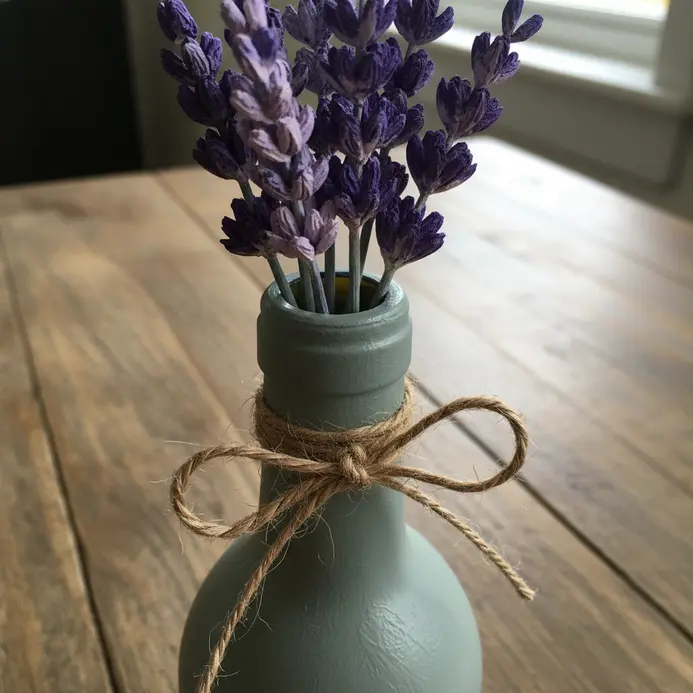
Ever wondered what to do with that empty wine bottle? This project transforms it into a rustic vase for a beautiful, no-water bouquet. You will start by thoroughly cleaning and drying the container, then decorate it with paint or twine. I love how the green floral wire blends perfectly with the stems you will create. The assembly is straightforward. You will cut and shape your purple material into tiny blossoms, then attach them to the wire with glue. Wrap each stem tightly with floral tape for a seamless look. Arrange your finished stems in the bottle, and you have a charming, long-lasting display.
28. Apply Stained Ink for a Paper Pansy Centerpiece
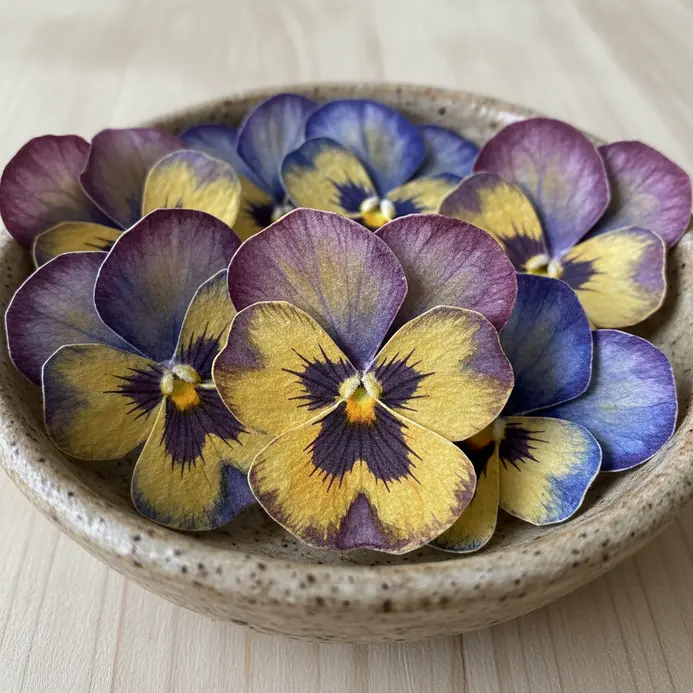
This one really surprised me. It looks painterly, but it is all about soft dabbing and patience. You start by loading a blending tool with a dark ink and gently swirling it right at the petal’s center. Build the color in thin layers, letting each one dry before adding the next. The magic is in using a clean, damp brush to softly pull that color outward for a feathery edge. I love how this technique mimics the natural, organic look of a real pansy. It transforms flat material into something with real depth and life, and the final result feels incredibly satisfying.
29. Achieve a Deep Velvet Finish Rose Centerpiece
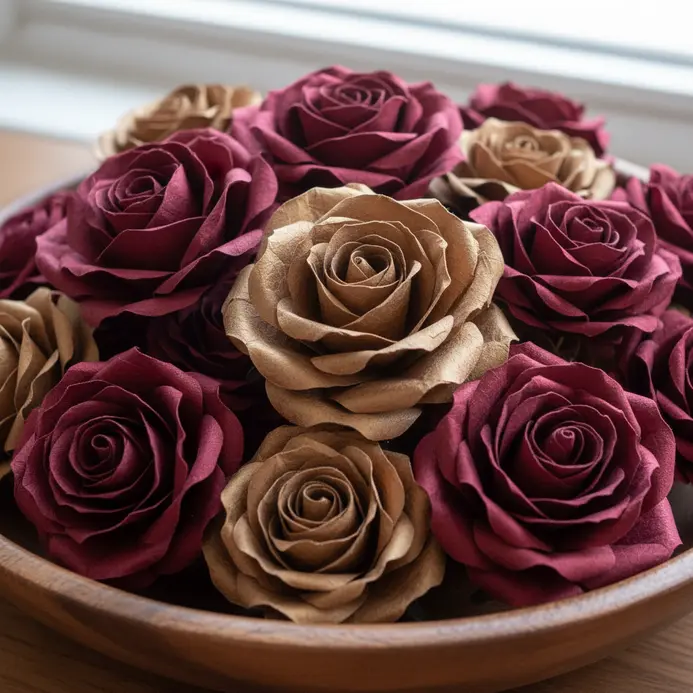
Ever wondered how to make cardstock look and feel like sumptuous velvet? This luxurious effect is easier than you think. The secret is applying flocking powder over a special adhesive. I love how it transforms flat material into a rich, tactile surface that catches the light beautifully. Start with deep, matte paper and shape your blooms. Then, coat them evenly with the adhesive and sprinkle on the powder. Trust me, the payoff is huge. Your display will have incredible depth and a soft finish that looks stunning from every angle.
30. Assemble a Paper Leaf and Berry Twig Centerpiece
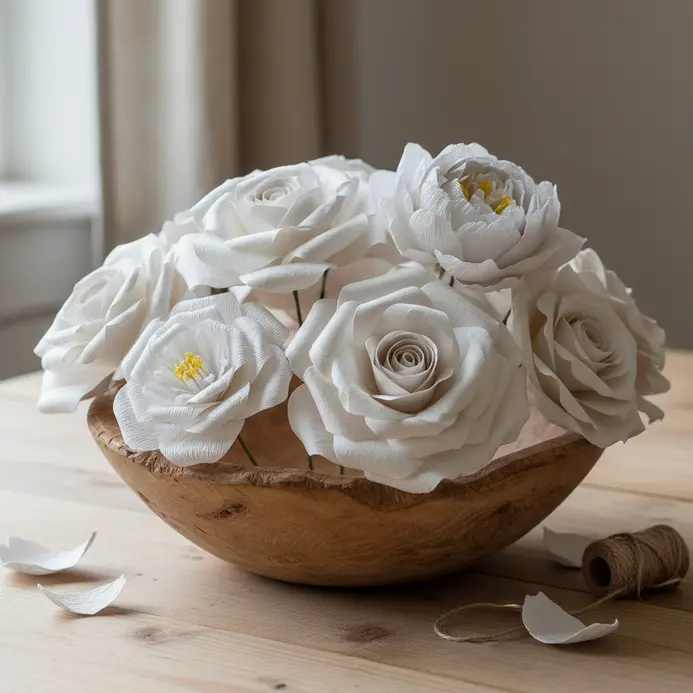
Who says a display needs fresh blooms? This one gives you that lush, natural look with a lasting paper creation. Start by cutting and scoring leaves for realistic veins for your DIY paper flowers, then twist their wire stems onto dried twigs. Add little clusters of berries for pops of color. You will love how the rustic twigs make your delicate elements look so organic and complete. This works because it is a sustainable, zero-wilt decoration you can customize for any season. My go-to tip is to use gentle pressure when scoring so you do not tear the sheet. Feel proud when you have a beautiful, permanent botanical display.
Preserving And Dusting Finished Floral Arrangements
One layer of matte varnish seals your work and protects it from dust and handling during your event. Here is the thing, you will notice that unsealed paper, especially lighter crepe, attracts dust like a magnet. A light spray of a clear acrylic sealant locks in the color and provides a slight protective barrier. For dusting, use a soft makeup brush or a gentle blast from a hairdryer on the cool setting to dislodge particles from those intricate ruffles. Avoid using compressed air cans, as the force can be too strong and damage delicate petals. This final step ensures your display looks pristine from every angle under the venue lights. Proper adhesive choice during assembly makes this maintenance much easier.
More DIY Paper Flower Centerpiece Ideas Gallery for Inspiration
Conclusion
The best part about crafting your own displays is how they capture the magic of paper flower centerpiece ideas for your celebration’s story. They hold the time you spent choosing colors and shaping petals, turning a simple table into a personal expression. My best advice is to start with one bloom type you love and make a few test pieces before committing to a full arrangement. It lets you play with scale and get comfortable with the material. Whether you go for elegant realism or joyful whimsy, your handmade touch is what makes the moment special. I hope these concepts spark the perfect project for your next gathering.
FAQs
Q: What basic supply list do I need to create paper flower centerpiece ideas?
A: The essential supply list includes paper (card stock is ideal for structure, but tissue paper, coffee filters, and printable templates also work), scissors, glue or a hot glue gun, wire or floral tape for stems, ribbon for accents, and optional votives or small candle holders if you want a centerpiece that pairs with candles. Having extra craft supplies like a craft knife, a cutting mat, and a stapler helps achieve a more polished, layered look.
Q: How can I make beautiful paper roses for the center of the table?
A: To learn how to make paper roses, start with printable petal templates or cut spirals from card stock, then roll and secure the paper with glue to form the bloom. Use floral wire for stems and wrap with floral tape. Add ribbon bows or tuck in small paper leaves for a festive, eye-catching finish that sits perfectly as the center of the table on a table runner or within a vase.
Q: Are there easy craft paper flower centerpiece ideas for a dining room table?
A: Yes—easy craft ideas include arranging layered paper flowers in a shallow bowl, filling a mason jar with paper flowers to fill the space around a candle, or scattering small paper votives and single blooms along a table runner. Using coffee filters for simple blooms and combining with ribbon or votives creates a beautiful, seasonal tablescape without advanced skills.
Q: Can I use printable templates and downloads to speed up making paper centerpieces?
A: Absolutely—printable templates and downloadable patterns for paper flowers, leaves, and paper roses save time and ensure consistent shapes. Print on card stock for sturdier pieces or on regular paper for delicate textures. Many downloads include instructions on how to layer petals for a dimensional, layered look that makes your centerpiece more eye-catching.
Q: How do I safely incorporate candles and votive holders into a paper flower centerpiece?
A: Safety is key—place battery-operated candles or LED votives among the paper flowers to avoid fire risk. If you use real candles, keep them in glass votives or hurricane holders and position paper flowers at a safe distance from the flame. Alternatively, use candle-shaped LED lights to achieve a festive, warm glow without compromising your home décor.