
Scale Cues For Convincing Miniature Scenes
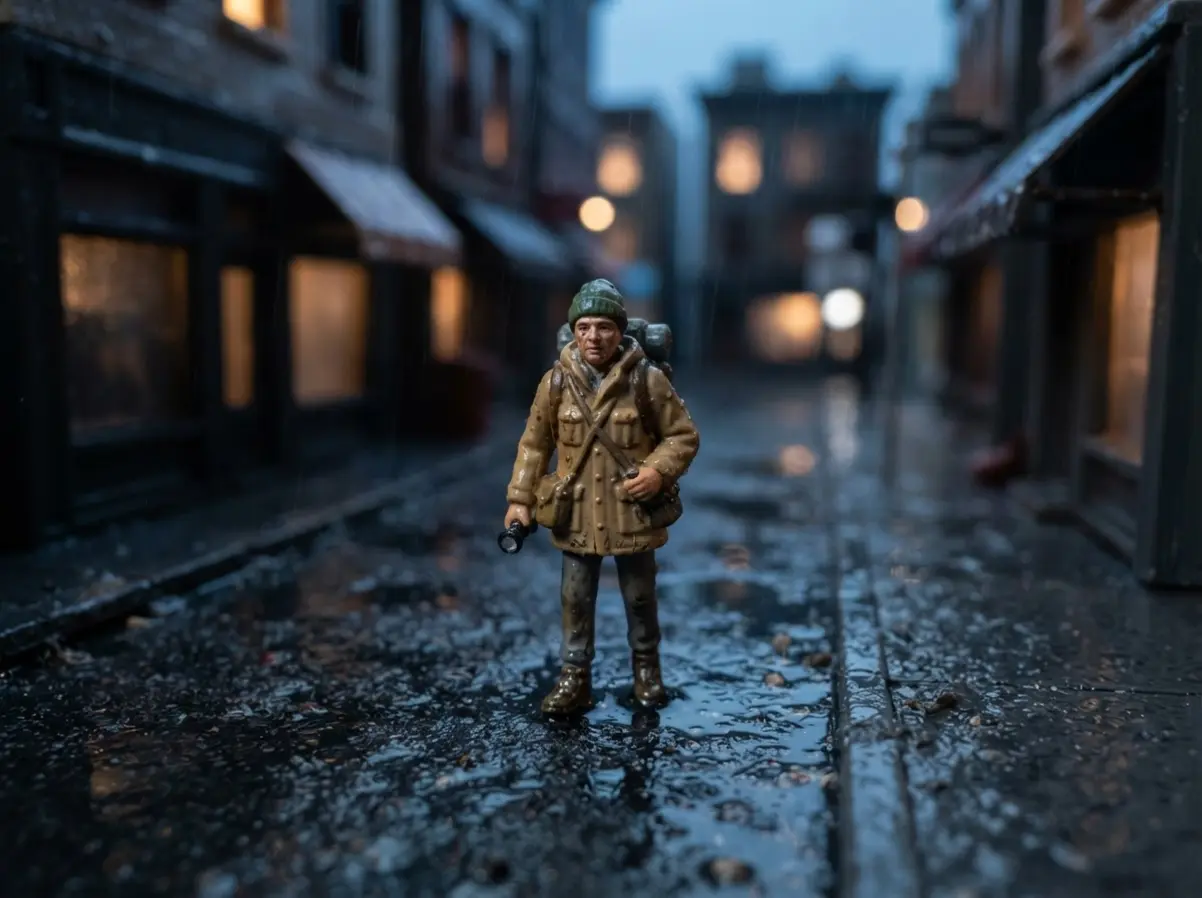
Place a familiar object beside the figure to establish scale before adding decorative props. A toy car, bottle cap, or child-sized spoon gives viewers a quick size reference without stealing attention from the subject, a foundational step for toy photography ideas. Match prop wear and surface texture to the setting, since a spotless plastic accessory looks false beside dusty ground.
Keep foreground objects slightly smaller than the toy unless you want a forced perspective effect. Textured paper beneath feet adds believable ground detail while hiding table edges. Leave breathing room around the head and hands, where scale errors show fastest. A single strong scale cue usually reads more clearly than several competing accessories crowded around an already expressive figure.
Manual Focus And Light Placement Decisions
Set manual focus on the toy’s nearest eye, then keep the camera fixed while you adjust light position. An LED placed forty-five degrees to one side gives facial features shape, while a second dimmer light softens harsh shadow edges. Keep lights above eye level for daylight scenes, or lower them for a dramatic nighttime mood, which matters for all toy photography ideas. Small colored gels shift the background hue without tinting the toy as strongly as direct colored light.
Use a low ISO to limit noise, especially when the set needs longer exposure times. Manual focus also prevents autofocus from grabbing a shiny prop or distant backdrop. Check white balance whenever daylight and LEDs share the frame, since mixed color casts weaken the scene’s mood.
1. Rainy City Street Action Scene: Wet Pavement Drama
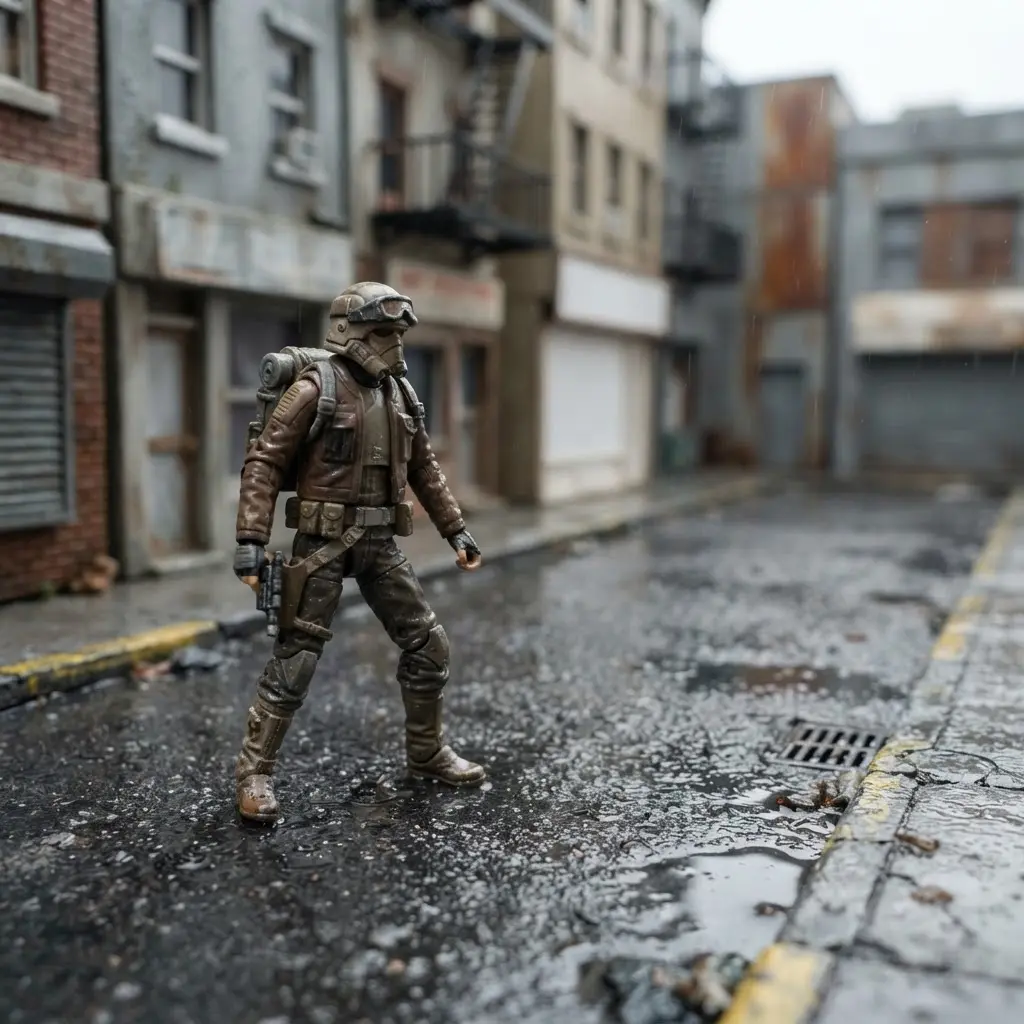
Ever wondered how a tiny figure turns a puddle into a full city chase? Start with a dark glossy base, then place a running figure low in the frame beside alley walls, signs, or a small police car. Add blue and magenta lights behind the toy so reflections streak across selected puddles, not the whole surface, creating dynamic toy photography ideas.
A small fan gives clothing or loose paper a sense of movement. Low-angle framing makes the scene feel larger and pulls your eye into the action. I love this setup because reflected color supplies depth while the pose tells a clear story. Keep electronics away from liquid, and use clear plastic film for safer water effects. A tripod helps in dim light, while restrained motion blur keeps the main figure readable.
2. Sunlit Forest Path Fairy Tale With Soft Focus

Try a side light, then adjust each reflection until the street feels tense and cinematic, which is perfect for testing toy photography ideas. This setup feels like a storybook scene before you even press the shutter.
Build a winding forest path with lush greenery on both sides, then tuck pink, white, and yellow wildflowers along its edges. Isn’t it satisfying when a tiny figure suddenly looks part of a hidden woodland? Place the scene where sunlight filters through branches, using leaves or small gaps to break the light across the trail.
Keep the brightest patch behind or beside the subject so the figure stays easy to see. I love adding a gentle soft-focus effect around the frame, since it gives the image a calm fairy-tale mood without losing the setting. Keep the colors fresh and the shadows soft.
3. Snowy Mountain Peak Climbing Expedition Setup

A simple dappled light pattern adds depth while the winding trail leads the eye forward. Trust me, preserving greenery, flowers, filtered light, and softness together gives your toy photography ideas a peaceful finish. I love this setup because a few household materials turn a toy figure into a brave climber.
Shape a snowy mountain peak from crumpled foil, then cover it with baking soda snow for soft ridges and powdery ledges. Add a tiny tent, sleeping bag, rope, and climbing tools near the base. Ever tried placing the figure halfway up the slope? It gives the scene a clear goal.
The scene works because the eye follows the figure from camp toward the summit, while footprints add direction across the white surface. I use a cool blue background and side lighting to create crisp shadows without hiding the gear. Keep the camera low, frame the peak behind the climber, and leave open space above the figure.
4. Macro Close-Up Action Portrait With Sharp Details

Trust me, the finished shot feels full of effort and wonder. Glossy plastic, tiny scratches, and a focused face fill the frame, while one raised arm freezes mid-action. Sound tricky? It is not.
Move your camera close with a macro-capable setup, frame the figure like a portrait, and place focus on the eyes, mask, or strongest surface detail. Keep the background soft with a shallow depth of field, then raise your shutter speed enough to preserve crisp edges during movement, a reliable trick for toy photography ideas. I love this approach because the close view gives a small toy real presence, and every molded ridge becomes part of the story.
5. Underwater Coral Reef Discovery Setup With Blue Light

Trust me on this one: check focus at full size before you finish, since a slightly soft key detail weakens the whole image. Many first attempts flood the entire reef with blue light, but a focused beam creates a stronger scene.
Place a toy diver beside coral shapes, colored plastic pieces, or tiny sea-life figures, then aim royal-blue light near one small area. Keep the background dark so glowing colors and blue reflections stay easy to see. Sound complicated? It is not. Use a camera barrier filter to reduce reflected blue light, then start near 1/250 second, f/10, and ISO 320.
Hold the camera steady while moving the lamp slowly across the reef, keeping stray white light away. I love how the diver’s pose feels investigative once one coral detail catches the viewer’s eye. Pro tip: test the filter and beam position before arranging every prop, so your miniature reef stays tidy and your final frame feels wonderfully focused, completing your toy photography ideas collection.
6. Cozy Library Reading Nook Diorama With Warm Light

Measure your shelf, windowsill, or display spot first, then cut a three-wall shell from foam board. Add a printed rear backdrop or small mirror, keeping your furniture, books, and props in one scale, such as 1:12 or 1:24. Sound complicated? It is not. Build from back to front, placing a chair, open book, or tiny lamp as the focal point, which anchors your toy photography ideas perfectly.
Hide warm white LEDs along the top edge or behind a shelf so the nook glows without harsh hotspots. Around 2700K gives the scene a soft reading-lamp feel, while brass accents, faux moss, and dry-brushed texture add cozy detail. I love how the layered setup makes a tiny room feel deeper. Leave a little empty space around the centerpiece, and enjoy the calm finish.
7. Desert Sand Dune Survivor Narrative With Strong Shadows

Ever tried making a tiny figure feel completely alone? Set a lone toy survivor across a rippling sand surface, leaving plenty of open space around the subject. Shape raised crests and curved ridges so the ground leads the eye toward the figure. Place the toy beneath a blazing-sun effect, with its body reading as a clean silhouette, a classic approach to toy photography ideas.
Use hard side light to cast long, distorted shadows across the dunes. Keep the brightest sand close to white while protecting deep, inky shadow areas. A few grains scattered near the foreground suggest wind, and a soft heat shimmer in the distance adds atmosphere without hiding the subject. I love how each ridge gives the frame movement.
Angle the figure into a trudging posture, with its head lowered and legs spaced as if every step takes effort. This small detail turns a pretty desert scene into a clear survival story. Pro tip: check the shadow edges before shooting, since soft lighting weakens the harsh mood.
8. Neon Lit Cyberpunk Alleyway Scene With Reflections
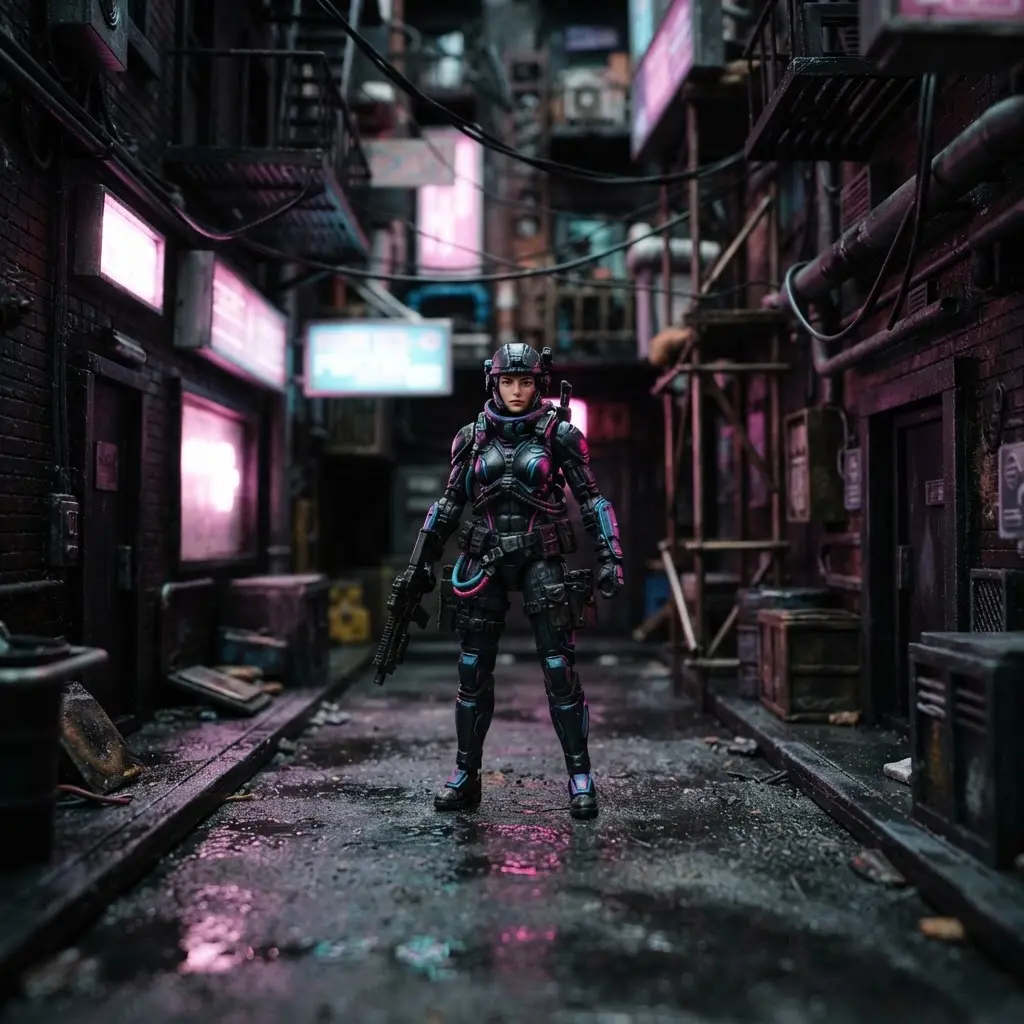
This setup turns a small figure into the star of a gritty city scene. I love placing a toy inside a narrow alleyway backdrop, with tall building pieces closing in from both sides. Set pink, blue, and orange lights at different angles so each color touches the figure, walls, and pavement, creating vivid toy photography ideas. Keep the camera low, then use a shallow focus so the foreground feels close while distant signs soften.
Sound complicated? It isn’t. A glossy pavement surface repeats the neon colors beneath the toy, giving the frame depth and a clear visual path. Those reflections make the scene feel connected instead of flat. Keep some areas dark, since deep shadows give the colored lights more strength.
Add one glowing accessory or cape for a small story detail, then watch your toy photography ideas turn into a moody cinematic scene. Keep the composition tight, and let the glowing props drive the visual narrative. Check your exposure before shooting, since bright neon can easily blow out dark corners. Adjust the light angles slightly to find the strongest contrast, and lock in your final shot.
9. Autumn Leaf Pile Playtime Setup With Warm Colors

This is one of my favorite seasonal setups because the colors feel cheerful before the camera even comes out. Ever tried giving tiny figures a leaf pile to play in? Start with a shallow tray, then spread red, orange, yellow, and brown leaves across the base. Add pinecones, acorns, small twigs, and pebbles around the edges so the scene has varied texture without hiding the figures, a wonderful foundation for toy photography ideas.
Place each toy in an active pose, such as stomping, sorting, gathering, or tossing leaves, and add a scoop, bucket, or pair of tongs for extra story detail. I love how the warm autumn colors separate the figures from the background while the natural textures make every close-up feel lively. Pro tip: inspect each leaf and remove stray debris before shooting, then feel proud when the playtime story comes together.
10. High Contrast Silhouette Against Sunset Sky
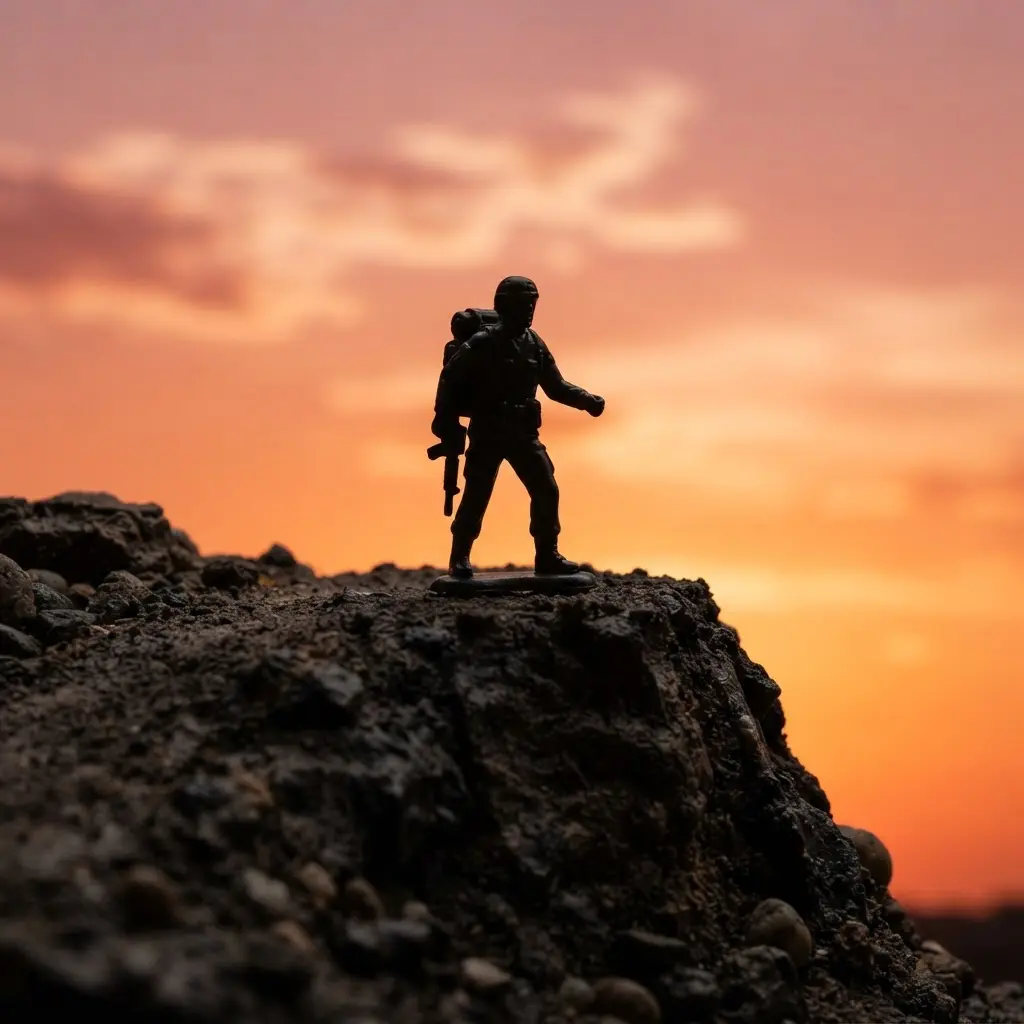
The toy appears as a crisp black figure, framed by orange, pink, and violet light. Its outline stands out while the sunset sky fills every open space. Isn’t it satisfying when a tiny subject feels so bold? Try a clean silhouette outline for the strongest effect, which works beautifully across all toy photography ideas. Place the toy between your camera and the brightest part of the sunset, then tap the sky to keep the figure dark. A low camera angle gives the subject a stronger shape, while a clean horizon keeps attention on its profile.
Turn the toy slightly until its pose reads clearly, and keep small details away from the sky’s brightest area. I love this setup because it turns simple positioning into a bold, graphic image. Use a steady tripod or rest your camera on a firm surface, then shoot several frames as the colors change. Check the edges for stray branches, fingers, or clutter before choosing your favorite frame. Feel the satisfaction when the outline looks clean against the glowing sky.
11. Beach Side Sandcastle Construction Scene With Props
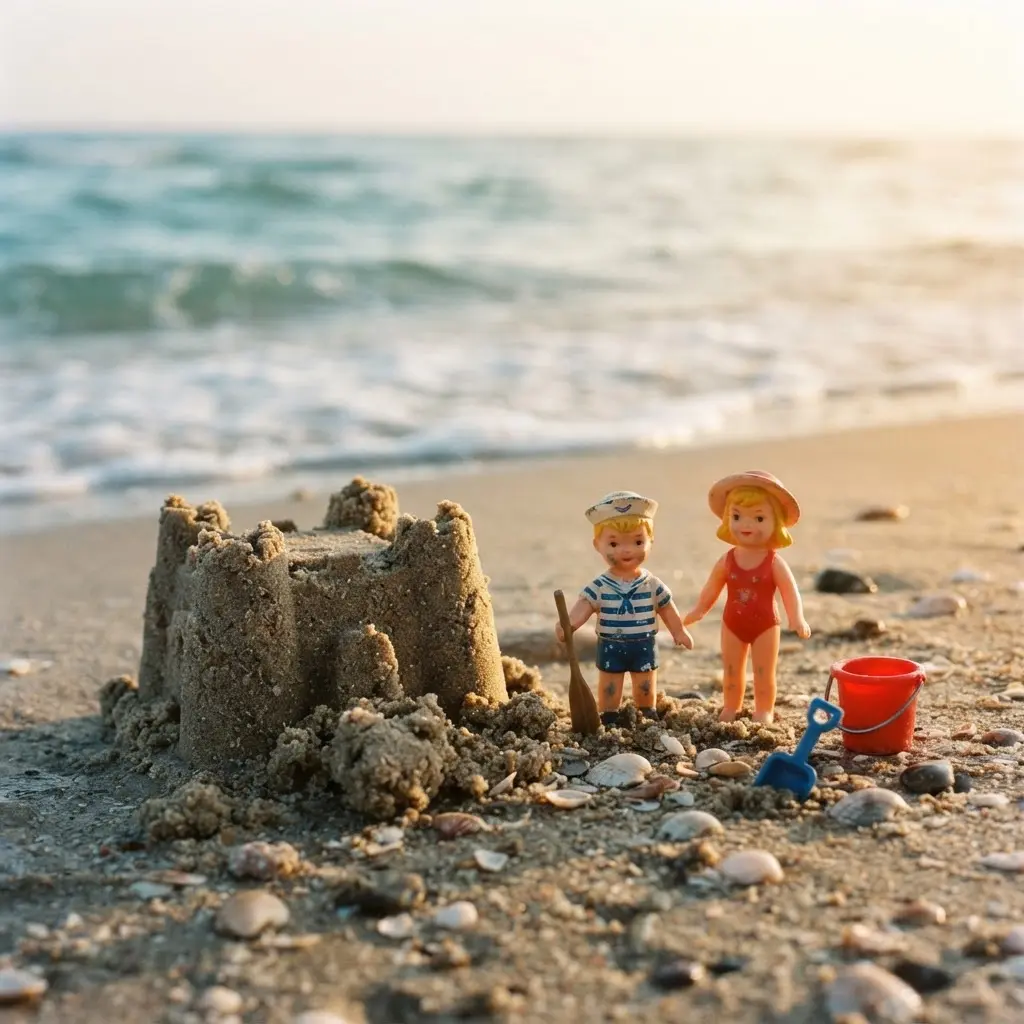
Many beach scenes look flat because the figures stand beside the castle instead of building it. Place one figure with a toy shovel near the wall, angle another toward a bucket, and keep the turrets clear in the center. Does the setup sound tricky? It isn’t. Add shells and short sticks around the base, then frame the sandy foreground with the ocean behind it. Bright daylight gives you crisp colors, while golden-hour light adds a soft summer glow, making this a standout choice for toy photography ideas. I love placing a small mold beside the busiest figure because it makes the construction story easy to read.
12. Vintage Desktop Office Meeting Setup With Paperwork
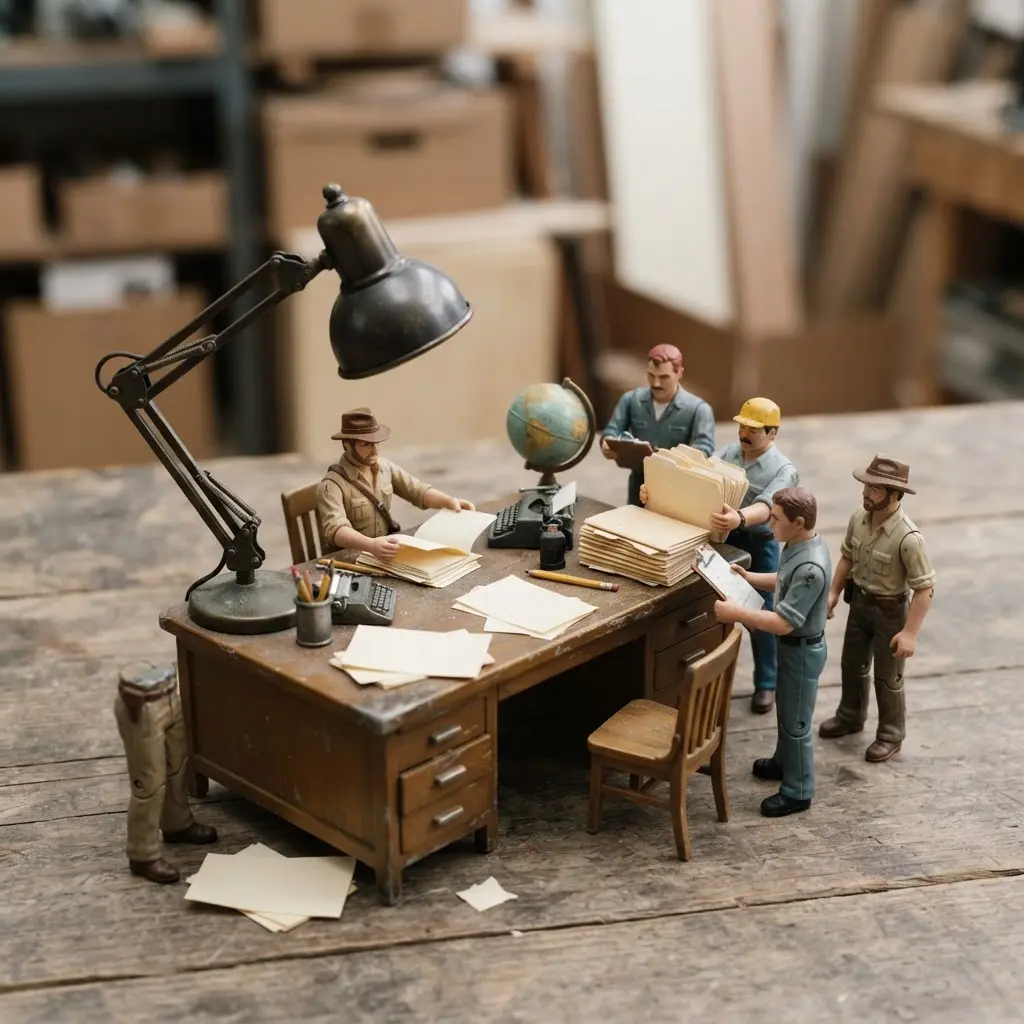
Stabilize every figure before shooting, and use contrasting buckets against pale sand. Your finished frame will feel playful, busy, and full of shared effort. Spread miniature paperwork across a wooden desk, leaving a few sheets slightly askew for a busy meeting feel. Add tiny folders, ledgers, and paper desk accessories around the figures. Keep the layout open enough for each character to appear involved. I love how quickly the scene starts telling a story, and this focus on detail defines great toy photography ideas. Place a rotary phone near one corner, then add a fountain pen, inkwell, typewriter, and shaded lamp. Seat figures in suits, dresses, or hats around the desk as they review documents. Does the setup feel too neat? Shift one chair, angle a folder, or turn a figure toward another person.
13. Foggy Cemetery Horror Movie Atmosphere With Cool Tones
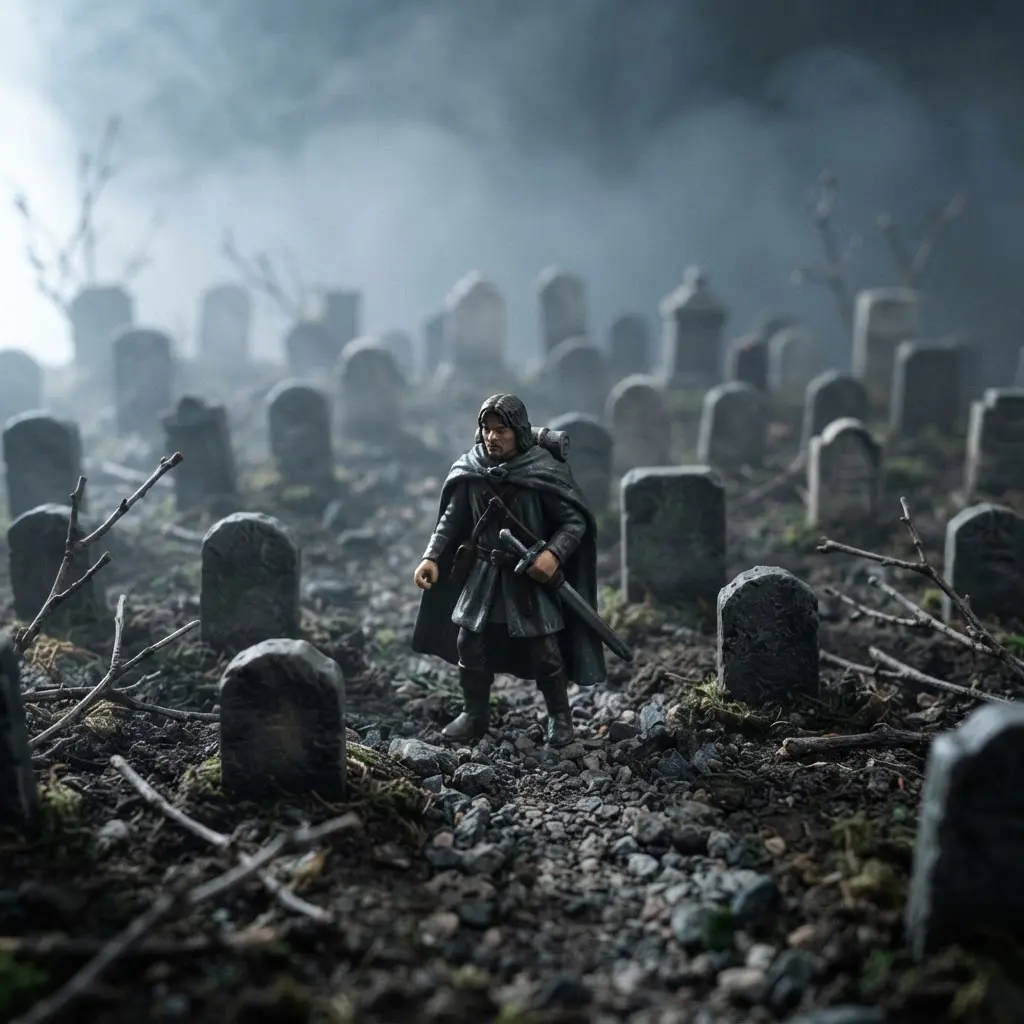
Finish with warm sepia lighting or a gentle aged color treatment. The vintage palette unifies the furniture, clothing, and office tools while giving the photograph a mid-century mood. Shoot from slightly above desk height so the paperwork stays visible. Trust me, small details make this meeting scene feel wonderfully alive. Ever wondered how a tiny cemetery scene gets such a chilling movie mood? Start with cool blue-gray lighting, then arrange tombstones, crooked crosses, a gothic arch, and a mossy coffin across several distances. Keep the brightest patch near the main figure so its shape stays readable through the fog, a core technique for atmospheric toy photography ideas.
Add rolling mist in light layers, leaving a clear opening around the toy. A low camera angle makes the set feel larger, while distant shadows and partly hidden statues give the frame mystery. I love how desaturated color lets small details feel grim without showing every prop. Pro tip: place a dim backlight behind the cemetery for a soft moonlit silhouette, then use vertical framing for a looming social post. Keep fog away from camera vents and check focus before each shot.
14. Flowery Garden Meadow Tea Party With Pastel Props
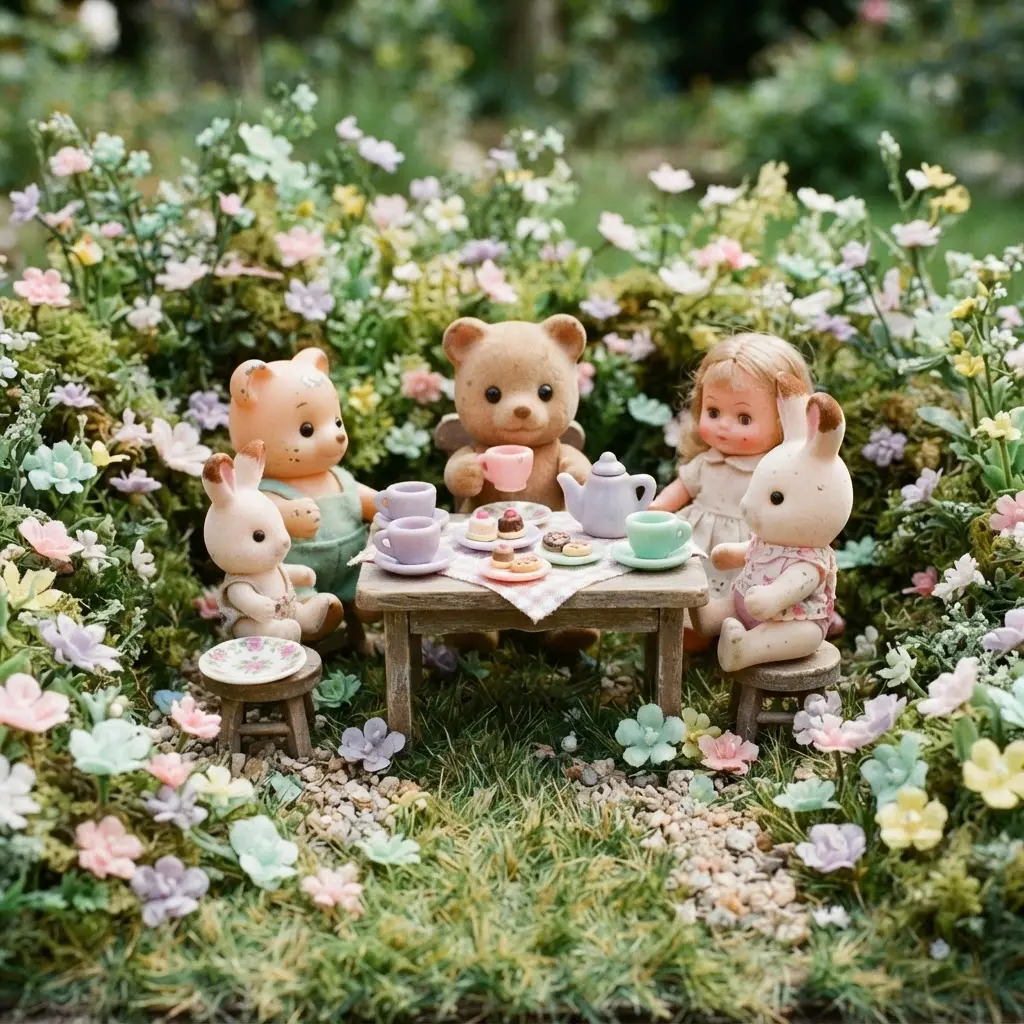
Pastel props turn a small garden setup into a sweet little story. Start with a meadow base, then place a miniature tea set at the center, with cups, saucers, a sugar bowl, and a floral teapot facing the camera. Add cream, blush, mint, and lilac linens, then tuck roses or hydrangeas into tiny vases beside a tiered cake stand. Soft cushions, balloons, and fairy lights bring gentle detail without hiding the figures. Isn’t it satisfying when every tiny piece supports the scene, especially when planning soft toy photography ideas? I love using morning shade for soft light, since harsh sun steals the calm mood. Keep the table tidy, match each prop to the figures’ scale, and leave open space around the characters so their tea-party story reads clearly. A pastel palette works because the flowers add texture while the china adds a graceful focal point. My go-to tip is to photograph from a cup-height angle, making the toys feel part of the gathering. Trust me, this setup feels sweet and serene.
15. Hard Motion Blur Racing Sequence With Speed Lines
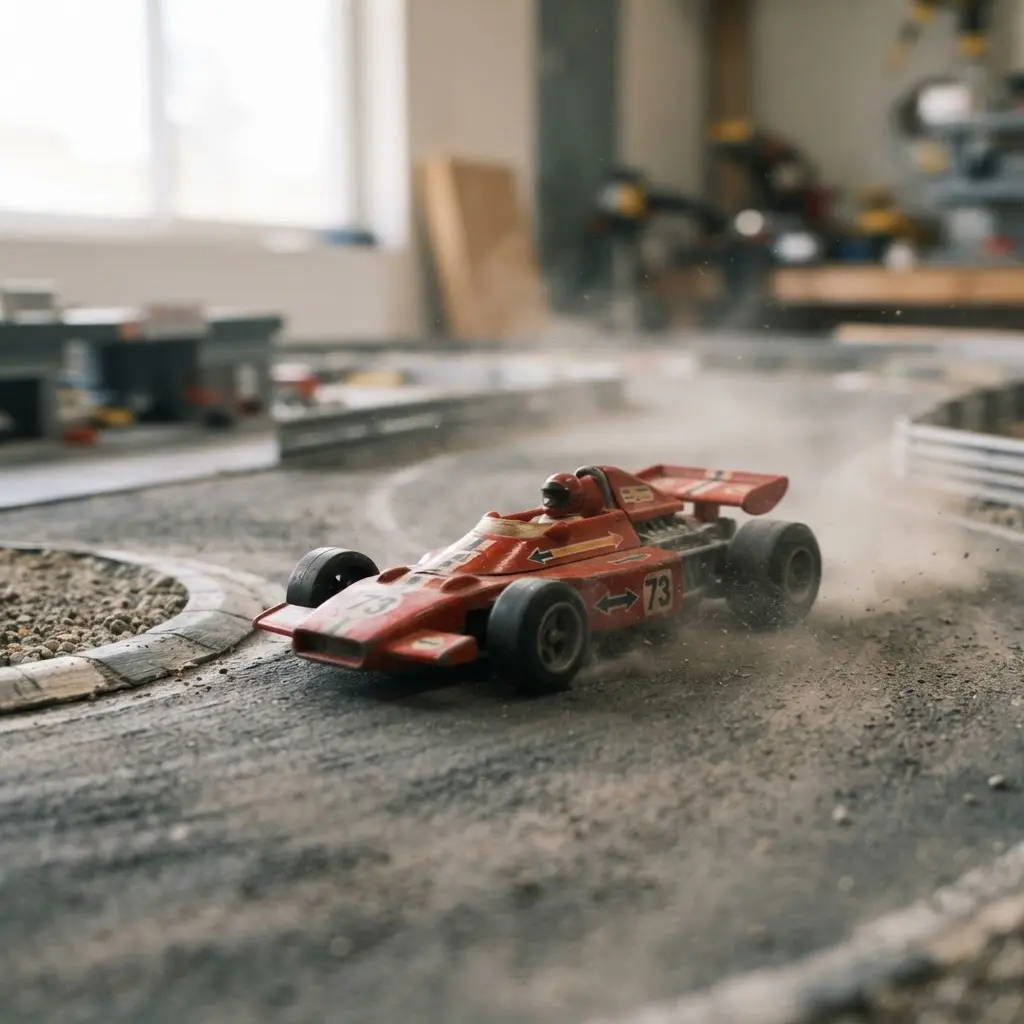
I love this setup because a tiny car suddenly feels fast and fierce. Place it on a dark miniature track with a glossy surface, then set your camera low behind the car. Add red, blue, or white lights along the route, and keep the car sharp while the background streaks behind it, creating high-energy toy photography ideas. Use a slow shutter speed for light trails, or add controlled blur during editing. Draw speed lines behind the vehicle, following its route instead of crossing the frame. Sound complicated? It is not. A dark scene, bright reflections, and a clear direction make the racing action easy to read.
I love how the low viewpoint gives the car extra presence. Pro tip: create a car mask before editing, so the effects stay around it and its details remain clear. Add a few reflections beneath the wheels for a wet-asphalt finish. Feel the rush when the still frame looks ready to race.
16. Low Angle Heroic Superpower Display With Blue Light
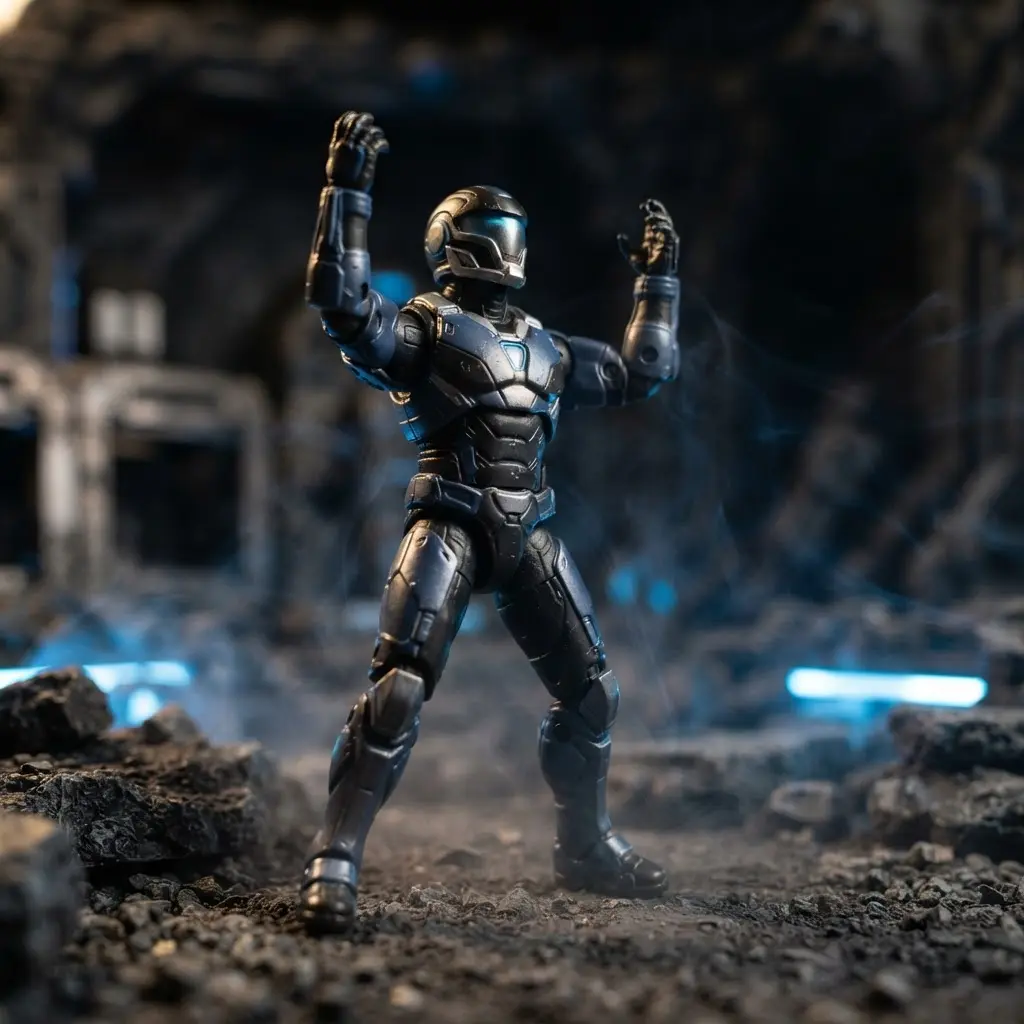
Blue light spills across the armor, while tiny lightning streaks gather near the gauntlets and brighten the dark background. Does this scene sound complicated? Set your camera below the figure’s eye level, then aim upward toward a broad stance with one foot forward and the chest open. Use a low camera position to make the hero fill the frame, leaving enough space above for a blue sky or shadowy cyberpunk setting, a reliable method for toy photography ideas. Keep the brightest glow close to the hands so viewers understand where the energy begins. I love how this angle turns a small figure into a commanding action character, especially when the pose feels firm rather than relaxed. A casual stance weakens the story, so straighten the limbs and spread the arms with purpose. My go-to tip is to lower the background brightness, helping the blue effect stand out without hiding the toy’s details. Feel the heroic charge when the final frame comes together.
17. Spooky Graveyard Nocturnal Encounter Scene With Moonlight
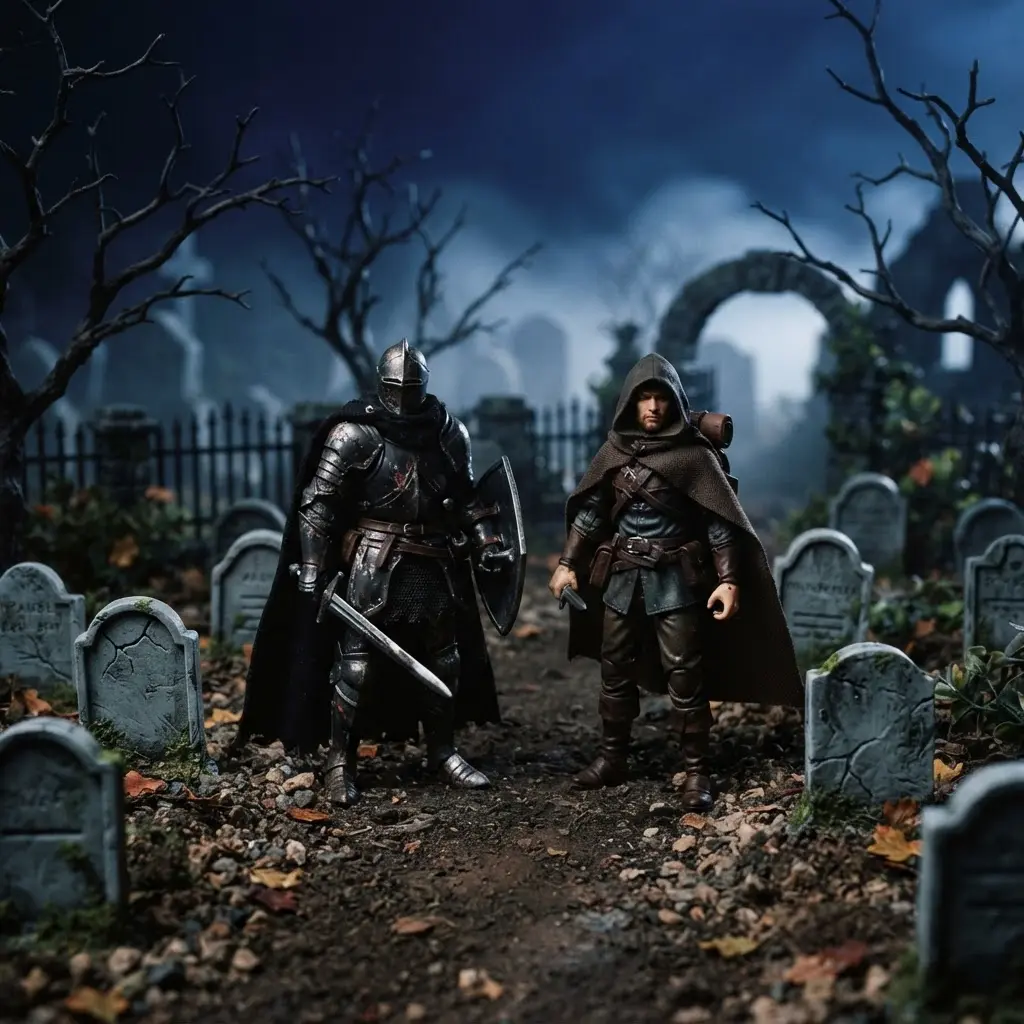
Many spooky cemetery shots turn into a black blur, but moonlight should reveal the scene. Start with a cool moonlight source aimed across tombstones, crosses, and bare branches. Sound too dark? Raise exposure until the path and figure stay readable, which keeps your toy photography ideas balanced. Place the hooded or skeletal figure in the middle distance, facing away or partly hidden by low fog. Add small candles as warm accents, then position a faint distant glow behind the graves. I love how separate light colors give the image depth without making the scene feel busy. Leave open space around the encounter, and layer nearby stones against distant trees for stronger depth. A long shadow leading toward the camera adds tension and guides the eye. Keep colors muted, then focus on the figure and let the mystery carry the frame.
18. Colorful Confetti Celebration Party Setup With Streamers

Grab crepe-paper streamers in three or four colors, then tape vertical streamers across a backdrop board. Keep the strips evenly spaced for a tidy party wall, leaving open space around each toy. Add a small banner near the top to frame the scene. Next, attach short strips beneath small balloons, then scatter paper confetti across the tabletop. Isn’t the little burst of color satisfying? I love how these layers give the scene height, movement, and a clear birthday-party feel without hiding the subjects. The balloon tails guide the eye toward the toys, adding joyful movement to toy photography ideas. Finish with a few confetti pieces near the feet or props, rather than covering every open spot. Pro tip: add confetti last so larger decorations do not disturb it. Repeat colors from the toys for a cheerful frame, and keep loose pieces away from tiny movable parts.
19. Steam Filled Industrial Workshop Diorama With Metal Props
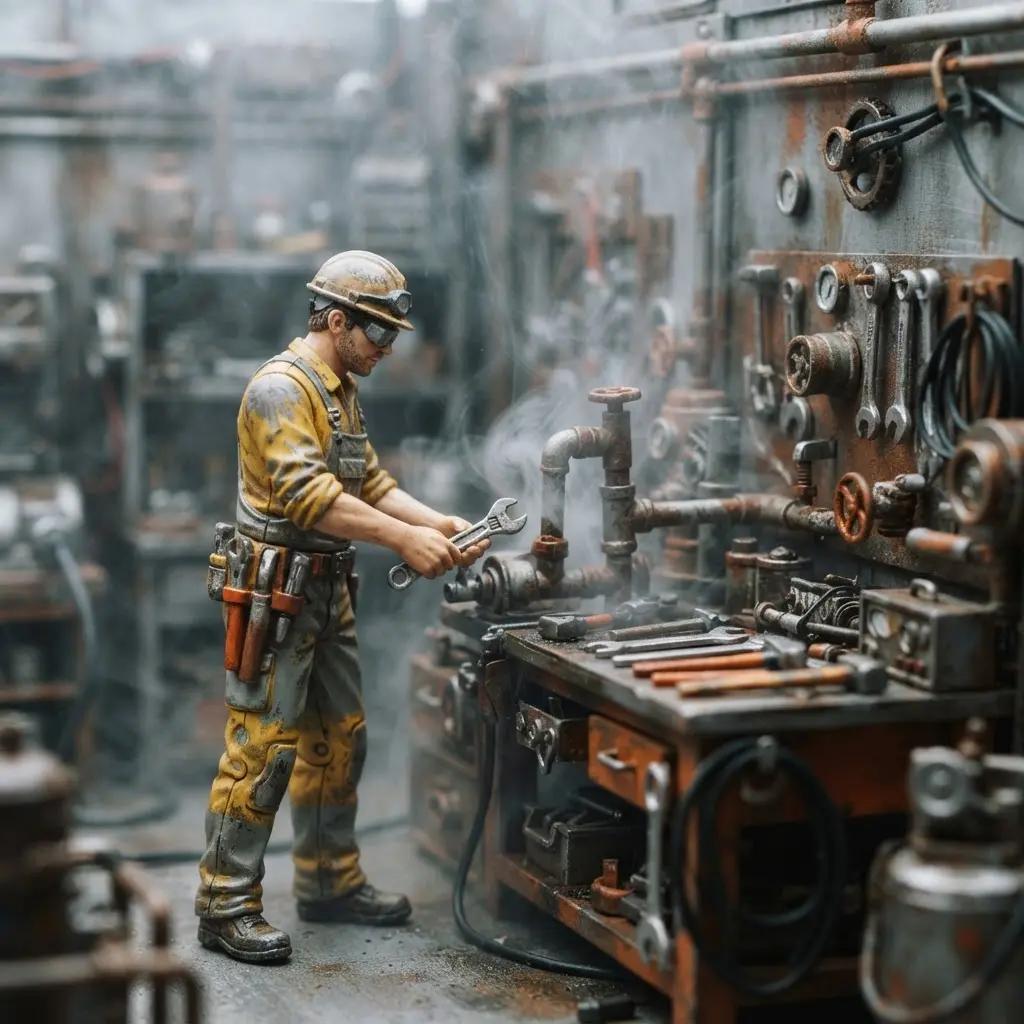
Ever wondered how much atmosphere a tiny workshop scene can hold? I love turning a small factory backdrop into a smoky machine room with weathered panels, rusty gears, pipes, chains, and a boiler or furnace as the focal point. Add a steam engine, pressure gauge, transmission shaft, blueprints, and spare pulleys so every object feels connected. Place the figures near the machinery, then use controlled steam effects and side lighting to catch reflections across the metal, a key trick for industrial toy photography ideas. Keep the background darker than the central machine, and leave open space around the focal point so the details stay readable. This setup works because repeated industrial shapes and moving vapor give your photo texture and depth.
Pro tip: photograph a working model under adult supervision, following its heat, pressure, and operating instructions. Trust me, the finished frame feels wonderfully alive.
20. Reflective Puddle After Rain Portrait With Soft Light
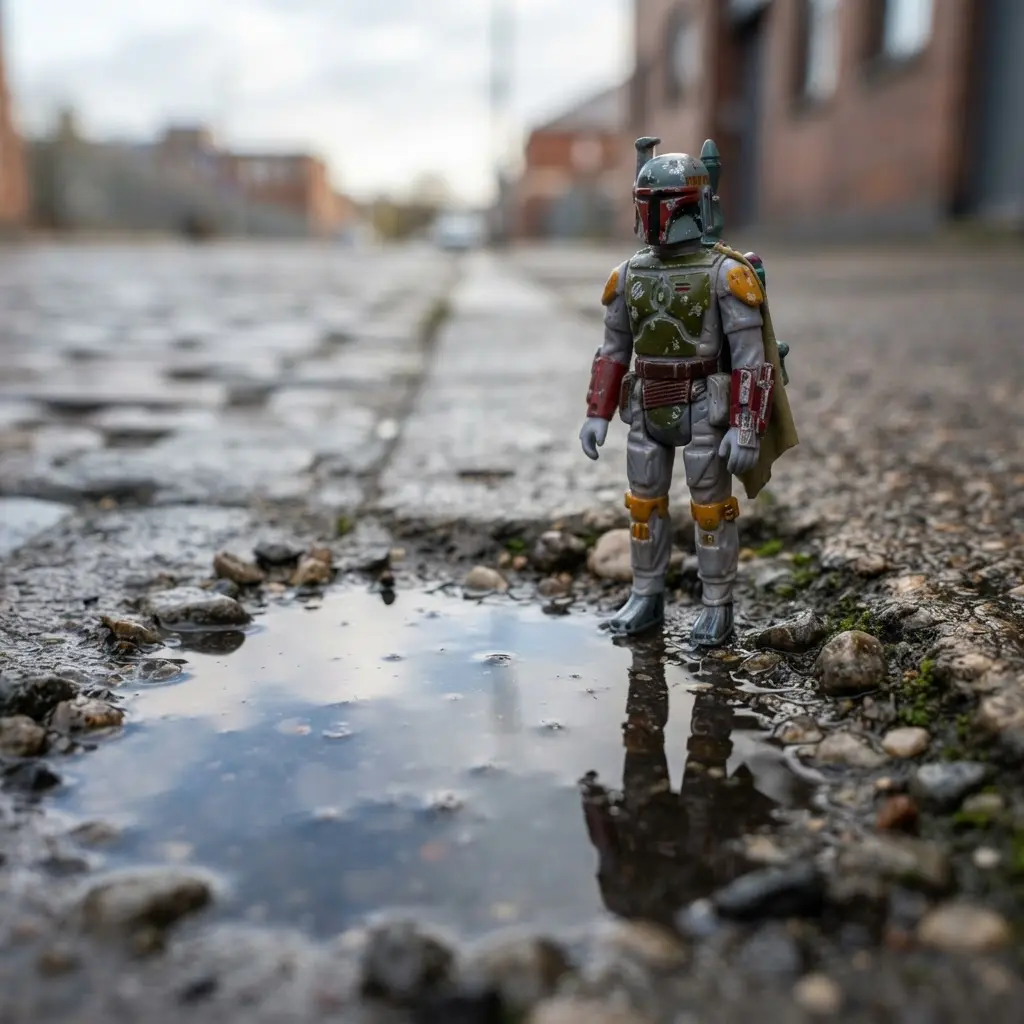
This setup gives a small figure a cinematic presence without a complicated set. Find a shallow, still puddle on dark asphalt, place the toy near its edge, and lower your camera until the reflected figure fills the lower frame. Use soft sunrise, sunset, or overcast light, then focus on the reflection and try f/8 to f/11 for clearer detail in both images. Ground-level framing keeps the puddle prominent and makes the subject feel larger, a proven method for moody toy photography ideas. I love how the water creates a second pose in one shot. Sound tricky? Wait for ripples to settle, use a polarizing filter to reduce glare, and keep every part of the reflection inside the frame. You will feel proud when the symmetry clicks.
Editing And Display For Finished Toy Images
Export a full-resolution file only after checking the eyes, because small focus errors become obvious on a displayed image. Crop away table edges and stray props, but keep enough surrounding space to preserve the intended scale. Adjust exposure gently so dark plastic keeps its texture and bright faces retain detail. Selective sharpening around the eyes gives a portrait more presence than sharpening every surface equally. Use a neutral screen or print reference when judging color, since warm room lighting shifts your perception. A matte acrylic varnish protects physical display pieces from dust and reduces distracting reflections under household lamps. Store the original file separately from edited copies, then choose a display size keeping fine props readable.
Conclusion
So how was your creative session? Your collection has more personality than a shelf display reveals, and each setup gives you a new way to share it. Look at what you have made. Choosing a setting, arranging props, and waiting for the right light all show real skill. Toy photography ideas work best when the scene feels personal, so begin with a character, memory, or tiny story you already care about. For your next session, limit yourself to three props and one light source. This keeps the frame clear and gives the subject room to lead the picture. Take a few shots from the figure’s eye level, then compare them with a lower view. Your favorite angle might surprise you. Pick one setup, place your camera close, and give your collection another story to tell.
FAQs
Q: What camera works best for toy photography?
A: A phone with a close-focus mode works well for beginners. A camera with a macro lens gives more control over detail, distance, and background blur.
Q: How do I make toys look life-sized in photos?
A: Place the camera at the toy’s eye level. Use a low viewpoint, hide visible supports, and keep background props in scale with the figure.
Q: What props work well for miniature scenes?
A: Foam board, moss, colored sand, paper, stones, fabric, and household objects work well. Choose props linked to the setting and limit their number so the subject stays clear.
Q: How do I light a toy photography setup?
A: Use a window for soft daylight or one portable LED panel for direct control. Move the light higher or lower to change the mood and shadow shape.
Q: How do I hide stands and supports in toy photos?
A: Place supports behind the figure or cover them with matching scene materials. A small change in camera height often removes them from the frame.