


Establishing Your Optimal Workspace Light Conditions
Position your light source directly over your shoulder to prevent glare and cast shadows that distort your color perception. Trust me on this, painting under a single overhead bulb creates a false sense of depth that will trick your eye. The best setup uses a bright, white lamp aimed at your canvas from the same side as your painting hand. You will notice your color mixing becomes far more accurate when you see the true hue and value on the surface. Incorporating these painting tips for beginners early on prevents the common frustration of a painting looking flat or muddy only when you step away from your desk. Consistent, shadow-free light is the foundation for judging every brushstroke you make.
Selecting Reliable Paints for Initial Practice
Start with a limited palette of high-pigment, student-grade acrylics for their forgiving nature and fast drying time. The good news is these affordable tubes let you practice color mixing endlessly without worrying about wasting expensive paint. Their water solubility means you only need two jars of water to clean your brushes. You want a small set of primary colors plus white and burnt umber to mix a vast range of realistic tones. Following basic painting tips for beginners like this teaches you the essential skill of deliberate color mixing instead of relying on pre-mixed hues straight from the tube. Building this fundamental knowledge with student-grade acrylics sets you up for success with any medium later on.
1. Mix Your Primary Colors to Build a Versatile Palette
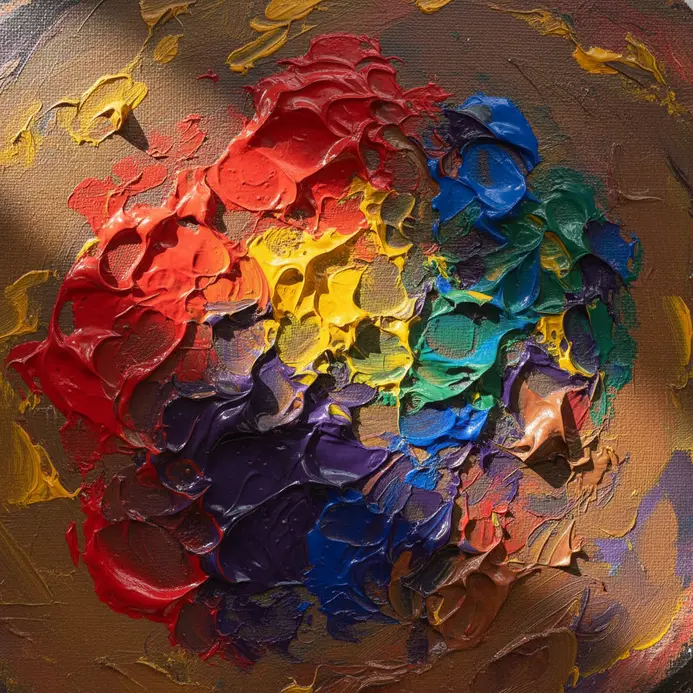
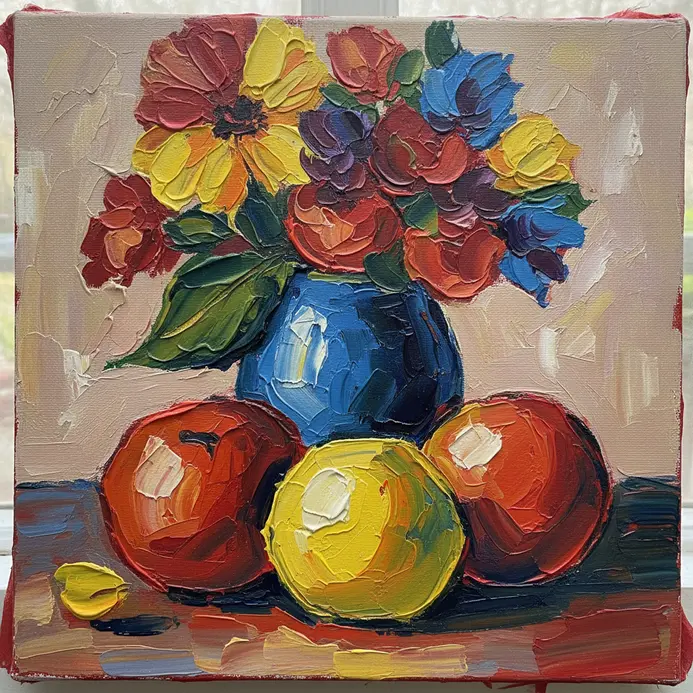
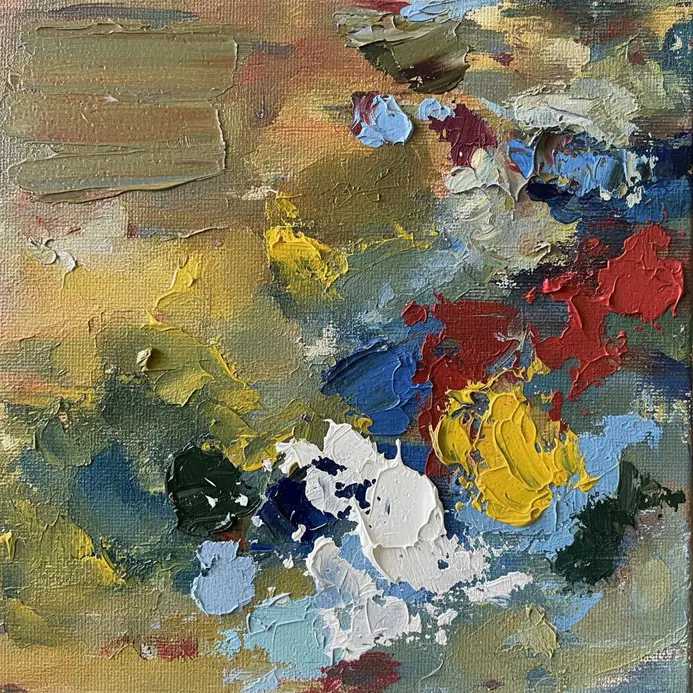
Ever felt overwhelmed by the wall of paint tubes at the store? I know I have. The secret is that you only need a few smart choices, like yellow ochre, to unlock every color you can imagine. Start with a split primary palette, which means picking a warm and a cool version of each primary color. Mastering these painting tips for beginners helps you understand exactly how to match those color biases for clean and bright results. This approach is a fantastic way to understand color relationships on a deep level. Instead of buying a tube of every shade, you learn to create them yourself, which saves money and gives you total control. Trust me, the moment you mix that perfect custom purple for your mini canvas painting ideas is incredibly satisfying. You are not just following a recipe, you are truly learning to speak the language of color. Watching the hues blend on your palette becomes a meditative practice that builds genuine artistic confidence.
2. Choose Synthetic Brushes for Acrylic and Watercolor Control
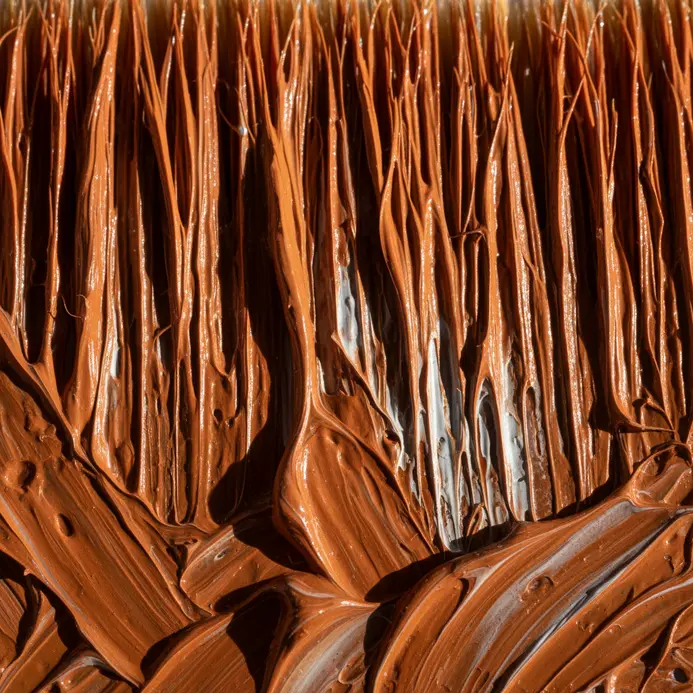
Ever wondered why your brush feels clumsy with thick acrylics or makes watercolors bleed? The right tool makes all the difference. I love reaching for synthetic brushes are great for oil painters. because their nylon or Taklon fibers give you the perfect mix of softness and spring. They hold their shape beautifully, giving you crisp lines for details and smooth washes without breaking the bank. Their non-porous nature means they do not soak up all your paint or water, so you get more control over the medium on your canvas. For acrylics, that stiffness lets you push the paint around with confidence. Applying these painting tips for beginners with the proper tools prevents those frustrating watercolor floods and keeps colors vibrant. Isn’t it satisfying when your brush does exactly what you tell it to? My go-to tip is to build a small set with different shapes like a round paintbrush for details and a flat for bold strokes. Remember to clean them well after each session to keep them performing their best for years.
3. Select the Right Paper for Acrylics and Watercolors
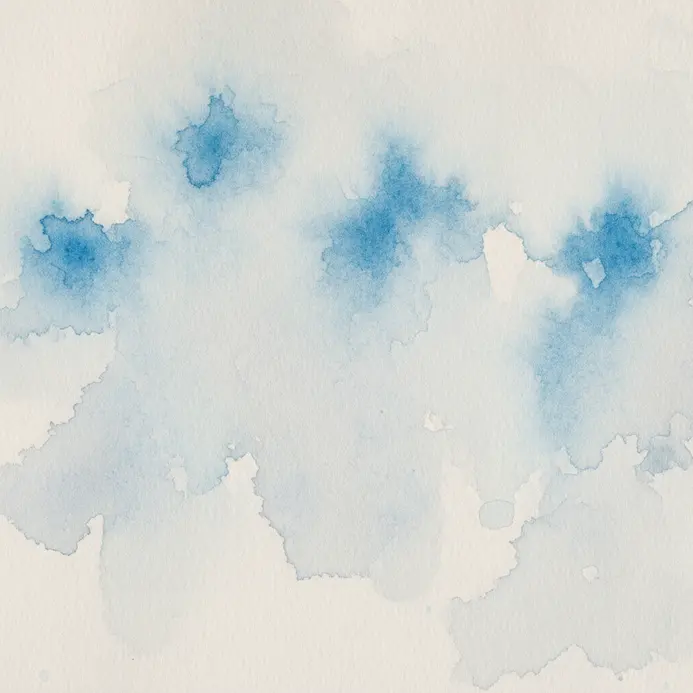
Ever feel like your paint will not behave on the page? The paper is likely the culprit. For watercolors, you need a heavyweight cold press paper to handle all that water without buckling when using a painting medium. For acrylics, a medium weight paper with a bit of tooth gives the paint something to grip. Using these painting tips for beginners avoids a frustrating, slippery surface and ensures better adhesion. Trust me, using the right foundation makes every brushstroke easier and your final piece more stable. It is the difference between a painting that lasts and one that warps or yellows. For more practice with your watercolor paper, try some easy watercolor painting techniques. Does that not feel like a solid start?
4. Load Your Brush Properly for Clean, Confident Strokes
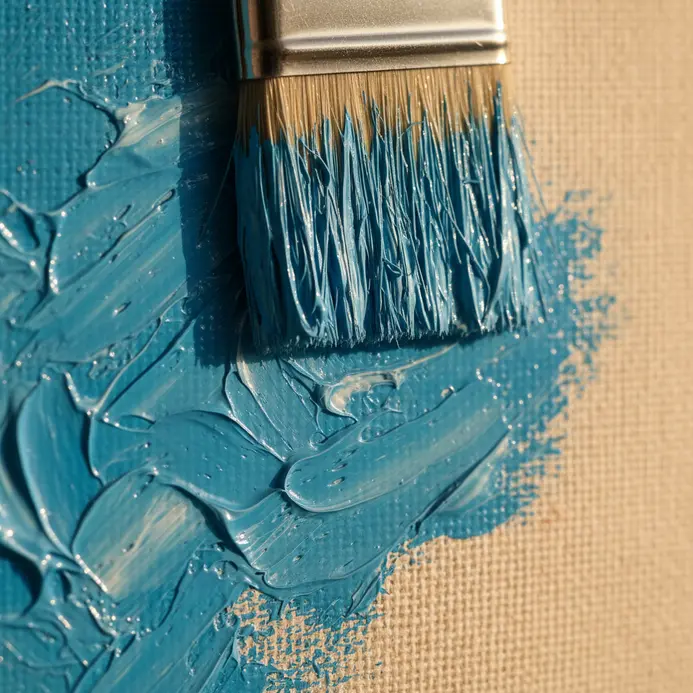
Ever notice how a simple dip into the paint leaves your brush looking starved or dripping? Proper brush loading is that subtle skill that makes all the difference. Here is my go-to method to begin painting. First, dampen your brush slightly for water based paints, then dip only the tip and belly into the color using a paintbrush. Following these painting tips for beginners helps you work the paint evenly into the bristles while avoiding the ferrule completely. This creates a perfectly shaped reservoir of paint right where you need it. When you get this right, you will have consistent paint flow for smooth, long strokes without any annoying drips or dry patches. It gives you much more control for sharp lines and detailed work. I love how this one simple habit lets you paint faster and with greater confidence. You can practice this technique perfectly when trying out some lovely beginner flower painting ideas. Feel the satisfaction of every stroke landing exactly as you intended.
5. Clean Your Palette to Keep Your Colors Pure and Fresh
Ever notice how a dirty plate makes your fresh food look less appetizing? A messy palette does the same to your paints. Trust me, taking a few minutes to clear off old, dried paint makes a world of difference. Incorporating cleaning steps into your painting tips for beginners routine instantly makes your work look more professional. During a session, use a palette knife to scrape away unwanted mixes and wipe the surface clean. For a deeper clean after you are done, a rag with a bit of odorless mineral spirits works wonders for oil paints. This prevents any stray, dried bits from sneaking into your beautiful new mixes and muddying your colors. Why does this simple step work so well? It gives you a true, fresh start every time you begin painting. You will love how much easier it is to mix the exact vibrant hue you are imagining. Feel the satisfaction of working with pure, fresh colors on a clean slate.
6. Apply the Color Wheel to Create Harmonious Paintings
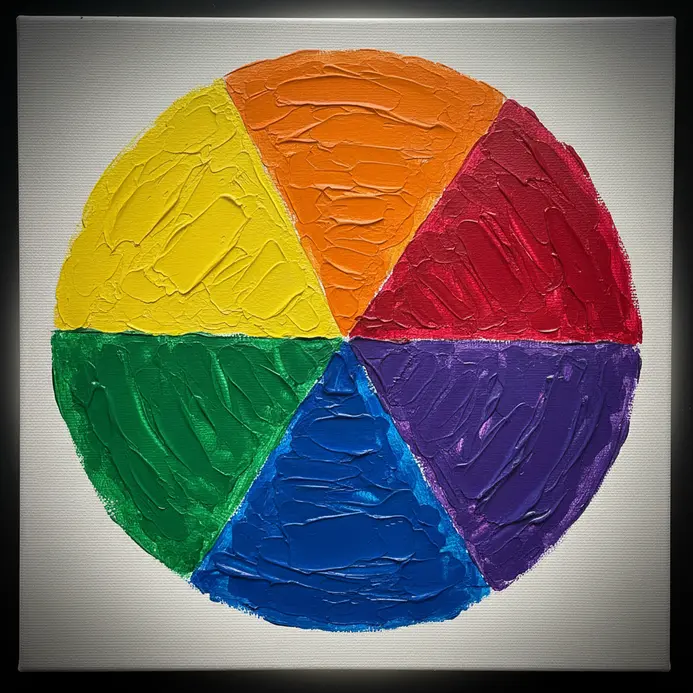
Ever feel your color choices are a bit random? The color wheel is your secret weapon to fix that. It shows you which colors naturally look good together, like blue and orange or red and green. I love using a complementary color scheme to make a specific part of my painting pop, because those opposites create amazing energy when placed side by side. You can also try an analogous scheme, picking colors that sit next to each other on the wheel for a calm, unified feel. Remember, warm colors seem to come forward and cool ones recede, which is perfect for creating depth. Applying color theory from these painting tips for beginners makes your next piece feel much more harmonious and intentional. For a quick mood boost in your work, check out these acrylic painting ideas for beginners. Feel the harmony when your colors, including pastel shades, finally sing together on the canvas.
7. Prime Your Canvas with Gesso for a Smooth, Lasting Surface
Ever wondered why your paint sometimes soaks into the canvas, making colors look dull? This one small step makes a huge difference. Adding an extra layer of acrylic gesso to your pre-primed canvas fills in the weave, creating a smooth, consistent surface. Use a wide, flat synthetic brush to apply it in thin coats. Let each layer dry completely, then lightly sand it with fine-grit sandpaper for an ultra-smooth finish. Following surface preparation in these painting tips for beginners controls the canvas absorbency, so your paint glides on and the colors stay true and vibrant. I love how a properly primed canvas makes the whole painting experience feel more professional and controlled. It is not only about the look right now, it is about protecting your artwork for years to come. That smooth, toothy surface you create gives the paint something solid to grip, preventing flaking and ensuring your piece lasts. Trust me on this one, taking those ten minutes to prime is a game-changing habit for any artist.
8. Thin Your Paint Effectively for Different Textures and Washes
Ever wondered how artists get those smooth, transparent layers of color? It all comes down to thinning your paint correctly. I love this technique because it unlocks a whole new world of effects from a single tube. The secret is to always run a scrap surface test before you touch your main canvas. This lets you see exactly how your mix will flow and dry. For acrylics, water is your go-to, but use it carefully. A light wash needs a lot of water, while a glaze works better with a painting medium. glazing medium to keep the paint strong. Adding too much water is a common mistake that makes your paint look chalky. Mixing thoroughly and adding thinner little by little is one of the most useful painting tips for beginners looking for perfect control. Mastering this gives you incredible flexibility for everything from soft backgrounds to luminous details. It is a core skill that makes painting more dynamic and fun. You can practice this control with some mini canvas painting ideas using acrylic. simple oil painting ideas too. Feel how much more expressive your work becomes.
9. Use Composition Rules to Plan a Balanced Painting
Ever felt like your painting looks a bit off, but you can not pinpoint why? Trust me, a few simple composition rules are the secret to making everything feel stable and intentional. Think of them as friendly guides, not strict laws, to help you arrange your elements for maximum impact. My favorite place to start is the rule of thirds. Lightly sketch a grid over your canvas and try placing your main subject where the lines cross. It instantly creates a more dynamic and interesting scene than plopping something dead center. This simple shift in thinking is one of those structural painting tips for beginners that gives your work a professional feel. You can also use natural lines, like a winding path or a river, to guide the viewer eye right to your focal point. This technique, called leading lines, adds depth and movement to your finished painting. It is a fantastic way to tell a story within your painting and keep the viewer engaged with every part of your work. For a great example of this in action, check out our guide to landscape painting for beginners. Does not that sound more manageable? Try planning your next piece with these ideas in mind and feel the satisfaction of creating a beautifully balanced artwork. Your compositions will naturally guide viewers through your visual story.
10. Layer and Glaze Your Paint to Build Depth and Light
Ever feel like your paintings look a bit flat? This is my favorite trick for making them pop with a realistic glow. Layering and glazing are about building your painting in thin, separate coats. You start with an underpainting, let it dry completely, then add thin, transparent layers called glazes on top. The magic happens when light passes through those transparent layers, bounces off the dried paint underneath, and comes back to your eyes. This creates incredible depth and a luminous quality you cannot get with one thick layer. The key is patience. Wait for each layer to dry fully, especially with oils. If you rush, the colors turn muddy. For a true glaze, mix a tiny bit of paint with a lot of glazing medium or water. Incorporating layering advice from these painting tips for beginners will give you the most vibrant, glowing green on a blue-yellow mix. Trust me, seeing that light appear is pure magic.
Varnishing Techniques for Long Term Preservation
Wait at least one full week for your acrylic painting to cure completely before you apply any sealant. Applying varnish to a tacky surface will trap moisture and create a cloudy, milky film you cannot fix. Use a wide, soft synthetic brush to apply an even coat of matte acrylic varnish in one direction across the entire surface. This protective layer locks in your colors from dust and UV light, preventing fading over the years. Adding proper sealing methods to your collection of painting tips for beginners ensures your artwork survives decades without damage. Let this first coat dry for a few hours before adding a second light coat perpendicular to the first for complete coverage. Your finished piece will have a uniform sheen and professional durability that makes all your hard work last.
Conclusion
Every painter starts with a first brushstroke, and the most important step is simply beginning. Remember, these painting tips for beginners are meant to be helpful guides, not rigid rules. Your personal style will emerge as you practice and experiment with what feels right for you. A wonderful next step is to pick one technique, like color mixing or layering, and focus on it during your next painting session. Enjoy the process of watching your skills grow with each canvas you fill. The journey of artistic discovery is always just one brushstroke away.
FAQs
Q: How do I start painting as a complete beginner?
A: Start painting by setting up a simple workspace with a white canvas or toned canvas, a few paint swatches, three primary colors and a basic paint brush. A beginner’s guide approach is to focus on learning how to paint basic shapes, mix the colors using a limited palette, and spend time learning through painting practice rather than buying every tool at once.
Q: What basic supplies do I need to start a painting process?
A: You need pigment in the form of your chosen paint (acrylics or traditional oil), a couple of good quality paint brushes, an easel to hold your canvas, a palette for mixing, and rags or paper towels. If using oil medium, include solvents and a safe thinner; for acrylics, water and a spray bottle are enough to keep thinned paint workable. Also prepare swatches to test paint color before applying onto your canvas.
Q: Which paint medium is best for beginners: oil or acrylic?
A: Both have advantages. Paint with acrylics for faster drying, easier cleanup and forgiving paint layers—great for painting practice and experimenting and playing. Traditional oil and oil medium give longer working time, smoother blending and techniques you can use like wet on wet or impasto, but they require more materials and ventilation. Choose like oil if you want the feel of oil painting; choose acrylic to learn fundamentals quickly.
Q: How do I learn to mix colors and understand lightness and darkness?
A: Start with the three primary colors plus white and maybe one earth tone. Practice mix the colors to create swatches showing variations in hue and value. Use exercises to adjust lightness and darkness by adding white or a darker pigment and keep notes of ratios. Using a limited palette helps you understand color relationships faster than using a lot of paint colors at once.
Q: What brush techniques should beginners focus on using a brush?
A: Learn basic marks: broad strokes for underpainting, feathering for soft edges, and controlled strokes for detail. Practice using a brush loaded with less paint to achieve thin layers and with thicker paint for texture. Try wet on wet to blend and impasto to build thicker paint and texture. Scraping paint with a palette knife is another useful technique to correct or create texture.


