
What You Will Need to Draw a Butterfly
When planning how to draw a butterfly, gather a pencil, such as a standard HB or 2H, for light guide lines, an eraser, and white drawing paper or a sketchbook. An optional ruler helps with the initial straight guide lines. For the final steps, keep an optional black pen or fine-tip marker nearby for inking over pencil lines. Colored pencils or markers are optional for adding color at the end. None of these supplies need to be expensive, so you already have everything you need to begin.
How to Use This Butterfly Drawing Tutorial
As you explore how to draw a butterfly, each step builds on the previous one, so follow the tutorial in order. Sketch guide shapes lightly at first because you will erase them when your final lines look clean. Slight imperfection in the early steps is normal and part of the process. With this construction approach, your butterfly drawing grows progressively more recognizable as you add the body, balanced wings, patterns, texture, shading, and color. Take your time, and let each small improvement guide the next one.
1. Center Line: The Key To Even Wing Placement
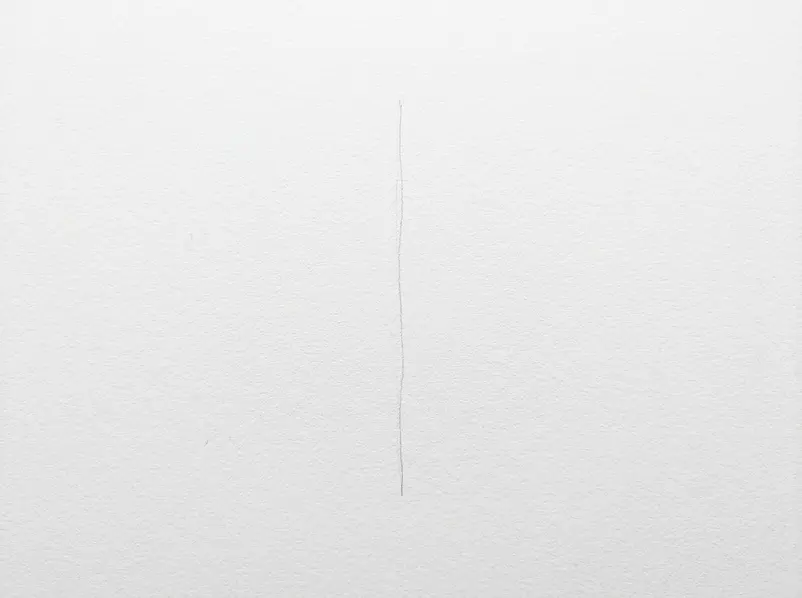
Start by learning how to draw a butterfly, beginning with a straight center line for your sketch. This line gives both sides an even place to grow, so you’ll have a clear guide for the wings.
Place a sheet of paper flat, then use a pencil to draw a light line while practicing. Keep the line near the middle of the page, leaving room on both sides for the wings. Press lightly, so the mark stays easy to erase later.
Add a tiny dot near the top and another tiny dot near the bottom to show where the line begins and ends. Check the paper, then adjust the line with an eraser if it leans too far to one side. Draw a second light line beside the first one if you need a straighter guide, then erase the first line.
Keep the final line thin and pale, since you’ll draw over parts of it later. Leave enough blank paper above and below the line for the rest of the drawing. Nice work, you’re building a strong start!
Pro tip: Fold the paper in half, press a light crease, then open it and follow the crease with your pencil for a straight center line.
2. Sketch Light Oval Guides For Four Wing Sections
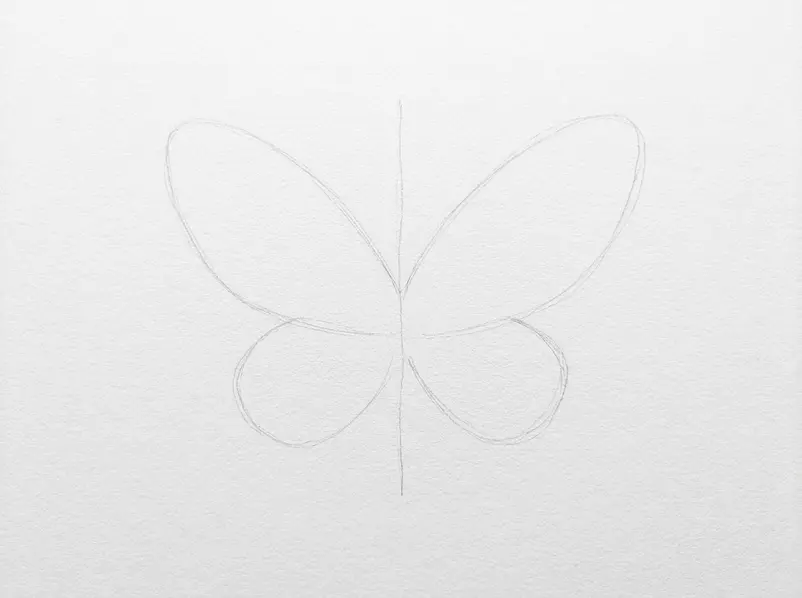
The next stage of how to draw a butterfly requires sketching four light oval guides around the center marks. These guides split the wings into clear sections, so the full butterfly stays balanced. Use a light pencil touch, and you’re doing great!
Place one oval above and to the left of the center as you continue learning. Place a second oval above and to the right, keeping both ovals close in size. Add a third oval below and to the left, with its lower edge near the first step’s center marks.
Add a fourth oval below and to the right, matching the lower left oval. Keep each oval loose and narrow near the center, then widen each curve as it moves outward. Leave small gaps between the ovals and the center so later lines have room.
Sketch each oval with light pressure, using slow, smooth movements from the center outward. Draw over a curve once only, then lift your pencil before starting the next curve. Nice work getting this far!
3. Shape The Rounded Wings Around Each Guide
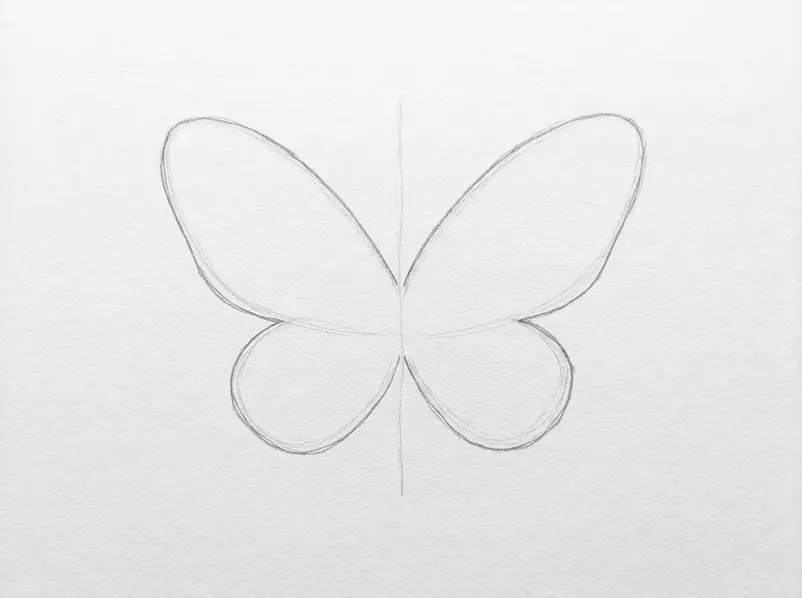
Your first step in how to draw a butterfly placed the body and wing guides on the paper. Now you will build each rounded wing around those lines, so the butterfly shape has a clear base.
Use a light pencil to start near the upper body guide on the left while mastering. Sweep one smooth line outward and upward, then curve it back toward the lower guide. Draw the right wing in the same way, keeping its widest point close to the same height as the left wing.
Connect the upper and lower curves with a soft bend at each wing tip. Keep both wings wide enough for clear space between the body guide and each outer line. Press lightly, then use an eraser to fix any bumpy line, sharp corner, or uneven wing tip.
Move your hand from your shoulder or elbow for each long curve, rather than making many short wrist lines. Turn the paper if a curve feels awkward, then draw it again in one steady pass. Leave the first outline pale until both wings sit around the same body centre.
4. Add The Slender Body And Curved Antennae
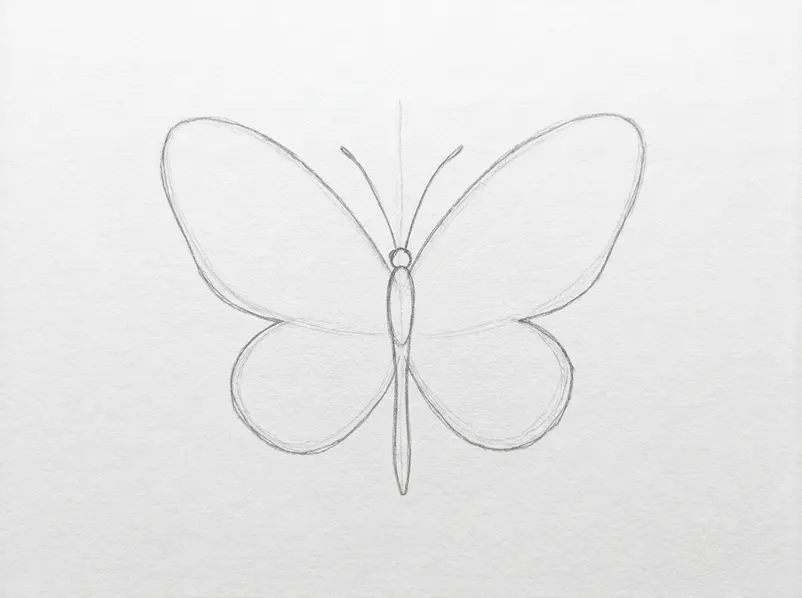
To advance in how to draw a butterfly, build on the wing shapes by adding the slender body between them. These small lines connect the wings and give the drawing a clear center.
Use a pencil to draw a narrow, curved line from the top gap as you work. Add a second curved line beside it, leaving a small space between both lines. Keep the top part a little wider than the bottom part.
Press lightly so you can erase and fix the shape with ease. Draw two short lines from the top of the body, one going left and one going right. Curve both lines outward, then gently curve their ends back toward the wings.
Add a tiny rounded mark at each end of the antennae. These marks give the lines a clean finish. Nice work getting this far!
5. Clean Pencil Lines Reveal A Balanced Butterfly
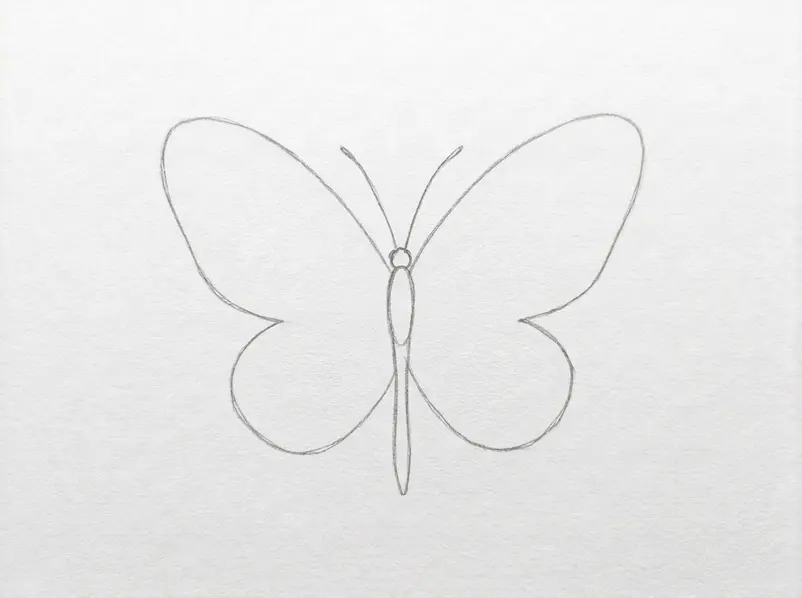
Refining how to draw a butterfly means using the light sketch on your paper as a guide for clean, balanced pencil lines. You’re doing great, because this step brings the butterfly parts into one clear drawing.
Place your pencil at the center of the paper while practicing. Draw a slim, slightly curved line from top to bottom for the body. Start at the upper center and draw one wide curved line out to the left, then bring it back near the middle to form the top wing.
Repeat the same movement on the right, keeping both top wings close in size and height. Add a smaller curved line below each top wing, with both lower wings ending near the same level. Draw two short lines at the top of the body for the feelers, then erase any extra marks outside the wings.
Trace over the strongest lines with light pressure, so the full butterfly outline stays smooth and easy to read. Nice work getting this far!
6. Ink The Wings, Body, And Antennae Clearly
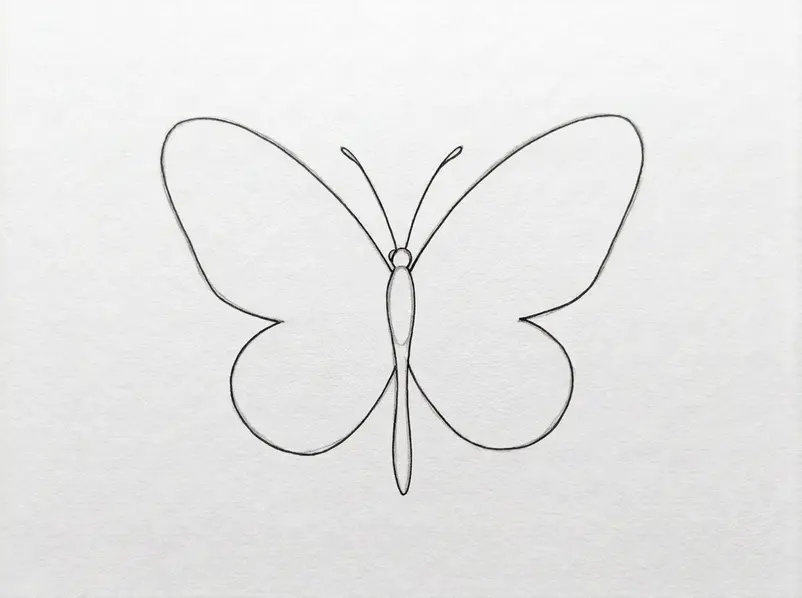
When your first pencil lines settle, this stage of how to draw a butterfly turns them into clear ink lines for the wings, body, and antennae. Keep the pencil guide underneath while you work, and use ink lines to make each part easy to read.
Place a clean sheet of paper over the sketch, or keep your drawing in place if you are working straight on the page. Use a fine-liner pen to trace the outside edge of each wing with slow, smooth lines as you refine. Trace the inner wing lines next, starting near the body and moving toward the wing tips.
Draw the body with two steady curved lines, then add small lines across it for simple detail. Draw each antenna from the top of the body, curve it outward, and finish with a small rounded end. Press lightly along thin details, then press a little harder along the main wing edges.
Lift the pen after each line instead of dragging it across the paper. Let the ink dry fully, then use an eraser to remove every pencil line beneath it. Pro tip: Check each wing edge before adding the inner lines, since a smooth outer line makes the rest of the butterfly drawing easier to trace.
7. Soft Shading Adds Depth Near Edges And Body
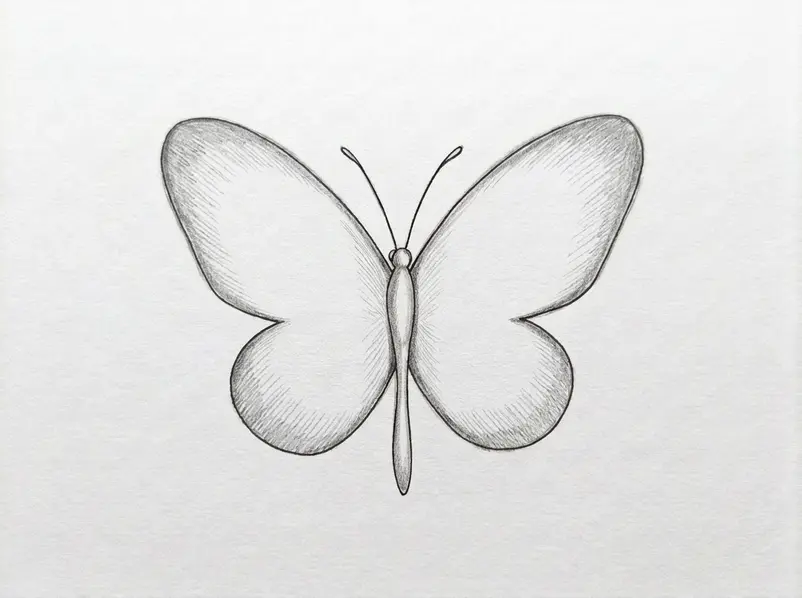
Now you are ready for the shading phase of how to draw a butterfly, building on the basic outline. In this step, you will add soft pencil marks near the wing edges and body, so your drawing has more depth.
Use a pencil with a soft tip and press lightly along the outer edges while learning. Draw short, curved marks from each edge toward the center, then lift your pencil after each mark. Keep the darkest marks close to the wing edges, and leave the middle areas mostly white.
Add a narrow band of light shading beside the body, using small strokes from top to bottom. Press a little more firmly near the body, then use lighter strokes as you move toward the wings. Add a few soft marks below the lower wings, following their curved edges.
Leave small gaps between some marks so the pencil shading stays gentle. You’re doing great, and this part is easier than it looks! Pro tip: Use a clean eraser to lift any heavy patch near the wing edges, then redraw it with lighter pressure.
8. Bright Colors Bring Each Wing Section Together
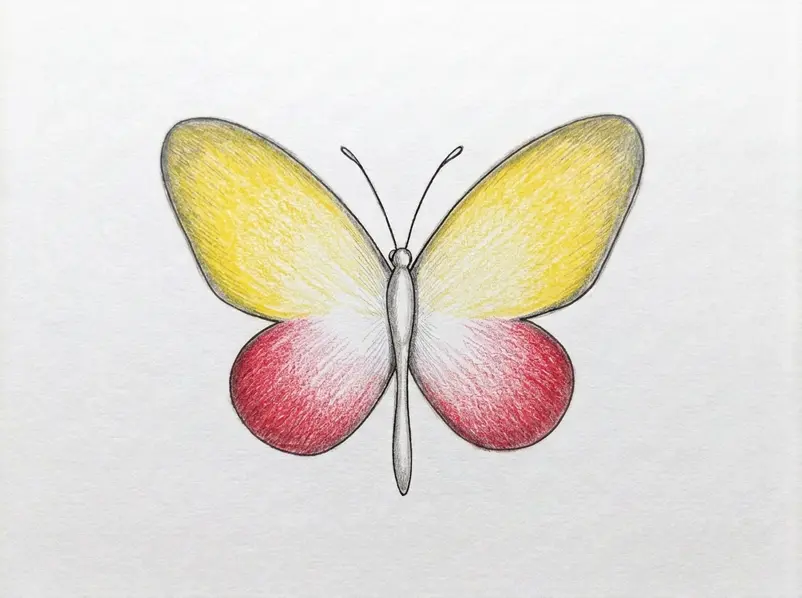
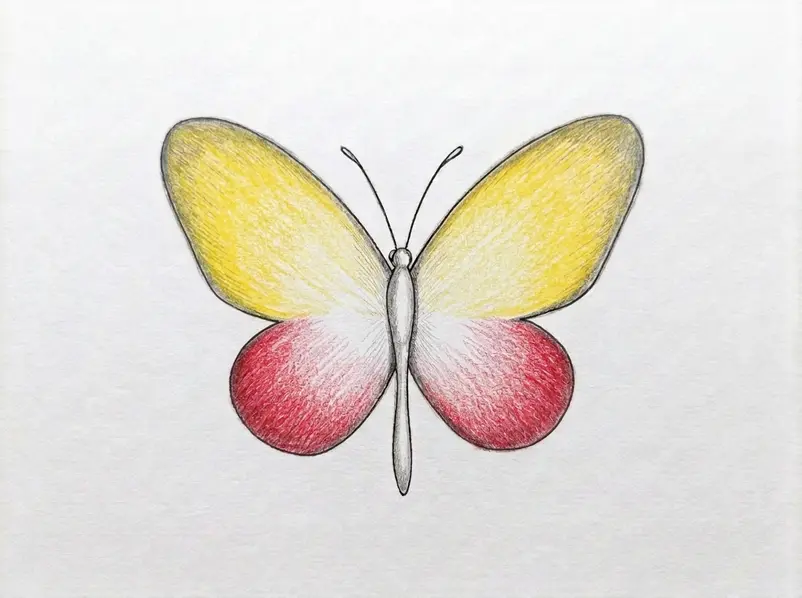
With your first butterfly outline on the paper, you will now fill each wing section with color to finish how to draw a butterfly. This step joins the light pencil marks into one clear, cheerful drawing.
Use examples from simple colored pencil drawings to choose two or three colors for each wing section. Start with the lightest color near the middle of each section, then draw small lines toward the outer edge. Add the darker color along the outer edge, leaving a thin strip of the first color between both areas.
Press lightly as you add short lines from the edge toward the middle, a key habit when learning. Repeat the same color plan on the matching wing, and keep the lines moving in the same direction. Add small color patches near the top and bottom sections, then leave the body area white until the wing color is finished.
You’re doing great, and each section will feel more complete as you add one small group of marks at a time. Pro tip: Hold your eraser beside the drawing and use its corner to lift color from any section that looks too dark, then add the lighter color back with short lines.
Tips to Improve Your Butterfly Drawings
Once you finish this guide, try drawing a butterfly a second time from memory. Practice the most complex section separately, which is often the decorative detail step. Vary the size of your butterfly to see how its proportions change, while keeping the body slender and the wings balanced. You might also experiment with a simple background or extra shading. Each new version gives you useful practice and helps your lines feel more confident.
Conclusion
You did it! Your butterfly is complete, from the first center line to the final bright wing colors. You built the drawing with light guide shapes, added the main structure, refined the body and antennae, then finished with clean lines, shading, and color. That step-by-step order helps your drawing stay balanced and easy to edit. Try drawing another butterfly from memory without looking back at the steps. Change the size, wing shapes, or color pattern to make a new version. You could also draw a moth, dragonfly, or ladybug next. Each subject will give you fresh practice with simple shapes and small details. Once you’re happy with your work, share it with someone you trust or display it where you draw. You should feel proud of finishing how to draw a butterfly and turning a blank page into something full of life.
FAQs
Q: What pencil should I use for this butterfly tutorial?
A: Use a standard HB pencil for light guides, outlines, and soft shading.
Q: How do I keep the butterfly wings symmetrical?
A: Draw a light center line first, then build matching wing shapes on both sides.
Q: Do I need to ink the butterfly drawing?
A: No. Inking is optional, though a black fineliner gives the final outline a crisp look.
Q: How long does this butterfly drawing take?
A: A basic colored drawing takes about 30 to 60 minutes, depending on your detail and shading.
Q: How do I shade a butterfly drawing?
A: Use soft pencil strokes near the body, wing edges, and inner wing sections for gentle depth.