


Preparing A Dedicated Festive Workspace
A heavy, stable surface like a wooden table or a large piece of heavy cardstock taped down is your best friend for preventing the wobbly disasters that come with paper plates and liquid glue. Trust me, this simple base gives little hands the solid foundation they need to press down on those textured additions like dried beans and pom-poms without the whole project sliding away. You want to protect that surface with a plastic tablecloth or a few layers of newspaper, because washable school glue and markers have a way of finding every unprotected inch. Then, pre-sort all your materials into small trays or bowls, thinking of burnt orange and mustard yellow cardstock pieces, pre-cut felt feathers, and those earthy brown clothespins. This organization turns a chaotic session into a smooth routine, making easy thanksgiving crafts for kids much more manageable. We all know a prepared space means less cleanup and more time for fun.
Selecting Safe Adhesives For Young Makers
The fastest way to dampen a child’s enthusiasm is waiting for a glob of white school glue to dry before they add the next piece. Here is the thing: for quick assembly of paper plate turkeys and felt cornucopias, a low-temperature glue gun with adult supervision or fast-drying tacky craft glue is the secret to success. These options create a strong bond almost instantly, so your young maker sees their festive creation come together without the frustration of pieces sliding apart, especially when using pipe cleaners. You must always check that any adhesive is labeled non-toxic and washable, especially for the preschool crowd who might get more on their hands than on the project. I avoid anything requiring strong solvents or ventilation, keeping the process safe and simple. This careful selection supports the tactile engagement that makes easy thanksgiving crafts for kids so rewarding for little makers.
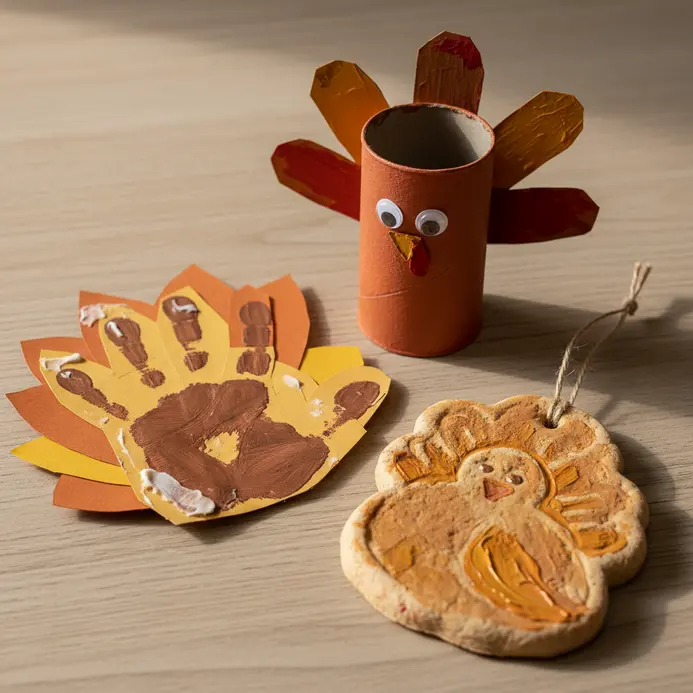
1. Build a Handprint Construction Paper Turkey Keepsake
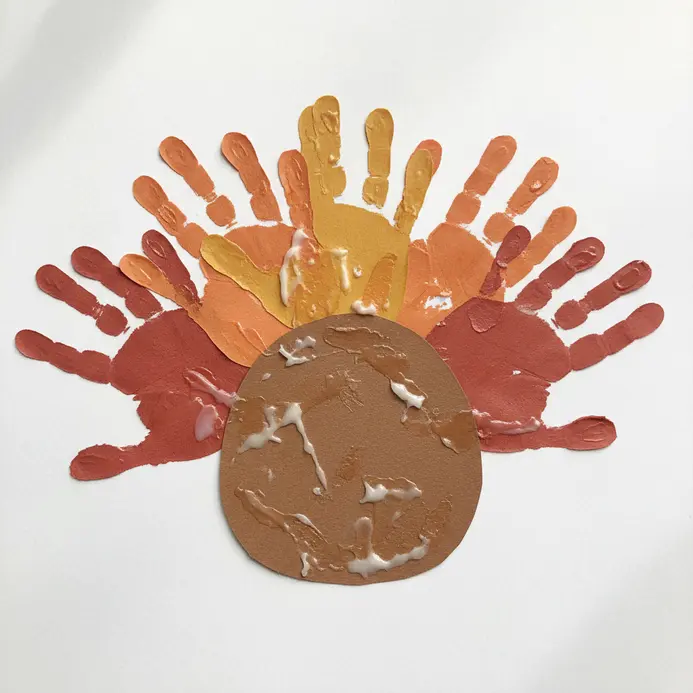
Image Source Ever wanted a sweet memento that captures how tiny your child’s hands are right now? This classic turkey project is the perfect sentimental keepsake, and it ranks as one of my top picks for easy thanksgiving crafts for kids. You will start by tracing a hand on brown paper for the body, then trace several more on bright autumn colors for the feathers, which kids will love. Arrange those colorful handprints behind the brown one and glue them down. I love adding a googly eye and a little red wattle for that playful turkey face. The magic here is that kids get to see their own handprints transform into a festive decoration. It is a fantastic, hands-on activity that builds fine motor skills and ends with a cute piece of art. For a less messy assembly, I always recommend using a glue stick. You can find inspiration for other simple projects like various easy crafts for kids to keep the creativity flowing. Your finished turkey will be a colorful, personal decoration that family will adore. Feel proud of this handmade holiday treasure.
2. Paint a Cheerful Paper Plate Leaf Turkey
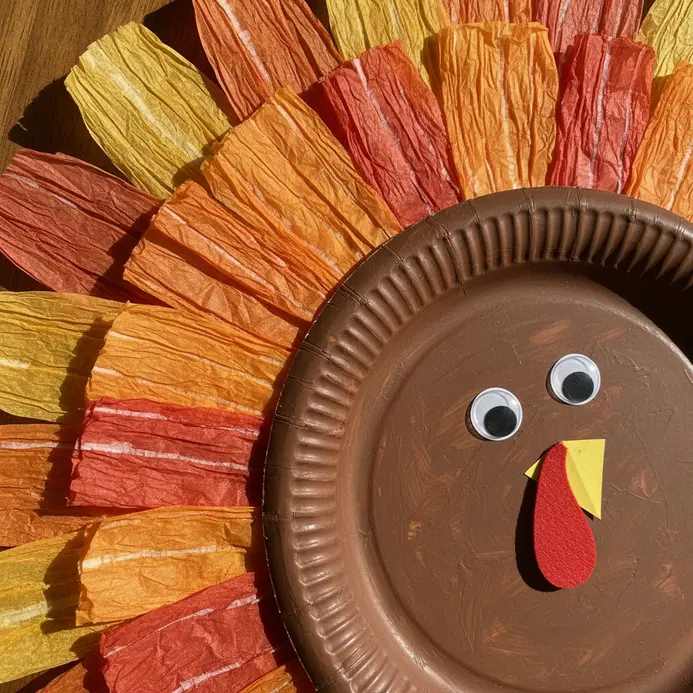
Image Source This craft looks impressive, but trust me, it is wonderfully straightforward. You start by painting a simple paper plate brown for the turkey’s body. While that dries, you can cut out an orange beak and red wattle, then glue them on with some fun and easy decorations. googly eyes for a silly face using pipe cleaners. The real magic happens when you add the tail to one of those easy thanksgiving crafts for kids. Gather colorful autumn leaves, either real ones you find outside or craft store versions. Fan them out around the back of the plate and glue them in place to create a vibrant, fanned tail. I love how this lets kids explore textures and colors. It works well because it turns basic supplies into a festive decoration that celebrates the season. A key tip for success is to make sure your brown paint is completely dry before adding anything else, like colorful candy corn decorations. This prevents any messy smudges and keeps your turkey looking crisp. Feel proud when you see that cheerful bird complete!
3. Assemble a Miniature Pinecone Feathers Turkey Sculpture

Image Source This project looks detailed, but trust me, it is one of the easiest and most satisfying decorations you make with your little ones. Start by finding a clean, stable medium pinecone for the body. The wider end is where you attach your chosen feathers, felt scraps, or even colorful leaves to create that signature fan tail. For the head, glue a small pom-pom to the pointed tip and add a tiny felt beak and googly eyes. I love how this simple combination instantly brings the little turkey to life. It is a fantastic way to use natural materials and create a personal piece, proving why it belongs on any list of easy thanksgiving crafts for kids. Feel that pride when your child shows off their creation. If you enjoy this, you will find more seasonal crafts for kids to try throughout the year.
4. Create a Textured Fork Painted Turkey Portrait
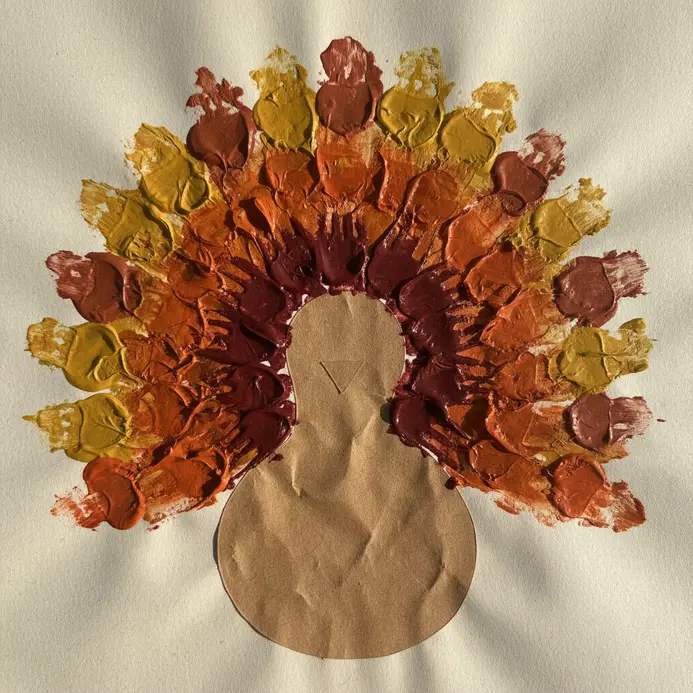
Image Source Who would have thought a simple plastic fork could be your secret tool for perfect turkey feathers? I love this one because it looks so impressive, but the technique is incredibly simple for little hands. You will start by painting a brown oval body on sturdy paper, which can be decorated with printable designs. cardstock or construction paper and letting it dry completely. Then, dip the tines of a fork into fall-colored paint, press it around the body, and drag outward to create those gorgeous, textured feather lines. Sound complicated? You just layer different colors, using the same press-and-drag motion, to build a full, vibrant fan of feathers around your turkey. The specific texture from the fork makes it look wonderfully rustic and feathery, proving why this ranks high among easy thanksgiving crafts for kids. This method is a fantastic fine motor skill activity that yields a decoration kids adore. My go-to tip is to avoid overloading the fork with paint for the cleanest lines. Try this project and feel a rush of pride when your textured turkey portrait is complete. discover Christmas craft ideas.
5. Make a Recycled Cardboard Tube Turkey Figure

Image Source This one surprised me. It looks like a detailed project, but you will love how quickly it comes together with a simple cardboard toilet paper roll. You cover the tube with brown paper, cut out colorful feather shapes, and glue them to the back to make a fanned tail. The real fun is in the decorating. Add a googly eye, a little orange beak, and a red paper wattle for the face. I always recommend cutting at least eight paper feathers in different fall colors for a full, festive look. Trust me on this one, and you will see why parents love easy thanksgiving crafts for kids that require minimal cleanup. Gluing the feathers to the bottom edge of the tube, not the whole feather, keeps everything neat and stable. Your child will feel so proud displaying their handmade turkey on the Thanksgiving table.
6. Fold a Construction Paper Gratitude Turkey Tree
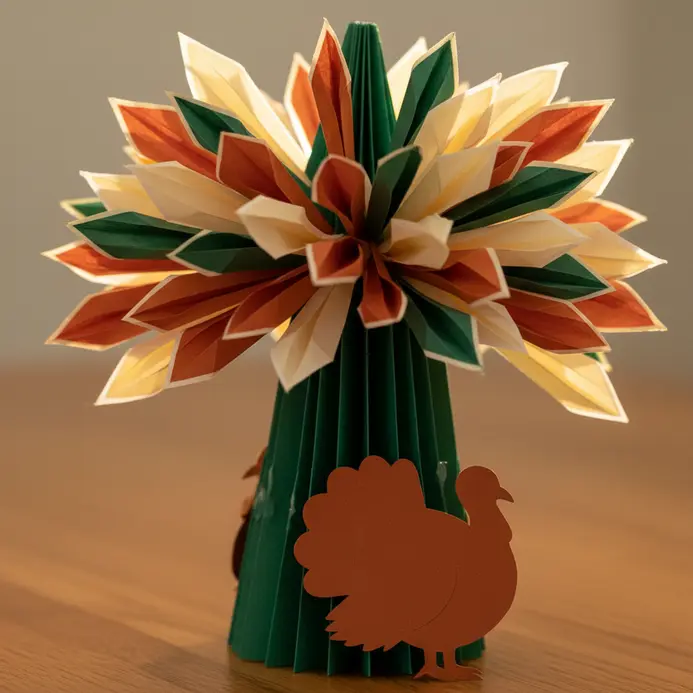
Image Source Who would have thought a simple fan fold could become a whole tree of thanks? This one surprised me with how meaningful it feels. You will start by turning colorful construction paper into those accordion-folded turkey feathers. Press each fold firmly to make them crisp and fan-like. Once you have a pile of colorful feathers, the real magic happens with the addition of fun and easy elements like candy corn. Write a personal gratitude message on each one. Then, glue them onto the branches of a brown paper tree trunk you cut out. I love how this turns a classic autumn craft into a beautiful, interactive centerpiece that kids will love. It is a fantastic way to get everyone thinking about what they appreciate through simple easy thanksgiving crafts for kids. Trust me on this one, using a glue stick for attaching the feathers helps prevent warping. family day craft activities. Feel proud when your gratitude tree is complete and full of color.
7. Craft an Autumn Leaf Thankful Jar Display

Image Source This craft is a family favorite because it looks beautiful and builds a habit of gratitude. Start with a clear glass jar as your centerpiece. Fill it with paper leaves in autumn colors where everyone writes what they are thankful for. Gather some real or artificial leaves to arrange around the base. I love preserving real leaves with a simple wax paper and iron method so they keep their color. Add a few pinecones or a mini pumpkin for extra charm. It creates a warm, seasonal spot perfect for sharing stories, activities for a Thanksgiving table, and a morning spent building easy thanksgiving crafts for kids. The best part is opening the jar later to read all the heartfelt messages. Feel that cozy, thankful glow every time you look at it.
8. Sew a Simple Felt Fabric Turkey Finger Puppet
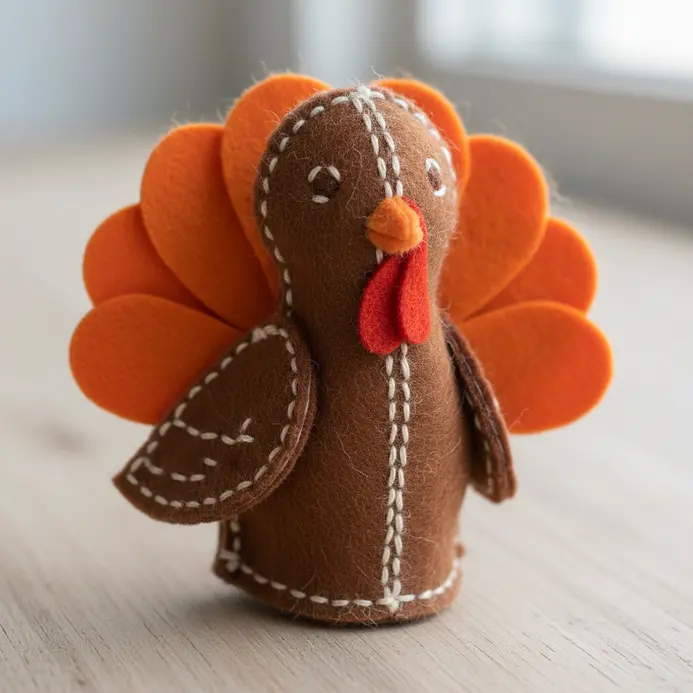
Image Source Who would have thought a little felt turkey could bring so much imaginative play to the holiday table? This one is a personal favorite because felt is so forgiving. You cut two simple body shapes, add a colorful stack of felt feathers to the back, and stitch on a funny face. Then you sew the front and back together, leaving the bottom open for a little finger to pop right in. It sounds detailed, but it all comes together in under an hour. I love that kids help pick the feather colors and watch their puppet take shape. The best part is seeing them play with it afterward. Trust me, the look of pride on their face after finishing easy thanksgiving crafts for kids is the real payoff, especially when they see their thanksgiving wreath come together.
9. Paint a Rock Turkey Table Centerpiece

Image Source Ever wondered how to make a centerpiece that looks like it came from a craft store? This rock turkey is your answer. You start by painting one larger rock brown for the body and a smaller one for the head, making it a fun and easy project. Then, paint several flat rocks in autumnal colors like red and gold to become the tail feathers. Once everything is dry, the real fun begins. Use a crayon to add details to your craft. strong adhesive to assemble your turkey, adding the painted facial features last. I love how this uses natural materials for a rustic, festive feel when planning easy thanksgiving crafts for kids. It is a wonderful way to add a personal touch to your holiday decor and can be enhanced with free thanksgiving printables. For more hands-on fun with simple materials, try these creative popsicle stick crafts. You will feel so proud when your unique creation sits on the Thanksgiving table.
10. Build a Button Mosaic Turkey Craft Plaque
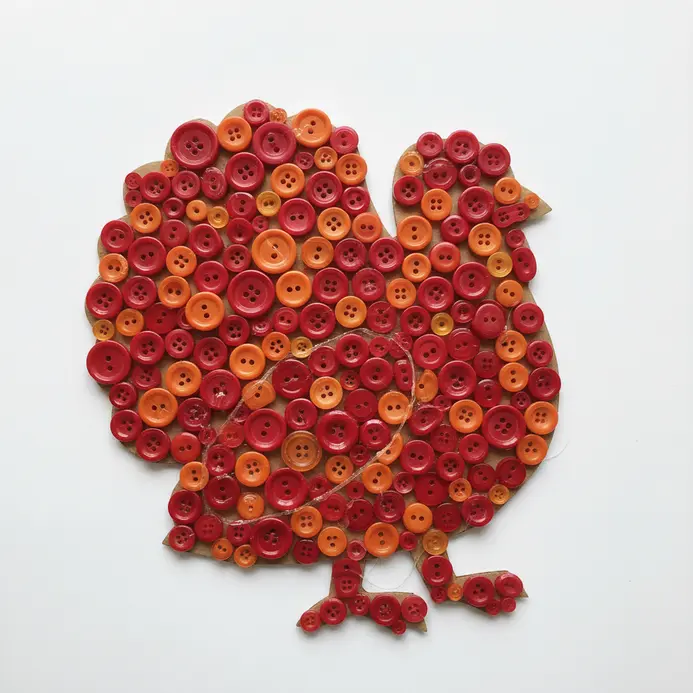
Image Source Who would have thought a box of old buttons could create something so festive? This project is a textural dream, turning hundreds of mismatched buttons into a colorful turkey that practically begs to be displayed. It works because it combines creative sorting with the pure satisfaction of completing easy thanksgiving crafts for kids as a family. You start by sketching your turkey outline on a wooden plaque or sturdy cardboard base. Then, the real fun begins. Sort your buttons into piles of warm fall colors and start gluing them down, using larger ones for the body and filling in with smaller ones to create a rich, mosaic-like texture. I love how arranging the buttons in a fan shape for the tail feathers instantly makes it look realistic. Your kids will adore the process, and you will end up with a unique piece of decor. fun suncatcher crafts for kids.
11. Create a Coffee Filter Rainbow Feather Turkey
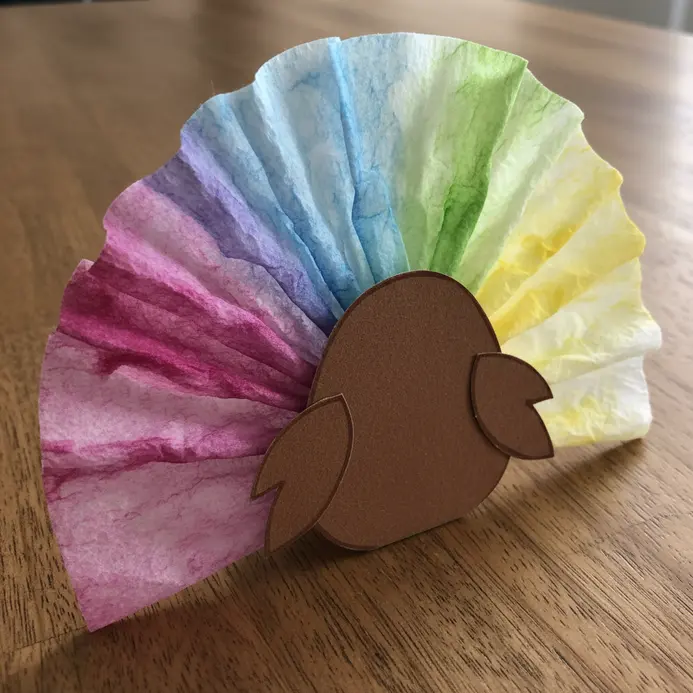
Image Source Ever wondered how to get that gorgeous watercolor look without any paint? This is my favorite part. You will color round coffee filters with printable coloring pages. washable markers in rainbow stripes, then give them a light mist from a spray bottle. Watch the magic as the colors blend and swirl. It is a fantastic sensory moment for little ones. Once your colorful feathers are dry, you glue them behind a simple paper plate turkey body. Add googly eyes and a paper beak, and your vibrant bird is ready. I love how this project turns everyday materials into a stunning centerpiece that rivals popular easy thanksgiving crafts for kids. Feel proud of your festive creation.
12. Make a Paper Bag Turkey Hand Puppet
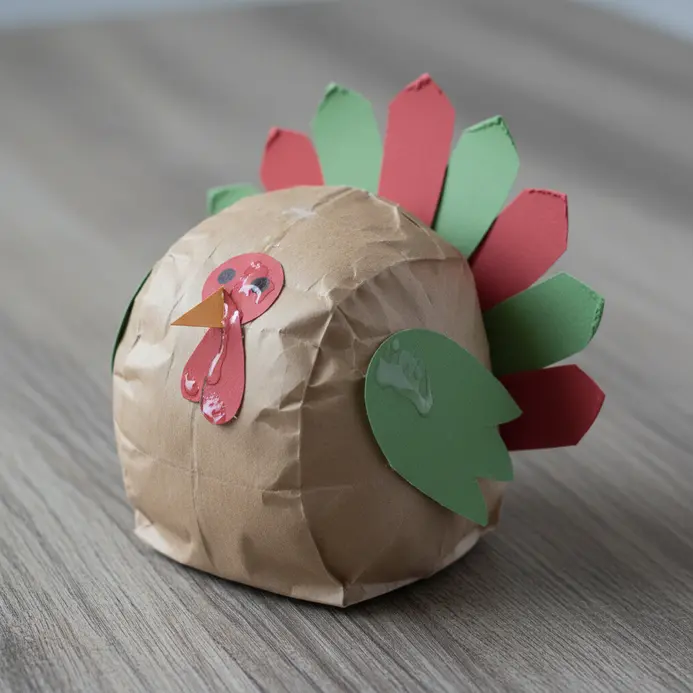
Image Source This one is a total classic for a reason. Ever wonder how to keep little hands busy on a cozy afternoon? Start with a brown paper lunch bag flat on the table, making sure the bottom flap is facing up. That flap becomes your turkey’s head. Glue on googly eyes, a little orange beak, and a red wattle. Now for the fun part. Cut out feather shapes from all your brightest colored paper. Glue them in a fan on the back of the bag for a fabulous tail. Isn’t it satisfying to see it come together? Your child gets a custom puppet for imaginative play, and you get a sweet keepsake. For another simple project that uses minimal supplies, check out these simple rock painting ideas.
13. Wrap Yarn Around Cardboard Turkey Wings
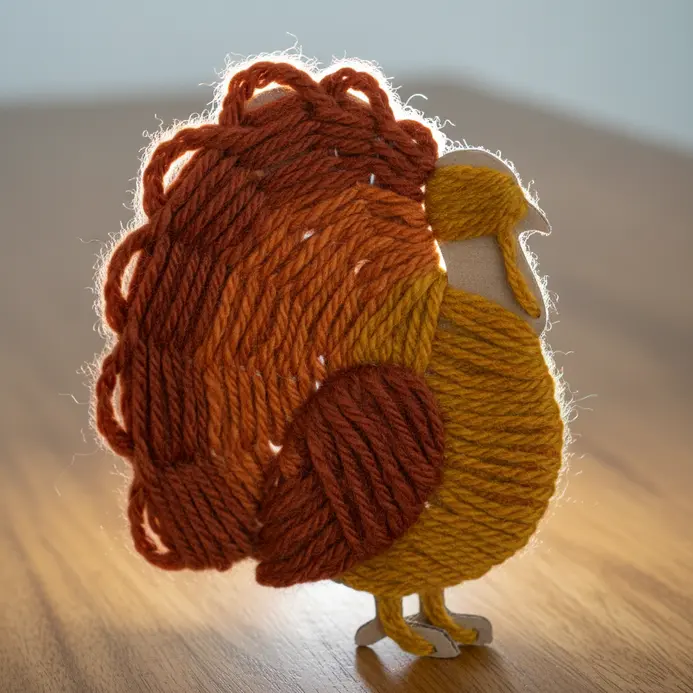
Image Source This one always surprises parents. It looks intricate, but the process is wonderfully simple and repetitive, perfect for little hands. You start by drawing two identical wing shapes onto sturdy cardboard and cutting them out. Then, you simply secure the end of your yarn and wrap it around and around until the cardboard is completely covered. I love how this creates a soft, textured wing that feels as good as it looks. The key is to keep your wraps tight and even to avoid any gaps. Isn’t it satisfying to see the plain cardboard transform under layers of colorful yarn? For a full turkey project, these wings pair perfectly with a paper roll body. This tactile addition is a fantastic way to add a handmade touch to your holiday.
14. Assemble a Popsicle Stick Turkey Wall Hanging
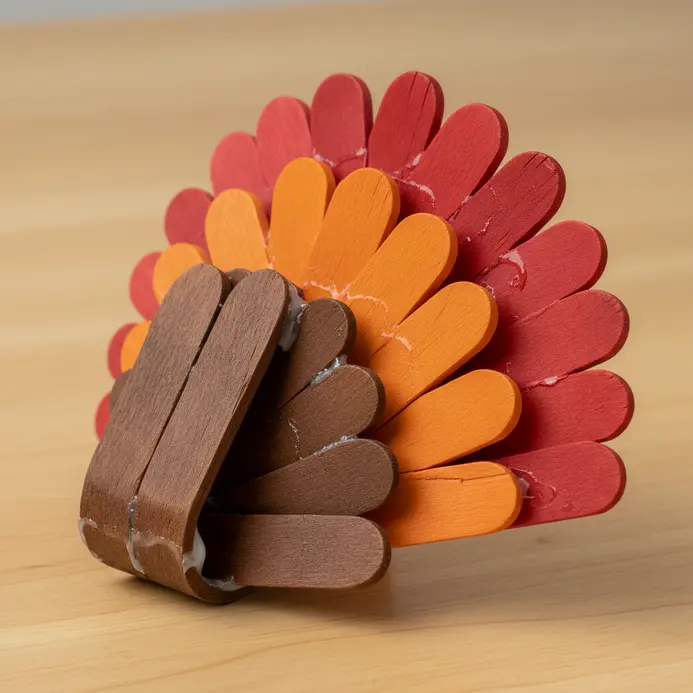
Image Source This one is a classic that always looks so impressive on the wall. Trust me, the secret is in the perpendicular support sticks you glue to the back of the body. Lay three or four brown sticks side by side, then attach two more sticks across them, one near the top and one near the bottom. This creates a super sturdy base for all those colorful feathers. Once your painted sticks are completely dry, you can start gluing the tail. Fan out your rainbow of colored sticks and attach them to the back of that sturdy body frame. Isn’t it satisfying to see the shape come together? Finally, add the personality with googly eyes and a little orange beak. You will love how charming your finished turkey looks hanging up for the season.
15. Form a Salt Dough Handprint Turkey Ornament
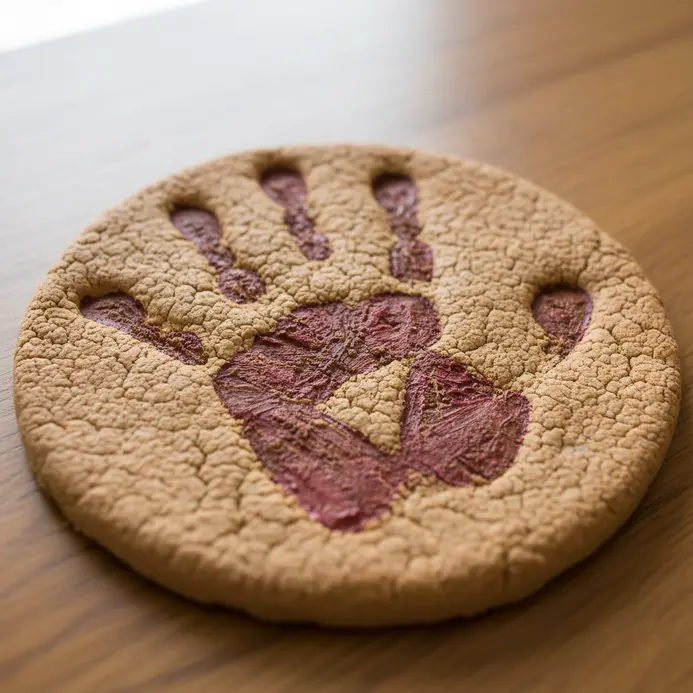
Image Source Ever wanted a sweet, tangible memory of your child’s hand at this age? This salt dough ornament is your answer. You mix a simple dough of flour, salt, and water, then roll it out and press a little hand in. After a low and slow bake, you paint the thumb as the turkey’s head and the fingers as colorful feathers. I love this one because it turns a simple activity into a cherished keepsake you will hang for years. The key to avoiding cracks is baking at a low temperature. Let it dry completely for several hours. For decorating, let the kids go wild with bright acrylic paints. Once dry, seal everything with a clear acrylic spray to protect their artwork. This project is a wonderful family activity that captures a moment in time. creative flower pot painting.
Displaying Handcrafted Decor On Thanksgiving Tables
A simple ring of double-sided tape on the back of a clothespin turkey or a salt dough ornament makes it secure enough to perch on a napkin ring or lean against a water glass without toppling over. You will notice these handmade pieces become the heart of your table setting, especially when you use that traditional harvest color palette to tie everything together. Cluster a few painted pumpkins and leaf rubbings around a central candle for a charming, rustic centerpiece that the kids will point to with pride. For place setting decorations, a name tag clipped on with a decorated clothespin or a paper plate wreath laid over the dinner plate makes each seat feel special. The good news is, these functional items are conversation starters that celebrate your family creative effort and the gratitude visual you built together. It turns your dining room into a gallery of their accomplishment.
Conclusion
The best part of these projects is not the cute turkey sitting on your table, but the time spent together making it. Each one becomes a small story about your holiday, a moment of focus and laughter. My advice is to pick the one that uses supplies you already have handy, so you start right away without a special trip to the store. The goal is the making itself, not perfection, which is exactly why easy thanksgiving crafts for kids create lasting memories. I hope your holiday is filled with the kind of simple, happy creating that everyone remembers.
FAQs
Q: What are some easy thanksgiving crafts for kids that are simple to make and fun to make?
A: Easy thanksgiving crafts for kids include simple projects like turkey handprint art, paper cup turkeys, tissue paper pumpkins, and egg carton turkey craft. These fall crafts use basic supplies, are fun and easy, and work for kids of all ages — preschoolers to older kids — making them perfect for Thanksgiving activities and keeping kids entertained.
Q: Are there free printable or free template options for fun thanksgiving activities?
A: Yes, many websites offer a free printable or free turkey template for crafts such as printable thanksgiving place cards, coloring sheets, and cut-and-paste turkeys. Printable thanksgiving templates make it easy for younger kids and elementary kids to follow along and help adults set up cute thanksgiving crafts quickly.
Q: What are cute thanksgiving crafts suitable for preschoolers to make?
A: Cute thanksgiving crafts for preschoolers include tissue paper pumpkins, turkey handprint art, and simple toilet paper roll turkeys. These preschool-friendly projects use large pieces and glue, are easy and fun, and are ideal for crafts for preschoolers and elementary kids during Thanksgiving celebrations or turkey day.
Q: How can older kids get involved with more advanced fall crafts and thanksgiving craft ideas for kids?
A: Older kids can take on projects like origami turkey, detailed centerpiece craft ideas, and handmade turkey place cards with decorative touches. They can help design a beautiful thanksgiving table on thanksgiving using printable place settings, paint techniques, and mixed-media elements that are still simple to make but more engaging for older children and teens.
Q: Can I find fun and easy thanksgiving craft ideas that are good for a classroom or a thanksgiving feast prep?
A: Absolutely — look for fun and easy crafts like egg carton turkey craft, paper cup turkeys, and printable thanksgiving coloring page activities. These are great for group settings, keep kids entertained during holiday prep, and can double as decorations or turkey treats for the thanksgiving feast.


