


What makes certain easy Madhubani drawing ideas so effective for newcomers is their reliance on repetitive geometric patterns rather than freehand realism. Equipped with basic tools like fine-tip acrylic markers and heavy sketching paper, anyone maps out beautiful geometric frameworks with ease. Maintaining a methodical focus on dot spacing and repetitive parallel lines naturally eliminates messy voids. We will break down the entire process into actionable steps that emphasize crisp double borders and systematic internal zone filling.
Essential Drafting Supplies for Mithila Art
Evaluating the right physical tools directly impacts which easy Madhubani drawing ideas remain manageable for new students. Choose a textured drawing paper or cartridge paper for its tooth, which holds pigment securely and mimics traditional plaster surfaces. For outlining, grab a 0.5mm fineliner to achieve the definitive, clean black borders that define this folk tradition. Fill patterns and solid color areas require opaque paints to cover underlying pencil guides effectively. Watercolor cakes or acrylic gouache provide a matte, vibrant finish that resembles natural dyes without requiring advanced mixing techniques. Keep a dedicated set of small, pointed brushes for detailed pattern work inside confined shapes.
Selecting Motifs and Traditional Pattern Styles
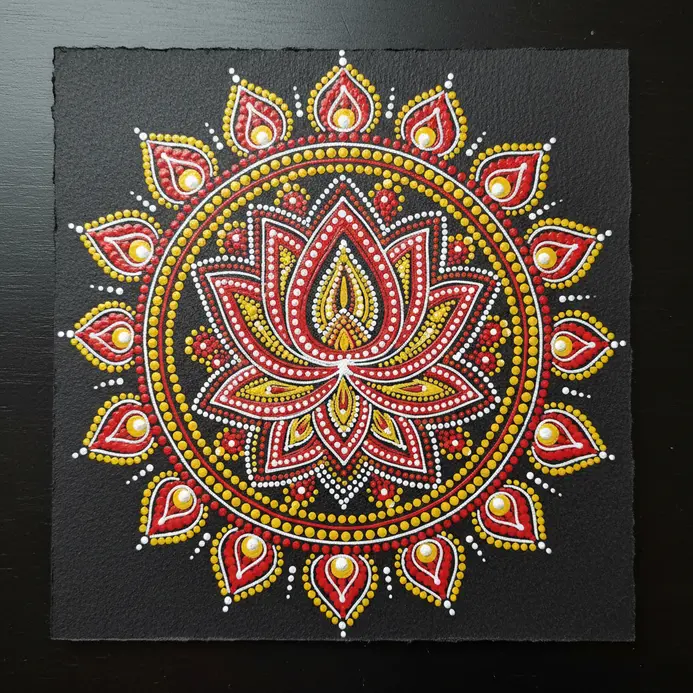
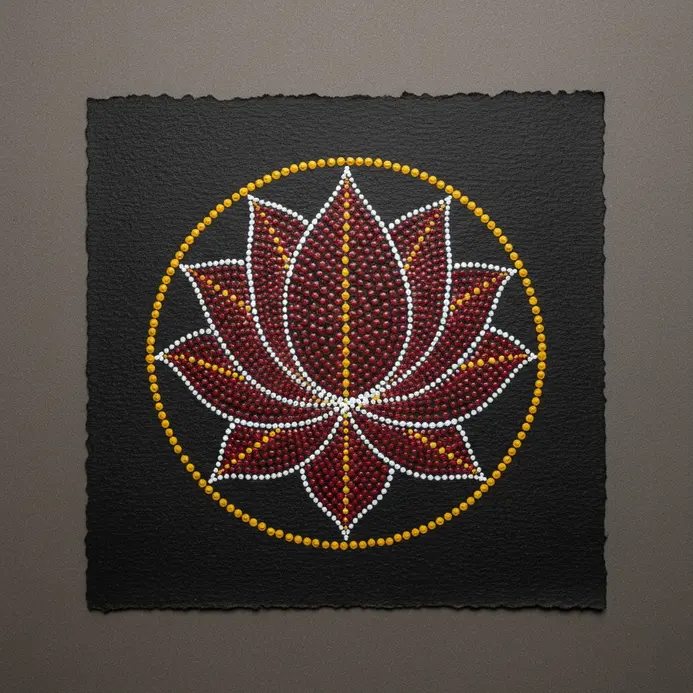
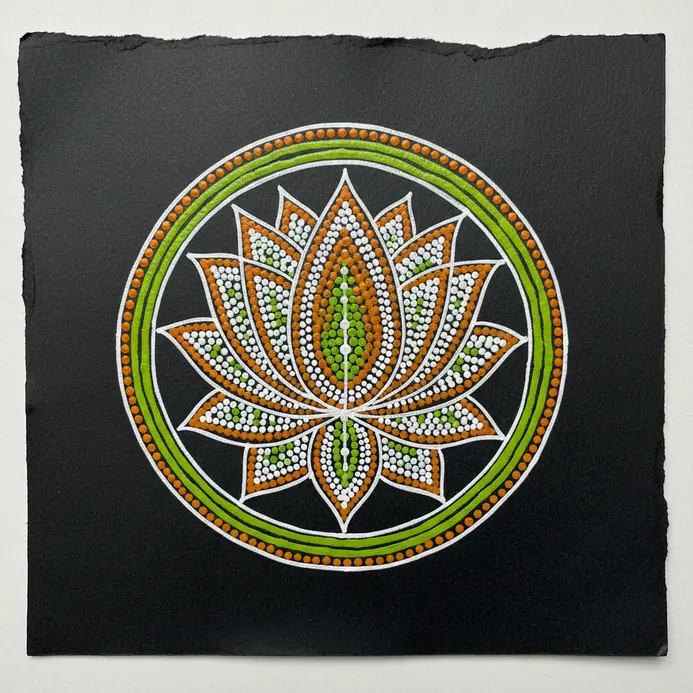
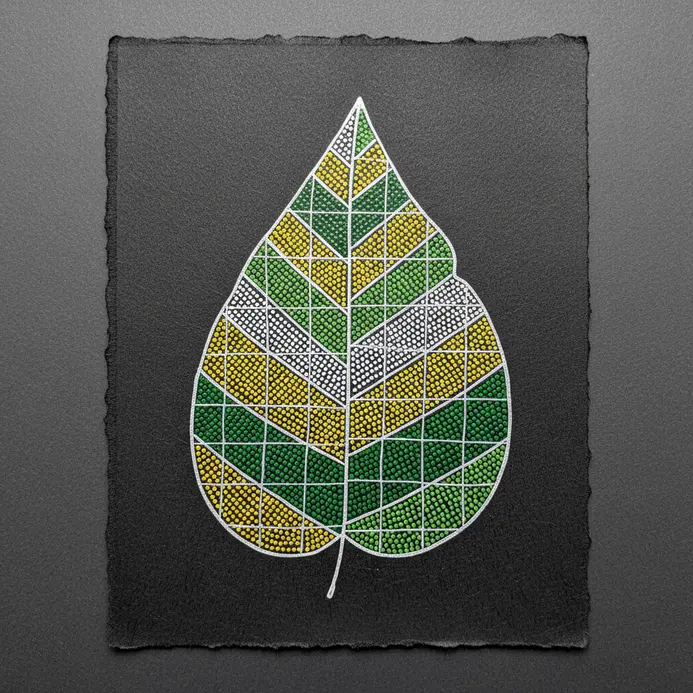
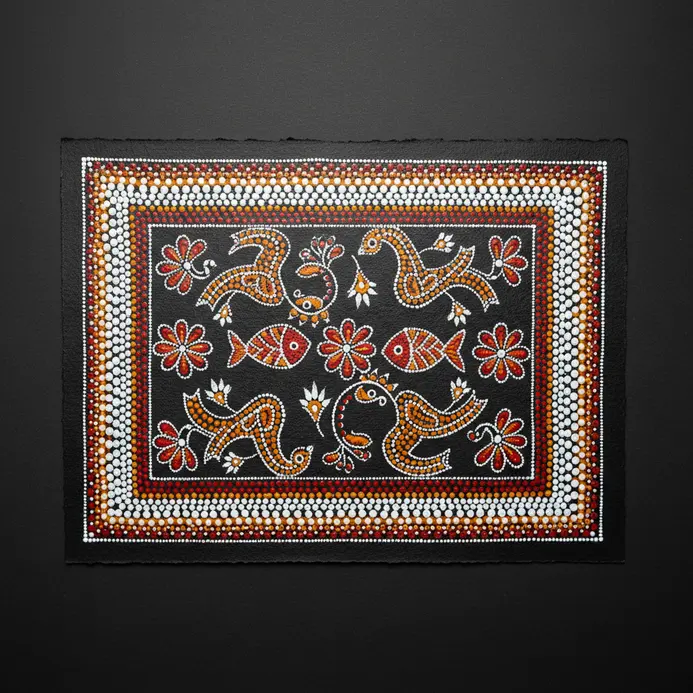
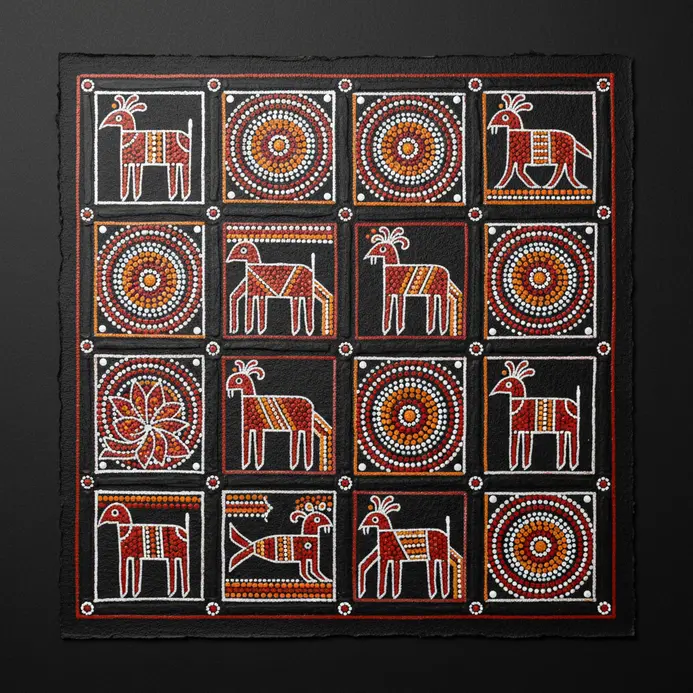
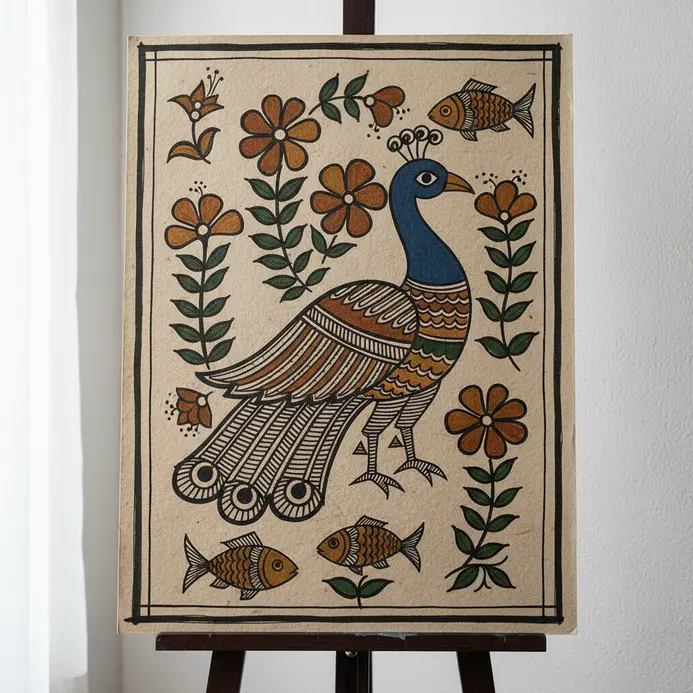
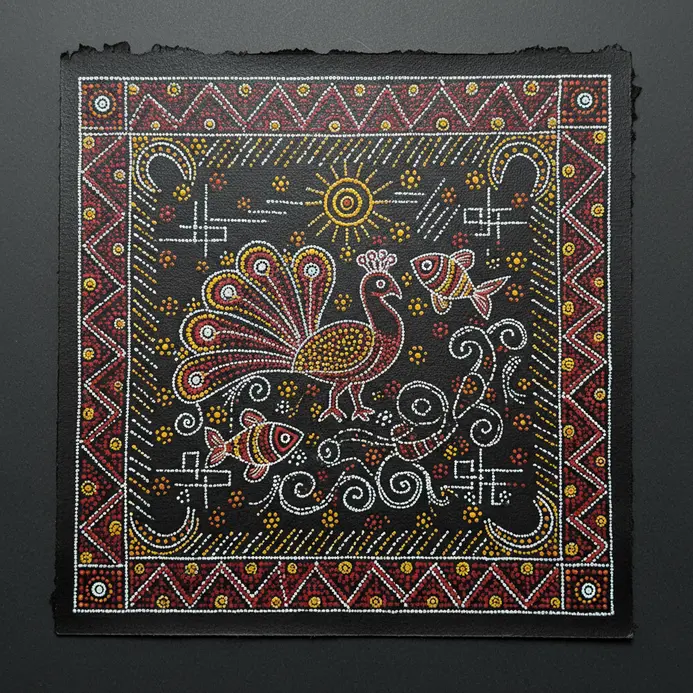
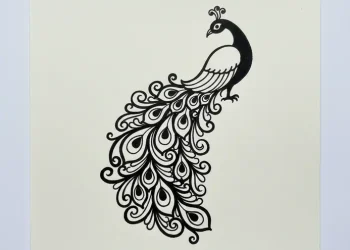
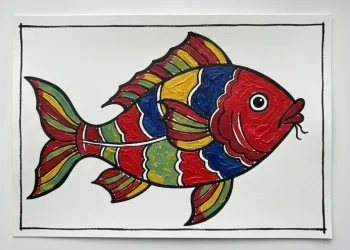
Beginners reviewing easy Madhubani drawing ideas often struggle to balance visual impact with manageable complexity during their first project. Start with a single, large-scale symbol like a fish, lotus, or peacock to establish a clear central form. Decide between the two core stylistic approaches before committing your pen to the page. The kachni line-work style focuses on filling the outlined form with dense patterns of parallel lines and cross-hatching, which rewards meticulous planning. The bharni filled style relies on solid color blocks as a base, decorated later with simpler linear details. Beginners find the line-work approach more forgiving because it prioritizes control over perfect flat color application.
1. Sketch the Simple Frame Border Guidelines
Viewing your border as a quiet stage ensures every easy Madhubani drawing ideas maintains proper structural balance. Begin by lightly marking the outer boundaries to establish a safe zone for your central figures. Measure outward from the center points using a transparent drafting ruler to connect matching marks with light graphite lines. This geometric precision creates a balanced foundation that prevents a cramped visual appearance. The primary goal requires maintaining uniform line weight and perfectly even margins across all four sides. A single-line border works exceptionally well for beginners because it stays straightforward and directs attention inward. For additional reference material, review these examples of line drawing art to understand how clean boundaries establish composition.
2. Draw the Primary Subject Outline: Map Your Focus Area
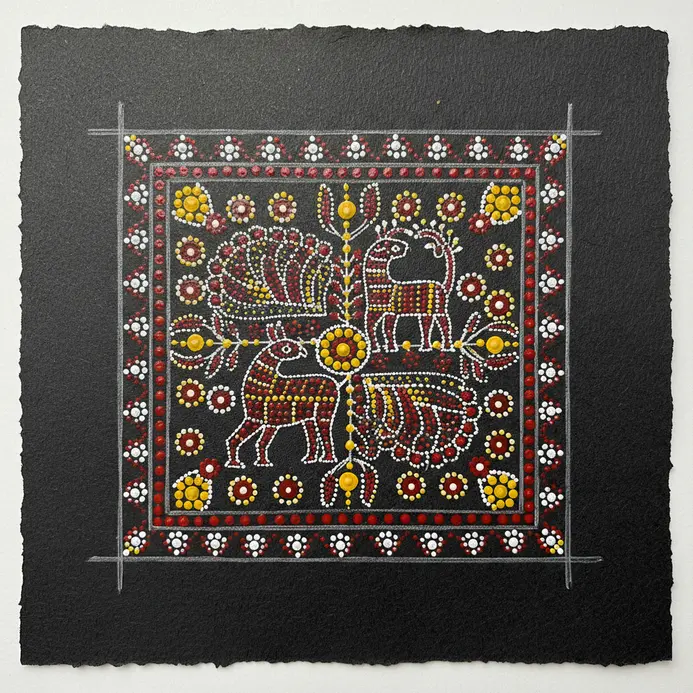
Translating project goals into a visual map requires focusing on one core concept at a time. Among all easy Madhubani drawing ideas, those centered on a single bold silhouette consistently produce the most satisfying beginner results. Your primary outline acts as the architectural blueprint, transforming abstract concepts into recognizable symbolic motifs. Drafting a branching tree silhouette or a large lotus establishes an anchor point for supporting elements. Place secondary symbols like peacocks or fish along the main branches or outer petals to create natural flow. This mapping process eliminates disjointed layouts and organizes your workspace efficiently.
Structuring your canvas with intentional negative space prevents awkward gaps between major elements. Authentic compositions demand thoughtful placement since every empty zone receives decorative treatment later. Maintaining consistent spacing around your anchor point establishes professional proportions from the start. Planning your layout carefully ensures each element receives proper visual weight and harmonious distribution. For further structural guidance, review simple drawings to practice to master proportion mapping.
3. Add the Secondary Double Outline for Authentic Folk Style
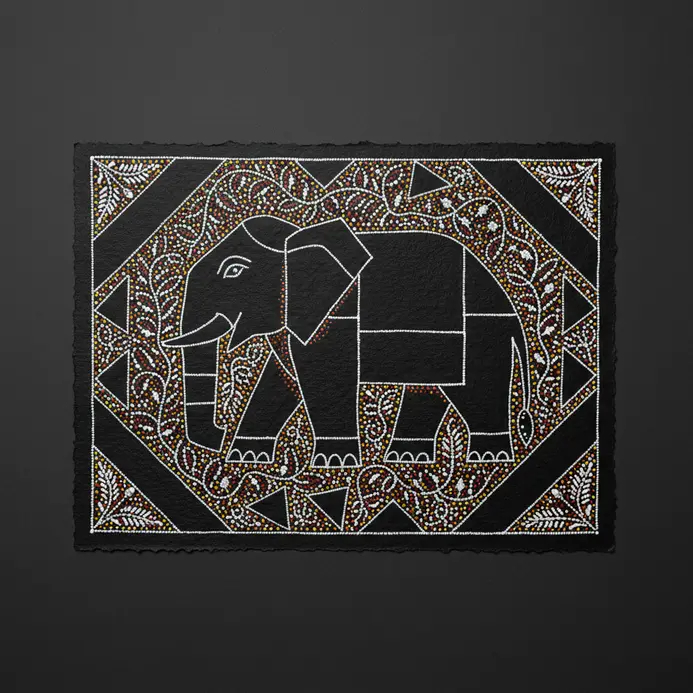
Achieving authentic texture requires implementing a consistent secondary border technique. This method involves drawing two parallel lines around your main shape, positioning one inside the edge and one outside the edge. The resulting channel creates dedicated space for pattern insertion, adding immediate visual depth. Establishing this framework transforms flat silhouettes into layered, traditional compositions. Many easy Madhubani drawing ideas depend on this double-line technique to achieve their characteristic hand-drawn charm. Applying a light graphite underlayer before tracing ensures precise line placement without permanent mistakes.
Reinforcing your primary lines with a confident ink pass guarantees durability and sharp contrast. Use a fine-tipped marker to follow your pencil guides with steady hand pressure. Maintaining equal spacing between both border lines preserves structural harmony and prevents lopsided framing. This dual-line approach solves flatness issues while introducing the characteristic hand-drawn charm associated with folk traditions. Practicing consistent strokes across curved edges builds essential pen control for future projects.
4. Divide Your Subject into Distinct Filling Zones
Breaking a complex figure into smaller compartments transforms an intimidating canvas into manageable sections. This step focuses on drawing an internal grid that partitions your main outline into distinct decorative areas. Think of these divisions like structural compartments on a bird wing or a reptile scale. Each isolated filling zone becomes a dedicated workspace for independent pattern application. Mapping out these boundaries early prevents visual overlap and maintains clean separation.
Allowing the natural curvature of your subject to dictate partition placement ensures organic flow. Dividing large petals or broad wings into smaller sections creates a logical workflow for detailed pen work. This compartmentalized strategy eliminates overwhelming decision fatigue during long drawing sessions. Follow your primary contours carefully to maintain symmetry while establishing new internal boundaries. For foundational grid practice, try simple drawings to practice before attempting full compositions.
5. Detail the Internal Facial Features: Define the Character
Constructing facial features transforms a geometric silhouette into a recognizable cultural figure. When exploring easy Madhubani drawing ideas that include faces, traditional iconography relies on symbolic mapping rather than realistic anatomical rendering. The eyes receive prominent sizing and curve into a distinct Meenakshi fish-eye shape to convey spiritual awareness. A single sharp line extends downward from the forehead region to establish the nose profile without shading. Keeping the mouth formed by two gentle curves maintains traditional simplicity and elegance.
Adding the sacred central forehead mark completes the facial structure according to classic conventions. Beginners benefit from mastering the side profile first, connecting the nose line directly to an arched eyebrow. This single structural connection instantly establishes traditional styling without requiring complex perspective work. Practicing these simplified facial constructs builds muscle memory for repetitive character placement. Maintaining consistent proportions across multiple figures strengthens overall compositional unity and professional presentation.
6. Decorate the Outer Border Pattern with Geometric Shapes
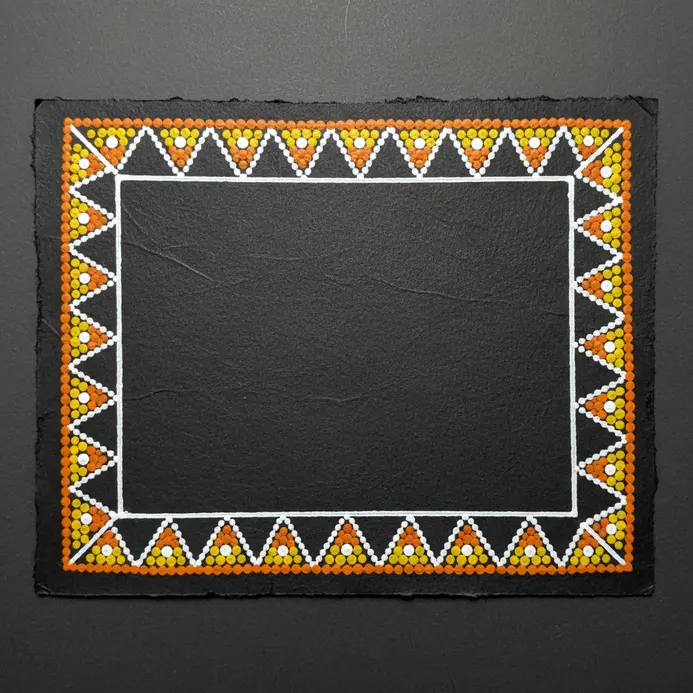
Framing your composition with structured geometry delivers immediate visual polish and structural definition. Start by using a light pencil and ruler to establish parallel boundary lines that create a clean working channel. Measure the exact center of each side before repeating shapes to guarantee corner alignment without awkward gaps. Selecting a single repeating shape like a triangle or diamond establishes predictable rhythm and guides viewer attention. Maintaining uniform sizing across all repetitions reinforces structural integrity and prevents visual clutter.
Executing these geometric repetitions with steady pen pressure produces crisp edges and consistent line weight. Working systematically along one edge at a time prevents hand smudges and maintains ink clarity. Checking alignment at each stage allows for minor adjustments before permanent ink application. Simplifying your border design ensures the central artwork remains the primary visual focal point. Reviewing basic geometric frameworks provides additional practice for developing consistent spacing skills.
7. Practice Parallel Line Hatching Inside the Main Body
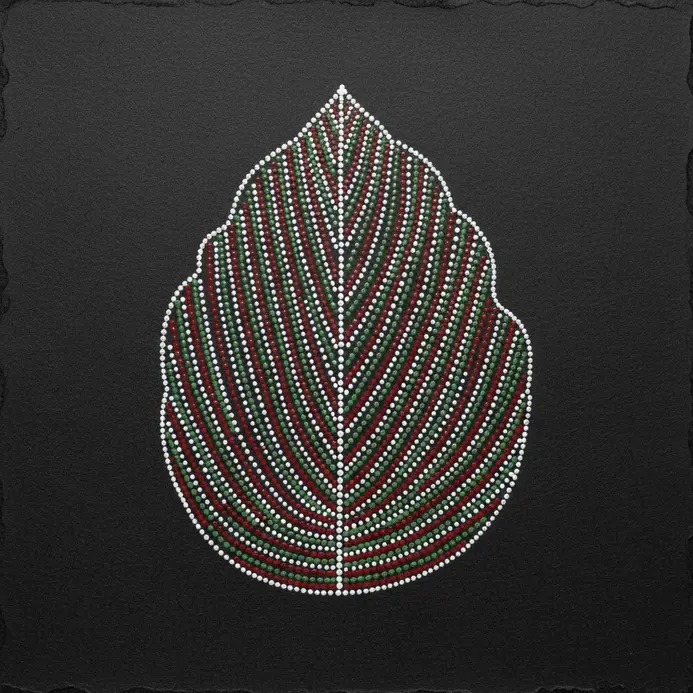
Mastering parallel line placement converts flat silhouettes into dimensional, textured compositions. This fundamental technique builds value gradients by adjusting spacing across confined drawing areas. You control shading intensity by modifying the proximity of your lines. Packing marks tightly together generates deep shadows, while widening spacing creates gentle highlights. Adjusting nib pressure and selecting appropriate pen grades further refines tonal variation.
Applying controlled pressure during repetitive strokes prevents hand fatigue and maintains uniform line thickness. Practicing this method on basic geometric shapes builds essential pen control before tackling organic curves. Understanding how directional lines follow surface contours adds realistic depth without traditional shading. This repetitive motion trains muscle memory for executing complex fills efficiently. Developing consistent hatching skills directly improves overall drawing precision and structural confidence.
8. Apply Cross Hatching to Zones: Build Deep Visual Texture
Layering intersecting line sets generates rich surface detail that separates adjacent visual zones. Many easy Madhubani drawing ideas achieve their stunning texture through this evolution of traditional fine-line work, which fills empty compartments with dynamic rhythmic energy. Enclose your target compartment behind a bold double-line border before beginning your intersecting passes. Draw your initial parallel set, then cross it with a second directional pass at a controlled angle. Prioritizing dense pattern coverage over realistic shading maintains traditional stylistic integrity.
Varying intersection angles between adjacent zones prevents visual monotony and distinguishes individual textures. Applying heavy contrast between intersecting layers creates dynamic surface tension that guides the viewer eye. Always employ an ultra-fine nib pen to maintain sharp intersections and prevent ink bleeding. Controlling stroke direction ensures clean overlapping without muddied line work. Practicing cross-layering techniques develops advanced pen control and spatial awareness.
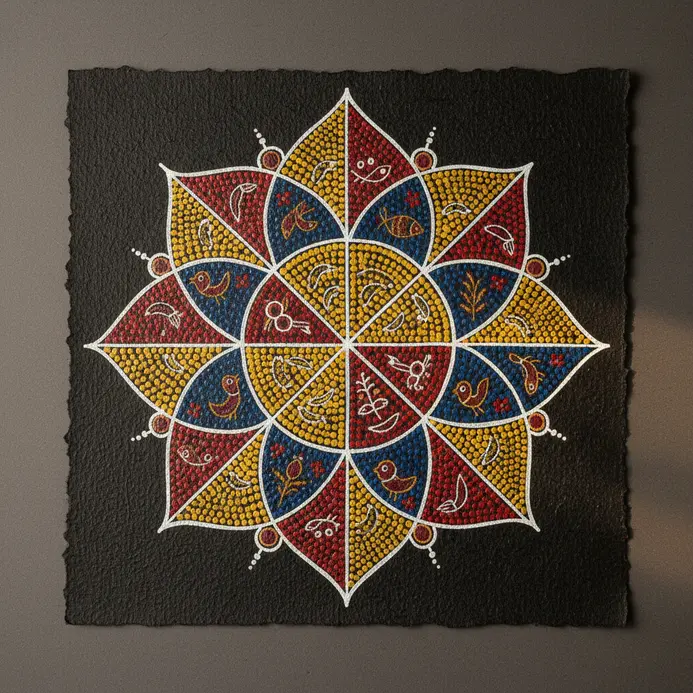
9. Add Repetitive Circular Dot Clusters for Rhythmic Balance
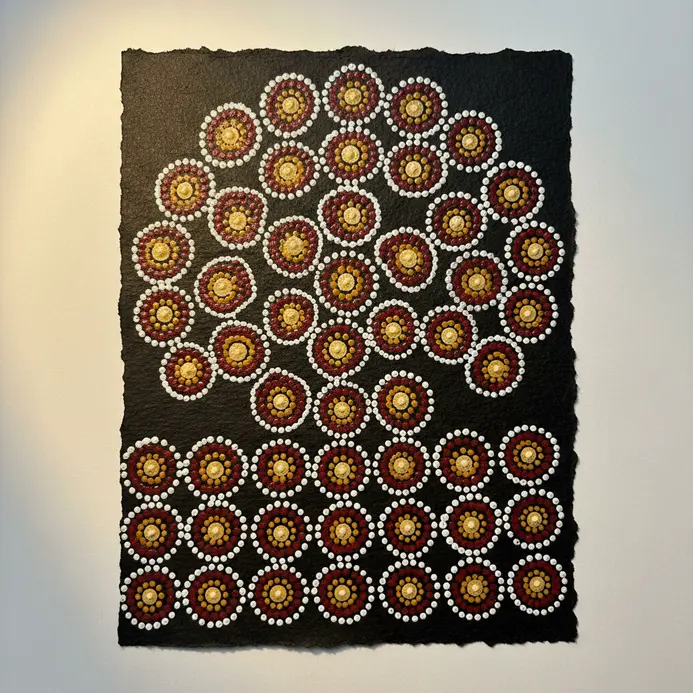
Organizing individual marks into grouped formations eliminates the mechanical appearance of perfect grids. Designing a master dot cluster establishes a repeating unit that drives natural composition flow. Assemble three to seven individual marks into a single organic grouping, then repeat this exact cluster across your designated space. This grouping strategy creates visual beats that unify scattered elements into cohesive rhythmic patterns. Maintaining slight size variation between repetitions preserves hand-drawn authenticity.
Placing these grouped formations along structural pathways guides the viewer attention smoothly across the canvas. Arranging clusters in symmetrical alignments reinforces formal balance, while offset placements create dynamic movement. Avoiding rigid mechanical spacing preserves organic energy throughout the composition. Introducing subtle size fluctuations between adjacent groups adds depth without disrupting structural flow. Exploring additional decorative frameworks provides supplementary techniques for developing rhythmic balance further. For expanded pattern references, see beautiful mandala drawing ideas.
10. Create Chevron Pattern Filling Lines Step by Step
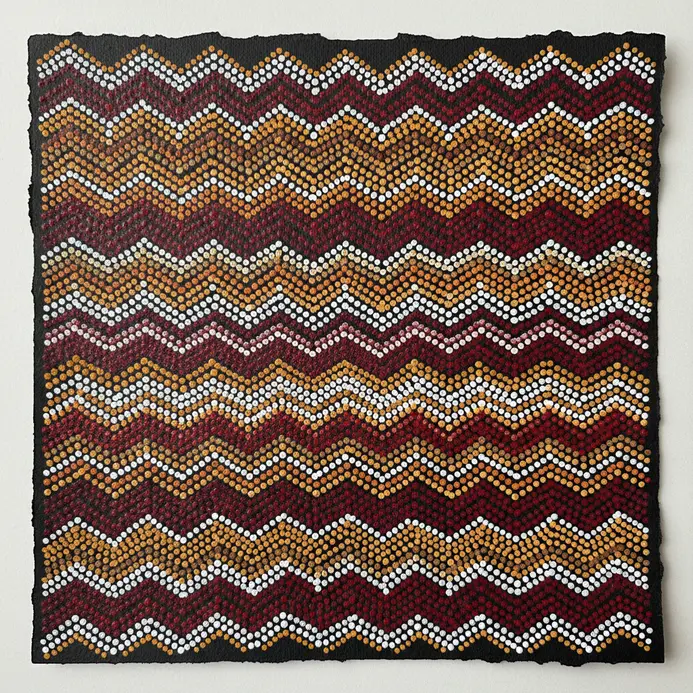
Stacking repeating V-shapes generates flowing directional energy that fills empty compartments efficiently. When trying easy Madhubani drawing ideas that incorporate chevron fills, selecting a fine-liner pigment pen ensures consistent ink delivery during rapid directional shifts. Placing light pencil anchor points at regular intervals guides your freehand V-formation without requiring rigid straightedges. Maintaining identical angles across repeating units preserves structural uniformity and professional presentation. Engaging your forearm for sweeping strokes delivers smoother motion compared to isolated finger movements.
Executing freehand zigzags builds essential pen control while maintaining organic stylistic charm. Keeping each vertex aligned vertically prevents drifting and maintains clean horizontal bands. Doubling the line weight on specific rows introduces visual hierarchy without disrupting overall balance. Practicing controlled directional changes strengthens wrist flexibility and improves long drawing sessions. This methodical approach converts empty negative space into active, engaging surface patterns.
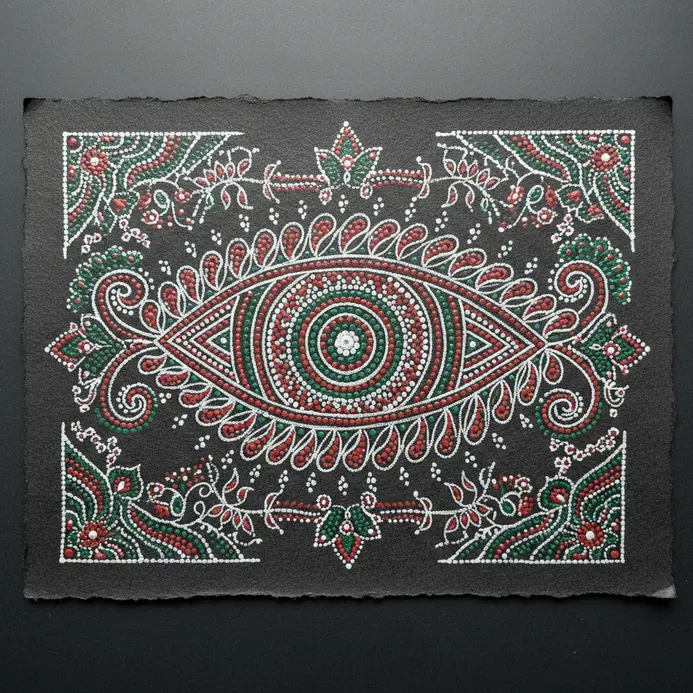
11. Draw Scale Shape Internal Motifs: Enhance Curve Elements
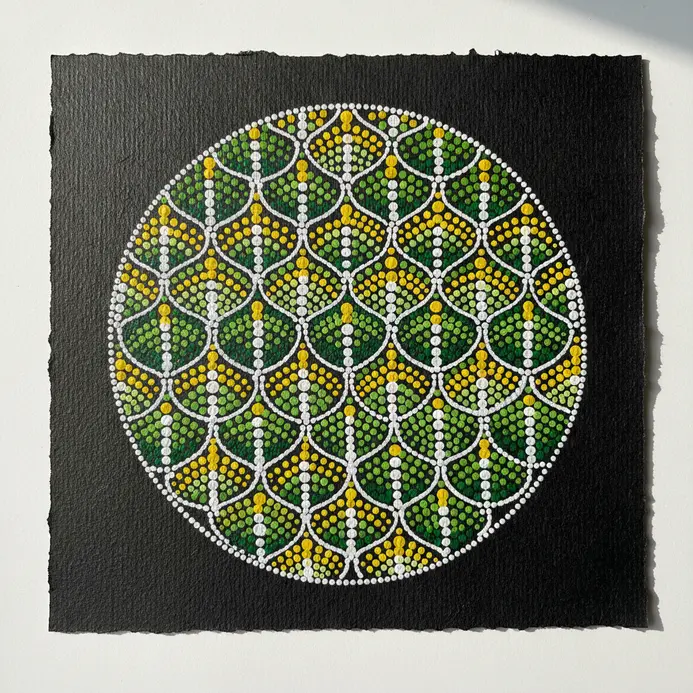
Transforming static repeating arcs into flowing organic forms elevates basic compartmental fills. Replacing standard arcs with a graceful swelling curve element introduces dynamic motion to rigid grids. Inserting a parallel companion line inside each curve generates a ribbon effect that simulates natural texture. Varying line thickness between ascent and descent mimics hand-drawn brushwork without requiring traditional paint. Maintaining consistent interlocking alignment prevents overlapping chaos while encouraging fluid transitions.
Limiting enhancements to one or two decorative variations per repetition preserves structural elegance. Adding terminal spirals to curve endpoints creates directional flow that guides the viewer gaze. Controlling repetition density prevents visual clutter and maintains clear structural boundaries. Practicing fluid transitions between interconnected scales builds essential line control. This refined approach generates sophisticated surface complexity while maintaining accessible execution techniques.
12. Sketch Uniform Leaf Pattern Fills Across Wide Areas
Establishing a light pencil framework converts large border areas into organized planting grids. Start with an H grade graphite pencil to lay down structural guide lines without heavy surface pressure. Sketching freehand sweeping curves establishes natural vine pathways for attaching repeated foliage shapes. Alternating placement along opposite guide lines creates balanced organic rhythm while preventing clumping. Inserting a central anchor dot before drawing each shape maintains uniform sizing across all repetitions.
Completing all primary outlines before applying secondary details enforces systematic workflow and consistent density. This structural approach eliminates uneven gaps and prevents rushed overlapping mistakes. Reviewing botanical references strengthens understanding of natural growth directions for accurate placement. Maintaining consistent spacing between anchor points guarantees professional presentation throughout wide zones. Practicing organic vine mapping improves layout confidence for expansive compositions. Review how to draw a tree for additional exercises in natural form consistency.
13. Infill Outer Edges With Small Contrast Dots
Applying contrasting edge detailing delivers immediate professional refinement to completed compositions. The most polished easy Madhubani drawing ideas always include this finishing step, positioning tiny ink marks along established borders to generate rhythmic lace effects that enhance traditional framing. Holding your pen vertically while applying light tapping pressure maintains identical sizing across extended sequences. Working systematically along one side at a time prevents fresh ink smudging and guarantees clean application. Following traditional spacing principles ensures balanced distribution without overcrowding primary focal points.
Using uniform dot sizing preserves visual harmony while establishing subtle texture gradients along perimeter edges. Positioning these marks tightly against double boundaries reinforces structural definition and prevents floating elements. Maintaining consistent pressure during repetitive tapping builds pen endurance and wrist stability. This finishing technique transforms basic outlines into polished presentation pieces ready for display. Applying careful edge detailing honors traditional philosophies regarding complete space utilization.
14. Create Background Filler Floral Elements: Eliminate Blank Space
Transforming empty background areas into decorative textures eliminates visual isolation around primary subjects. Populating negative space with stylized floral motifs establishes signature dense compositions characteristic of traditional folk art. Incorporating miniature almond leaves alongside dot chains and curved vines generates continuous visual rhythm. Scaling pattern sizes relative to available space maintains harmonious proportion without overwhelming central figures. This strategic filling approach grounds focal points while delivering polished professional presentation.
Maintaining clear size differentiation between foreground and background elements preserves depth perception. Applying smaller decorative fills in tight corners prevents crowded edges and maintains clean structural breathing room. Outlining primary figures completely before beginning background work prevents ink bleeding and overlapping mistakes. For additional line control exercises, review these examples of line drawing art to develop precision techniques. Systematic space elimination ensures complete canvas utilization and traditional stylistic compliance.
15. Incorporate Tiny Geometric Star Shapes Between Main Vines
Sprinkling pointed formations across narrow gaps introduces delicate surface sparkle without disrupting organic flow. Following the Bharni space rule requires utilizing every available negative compartment for decorative enhancement. Contrasting sharp geometric points against flowing vine lines generates engaging visual tension and dynamic movement. Applying consistent sizing across scattered elements maintains professional harmony and prevents visual distraction. Restricting variations to four-point and five-point formations ensures clean repetition and manageable execution.
Positioning these miniature accents organically throughout negative zones eliminates rigid mechanical appearance. Distributing placements unevenly preserves natural composition energy while maintaining balanced visual weight. Avoiding perfect grid alignment encourages dynamic viewer gaze movement across the entire canvas. Applying minimal pressure during pen strokes prevents accidental ink pooling on delicate intersections. This subtle detailing technique enhances overall richness while maintaining accessible beginner-friendly complexity.
16. Use Gentle Wavy Lines for Negative Space Flow
Filling background voids with flowing parallel curves generates continuous environmental rhythm instead of empty isolation. Traditional composition rarely leaves negative compartments completely vacant, opting instead for gentle wavy lines that simulate liquid movement. When practicing easy Madhubani drawing ideas, executing elongated S-curves around central anchors establishes directional flow that unifies scattered visual elements. Maintaining uniform spacing between parallel bands prevents visual clutter while supporting consistent background coverage. Stopping lines cleanly against primary subject edges preserves distinct separation between figure and environment.
Applying arm-driven strokes instead of wrist-only movements produces smoother continuous curves across extended distances. Establishing one confident anchor path before echoing identical formations guarantees proportional consistency throughout the zone. This flowing background technique resolves dead space by acting as unifying visual connective tissue. Maintaining steady pen pressure during sweeping arcs prevents uneven ink distribution and jagged breaks. Reviewing foundational curve exercises builds essential control for executing seamless environmental backgrounds effectively.
17. Finalize All Structural Double Outlines: Lock in the Grid
Reinforcing your invisible geometric framework transitions wobbly sketches into permanent professional layouts. Applying heavy ink pressure across established boundaries permanently locks structural columns into fixed positions. Maintaining consistent measurement increments across all outlines guarantees proportional uniformity throughout the entire composition. This structural reinforcement eliminates hesitation during detailed filling and establishes reliable spatial boundaries. Reviewing alignment from multiple viewing angles ensures balanced distribution before proceeding to permanent ink stages.
Applying identical double-line reinforcement across adjacent compartments maintains visual continuity and prevents irregular spacing discrepancies. This foundational discipline transfers directly to more complex projects requiring precise geometric planning. Mastering consistent boundary reinforcement develops professional spatial awareness essential for scalable artwork. Establishing fixed boundaries early provides secure reference points for executing complex internal patterns confidently. For advanced structural applications, study these realistic animal pencil drawings to observe boundary integration techniques.
18. Clean Errant Pencil Marks After Ink Cures Completely
Revealing clean finished lines requires complete pigment drying before attempting any surface correction. Allowing applied ink to cure for twenty-four hours prevents permanent smudges during graphite removal. Testing cleanup methods on a sacrifice swatch verifies eraser compatibility before touching finished artwork. Applying gentle lifting pressure with a kneaded eraser removes underlying graphite without damaging delicate paper fibers. Brushing loose debris away using a soft cleaning brush preserves surface cleanliness during the process.
Switching to a vinyl eraser only when necessary addresses stubborn graphite buildup while maintaining controlled application. Sketching original guidelines with a hard lead pencil using minimal pressure simplifies the entire cleanup phase. Rushing the drying stage permanently compromises finished presentations and damages applied ink layers. Exercising patience during the curing period guarantees vibrant pattern preservation and professional surface quality. Implementing proper graphite removal techniques delivers polished results suitable for framing and display.
19. Review All Inner Internal Pattern Density Carefully

Evaluating internal compartment filling ensures consistent texture distribution across completed structural boundaries. The most successful easy Madhubani drawing ideas result from careful density review, where traditional methodology requires replacing empty spaces with repetitive linear or dot formations instead of flat color application. Maintaining balanced internal pattern density guarantees visual harmony while honoring traditional abundance symbolism. Scanning the entire composition from multiple viewing distances reveals accidental gaps or overcrowded sections requiring adjustment. Aligning line spacing across adjacent compartments strengthens compositional unity and professional presentation standards.
Applying final visual inspections prevents rushed oversights and guarantees polished presentation quality across all structural zones. Adjusting inconsistent line weights before ink sets permanently eliminates potential aesthetic disruptions in final compositions. Reviewing spacing uniformity strengthens structural confidence and refines future pattern application techniques. For additional reference material examining structural balance, observe examples of line drawing art demonstrating effective pattern distribution strategies.
20. Enhance Dedicated Dark Areas With Ink: Add Immediate Contrast
Selecting specific shadow compartments for complete pigment saturation generates instant structural definition across finished compositions. Applying pure black ink establishes light-absorbing zones that pencil shading or translucent wash fails to deliver. Outlining shadow boundaries with precision nib application ensures sharp geometric separation before beginning fill procedures. Utilizing broader brush pens during flooding stages accelerates completion while maintaining uniform edge coverage. Maintaining strict adherence to planned shadow shapes prevents accidental bleeding into adjacent detailed patterns.
Employing controlled stippling edges around solid black compartments prevents harsh visual boundaries from disrupting surrounding flow. Thinking in shadow shapes instead of object outlines ensures realistic light interpretation and professional contrast balance. Adding deep black zones immediately grounds scattered bright elements and strengthens overall compositional weight. Avoiding random darkening preserves structural logic while highlighting intentional focal points effectively. Practicing shadow planning develops advanced value management skills essential for professional-level presentations.
21. Apply Final Finishing Touches to Outer Frame Edges
This is where your project transforms from a homemade craft into a professional-looking piece. The goal is to create crisp, seamless edges that feel smooth and look flawless under a finish. We use a rigid sanding block and work through grits to achieve this polished surface. Always start by inspecting your work under a low-angle light to spot any glue or dents. Carefully remove dried glue with a sharp chisel before you even touch sandpaper. Then, fill any gaps with a stainable wood filler and let it cure completely.
Why does this matter? Graduated sanding creates the perfect surface for paint or stain to adhere without blotches. A final tip is to lightly sand the sharp outer corners at a 45-degree angle. This eases the edge, preventing chips and making the frame comfortable to handle.
Preserving and Mounting Your Finished Folk Illustration
Applying protective surface coatings guarantees long-term pigment stability and prevents environmental deterioration over extended periods. Coating paper surfaces with thin matte acrylic varnish using wide application brushes shields work from ultraviolet exposure and moisture intrusion while preserving traditional non-glossy appearance. Allowing initial sealing layers to cure completely prevents premature brush strokes from disturbing fresh protective coatings. Displaying works using archival mounting tape on slightly larger backing boards prevents adhesive degradation and permits natural material expansion. Framing completed pieces behind ultraviolet-filtering glazing delivers additional environmental shielding that preserves vibrancy across decades of public display.
Conclusion
Returning to fundamental boundary structures maintains continuous skill progression and prevents technical stagnation across repeated practice sessions. You now possess a comprehensive collection of easy Madhubani drawing ideas to reference during upcoming studio sessions and weekend study periods. Always map primary silhouettes securely before advancing toward decorative dotting procedures or internal line hatching stages. Maintaining clean exterior boundaries prevents detailed inner compartments from appearing cluttered or visually disorganized.
Storing acrylic markers in horizontal orientation preserves consistent pigment flow during extended drawing periods. Selecting straightforward symmetrical subjects permits natural confidence expansion regarding rhythmic spacing and repetition control. Dedicate specific sketchbooks to motif tracking to monitor precision improvements and technique refinement throughout your artistic development. Review parallel line applications and dot clustering methodologies whenever pattern spacing requires immediate recalibration. With consistent practice, these easy Madhubani drawing ideas will become the foundation for increasingly ambitious folk art projects that showcase your growing mastery of this timeless tradition.
FAQs
Q: Do beginners need special brushes for this folk style?
A: Standard mechanical pencils combined with affordable fine-liner pens deliver sufficient structural control for initial pattern application. Modern archival ink markers provide reliable line consistency for beginners establishing foundational layout habits.
Q: How do artists prevent the intricate ink lines from smudging?
A: Allowing initial boundary lines to achieve full curing prevents wet pigment transfer during subsequent detailing stages. Executing directional strokes from central anchors toward outer edges eliminates hand contact with freshly applied ink zones.
Q: What makes certain easy Madhubani drawing ideas more suitable for complete beginners?
A: The most beginner-friendly compositions feature single centralized motifs with symmetrical designs, requiring only repetitive pattern fills rather than complex perspective work. Starting with a large lotus or fish silhouette allows new artists to focus on mastering line control and dot spacing before advancing to multi-element compositions.
Q: What paper thickness works best with heavy marker use?
A: Standard mixed media boards or heavy sketching sheets withstand dense pigment application without structural buckling or reverse-side bleeding. Smooth coated surfaces protect delicate nib tips during extended repetitive hatching sessions.
Q: Why do beginners struggle with the internal division step?
A: Rushing compartment generation without establishing measurement guidelines produces inconsistent spacing and overlapping pattern zones. Segmenting primary anchors into smaller isolated sections transforms chaotic filling into highly manageable sequential tasks.


