

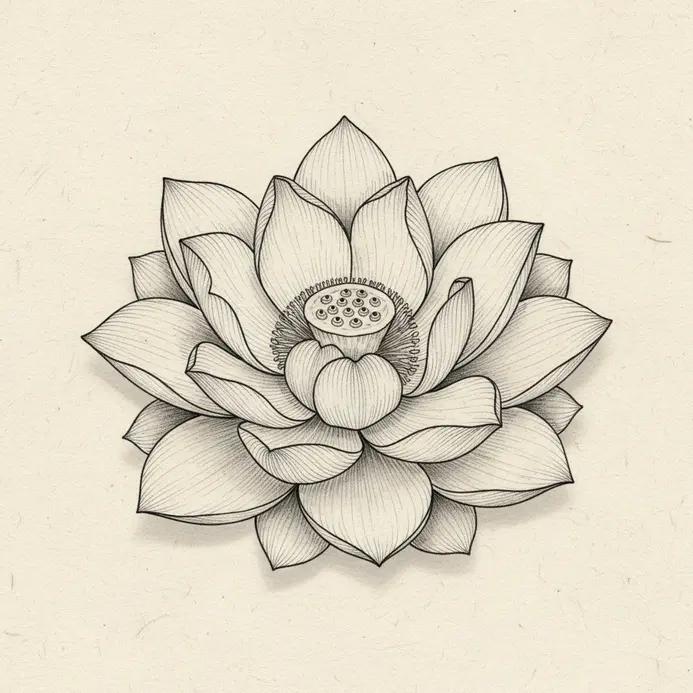


Anatomical Petal Geometry for Clearer Outlines
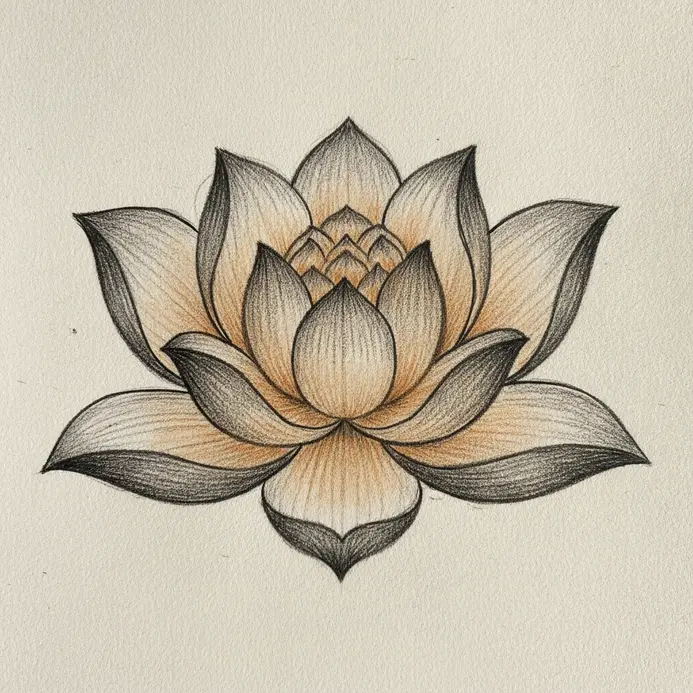
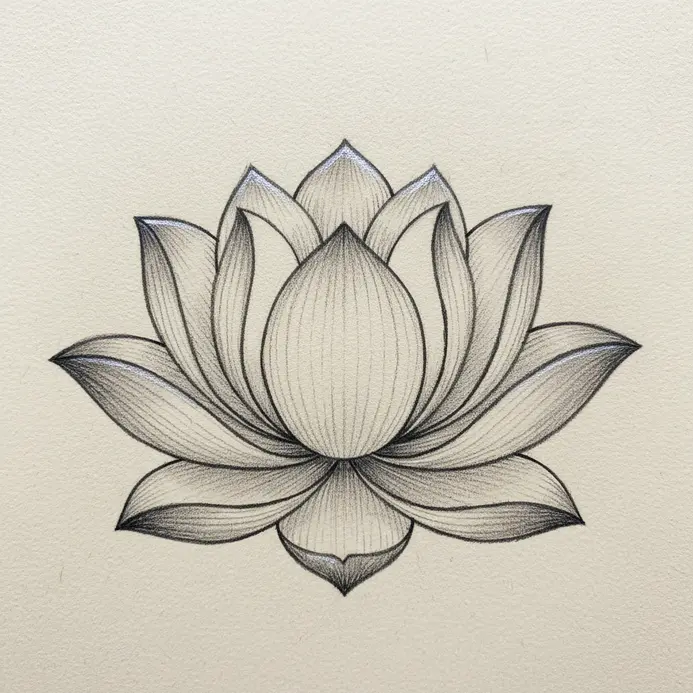
The most common beginner mistake is drawing petals as uniform, static shapes which makes the flower look flat and artificial. Trust me on this, the key to a realistic lotus is the teardrop structure of each petal, with a pointed tip and a wide, softly curved base that seems to cradle the inner layers. When exploring Easy Lotus Flower Drawing Ideas for Beginners, you want to vary the widths and lengths of these teardrops dramatically from the center outwards to create that beautiful concentric radiance. The good news is you do not need perfect symmetry. Focus on the negative space between petals instead, letting those gaps define each layer and give your sketch a natural, organic fluidity. This approach builds depth and movement with surprisingly simple lines.
Selecting Archival Pens and Graphite Grades
To apply Easy Lotus Flower Drawing Ideas for Beginners properly, an HB pencil is your best friend for the initial light construction sketch because it erases cleanly without ghosting on smooth paper. Once you are happy with the petal placement, commit to your final lines with a fine liner pen in 0.3mm to 0.5mm thickness for crisp, permanent definition. This two-step process gives you the freedom to adjust the geometry without fear. The paper matters just as much. You need a smooth-finish marker paper specifically designed to prevent ink bleed, which keeps those delicate petal outlines sharp. A single confident line with the right pen on the right surface makes all the difference between a sketch that feels tentative and one that looks elegantly finished.
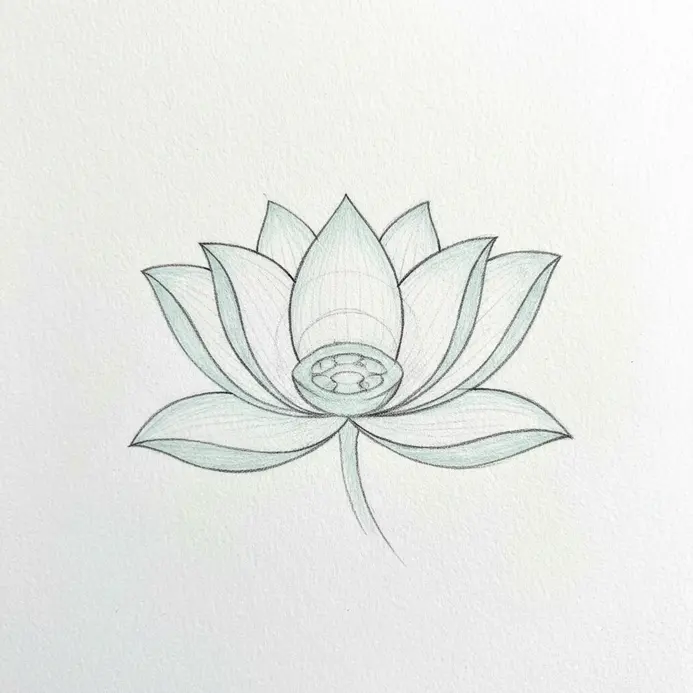
1. Draw the Tiny Central Bud Circle — Your Lotus Foundation
When following Easy Lotus Flower Drawing Ideas for Beginners, that one tiny circle in the center of a lotus is actually your best friend. This tiny central bud circle is the anchor for your entire drawing. I love thinking of it as a small, three-dimensional pea, not just a flat dot. Place it lightly with a light pencil in the middle of your page, using barely any pressure so you can adjust it later.
Keep it small, about the size of a lentil, and do not worry about it being perfectly round. A slightly organic shape looks more natural for a flower. This foundation sets your scale and gives you a reference point for every petal you will add. Trust me, starting with this simple step makes the whole process flow so much better. If you enjoy this, you can find more easy flower drawings to practice your foundational skills.
2. Sketch Narrow Teardrop Inner Petals — Form the First Layer
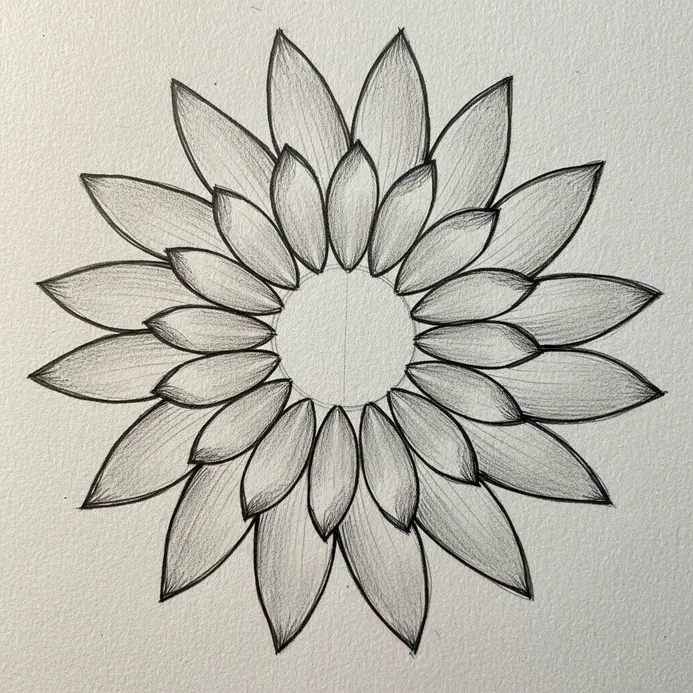
As you work through Easy Lotus Flower Drawing Ideas for Beginners, you might notice your flower’s center looks flat and unnatural if the inner petals are too uniform. Let us fix that by building the heart of your lotus. Start with a tiny dot for your absolute center. From there, draw the first petal with a continuous, flowing line, curving up and out before tapering back to a point. Think of a slender, elegant teardrop. I love this step because it is where the personality starts to show.
Add three to five more petals around your center point, working in a circle. Make sure they overlap each other slightly and vary their angles. This overlap is your secret weapon for instant depth. Use a light pencil touch for all these initial lines so you can adjust easily. Trust me, letting your wrist guide these small, gentle curves makes all the difference. Feel the satisfaction as that first delicate layer takes shape.
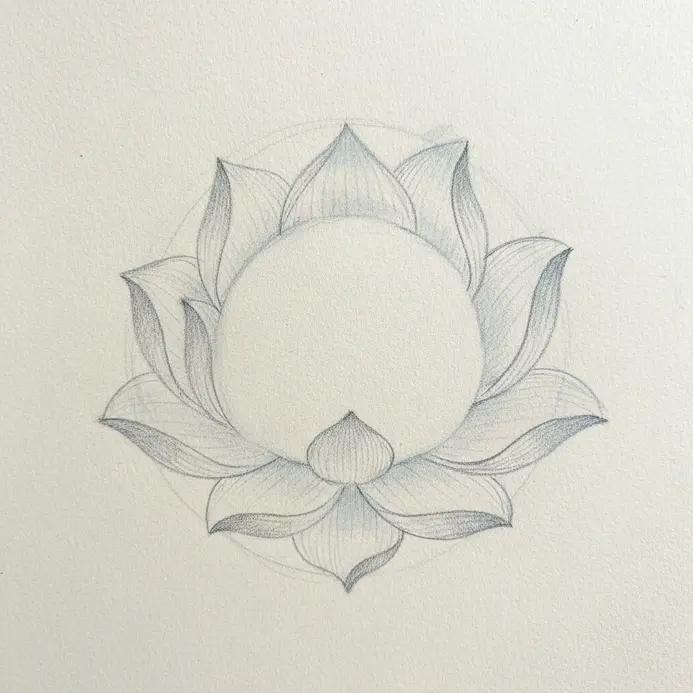
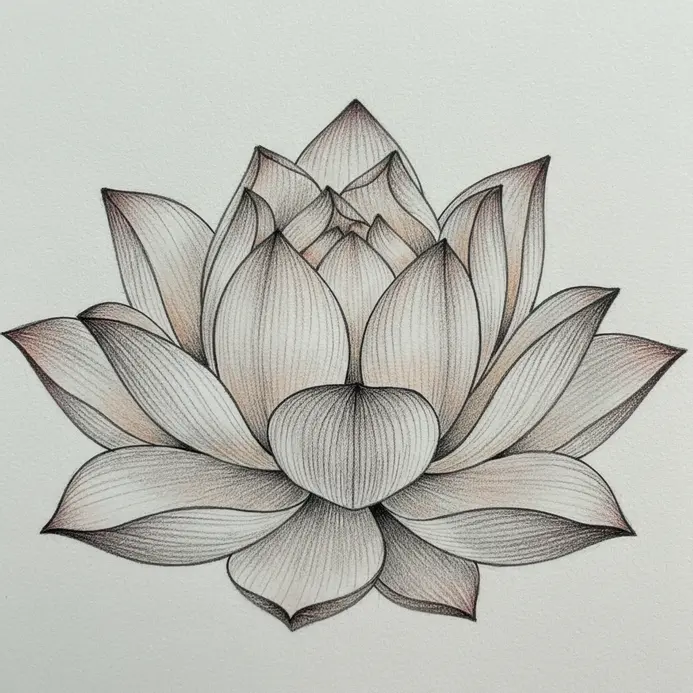
3. Add Two Overlapping Side Petals — Create Natural Depth
Part of successful Easy Lotus Flower Drawing Ideas for Beginners relies on using simple overlaps to instantly make a flat shape feel three-dimensional. That magic works well for this step, where you will sketch two new petals curving out from the sides of your flower’s center. The key is to let each new petal’s line stop and restart where it passes over a line you have already drawn, creating that lovely visual interruption that signals depth.
I love this part because it is where your drawing starts to feel real. Avoid making the side petals perfectly mirrored; a slight variation in their angle or size looks much more natural. If you want to push the effect further, add a whisper of light shading underneath the overlapping edge. It creates a subtle shadow that really makes the front petal pop.
This technique is a fantastic way to add sophistication to simple sketches. For more inspiration for whimsical drawings, try applying this overlap idea to other organic shapes. Feel how your flower gains instant character!
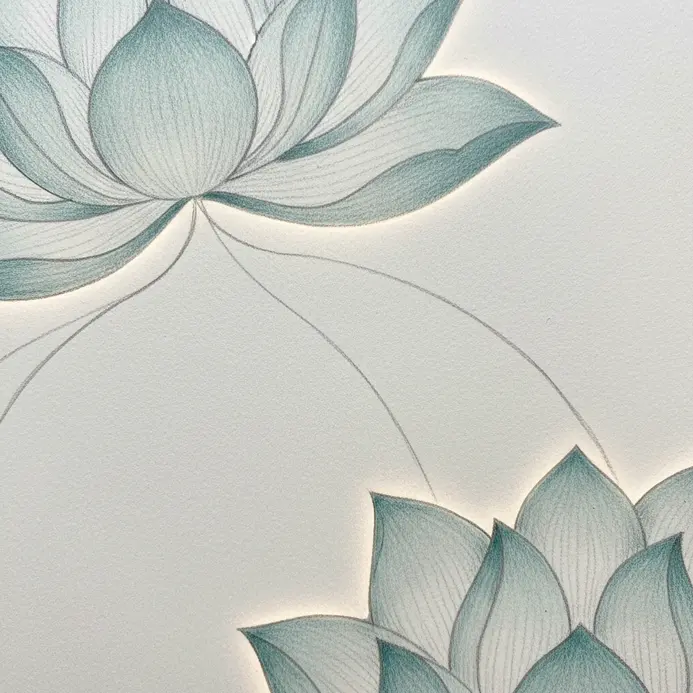
4. Draw Mirrored Outer Petal Layers — Build Symmetrical Form
When studying Easy Lotus Flower Drawing Ideas for Beginners, you will find that perfectly balanced petals come from creating one side and mirroring it. Start by finding your flower’s center and lightly sketching a single petal shape on one side of your vertical axis. The trick is to then replicate that exact shape on the opposite side, using your construction lines as a guide to measure key points. This method ensures each layer of outer petals feels harmonious and realistic.
Why does this work so well? It builds a strong symmetrical form that makes your entire drawing look polished and intentional. My go-to tip is to keep your initial lines super light so you can easily erase and adjust. Trust me, when you connect those mirrored halves, you will feel a real sense of accomplishment as your lotus takes shape. For even more inspiration on what to sketch next, check out these other easy things to draw.
5. Refine Petal Tips with Gentle Curves — Soften the Silhouette
Every effective set of Easy Lotus Flower Drawing Ideas for Beginners warns against stiff, pointed petals that can make your flower look artificial. This step is all about fixing that issue. Instead of sharp points, think about drawing the very ends of your petals with soft, flowing lines. I love visualizing them as little shallow “U” shapes or gentle, rounded “V”s. Use light, exploratory strokes to find the perfect curve for each tip before you commit.
Why does this small change matter so much? Those gentle curves add a natural rhythm and a sense of delicate movement to your entire drawing. They soften the whole silhouette, making your lotus feel more lifelike and peaceful. Trust me, it is the difference between a diagram and a drawing that feels alive.
A common mistake is making every petal tip identical. Nature is wonderfully varied. Look at a real flower and you will see some tips are more rounded, while others might have a slight wave or a soft point. Try introducing this variety in your sketch. Your eraser is a great tool here for sculpting and refining those lines until they feel just right. Does that not look more organic and beautiful?
6. Connect Petal Bases with Subtle Arcs — Anchor Your Flower
Many Easy Lotus Flower Drawing Ideas for Beginners skip this crucial phase, but connecting the bases is what makes your lotus look like a living flower, not just a collection of shapes. It is all about drawing gentle, shallow curves at the bottom of each petal to connect them to the flower’s center. I love how these subtle arcs instantly create a sense of depth, making the petals appear to curve inward naturally. The trick is to use light pressure and think of them as soft ‘U’ shapes rather than straight lines.
Avoid the common mistake of drawing them too dark or deep, as that can make your flower look segmented. Instead, let these lines be a light guide. For a more fluid look, you can try connecting the front petals with one continuous, undulating line. This technique gives your drawing a cohesive structure and stops any petal from looking like it is floating on its own. It is a simple move with a huge payoff for your beginner drawing skills.
Trust me, anchoring your petals this way is incredibly satisfying. Once you see how it pulls the whole composition together, you will want to explore aesthetic drawing ideas for your next project.
7. Draft a Thin Downward Vertical Stem — Add Structure
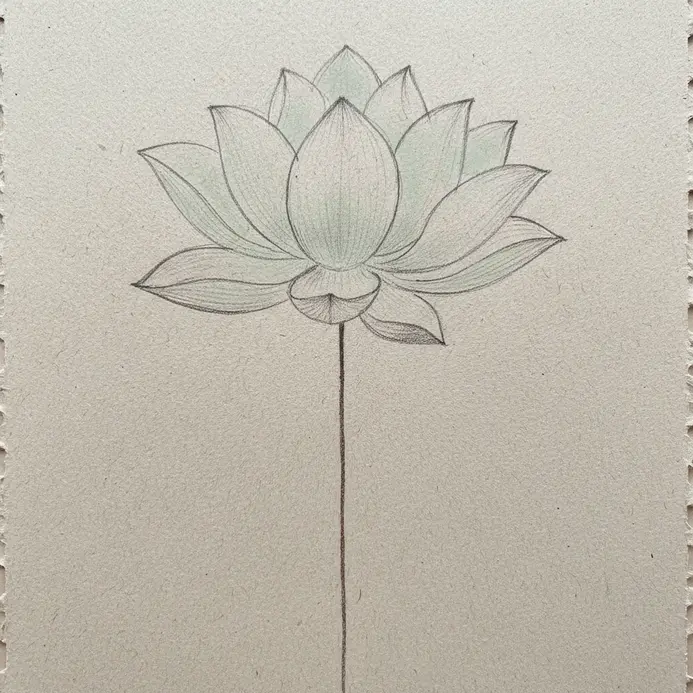
While most Easy Lotus Flower Drawing Ideas for Beginners focus only on the bloom, drafting a downward vertical stem adds the structure your whole piece needs. This might seem like a simple line, but getting it right is the secret to a stem that looks strong and elegant, not wobbly. The goal here is to draw a single, perfectly vertical line downward, using feather-light pressure so it serves as a light guideline you can easily erase later. I love this step because it builds a solid spine for your whole lotus drawing.
For perfect vertical alignment, I strongly recommend using a straightedge or ruler. This ensures your stem is structurally sound from the start. In digital programs, hold the Shift key while using your line tool for an instant, flawless straight line. Ever tried drawing a straight line freehand and ended up with a slight curve? Using a guide completely avoids that common beginner frustration.
Place this line between your top and bottom horizontal height guides. This measured approach means your stem will fit perfectly within your composition, which is incredibly satisfying. Once you have that clean, central axis, your lotus has a strong foundation. creative doodle art prompts.
8. Add a Side Leaf Support Structure — Complete the Composition
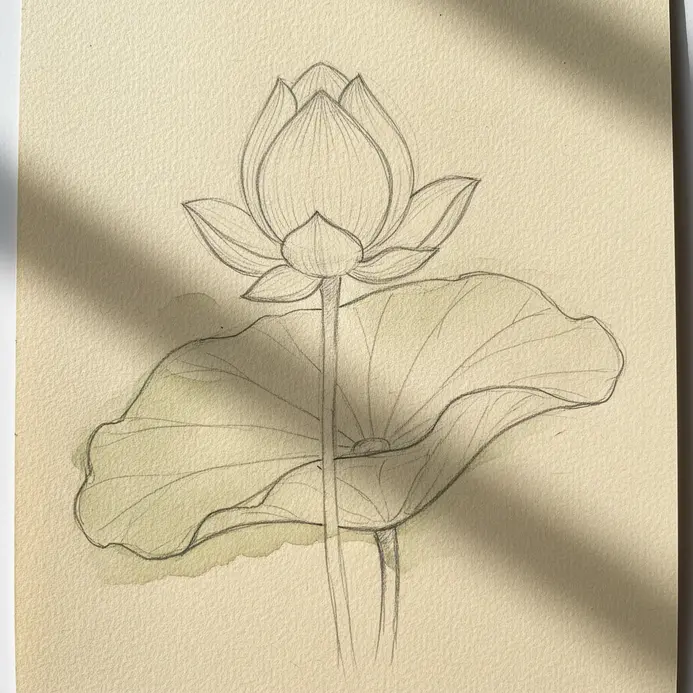
If you want your Easy Lotus Flower Drawing Ideas for Beginners to feel complete, a side leaf acts like a perfect visual anchor to ground the floating composition. That is exactly where a side leaf comes in, transforming a lone flower into a complete scene. Start with very light pencil pressure to sketch the leaf’s general shape and placement. Think about framing the lotus or filling an empty space. Once you are happy with it, refine the outline and add a main stem with some simple veins.
Your main goal here is integration. Avoid making the leaf too large or detailed, as that can steal focus from your beautiful lotus. Instead, use it to create depth and lead the viewer’s eye. Is not it satisfying to see the whole composition click into place? Feel how that one simple addition brings your entire sketch to life.
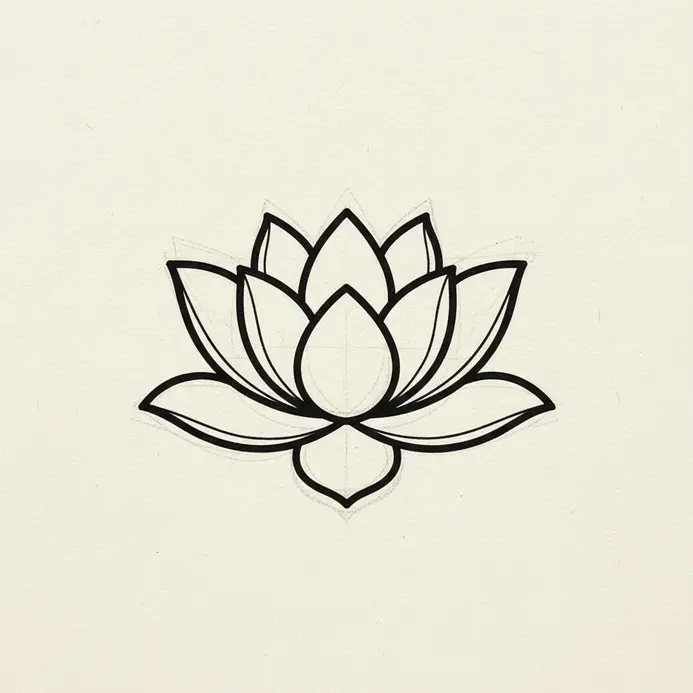
9. Trace Outlines with a Fine Liner — Define Your Clean Lines
Finalizing your Easy Lotus Flower Drawing Ideas for Beginners requires tracing those outlines with a fine liner pen, making your lines crisp, dark, and confident. You will take your light pencil sketch and trace over it, making those lines instantly look finished and professional. I love how this small step elevates the entire artwork.
Focus on making smooth, deliberate strokes. Start with the big outer petals first, then move inward to the smaller details. The key here is to let the pen do the work, avoiding wobbly, sketchy lines. This forces you to commit, which is fantastic practice for building your drawing confidence.
Try varying your line weight a little, making lines thicker where shadows might fall or on the petals closest to you. That subtle variation adds so much depth and makes your flower look less flat. Trust me, this small trick makes a huge difference. Once your ink is dry, you can erase the pencil lines underneath for a perfectly clean piece. If you enjoy how this looks, you might want to transition to flower painting next.
10. Erase Internal Graphite Guide Lines — Reveal Your Final Sketch
The satisfying payoff of Easy Lotus Flower Drawing Ideas for Beginners arrives once you carefully remove the light construction lines hiding inside your lotus. Ever feel that moment when a messy sketch suddenly becomes a clean drawing? That is exactly what this step achieves. You are not making marks, but rather carefully erasing the graphite. I always use a kneaded eraser for this, gently dabbing to lift the graphite without harming my paper or dark final lines.
Rubbing too hard is the most common mistake here. Use light, short strokes with a plastic eraser if you need to remove a stubborn line completely. Working systematically from the center outward helps you avoid accidentally erasing the beautiful contours you have already drawn. Trust me, the magic happens when those faint guides disappear and your crisp lotus sketch is all that remains. This clarity makes it perfect for your next step, whether that is shading or exploring ideas for colored pencil drawing.
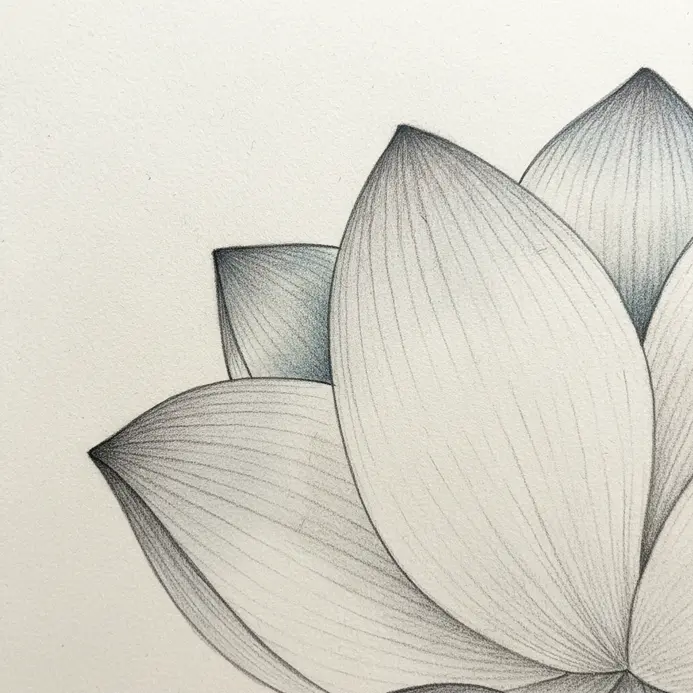
11. Add Inner Petal Dimension Lines — Suggest Gentle Folds
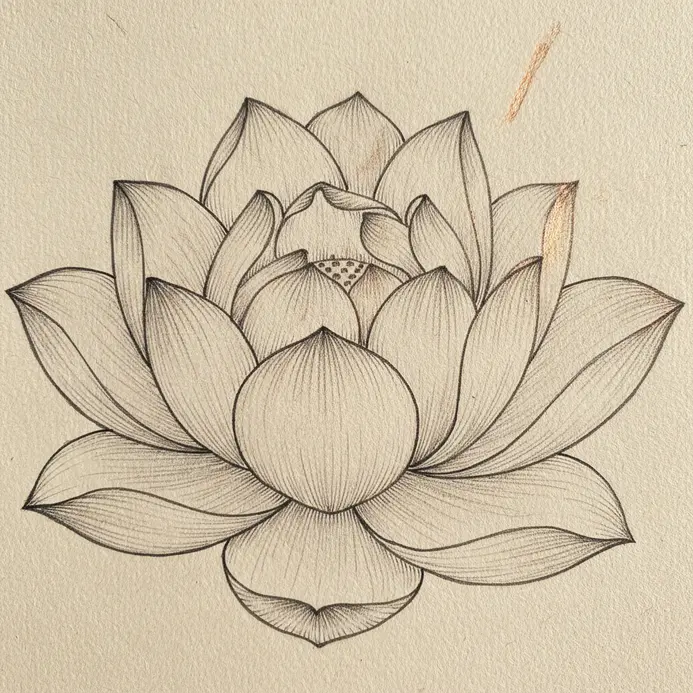
To bring your Easy Lotus Flower Drawing Ideas for Beginners to life, you must add inner petal dimension lines that suggest gentle folds instead of hard outlines. The secret is adding those subtle lines inside each shape. Think of them as gentle suggestions of folds and curves, not rigid definitions. You will use a light touch with a harder pencil to draw faint lines that follow the petal’s natural shape.
Try a single, slightly curved line from the base towards the tip to act like a vein. For extra depth, add a short, soft curve just inside the outer edge to hint at an overlap. This technique works because it creates the illusion of thickness and organic form. Trust me, your lotus will instantly look more lifelike and less like a paper cutout.
Remember, the biggest mistake is going overboard with too many or too dark lines. Keep it simple and light. Does that not feel like a satisfying way to add realism?
12. Apply Light Edge Shading Strokes — Create Soft Highlights
When practicing Easy Lotus Flower Drawing Ideas for Beginners, you will quickly learn that applying light shading to the edges brings flat petals to life. Ever feel like your petals look a bit dull? The trick is to use light edge shading strokes. First, decide where your light is coming from. Then, with a lighter touch, add delicate lines along the edges that catch the light, letting them fade into the darker areas. It is not an outline; you are blending to show the curve.
I love using a kneaded eraser for this technique. You can lightly lift graphite from a mid-tone area to create a soft highlight, which is perfect for suggesting a matte surface like a lotus petal. This subtle touch adds so much depth and realism. For a whole library of subjects to practice this on, have a look at more easy flower drawings.
Does that not make a huge difference? Seeing that gentle glow appear is incredibly satisfying.
13. Enhance Shadow at the Petal Base — Ground Your Flower
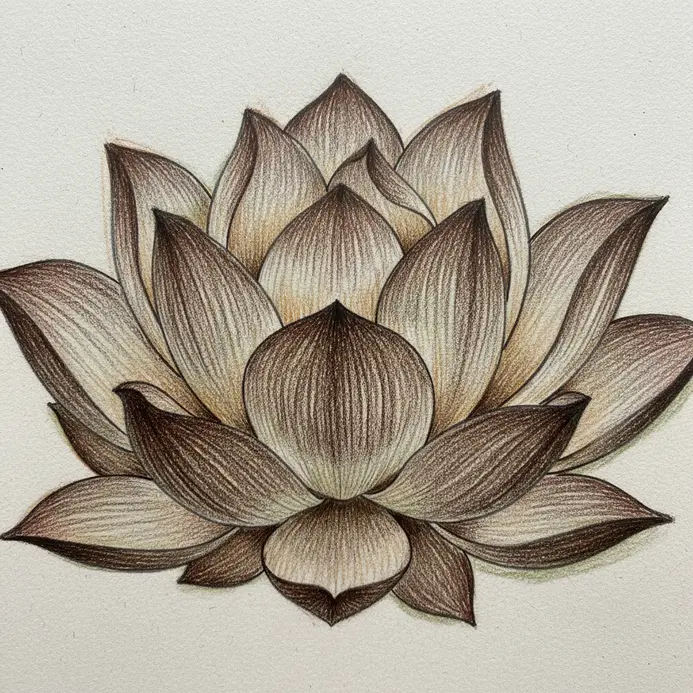
Adding depth to your Easy Lotus Flower Drawing Ideas for Beginners requires focusing on where each petal attaches, applying layered pencil pressure to create a soft, dark crease. Ever notice how a flower looks like it is just floating on the page until you add those grounding shadows? You will focus on the overlapping areas, building up the darkness slowly and feathering it out as the shadow follows the petal’s curve.
Why does this work so well? It tricks the eye into seeing real, three-dimensional form instead of a flat shape. I love how this simple technique instantly makes your drawing feel solid and believable. For a beautiful, natural look, try using a darker shade of the petal’s own color instead of plain black. Once you see how grounded your lotus looks, you will feel a real sense of accomplishment. If you are looking inspiration for whimsical drawings, try applying this to other botanicals.
14. Draw Water Ripples Around the Stem — Set the Scene
Ever wondered how to make your lotus look like it is actually floating on water? This step is your secret weapon. Instead of drawing perfect circles, focus on how light hits the surface. Use your lightest pencil to sketch faint, uneven ovals around where the stem touches the surface. The ripples closest to the stem are the darkest and closest together, then they get lighter and wider as they spread out.
Here is the magic part: do not outline the whole ripple. Just shade the trough, the shadowy part between each wave crest. Let the white of the paper be the highlight on top of the water. I love this trick because it instantly creates that shimmering, three-dimensional look. Trust me, watching those simple lines turn into a believable surface feels amazing.
A common pitfall is making every ripple identical. Remember, they fade and flatten as they move away. Also, do not forget to slightly bend your stem line right at the water surface to show refraction. Grab a clear glass of water and a pencil to see this effect for yourself. It is the best reference you will find.
15. Finalize Leaf Veins and Texture — Add the Finishing Detail
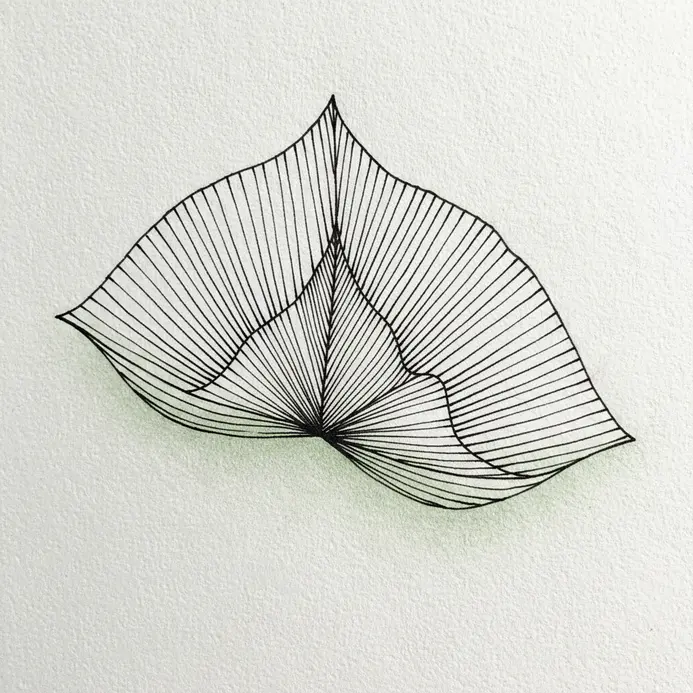
Ever wondered how a simple leaf shape suddenly looks so real and alive? This final step is pure magic. Study a real lotus leaf or a great photo first to see its unique vein pattern and surface feel. Then, with a light touch, use your finest pencil or pen to draw the main vein a bit thicker, and the secondary ones thinner, letting them fade softly into the leaf. I love how a few broken, whisper-thin lines for the smallest veins suggest detail without cluttering your drawing.
This careful work adds incredible realism and depth, making your lotus feel truly three-dimensional. It is the detail that makes flower enthusiasts stop and look closer. For your next project, check out other easy things to draw to keep building your skills. Does that not feel satisfying?
Preserving Paper Sketches Against Humidity
Your line work is safe from smudging once the archival ink dries, but paper itself is vulnerable to environmental damage like humidity and light. The simplest protection is a light, even coat of a workable fixative spray applied from about twelve inches away. This creates a clear barrier that locks the graphite and ink in place without altering the matte finish of your sketch.
Store the finished piece flat in a portfolio case away from direct sunlight and moisture. For long-term display, consider a frame with UV-protective glass, which shields the paper from fading while letting the elegance of your line sketching shine through for years.
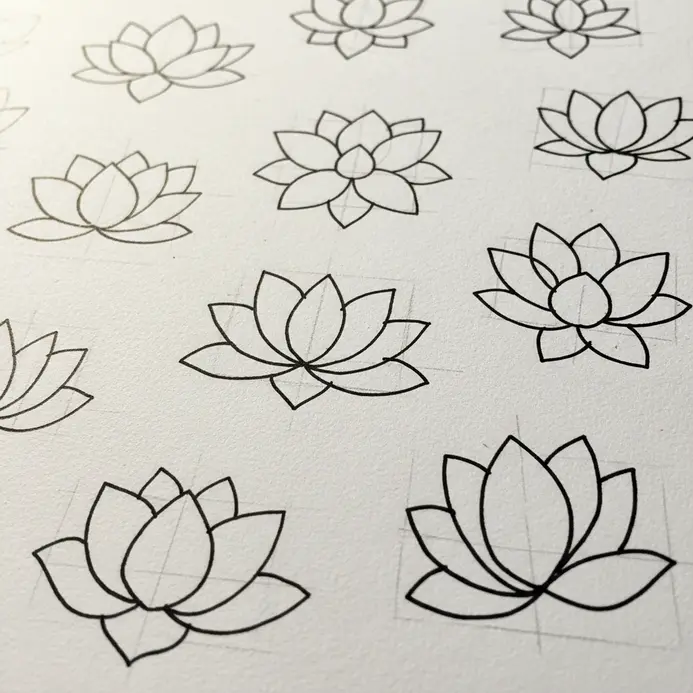
Conclusion
You started with a simple circle and built it into a complete lotus, learning how balance and overlapping shapes create that elegant form we love. That sense of accomplishment you feel is the real reward. For your next project, take these Easy Lotus Flower Drawing Ideas for Beginners and try drawing a few together on one page, experimenting with different petal counts. The best drawings come from enjoying the process, not from perfect symmetry. Keep your pencil moving and see where your lines take you next.
FAQs
Q: What is the best pencil for a lotus flower sketch?
A: Use a harder H-grade pencil, like an H or 2H, for your initial light guide lines. This makes them easy to erase later. Then, you can go over your final lines with a softer B pencil or a fine liner pen.
Q: How do I stop my lotus drawing from looking stiff?
A: Avoid drawing each petal with perfect, mirrored symmetry. Let the curves vary slightly and allow some petals to overlap others more naturally. Focus on the overall graceful shape rather than each individual part.
Q: Should I draw the petals or the center first?
A: Always start with the tiny central bud. Building your lotus flower outward from this core point helps maintain proper proportion and spacing. It prevents the petals from becoming crowded or misaligned as you add more layers.
Q: My lines look shaky. How can I make them smoother?
A: Try drawing with your whole arm moving from the shoulder, not just your wrist. Make light, quick strokes instead of slow, careful ones. You can always go back and refine a confident line more easily than a hesitant one.
Q: How do I add depth without shading?
A: Use line weight variation. Press harder with your pencil or pen on the lines at the base of petals and where they overlap. Keep the lines at the petal tips and edges lighter. This simple change makes the flower look three-dimensional.


