Navigating Traditional Materials and Modern Substitutions
The single best move you can make as a beginner is swapping traditional hand-ground natural dyes for modern opaque gouache paints. Trust me on this, the intense pigment and forgiving, matte finish of gouache lets you focus on mastering those rhythmic patterns without battling with watery consistency. You want that same flat, solid color area that defines Pattachitra, and thick poster paint or acrylics work beautifully for this too. For your outlines, a set of archival fine-line pens from 0.1mm to 0.8mm gives you that essential, consistent line weight from the start. Start your practice on heavy cartridge paper, which handles ink beautifully and is far more accessible than primed MDF boards used in more relief-heavy styles.
Foundational Motifs for Culturally Authentic Visuals
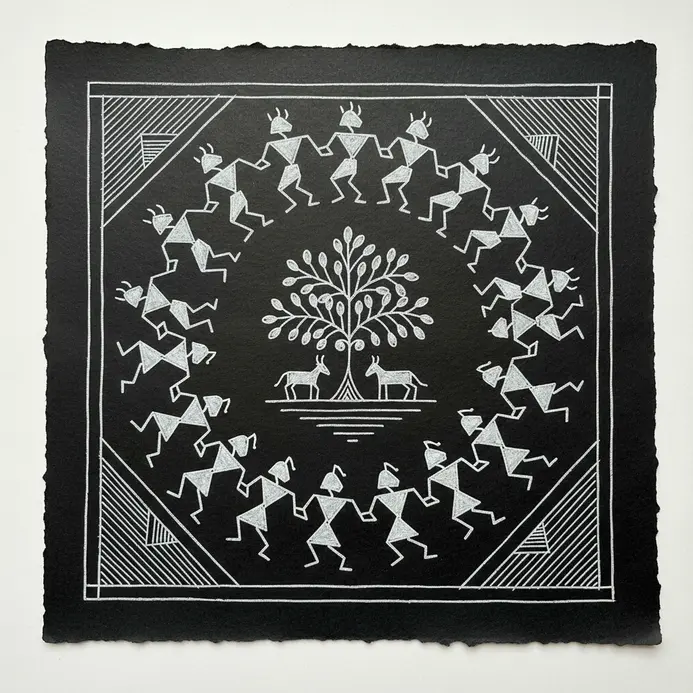
Your first project should build from the simple stick figures and triangular forms found in Warli art, not the intricate mythology of Madhubani. Here is the thing: these basic shapes are the building blocks for nearly every traditional narrative. You will notice successful pieces use intentional symmetry within each motif, like the repeating fish-scale patterns in Gond art or the concentric circles in Mandana designs. This stylized iconography is about symbolic representation, not realism, so let go of perfect proportions. We tend to overcomplicate, but the visual power comes from the rhythmic repetition of dots, dashes, and geometric shapes that fill your animal or human forms.
1. Sketch Monochrome Warli Dancing Human Figures with Simple Stick-Figure Forms
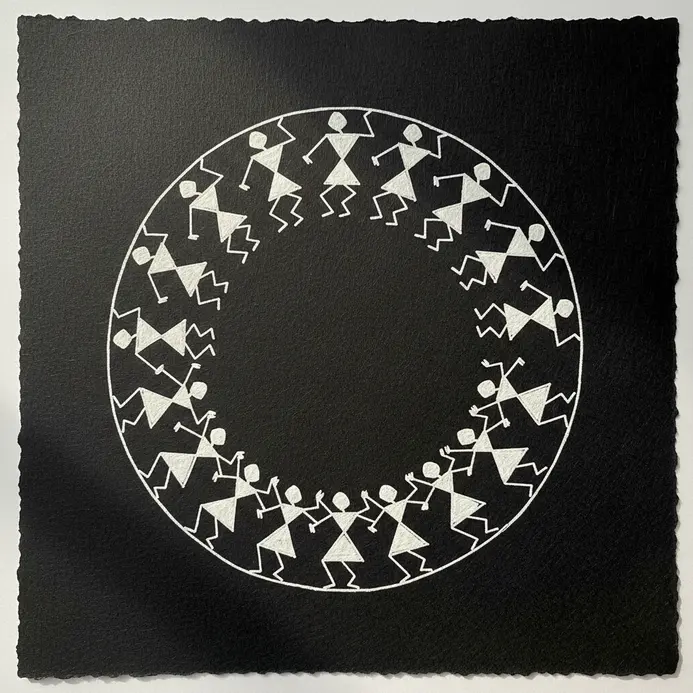
Ever wondered how such an iconic style could be so simple to draw? I love this one because it strips away everything but the essential, joyful shapes. Your goal is to create bold, symbolic figures using only clean lines and basic geometry. Start by mapping the dancing group with a light pencil sketch to get your spacing right, focusing first on the triangular torsos anchored to a baseline. When you ink, use a single, confident stroke for each limb. Remember, the appeal is in the stylized abstraction, so avoid adding joints or facial features. A common pitfall is trying to make the limbs look anatomically correct. Instead, embrace the playful, rhythmic feel by using Z-shaped lines for bent dancing legs. For more inspiration on where to take your simple sketches next, you can explore simple Indian drawing ideas. This project is a perfect example of easy indian traditional art for beginners because it relies on repetition rather than precision. Focus on moving your whole arm for those sweeping, curved lines. This gives your dancers a fluid, energetic motion that feels alive. Trust me, the satisfaction comes from seeing those simple stick-forms transform into a lively, monochrome scene. Does that not look stunning?
2. Geometric Madhubani Peacock Centerpiece: Achieve Striking Symmetry with Basic Shapes
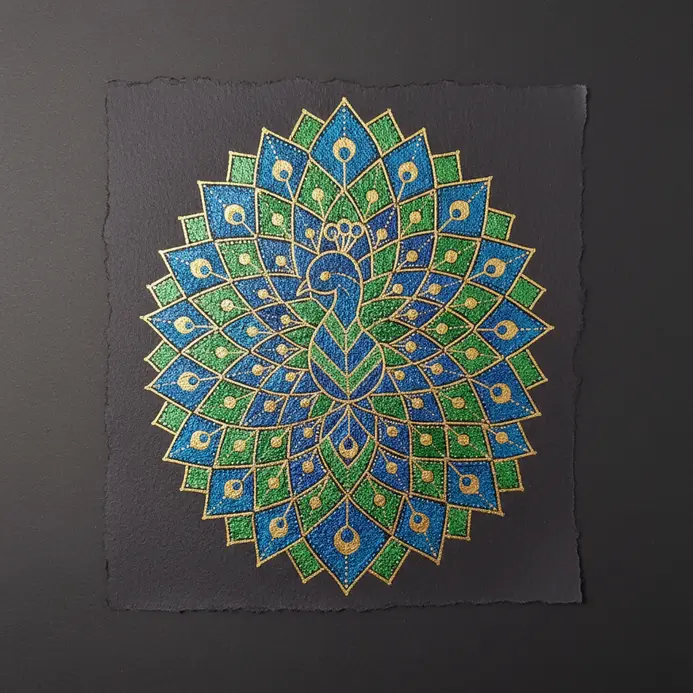
Ever felt intimidated by the intricate details of a peacock? This geometric version is perfect for beginners. Start by drawing a precise vertical centerline with a ruler and compass to lock in that striking symmetry. Then, sketch the body as a circle, add a triangle for the beak, and layer the tail feathers with triangles and diamonds. It is all about breaking it down into manageable parts, which makes it such an easy indian traditional art for beginners project. Once the structure is set, move on to the fun part: filling each segment with vibrant colors and rhythmic patterns. Stick to a traditional Madhubani palette of reds, yellows, deep blues, and greens. Use simple motifs like dots, stripes, and chevrons to fill the spaces. The key is the black outline. It defines every shape and gives that classic Madhubani feel. For the outlines, try the double-line technique with a fine liner pen for added depth. I find this method satisfying because each geometric section feels like a small win, and the symmetry creates a visually stunning piece that looks professional even from a beginner’s hand. My top tip? Fold your paper in half before you begin to create a natural crease for symmetry. This little trick ensures both sides match perfectly. Also, limit yourself to a few pattern types to avoid clutter and maintain that clean, geometric look. Give it a shot and enjoy the moment when your geometric peacock comes to life with perfect balance and beauty, inspired by the intricate feather details found in traditional paintings. You will be amazed at how simple shapes can transform into such an elegant centerpiece.
3. Mandala Lotus Petal Radial Design: Repetition That Builds Drawing Confidence
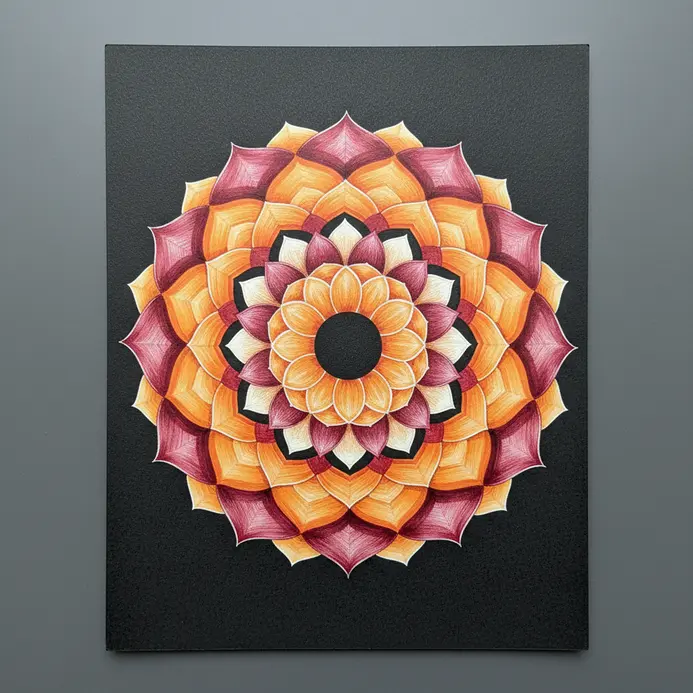
Ever felt intimidated by intricate mandala art? This lotus petal radial design is your perfect starting point. It looks complex, but the process is beautifully simple. First, anchor your design with a central circle using a compass. Next, divide the circle into equal segments with a protractor for those crucial radial guidelines. Now, draw identical teardrop-shaped petals in each section, reminiscent of the patterns in Madhubani painting. As you add layer upon layer, the mandala expands in a satisfying, symmetrical bloom. This is precisely the kind of easy indian traditional art for beginners that builds confidence through repetition. Why does this work so well for beginners? You build muscle memory by repeating one shape, turning a daunting task into a confidence-boosting exercise. Isn’t it amazing how repetition creates such intricate beauty? I love how this design grows from a single point. My go-to tip: keep all pencil lines light for easy cleanup. Focus on neat repetition over complexity, and you’ll feel proud of the professional-looking result.
4. Apply Dot Pattern Gond Art Elephant Using Repeat Filling Motifs
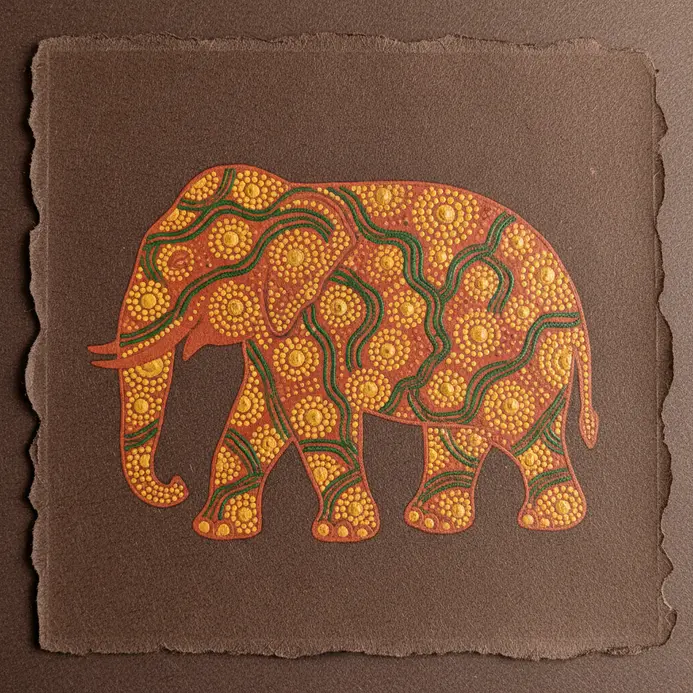
This one looks intricate, but trust me, it is incredibly meditative. You start with a simple, stylized elephant outline, then divide its body into clear sections like the trunk and ears. Here is the fun part: you fill each area with a different repeat dot motif, such as tiny spirals or concentric circles. The rhythm of placing dot after dot is what creates that authentic, tribal look. This dot-filled approach is a wonderful easy indian traditional art for beginners technique. Why does this work so well for beginners? It takes the pressure off drawing perfectly, shifting your focus to a calming, repetitive pattern. Your hand finds a steady groove, and before you know it, you have a stunning piece. For a great foundation, check out these simple Gond painting ideas for beginners. My go-to tip? Always practice your chosen dot patterns on scrap paper first to get the spacing right. You will love seeing your elephant come to life with texture and rhythm. Does that not feel satisfying?
5. Simple Triangular Rangoli Floor Pattern: Master Grid-Based Symmetry Easily
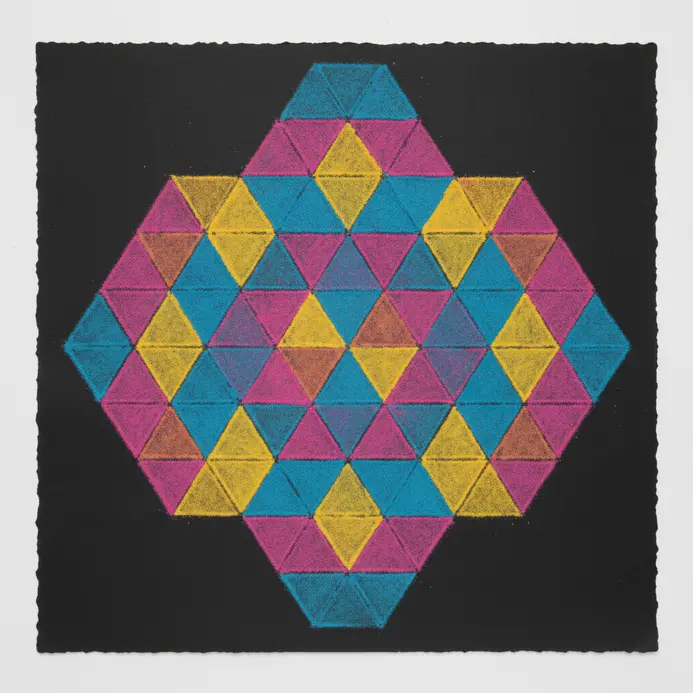
Sound complex? Honestly, this is the pattern that made symmetry finally click for me, much like the balanced compositions in traditional Indian art. You start with a basic triangular grid of dots, which acts like a perfect cheat sheet. Just connect the outermost marks to form your big boundary, and then mirror every line you draw from the center outwards. This rigid structure means your design can’t help but look balanced and intentional. It is a classic easy indian traditional art for beginners project because the grid does the heavy lifting. Why does it work so well for beginners? The grid takes away the guesswork, so you can focus on the fun part of connecting lines and adding color. I love using vibrant colored sand to fill in the little geometric shapes that appear. Trust me, the moment you step back and see that perfect symmetry, you will feel a real sense of proud accomplishment.
6. Mythological Krishna Profile Pattachitra Sketch: Capture Bold Outlines with Minimal Detail
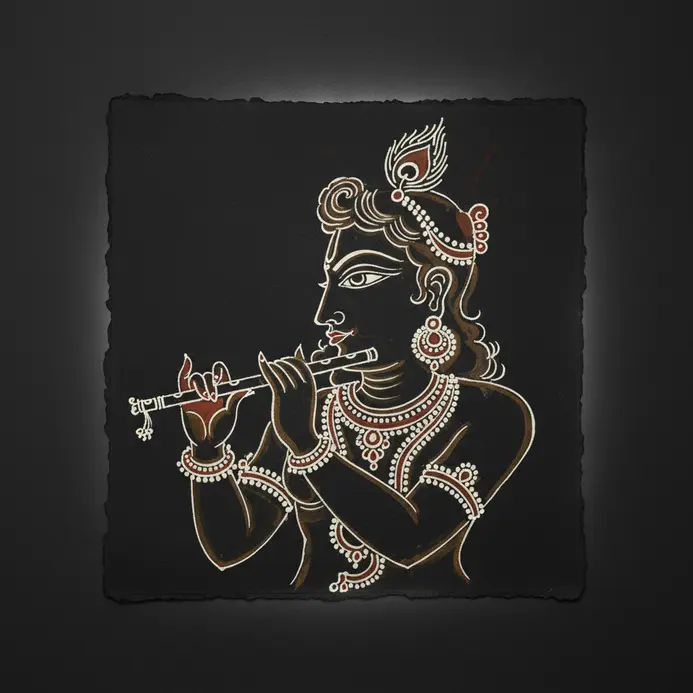
Ever felt intimidated by detailed Indian art? This Krishna profile Pattachitra sketch breaks it down with bold outlines and minimal detail, making it perfect for starters. I love how it transforms complex iconography into a clean, graphic piece you can create quickly. This minimalist approach is easy indian traditional art for beginners at its best. Begin with textured, off-white paper to mimic traditional cloth. Lightly pencil the elongated profile, almond-shaped eye, and peacock feather crown. Then, use a waterproof pigment ink pen with a bold nib to trace over your lines in steady, continuous strokes. This method focuses on silhouette over shading. It works because the simple shapes are instantly recognizable and forgiving. My go-to tip is to draw the primary contours in one fluid motion for that classic flow. Feel accomplished when your minimalist sketch emerges, and if you’re inspired, you can explore simple Indian drawing ideas for more beginner-friendly art.
7. Build Circular Mirror Lippan Clay Wall-Art with Layered Mud Relief
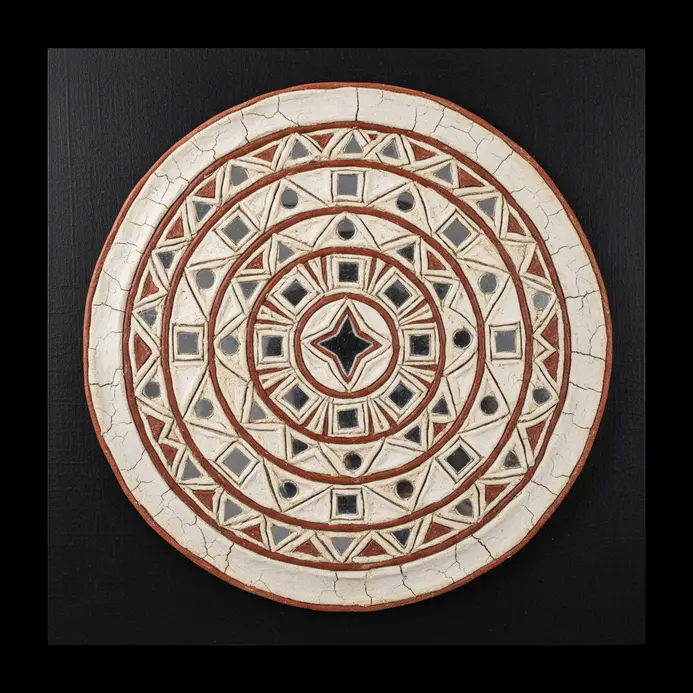
Who would have thought mud and mirrors could create something so stunning? This project looks intricate, but the rustic texture is incredibly forgiving for a first attempt. You will start by spreading a smooth base layer of clay onto a primed circular board. Then, you roll clay into long snakes to build up your raised patterns, adding smaller details on top for that gorgeous 3D depth. I love pressing in the little mirrors last, locking them in place with extra clay. This 3D approach is another fantastic method often used in Indian painting styles. easy indian traditional art for beginners option. The magic happens because the layered relief casts beautiful shadows, making the design pop. And those mirrors? They catch the light throughout the day, so your artwork never looks the same twice. Trust me, the satisfaction of seeing your handmade piece catch the sun is unbeatable.
8. Stylized Tree of Life Gond Painting: Develop Your Dot Work Across Large Areas
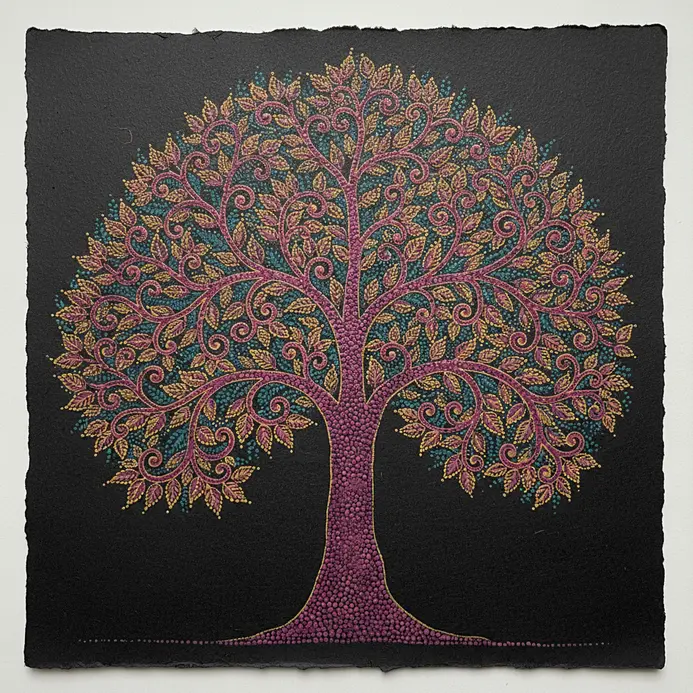
Ever feel like you need a project that is both meditative and visually spectacular? This stylized Tree of Life is it. You will start by sketching the tree’s strong trunk and sprawling branches, then block them in with bold, solid colors. The magic happens when you fill these outlined shapes with rhythmic, patterned dots using a metal dotting tool or even a matchstick. The dense texture you create feels alive. This dot-work project is a prime example of easy indian traditional art for beginners that yields impressive results, reminiscent of the detailed work in Madhubani painting. What makes this so effective for a beginner is the forgiving nature of the dot work. You are building a stunning visual impact through repetition, not perfect line drawing. The process itself becomes a calming rhythm. My go-to tip is to work in small sections to avoid fatigue and keep your dot spacing even. Try it and feel the immense satisfaction when that final, vibrant mosaic comes together.
9. Symmetrical Floral Madhubani Border Design: The Perfect Frame for Any Artwork
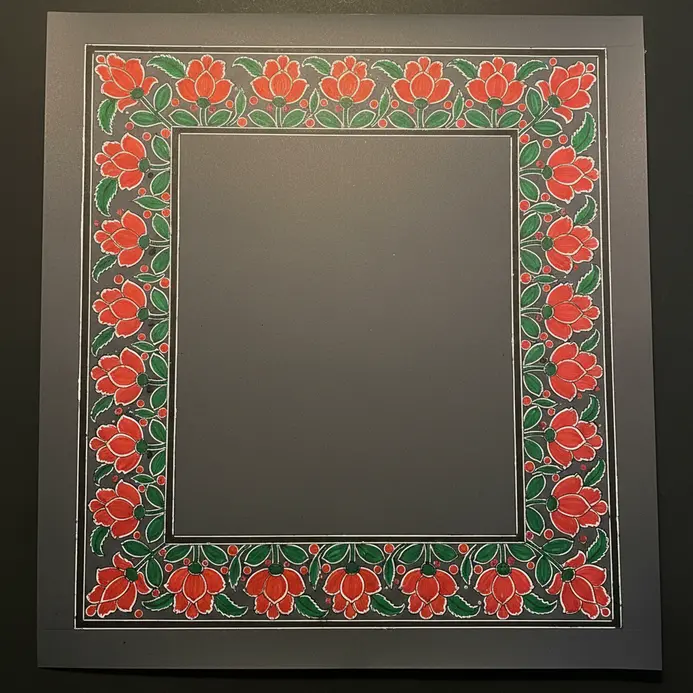
Ever felt like your artwork needs a bit of contained magic? A symmetrical Madhubani border is that perfect finishing touch. It looks intricate, but it is all about repeating a simple floral unit. You start by lightly drawing your frame and a central axis line with a pencil and ruler. This is your guide for mirroring the lotus flowers and vines perfectly. Such border designs are a staple of easy indian traditional art for beginners. Trust me, the key is to ink your design with fine liner pens before adding any color. This crisp outline gives it that classic, bold look. The structured repetition guides your eye right to the center of your piece, which is why it works so beautifully. Try it and feel the satisfaction of creating a professional-looking frame for any project. After mastering this, you can explore some fun Madhubani drawing ideas to pair with your new border skills.
10. Draw Sun and Moon Warli Motif with Contrasting Geometric Bodies
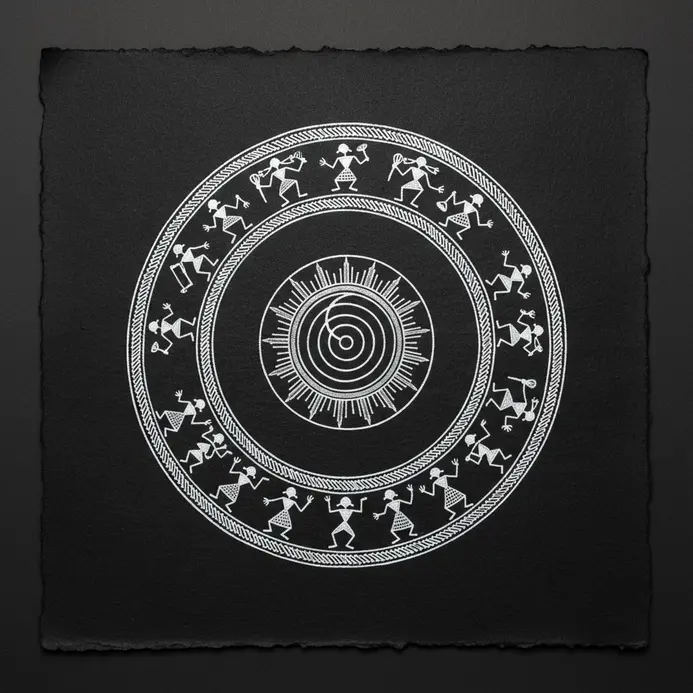
This one looks intricate, but I promise it is simpler than it appears. You start by drawing two simple shapes on your red ochre background. The sun is a circle filled with a sharp hexagon and surrounded by spiky triangles. The moon is a soft crescent filled with little dots or wavy lines. The magic happens in their stark contrast. This motif works so well because it uses the pure, fundamental language of Warli art to tell a whole story of balance. It is a perfect easy indian traditional art for beginners piece that uses only basic geometry. Trust me on this one, the satisfaction of seeing that bold white pop against the dark earth tone is fantastic.
11. Nested Circle Mandala Ink Drawing: Create Deep Radial Focus with Simple Tools
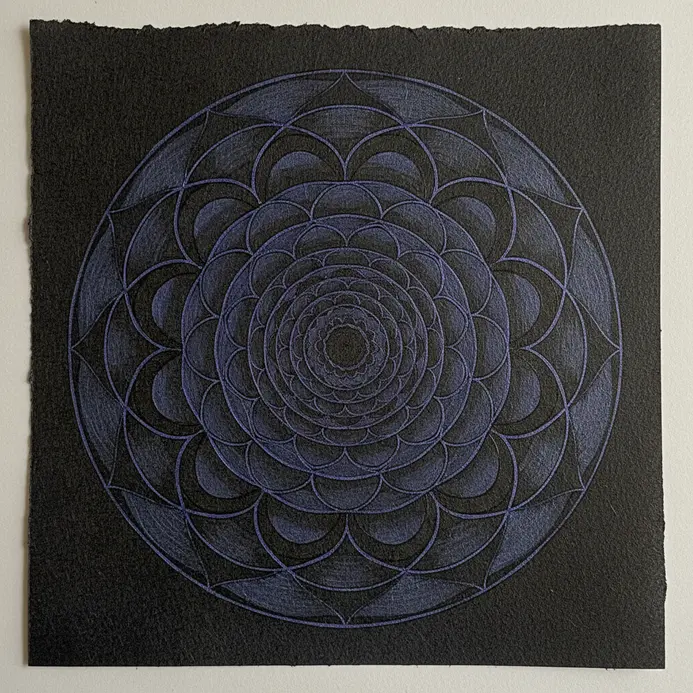
Ever wondered how those intricate mandalas seem to pull your gaze right into their center? This nested circle method looks complex, but it is surprisingly approachable, similar to the folk art techniques found in Warli painting. You will start by using a compass and protractor to create a perfect symmetrical framework of concentric rings. Then, you fill each band with repetitive patterns, beginning with bold, dense marks at the core using your thickest pen. This structured method is easy indian traditional art for beginners that teaches focus and symmetry. As you work outward, you switch to finer liners for the outer rings. This gradual shift in line weight creates incredible visual depth, making the center pop. The satisfaction comes from watching a flat drawing transform into a piece with real focus and balance. Trust me on this one, the moment you erase those pencil guides to reveal your crisp ink work feels absolutely magical, much like the transformation seen in traditional Indian paintings.
12. Small Fish Motif Madhubani Square: A Compact Composition for Quick Practice
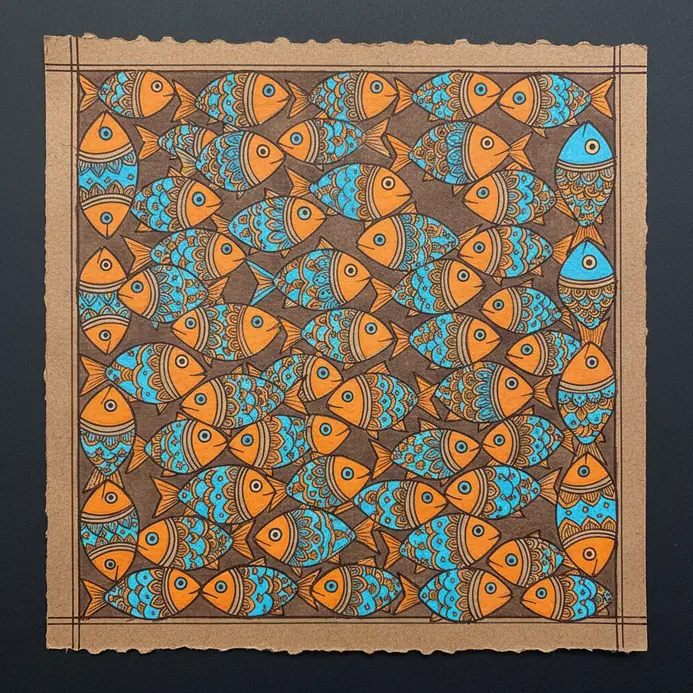
This one is a perfect little project. It looks intricate, but you will finish a complete, authentic-looking piece in under half an hour, akin to the efficiency of traditional Indian art. You start with a simple square and a bold black ink pen for the defining outlines. This compact project is a fantastic easy indian traditional art for beginners exercise. Draw your central fish and then fill its body with neat rows of tiny ‘U’ shapes for scales. Surround it with wavy water lines and a few floral buds in the negative space. The real magic happens when you add the rhythmic patterns to the double-line border. Isn’t that satisfying? This works so well because it gives you a complete microcosm of the art form. You practice symbolism, pattern filling, and border work all at once. My go-to tip? Embrace the spontaneity and skip the pencil sketch. Draw directly with your pen and incorporate any happy accidents into the design.
13. Assemble Interlocking Diamond Clay Mirror Placement for Reflective Wall Art
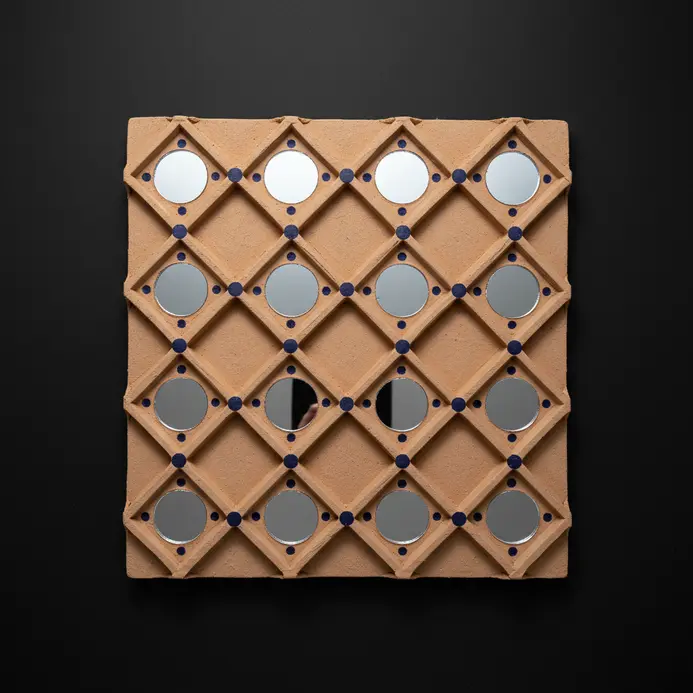
This one surprised me – it looks complex but is wonderfully modular. You create a geometric pattern from individual clay diamonds, each with a central acrylic mirror for a reflective sparkle, similar to the vibrant colors seen in Indian paintings. The key is cutting tabs and slots on the edges so the pieces physically interlock, giving your wall art a clean, professional structure. This modular approach is another easy indian traditional art for beginners technique that feels more like assembly than sculpture. I love how the dry-fit assembly on the floor saves you from wall-mounted headaches. It works because the lightweight, modular design lets you customize the scale to fit any space perfectly. Try it and feel the satisfaction of clicking those shimmering diamonds into place.
14. Detailed Bird Motif Pattachitra Panel: Refine Your Brush Control with Fine Linework
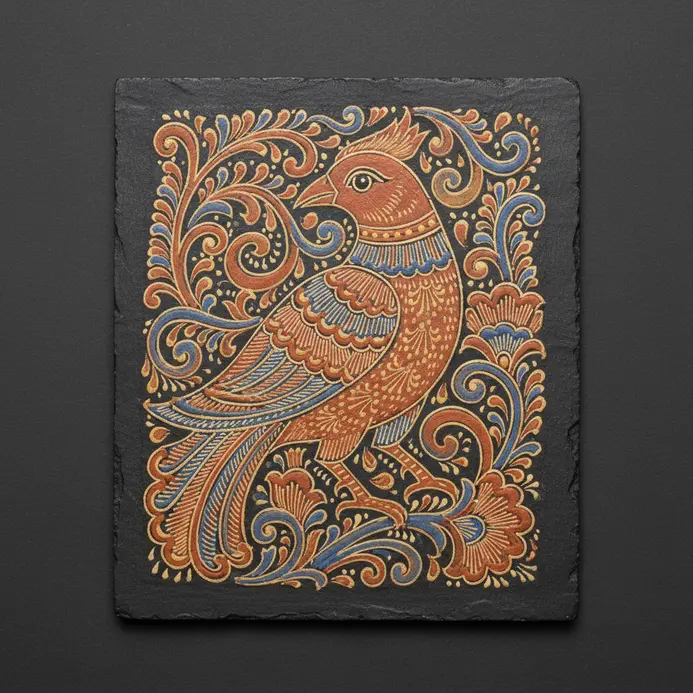
Ever feel like your brush has a mind of its own when you try to draw fine lines? This project is your secret weapon to master that control. You start with a simple, bold outline of a peacock or parrot, then fill it with those signature intricate feather details that are often celebrated in Indian painting styles. and decorative patterns. I love how this process teaches you patience and precision in such a structured way. It represents a slightly more advanced easy indian traditional art for beginners challenge. The real magic happens when you switch to your tiniest brush for the repetitive cross-hatching and tiny dots. Trust me, holding the brush closer to the ferrule gives you the stability you need for those micro-details without any shaking. Your final piece will have that beautiful, rhythmic quality that makes Pattachitra so captivating. Feel proud when you see those clean, confident lines come together.
15. Floral Rangoli Grid Style Square: Block In Petals for a Vibrant Traditional Pattern
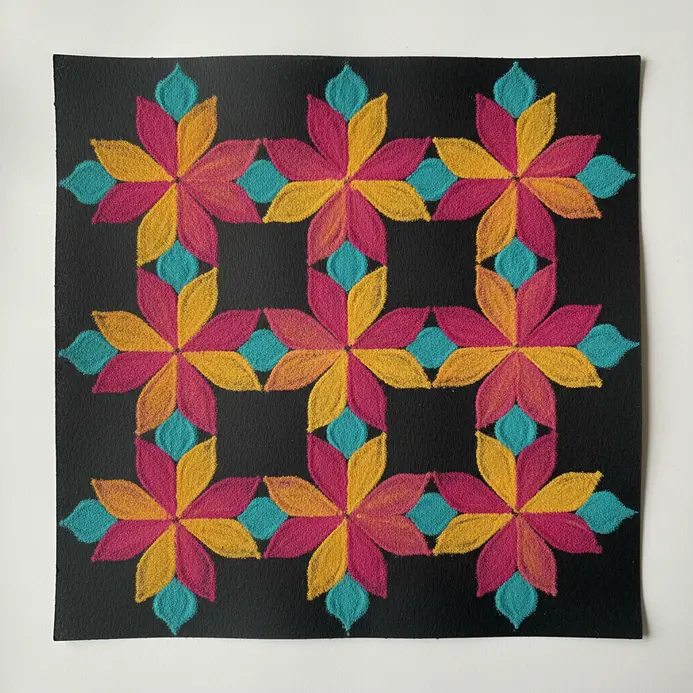
Who would have thought a rigid grid could make floral art so approachable? This one surprised me. You start by drawing a perfect square grid on your floor with chalk or rice flour. Then, you simply fill each little box with a dense, single-color block of petals, like a living mosaic. I love how it transforms soft marigold or rose petals into sharp, geometric shapes. This grid-based method is a stunning easy indian traditional art for beginners project. The method works brilliantly because it removes the pressure of freehand drawing. You focus on one small square at a time, which feels totally manageable. Your final pattern looks incredibly intentional and balanced, even on your first try. My go-to tip? Step back frequently to check your work from a standing height. It is so easy to lose the overall symmetry when you are working close to the ground. Feel the satisfaction of seeing those crisp, colorful blocks come together into a stunning floor design.
Displaying and Preserving Your Indian Art Gallery
Once your ink is completely dry, a light spray of matte acrylic varnish is non-negotiable for protecting your work from dust and UV light. This clear coat locks in your flat color areas and prevents any smudging, especially on paper surfaces. For pieces on heavier board, you can use a brush-on varnish for more control. When framing, choose acid-free mats to prevent yellowing over time, as these earthy palettes and high-contrast outlines deserve to stay crisp. Display your art away from direct sunlight, which can fade even the most vibrant synthetic pigments you used as a smart beginner substitution.
Conclusion
Your first attempts at these traditional forms connect you to a rich visual history, one simple line and dot at a time. The real success lies in the quiet focus you found while filling a space with pattern or balancing a symmetrical border. For your next step, take the motif you enjoyed most and draw it again, but slightly larger or with a new color combination. This practice deepens your understanding of the style’s rhythm. Working on easy Indian traditional art for beginners builds a foundation of patience and observation that makes every future project feel more approachable. Keep your early drawings to see how far your hand and eye have traveled.
FAQs
Q: What is “easy indian traditional art” and which traditional art style does it refer to?
A: Easy Indian traditional art generally refers to simple yet distinct traditional painting styles and folk art forms that are accessible to beginners; it can include styles of Madhubani (Mithila), pattachitra painting, kalighat painting, pichwai painting and many regional devotional art practices that narrate scenes of everyday life, mythological and religious themes and stories of local deities.
Q: How do traditional painting styles like Madhubani and Mithila differ from miniature painting?
A: Traditional Indian painting styles such as styles of Madhubani from the Mithila region of Bihar are folk-oriented, often done on paper, walls or cloth using rice paste, plant sap and natural dyes and pigments, emphasizing vivid colours and simple yet distinct compositions; miniature paintings like Kangra and other distinct schools of miniature paintings are finer in scale, use delicate brushwork and are rooted in courtly and devotional themes.


Q: What materials and natural dyes are commonly used in these folk art forms?
A: Many traditional artforms use readily available materials—rice paste or gum as a binder, plant sap and natural dyes and pigments made from indigo, Indian red (earthy Indian colours like indigo and red ochre), crushed minerals and vegetable extracts; some wall paintings and Kerala mural paintings also use cow dung and lime bases, while pattachitra painting typically uses cloth primed with a mixture of gum and chalk.
Q: Are these painting styles prevalent across India or unique to certain regions?
A: Painting styles are prevalent across various regions—Rajasthan hosts miniature and pichwai painting, the Mithila region of Bihar is famed for Madhubani, Odisha and West Bengal for pattachitra, Bengal for kalighat painting, Kerala for mural paintings, and central India for tribal styles like those of the Gondi tribe of central India; each region has its own history of Indian art and distinct schools of miniature paintings like Kangra among others.
Q: Can beginners learn and create these traditional artforms at home?
A: Yes—many folk art forms are intentionally simple and passed down through generations as devotional art practice or everyday expression; beginners can start with basic tools, paper and natural pigments, learn simple motifs and compositions, and practise scenes of everyday life, nature and social rituals to build skill in these easy Indian traditional art styles.