What You Will Need to Draw a Dog
When you start learning how to draw a dog, gather a standard HB or 2H pencil for light guide lines, an eraser, and white drawing paper or a sketchbook. An optional ruler helps with initial straight guide lines. For the final steps, keep an optional black pen or fine-tip marker nearby for inking over pencil lines. Colored pencils or markers are also optional for adding color at the end. None of these supplies need to be expensive, so you already have everything you need to begin.
How to Use This Step-by-Step Tutorial
Each step builds on the previous one, so follow this order when you figure out how to draw a dog from start to finish. Sketch guide shapes lightly at first because you’ll erase them when the final lines look clean. Slight imperfection in the early steps is normal and part of the process. With this construction approach, your drawing grows progressively more recognizable as you add the head, body, legs, features, and finishing details. Take your time and enjoy seeing the form develop.
1. Light Center Guidelines Set Your Dog’s Pose
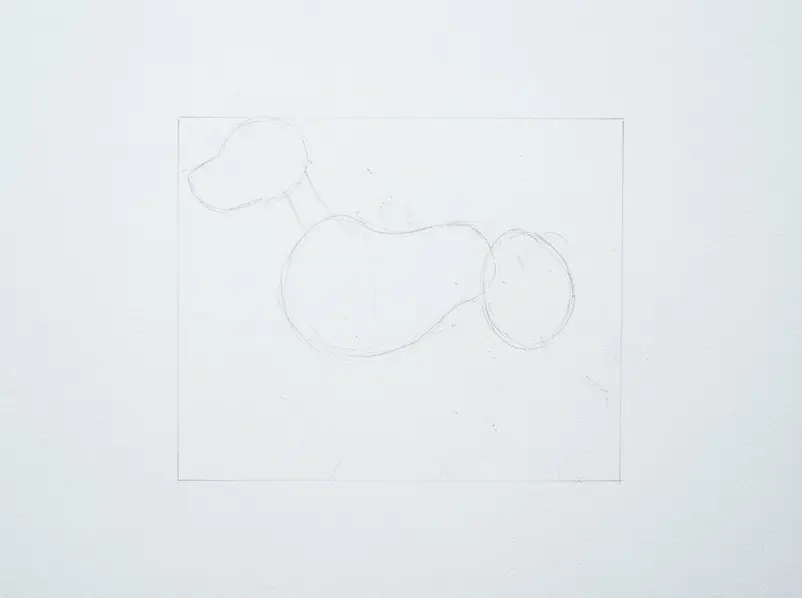
This first step helps you understand how to draw a dog by setting the pose with light construction lines before you add details. You’ll guide the head, body, legs, and tail with one connected set of marks, so the drawing feels balanced on the page.
Use a sharp H pencil to begin practicing how to draw a dog, and press lightly enough for pale lines. Start near the middle of the page, then draw a loose curved line through the body from the chest area toward the rear body. Add a light line across the head, and curve it around the head in the direction the dog faces.
Extend light center lines through the neck, front body, middle body, rear body, legs, and tail. Keep each line connected to the body curve, so the head, legs, and tail follow one pose instead of pointing in separate directions. Mark light lines down the legs touching the ground, then add a few soft strokes beside any misplaced line rather than pressing harder to fix it.
Pro tip: Hold your pencil loosely and draw from your elbow for the long body curve. A few pale strokes are easier to erase than one dark line, so don’t worry if the first curve isn’t perfect. Explore easy animal pencil drawings to continue learning.
2. The Body Oval Defines The Main Silhouette
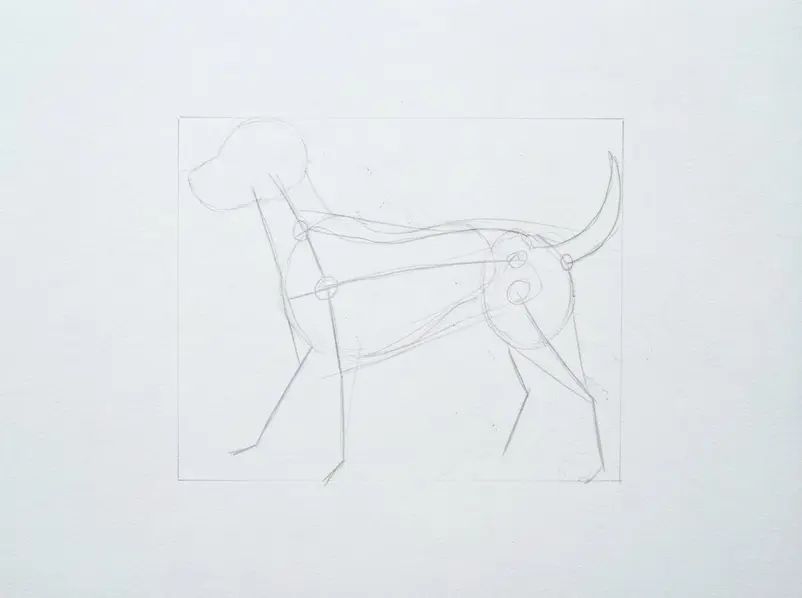
Now, build on the first step by adding a wide body oval behind your initial sketch when you learn how to draw a dog. This oval sets the main outline for the drawing, so keep it light and easy to change. You’re doing great!
Use a light pencil and place its tip near the middle of the first shape. Draw a long, soft curve down and to the right to start the oval. Curve the line around the lower part of the page, then bring it back up toward the first shape.
Leave a small gap where the two shapes meet, or let the oval overlap the first shape with a light line. Keep the oval wider from left to right than from top to bottom. Press lightly as you draw, then close the shape with one smooth curve along the top. When you practice how to draw a dog this way, erase and redraw any part of the body shape if the line feels too long, too narrow, or too high.
Add a second light line inside the oval only when you need help checking its size. These simple shapes give your drawing a clear base. Nice work getting this far!
Pro tip: Hold your eraser ready, and remove only the extra lines outside the oval instead of rubbing away the full shape. Explore realistic animal drawing techniques to continue learning.
3. Add The Head And Muzzle With Simple Shapes
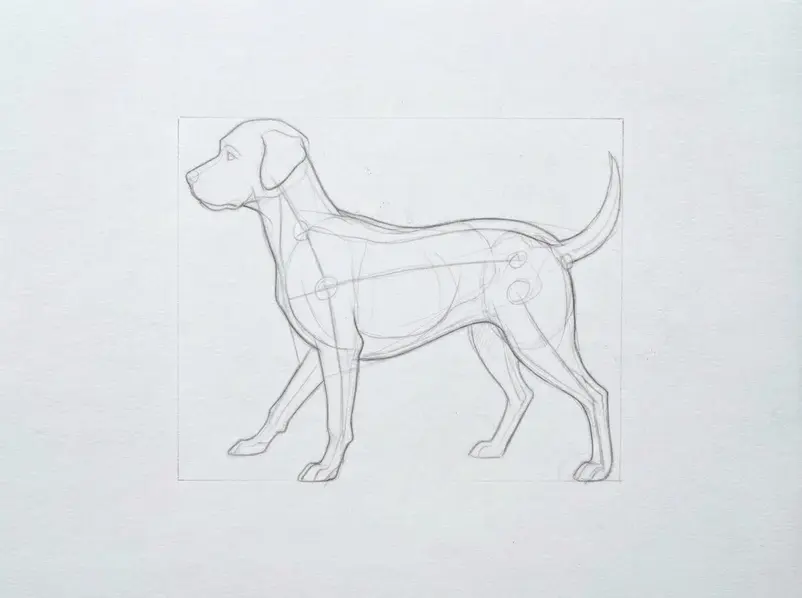
Now that you’ve finished the first step, you’ll add the head and muzzle with simple shapes while figuring out how to draw a dog. These marks give the rest of your drawing a clear place to connect. Extra practice with head shapes is available in drawing faces for beginners.
Draw a large, light oval above the body shape, leaving a small gap between the two forms. Add a smaller rounded shape at the lower front of the oval for the muzzle, and let its edge overlap the head. Use a pencil with light pressure so each line stays easy to change. Curve two short lines from the top of the muzzle toward the sides of the head.
Add two long, soft ear shapes above the head, with one ear on each side. Draw two short neck lines from the bottom of the head down toward the body, then erase any extra lines inside the muzzle shape. Keep the head a little wider than the neck, and leave open space for the eyes in the next step as you practice how to draw a dog.
Your paper should now show one large head shape, one smaller muzzle shape, two ears, and two neck lines. Nice work getting this far! Don’t worry if your curves don’t match perfectly. Pro tip: Check the muzzle with an eraser by lightly removing one side and redrawing it if the shape sits too high or too low.
4. Outline Legs, Paws, Ears, And Tail
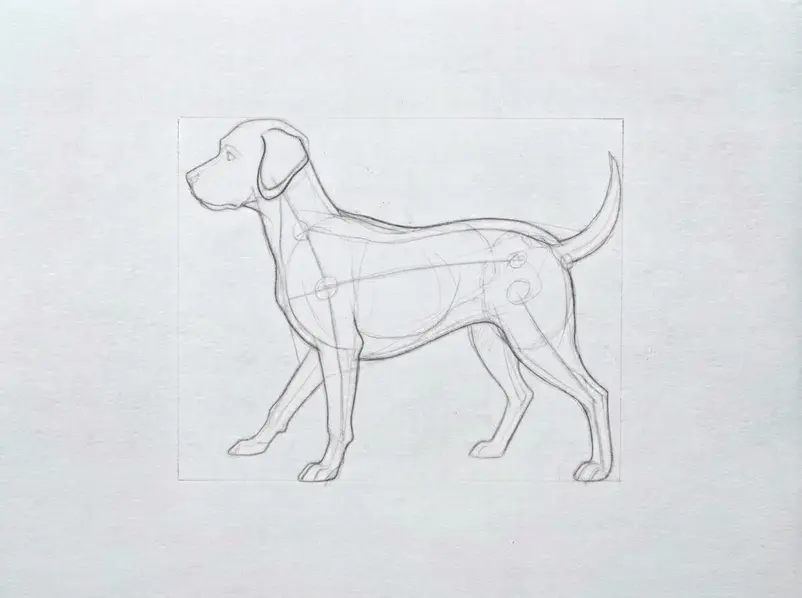
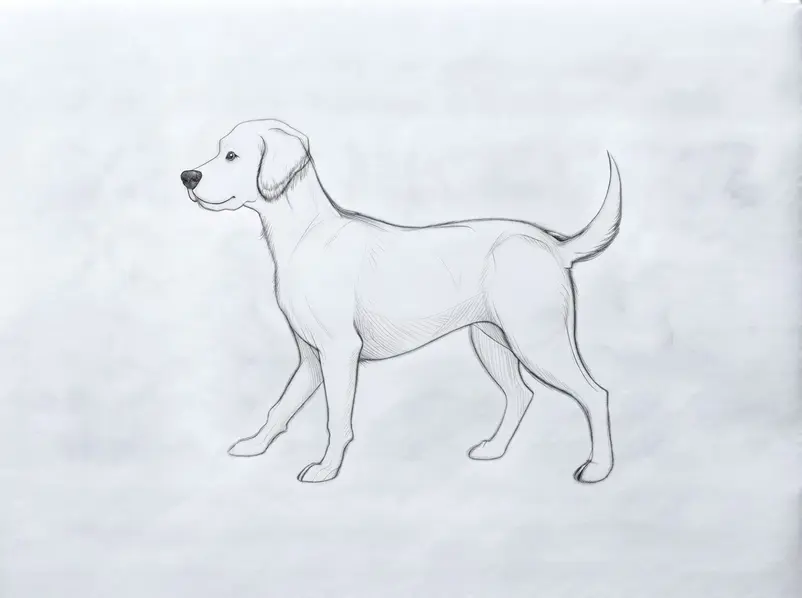
After your first step, use the guide marks already on paper to learn how to draw a dog, adding the legs, paws, ears, and tail. These lines give the drawing its full outline and help each part sit in the right place.
Use a soft pencil to outline the front legs when you figure out how to draw a dog, keeping the lines close to the body guide. Add two back legs below the rear of the body, with each leg curving slightly toward the ground. Draw each paw as a short, rounded line at the bottom of a leg, then add two tiny lines for the toes.
Sketch one ear above each side of the head, using curved lines from the head guide down toward the cheeks. Add the tail at the back of the body with two long curved lines, then join the lines at the tip. Press lightly as you connect the legs, paws, ears, and tail to the body, and leave the first body guides easy to erase.
Nice work, keep checking the spaces between each part as you draw, so the outline stays clear and balanced.
Pro tip: Keep an eraser close and remove only the guide lines inside the legs, paws, ears, and tail after the new lines feel right. Explore improve your drawing skills to continue learning.
5. Refine The Dog’s Form With Fur Details
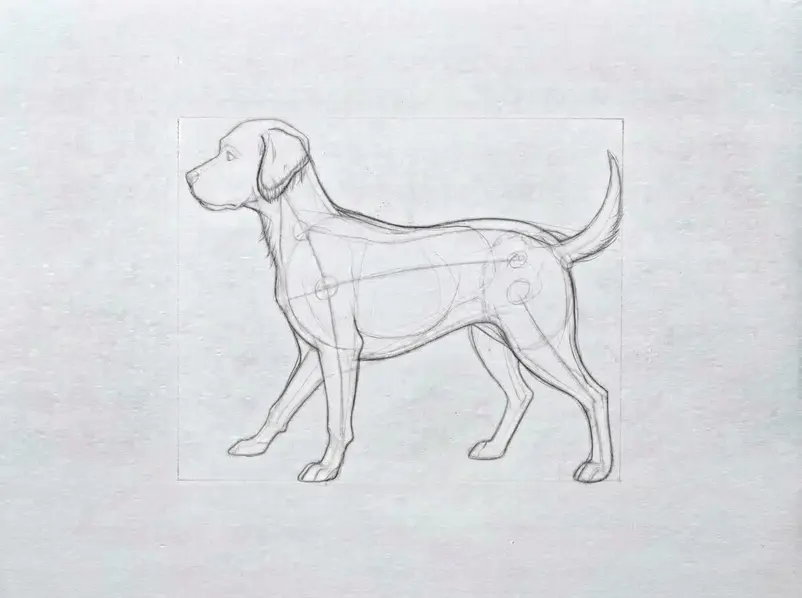
Now build on the lines from your first step by adding fur marks around the dog’s form while you master how to draw a dog. These marks will give the drawing more shape and texture. Nice work getting this far with your pencil!
Start at the top of the head and draw small lines in the same direction as the head’s curve. Add short lines around the cheeks, leaving small gaps between each mark. Use realistic animal drawing techniques to guide the direction of each fur line. Draw longer lines along the neck and chest, then use shorter lines near the face.
Add a few curved lines over the back, legs, and tail, following the outline already on your paper. Press lightly at first, then press a little harder near the darker parts of the dog outline. Add a few darker lines under the ears, below the neck, and beside the legs. Keep the middle of each large area lighter by leaving some paper clear.
Use an eraser to remove fur lines if a section looks too dark or crowded as you refine how to draw a dog. Then add a few fresh lines over the clean space. You’re doing great, and each small mark is helping the dog take shape!
Pro tip: Keep fur lines short and uneven instead of making long rows, since repeated rows make the drawing look stiff.
6. Erase Guides For A Clean Pencil Drawing
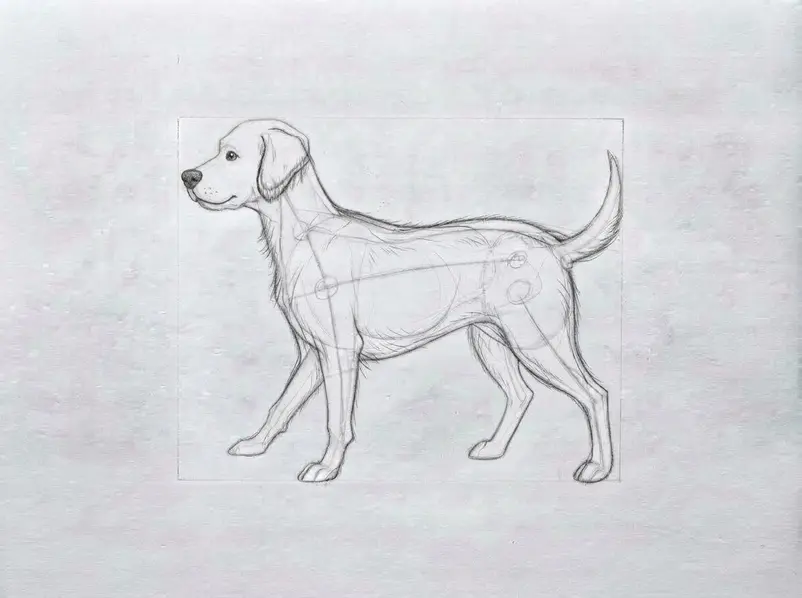
Now that your first step is on paper, this part clears away guide lines from your dog drawing. A soft eraser helps keep the dark pencil marks safe while you perfect how to draw a dog and the page becomes cleaner.
Place the eraser over one light guide line and rub with small, gentle strokes. Lift the eraser often so you don’t rub away the dog’s outline. Erase the lines inside the head, body, legs, and tail first. Leave every darker edge in place as you work.
Turn the paper slightly and check each area for leftover marks. Use the corner of the eraser for small spaces near the ears, paws, and nose. Brush away the crumbs with your hand, then add a few light pencil lines where an edge needs more shape as you clean up how to draw a dog.
If a line feels too dark, press the eraser lightly over it instead of rubbing hard. Keep your page clean, and your drawing faces for beginners clear lines ready for the next step. You’re doing great!
Clean erasing takes a little care, so don’t worry if you need to go over one spot twice. This part is easier than it looks!
Pro tip: Cover one small area at a time with a small eraser, and stop as soon as the guide line fades. This keeps your main outline safe and gives the pencil drawing a neat finish. Explore drawing faces for beginners to continue learning.
7. Ink The Final Outline And Key Details
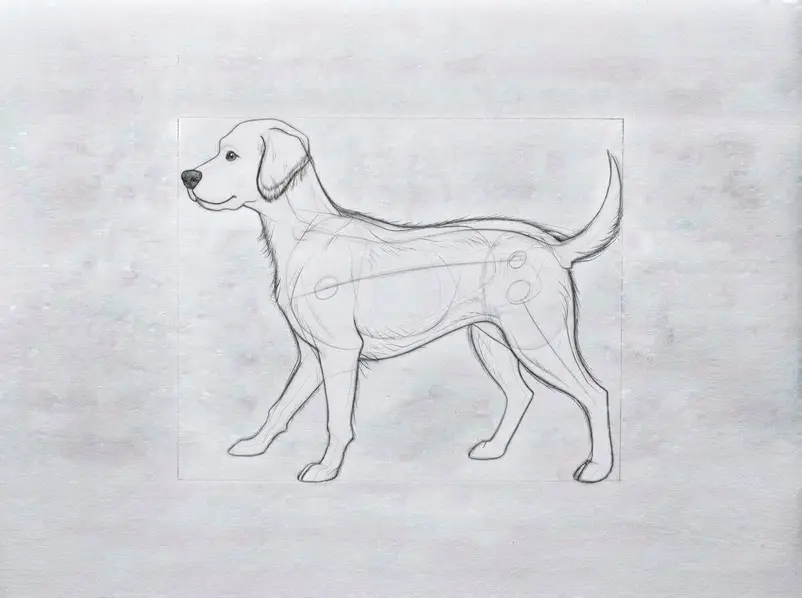
Now that your first step is on paper, this chapter moves your how to draw a dog sketch toward a finished drawing. You’ll trace the main shapes and add small marks for the face, paws, and fur.
Use a fineliner to trace the outside edge of the head when you finalize how to draw a dog, using slow, smooth lines. Press lightly at first, then press a little harder along a few parts of the back, chest, and tail. Draw two small marks for the eyes, a dark shape for the nose, and a short curved line for the mouth.
Add short lines inside the ears, around the paws, and along the cheeks to create simple fur marks. Draw a few longer lines on the neck, chest, back, and tail, then erase the old pencil lines once the ink is dry. You’re doing great, and this part is easier than it looks!
Pro tip: Keep your ink lines simple instead of tracing every pencil mark. A clean outline with a few well-placed fur lines will look clearer than a page filled with tiny strokes. Explore how to draw simple shapes to continue learning.
8. Add Soft Pencil Shading For Volume
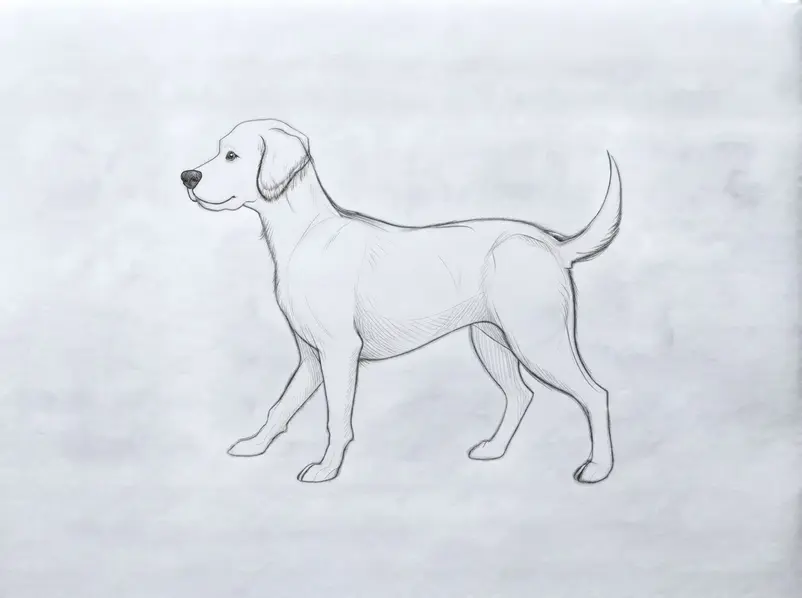
Now that you’ve placed the first pencil marks, this step adds soft shading inside the dog as you complete how to draw a dog. These gentle marks help the drawing feel round instead of flat. Start with soft pencil shading inside the lines you’ve already drawn.
Hold a 2B–6B pencil farther from the tip, and press lightly as you add the first layer while you finish learning how to draw a dog. Use realistic 3D pencil techniques to build smooth layers without thickening the outside line.
Draw short, curved strokes below the muzzle, inside the ears, under the neck, between the legs, and along the far side of the body. Follow the dog’s form with longer strokes along the back and middle of the body, then use small, close strokes for the nose and deep ear areas. Add one light layer over another, making each shaded spot a little darker with every pass.
Leave the brightest paper untouched, soften the edges with a clean cotton swab, and add a light cast shadow under the paws after the body shading is finished.
Pro tip: Start with light pressure instead of dark marks, because heavy pencil lines are hard to lift with an eraser. You’re doing great, and a few uneven marks are totally normal.
Tips to Improve Your Dog Drawings
Once you’ve completed your drawing, try sketching it a second time from memory. Practice the most complex section separately, which is usually the decorative detail step. Vary the drawing’s size to see how proportion changes, then experiment with adding a background or extra shading. Each attempt gives you a clearer sense of form, so keep practicing and let your confidence grow.
Conclusion
You did it! You’ve completed a full lesson on how to draw a dog from a blank page, and that’s a real win. You used light guide shapes to set the head and body, added the legs and features, refined the form, and finished with clear lines and shading. Those steps give your drawing a strong base and help the dog feel balanced. Try the lesson again from memory when you’re ready. Make one drawing small, then make another larger and compare the results. You could also try a puppy, a sitting dog, or a long-eared dog using the same shape method.
Next, try drawing a cat or another animal with simple body forms. Keep your first drawing nearby so you can see how much you’ve learned. Display your finished work somewhere you enjoy, or share it with someone who will cheer you on. Every page gives you more practice.
FAQs
Q: What pencil should I use for this dog drawing tutorial?
A: Use an HB pencil for the light sketch. A 2B pencil works well for the final shading.
Q: How do I keep the dog’s body proportions balanced?
A: Use light ovals and rectangles first. Check the head, body, and leg lengths before adding fur or small features.
Q: Should I erase the guide lines before inking?
A: Yes. Erase most guide lines after refining the pencil drawing, then trace the clean outline with a fineliner or ballpoint pen.
Q: How long does it take to draw a dog?
A: A beginner will usually need about 30 to 60 minutes, depending on the level of detail and shading.
Q: How do I add shading to my dog drawing?
A: Use a soft 2B pencil in layers. Place darker tones under the belly, inside the legs, and behind the ears.