


Archival Materials Required For Lasting Memory Preservation
The most heartbreaking mistake is using a standard glue stick on a photo that will yellow and peel in five years. You need a pH-neutral adhesive for anything paper-based, which stops acid migration from eating your memories. That same archival rule applies to your background papers and cardstock, so look for acid-free labels. When gathering supplies for diy heart touching scrapbook ideas, keep your tactile treasures like ticket stubs or fabric swatches protected. A tiny dot of acid-free double-sided tape holds them without staining. The good news is these materials are easy to find and give you peace of mind. Your work becomes a true heirloom, not a temporary collage. This preservation approach ensures every texture and photo stays as vivid as the day you placed it.
Establishing A Cohesive Emotional Narrative Through Layout
Your viewer’s eye needs a clear starting point, which is why you must establish a single focal photo on each spread. Build your layout around that anchor image, using smaller supporting pictures and journaling to tell the fuller story. Resist the urge to fill every inch of the page because strategic white space gives the eye a place to rest. We all know the temptation to use every cute embellishment, but that clutter competes with your core memory. Layer textures like vellum or lace under a photo to create depth and pull people into the scene. This technique of visual hierarchy guides diy heart touching scrapbook ideas through a feeling, not just a timeline. Trust me, a page with breathing room feels more intimate and impactful than a crowded one.
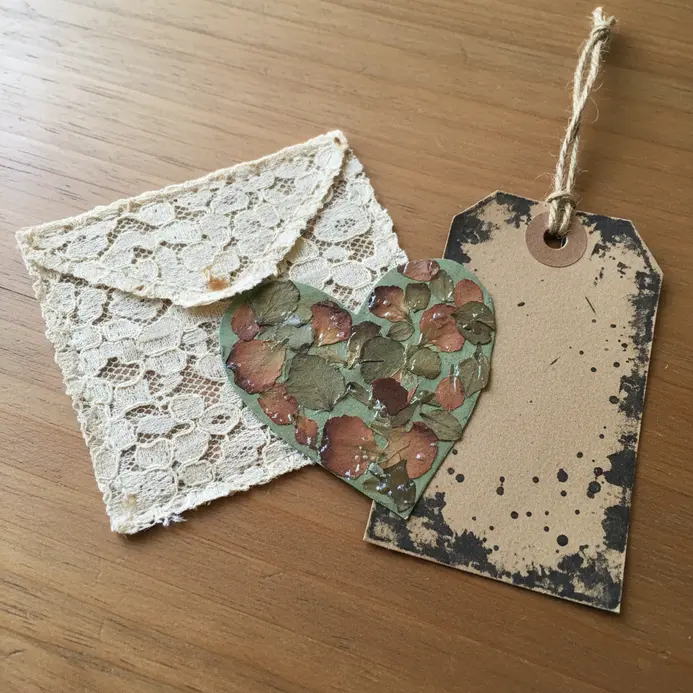
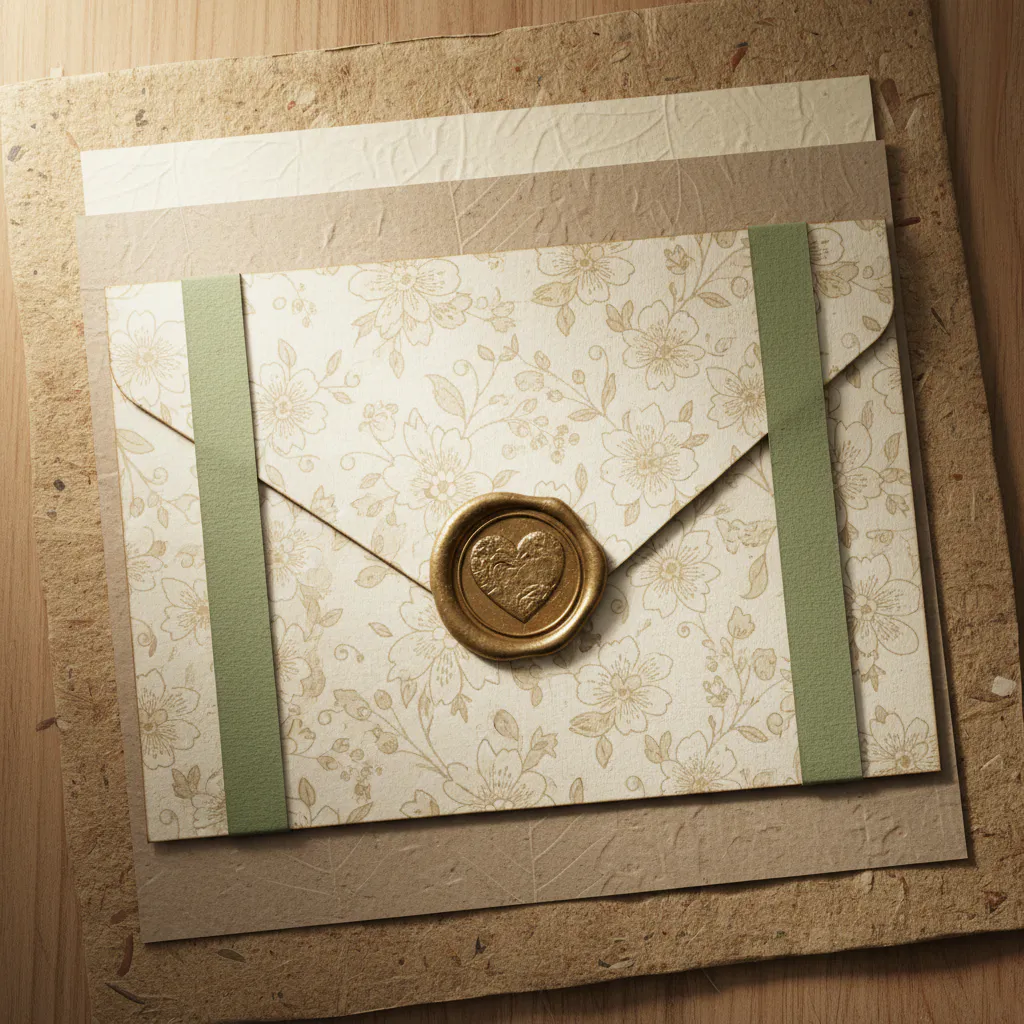
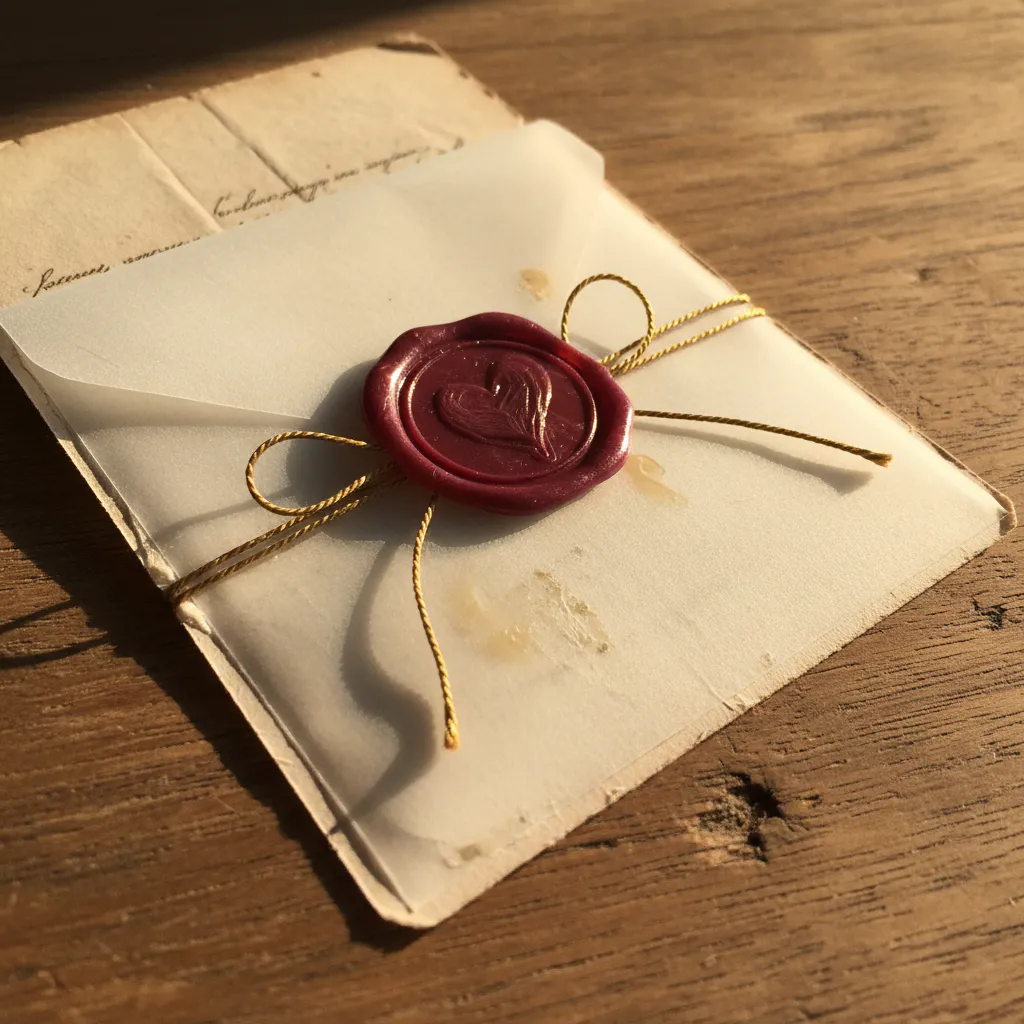
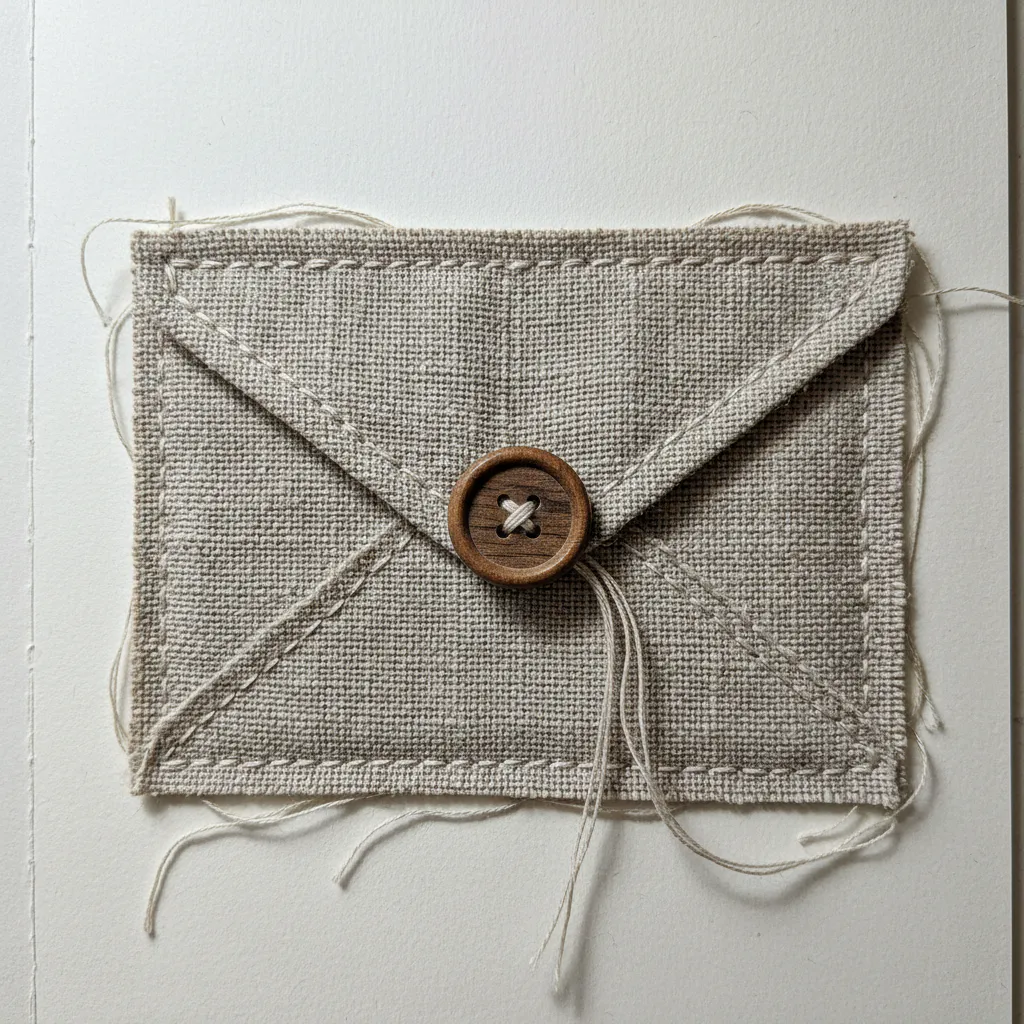
1. Build a Vintage Lace Envelope Keepsake Pocket
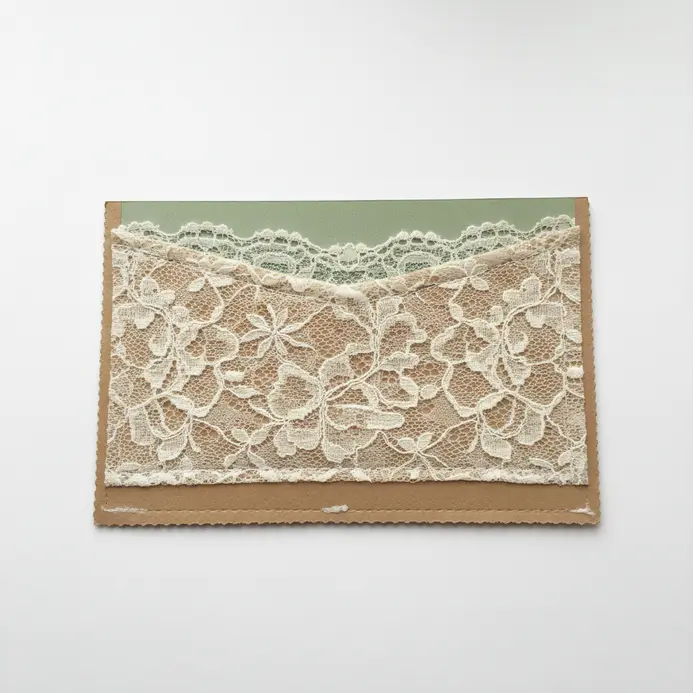
Ever wanted to hold a tiny, precious memory in something just as delicate? This one looks like it needs a sewing machine, but you can create it with just fabric glue and a few pieces of beautiful lace. Cut your lace into a simple envelope shape, fold the sides to form the pocket, and secure it all with thin lines of adhesive. I love how the vintage texture makes any note or photo inside feel like a cherished heirloom, perfect for scrapbooking. For a beautiful, no-sew closure, add a small ribbon tie or a vintage button. Crafting these diy heart touching scrapbook ideas feels incredibly sentimental and you can find more DIY scrapbook ideas to pair it with.
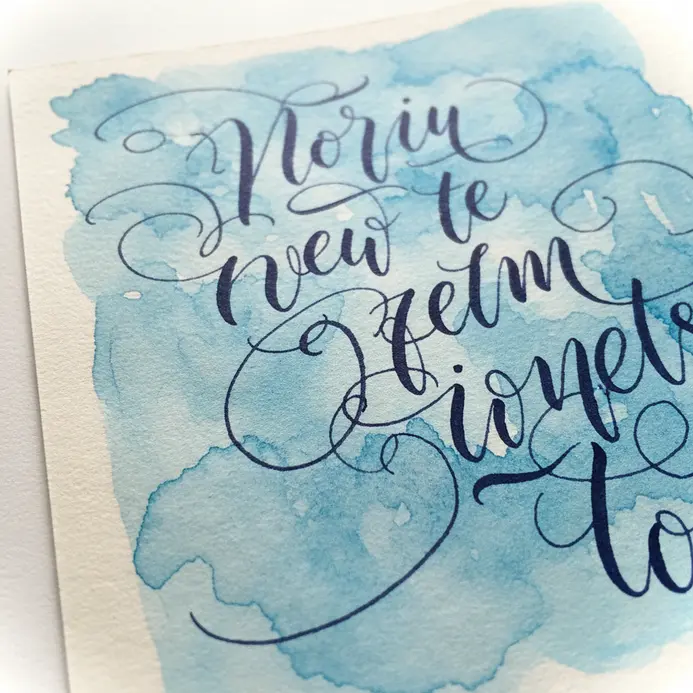
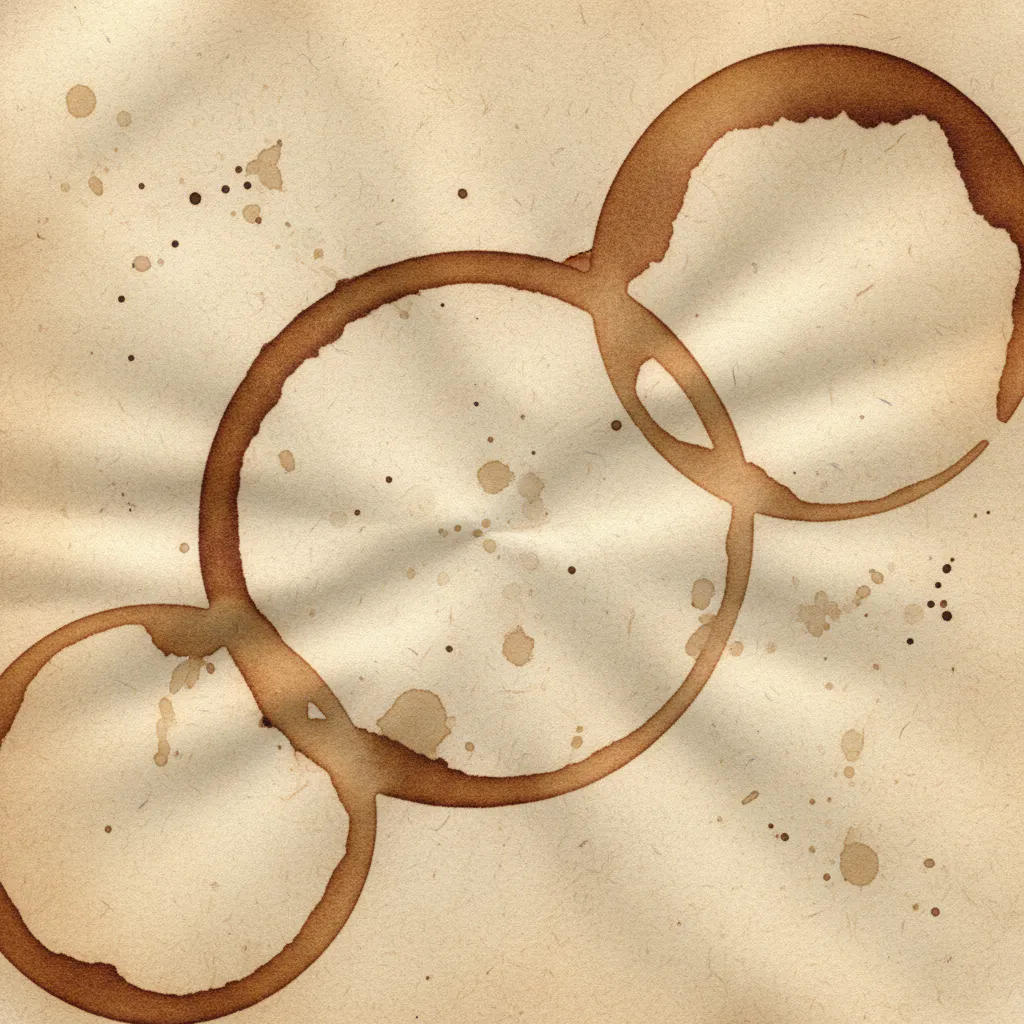
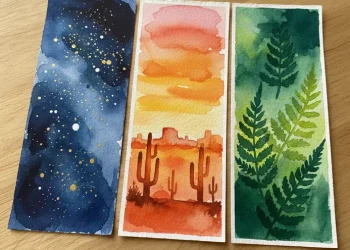
2. Create a Watercolor Washed Memory Narrative Page

Isn’t it wonderful when a page feels as soft and emotional as the memory itself? This technique starts by laying down a beautiful, flowing watercolor wash on your paper to set the entire mood. I love how you then layer your written story and special photos or tickets right over that dreamy background. It works so well because the fluid colors evoke the feeling, while your words and keepsakes tell the specific tale. Trust me on this one – using 140lb watercolor paper is the key to keeping everything flat and perfect when planning your diy heart touching scrapbook ideas.
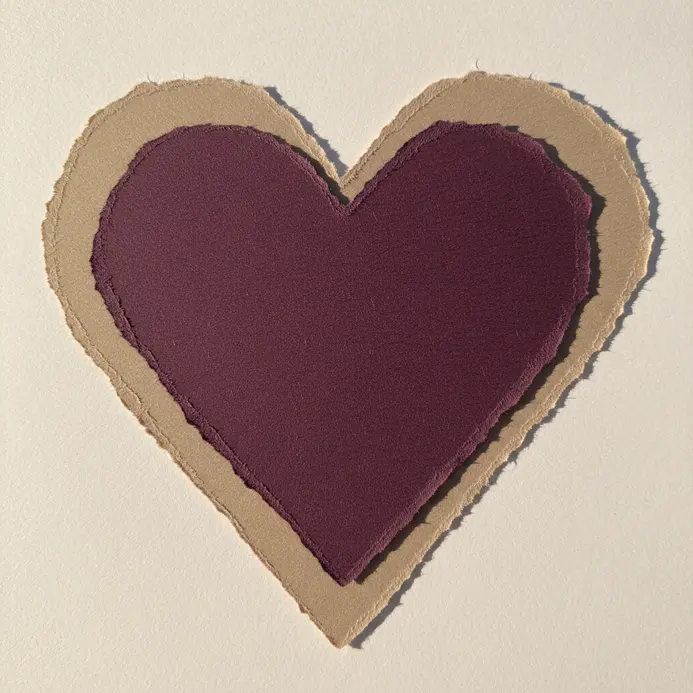
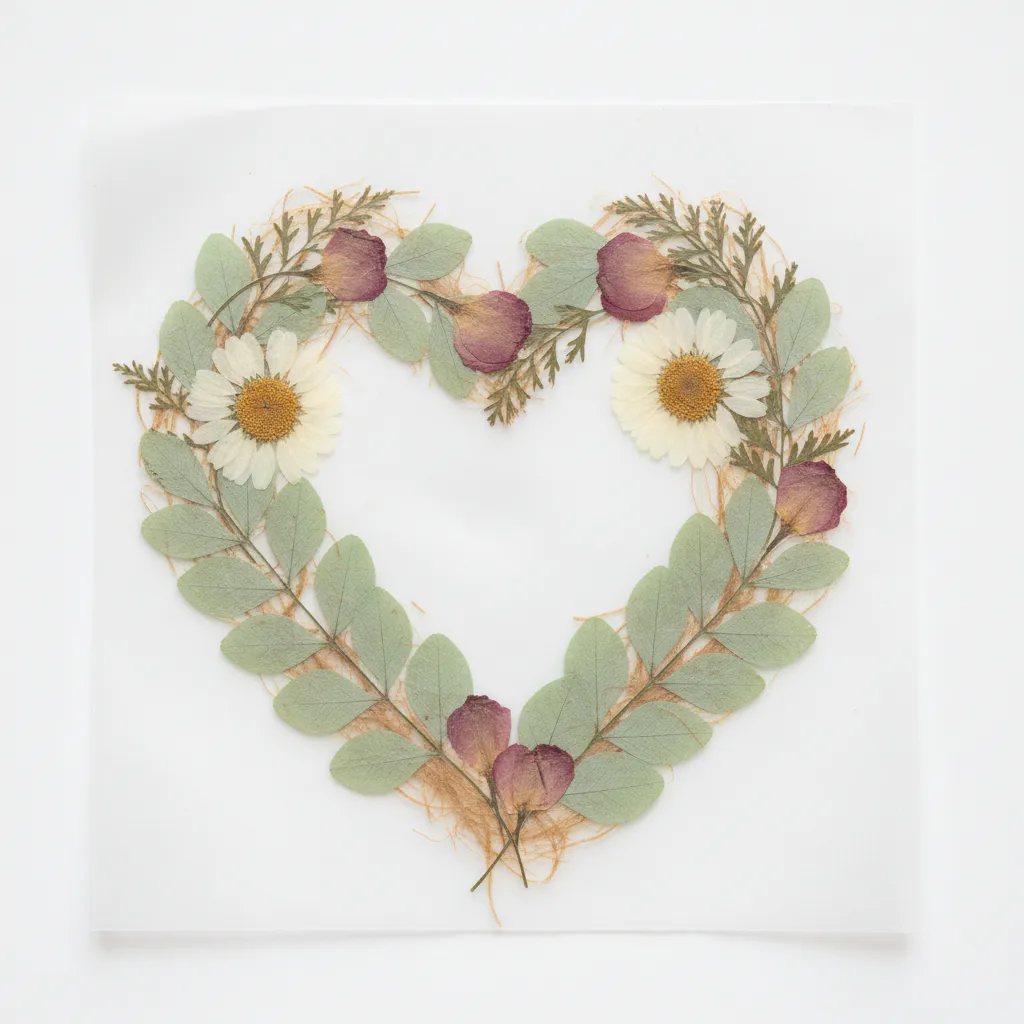
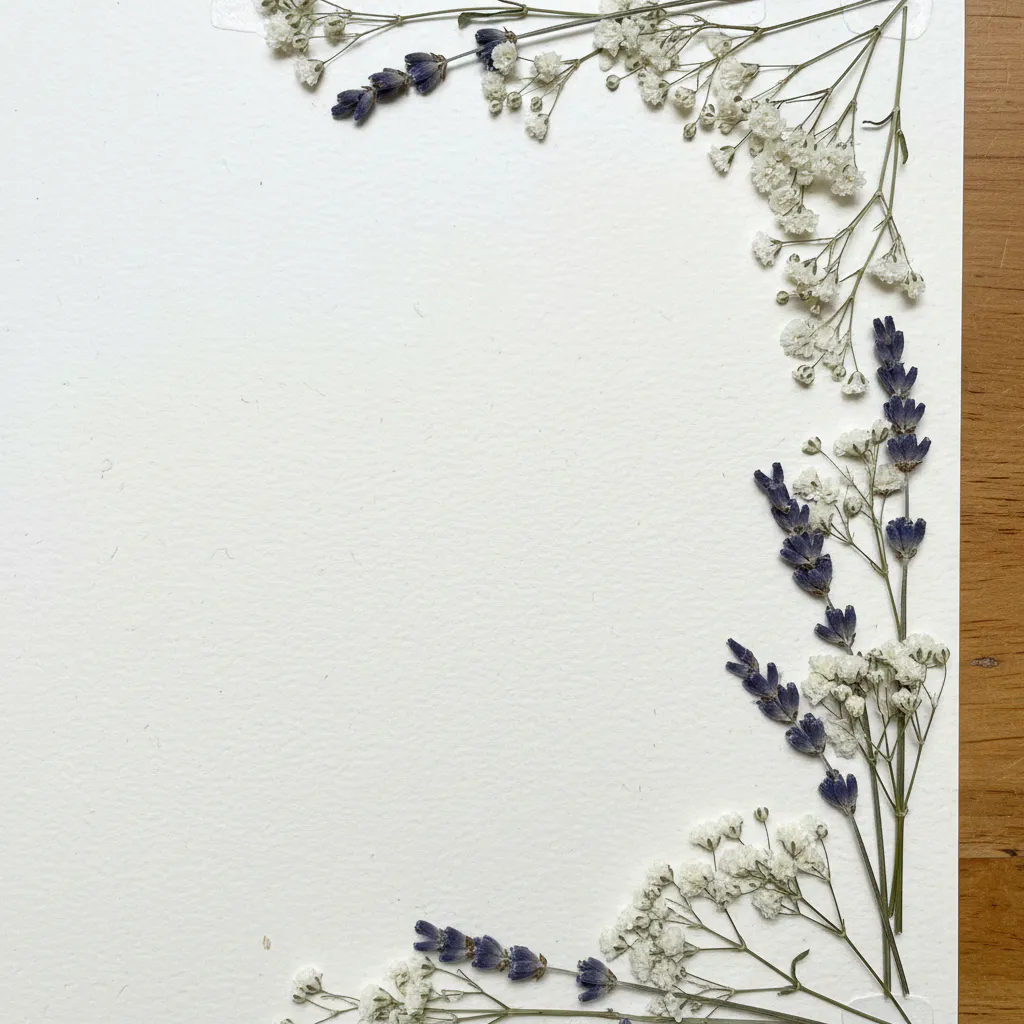
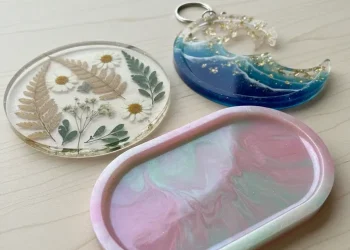
3. Assemble a Pressed Botanical Heart Collage Layout
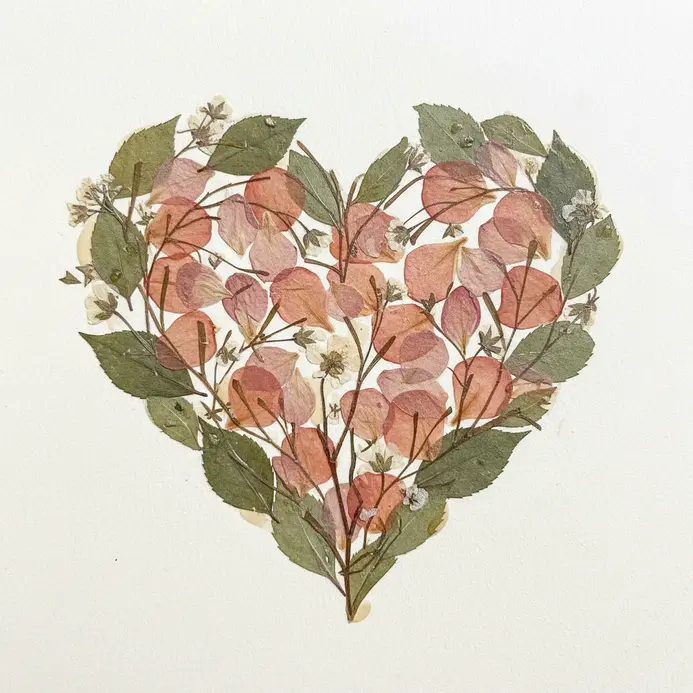
This one feels like magic, doesn’t it? You are turning delicate, preserved flowers into a symbol of lasting affection. First, lightly sketch a heart onto your acid-free cardstock. Then, without any glue, play with arranging your pressed botanicals inside that shape. I love starting with a larger leaf as an anchor point. Once you are happy with the layout, carefully glue each piece down with a tiny brush. It works because you are combining nature’s own beauty with a shape everyone loves, creating a gift full of personal meaning. For another sentimental handmade gift, you might enjoy these creative DIY keychain crafts. Adding pressed botanicals to your diy heart touching scrapbook ideas brings nature indoors.
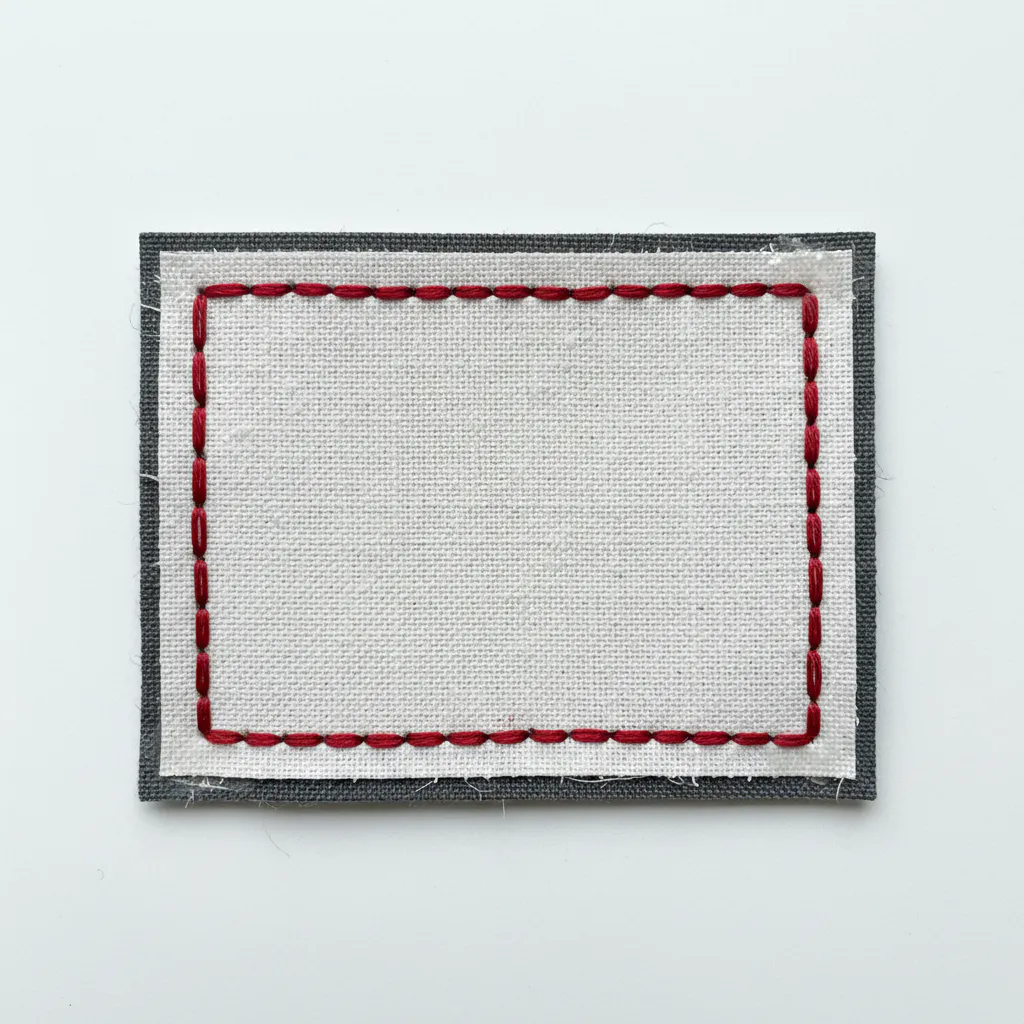
4. Add a Hand Stitched Thread Border Frame
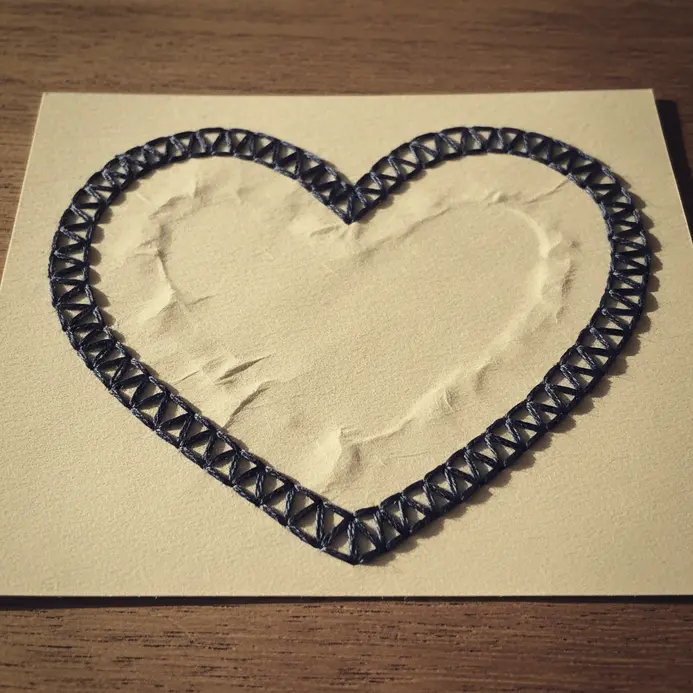
This one looks so intricate but trust me, it’s a wonderfully simple way to add a handmade feel. You just need your scrapbook page, some embroidery floss, and a needle. Mark two parallel lines around your photo or element, then stitch right along them with a basic backstitch or running stitch. It works because that soft, textured border gives your page a cozy, artisanal quality you simply cannot get with paper alone. I love how it makes everything inside feel special and protected. For a clean start, try this on a smaller project first, like one of those easy craft ideas for kids to get your stitching confidence up. These stitching details elevate diy heart touching scrapbook ideas effortlessly.
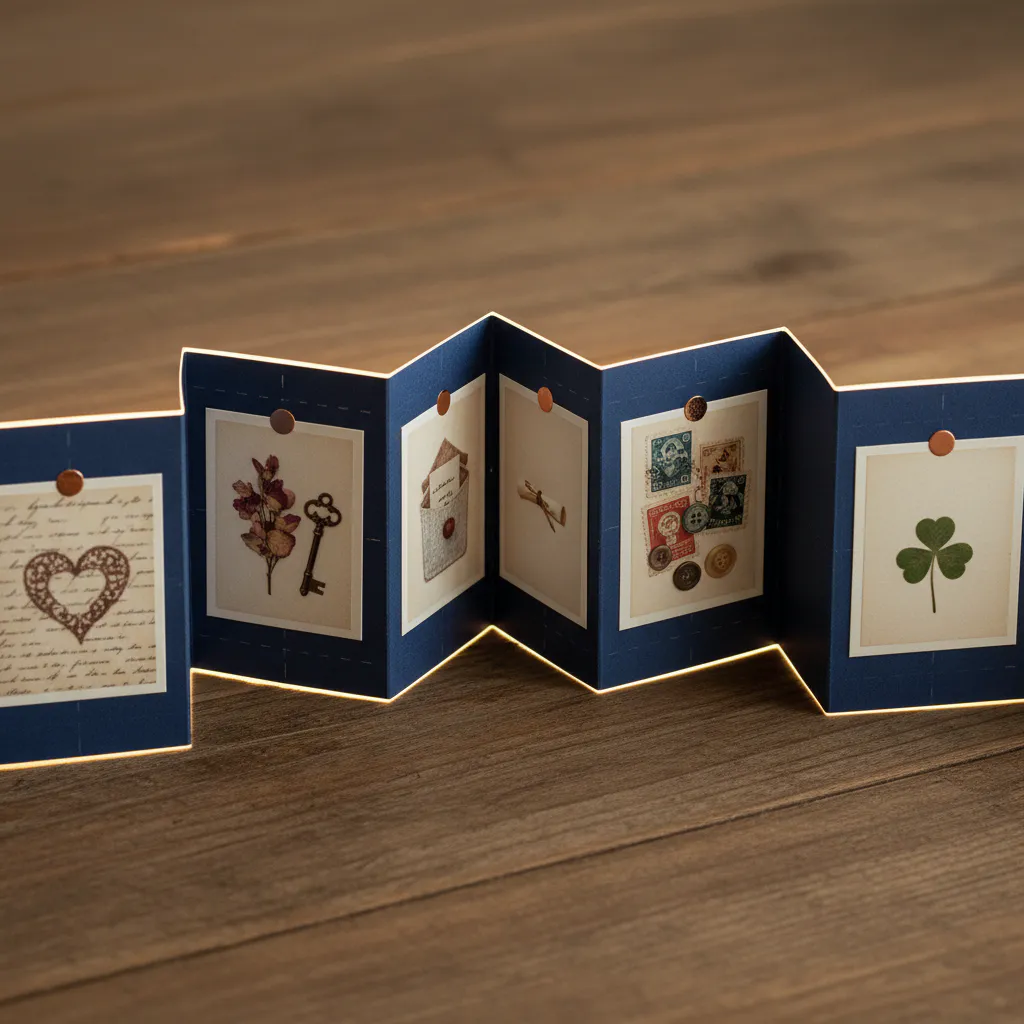
5. Fold an Accordion Photo Timeline Strip
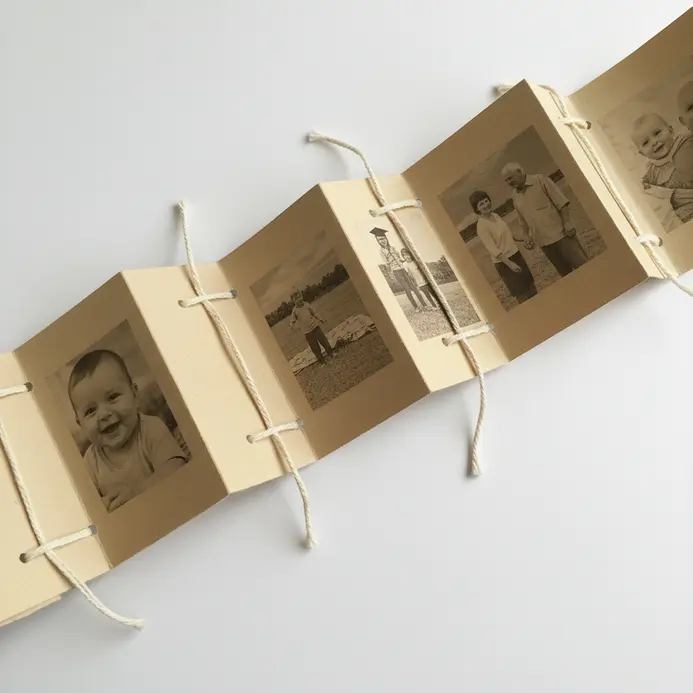
This looks fancy, but the technique is wonderfully simple. You take a long strip of paper with your photos attached and fold it into a compact zig-zag. The secret is the alternating valley and mountain folds. You fold one section under, then the next section over, pressing firmly each time. I love how this creates a neat little fan that stores flat and unfolds into a beautiful, flowing timeline. Isn’t it satisfying to see all your memories pop out like that? For the sharpest creases, trust me on this one and use a bone folder. Your finished accordion strip will be a stunning way to present your diy heart touching scrapbook ideas through a flowing timeline.
6. Layer a Translucent Vellum Overlay Lyric Page
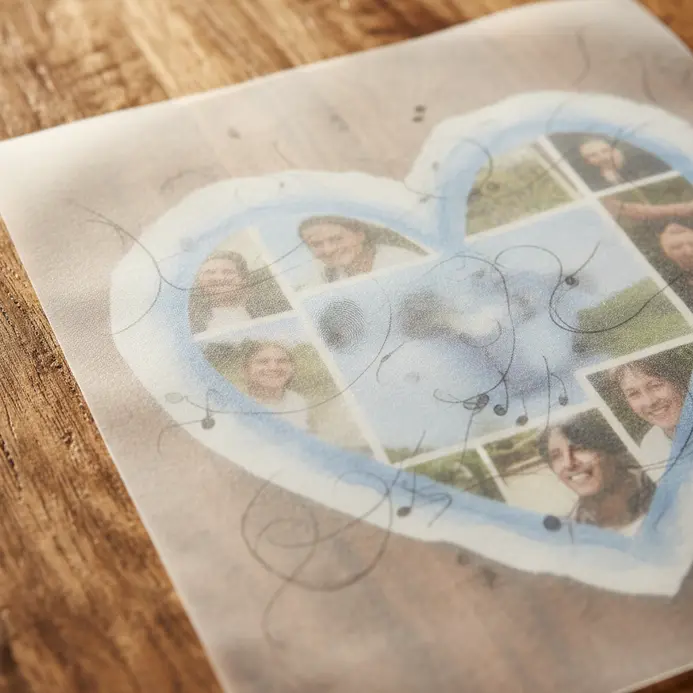
This technique looks so elegant and complex, but it is surprisingly straightforward. You will create a beautiful base page, perhaps with a photo or patterned paper. Then, you print or write your favorite song lyrics on a sheet of translucent vellum paper is a fantastic accessory to inspire creativity in your scrapbooking. and layer it right on top. The magic happens because the vellum is semi-transparent, letting the background softly show through your words. It works because it adds wonderful depth and a dreamy, soft focus to your page. I love how it makes the lyrics feel like part of the memory itself. For a clean look, remember to use special vellum adhesive so the glue does not show. Layering vellum like this is one of my favorite diy heart touching scrapbook ideas. Does that not create a stunning, heartfelt effect?
7. Make a Distressed Kraft Paper Sentiment Tag
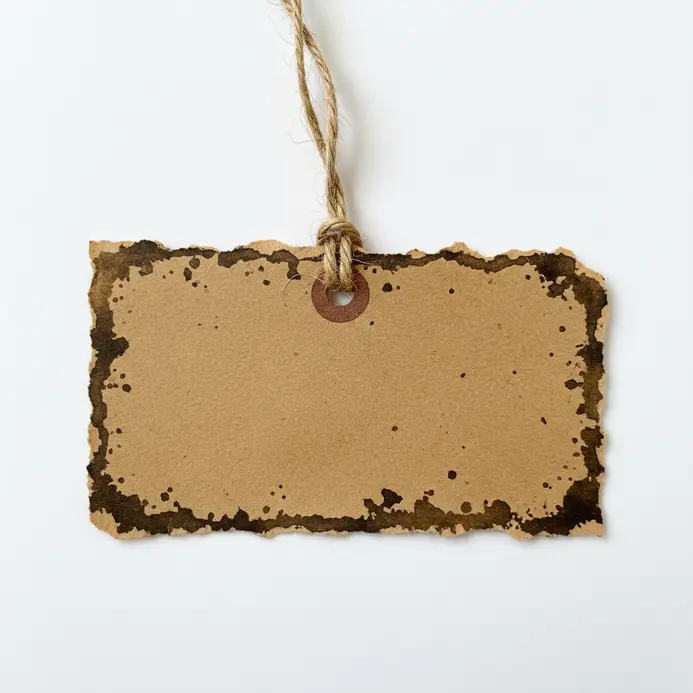
This one looks like a professional antique find, but trust me, it is surprisingly simple to create. You start by cutting your tag shape and adding a handwritten or stamped message. The magic happens when you gently rub distress ink onto the edges, instantly giving it that warm, worn-in character. Isn’t it amazing how a little scuffing and crinkling transforms plain paper into a heartfelt keepsake? I love how this technique adds so much personal history and rustic charm. It makes your layout feel like a treasured storybook. For another way to add a personal touch to your home, explore DIY wind chime projects. Distressed paper details elevate your diy heart touching scrapbook ideas beautifully.
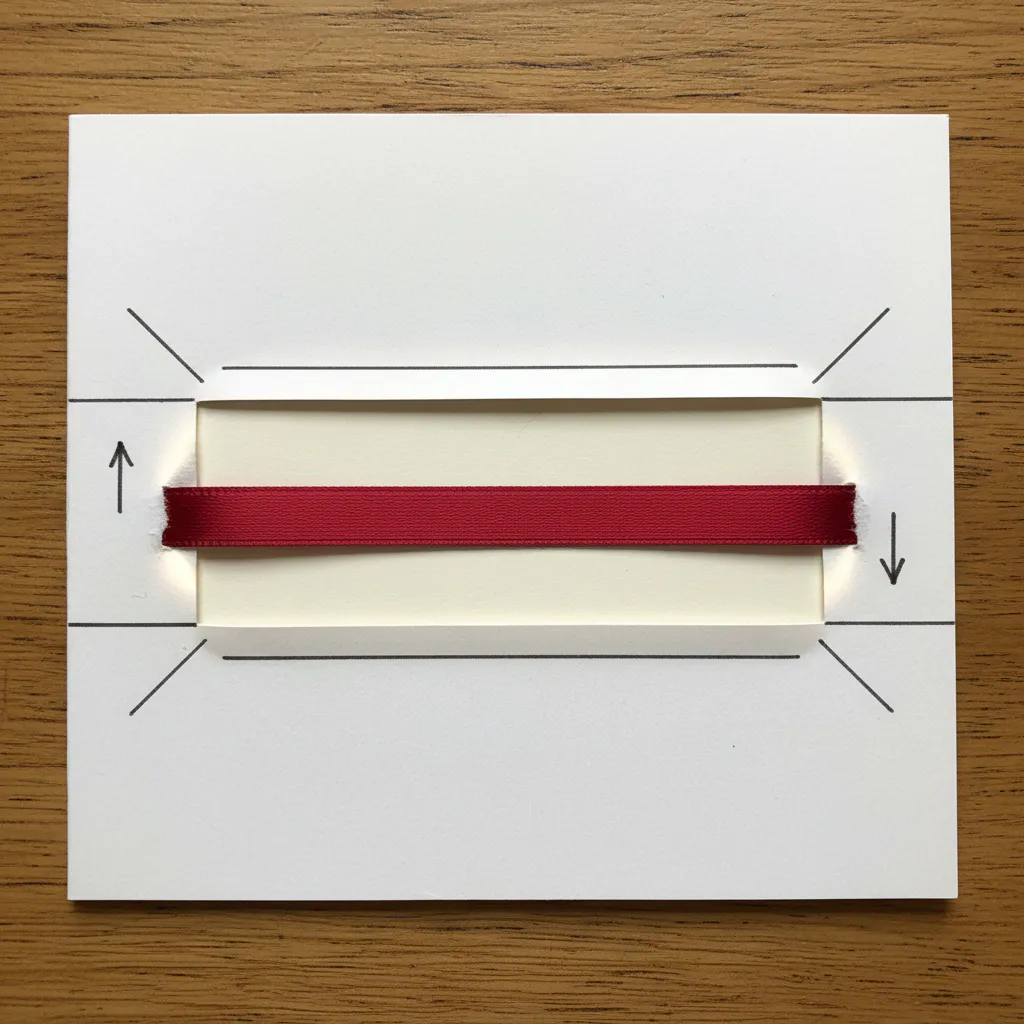
8. Add a Hidden Journaling Pull-Out Card Tab
Ever wish you could add more words without crowding your page? A hidden pull-out card is your secret solution. You simply create a small pocket on your layout and tuck a folded piece of cardstock inside, leaving just a little tab visible. Pull it out to reveal a whole extra space for your thoughts or a tiny photo collage. I love how this adds an interactive surprise. It keeps the main design clean while giving you a private spot for your most personal reflections. Trust me, that little ‘reveal’ moment feels so special every time you explore these diy heart touching scrapbook ideas together.
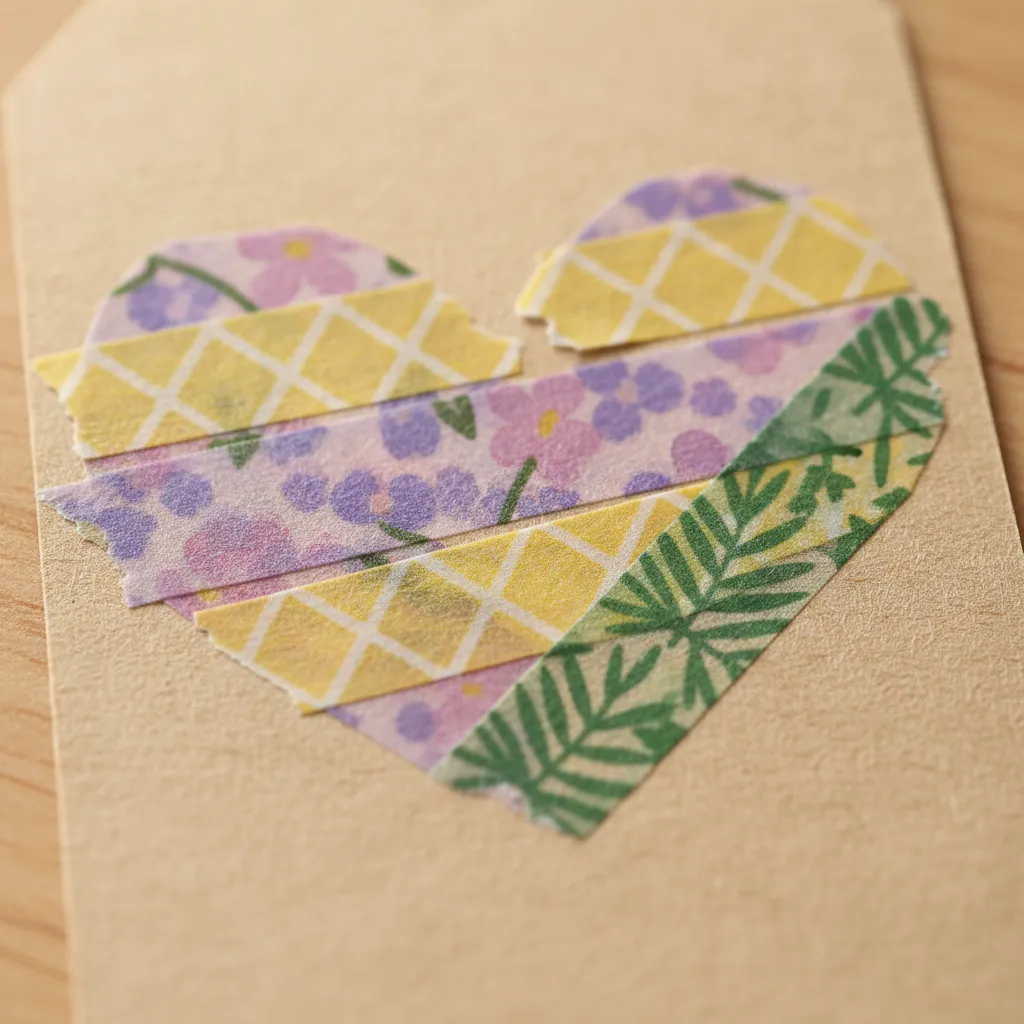
9. Apply a Polaroid Style Washi Tape Edge
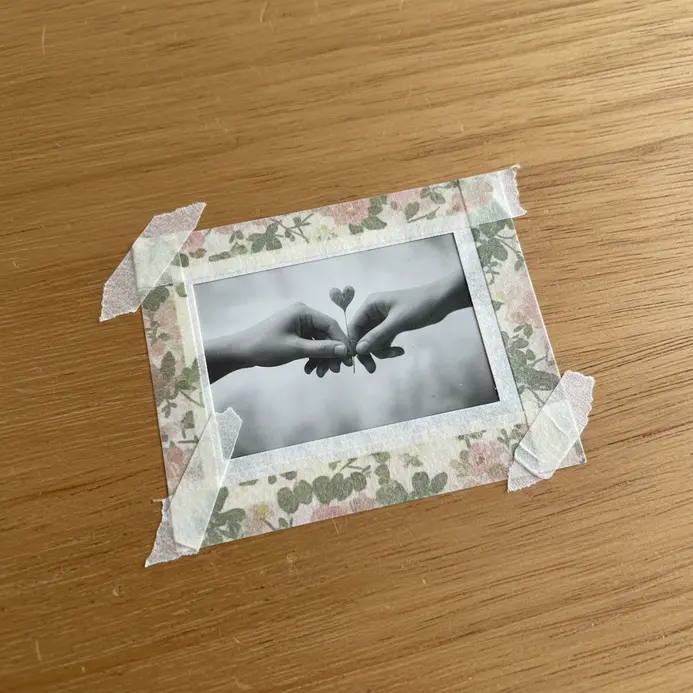
This trick looks so polished, but it is one of the easiest ways to decorate a photo in your scrapbook. You simply create a classic instant camera border using white washi tape. The key is using a wider strip for the bottom and narrower strips for the top and sides. I love how it instantly gives your page a nostalgic, handmade feel. Start by placing your picture on your work surface. Apply the wide tape along the bottom edge first, then add the thinner tapes to the sides and top. Trim everything flush for a clean finish. This framing technique works beautifully for highlighting special moments when planning your diy heart touching scrapbook ideas. Does that not look charming?
10. Press a Flower with a Date Marker
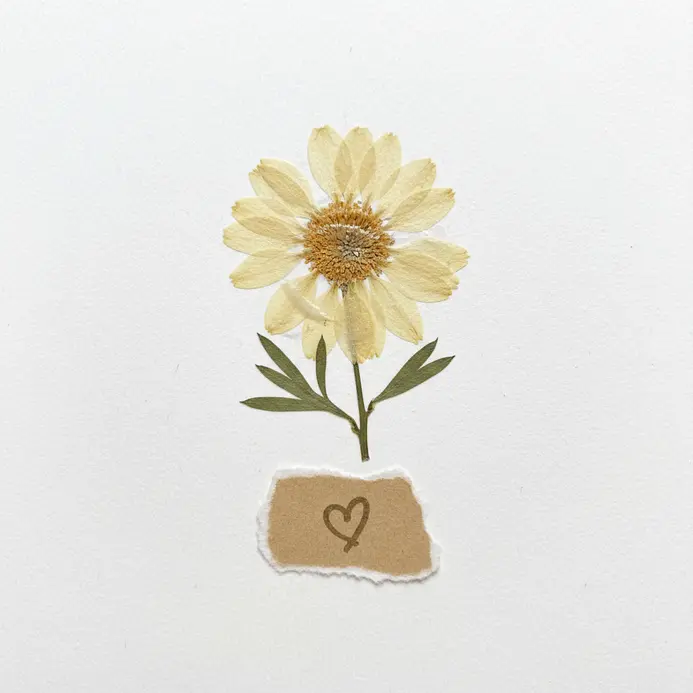
Ever wanted to hold onto a beautiful moment in nature? This idea is my personal favorite for turning a simple flower into a story. You pick a fresh bloom, like a pansy or daisy, and press it flat in a book or a flower press with some absorbent paper. The magic happens when you write the date on a tiny piece of cardstock and press it right alongside the flower to celebrate the occasion. It works so well because the date transforms it from a pretty decoration into a powerful, personal memento of a specific day. You will love how this adds a deeply sentimental layer to your pages, and for another way to create lasting handmade gifts, check out these simple rock painting ideas. Including floral timelines in your diy heart touching scrapbook ideas captures time perfectly.
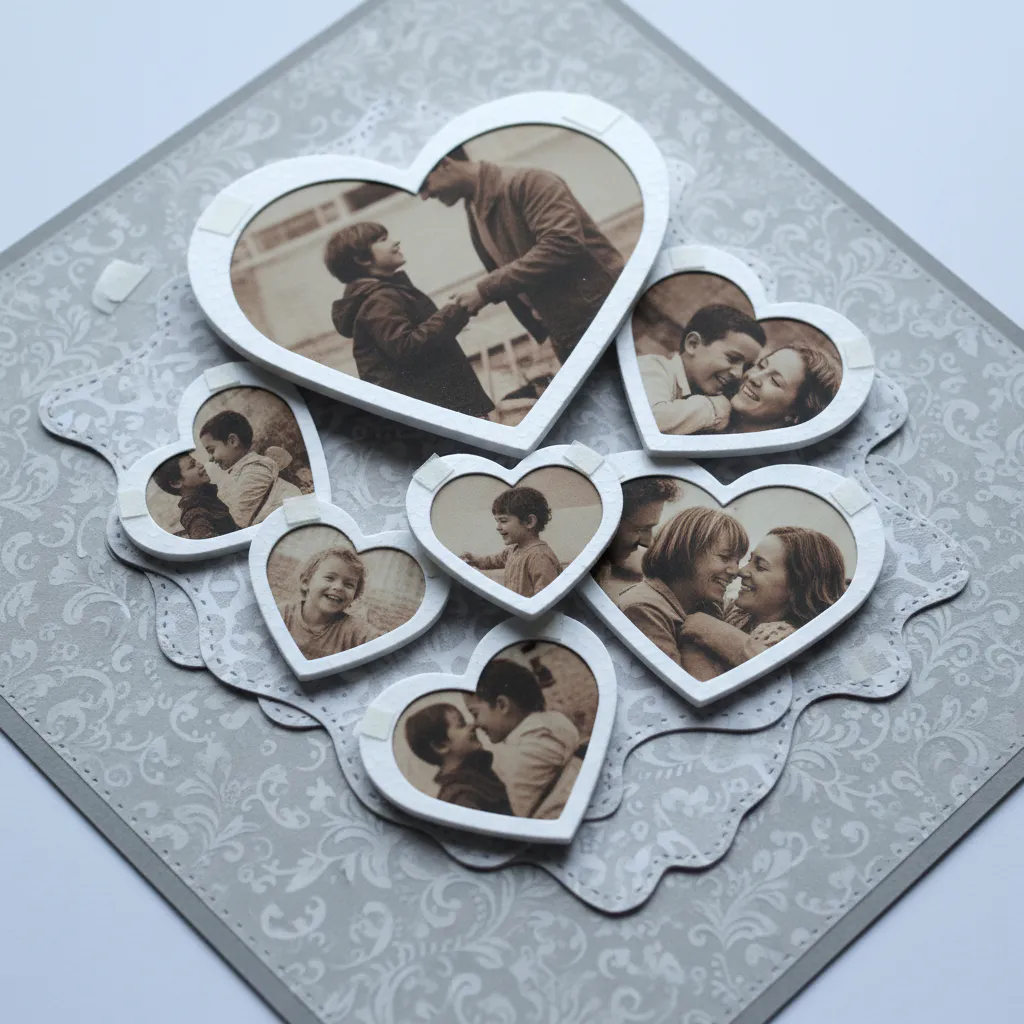
11. Layer a Cardstock Memory Layering Block
This technique looks so professional, but it is honestly one of the simplest ways to add instant depth. You are basically building a little stage for a special photo or journaling block. Start by cutting pieces of coordinating cardstock can be used to celebrate special occasions in your scrapbook. in slightly different sizes, then stack them with a tiny offset between each layer. I love using foam adhesive squares are an adorable accessory for any scrapbooking project. between some of the layers. This creates a lovely raised effect that makes your focal point pop right off the page. Isn’t it satisfying to see those flat materials transform into something with so much dimension? Building layered blocks makes your diy heart touching scrapbook ideas visually stand out immediately.
12. Build a Handwritten Letter Fragment Collage Background
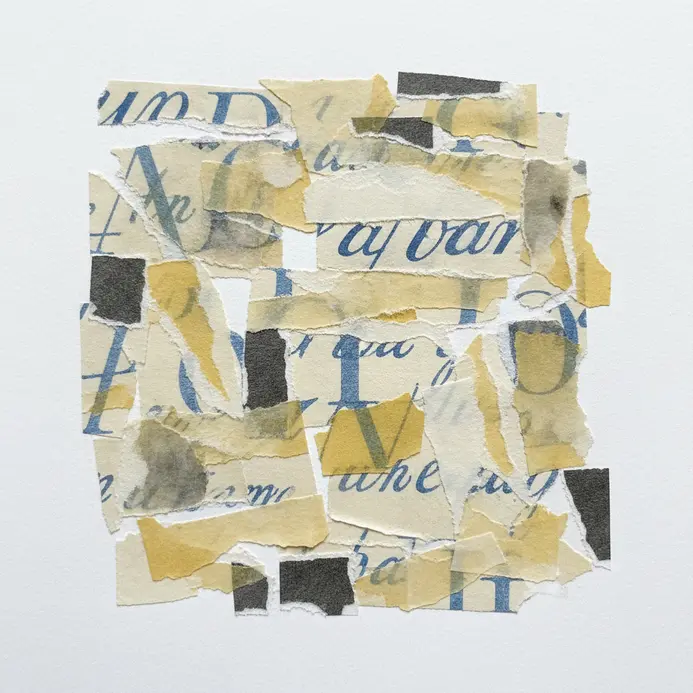
This technique looks intimidatingly vintage, but it’s just about layering pieces of the past. You’ll gather handwritten text, tear or cut it into fragments, and overlap them onto your page. I love using a good glue stick is essential for decorating your scrapbook effectively. to secure everything without warping the paper. The result is a beautifully textured background that whispers with nostalgia. For the best effect, embrace the mess. Tear edges roughly and vary the size of your pieces to build depth. Isn’t it amazing how a few layered scraps can evoke such a personal feeling? This collage style pairs wonderfully with other projects that rely on personal history when you explore more diy heart touching scrapbook ideas. Feel the history come alive on your page.
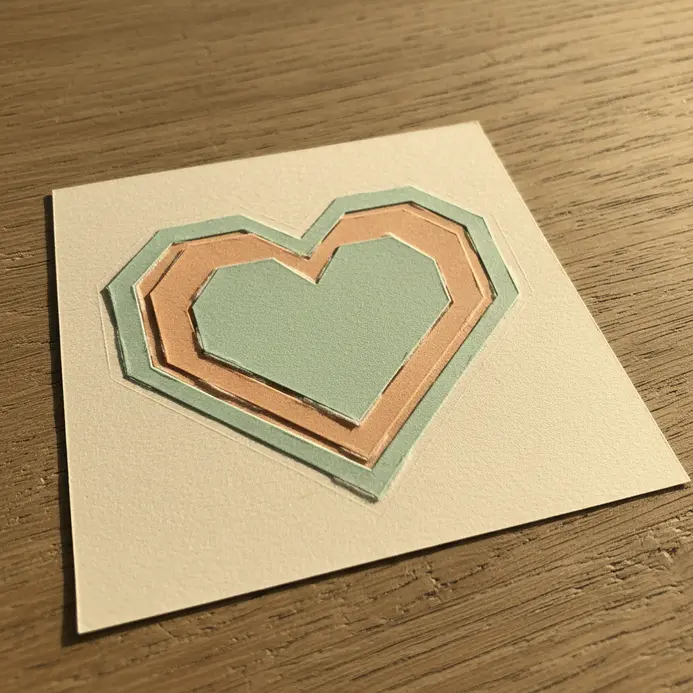
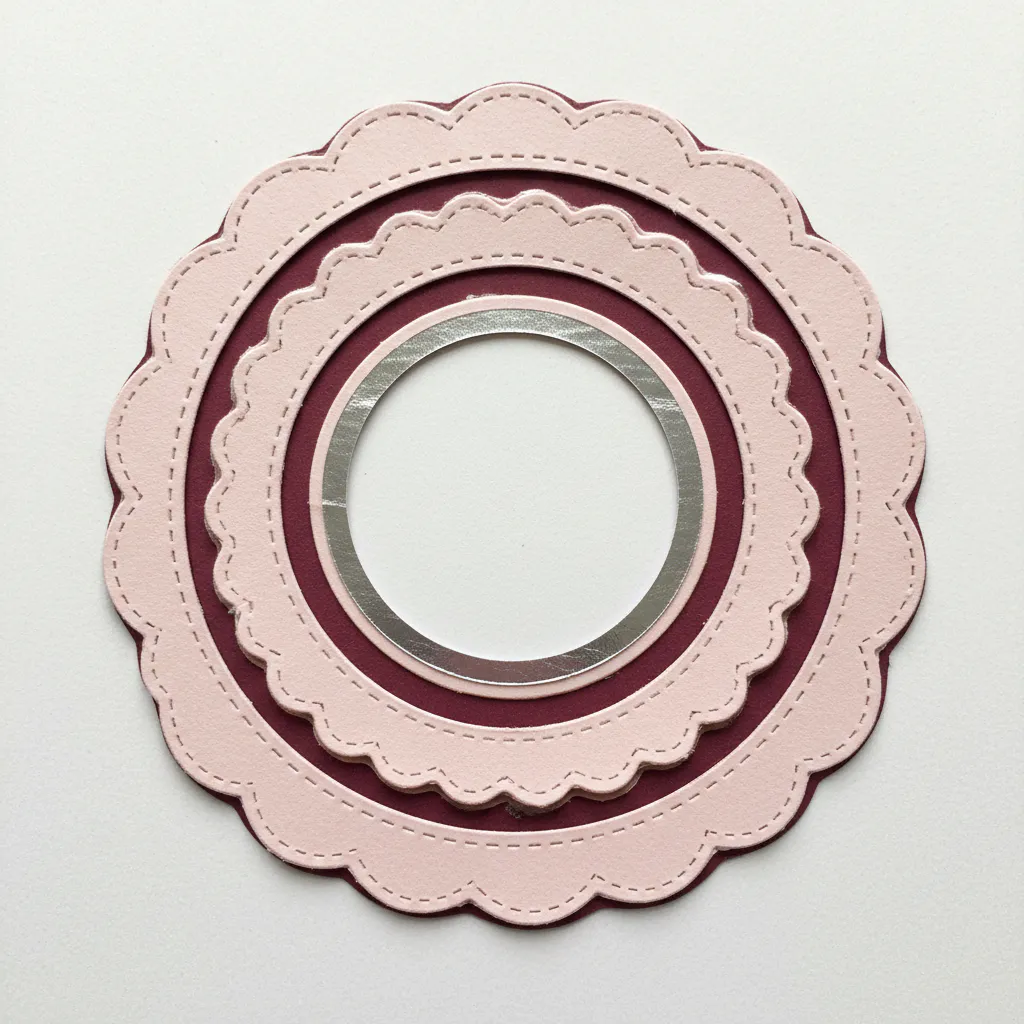
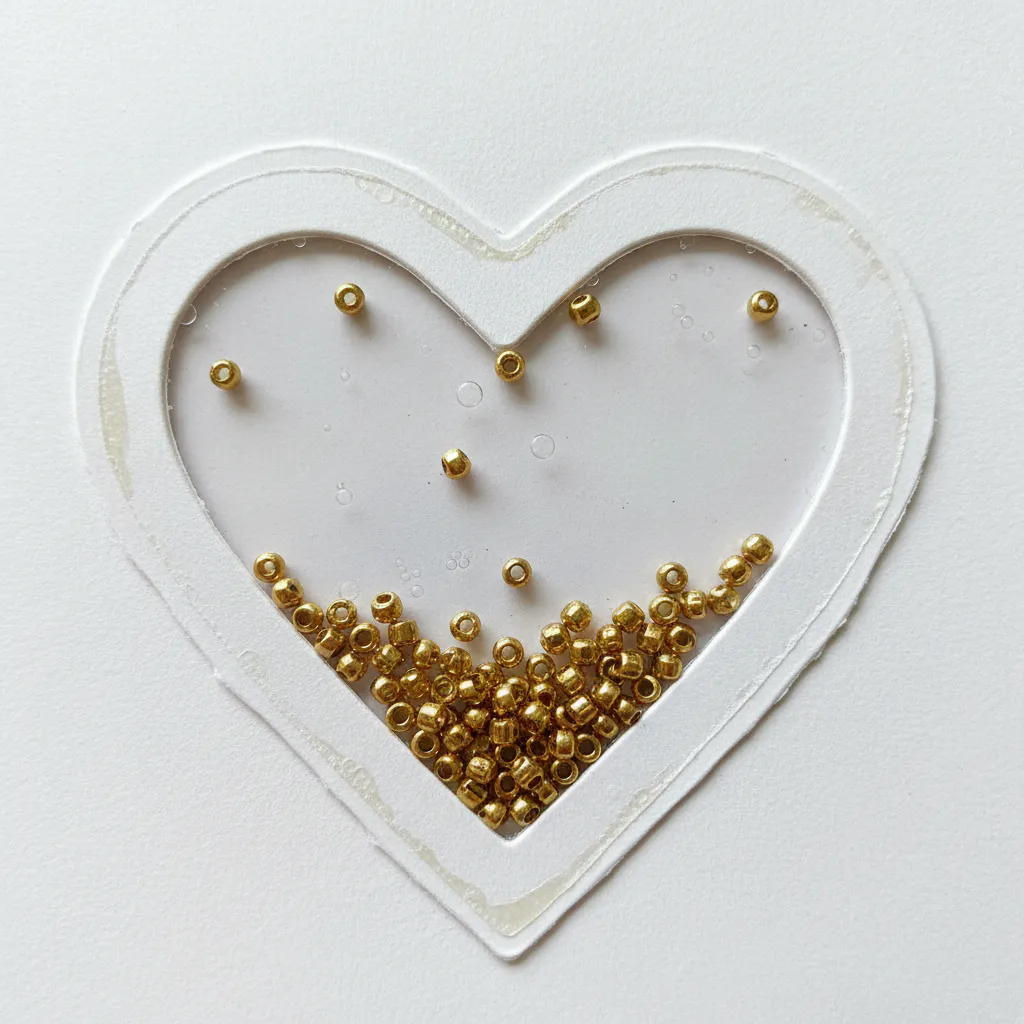
13. Use Multi Dimensional Foam Dot Framing
Ever wondered how to make a photo or small memento really pop off the page? This technique is my go-to for adding incredible depth and a professional touch. You’ll arrange tiny, pre-cut foam adhesive dots in layers to create a floating, three-dimensional frame around your element. Start by placing a single layer to lift it slightly, then add a second, smaller ring of dots on top of the first for a stepped, shadow-box effect. The magic is in the varying heights, which cast soft shadows and make your focal point feel tangible and precious. I love how it transforms a flat layout into something you just want to reach out and touch. Trust me, adding foam framing to your scrapbooking ideas will gain a stunning, gallery-quality look that feels incredibly satisfying to create.
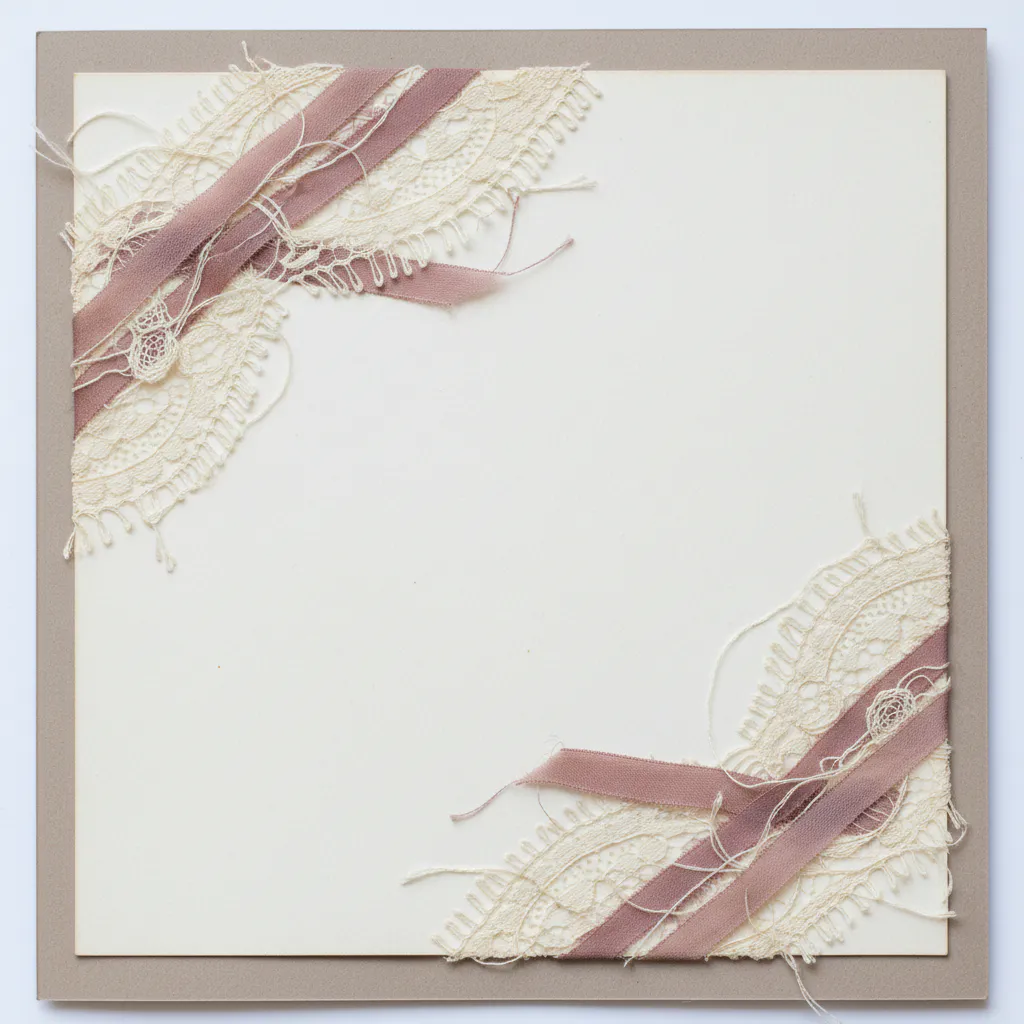
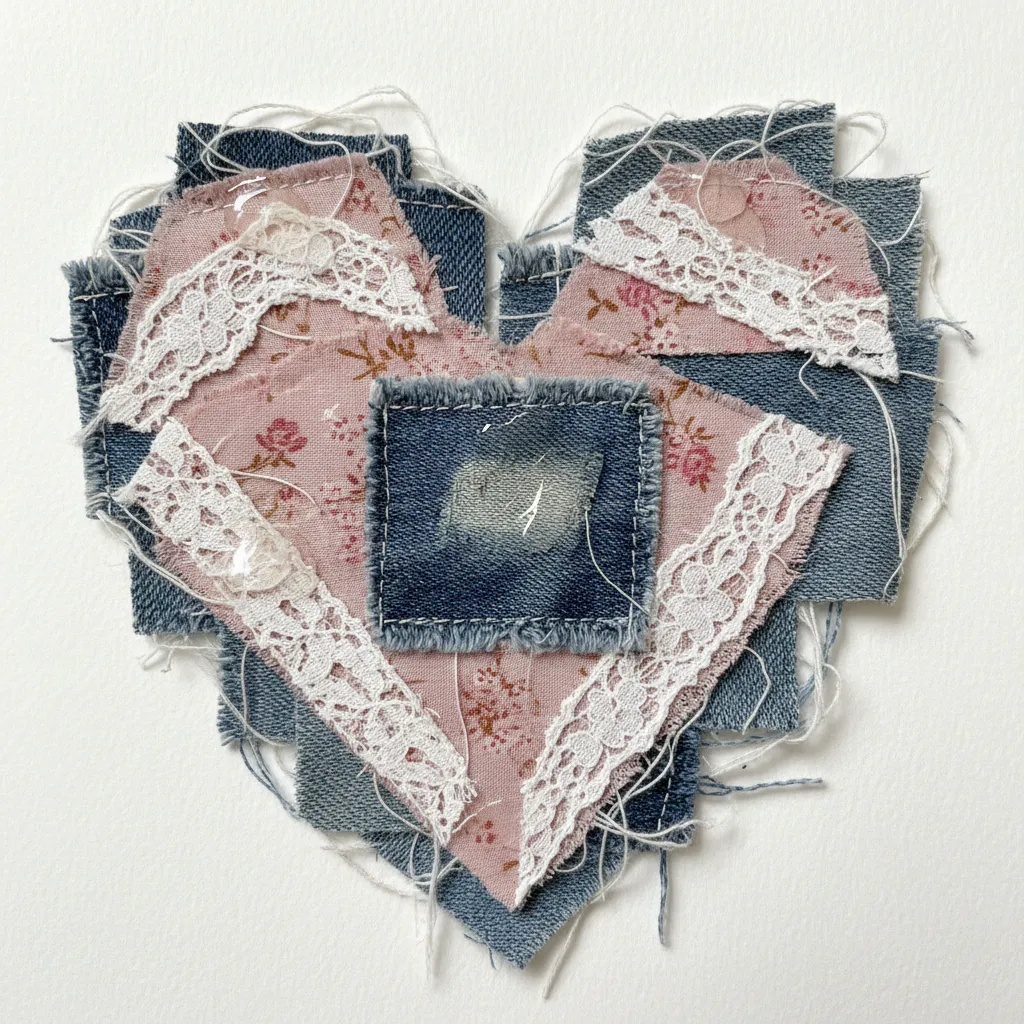
14. Add a Fabric Swatch Textured Border Accent
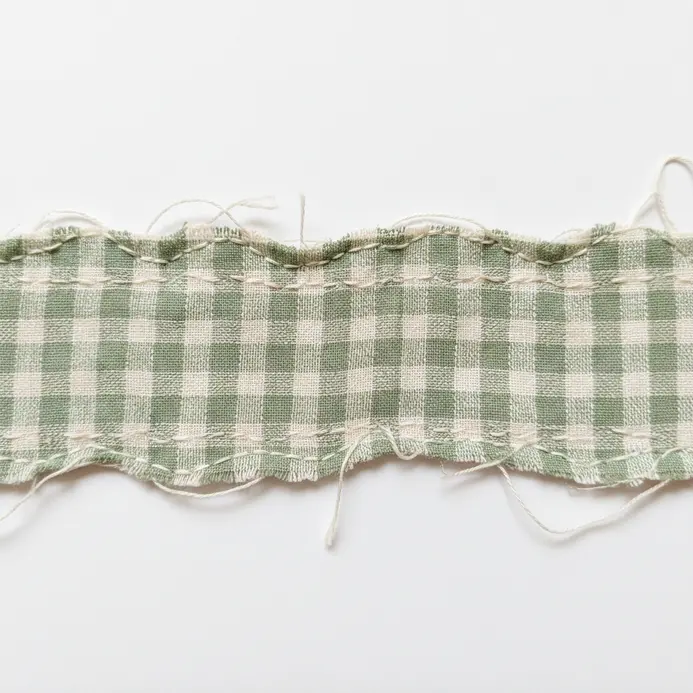
Ever feel like your pages need a little extra warmth and dimension? This is my go-to trick for adding a cozy, handmade feel that paper alone simply cannot match. You simply select a small piece of fabric, like linen or lace, cut it into a strip for your border, and adhere it firmly to the edge of your page. The fabric swatch instantly introduces a lovely texture and visual depth, making the whole layout feel more personal and rich. It works so well because that tangible, tactile element invites the viewer to touch and connect with the memory. For a fantastic pop of color that works beautifully with textured elements, you should check out colorful melted crayon art for more scrapbooking inspiration. Textile accents bring unique warmth to your scrapbooking ideas, inspiring heart-touching creations.
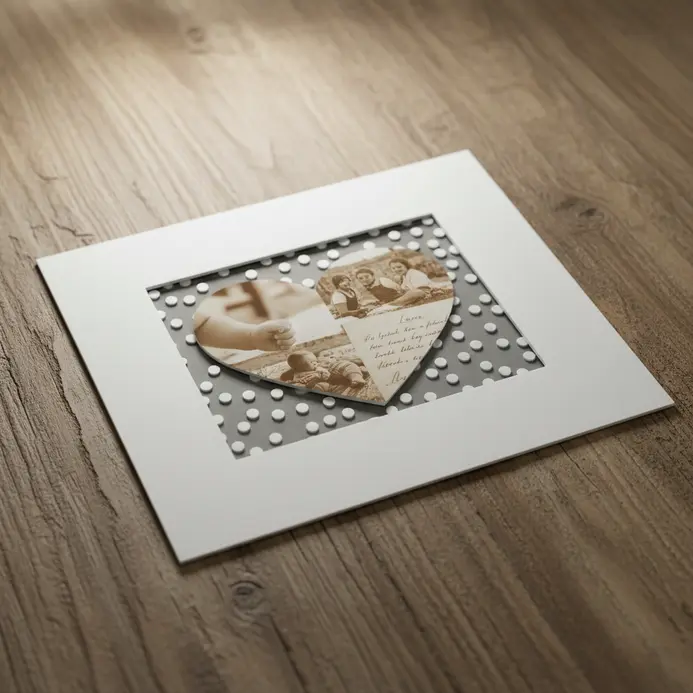
15. Create a Minimalist Single Photo Focus Layout

Ever feel like your most cherished photo gets lost on a busy page? This layout is your secret weapon. It is all about giving one incredible image the spotlight it deserves. I love how it feels so clean and intentional. You will center your photo with loads of breathing room around it, using a neutral background. Any text, like a short caption, stays tiny and subtle. Why does it work so well? It forces the viewer to stop and really feel the moment in your photo, making it the undisputed emotional heart of the page. That powerful focus is perfect for creating truly sentimental keepsakes. For a similar clean aesthetic in another project, check out these ideas for simple DIY wall art. Embracing negative space makes diy heart touching scrapbook ideas incredibly impactful.
16. Make an Accordion Style Mini Album Insert
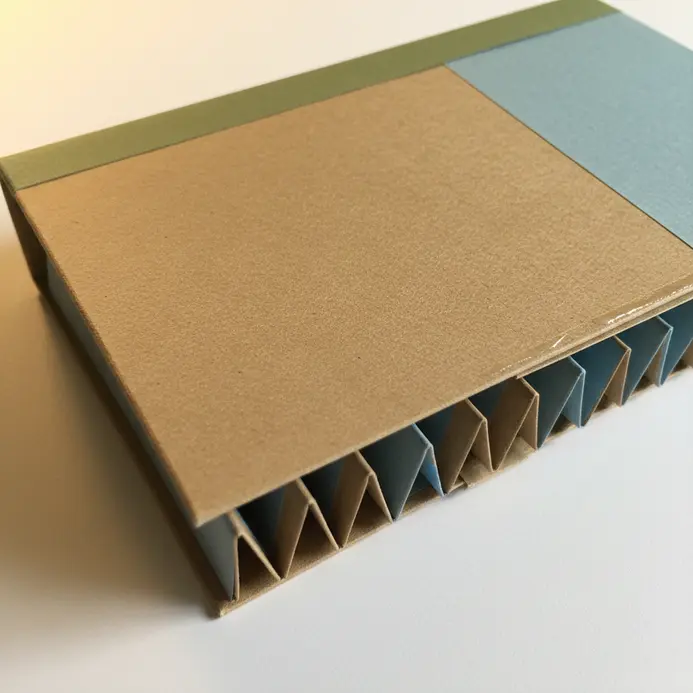
This one looks intricate, but I promise it’s surprisingly simple to put together. You start by cutting a long strip of sturdy cardstock and scoring it at perfectly spaced intervals. Fold it back and forth along those lines, and you have a compact, expandable storybook. I love how it tucks neatly into a larger scrapbook page, then unfolds to reveal several panels for photos and handwritten notes. It works so well because it adds a delightful element of surprise and lets you pack a lot of heartfelt content into a tiny space. Trust me, the first time you open one you’ve made, you will feel a genuine sense of accomplishment. Creating mini inserts is a brilliant way to organize diy heart touching scrapbook ideas efficiently.
17. Design a Black and White Contrast Page
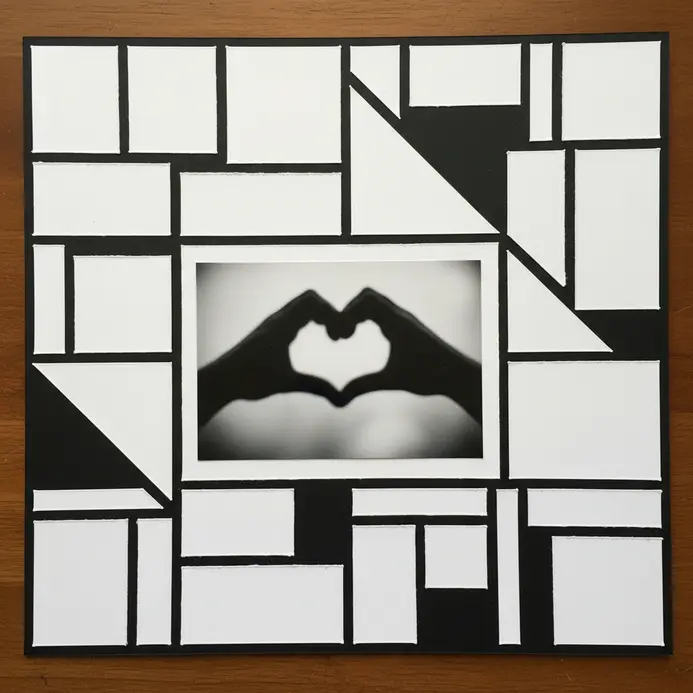
Ever feel like a layout needs a touch of drama? A black and white contrast design is your secret weapon. It strips away color to focus purely on form, texture, and light. I love how this forces you to think about composition and generous white space to let your photos and words breathe. Your typography choices become super important here. Mix a classic serif font with a clean sans-serif, and play with size and weight to create a clear visual hierarchy. The real star is your imagery, so use high-contrast black and white photos with strong shadows. When you get it right, the result feels sophisticated and memorable. For even more inspiration, check out these more DIY scrapbook ideas. Monochrome themes highlight diy heart touching scrapbook ideas with striking clarity.
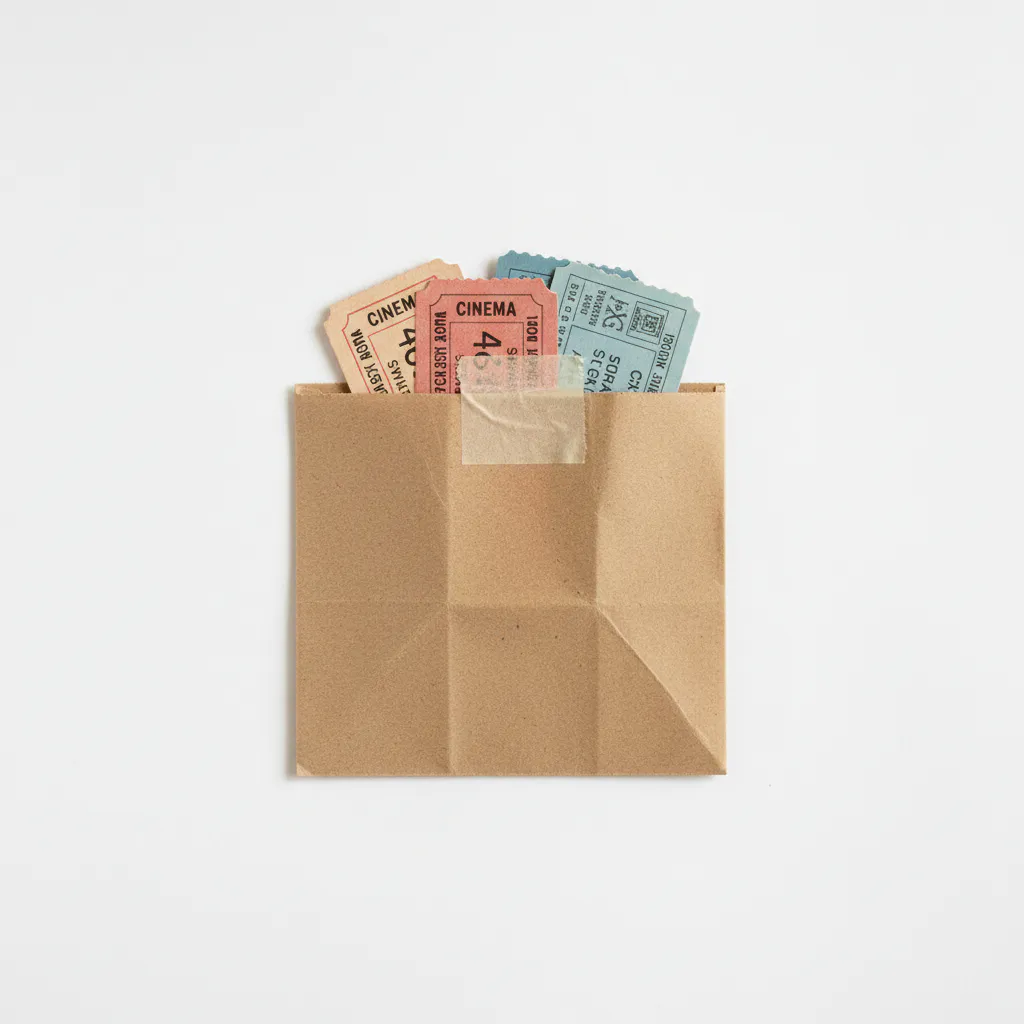
18. Assemble a Ticket Stub Collector Grid Layout
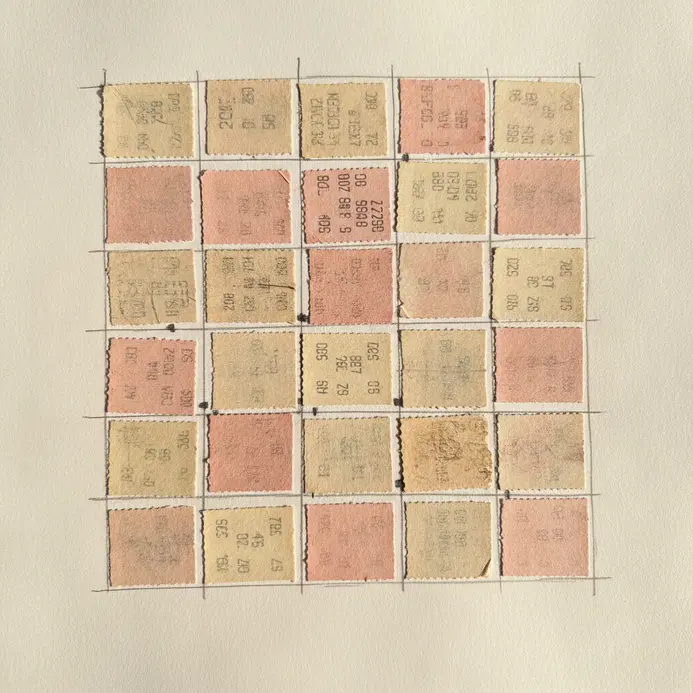
Ever felt overwhelmed by a pile of ticket stubs? This grid layout is your solution, turning chaos into a clean, gallery-worthy display. You will arrange your stubs in neat rows and columns on a backing board, securing them with acid-free photo corners or adhesive. I love how this method gives each little memory its own space while creating a striking overall piece. It works because the structure feels satisfyingly orderly, transforming a jumble of papers into a curated story of your adventures. For a different kind of personal project, check out these creative DIY keychain crafts. Structural grids make diy heart touching scrapbook ideas incredibly organized and elegant.
19. Build a Pressed Leaf Family Tree Graphic

Ever wanted a family tree that feels truly organic? This project uses nature itself as your medium. You will press a variety of leaves, then arrange them into a branching structure on a sturdy base like heavy cardstock or canvas. Each leaf becomes a visual representation of a family member, connected by twine or simply by placement. It is a beautiful way to connect your heritage to the natural world, resulting in a piece of decor that feels warm and deeply personal. I love how the different leaf shapes and colors tell a story. The key is patience during the pressing stage to ensure your leaves are completely flat and dry. Trust me, the wait is worth it for a crisp, lasting graphic. Does that not sound like a meaningful way to honor your roots? Mapping family connections brings life to diy heart touching scrapbook ideas beautifully.
20. Paint a Hand Lettered Quote Spotlight Page
Ever wanted to make a favorite saying truly sing on the page? This is your chance. Start by picking a short, meaningful quote and sketching your layout lightly with a light H pencil. Then, paint the letters using your chosen style and colors, letting your brush flow. The magic happens when you turn simple words into a mini piece of art. I love how this technique makes the quote feel special and personal. It is a fantastic way to add a unique touch to a memory book, and the process is so much fun. You might even find it sparks ideas for other projects, like those easy craft ideas for kids. Hand-lettered quotes bring typography to life in your diy heart touching scrapbook ideas effortlessly.
21. Add an Interactive Flip Up Photo Door
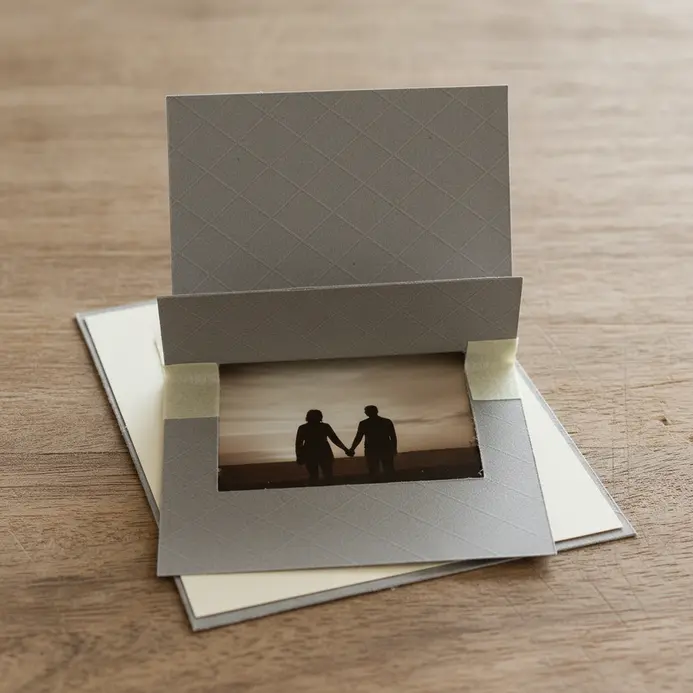
This one is my personal favorite trick for adding a surprise element. Ever wondered how to make someone pause and interact with your page? You create a crisp scored hinge on a piece of cardstock, then attach it over your photo like a little door. The reveal underneath feels like a special secret just for them. Trust me, using a bone folder for that fold makes all the difference between a wobbly flap and a perfect, satisfying flip. This technique works because it turns viewing into an experience, creating a memorable moment of discovery. It is a fantastic way to add more journaling or a second photo without clutter. For a seasonal twist on interactive projects, check out these simple Christmas craft ideas. Flap doors hide extra magic inside your diy heart touching scrapbook ideas perfectly.
22. Apply Patterned Washi Tape in a Geo Pattern

This trick looks so polished, but the secret is how forgiving it is. Start by lightly sketching your geometric design with a pencil. Then, apply strips of your chosen patterned washi tape over those lines, cutting precise corners with a craft knife. I love how mixing different tape patterns and widths adds instant depth. It works because the clean lines create a modern, graphic look that feels custom-made. Trust me, taking a moment to plan your pattern first makes the whole process smooth and satisfying. Geometric backgrounds add structure to your scrapbooking ideas effortlessly, making them more visually appealing.
23. Write Soft Pastel Marker Scribbled Notes
Who would have thought something as simple as a scribbled note could look so intentional and lovely? I love this one because it captures a genuine, fleeting feeling. Grab your soft pastel markers and write a quick thought or a tiny to-do list right onto your page. The key is to embrace the imperfect, freehand motion, letting your lines be a little wobbly. This works because the gentle, muted colors and spontaneous style feel personal and intimate, like a secret shared. For a cohesive look, try placing your note near a photo or a piece of ephemera. You can find more ways to add a personal touch with unique flower vase decorations. Casual handwriting brings personality to your diy heart touching scrapbook ideas instantly.
24. Create a Torn Edge Paper Layering Effect
This technique looks so professional, but trust me, it’s surprisingly simple to pull off. You’ll start by creating a solid paper layer in your editing software, then use the Lasso Tool to draw a jagged, irregular selection line where you want the tear. Apply a tiny Feather to soften the edge, then hit it with the ZigZag filter to get that perfect, realistic ripped texture. It works because it adds instant visual depth and a wonderfully handcrafted feel to your pages. For another project that brings handmade charm into your home, try these DIY wind chime projects. Digital torn effects mimic the charm of diy heart touching scrapbook ideas beautifully.
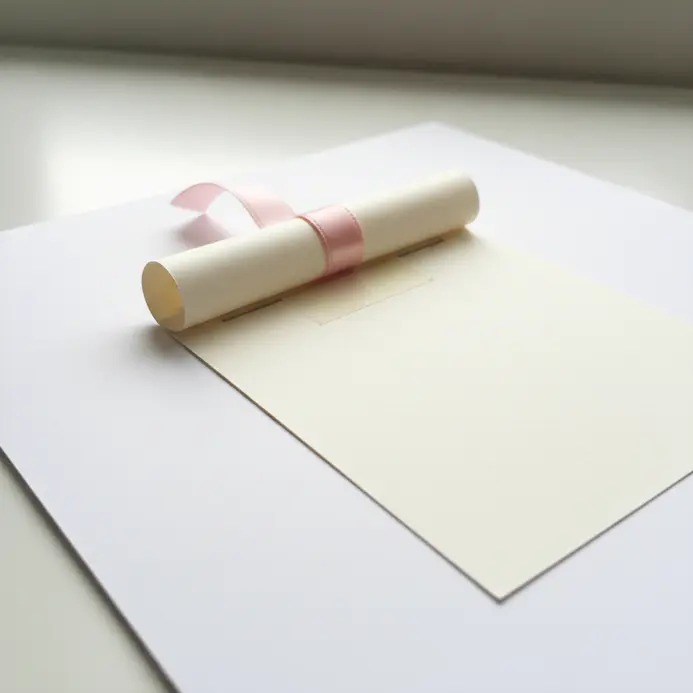
25. Add a Decorative Ribbon Tied Binding Accent
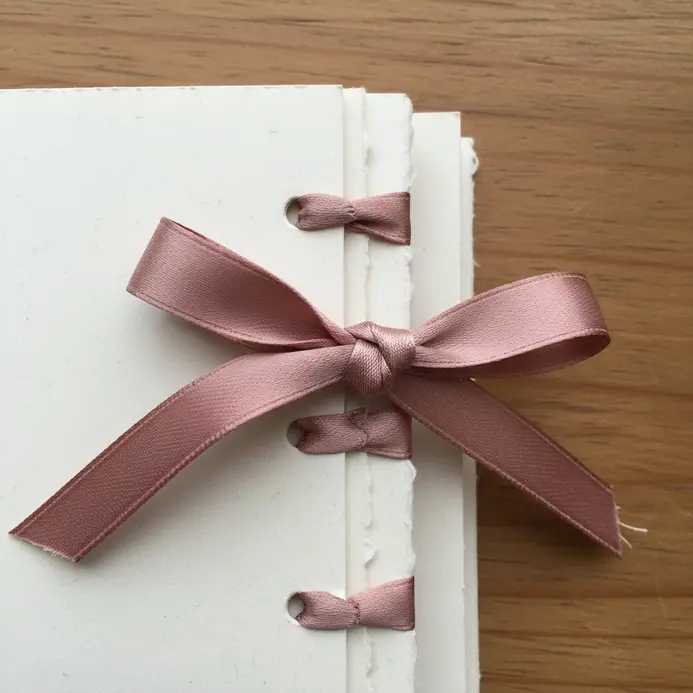
This final touch looks intricate, but it is a wonderfully simple way to finish your project. You can simply tie a satin ribbon into a bow around the spine for a classic look, or thread it through punched holes to bind everything together. The choice of ribbon color and texture adds a whole new layer of personality to your scrapbooking projects. Why does this work so well? It gives your creation a tactile, hand-finished feel that instantly feels more personal and thoughtful. I always cut my ribbon much longer than I think I need. Trust me, having extra to work with makes tying that perfect bow so much easier and less stressful.
Protective Techniques For Long Term Keepsake Storage
After all that careful work, you must shield your pages from fingerprints, light, and dust with a proper sealant. A light mist of archival-quality spray fixative over finished layouts locks down loose chalk details without warping the paper. For a more substantial barrier, slide each completed design into a clear, acid-free page protector before closing the album. Store your finished book flat in a cool, dry place away from direct sunlight, which fades pigments over time. This final step is what separates a temporary project from a permanent heirloom. Your sensory storytelling, with all its delicate layers and textures, will remain safe for years of revisiting.
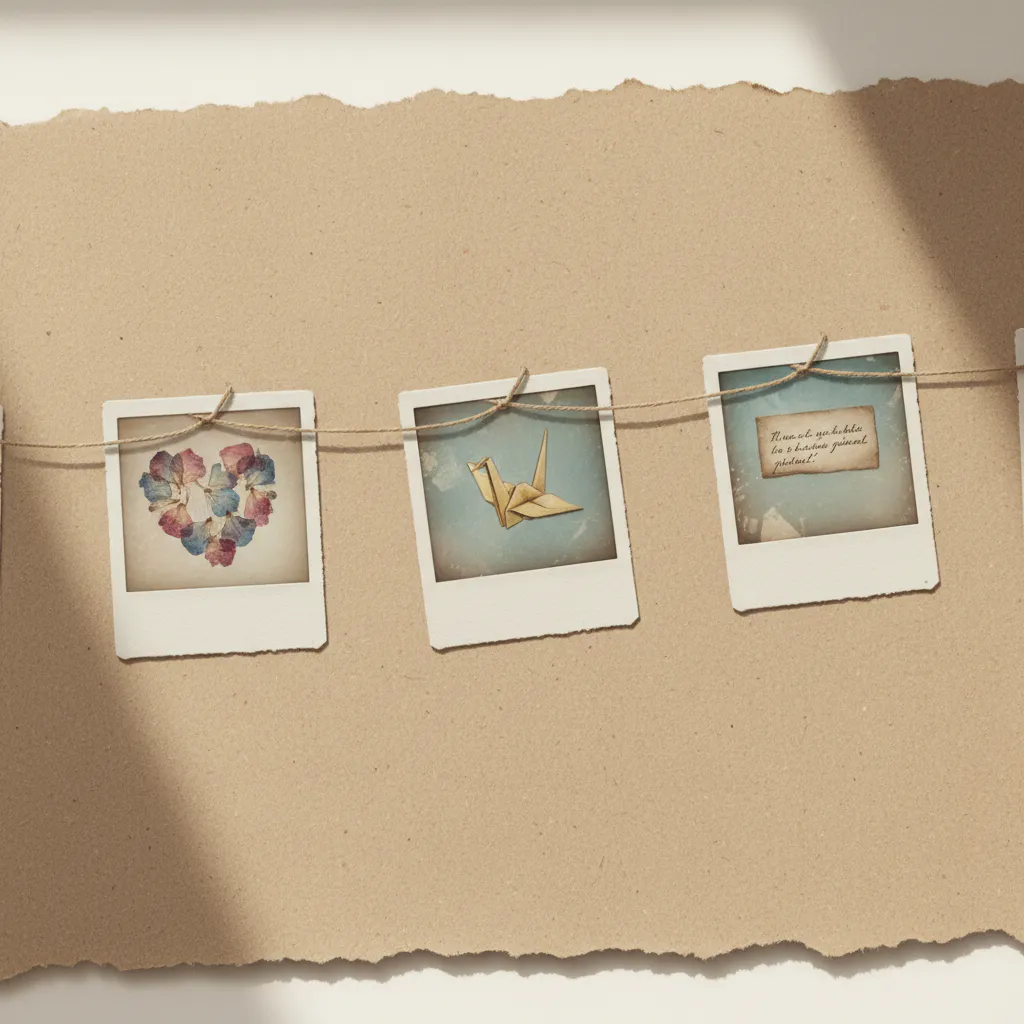
More DIY Heart Touching Scrapbook Ideas Gallery for Inspiration

Conclusion
Your photos and mementos are not just objects; they are pieces of your story waiting to be held. The best diy heart touching scrapbook ideas come from trusting that story and giving it space to breathe on the page. My advice is to pick one design from this list that speaks to you right now, gather your supplies, and simply start. Do not worry about making the whole album perfect at once. Focus on that single page, that one memory. Let the texture of the paper and the feel of the pen guide you. The joy is in the making, in the quiet time you spend honoring those cherished memories. Your future self will treasure this handmade book, filled with the love you put into every detail.
FAQs
Q: What are some quick and easy DIY heart touching scrapbook ideas for beginners?
A: Start with a simple theme of your scrapbook like “love story” or “date nights” and compile candid photos chronologically; use sticker accents, colored pencils for shading, and a few die cutting shapes to create a heartfelt narrative without a long tutorial — it’s a quick and easy way to make something genuinely touching.
Q: How can I make a scrapbook ideas for couples that encapsulate our relationship?
A: Reflect on milestones to create a chronological layout that acts as a testament to your partnership; incorporate mementos like ticket stubs, write short captions to encapsulate memories, add mixed media elements for texture, and finish with a cute card or card featuring a favorite quote to make it uniquely yours.
Q: Do I need a printer or expensive tools like die cutting machines to create a masterpiece scrapbook?
A: No — while a printer and die cutting tools expand options, you can craft a masterpiece with scissors, stamp sets, stickers, and colored pencils; consider a step-by-step tutorial for budget-friendly techniques and use creative finishing touches like ribbon or hand-drawn frames.
Q: What are some versatile themes for valentine’s day or Valentine’s Day scrapbooks?
A: Popular themes include firsts (first date, first trip), date nights highlights, love story timelines, or whimsical scenes of daily life; these versatile themes work well for valentine’s day keepsakes or valentine’s cards and can be personalized with mixed media and heartfelt captions.
Q: How can I incorporate mixed media and stamp sets without overwhelming the page?
A: Balance is key: pick one focal photo, use mixed media like watercolor washes lightly in the background, add subtle stamp sets for texture, and use stickers sparingly as a finishing touch so the page looks cohesive and genuinely reflective rather than cluttered.


