


Anatomical Landmarks Of Wild Fungal Growth
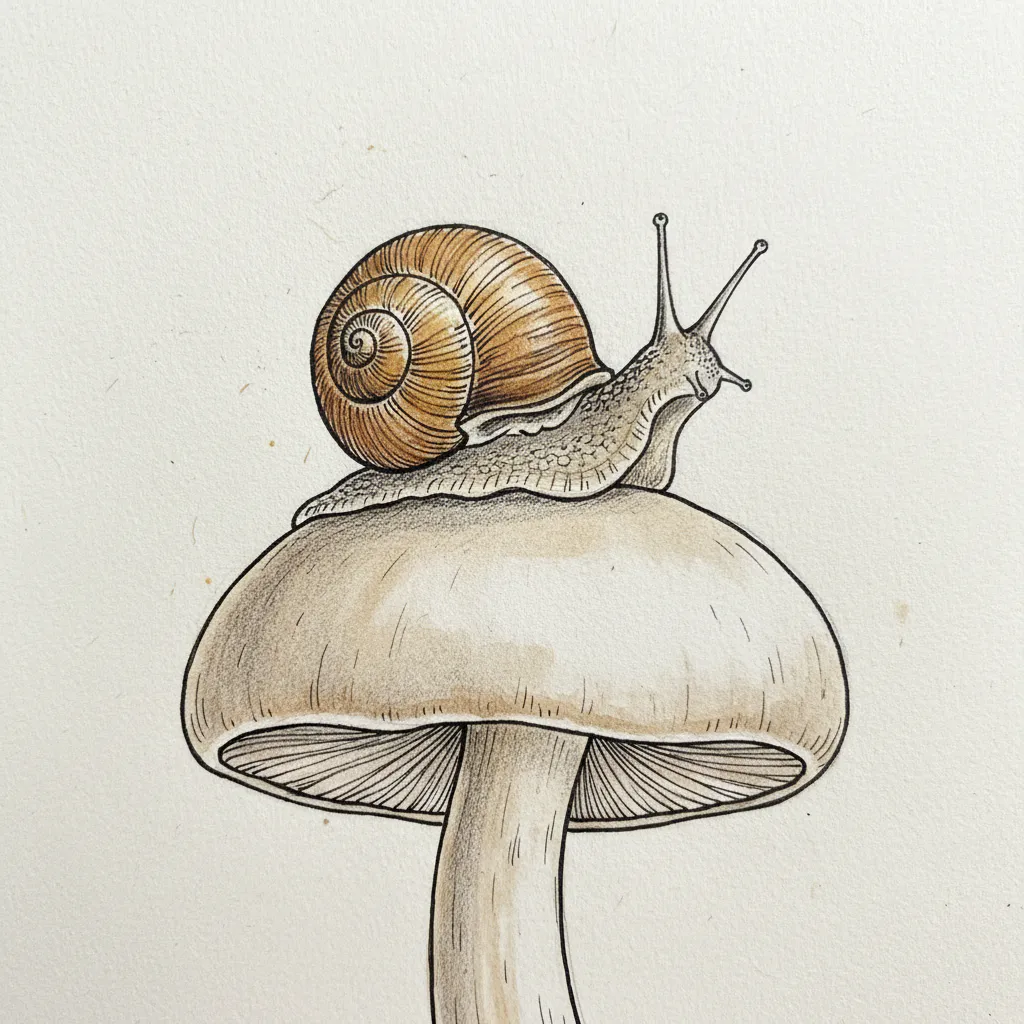
Your mushroom will look fake if you ignore the exact point where the cap meets the stem. Trust me on this. That intersection is a three-dimensional curve, not a simple stick-on-top-of-a-ball. We tend to skip this step, but the cap often has a slight overhang, creating a thin shadow line called the annulus on some species. Focus on the gill articulation underneath, too. They radiate from the stem outwards, and using cross-hatching in those recessed areas creates instant depth. The good news is that natural decay adds character. Think of a tiny nibble from a snail or a soft spot of moss clinging to the fibrous stem. These easy mushroom drawing ideas rely on anatomical landmarks to tell the story of your mushroom’s life.
Selecting Suitable Paper Surfaces For Ink Work
A smooth, hot-pressed watercolor paper gives your ultra-fine-liner pen the crisp, clean lines you need for gill details. Here is the thing. That slick surface lets the nib glide without catching or feathering, which perfectly suits the repetitive mark-making of shelf fungi layers. For graphite work where you want to build up soft shadows, a cold-pressed paper with a subtle tooth works better. Its texture holds the pencil pigment, allowing for rich, dark values with a 4B pencil without looking shiny. You want to avoid thin sketchbook paper for finished ink pieces. It might buckle with light washes and lacks the professional feel of a proper 140 lb cotton sheet. The right foundation makes all your detailed line work pop, especially when you follow these easy mushroom drawing ideas for beginners.
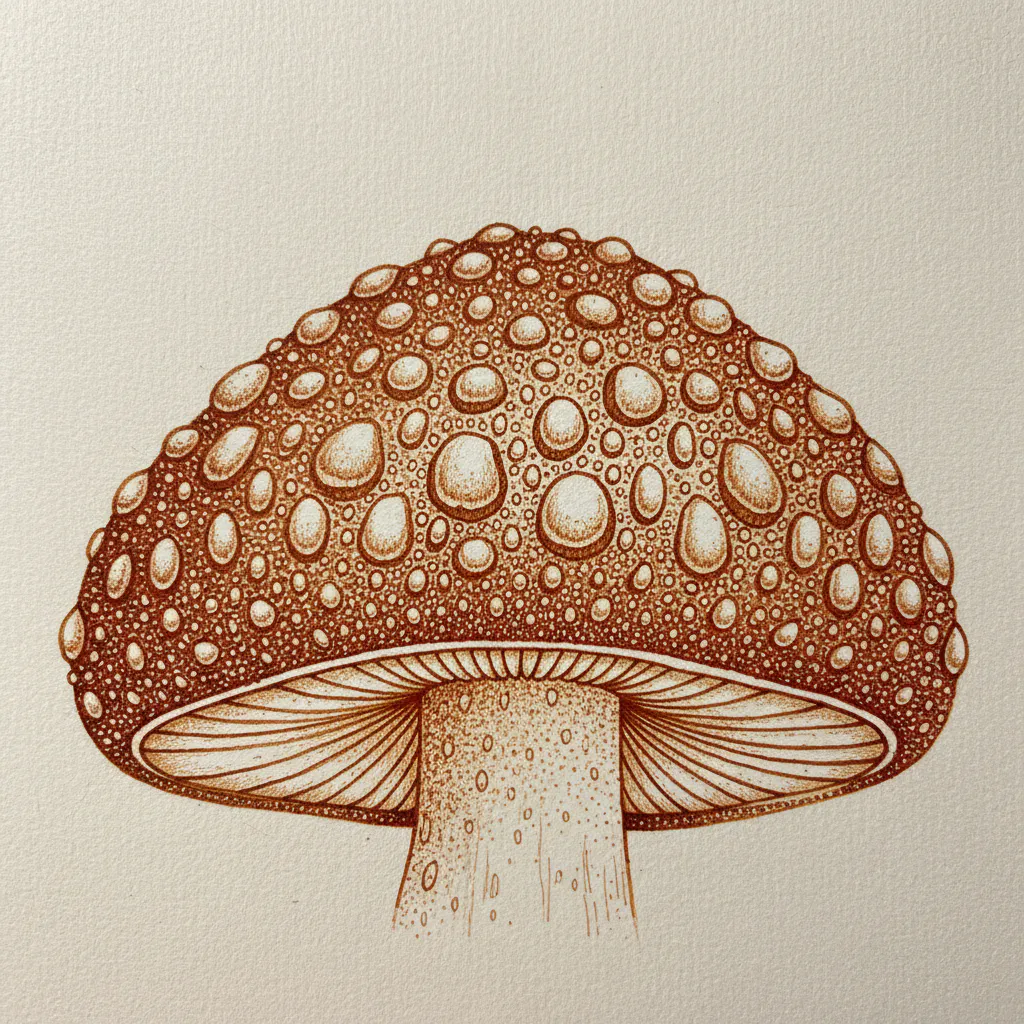
1. Draw a Classic Red Toadstool with Polka Dots

Who hasn’t sketched this iconic shape as a kid? It looks complex, but trust me, it’s built from simple forms. Start with a dome for the cap and a cylinder for the stem. Once you have your shapes built, refine them and add that little skirt-like ring. Then, grab your red colored pencil and fill in the cap. The magic happens when you add the white polka dots. Vary their sizes and spacing to avoid that artificial look. This project is one of the most popular easy mushroom drawing ideas because it teaches you basic construction and shading in a single, fun activity. Try it and you’ll feel that wonderful payoff of creating something instantly recognizable, especially with these easy steps. If you enjoy this style, you can explore more whimsical drawing ideas to build on this playful foundation.
2. Create a Minimalist Ink Line Button Mushroom
Who would have thought a single fluid line might create such a clean shape? Start with a fine-liner pen to draw a smooth, continuous ‘U’ for the cap, then add two slightly curved parallel lines for the stem. I love how this style forces you to simplify. Keep your hand steady and your lines confident, and you will feel proud of your elegant little fungus. It fits perfectly into a collection of easy mushroom drawing ideas when you want quick, modern results.
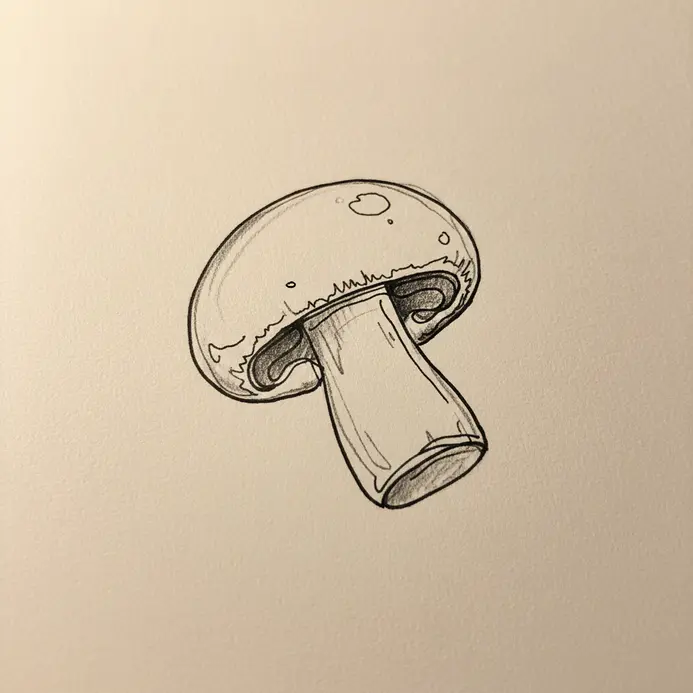
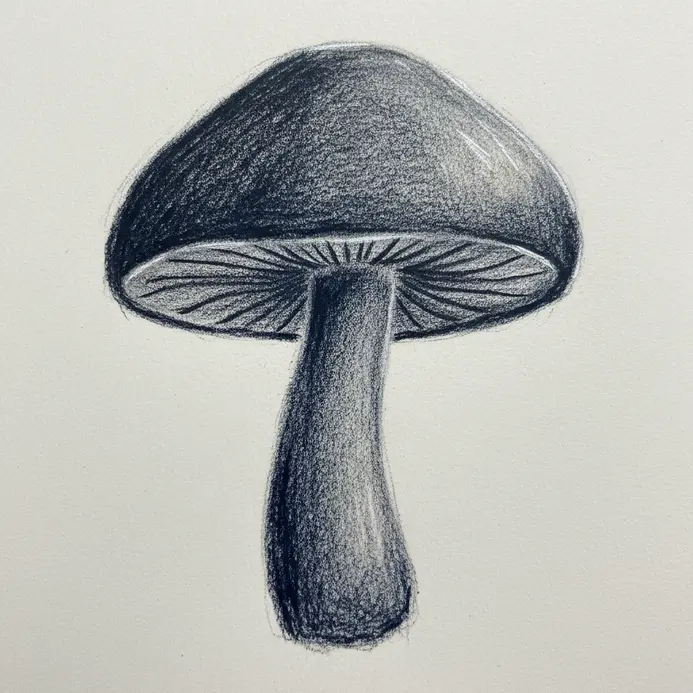
3. Sketch a Flat Top Portobello Botanical Study

This one looks so complex, but trust me, focusing on its botanical details makes it surprisingly approachable. You start by lightly sketching a broad, flat oval for the cap and a sturdy cylinder for the stem with a 2H pencil. Then, you refine the shape, adding the fibrous textures and that distinctive ruffled ring on the stem. The real magic happens when you define the dark, radiating gills on the underside. Isn’t it satisfying to see this common fungus transform into a detailed study? I love how this project rewards close observation. Your final drawing will feel so realistic and complete, proving how versatile easy mushroom drawing ideas are for artistic growth.
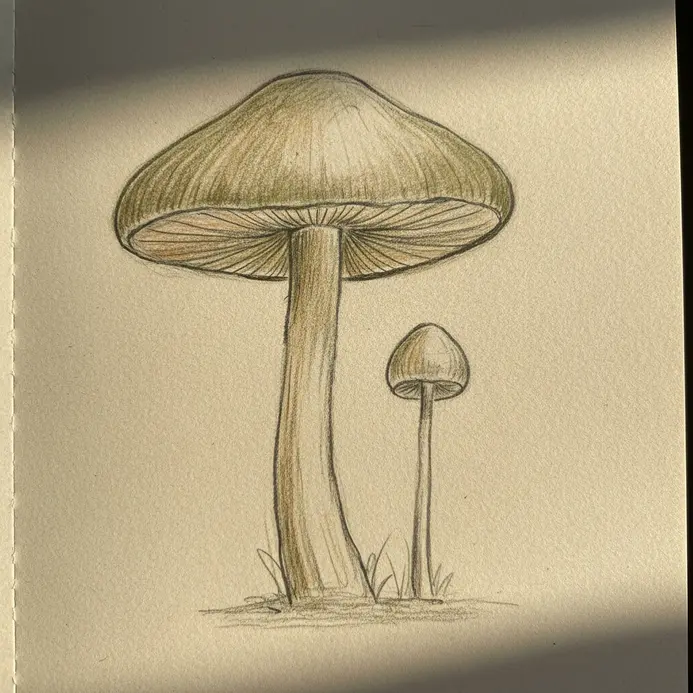
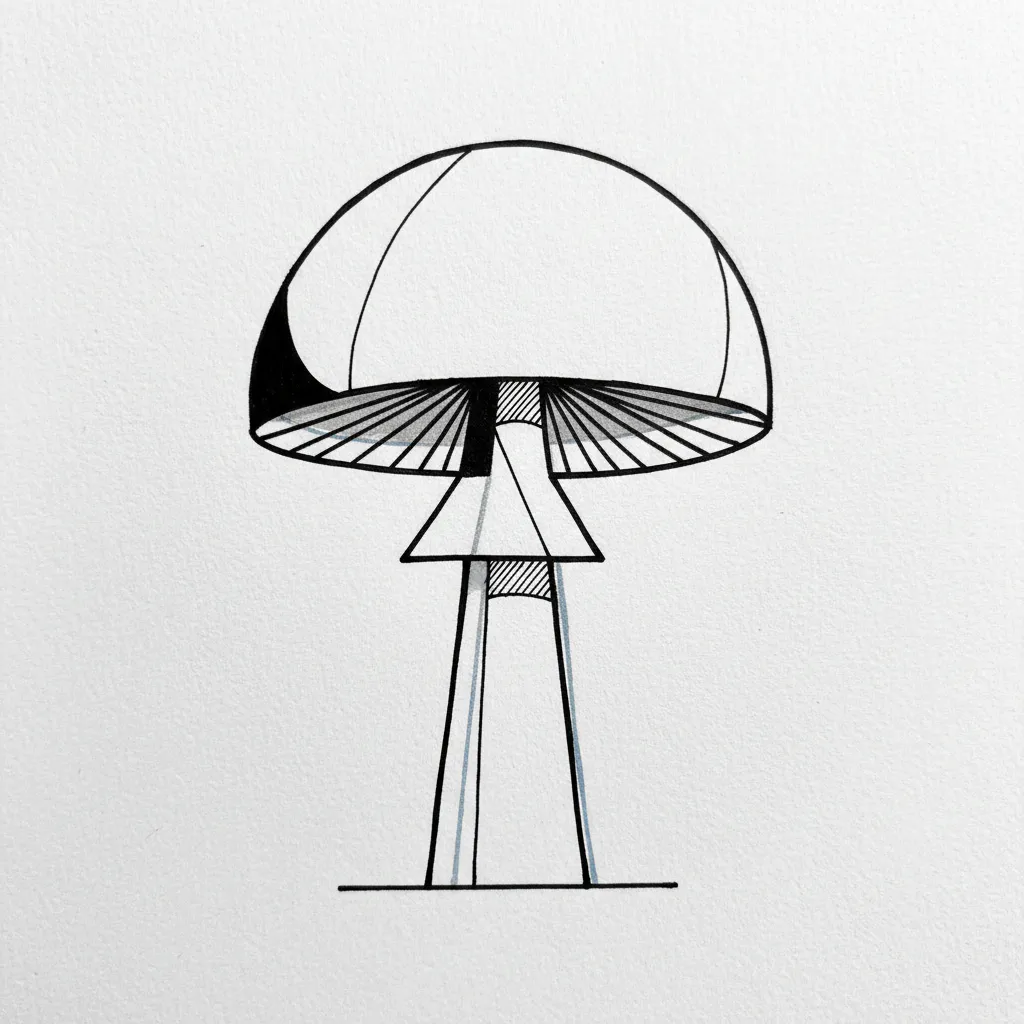
4. Form a Tall Slender Bell Shaped Fungus

This shape looks so elegant, doesn’t it? I love how it comes together by starting with two long, thin vertical lines for the stalk. Let your arm guide you for a smooth, straight stroke. Then, add the bell-shaped cap with a single, gentle curve flaring out from the top. The magic is in that tall, slender proportion it feels delicate and natural. This elegant approach is why many artists list these easy mushroom drawing ideas in their daily warm-up routines. ideas for drawing forests.
5. Build a Double Tiered Fantasy Mushroom Sketch

This one looks complex but is an excellent choice to build up a whimsical scene. Start with a light sketch of a thick, curved stem and a large cap on top. Then, draw a smaller second stem growing right from the center of that first cap to support a little top tier. I love how this stacked form instantly feels like it belongs in a storybook. Let your lines be a little imperfect for that organic, grown-in-the-woods charm. You will find that layering shapes like this is a staple among easy mushroom drawing ideas for fantasy lovers.
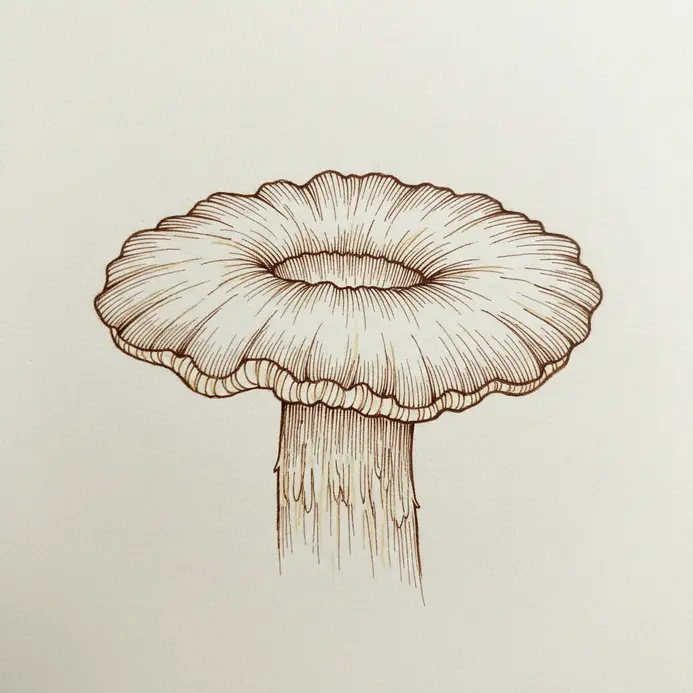
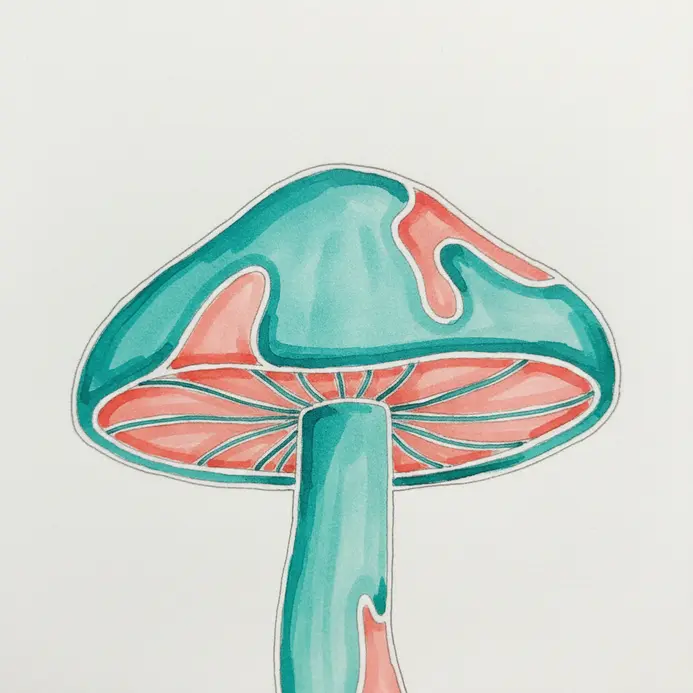
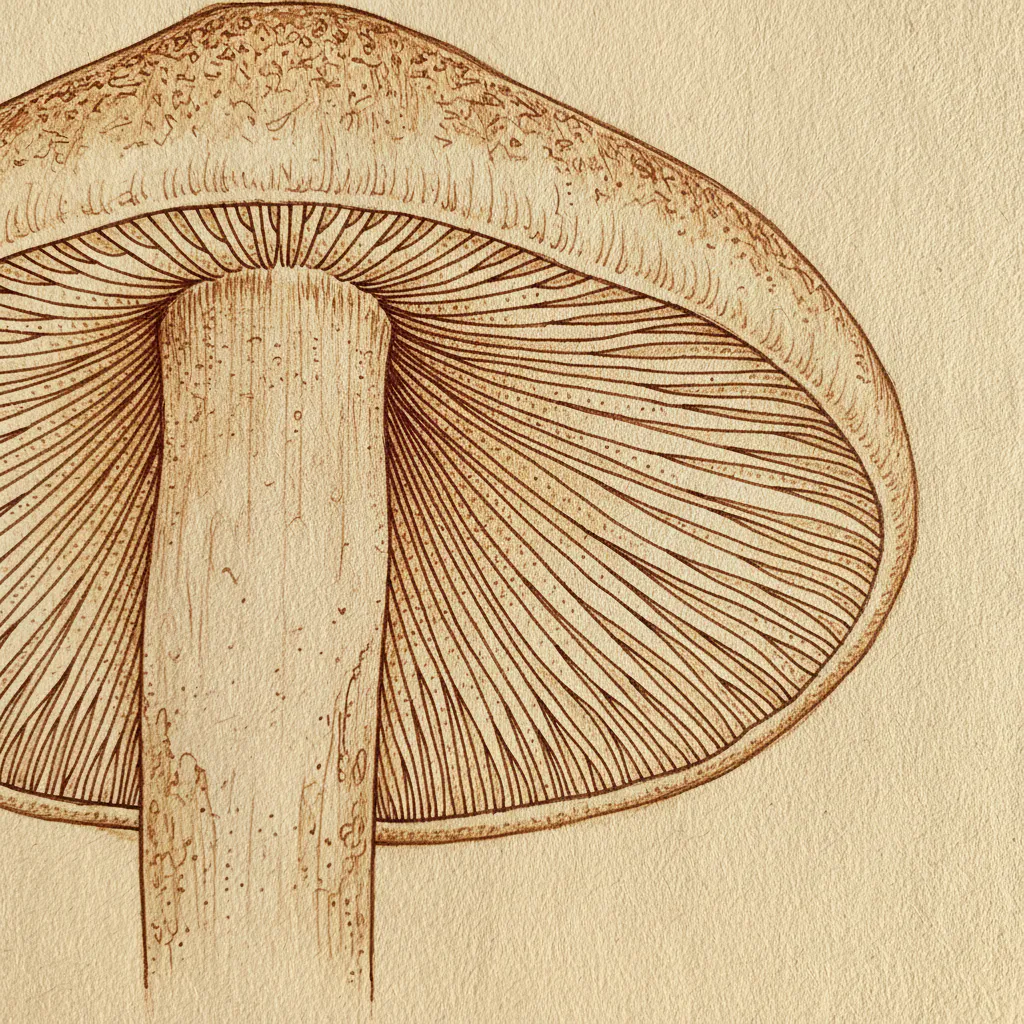
6. Capture Gilled Underside Detail in a Mushroom Study

Ever feel overwhelmed by the detailed patterns under a cute mushroom cap? Trust me, focusing on the gill structure is simpler than it looks. Start by sketching the basic fan shape of the lamellae, then note their spacing and how they attach to the stem. This careful observation adds so much scientific realism to your piece. I love using a fine-tipped pen to map out the lines, paying close attention to the edges and any shorter gills. This level of detail is what truly brings your drawing to life. You can apply this focused study technique to simple flower drawings as well. Many of my favorite easy mushroom drawing ideas rely heavily on mastering these delicate gill patterns first.
7. Draw a Ruffled Skirt Annulus Mushroom Illustration
Ever wondered how to make a fungus look like it’s wearing a tiny skirt? This one is all about the overlapping “U” shapes. Start with a light, wavy line about a third down the stem. Then, draw a series of these little “U” or “V” shapes along that line, making sure they vary in size and depth, as shown in the step-by-step tutorial. Add some inner lines within each shape to suggest the folds. I love this step because it transforms a simple stem into something with real character and texture. Trust me, your drawing will look fantastic with this delicate, natural detail, especially if you follow this drawing tutorial. It is a classic trick found across easy mushroom drawing ideas that adds instant visual interest.
8. Add a Base Volva Cup Detail to Your Mushroom Drawing
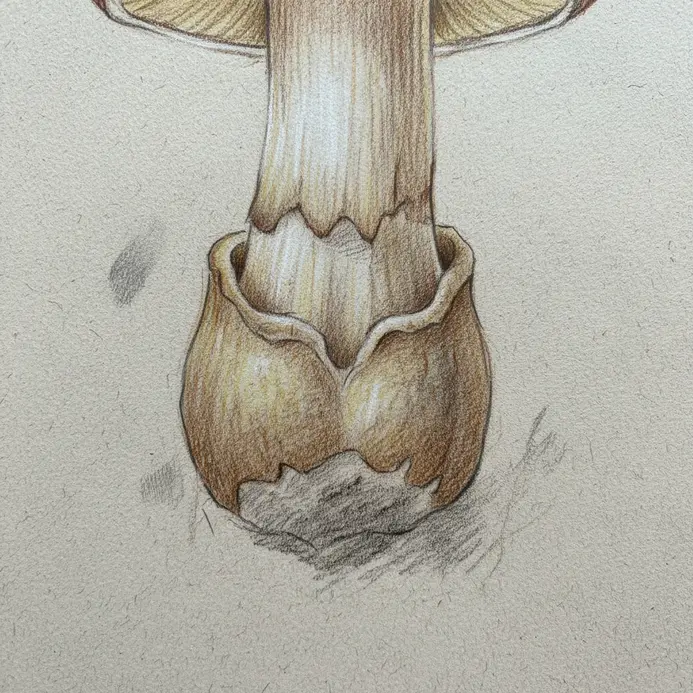
Ever wondered what gives a fungus illustration that extra touch of scientific realism? Adding the volva cup detail at the base of the stem is your secret. I love this step because it grounds your illustration in nature. Start by lightly sketching the cup’s shape where the stem meets the ground, using a clear reference photo as your guide. This small detail makes your piece look authentic and complete. Adding ground-level anchors like this is why so many artists recommend these easy mushroom drawing ideas for nature journaling.
9. Apply Textured Stippling to a Mushroom Cap Sketch

Ever wondered how artists create those soft, textured surfaces with only dots? This stippling technique for a cute mushroom drawing. is your secret. Start with your pencil sketch and a fine-tip pen, placing sparse dots for highlights and packing them closer for shadows. I love how this method builds a natural, three-dimensional feel one tiny mark at a time. It is incredibly satisfying to watch the form emerge from pure texture. If you enjoy this detailed approach, you might explore more aesthetic drawings for similar projects like cute mushroom drawing tutorials. This patient method is one of the top easy mushroom drawing ideas for relaxing evening sketching.
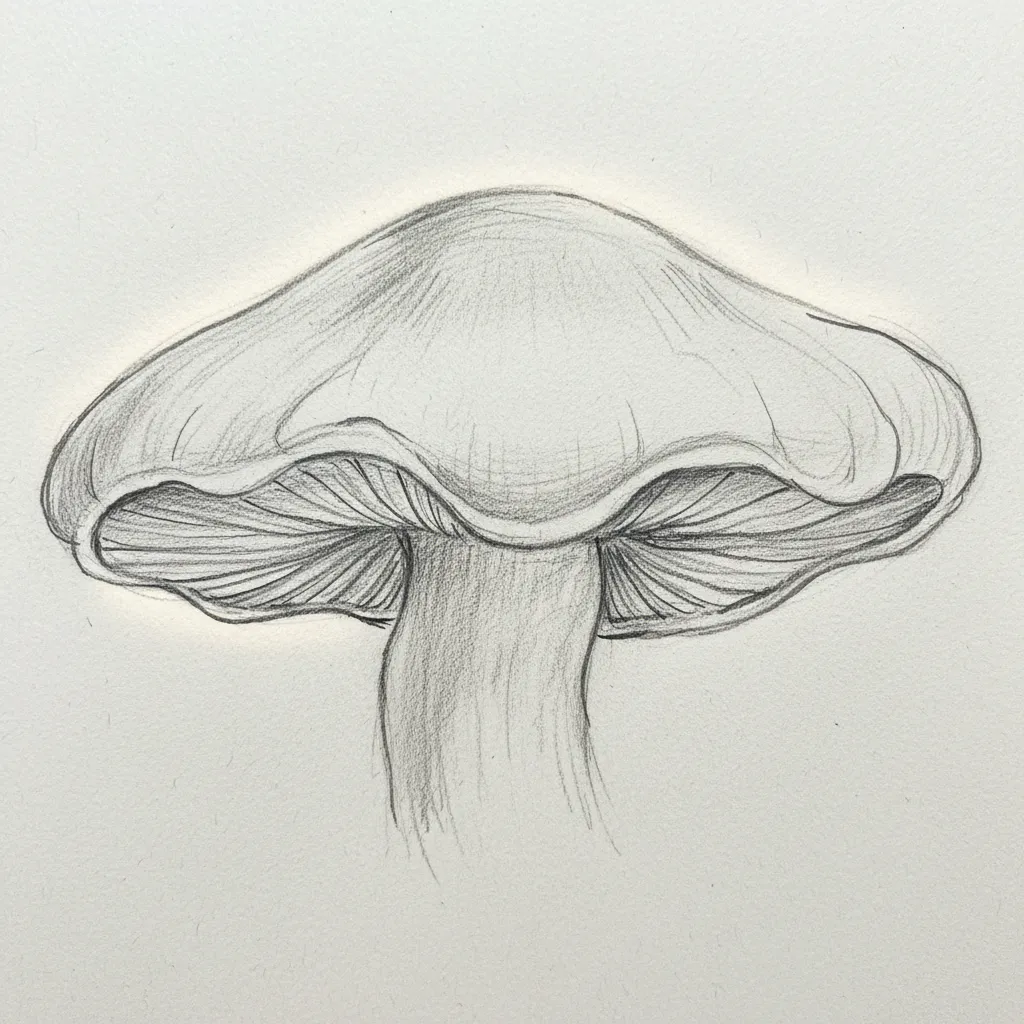
10. Outline a Wavy Edged Whimsical Mushroom
This one is my absolute favorite for feeling like you are drawing a magical storybook creature. Focus on the soft, flowing waves of the cap edge, making each curve a little different for a charmingly lopsided look. Let the stem lean gently and give it a slightly swollen base. The joy here is in the freedom – it does not need perfect symmetry to look perfectly enchanting. You will find that embracing organic curves is a recurring theme in easy mushroom drawing ideas for playful artists.
11. Sketch an Uneven Mushroom Pair for Size Contrast
Ever feel like your drawings need a little more depth? This one is an excellent choice for that. Start with a large, lopsided cap and a thick stem for your first mushroom. Then, draw a second one that is tiny and delicate right next to it. The stark size difference instantly creates visual interest and makes your sketch pop. Focus on the shadows to truly sell the size contrast. A big fungus casts a big, soft shadow, while the little one has only a tiny mark. This simple trick adds so much dimension. I love how this exercise makes a concept like scale clear and fun to draw. For more practice with simple subjects, try these other easy drawing ideas. Playing with scale is exactly why pairing subjects appears in easy mushroom drawing ideas for dynamic compositions.
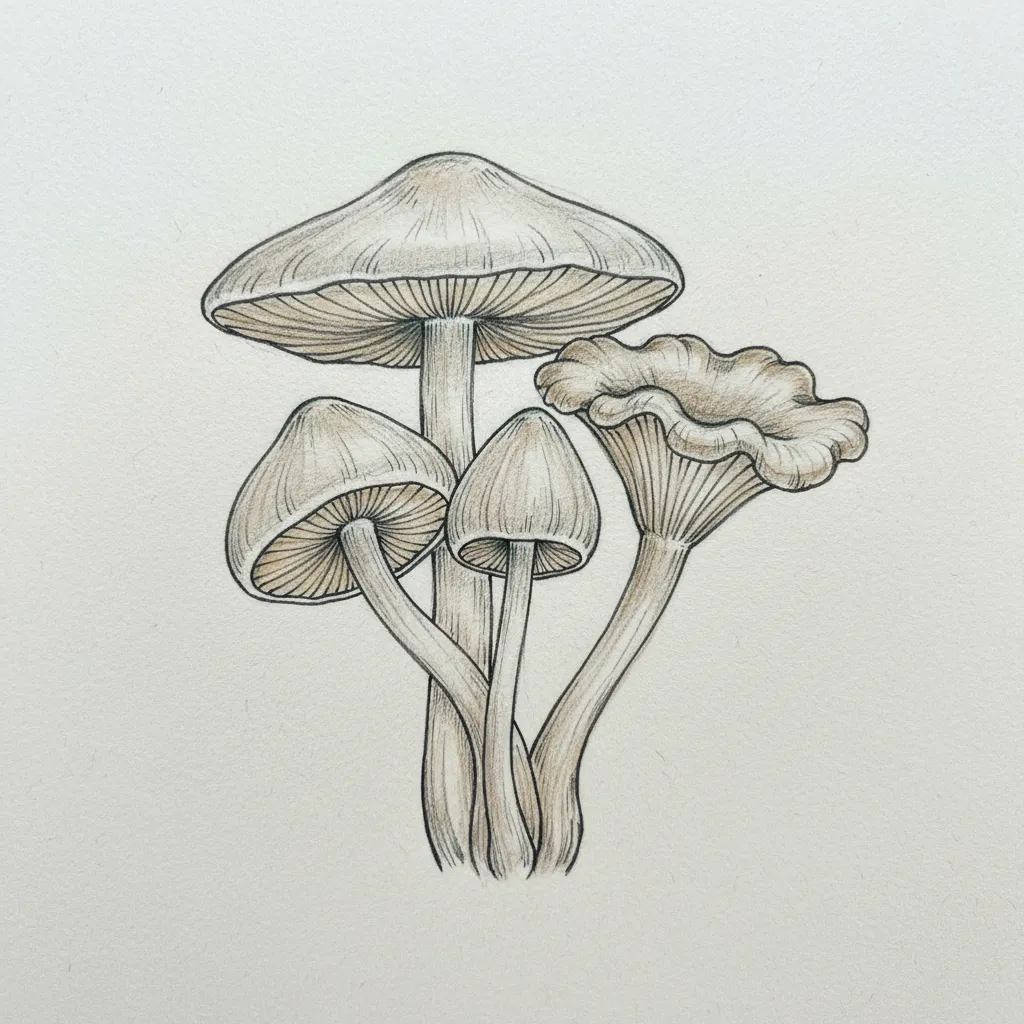
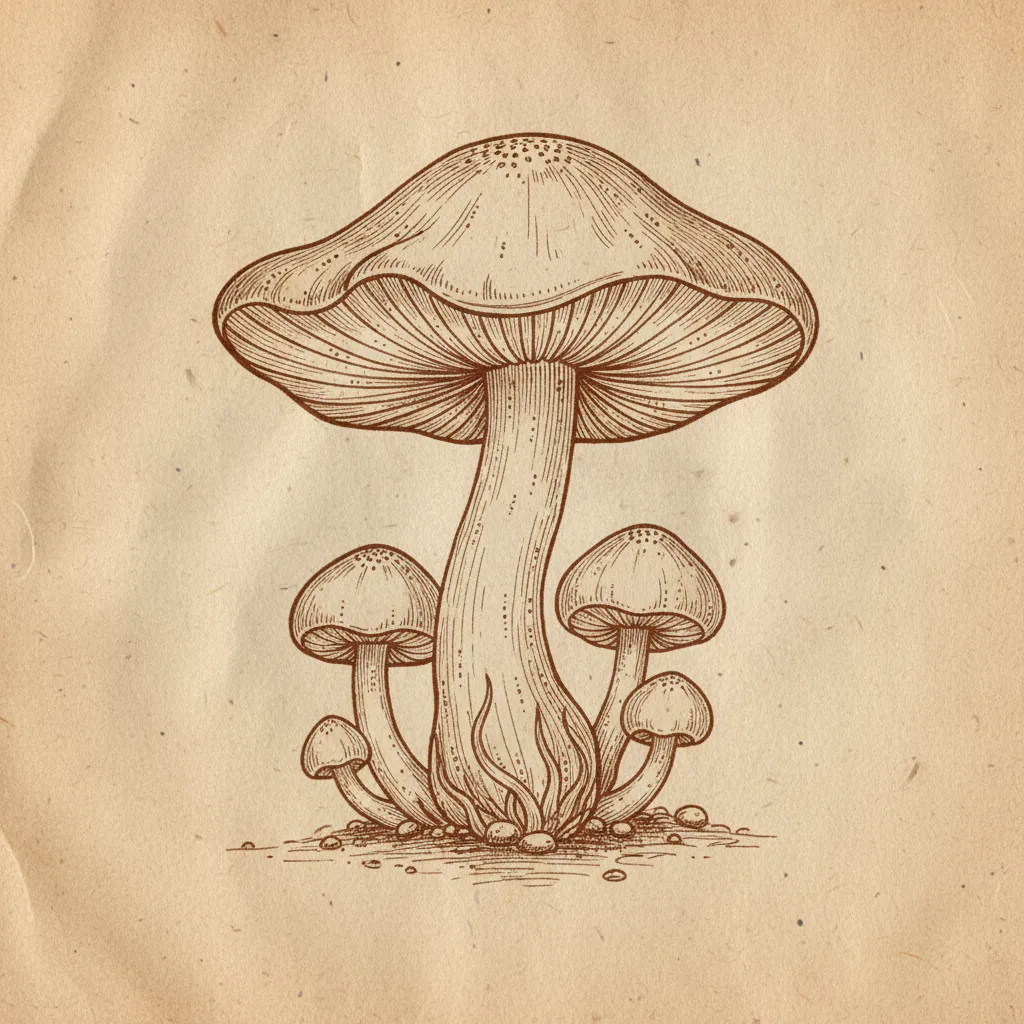
12. Draw an Overlapping Mushroom Cluster Botanical Sketch

This one looks complex, but the trick is to start with the whole cluster’s shape, not individual fungi. Use a light hand to create depth in your cute mushroom drawing. H or 2H pencil to sketch a loose, cloud-like footprint for the group. Identify your main ‘hero’ fungus first, then layer others behind and around it, letting stems and caps naturally overlap and hide parts of each other. Why does this work so well? It creates a natural, cohesive botanical sketch that feels alive and grounded. My go-to tip is to vary the sizes and angles of the caps to avoid a repetitive look. You will love how dimensional your final sketch feels, which is why clustering techniques are heavily featured in easy mushroom drawing ideas.
13. Create a Mushroom Growing From a Mossy Mound

Does creating a miniature scene sound intimidating? It is not once you start with a mossy clay mound. Build an irregular base from brown or green clay, then pinch and poke it to look like real earth. I love adding texture with a piece of crumpled foil for that soft, natural feel. Next, form your fungus and press its stem into the mound. The key is avoiding perfect symmetry in both parts. Add fine details like gills under the cap and varied green speckles on the moss. Trust me, embracing this natural irregularity makes your little diorama look wonderfully authentic and alive. Building grounded habitats like this keeps easy mushroom drawing ideas feeling fresh and realistic.
14. Place a Tiny Mushroom Beside a Heart Shaped Leaf

Who would have thought a simple heart-shaped leaf and a fungus might create such a charming little scene? Start by sketching the cordate leaf with its rounded base and pointed tip. Then, draw a tiny mushroom right next to it, keeping the cap small and the stem slender so it looks delicate beside the leaf. This pairing works because the scale creates a sense of a miniature, magical world you have found. I love how this tiny detail adds a whimsical touch, and it is a perfect element to include when you are drawing whimsical landscapes. Adding companion botanical elements is a clever trick that elevates many easy mushroom drawing ideas for nature lovers.
15. Sketch a Simple Mushroom Amidst Grass Blades

Ever notice how a fungus feels at home nestled in the grass, much like a cute mushroom? This one is a quick, natural scene. Start with a light, wobbly oval for the cap and two slightly curved lines for the stem. I love this part because it feels like building a little world. Now, add life with quick, flicking strokes for grass blades around it. Vary their height and let some disappear behind the fungus to create depth. It works because those simple, overlapping lines instantly tell a story of place. Trust me on this one, keep your initial pencil pressure light and feel the satisfaction when your simple sketch looks perfectly at home in the wild. Grounding your subject in quick foliage is exactly how you practice the foundational strokes of easy mushroom drawing ideas.
16. Draw an Exaggerated Cartoon Chunk Mushroom

Who would have thought a fungus could look so chunky and friendly? Start by sketching a massive, slightly squashed oval for the cap, making it look like a heavy, puffy pillow. Then, give it a short and thick stem that seems to heroically hold up all that weight. The magic happens when you add the character details. Draw large, expressive eyes and a wide mouth right on the cap to give it a goofy personality. I love using a bold marker to outline everything, which truly makes those chunky features pop. This style is so effective because it turns a simple shape into a lovable, whimsical character that feels instantly approachable. create whimsical watercolor art. Trust me, the key is to avoid perfect symmetry. A wobbly, oversized cap is what gives it that charming, exaggerated look. Feel the joy of creating your own little cartoon buddy. Exaggerating proportions for character work is a fun variation of easy mushroom drawing ideas.
17. Add a Kawaii Face to a Mushroom Character Sketch

Ever wondered how a simple fungus sketch gets its charming personality? The secret is all in the face of your cute mushroom drawing. I love adding a kawaii style face to my character sketches. Draw two large, symmetrical eyes with white highlights for sparkle, then place a tiny w-shaped mouth below them. This works because the exaggerated cuteness instantly makes your creation feel friendly and alive. Try it and watch your sketch transform into an adorable character. Incorporating expressive features is exactly what bridges cute aesthetics with easy mushroom drawing ideas.
18. Build a Geometric Form Triangular Cap Mushroom

This one looks complex, but trust me, it is built from two simple shapes you already know. Start by designing your triangular prism cap and cylindrical stem on paper, then cut and fold the templates from cardstock. You will feel so clever watching flat pieces become a sturdy 3D form, which makes it a standout choice for easy mushroom drawing ideas that blend craft and sketching. Isn’t that satisfying? My go-to tip is to always add generous glue tabs to your net.
19. Outline a Bold Graphic Mushroom Shape

Ever notice how the best logos are only a clean, strong outline? That’s the energy we want here. Start by drawing a wide, smooth arc for the top of the cap, like a broad, shallow dome. Then, bring two confident lines down from the ends to form the cap’s underside, connecting them at the center. For the stem, draw two clean, parallel lines straight down from that point to create a sturdy base. I love how this single continuous line becomes a powerful shape you might fill with color or patterns. It looks fantastic on a tote bag or a sticker featuring your cute mushroom drawing. For a fun twist, pair your graphic fungus with some easy whimsical painting projects.
20. Draw a Solid Silhouette Mushroom Shape
This step looks so simple, but it’s incredibly satisfying. You will focus on creating a single, dark shape with no internal details. Use a firm, dark pencil to draw a clean, closed outline of the cap and stem, then fill it all in. I love this because it forces you to see the fungus as a bold, simple form. Trust me, the result is a striking graphic piece you will be proud of.
21. Sketch a Mushroom Under Simple Rainy Lines

Who would have thought a few simple lines might add so much cozy atmosphere? Start by sketching a wide, slightly flattened arc for the top of your fungus cap, like the top of an umbrella shape. Then, connect the ends with a second, flatter arc to form that classic dome. Add a simple stem and then, the magic touch: draw a series of gentle, diagonal lines across the scene to suggest rain. This works so well because the minimal detail creates a charming, storybook feel. For a cleaner, more defined look, you might trace your sketch with a simple colored pencil for a soft, whimsical finish.
22. Place a Mushroom Near a Small Garden Snail
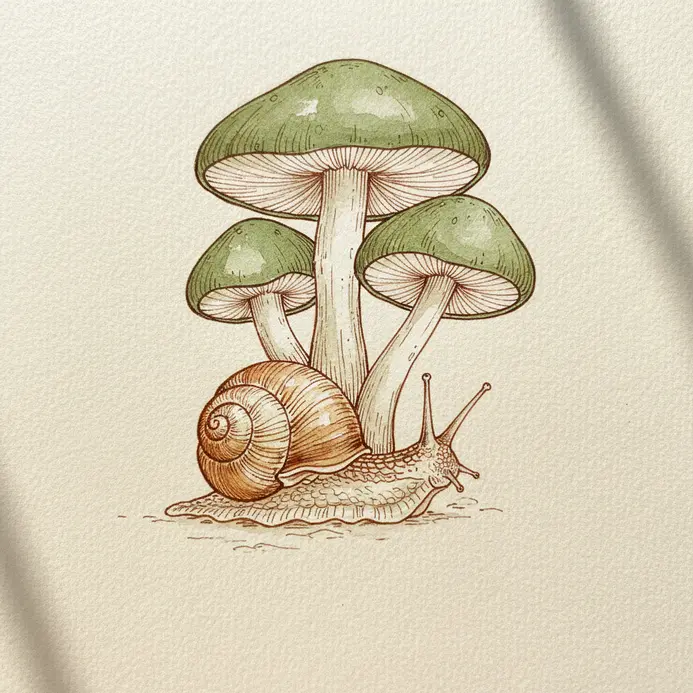
Ever wondered how to create a charming, natural scene? I love setting up a fresh, intact fungus near a small garden snail. The key is using a commercially grown, edible mushroom for the snail’s safety. Gently place them together to highlight their delicate sizes and textures. This works because it captures a tiny, whimsical moment from the forest floor. Try it and feel the delight of a miniature world.
23. Draw a Hollowed Log Mushroom Habitat Sketch

Ever wondered how to make a log look old and decayed? Start with a thick, diagonal line for the trunk, then carve out a jagged hollow on one side. Use short, broken lines for the bark’s texture and wavy, parallel strokes for the exposed wood grain. It feels satisfying because you are building a whole tiny ecosystem on your page. Now, add life! Draw some shelf fungi fanning out from the wood, complete with concentric rings. I love tucking clusters of smaller fungi with delicate stems into the cracks and shadows. A light touch with your pencil for some stippled moss and a few fallen leaves makes it all feel wonderfully real.
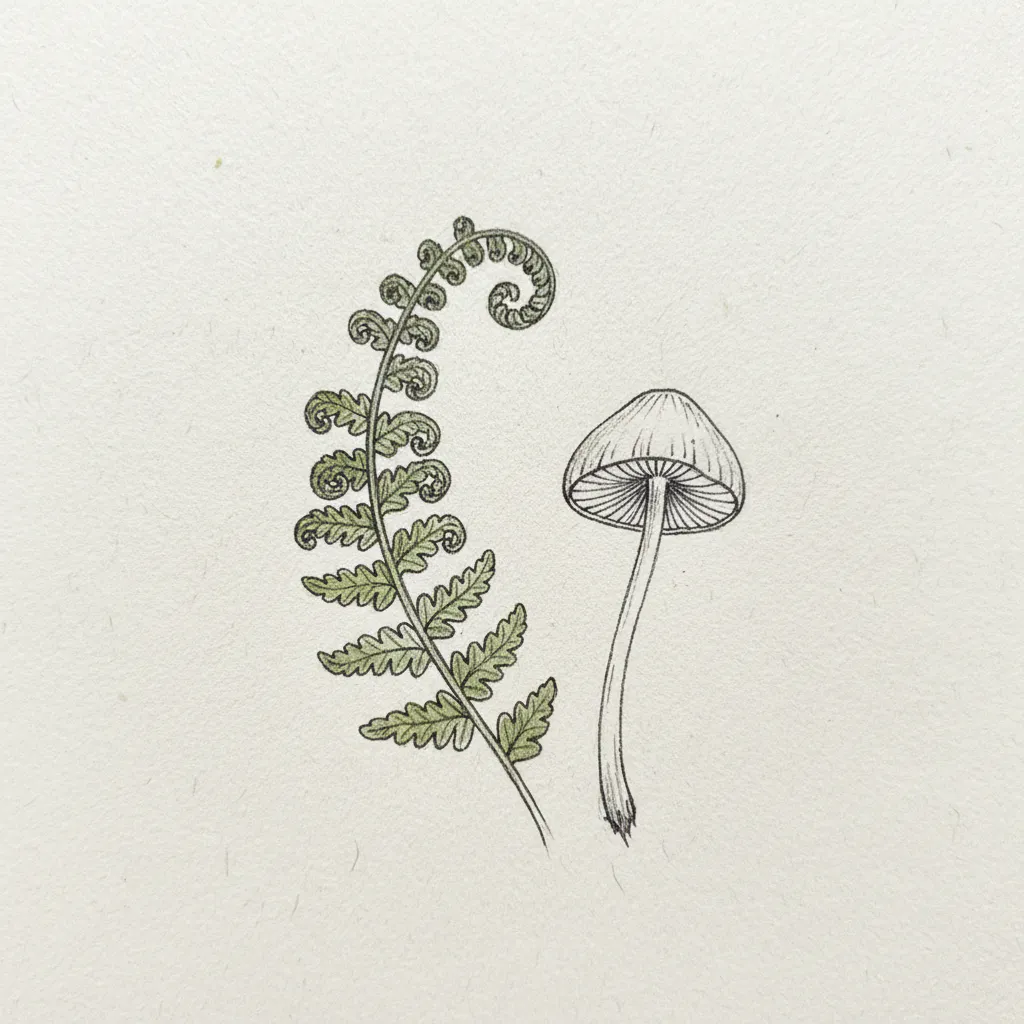
24. Add a Drooping Fern Frond to Your Mushroom Sketch

Ever wondered how to make your fungus sketch feel truly part of the woods? Adding a drooping fern frond is my favorite trick for that. The key is to draw graceful, downward curves for the main stem, letting the weight feel real. Let the individual leaflets overlap and vary in size, then add very light veins for a feathery texture. Trust me, this simple addition creates amazing depth and a natural frame. It also gives you a perfect excuse to practice your creative doodle art inspiration with organic shapes. Feel that satisfying woodland atmosphere come to life on your page.
25. Sketch a Tiny Spore Cloud Floating from a Mushroom

Isn’t it fascinating how something so small might add so much life to a drawing? Start by sketching a simple fungus with a cap and stem, then lightly outline a wispy, upward floating shape beneath it. Use a kneaded eraser to soften those cloud edges until they look like they are fading into the air. I love how this captures a fleeting moment of nature’s magic. Try it and feel the whimsy you have created.
26. Draw Dew Drops Hanging from a Mushroom Cap

This detail looks tricky, but it’s a simple way to add sparkle. Start by lightly sketching the shape of each water drop on your fungus cap. Remember, they act like tiny lenses, so slightly curve the lines of the gills you see through them to show subtle refraction. Add a bright highlight and a dark shadow opposite it to make the drops look round and wet. That little cast shadow underneath each drop is what makes it look like it’s clinging, not floating. You’ll love the fresh, magical feel it gives your illustration. more whimsical drawing ideas.
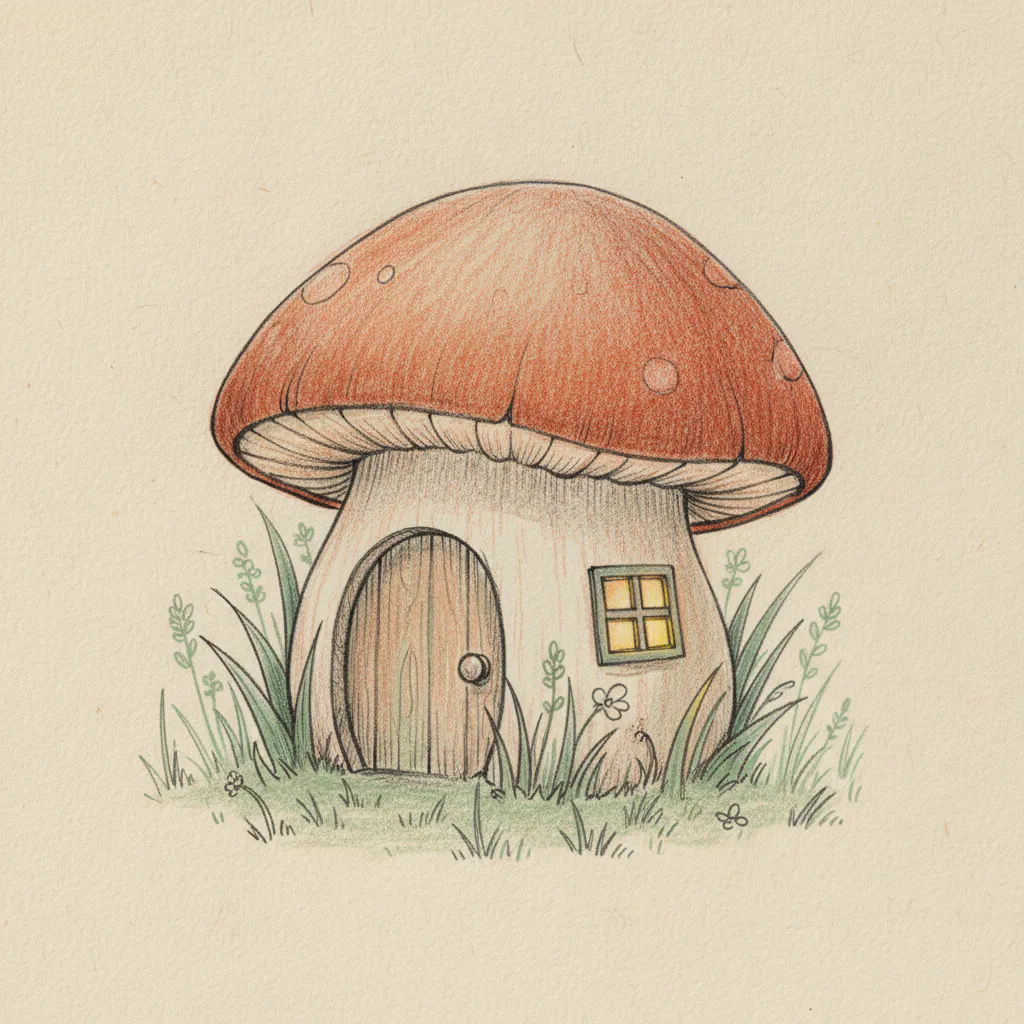
27. Create a Cozy Mushroom House Window Sketch

Who said fungi might not be homes? Start by lightly sketching a big, irregular oval for the fungus body and a wide, flattish curve for the cap. Place a simple rectangle or arched window frame slightly off-center in the body. Isn’t that a charming start to learn how to draw a cute mushroom? Now, add the cozy magic. Draw soft, flowing curtains inside the window and a thick sill underneath. I love establishing a consistent light source next, using a 2B pencil to shade the opposite side of the fungus for depth. This creates that inviting, warm glow from within. Your sketch tells a tiny story, and that’s the real payoff. Feel that whimsical satisfaction as your little house comes to life.
28. Wrap an Ivy Vine Around a Mushroom Drawing

This trick looks detailed but it’s surprisingly straightforward. Lightly sketch a flowing, curving line for your ivy vine’s main path around your fungus’s stem and cap. Then, draw leaves with three to five lobes, placing them alternately along that stem and letting some disappear behind the fungus for a real wrapping effect. I love how this adds instant depth and a cozy, botanical feel to a simple sketch. Trust me, a quick glance at a reference photo makes those natural leaf shapes click.
29. Draw an Abstract Swirl Pattern Mushroom Design

Ever wanted to draw something that feels more like art than a simple sketch? Start by lightly sketching a broad, gentle dome for the cap, but let it be a little wonky—perfect symmetry is your enemy here. Next, fill that cap with loose, overlapping abstract swirls, letting your pen flow freely without overthinking. I love how this fluid, artistic approach transforms a simple fungus into a unique piece. For a complete scene, you might add some ideas for drawing forests around your whimsical subject.
30. Achieve a Midnight Glowing Moonlit Mushroom Drawing

Ever wondered how to capture that magical, quiet glow of a forest at night? The secret is mastering two light sources. Start with a dark, desaturated background like indigo or charcoal, then softly hint at the moon with a cool blue gradient. Let your fungi be the true stars, using a warm, gentle light on a separate layer to make them appear to glow from within. I love how this teaches you to paint with light, not only color, in your mushroom drawing easy. The contrast between the cool moonlight and the warm fungus light creates instant, stunning atmosphere. Try it and feel the magic come to life on your page.
Preserving Finished Illustrations With Archival Fixatives
A single light coat of workable fixative applied after your initial pencil sketch prevents smudging while you add ink. This is my secret for keeping a clean drawing. Once your final lines and botanical elements like fern fronds are complete, you need a permanent seal. Use two or three light, even passes of a final matte archival spray, holding the can about twelve inches away. Let each layer dry completely. This protects your weeks of work from UV light and skin oils without altering the delicate values of your graphite shadows or the deep black of your ink. Your finished piece will stay exactly as you intended, with all its weighted line work and texture intact for years.
More Easy Mushroom Drawing Ideas Gallery for Inspiration

Conclusion
Your sketchbook is a perfect place for these charming, simple forms. Each of these easy mushroom drawing ideas was chosen to help you practice a different aspect of drawing, from clean line work to adding tiny environmental details. The real joy comes from seeing your page fill up with these cozy scenes, each one a small celebration of botanical whimsy. Take one of your favorites and try it again with a different tool, like a brush pen or a light watercolor wash. The best part about building a collection of simple fungal sketches is watching your own style emerge naturally as you play.
FAQs
Q: How do I draw a mushroom step by step if I’m a complete beginner?
A: Start with basic shapes: sketch an oval for the cap and a curved rectangle for the mushroom stem using a B pencil to keep lines light. Follow a beginner-friendly step by step tutorial: refine the cap shape, add the underside of the mushroom with simple lines for the gills of the mushroom, then erase stray marks and darken final lines with a black pen. This learning to draw approach makes the drawing process easy and fun.
Q: What is the easiest way to draw mushrooms with a classic look?
A: For a classic look, draw a mushroom by making the cap as a hat—an oval shape slightly flattened on top—and a short rounded stem. Add white spots or a cap dotted pattern, sketch the gills of the mushroom subtly under the cap, and shade your drawing lightly to create a textured look. This produces a cute and easy drawing of a mushroom.
Q: Can I create a cute and easy two mushrooms composition?
A: Yes—start with two basic mushroom shapes next to each other, varying sizes for interest. Use basic shapes to block in a larger cap and a smaller cap, add the stems and underside details, and include a variety of shapes for the caps to make them look natural. Shade your drawing and add small white spots or a cap dotted pattern to make a charming collection of easy drawing mushrooms.
Q: How do I show the underside of the mushroom and the gills in a simple drawing?
A: After sketching the cap and stem, flip to the top part’s underside: draw short, parallel lines radiating from the stem to the edge of the cap to indicate the gills of the mushroom. Keep lines light with your B pencil, then emphasize with a black pen if desired. Minimal lines create a convincing underside without overcomplicating the mushroom step by step process.
Q: What tools should I use to make a mushroom drawing beginner-friendly?
A: Use a soft B pencil for initial sketches, an eraser to remove construction lines, and a black pen to finalize outlines. Optional shading tools like a blending stump or a graphite pencil help shade your drawing and add a textured look. These simple tools keep the drawing process accessible for beginners learning to draw.


