


Glass Surface Degreasing and Preparation Requirements
The single biggest mistake I see is skipping the isopropyl alcohol wipe, and trust me, your paint will betray you for it. Your jar might look clean, but invisible skin oils from handling it will cause the paint to bead up and refuse to stick. After a good wash with dish soap, you must give the entire surface a final pass with a lint-free cloth soaked in 91% isopropyl alcohol. This step removes every trace of grease and creates the perfectly clean, slightly etched surface your primer needs to grab onto. I keep a dedicated bottle and cloth in my craft area because this preparation is the non-negotiable foundation for any lasting project, especially when painting glass.
Selecting Paint Types for Glass Durability
When planning a diy mason jar painting project, you need paint formulated with adhesion in mind, not just any acrylic from the kids’ aisle. Look for bottles labeled specifically for multi-surface or glass and ceramic use, as these contain additives that bond to slick surfaces. FolkArt Enamels or DecoArt Americana DuraClear are fantastic options that dry to a durable, slightly flexible finish. For a rustic, vintage look, a quality chalk-style acrylic paint adheres beautifully and provides that soft matte contrast against the clear glass. The opacity you choose matters too. A solid, opaque base coat lets you create strong graphic designs, while translucent washes allow the jar’s contents to glow through for a candle holder.
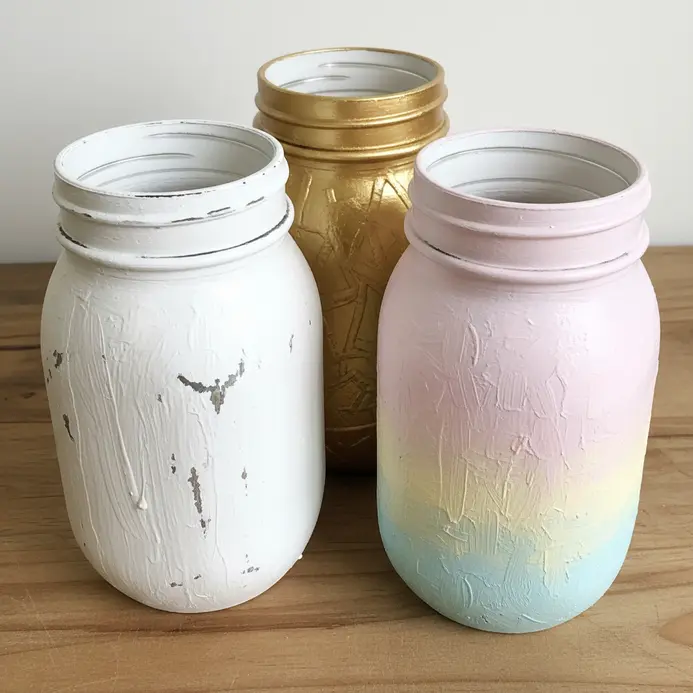
1. Paint a Matte White Distressed Farmhouse Jar
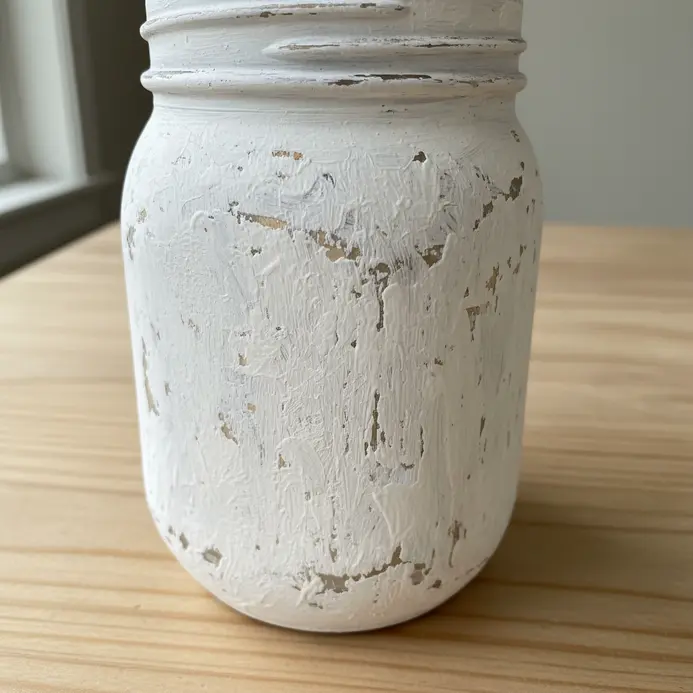
You might assume professional decor requires heavy tools, but diy mason jar painting stays wonderfully straightforward here. You start by cleaning your jar with rubbing alcohol to ensure the paint sticks. Then, apply a few thin, even coats of a matte white paint on the outside of the jar, letting each dry fully. The real magic happens with a piece of sandpaper. You gently rub on edges and raised details to create that perfect worn look. It works because the contrast between the crisp glass and the soft, aged paint feels authentically rustic. I love how this single project can anchor a whole shelf of farmhouse decor. For more inspiration on where to take your painted jar, take a look at some glass painting designs.
2. Apply a Metallic Gold Geometric Patterned Jar
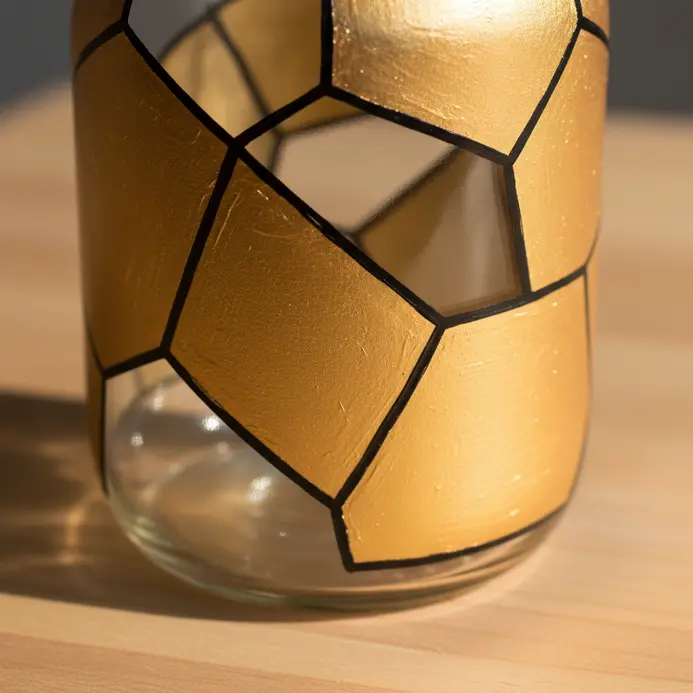
This design looks intricate, yet diy mason jar painting techniques like this are surprisingly simple to execute. The key is using painter’s tape to map out your sharp lines and shapes before you even pick up a brush. Apply an even coat of your metallic gold paint, let it get slightly tacky, then slowly peel the tape away to reveal those crisp, modern patterns. I love how this method combines luxury with clean, structured lines. It is such a satisfying transformation that elevates a simple jar into a stunning piece of home decor. Your finished geometric jar will look fantastic holding utensils or standing alone as an accent.
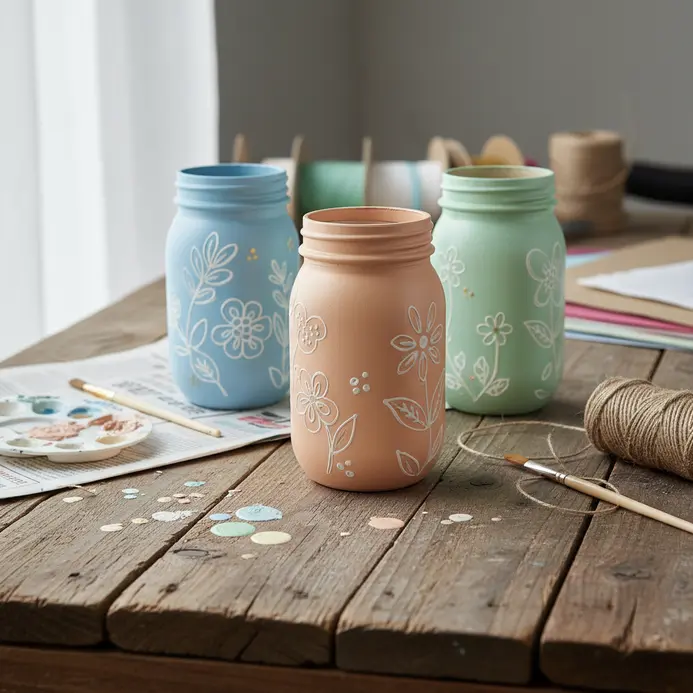
3. Create a Soft Pastel Ombre Painted Jar
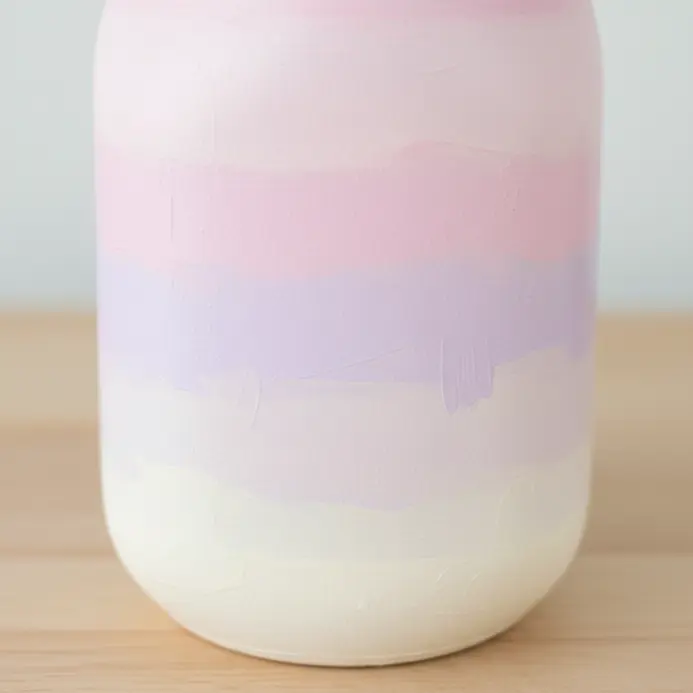
This soft gradient looks elegant, and practicing diy mason jar painting helps you master blending wet paint. You will start by painting the bottom third of your jar with the darkest pastel color. While it is still wet, apply your middle shade right above it, slightly overlapping the edges. Now, grab a clean, damp brush and gently blend where the two colors meet with soft, back-and-forth strokes. This technique gives you that perfect, seamless transition when you paint the outside of the jar. I love how forgiving this method is, letting you adjust the blend until it looks right, whether you’re using a paintbrush or spray. easy glass painting ideas to expand your project list. Just remember to wipe the jar with rubbing alcohol first for the best paint adhesion. That final, smooth fade is so satisfying to watch come together.
4. Achieve a Glossy Neon Summer Party Jar
Ever wondered how those glowing centerpieces are made? Mastering diy mason jar painting reveals the secret lies in high-impact color with a slick, wet-look finish. The trick is using neon gloss spray paint or a clear gloss topcoat over neon acrylics. Apply your chosen paint in multiple thin coats, letting each dry fully to prevent drips. That glossy seal makes the colors pop under the lights, creating a perfect summer party vibe. Trust me, the key is patience with those thin layers. For another project with a similarly fun, colorful vibe, you might enjoy painting terracotta flower pots. Does that not look stunning when it all comes together?
5. Build a Chalky Navy Blue Winter Jar
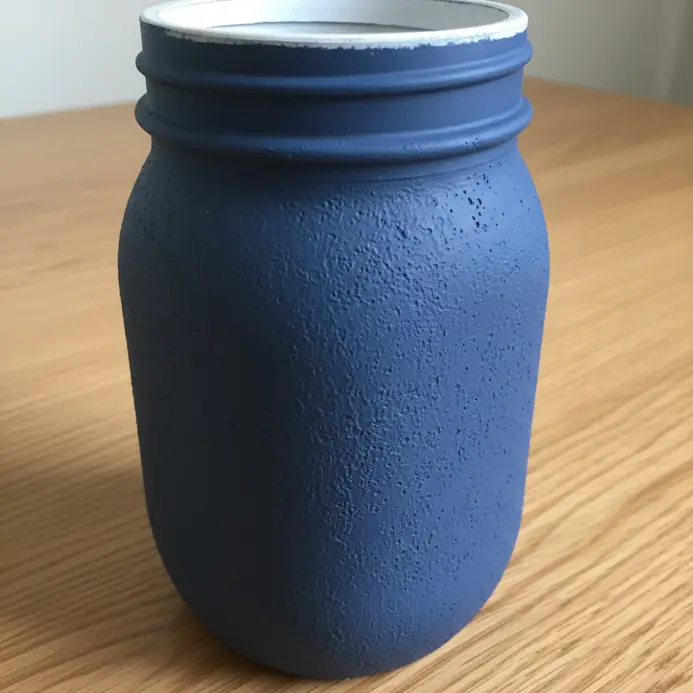
This piece looks like something from a boutique, but diy mason jar painting transforms simple glass with a few steady strokes. You start by cleaning your jar with soap and water, then wipe it down with rubbing alcohol to remove any grease. This step is non-negotiable for solid paint adhesion. Next, apply two or three thin coats of your navy blue chalk paint, letting each dry completely. I love how the matte finish instantly feels cozy and wintry. Once the paint is dry, seal it with a clear matte wax or a polycrylic topcoat to protect your work. Now for the fun part. Wrap some twine around the neck, hot glue on a few small pinecones or faux berries, and maybe tuck in a sprig of greenery. Your new jar is perfect for holding a candle, some dried flowers, or even kitchen utensils. Does that not look stunning?
6. Add a Silver Glitter Dipped Party Jar
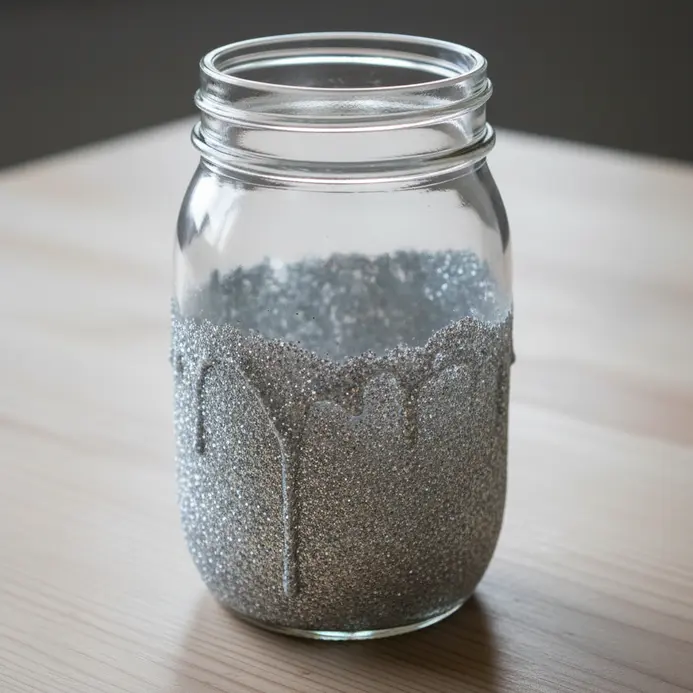
Wondering how those festive centerpieces look so professionally finished? Every diy mason jar painting session with metallic accents proves it only takes one solid base. You will apply a generous coat of gloss Mod Podge to the bottom section of your clean jar, then roll it right into a pile of silver glitter. Let it dry and seal it with another layer for durability. I love how the high-impact sparkle instantly elevates a simple jar into a standout party accent. For another fun way to decorate everyday objects, check out these ideas for rock painting.
7. Stencil a Polka Dot Bright Floral Jar
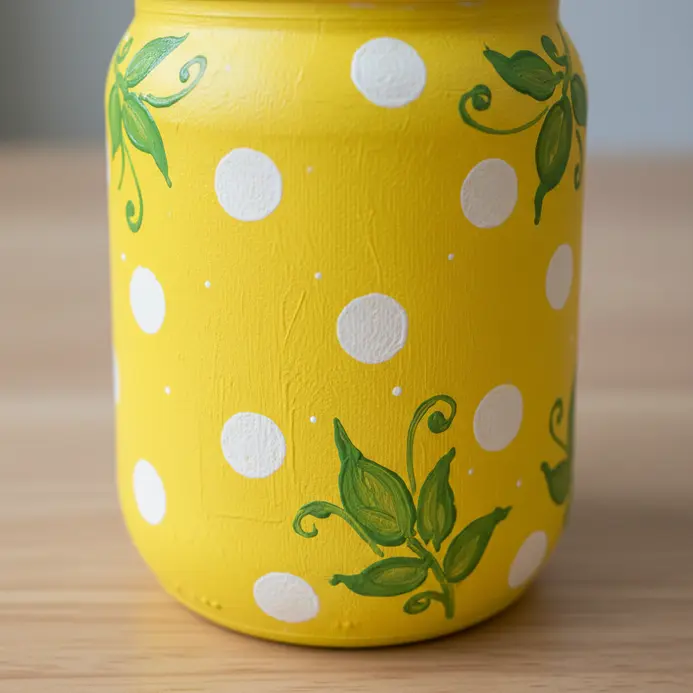
Wondering how to achieve crisp, perfect dots without hours of work? This design shows that diy mason jar painting relies on smart tools. Start with a clean jar and a light base coat. Then, secure your polka dot stencil and dab on paint with a sponge dauber. Once that layer dries, add your bright floral stencils in a mix of colors and sizes. I love how the geometric dots and organic flowers play off each other. It works because stencils do the hard part, letting you create a complex, cheerful design with ease. For another fun project using simple shapes, you can explore rock painting with animals.
8. Wrap a Rustic Burlap Painted Jar
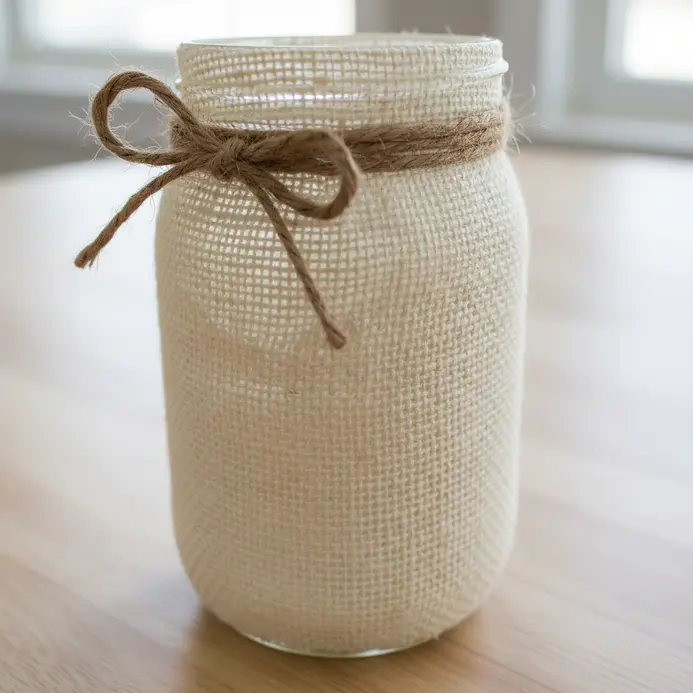
Who knew burlap and paint could combine so well? Exploring diy mason jar painting proves the process stays straightforward. First, give your jar a thin coat of acrylic paint. This base prevents the glass from showing through the burlap and gives everything a solid background. Next, cut your burlap to fit and secure it with a thin layer of fabric glue. A hot glue gun works faster, but fabric glue lets you adjust the placement. The best part? You get the perfect rustic texture for your home decor. Try it and feel the satisfaction of creating a handmade farmhouse accent.
9. Capture a Frosted Glass Winter Snow Jar

Ever wanted to bottle up a quiet winter wonderland? A focused diy mason jar painting routine lets you transform clear glass into a serene snowy scene. You will need a clean jar, some frosted glass spray paint for that icy effect, and miniature winter decorations like tiny trees or deer for inside. I love how this approach turns everyday items into personalized holiday decor. Apply several thin coats of spray paint to the outside of your jar, letting each dry completely. Then, arrange your faux snow and secured figurines inside to build your miniature landscape. The thin coats are key for a smooth, realistic frost that still lets light through. For another fun way to decorate outdoor items, check out these garden rock painting ideas. It is so satisfying to step back and see your own little snowy world glowing softly on a shelf. Does that not look stunning?
10. Make a Vintage Floral Decoupage Painted Jar
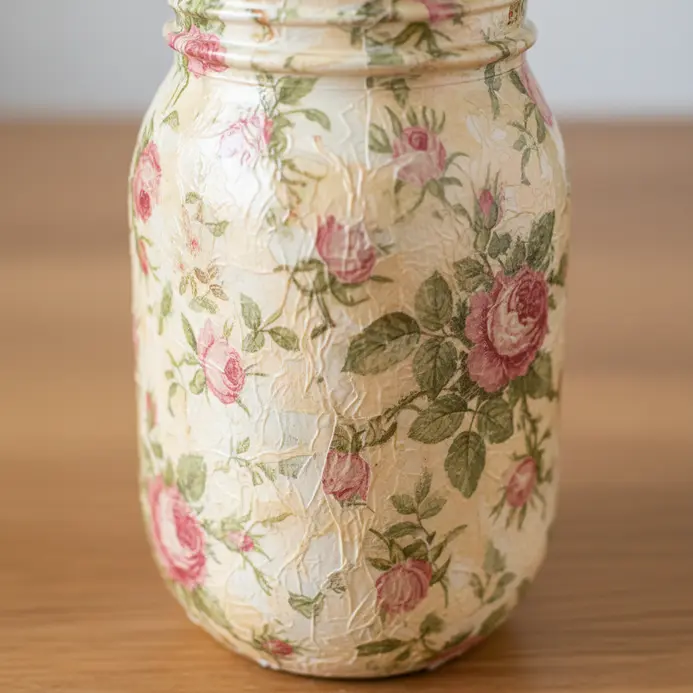
This piece looks highly detailed, but diy mason jar painting techniques keep the process wonderfully forgiving. You start by painting your jar with a thin coat of matte chalk paint in a soft, neutral color. Once that dries, you carefully apply delicate floral cutouts from a vintage napkin using decoupage medium. The magic happens when you gently distress the edges with sandpaper, revealing a hint of glass for that perfectly aged look. It works because you get gorgeous, intricate florals without needing to be a master painter. The technique relies on layering thin coats and steady hands. For another way to decorate everyday items, check out these paint coffee mug ideas. Trust me, the final result feels so personal and charming.
11. Paint a Deep Crimson Holiday Wreath Jar
Want a festive piece that feels truly traditional with a layer of paint that shines? My favorite diy mason jar painting method for the holidays uses rich red tones. You will start with a clean glass jar and apply a few thin coats of your deep crimson paint to form a wreath shape. Let each coat dry fully to prevent drips. You can keep it simple or add optional green leaves and metallic berries for extra charm. The key is patience with those thin layers. Trust me, the final look stays rich and warm, perfect for holding treats or as a standalone centerpiece. Does that not sound wonderfully festive?
12. Create a Striped Nautical Blue Beach Jar
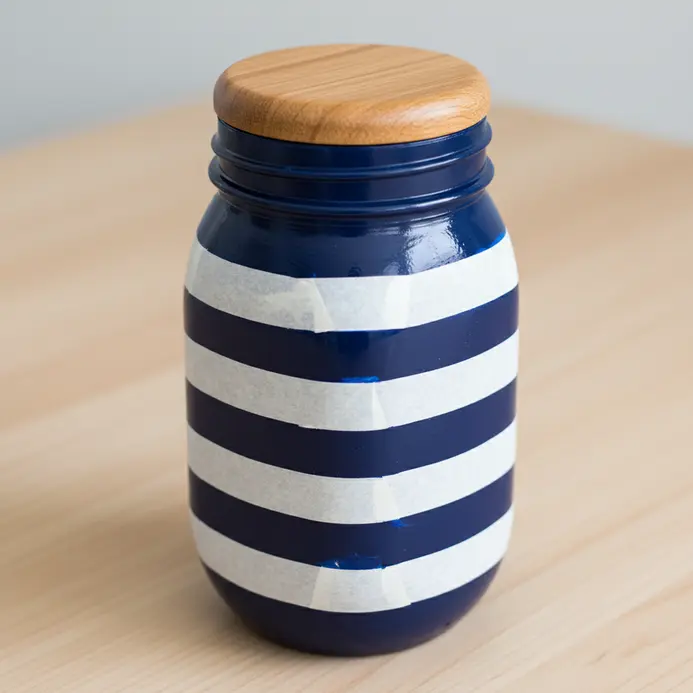
Wondering how to achieve crisp, perfect bands without steady hands? A reliable diy mason jar painting workflow relies heavily on masking materials. You’ll apply high-quality painter’s tape in your chosen pattern, press it down firmly, then paint your nautical blue and white bands right over it. The magic happens when you peel the tape away to reveal clean lines. I love this project because it instantly feels like a coastal getaway. A pro tip for a clean finish is to remove the tape while the paint is still slightly tacky. If you’re looking for more decorative painting ideas for wine glasses, the same technique works beautifully.
13. Achieve a Copper Painted Industrial Styled Jar
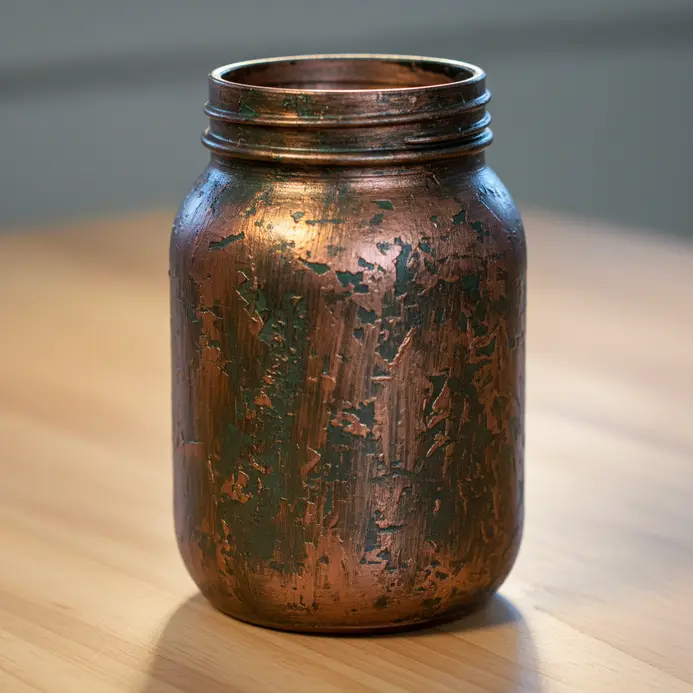
This design delivers modern rustic charm with a warm metallic twist. Every DIY mason jar painting tutorial I trust begins with proper bonding agents and a good coat of paint. Start with a spotless jar and a coat of glass adhesion primer, which is the secret to making paint stick. Then, apply a few light layers of metallic copper spray paint for a smooth, professional-looking finish, ensuring each coat of paint is even. To get the signature industrial look, lightly sand the edges after it dries for a distressed, aged appearance. Isn’t it satisfying to see that raw utilitarian character emerge? easy things to paint. Finish by sealing your work with a matte topcoat to protect all that gorgeous texture. Feel proud of your stylish new decor piece!
14. Build a Translucent Amber Stained Glass Jar
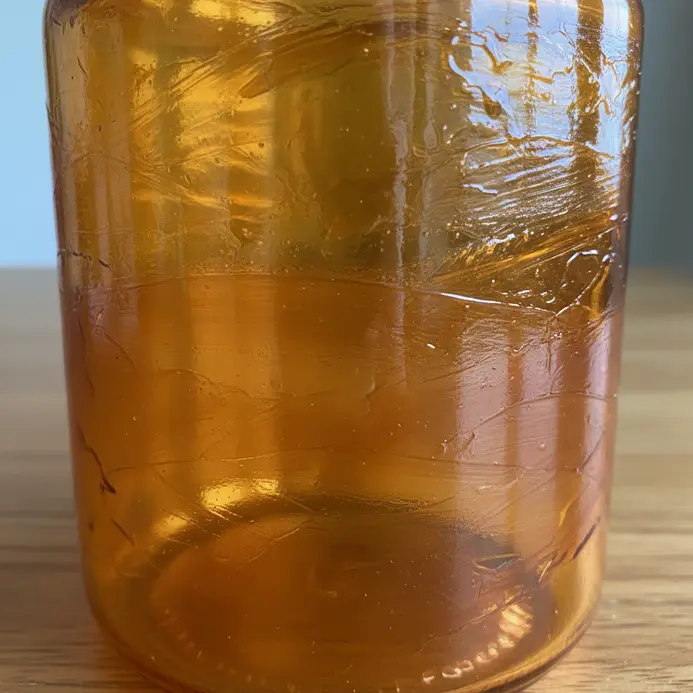
Wondering how to capture that warm, glowing light effect? A careful diy mason jar painting approach makes this surprisingly approachable. The secret is using transparent glass paints in amber and gold tones, applied inside the lines of your design. You will carefully fill each section with these paints, allowing light to pass through for that signature stained glass effect. It works because the translucent layers build up color while still letting light shine, creating a cozy ambiance. My go-to tip is to let each layer dry completely before adding another to prevent muddying those beautiful hues. You will love the radiant finish when you place a candle inside.
15. Apply a Mint Green Chalky Kitchen Jar
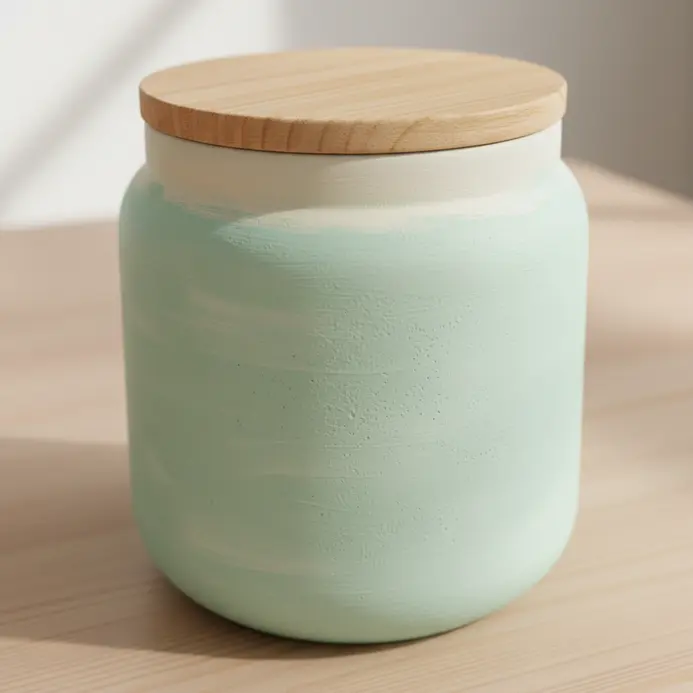
Wondering how to refresh your countertop display? A routine DIY mason jar painting practice delivers that fresh farmhouse vibe with each layer of paint. You will start by cleaning your jar thoroughly with soap and water, then wiping it down with rubbing alcohol to remove any oily residue. Next, apply two or three thin, even coats of mint green chalk paint, letting each one dry completely. That soft, matte look holds utensils or dry goods beautifully. What makes this so satisfying is how quickly a plain jar transforms into lovely decor. For a durable finish that stands up to kitchen use, you must seal it with a Apply a clear matte sealer to protect the outside of the jar after painting.. The payoff is a custom piece that feels both rustic and fresh. If you enjoy this kind of creative transformation, you might also like to learn watercolor painting techniques.
16. Make a Blackboard Painted Herb Garden Jar
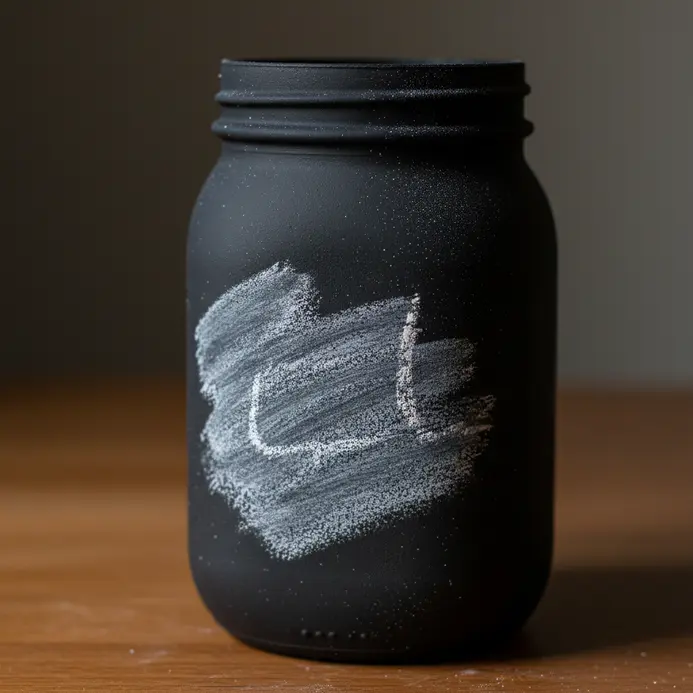
This idea wins for any windowsill gardener. You start by giving your clean mason jar a solid coat of chalkboard paint. Once it is completely dry, the fun begins. You get to write the names of your herbs right on the glass with chalk, which makes labeling and replanting simple. It is a clever twist that makes your jar both beautiful and functional. If you are new to decorating objects, this project serves as a fantastic, low-pressure starting point, much like trying pottery painting for beginners. You will love the rustic, personal touch it adds to your kitchen.
17. Create a Rose Gold Marbled Swirl Jar
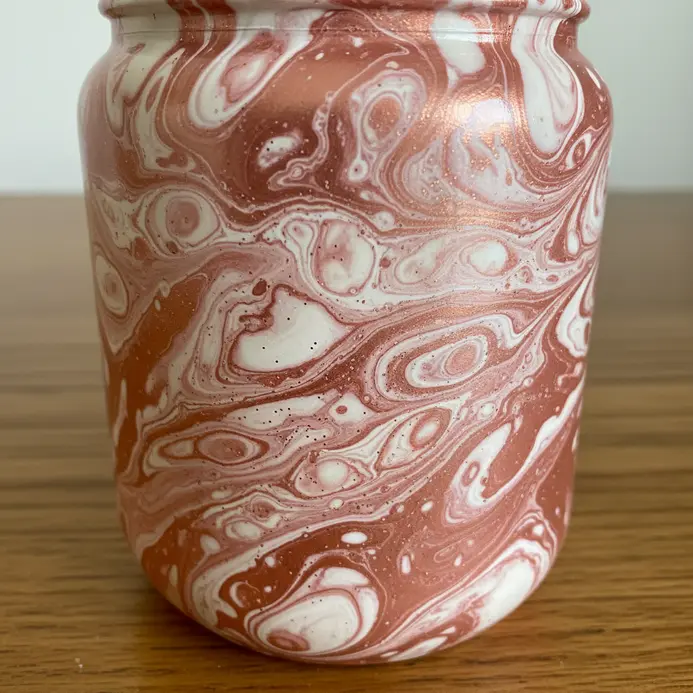
This result looks elegant, with a smooth coat of paint, but the technique remains simple. You will drip rose gold and white paint onto water, swirl it with a wooden skewer, then dip your jar to pick up the pattern. I love how the metallic finish catches the light for a truly refined appearance. It is crucial to start with a perfectly clean jar and use room temperature water. If your paints feel too thick, thin them slightly to ensure smooth spreading. The trick is avoiding over-swirling, which keeps those beautiful marbled lines distinct. Trust me, the payoff feels huge. You will feel proud holding your own sophisticated, one-of-a-kind creation.
18. Add Lavender Lace Embellishments to a Painted Jar
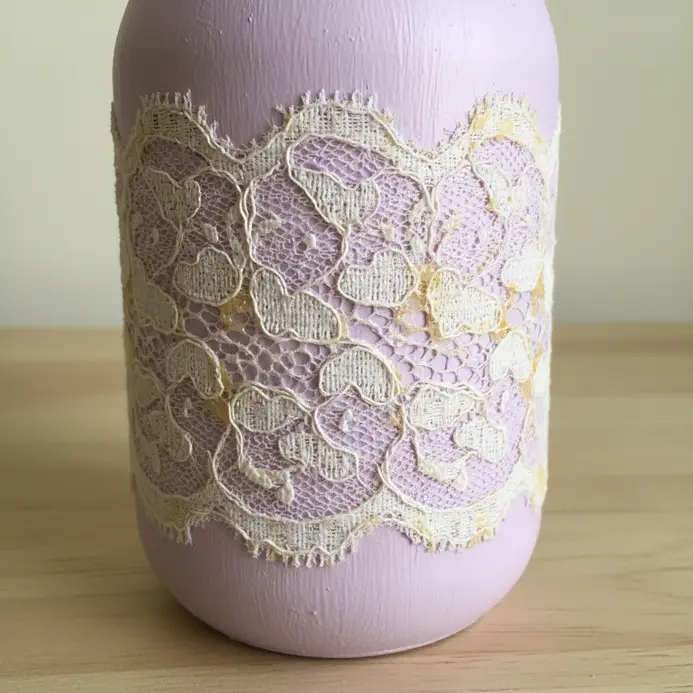
Who knew a soft trim could elevate a painted surface so quickly? This final step adds that gentle finishing touch. After your paint cures completely, measure and cut your lavender lace trim to fit the circumference. I love using a strong fabric glue to adhere it neatly around the jar’s middle or base for a delicate, textured look. It works because the lace introduces a beautiful contrast against the smooth background, creating instant vintage charm. For a cohesive look, pair this with a softer base color and explore more whimsical art painting styles that complement this aesthetic. Feel that lovely, handmade elegance come together.
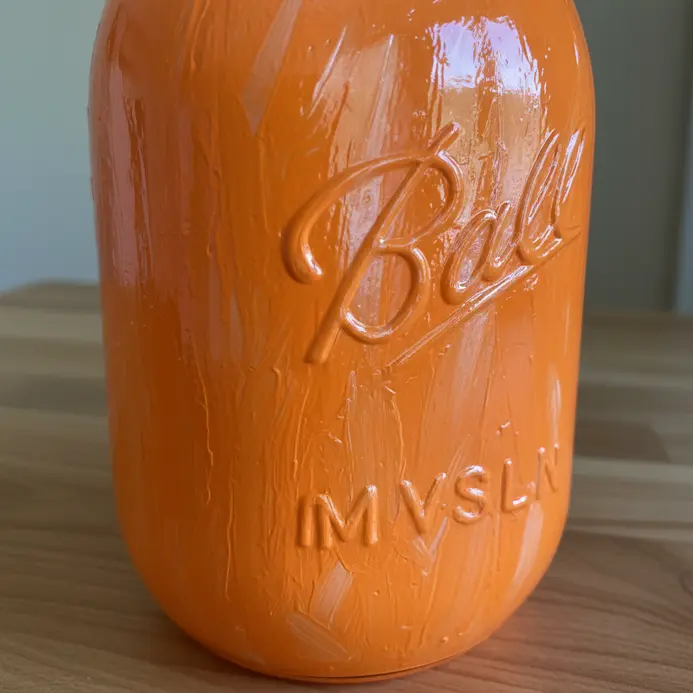
19. Paint a Bright Sunflower Yellow Jar
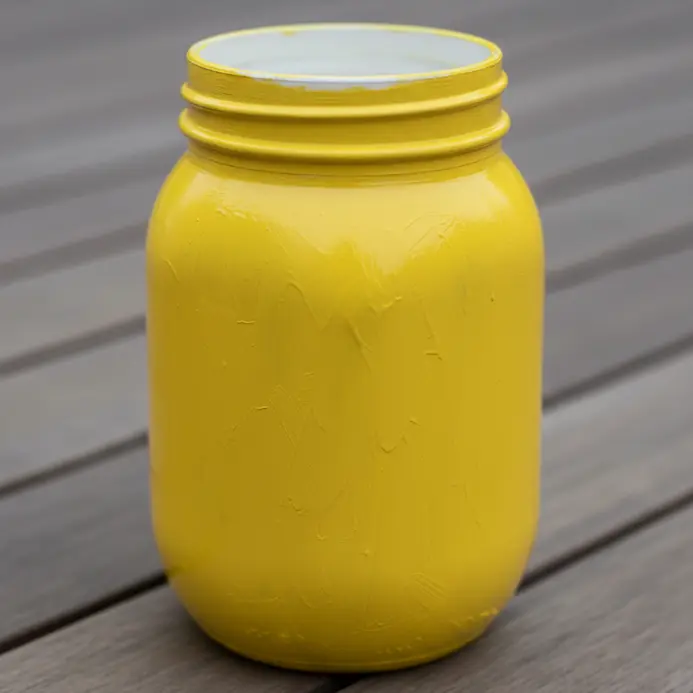
Wondering how to instantly brighten a reading nook or workspace with a painted glass piece? This cheerful design delivers instant optimism. Start by cleaning your jar thoroughly with rubbing alcohol to remove any grease. Then, apply your chosen paint in multiple thin coats, letting each dry completely for a smooth, opaque finish. I love how this vibrant shade mimics a real sunflower. It works well because it brings warm energy to any shelf. For a huge variety of other beautiful patterns to try, you can explore more glass painting designs. Feel the sunshine!
20. Form a Monochrome Grey Abstract Art Jar
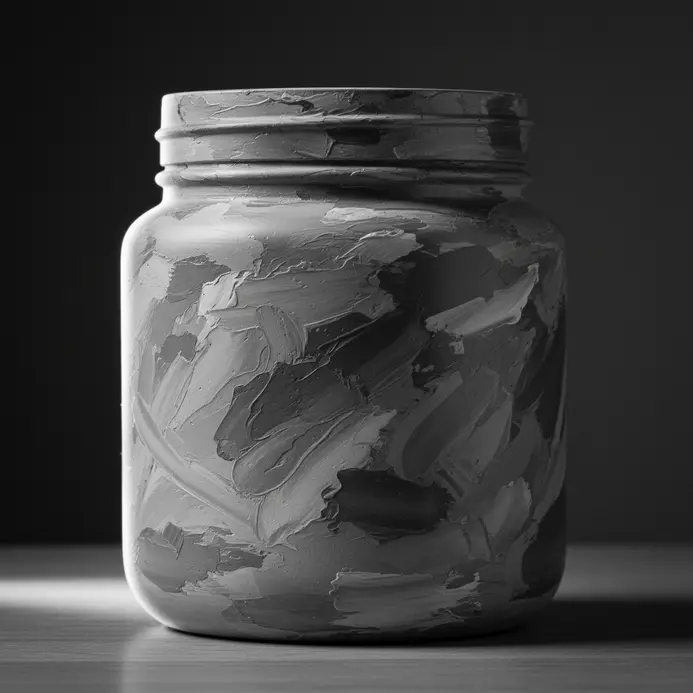
Who knew a single hue could hold such visual power? This project explores the subtle drama within a limited palette. You will start by gathering a range of grey-toned materials, from paint brushes to different types of paint. charcoal acrylic paint to textured fabrics and found objects. Play with their placement, layering them inside and outside your clean jar to build depth. I love how this process feels like a quiet study of texture and light, especially when painting glass. Mixing warm and cool greys, along with different finishes, unlocks a sophisticated result. Your final piece will feel calm, modern, and uniquely yours. Isn’t that a beautiful payoff?
Applying Protective Sealants for Long Term Display
A decorative painted jar stays finished only when you lock it in with a clear topcoat. Without it, ambient moisture or accidental splashes can soften the paint over time. For the best protection, use a spray or brush-on varnish made for acrylics, choosing a matte or glossy sheen to suit your design. Apply two to three thin, even coats, allowing full drying time between each. This final step transforms your project from a quick weekend activity into lasting home decor. A quality acrylic sealer ensures your jar wipes clean easily and stays intact through seasons of use.
Conclusion
Seeing your personal style reflected in everyday objects brings a quiet kind of joy. A painted jar is more than shelf filler. It is a tangible record of your creativity, ready to hold flowers, organize supplies, or simply brighten your hallway. The best part about diy mason jar painting is how it encourages experimentation without pressure. Pick one design that speaks to your taste, gather your supplies, and watch a simple glass container transform into something special. Your next favorite handmade piece is waiting.
FAQs
Q: How do I paint mason jars so the paint sticks to glass mason jars?
A: To paint mason jars successfully, start by washing the jar with soap and warm water to remove residue, then let dry. Lightly sand the type of glass if it’s very smooth, wipe away dust, and use paint designed to stick to glass like enamel, acrylic made for glass, or spray paint. Apply a thin first coat, let it dry between layers, and add a second coat or second layer for full coverage so the paint doesn’t become streaky. Finish with a coat of sealer to prevent paint chipping.
Q: Can I paint the inside the jar if I want a painted mason look on the interior?
A: Yes, you can paint the inside the jar for a smooth finish or to hold water for flowers, but use paints labeled safe for interior use and consider how it will affect holding water—some paints or sealers can leach. Pour in paint, swirl to coat, pour out excess, and let it sit upside down on a piece of paper to dry between layers. Multiple thin coats dry more evenly than thick coats.
Q: Are painted mason jars dishwasher safe or do I need to hand-wash them?
A: Most painted mason jars are not dishwasher safe unless you use a dishwasher safe mod podge or a high-temp oven-bake glass paint designed for dishwashers. To prevent paint chipping and preserve added glitter or modpodge, it’s safer to hand-wash painted glass mason jars gently. If you prefer dishwasher use, follow the paint manufacturer’s instructions and add a coat of sealer labeled dishwasher safe.
Q: What’s the best technique to avoid a streaky or thick paint finish on glass mason jars?
A: Avoid streaky results by applying thin, even coats and allowing each coat to dry between layers. Use a smooth bristle brush or foam brush for acrylics, or spray in light passes for spray paint. If you have thick paint, thin it per manufacturer directions. Light sanding between coats can help smooth a painted mason surface before applying a final coat of sealer for a smooth finish.
Q: How can I make painted mason jars into vases or gifts for Christmas and Mother’s Day?
A: Painted mason jars make charming vases and gifts for Christmas or Mother’s Day. Paint the outside in seasonal colors, add glitter or mod podge rocks for texture, or paint a design then coat of sealer. To turn jars into vases that hold water, ensure the inside is sealed or use a glass insert. Personalize with ribbons or tags to create easy painted gifts that friends and family will love.


