


What You Need to Start Wine Glass Painting (Beginner Supplies List)
You only need a few affordable items to begin your first artistic wine glass painting project. Most beginners finish their first glass in under 30 minutes.
Basic Supplies (under $25 total):
• 4–6 clear wine glasses (cheap ones from the dollar store or IKEA work perfectly for your DIY project)
• Glass-specific paint: enamel or acrylic formulated for glass (brands like FolkArt Glass & Tile, DecoArt Glass Paint, or Pebeo Vitrail)
• Fine detail brushes (size 0 or 1) + a small flat brush
• Cotton swabs or sponge daubers (for dots and blending)
• 91% isopropyl alcohol + paper towels (for cleaning the glass)
• Optional but helpful: washable marker or chalk pencil (for light sketching), painter’s tape (for straight lines and stripes), clear gloss sealer spray (for extra durability)
Pro tip: Buy paint labeled “dishwasher safe” or “oven cure” so your designs last longer. Everything above is available on Amazon or any craft store.
Step-by-Step Prep Before You Paint (5 Minutes)
1. Hand wash each wine glass with warm soapy water before starting your painting project.
2. Wipe the entire surface (especially the bowl) with alcohol to remove all oils and fingerprints.
3. Let it air dry completely — this takes 2–3 minutes.
4. Work on a clean tray or newspaper so you don’t get paint everywhere.
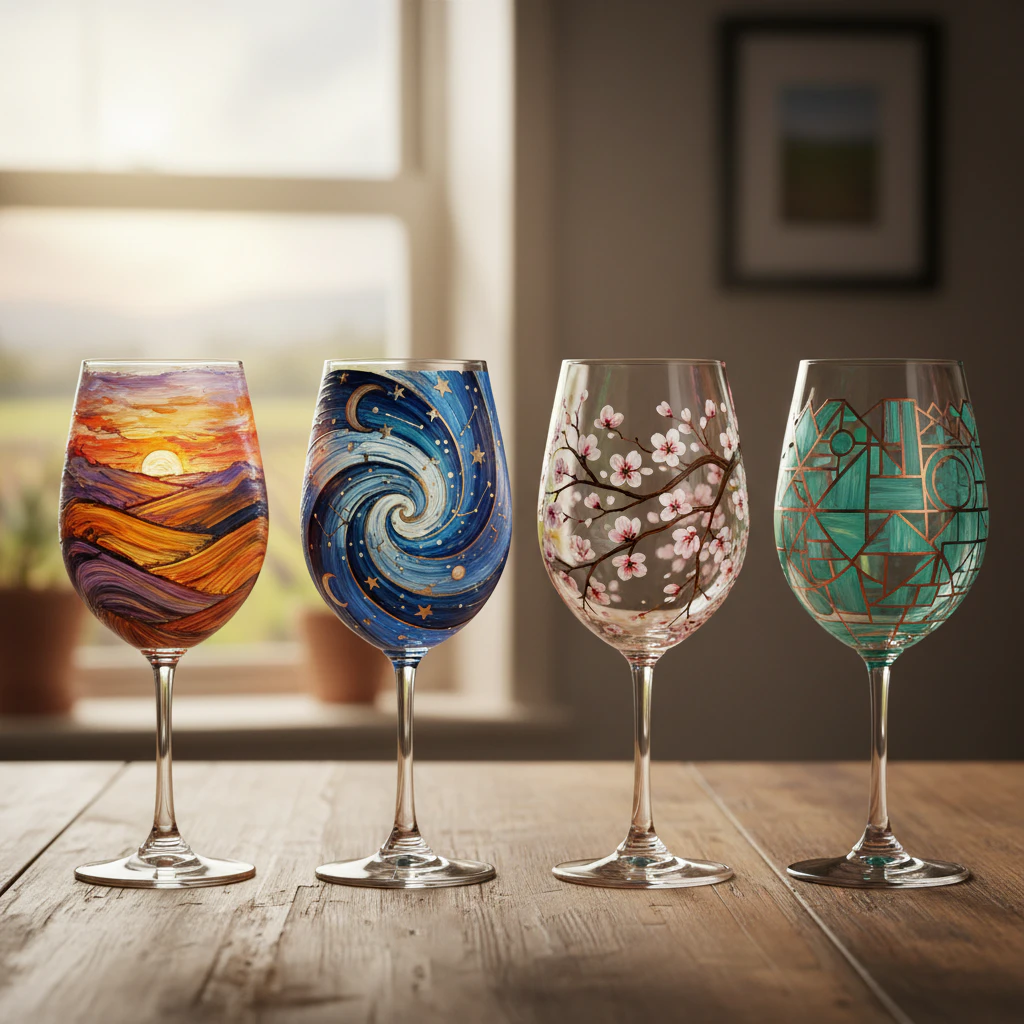
Once your supplies are ready and the glass is prepped, you can dive straight into exploring easy artistic wine glass painting ideas for beginners.
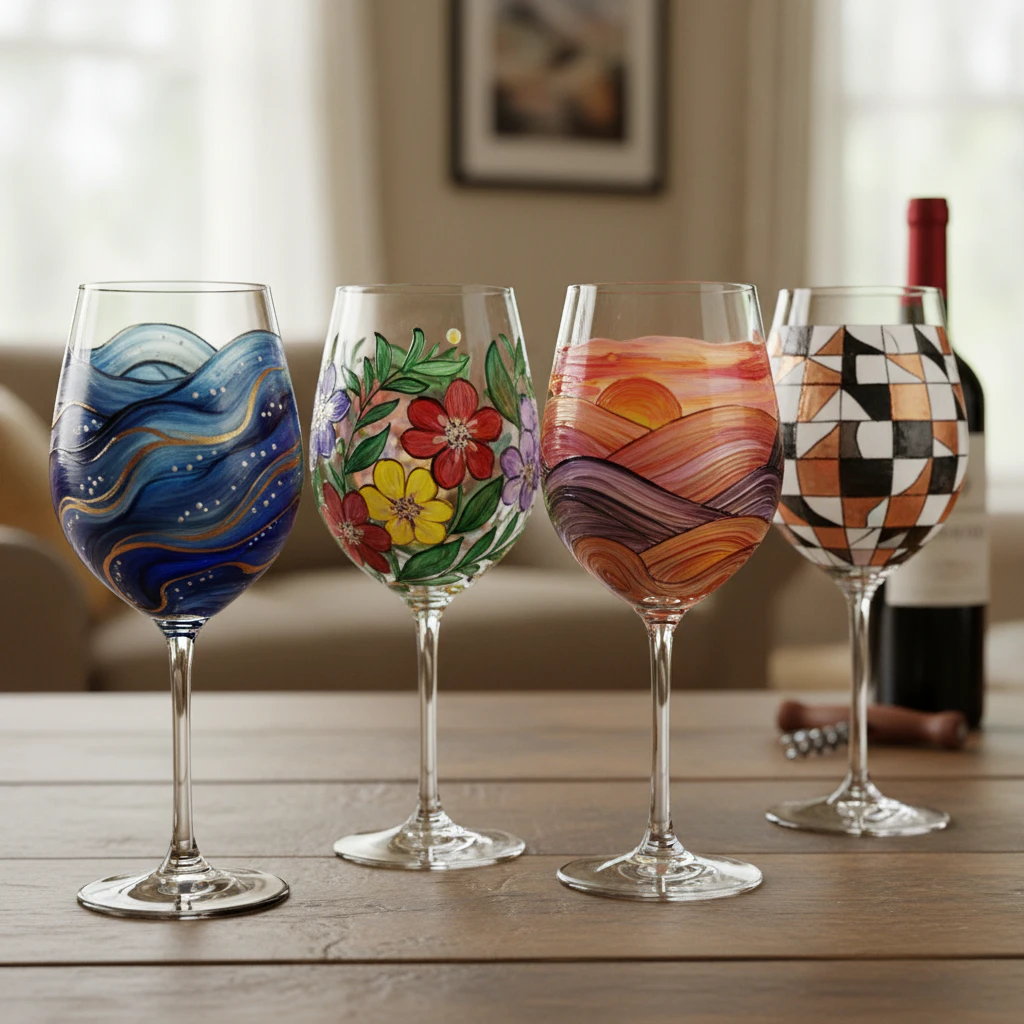
1. Gold Rim Drip Glass For Easy Shine

Selecting elegant artistic wine glass painting ideas using acrylic paint brings instant table sophistication. The gold rim drip technique creates a sleek metallic edge that cascades downward in controlled liquid lines. You will transform ordinary drinkware into celebratory centerpieces with a low-maintenance application method. Tilt your brush slightly to guide the metallic flow down the glass wall. This technique controls the drip length and prevents pooling near the rim. Review additional metallic handling methods by reading the easy wine glass painting designs resource for expanded guidance.
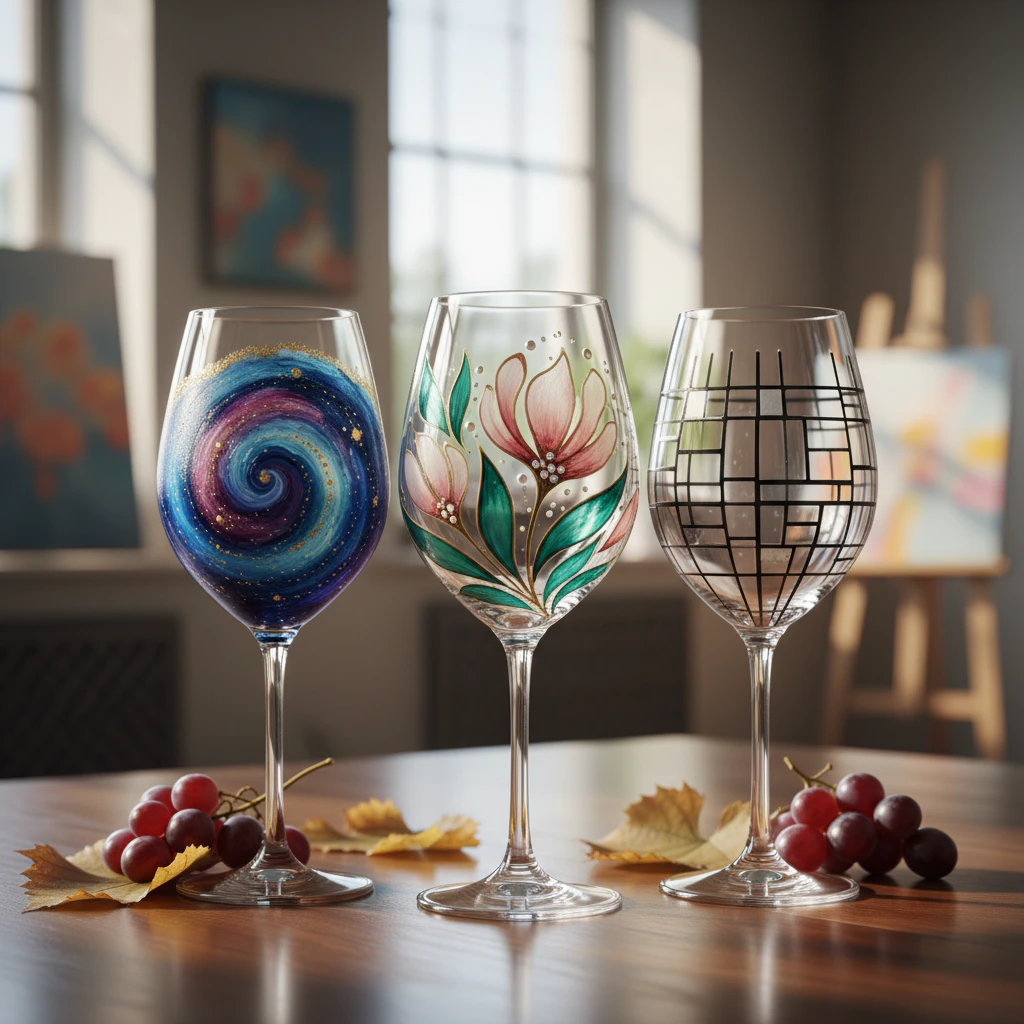
2. Geometric Dot Stem With Clean Lines

Modern drinkware updates well when you apply crisp, intentional geometric patterns. This style relies on simple anchor dots paired with straight stem lines and occasional triangular accents. You will notice how structured spacing creates a contemporary visual rhythm that complements minimalist decor. Sharp edges require steady brush control and careful masking tape placement along the stem. Mark your guide points with a washable marker, fill in each dot, and connect them with thin paint strokes. Explore related geometric techniques through the abstract dot art painting techniques reference.
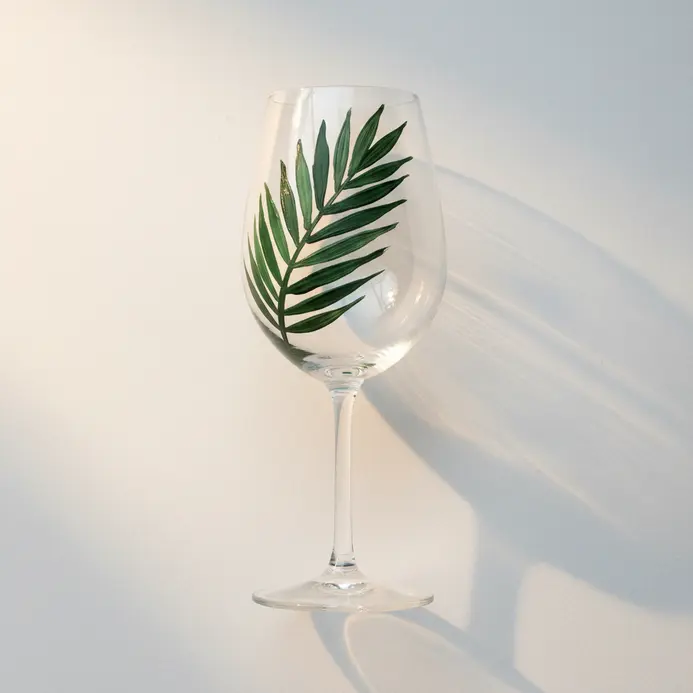
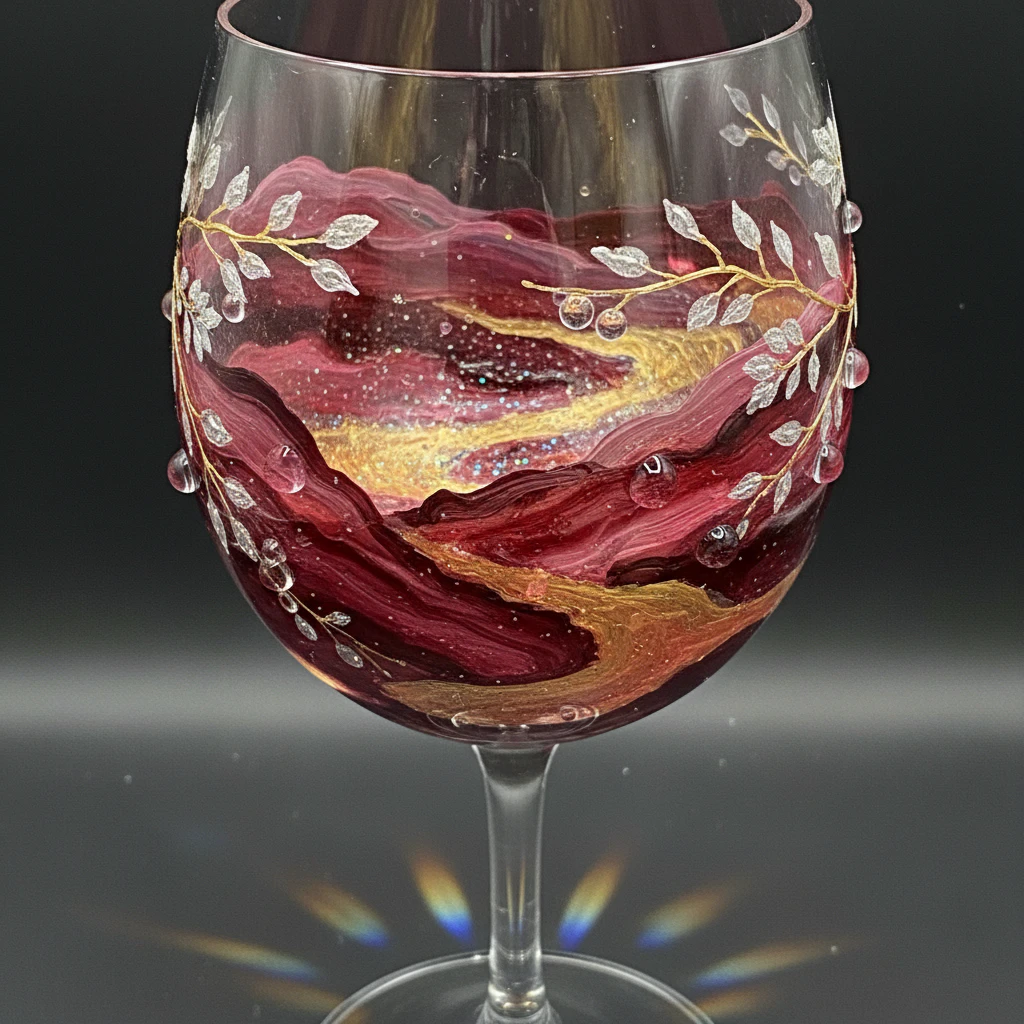
3. Minimal Leaf Sprig Along One Side

Placing a slender leaf branch along one side of a glass creates deliberate asymmetry and natural elegance. The design thrives on open space, allowing a few painted stems and tiny foliage shapes to stand out clearly. You will appreciate how this restrained approach adds garden charm without heavy coverage. Outline your sprig with a fine liner brush and fill in using transparent acrylic formulas. Keep your strokes light so the edges remain crisp against the clear background. Expand your botanical techniques by reviewing the easy glass painting designs tutorial.
4. Monogram Script Bowl For A Personal Touch

Adding flowing initials to the bowl creates immediate personality and table recognition. You will choose single letters, traditional three-letter arrangements, or full name placements that match your hosting style. The curved surface enhances cursive flow and draws attention to the center of each piece. Start with light guide marks, practice your script spacing on paper, and then transfer the design with a steady brush hand. Center your letter placement carefully so it remains readable when filled with liquid. Consider the functional use of each glass when deciding between large statement letters or subtle signature marks.
5. Autumn Maple Cluster With Warm Color

Layering warm foliage tones creates a rich seasonal display across curved glass surfaces. Group three overlapping maple leaves near the lower bowl using scarlet, pumpkin orange, and buttery pigments. You will achieve a dappled sunlight effect when layering lighter yellows beneath richer reds. Work while the previous coat remains slightly damp so edges blend naturally. Apply tiny dot accents around the leaf cluster to mimic scattered foliage details. Study additional seasonal layering techniques through the easy whimsical painting ideas guide.
6. Frosted Snowflake Pattern Across The Bowl
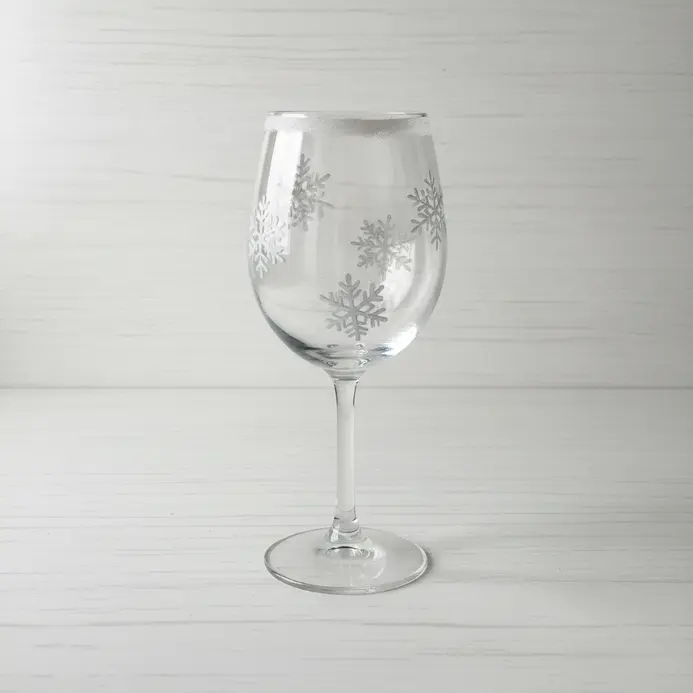
Winter table settings brighten immediately with delicate crystalline frost patterns. Apply a soft matte finish across the bowl using a lace stencil to guide symmetrical branching shapes. This technique creates a professional frosted appearance without demanding freehand precision. Dab pigment gently with a stencil brush to keep edges clean and prevent bleeding into adjacent clear zones. Space each snowflake evenly around the upper curve for balanced visual weight. Reference additional delicate pattern guides in the easy glass painting designs collection.
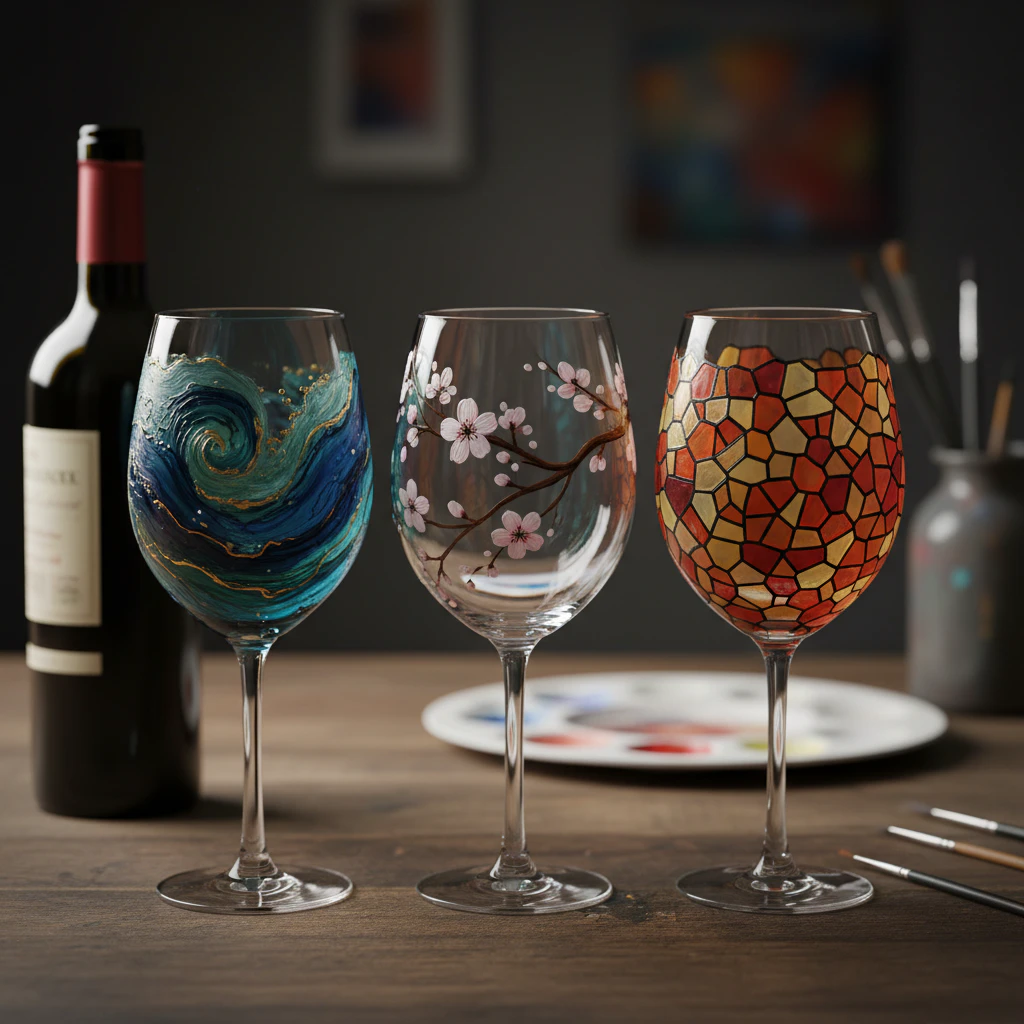
7. Cherry Blossom Branch For A Soft Finish
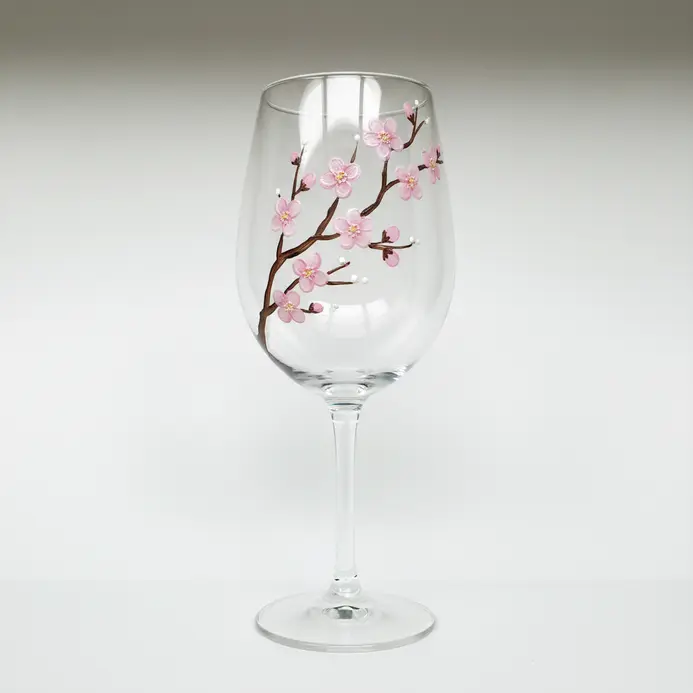
Airbrushed floral results emerge when you apply pigment with gentle patting motions. Load a soft domed brush with diluted pink formula, tap off excess moisture, and press the bristles lightly onto the glass curve. You will blend the edges seamlessly by rotating your wrist in tiny circular strokes. Deposit slender dark branches first, then add clustered blossom dots at key junctions. This layering method avoids harsh paint buildup and creates a translucent petal appearance. Practice similar blending workflows by reviewing the easy glass painting designs tutorial.
8. Citrus Slice Accent With Bright Energy

Vibrant fruit motifs inject immediate sunshine into clear tableware. Paint a single lemon, lime, or orange cross-section near the center using saturated yellows and greens. Leave generous white space around the slice so the bright colors remain sharp and readable. Use glass markers for precise segment lines, then fill the pulp areas with a soft brush. Balance the high-saturation center with pale background accents. You will find additional high-contrast application tips in the easy glass painting designs archive.
9. Palm Frond Silhouette For A Bold Shape
High-contrast botanical silhouettes deliver graphic impact with minimal detailing. Choose a sweeping feather shape or a structured fan outline, trace it onto the bowl, and erase internal leaflet lines until a solid mass remains. Paint the silhouette in deep green, navy, or charcoal to maintain strong readability. Negative gaps between leaflet shapes should form pleasing triangular or curved zones. Scale one large frond for maximum focal presence, or group three smaller silhouettes for layered depth. This stencil-friendly approach pairs well with the techniques outlined in the easy glass painting designs guide.
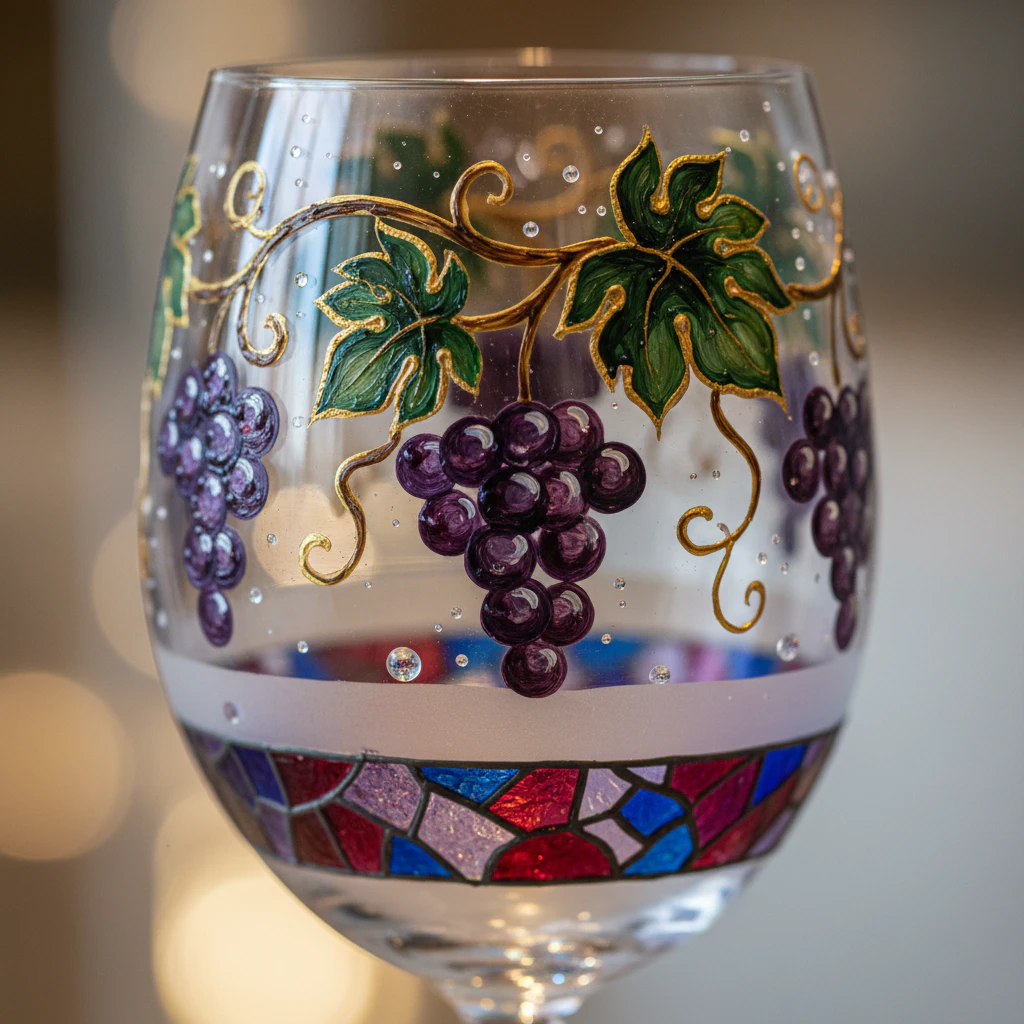
10. Holly Berry Garland With Festive Balance
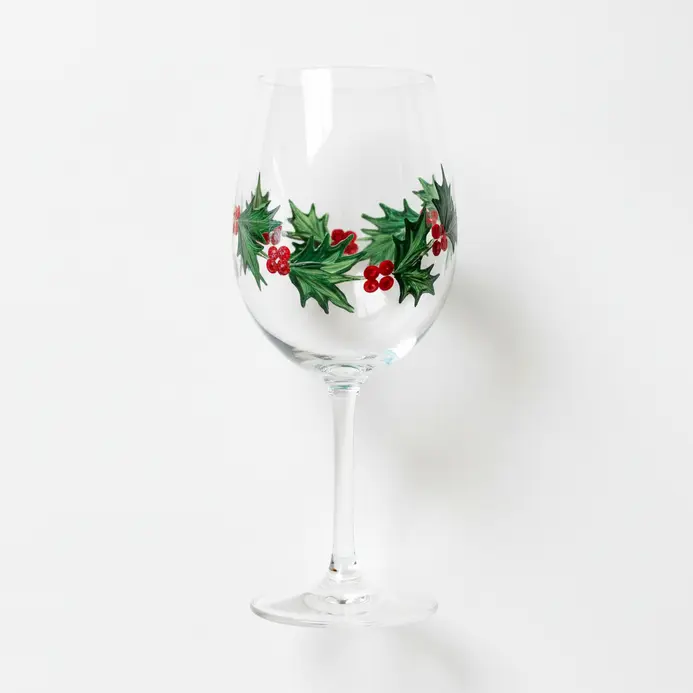
Coordinated holiday motifs thrive when you balance foliage and fruit in rhythmic sequences. Paint a continuous curved holly band across the lower bowl, alternating matte green leaves with glossy red berries. Introduce occasional metallic dots or burgundy fruit to your painted wine glasses to add visual depth and seasonal variety. Space your elements organically rather than measuring perfect symmetry in your DIY project. Vary leaf sizes and berry placements slightly so the garland mimics natural growth patterns. Reference additional color harmony examples through the beautiful wine glass painting designs resource.
11. Spiderweb Corner Detail For Halloween
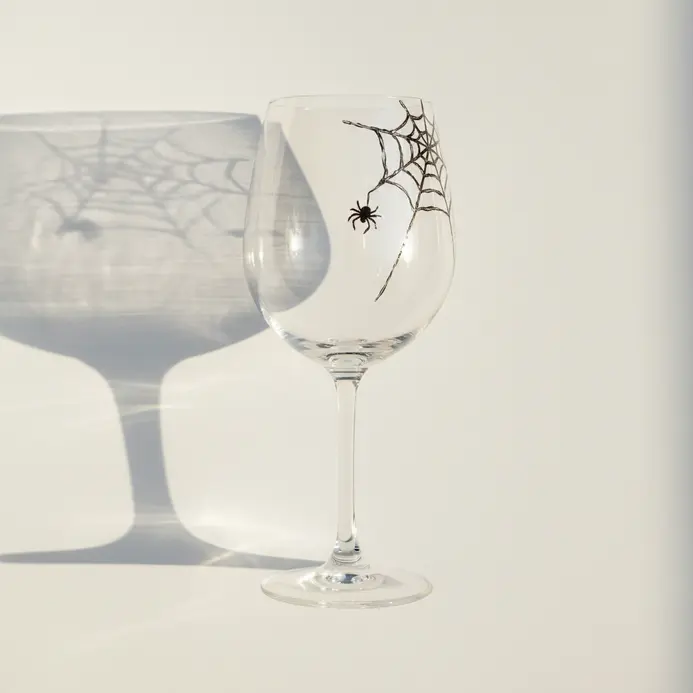
Eerie focal points emerge quickly when you concentrate delicate webbing in a single upper curve. Map radial lines from a tight corner center, then connect them with sweeping arcing threads using a fine detail brush. Keep your strokes slightly uneven to mimic natural abandoned cobwebs. Paint a tiny spider near the outer edge using a round brush or fine applicator tip. Use glossy white or metallic silver for high contrast against tinted glass. Explore similar texture-building exercises in the creative glass painting designs archive.
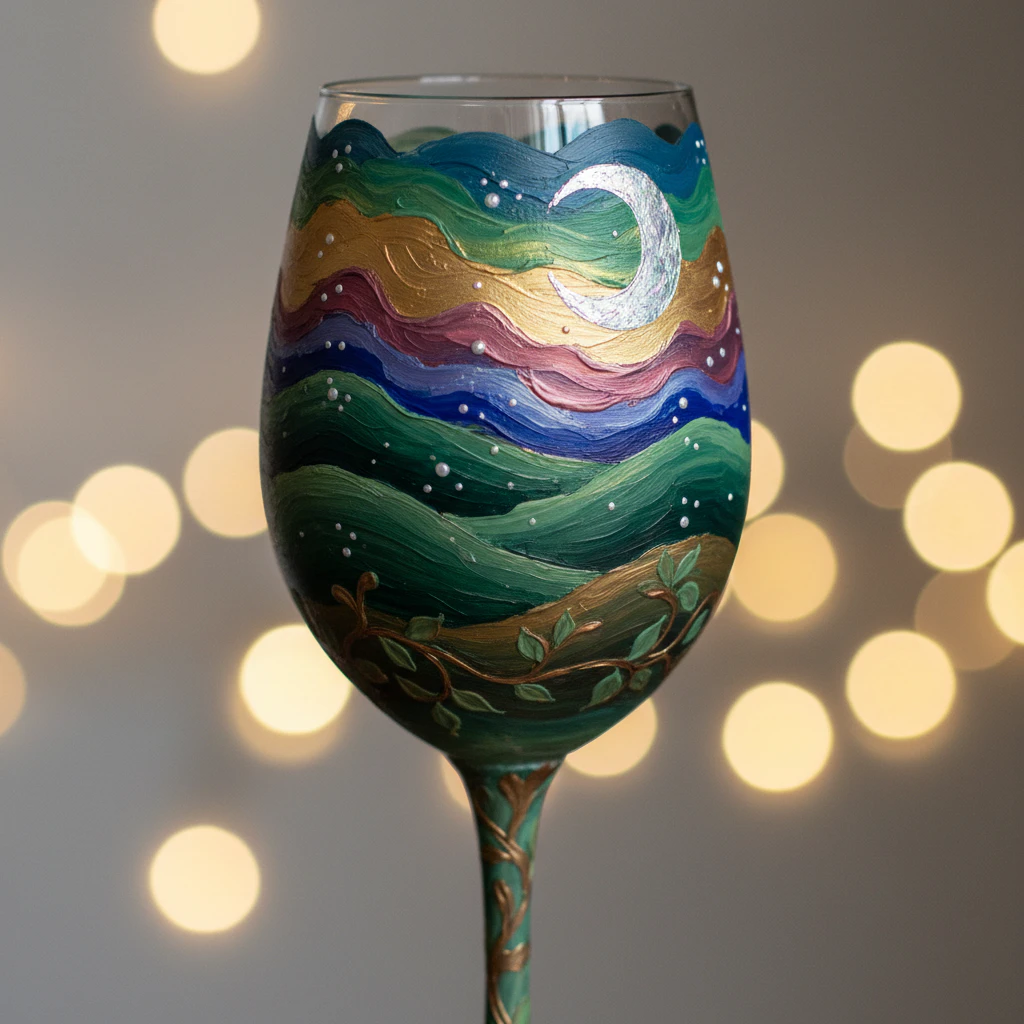
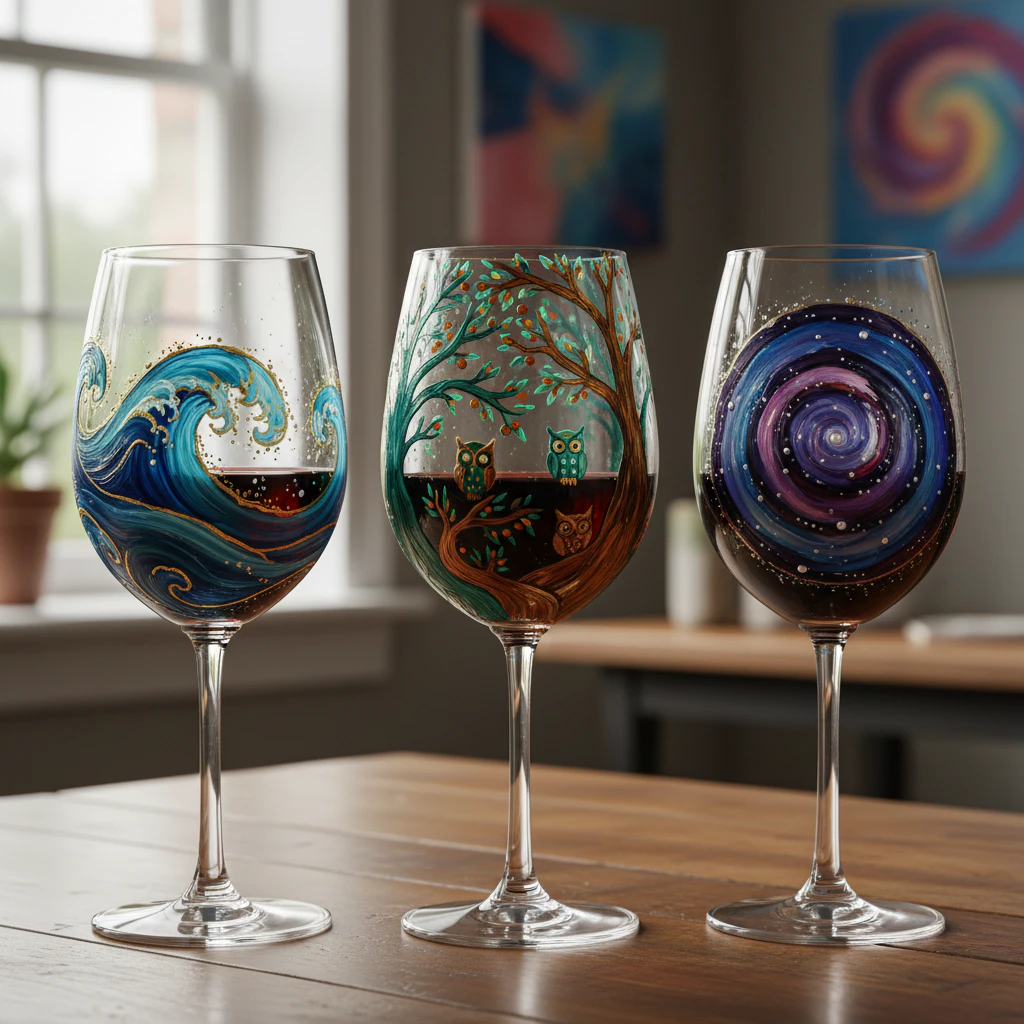
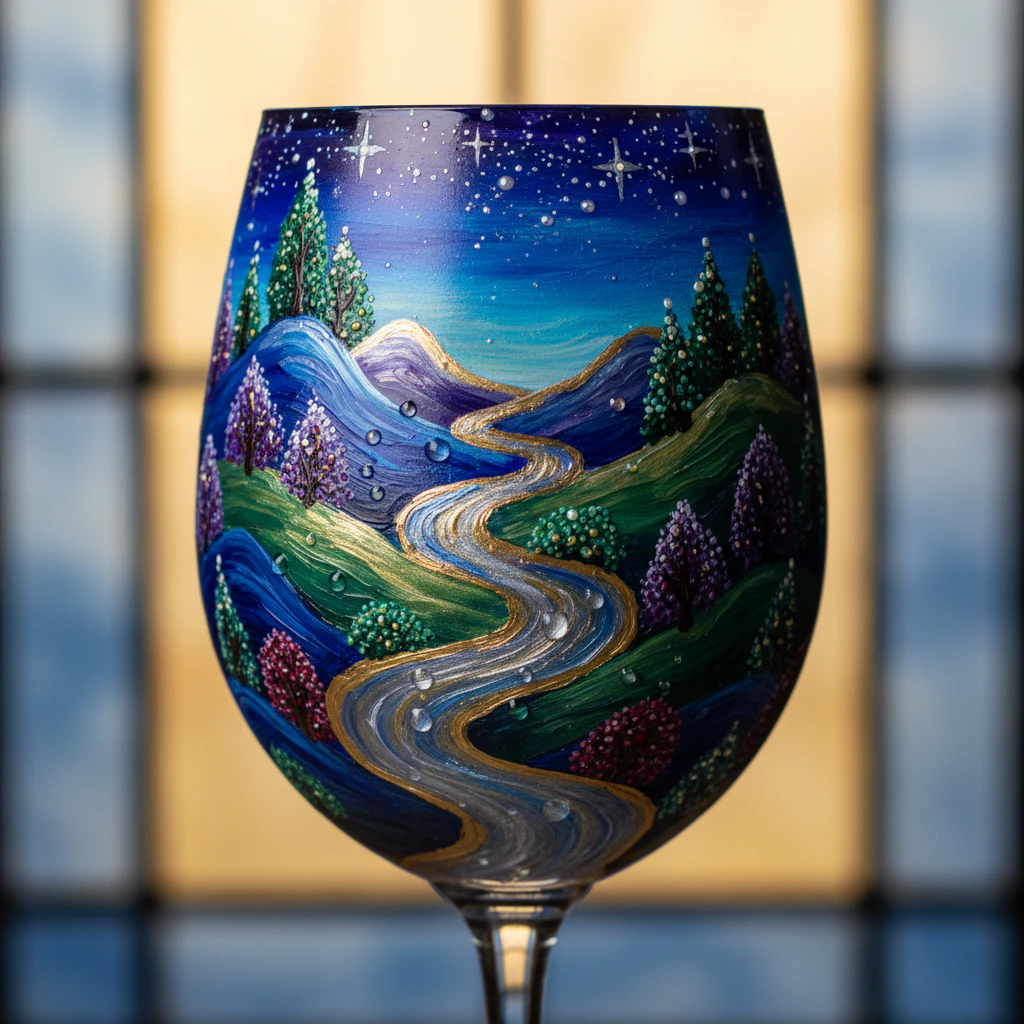
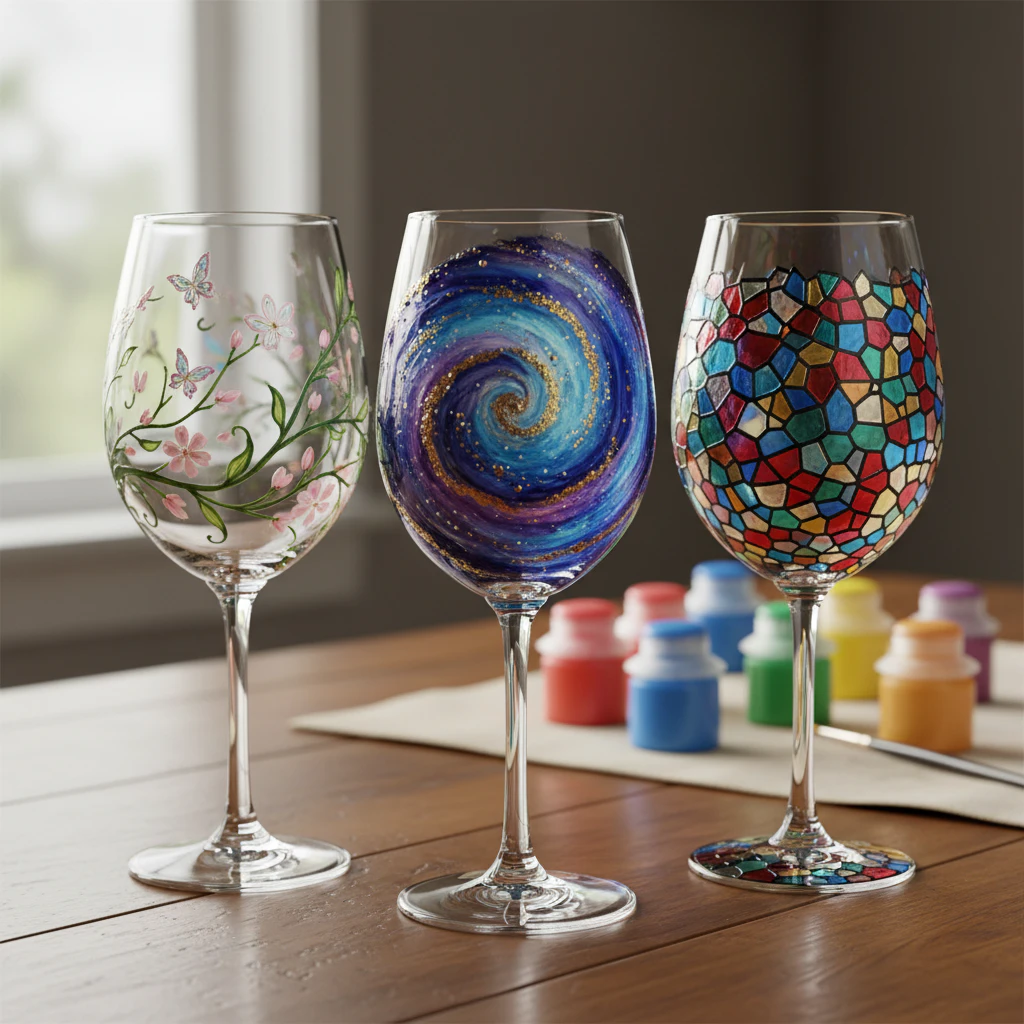
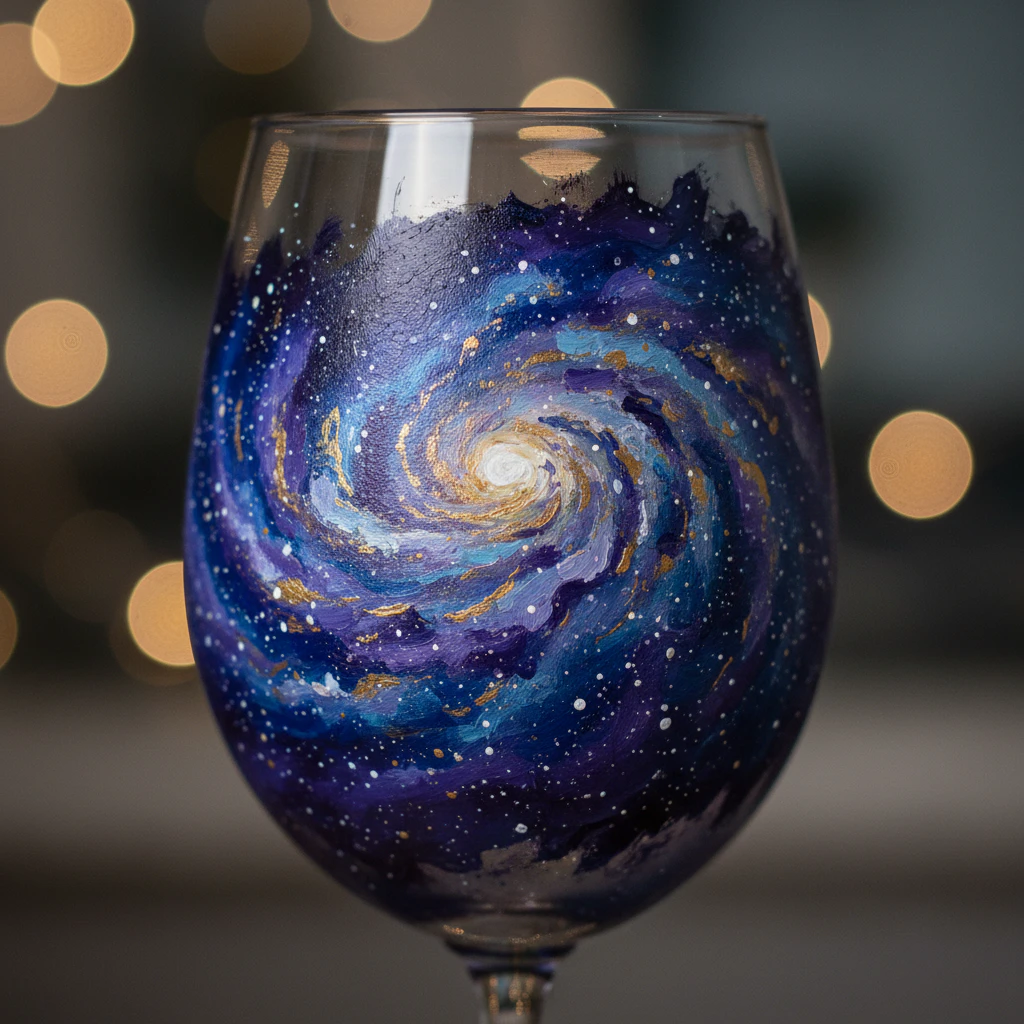
12. Moon And Star Scatter For A Night Sky
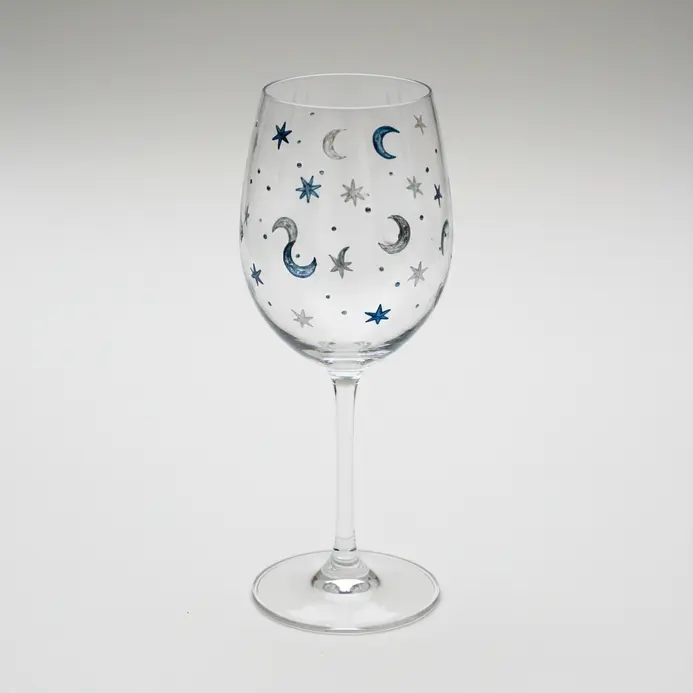
Dark background bases instantly elevate celestial motifs and luminous metallic accents. Apply a deep navy or black wash, place an off-center crescent or full moon shape, and dot scattered stars across the remaining curve. Cluster smaller dots near the moon on your painted wine glasses to create atmospheric density. Use a brush handle tip or fine stylus to press consistent star shapes without hand shaking. Leave ample open space between star groups so the pattern feels spacious and dreamy. You will discover additional dot placement exercises in the abstract dot art painting techniques tutorial.
13. Animal Face Whiskers For Playful Charm
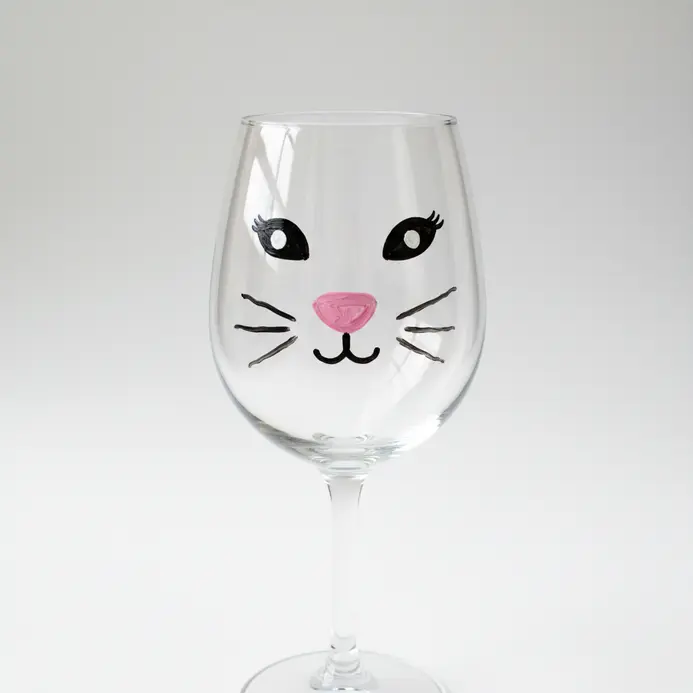
Whimsical character motifs emerge when you focus on delicate facial line work. Paint slender whisker strokes extending outward from tiny nose dots, adding curved ear outlines to frame the upper bowl. Keep your strokes rapid and light so the features appear playful rather than rigid. Balance the face centrally or offset it slightly for a more dynamic composition. Use opaque white or metallic gold for crisp visibility on clear surfaces. You will find additional playful motif strategies in the easy whimsical painting ideas guide.
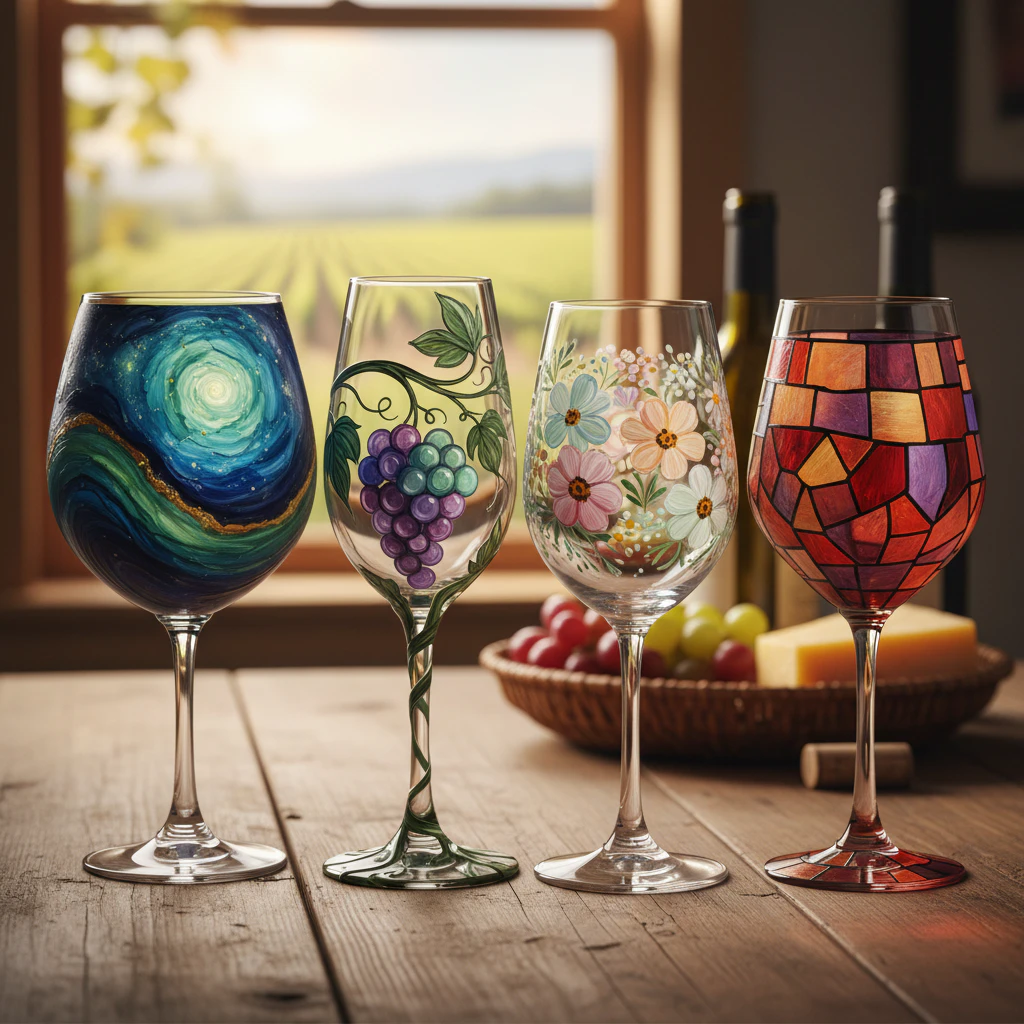
14. Watercolor Rose Cluster With Soft Edges
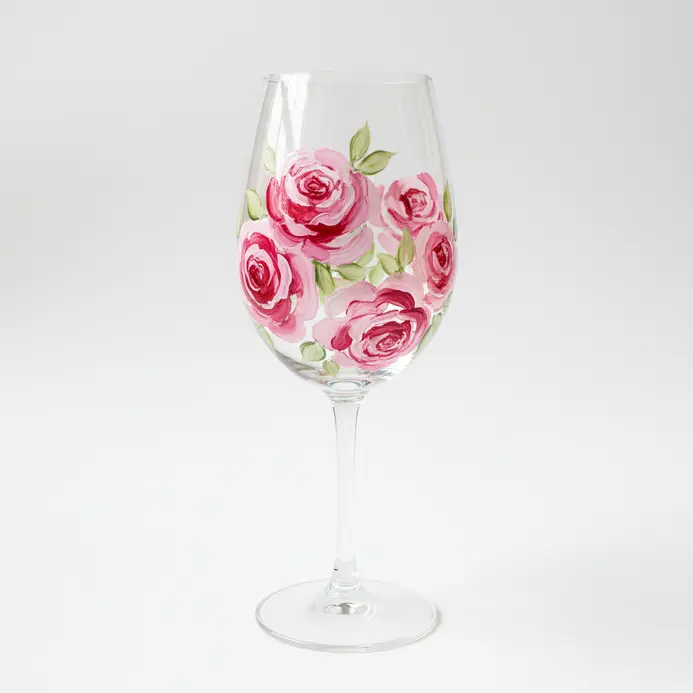
Translucent floral washes create romantic, blended blooms without harsh contour lines. Lay down diluted Quinacridone or soft pink pigment across the lower bowl, then drop in Sap Green for gentle leaf suggestions. Allow the wet colors to mingle naturally on the glass surface. Build multiple layers while keeping each coat thin so light passes through the petals easily. Overlap your brush strokes lightly to form organic petal shapes. This forgiving watercolor approach suits both beginner practice and advanced tableware sets.
15. Metallic Feather Sweep Down The Bowl

Fluid sweeping strokes deliver instant glamour when working with shimmering metallic formulas. Load a flat brush with gold or silver paint, press gently near the rim, and drag downward in one continuous motion to form a tapered shape. This technique mimics delicate plumage while maintaining strong modern appeal. Keep your brush pressure light so the pigment tapers naturally toward a fine point. Practice the sweep motion on paper first to build muscle memory for your tableware project. You will notice rapid improvement with each additional practice stroke.
16. Confetti Dot Wrap Around The Glass
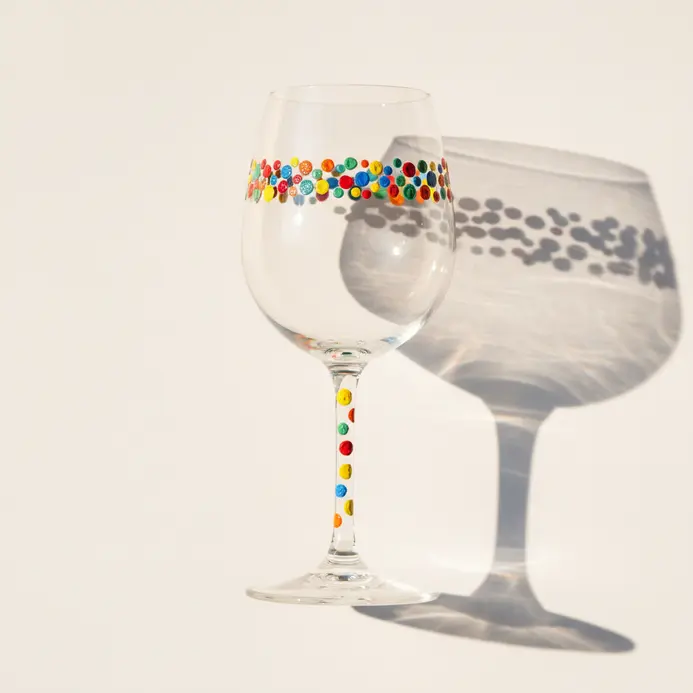
Festive party pieces form quickly when you wrap the bowl in scattered colorful dots. Space bright pigments in loose horizontal bands, varying the size of each circle to create visual rhythm and cheerful energy. This playful approach suits birthdays, gatherings, and coordinated drinkware collections. Use transfer tape to mark even spacing before applying your first pigment layer. Mix primary and secondary shades so each wrap features contrasting tones that pop against the clear background. Review additional spacing strategies in the glass painting designs tutorial.
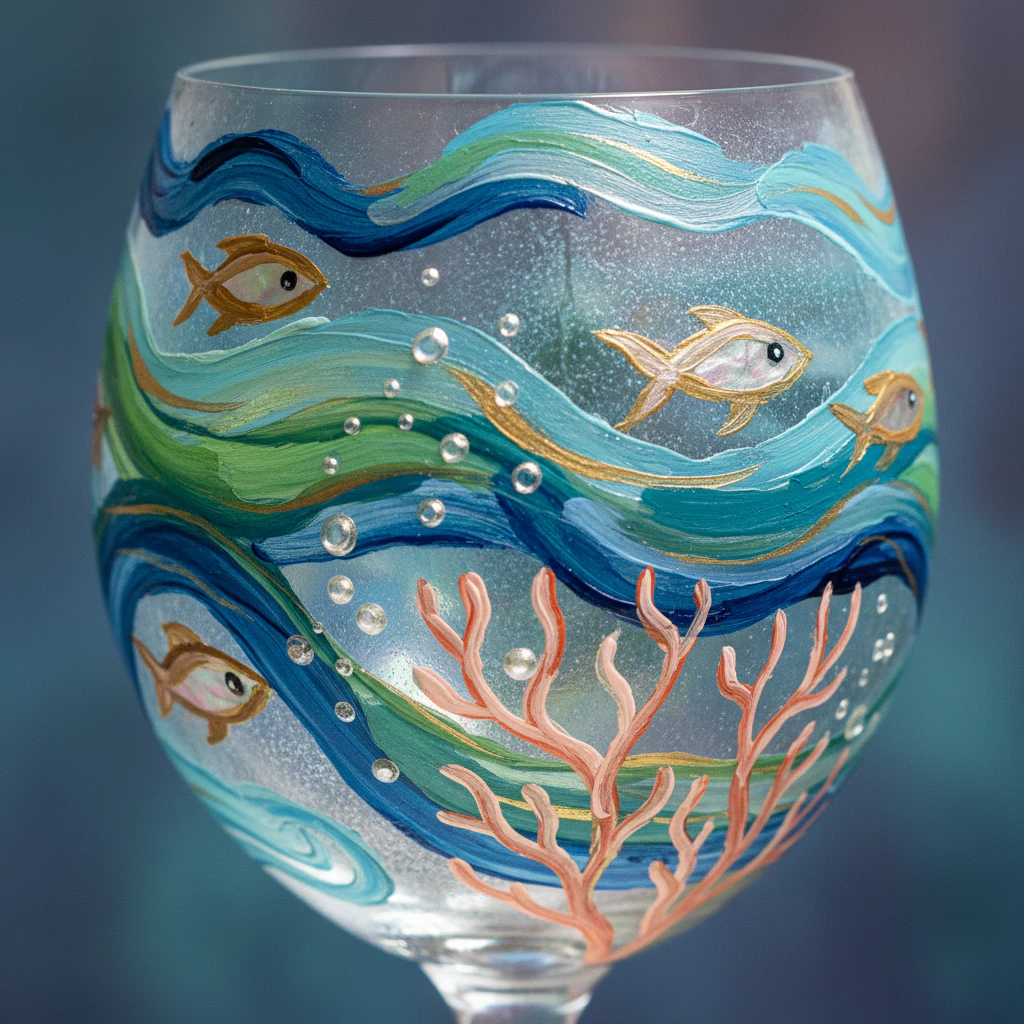
17. Mermaid Scale Band With Repeating Curves
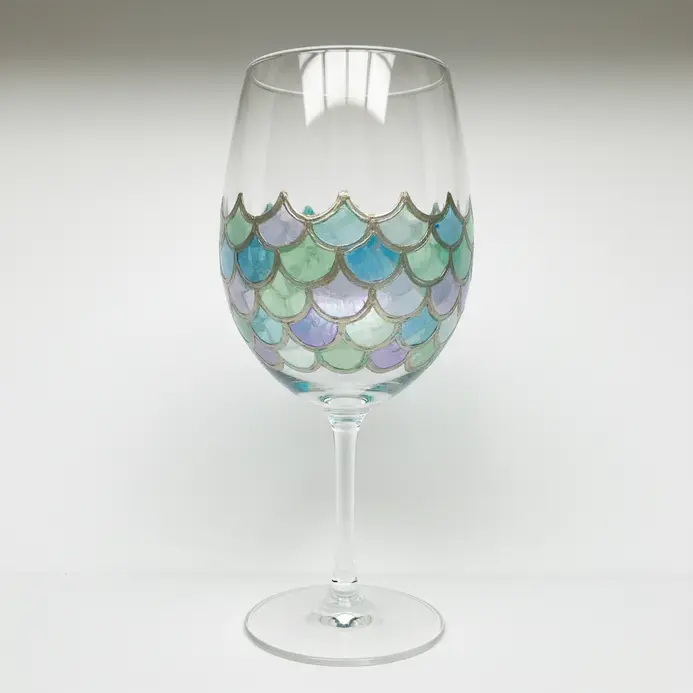
Oceanic wave patterns translate beautifully into repeating curved scale arrangements. Paint overlapping half-moon shapes along the lower bowl, staggering each row so the arcs nest together cleanly. You will achieve a sculptural shimmer when light reflects off the layered curves. Outline each scale with a fine metallic marker, then fill the centers with translucent teal or lavender washes. Vary the curve depth slightly to mimic natural fish scale texture. This detailed layering technique rewards steady pacing and careful edge control.
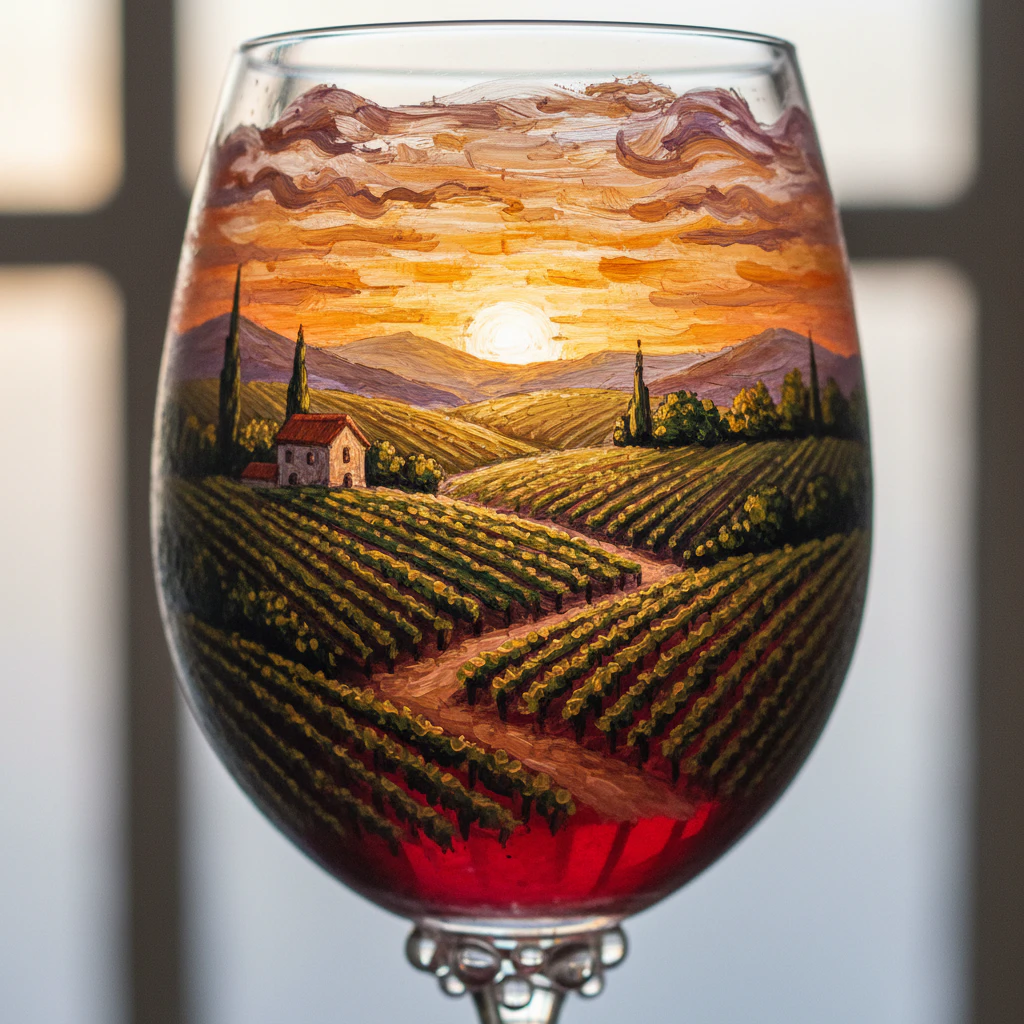
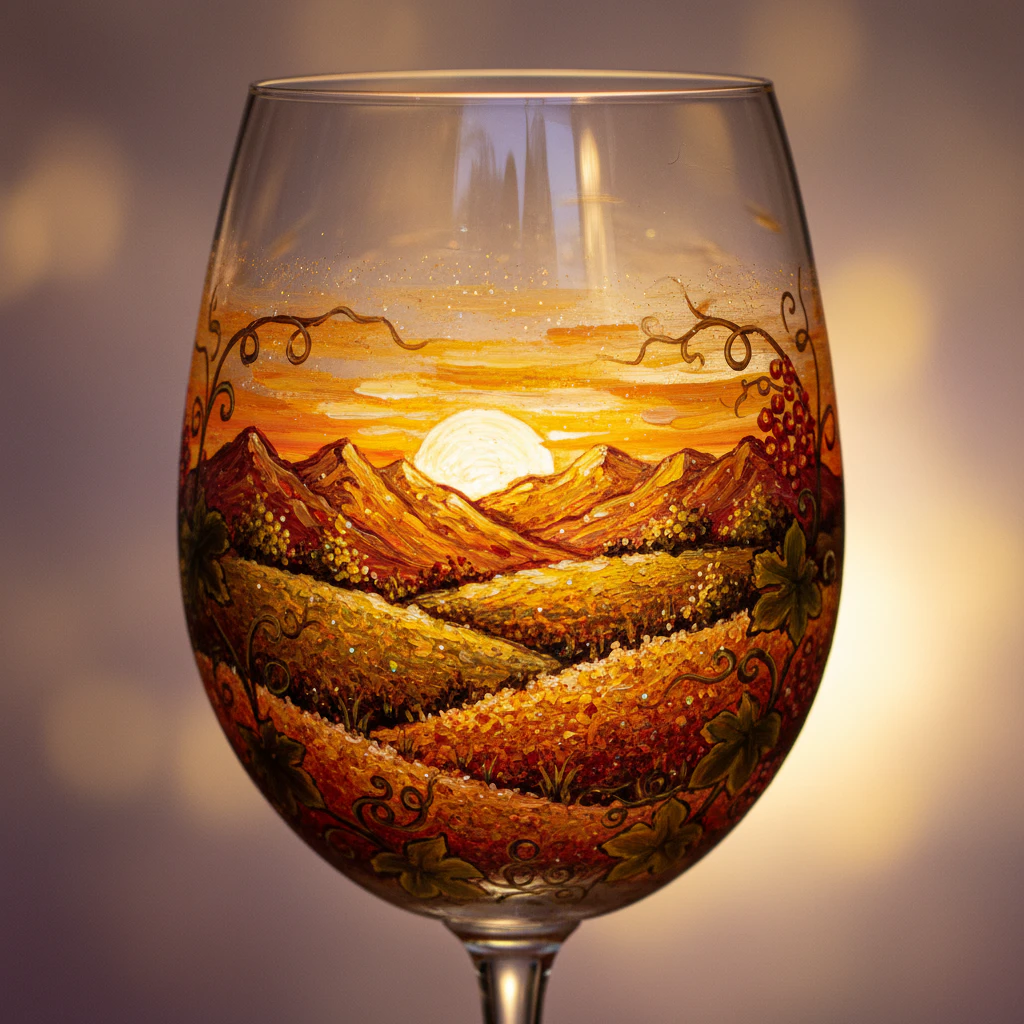
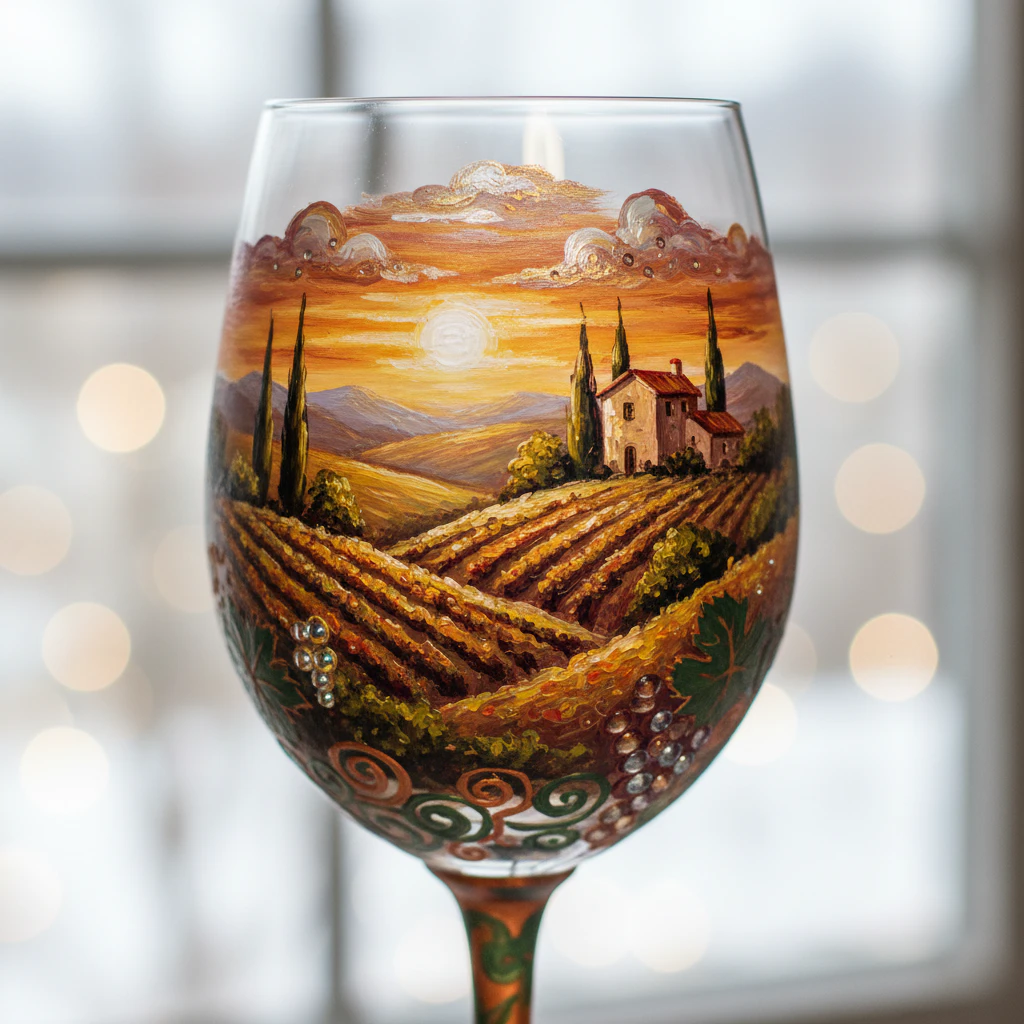
18. Ombre Sunset Fade From Rim To Base

Warm gradient transitions transform ordinary glass into glowing horizon displays. Start with bright yellow near the rim, blend into soft orange across the middle, and finish with deep magenta or violet at the base. Apply each color while damp so the boundaries soften naturally. Use a clean makeup sponge to dab and blend overlapping zones without leaving brush marks. Keep your surface clean and free of fingerprints before starting the gradient sequence. You will find additional blending exercises for painting wine glasses by exploring the easy wine glass painting designs archive.
19. Pressed Flower Strip For A Botanical Look
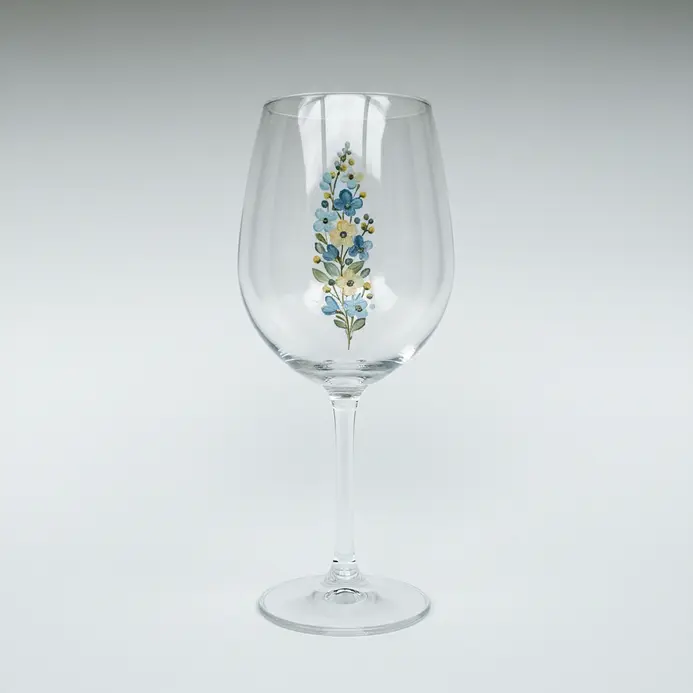
Vertical botanical strips preserve garden elegance in slender linear arrangements. Position tiny pansy or daisy shapes along one side of the bowl, leaving generous clear space around each bloom. This gallery-style layout keeps delicate structures visible and balanced. Apply pigment in thin translucent layers so the natural flower shapes remain legible. Add subtle green stem lines to anchor each bloom to a central vertical axis. Practice similar botanical spacing techniques through the easy glass painting designs resource.
20. Black Lace Motif With Fine Detail

Vintage-inspired filigree flourishes demand precision brush control and patient layering. Sketch scrolling vines and delicate floral webs using a fine-tip pigment pen, then fill the interior shapes with a small round brush. Keep your line weight consistent so the lace pattern reads clearly against clear glass. Work from the outer border inward when painting wine glasses to maintain balanced spacing and avoid smudging previous strokes. Seal your lace design immediately after drying to protect thin lines from accidental abrasion. Practice filigree spacing with additional patterns found in the easy glass painting designs guide.
21. Pearl Edge Beading For A Finished Frame
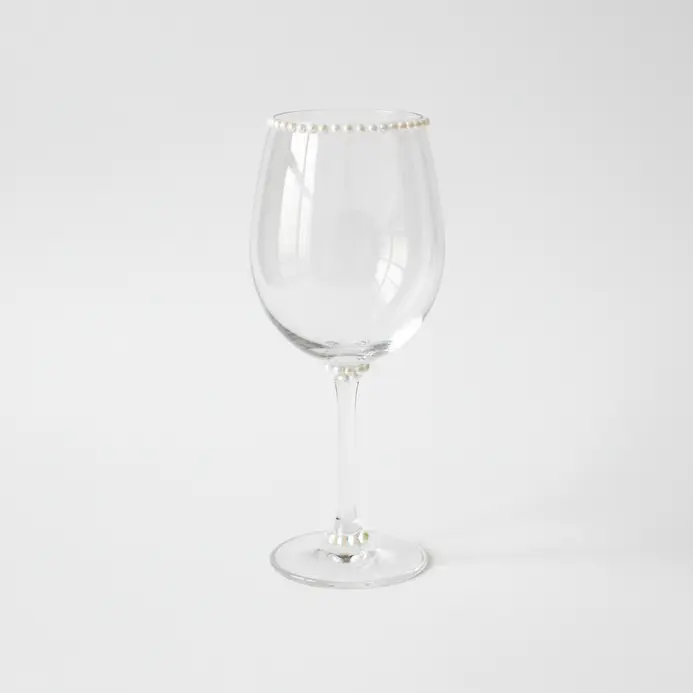
Want a frame that looks professionally finished with an elegant border? Pearl edge beading is your secret weapon. This thin, half-round molding creates a delicate string of pearls effect around your frame. It hides any small gaps at the corners and adds a lovely shadow line that catches the light. People love it because it turns a simple frame into something truly refined. Apply the beading after your main frame is fully assembled and its finish is completely dry. You’ll need a miter box and backsaw to cut perfect 45-degree angles for the corners. Remember to measure from the inside of one corner to the inside of the next, not the outside edge. Use a strong wood glue for wood frames or a flexible adhesive for painted or polymer beading to get a secure hold.
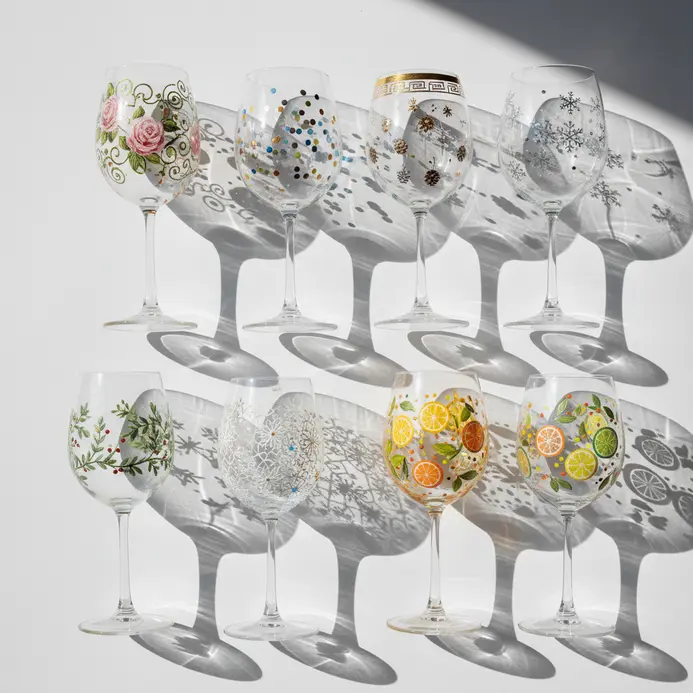
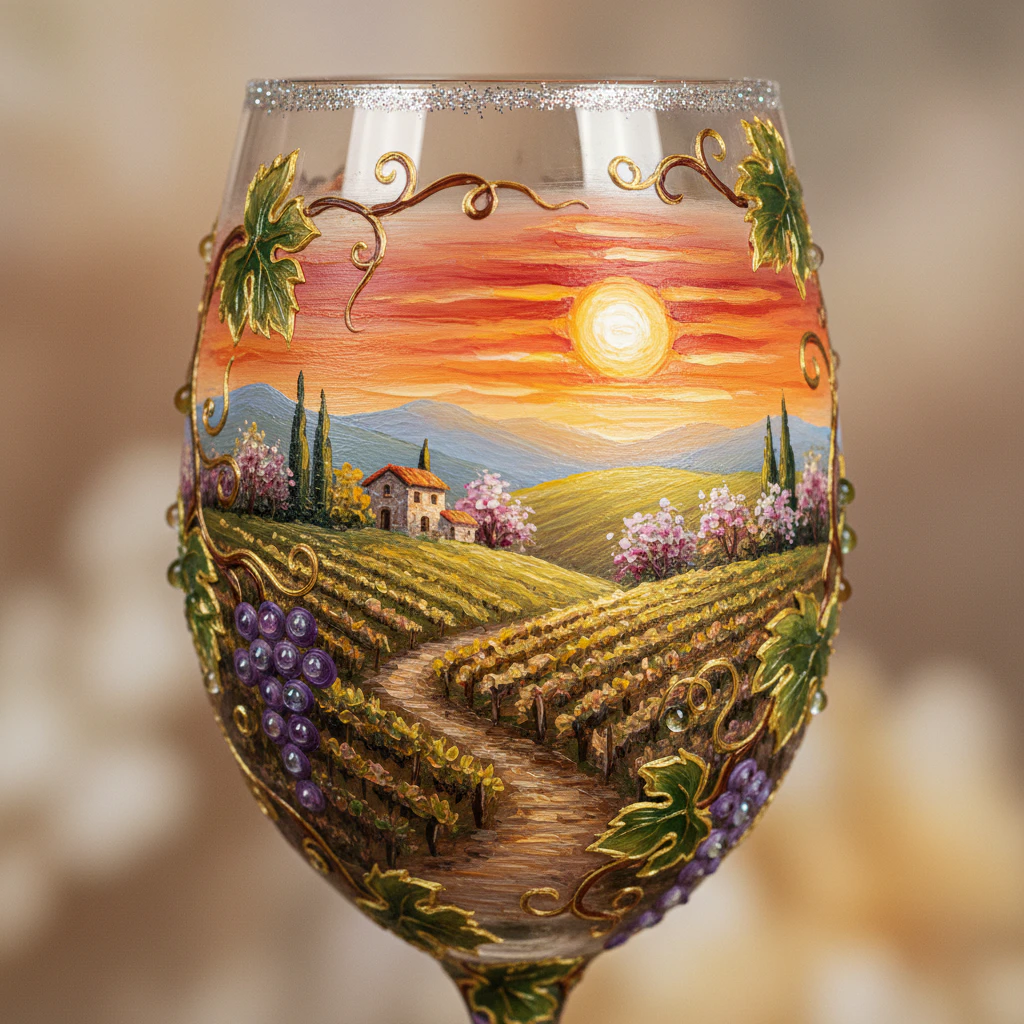
Seasonal And Special Occasion Wine Glass Ideas
Seasonal motifs provide adaptable artistic wine glass painting ideas that feel timely while retaining lasting appeal. Leaves, snowflakes, citrus slices, celestial bodies, and holiday accents all perform well on curved surfaces where visibility matters during service. Wedding sets benefit from refined initials, metallic edge bands, or narrow floral wraps that maintain table elegance. Balanced layouts for painting wine glasses rely on thin pigment layers and careful curve tracking so the vessel shape remains prominent. Follow manufacturer curing steps precisely and allow each coat to dry completely before stacking or washing. This disciplined approach guarantees long-lasting clarity and professional-grade durability.
More Easy DIY Artistic Wine Glass Painting Ideas for Beginner


Conclusion
You now hold a complete reference library of artistic wine glass painting ideas to guide your next tableware project. Strong designs share identical structural foundations, beginning with clean prep work, establishing a single focal shape, adding light accent marks, and sealing the surface properly. This method prevents overcrowding and keeps each piece looking polished and purposeful. Push your results further by painting a second round from memory, adjusting motif scale, or transferring familiar patterns onto different glass shapes. Pair one primary design with subtle stem details for coordinated collections. Test your favorite pattern on a single practice vessel first, then proceed with your full set and display where the details receive proper attention.
FAQs
Q: What are some beginner-friendly artistic wine glass painting ideas?
A: Beginner-friendly ideas include simple polka dots using a paint pen or paintbrush, dipped ombré effects with regular acrylic paint, and hand-painted wine glasses with minimal geometric lines. Start with stencils or use q-tip dots for consistent polka dots, practice on a spare glassware piece, and choose non-toxic, best paints to use that are labeled for glass to improve adhesion.
Q: Which paints and tools work best for paint on wine glasses?
A: For paint on wine glasses, the best paints to use are enamel or specially formulated glass paints; regular acrylic paint can work if you use a proper glass primer and sealant. Useful tools include paint pens for fine lines, a soft paintbrush for dry brush textures, q-tip for tiny dots, and rubbing alcohol for surface prep. Permanent markers can be used for outlines but are not always dishwasher-safe unless sealed.
Q: How do I prepare the glass of wine glasses before painting?
A: Clean the glassware thoroughly with rubbing alcohol to remove oils and fingerprints, then let it dry completely. Avoid painting inside the glass or anywhere food and drink will contact; focus on exterior surfaces only. Proper prep increases adhesion and helps the paint sticks properly, ensuring longer-lasting glass art.
Q: Can I make my wine glass painting dishwasher-safe or should I always hand wash?
A: Many painted glasses can become dishwasher-safe if you bake the paint according to manufacturer instructions and apply a quality sealant. However, to preserve hand-painted wine glasses, always hand wash gently with mild soap—hand-washing is the safest method to prevent chipping or fading of your décor.
Q: What safety tips should I follow when creating diy wine glass painting projects?
A: Use non-toxic paints and work in a well-ventilated area. Do not paint inside the glass where it contacts liquid, and keep paint and sealant away from lips. If using rubbing alcohol or other solvents, avoid open flames and follow product safety instructions. For bridal or party ideas where glasses are used by guests, label or personalize glassware rather than using interior paint.


