


Surface Preparation Techniques For Lasting Pumpkin Decor
When learning how to paint a pumpkin, remember that your colored design will slide right off the rind if you skip cleaning it first with a simple mix of water and white vinegar. We all know how waxy and dusty a fresh field harvest feels, and that slick texture works against proper adhesion every single time. Scrub your chosen piece thoroughly with a soft cloth dipped in the vinegar solution to cut through natural oils and wipe away lingering dirt. Let it dry completely in a warm room before you even think about dipping a single brush into your palette. This foundational step creates a perfectly grippy surface for your medium to grip, which guarantees your artwork lasts from September until Thanksgiving. Trust me on this, a properly prepped rind marks the difference between a porch display you admire for weeks and one that flakes away after three days. Knowing how to paint a pumpkin truly begins the moment you wash the skin.
Selecting The Ideal Medium For Natural Rind Adhesion
The most reliable choice for raw organic skin remains a thick, multi-surface acrylic craft formula because it locks onto that waxy exterior without pooling or running. Standard watercolors simply bead up and slide downward, which wastes your precious time and leaves frustrating streaks. You need a heavy-body pigment that spreads easily in thin, controlled layers, allowing you to build rich tones without soaking the fibrous flesh. I also reach for paint pens to outline fine details and lettering, since they offer incredible directional control across those curved natural ribs. Understanding how to paint a pumpkin includes choosing water-based, non-toxic bottles so your finished piece breaks down naturally in your compost bin after frost hits. Keep those application coats thin and deliberate to completely avoid the dreaded peeling cracks that frustrate first-time crafters.
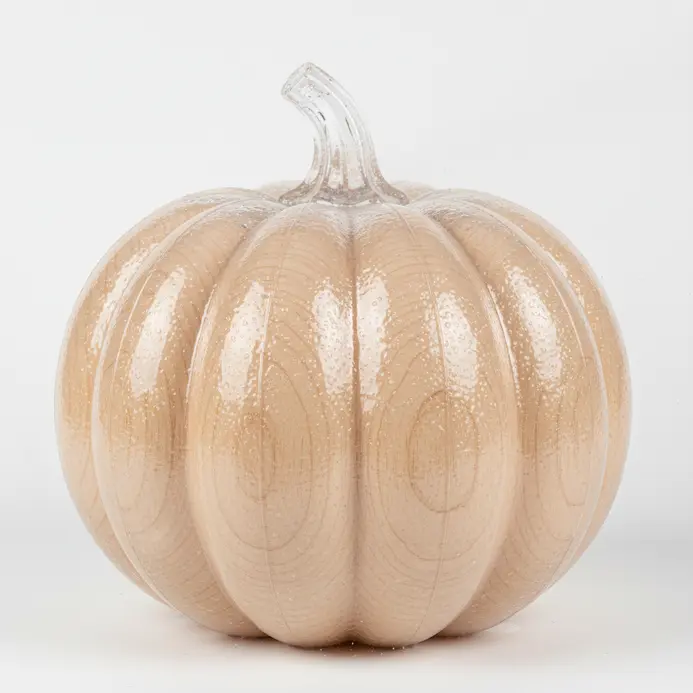
1. Select and Clean Your Smooth Pumpkin Surface
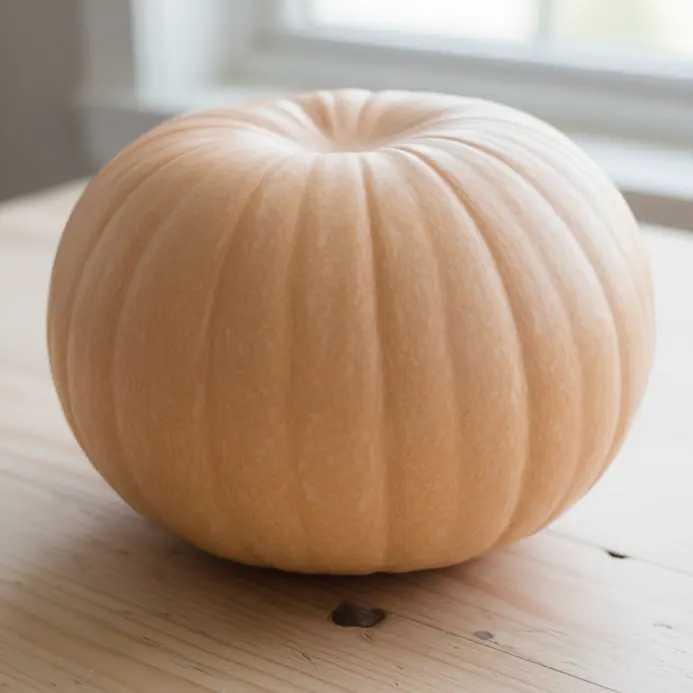
Ever wonder why your final color application sometimes dries looking uneven or patchy? That visual inconsistency usually traces back to this first, easy-to-overlook setup step. Your seasonal gourd becomes the literal canvas, so you absolutely want its exterior as flawless as possible before your brush even touches it. Run your palms along the curved walls to locate a smooth surface with minimal deep ridges, and give the structure a gentle squeeze to verify solid firmness underneath. A quick rinse with a soft sponge and mild soapy water lifts away field residue or invisible waxy coatings that would otherwise repel your top coats. Trust me, bypassing this wash remains the most frequent mistake I see at seasonal workshops. Removing those barriers makes all the difference for a crisp, professional decoration that survives weather shifts. Mastering how to paint a pumpkin means respecting this simple cleaning phase. If you want Check out these spooky Halloween painting ideas for your pumpkin that are sure to impress on Instagram. to experiment with later, start with this immaculate foundation.
2. Dry the Pumpkin Surface Completely for Proper Adhesion
Ever pat your washed harvest dry and assume it feels ready for pigments? Trust me, it does not feel ready at all. A quick towel wipe leaves trapped moisture hidden inside those shallow grooves, which guarantees ruined layers down the line. Always follow your wash by thoroughly blotting every inch with a clean absorbent towel. Do not skip the stem base or those tight indentations between ribs. Now comes the crucial waiting period. Move your piece into a well ventilated area and leave it undisturbed for several hours, spinning it halfway through to expose all sides. This waiting step is absolutely non negotiable for reliable paint adhesion. Why does it matter so much? Any hidden water creates an invisible barrier, forcing your colors to chip and peel once cured. When learning exactly how to paint a pumpkin, you might cautiously direct a hair dryer on low heat toward a stubborn damp corner. Your patience here rewards you with a flawless, long-lasting finish that holds its shine for months.
3. Apply a Primer Coat for More Vibrant Colors

Ever notice how bright magenta or deep violet shades sometimes dry looking dull or washed out against that natural orange flesh? One simple underlayer solves that problem instantly. Rolling on a primer coat provides your vibrant top hues with a neutral, reflective base that forces your colors to pop right off the canvas. Think of this stage like whitewashing a dark wooden fence before adding a bold new stain. The underlayer functions by sealing the porous flesh and hiding the original autumn tint. This sealing action stops the skin from drinking up your pigment unevenly, which eliminates that frustrating, streaky appearance, especially when using mod podge. I rely on this trick because it uses less expensive pigment while delivering truer, highly saturated results in the end. Let that white foundation dry completely, and you stand ready for the creative phase of painting your pumpkin. Practicing how to paint a pumpkin works beautifully alongside these Here are some easy painting projects for beginners, including how to paint your pumpkin beautifully. to build your confidence.
4. Sketch Your Design Using Light Pencil Marks
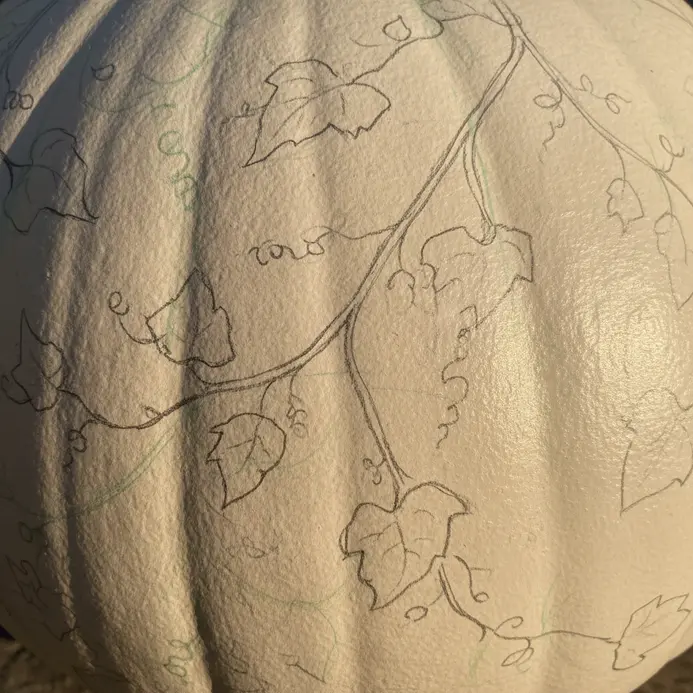
Ever watch artisans map out flawless gourd patterns without leaving a single visible mistake on the finished piece? This stage gives yourself full permission to experiment, erase, and rearrange without consequences. Grab an H or 2H graphite pencil and hold it slightly back from the sharp tip for better control. Apply the lightest pressure you manage to block in foundational shapes like sweeping curves and sharp triangles. This ghosting technique lets your hands discover the natural flow of the form before you commit with liquid medium. Trust me, beginning with those nearly invisible guide marks drops your stress levels dramatically. You simply erase wrong proportions with a gentle rub. Figuring out how to paint a pumpkin becomes much easier when you leave room for adjustments. That invisible blueprint guarantees your final strokes look sharp and deliberate. Browse these beginner acrylic painting techniques for layout inspiration.
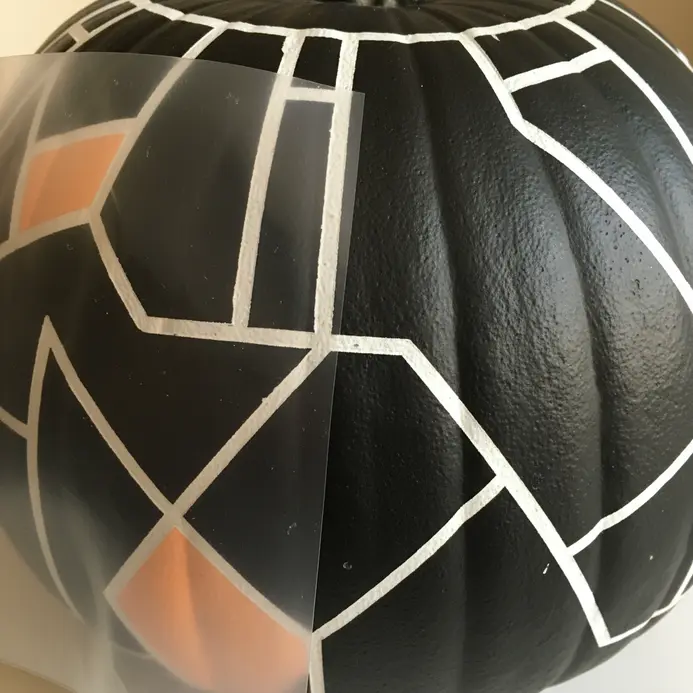
5. Apply Painter Tape for Crisp, Clean Lines
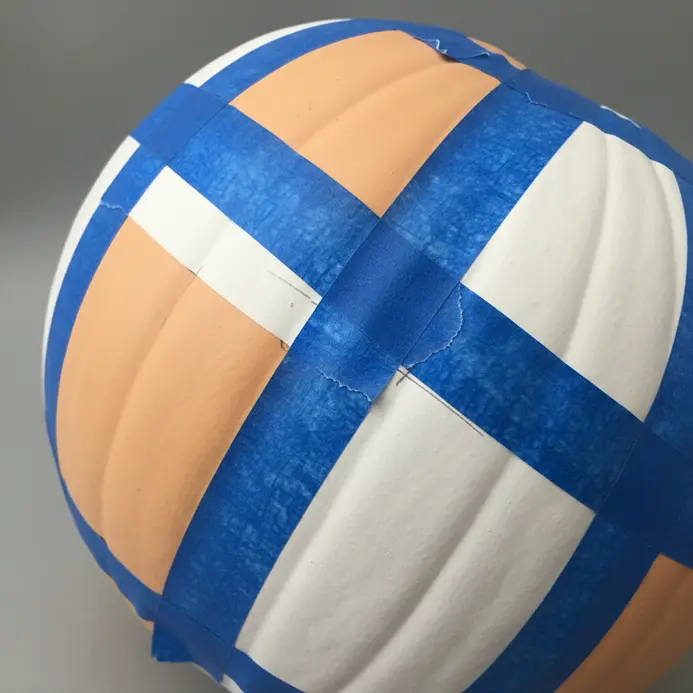
Ever wonder how perfectly straight stripes and precise geometric blocks appear on decorated harvests during fall festivals? The magic lives entirely in the masking stage rather than brush skill. You will press painter’s tape firmly over zones you intend to keep paint-free, carving out those studio-quality sharp boundaries. Lay out manageable tape sections, firm them down without pulling, and seal the borders tightly. First, verify that your surface stays clean, dry, and free of dust. Apply adhesive strips in short segments, smoothing each edge flush against the flesh. For the tightest possible seal, drag a straight edge along each border before your first brushstroke. This sealing action stops unwanted bleeding and preserves your intended design. When showing newcomers how to paint a pumpkin, emphasizing this taping step makes the entire project feel professional. Once you apply your color and let it sit until slightly tacky, slowly peel the strips away at a forty-five-degree angle. You will instantly see flawless edges emerge. This masking trick slashes cleanup time and delivers that satisfying, gallery-ready aesthetic for your porch setup. Enjoy watching those sharp borders take shape.
6. Paint the Base Layer with Opaque Acrylics
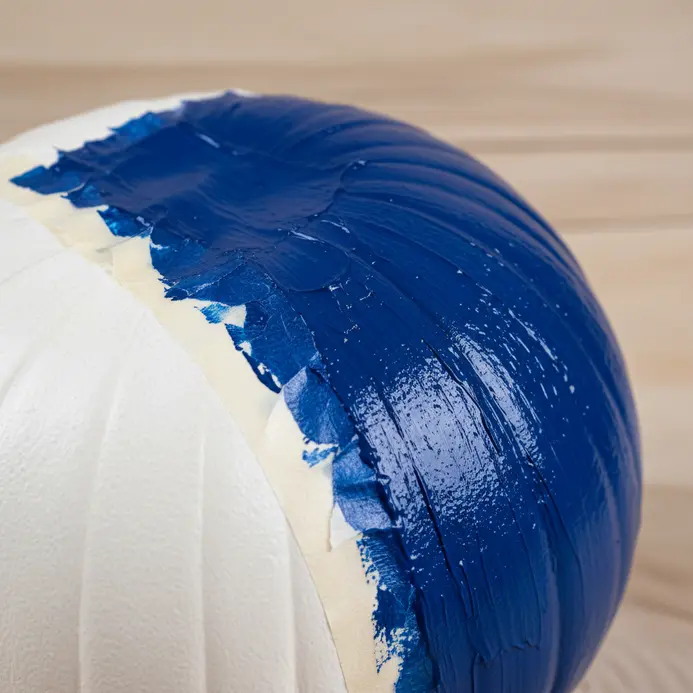
Ever stare at finished displays and question how artists achieve those solid, vibrant backgrounds without showing any original skin underneath? This foundation stage acts as your most important tool. Load up larger flat brushes and pour out your main palette selections. Glide the brush across your zones in long, consistent sweeps to coat every visible square inch. That heavy initial layer establishes a uniform starting point for every accent you plan later. I favor standard acrylics here since they dry rapidly, letting you pivot to the next step without lengthy waits. A frequent beginner trap involves stretching pigment too thin, which allows the original orange flesh to ghost through. Pour generously and press confidently to achieve full, rich coverage. When you genuinely understand how to paint a pumpkin, that solid base becomes a reliable springboard for side projects like these easy rock painting designs.
7. Dry the First Coat Before Adding Any Details
Ever feel that sudden urge to rush ahead and start tracing faces or adding intricate swirls the moment the brush lifts while following a step by step tutorial? I have fallen for that impatience myself, but respecting the cure time guarantees success. Let your initial base coat of paint reach complete dryness against your fingertips. You want a surface that feels completely dry and ambient temperature, which often takes much longer than you expect when working with thick formulas. Why do you need to wait so carefully in the tutorial? Touching a tacky surface drags your fine brush backward, smearing your colors into a muddy mess instead of crisp shapes. Your sharp patterns dissolve into blurry streaks the second wet pigment meets wet pigment. Instead, waiting provides a completely stable platform so every dot, stripe, and flourish sits exactly where you dropped it. Grasping how to paint a pumpkin means honoring those drying windows. For a stress-free workflow, always verify the manufacturer recommended drying time printed on your bottle. Waiting roughly ninety minutes in standard indoor temperatures usually suffices. If younger helpers grow restless during the waiting period, hand them paper and brush to practice painting ideas for kids while the main piece cures. Feel the pride when your final details snap perfectly onto that solid, dry surface.
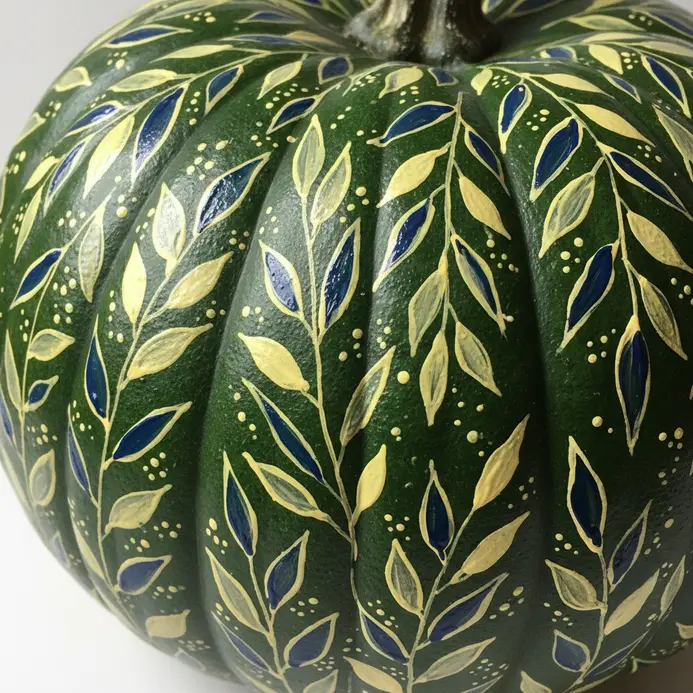
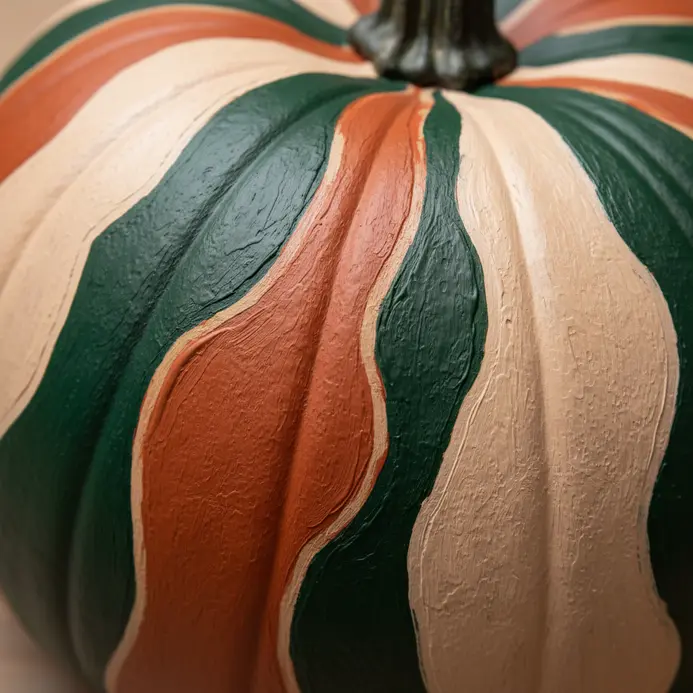
8. Apply Secondary Color Layers for Visual Depth
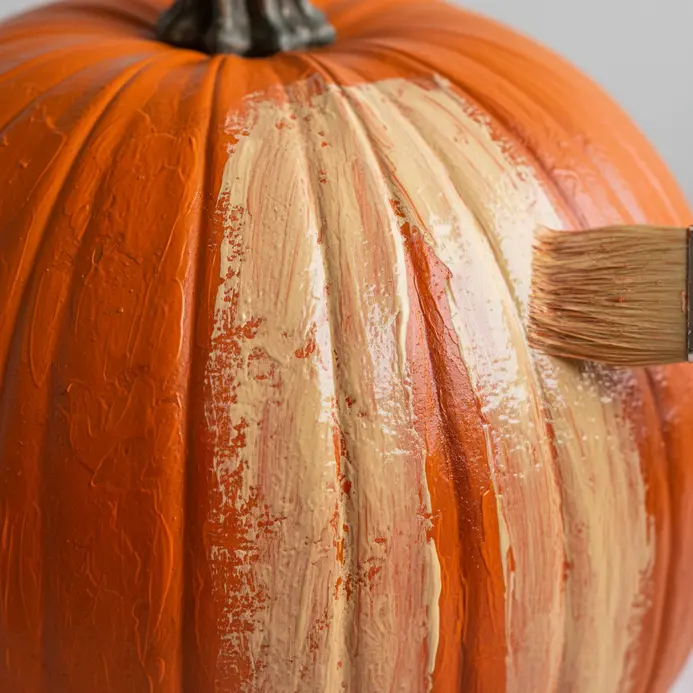
Ever study festive porch displays and notice how certain pieces appear almost three-dimensional under sunlight? That lifelike volume appears entirely through strategic color stacking, especially when using black paint for dramatic effects. Lay down your primary background, then blend a muted teal or soft lavender into the deepest valleys and lower curves where shadows naturally gather. Follow that by brushing brighter golden or lime tones across the highest ridges where direct light strikes first. Visual layering succeeds because warm secondary shades push forward visually, while cooler tones visually sink backward. I adore how this simple contrast fools the human eye into measuring actual volume and space. When researching how to paint a pumpkin, build those shadow and highlight layers slowly until you watch that satisfying dimensional illusion fully emerge, as shown in a video tutorial. Keep your brush light and let the colors breathe together.
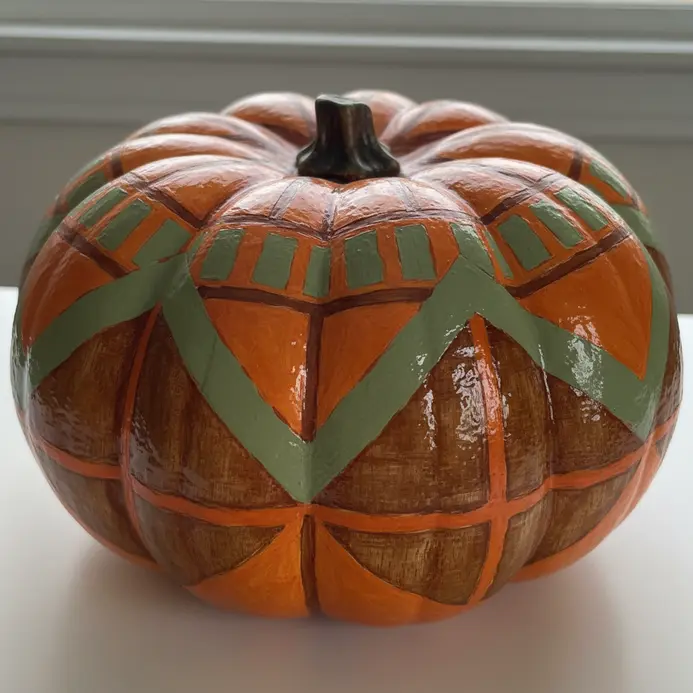
9. Stencil Intricate Geometric Designs Onto the Pumpkin Skin
This modern approach looks wildly complicated on first glance, but trust me, it remains highly accessible for weekend crafters. Begin by washing and completely drying your chosen harvest. Position your chosen geometric stencil securely using a quick mist of low-tack spray adhesive. Dab your acrylic pigment onto the exposed cutouts using a dedicated stencil brush or a soft foam pouncer. Maintain a light, vertical tapping rhythm to completely stop moisture from sneaking beneath the plastic borders. I genuinely love the precise results this masking method delivers every single time. It feels incredibly satisfying to lift the sheet and reveal flawless, repeating shapes underneath. If you want to drill how to paint a pumpkin before tackling the main project, browse these beginner watercolor painting projects. Does that geometric precision not look stunning on a porch table?
10. Use Fine Brushes for Detailed Highlights and Shadows
Ever notice how museum-quality harvest art seems to emit a subtle, dimensional glow from across the room, much like the best paint pumpkins? That radiance stems entirely from micro-scale finishing touches. This phase transforms your standard round brush into an absolute necessity. Touch the tip gently along the upper curves to place tiny reflective spots and drag a darker shade into the deepest seams where light naturally vanishes. Those miniature value shifts trick your vision into perceiving realistic ridges and valleys. For a genuinely eerie autumn centerpiece, you might collect extra scary Halloween drawing inspiration to guide your accent placements. Mastering how to paint a pumpkin means dedicating quiet time to these microscopic details. Try dropping those tiny strokes onto your surface and watch the piece suddenly breathe with satisfying realism.
11. Outline Your Design with a Permanent Paint Pen
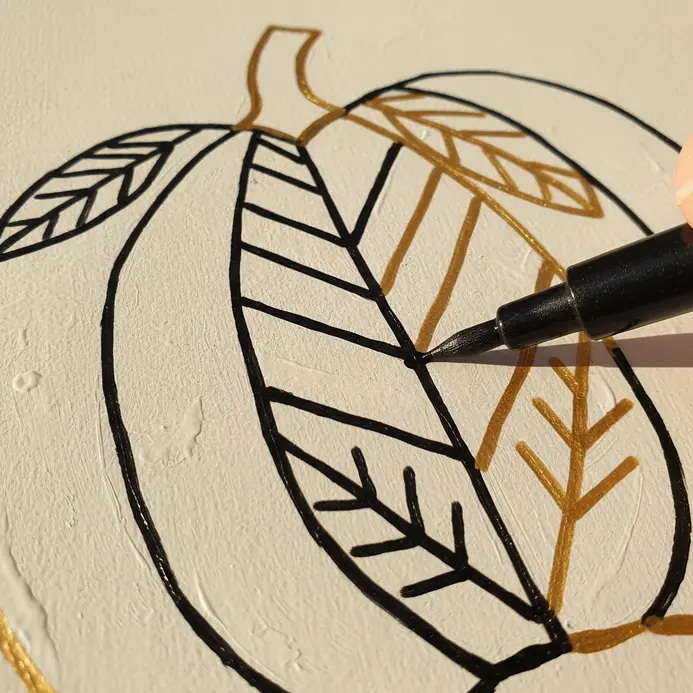
Ever ask yourself why certain decorated gourds maintain such flawless border separation between colors? This defining moment serves as my favorite finishing trick. Grip your permanent paint pen comfortably and trace slowly along your sketched boundaries. Maintain steady wrist movement and let the dense fluid form a sharp, waterproof wall that holds your inner blocks in place. The archival formula succeeds because it refuses to smear or migrate, guaranteeing your background stays completely isolated, making it perfect for paint your pumpkin projects. I love how one thin ink pass instantly elevates a amateur sketch into a gallery-ready composition. Teaching anyone how to paint a pumpkin requires patience during this tracing phase, slowing down until every intersection meets perfectly tight. Feel the deep satisfaction as your concept sharpens into undeniable clarity.
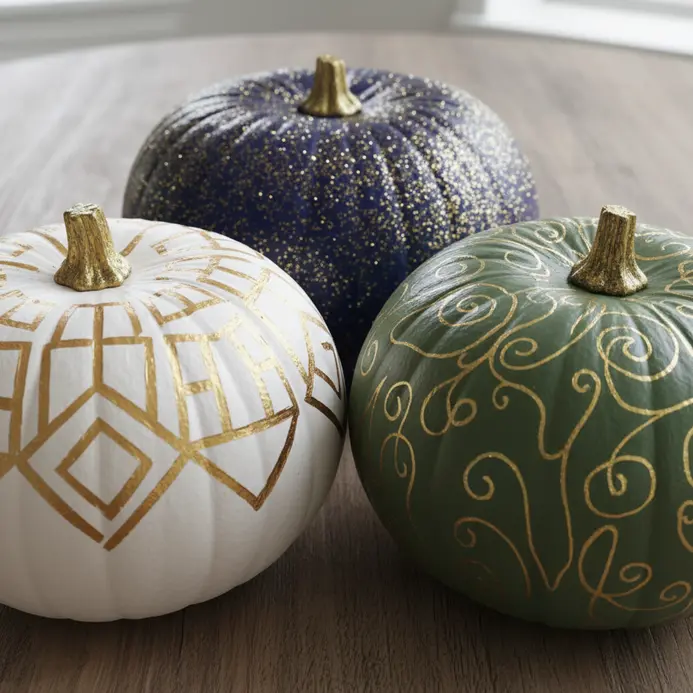
12. Add Decorative Accents Like Metallic Glitter
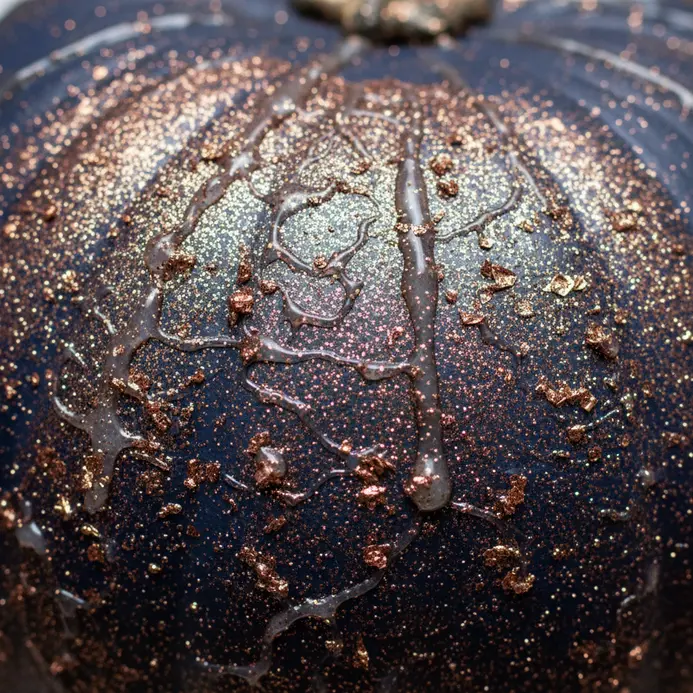
Who truly enjoys missing an extra dose of sparkle during the festive months? Brushing on metallic glitter instantly transforms a standard seasonal decoration into a glowing porch centerpiece. Paint your selected accent zone with a thin, even blanket of craft glue or matte medium, then rain your chosen sparkle particles directly onto the wet surface. Bump the side gently to drop loose flakes, let everything harden fully, then seal again with another clear wash to trap the texture permanently. I always achieve the strongest texture contrast using either ultra-fine dust or chunky hexagonal flakes, since they reflect light at completely different angles. This shimmering step works because those reflective fragments catch ambient daylight and cast soft highlights across your pattern. Learning how to paint a pumpkin includes mastering this final embellishment stage. Blend techniques from this DIY painting projects for home guide to elevate your holiday tablescape.
13. Allow the Paint to Cure Fully Overnight
Ever catch yourself reaching for your freshly colored harvest the second it stops feeling tacky? I fight that impulse constantly, but resisting it guarantees durability. That initial dry sensation simply signals the surface water has evaporated into the air. For your layers to reach maximum toughness and scratch resistance, the material requires the complete chemical curing process to unfold through the night, ensuring your paint pumpkins project lasts. During this resting phase, polymer chains link tightly, changing a soft film into a rigid protective shell. Why does this timeline protection matter so much for outdoor displays? Grabbing or stacking a half-set surface remains the number one cause for scratches, scuff marks, or entire peeling sections when you paint your pumpkin. Granting that full twelve-hour rest period guarantees your vibrant layout survives heavy autumn weather without fading. Figuring out how to paint a pumpkin means trusting that quiet overnight cure completely. Follow along with this beginner pottery painting guide mindset for proper curing habits. Does it not feel wonderful to protect your hard work properly?
14. Apply a Clear Protective Spray Sealant Coating
Ever wonder how outdoor autumn decorations survive freezing morning frosts and sudden November rains? That protective shield relies entirely on this final top coat. Move your completed piece to a breezy patio or open garage door. Shake your clear acrylic spray sealant can vigorously, then position it roughly twelve inches from the surface. Sweep a fine, consistent mist across every visible inch, maintaining smooth, overlapping passes from side to side. Wait until that first transparent film hardens completely before spraying again. This disciplined layering rewards you with a breathable, water-resistant shield that traps your vibrant layers while blocking dirt, dew, and UV damage. I genuinely appreciate this closing stage since it elevates amateur handiwork into long-lasting outdoor art. Recognizing how to paint a pumpkin fully means finishing with a reliable barrier layer. Watch that beautiful satin or high-gloss sheen lock in every hour of effort.
15. Display Your Finished Pumpkin in a Dry Location
Ever question why your beautifully decorated harvest shrivels or warps so rapidly despite careful painting? Choosing a protected shelter zone guarantees longevity, which means far more than simply avoiding direct rainfall. Your mission centers on establishing a stable microclimate that defends against rising damp while simultaneously buffering harsh wind exposure. Choose a covered corner safely away from lawn sprinklers and overnight dew puddles. I strongly recommend resting the base on a wooden slat or stone paver to keep it elevated above cold, wet concrete. Gentle air circulation helps immensely, but steer clear of high-speed draft corridors that rapidly draw moisture from the skin and trigger splitting. Keep the piece shaded from intense direct sun or place it far away from indoor heaters, since prolonged warmth accelerates organic shrinking. This thoughtful positioning stops fungal growth while preserving your gourd shape and crisp painted accents for eight solid weeks, ideal for a Halloween monster theme. When exploring how to paint a pumpkin, always plan the final display location before your first brushstroke. Mix these spooky Halloween painting ideas with your finished arrangement. Feel genuine pride watching your autumn setup thrive.
Durable Finishing Sprays To Prevent Paint Flaking
A swift pass of clear matte varnish acts as your strongest defense against surface flaking while guarding your artwork from heavy humidity and frequent guest handling. Select a non-yellowing, acrylic spray engineered for mixed materials, and always work outside near an open window. Keep the nozzle approximately ten inches from the target and use smooth, sweeping glides to anchor your design without pooling liquid or creating tacky patches. This sealing barrier locks your pigment directly into the textured flesh and gives your seasonal decor that polished, professional presence. A single light coat usually protects sufficiently, though high-traffic displays benefit from a second round after full drying. Your decorated harvest will hold its structural shape and visual charm straight through the holiday table.
Conclusion
Your decorated harvest represents far more than a temporary autumn shelf piece. It serves as a personal seasonal milestone and reflects the quiet dedication you pour into your home atmosphere. The entire process of learning how to paint a pumpkin teaches gentle patience with drying windows and delivers deep satisfaction as you stack rich layers and sharp edges. For your next table centerpiece, experiment with a color scheme borrowed from your favorite throw blankets to create a tightly coordinated porch vignette. Gazing at your finished work resting on the front steps each morning brings a private, calming joy that mass-produced factory decor simply cannot match.
FAQs
Q: What basic instruction should I follow before I start to paint a pumpkin?
A: Begin with a clear step-by-step tutorial: clean the pumpkin, remove dirt and seeds if you carve, let it dry, and protect the surface with a coat of gesso if you want a smooth, consistent base. Work in thin layers, allow paint to dry between coats, and finish with a sealant if you want a shiny result.
Q: Can I use a regular paintbrush or do I need special tools?
A: A regular paintbrush works well—use different sizes for details and large areas. For textured or patterned effects, try varying your brush strokes and using a foam brush for broad coverage. Keep a paper towel nearby to blot excess paint and clean brushes between colors.
Q: Is there a difference between painting using real pumpkins and fake ones?
A: Yes. Using real pumpkins means dealing with soft spots and natural ridges; inspect and avoid areas that are too soft before painting. Artificial pumpkins often have smoother surfaces and may need light sanding and a gesso primer to help paint adhere. Both can be painted successfully with proper prep.
Q: How do I attach decorations like faux ears or embellishments securely?
A: Use hot glue for most craft embellishments such as faux ears, fabric leaves, or plastic seeds. For heavier items, consider reinforcing with wire or toothpicks that penetrate slightly into the pumpkin flesh or foam core. Press firmly and allow glue to cool fully before moving the pumpkin.
Q: Any tips for preserving painted pumpkins and preventing mold or decay?
A: If using real pumpkins, wipe the surface with a mild bleach solution to reduce surface bacteria before painting, then let dry completely. Seal painted surfaces with a clear outdoor-rated sealant to protect the paint and slow moisture loss. Store painted pumpkins in a cool, dry place away from direct sun to extend life.


