


Achieving Proper Paint Consistency And Flow
The fastest way to ruin a beach painting is using acrylic straight from the tube, which dries too fast and skips on your canvas. You want a smooth, creamy consistency, like melted ice cream, for easy blending in your sky and water gradients, especially when tackling any easy acrylic beach painting for beginners session. Add a few drops of water or a flow improver medium to your puddles of ultramarine and cerulean blue before you start. This keeps them workable for those crucial few minutes you need to layer the deep ocean behind the shallow turquoise shallows. Trust me, this single step prevents the frantic over-blending that turns those beautiful blues into a flat, muddy gray. You will notice your brush glides effortlessly, letting you build up those distinct color zones for that gorgeous, luminous depth we all love in a seascape.
Essential Flat And Fan Brush Selection
Your entire sky and sea base layer gets blocked in with a wide, soft synthetic flat brush, which holds a lot of paint for those big, smooth washes during an easy acrylic beach painting for beginners attempt. That generous belly of pigment is what lets you lay down a seamless gradient from a pale horizon line up into a deeper sky blue without leaving harsh streaks. Then, for the magic of sea foam and textured waves, you switch to a fan brush. Lightly load just the tips with titanium white, then drag it almost dry across your already-dried darker ocean layers. This scumbling technique creates the perfect suggestion of foamy ripples and light catching on the water, which looks far more natural than trying to paint every single wave. The right tools do half the work for you, creating movement and realism with simple, confident strokes.
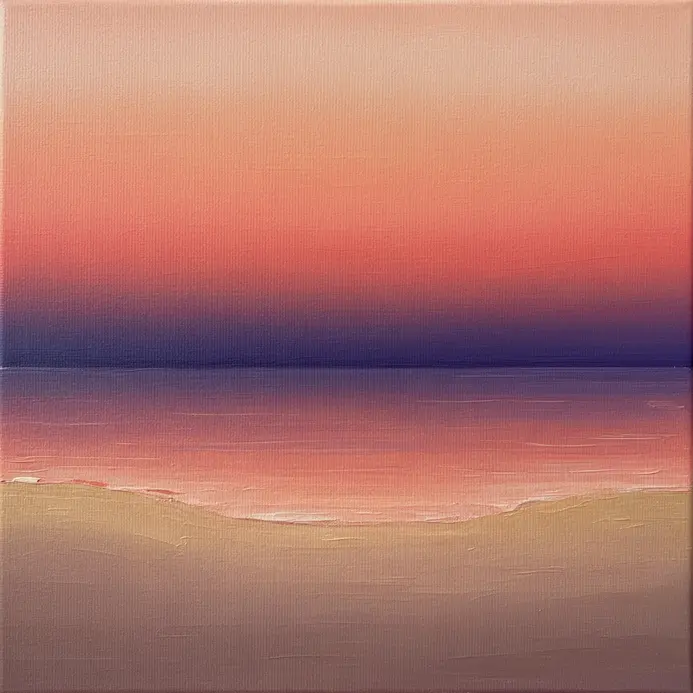
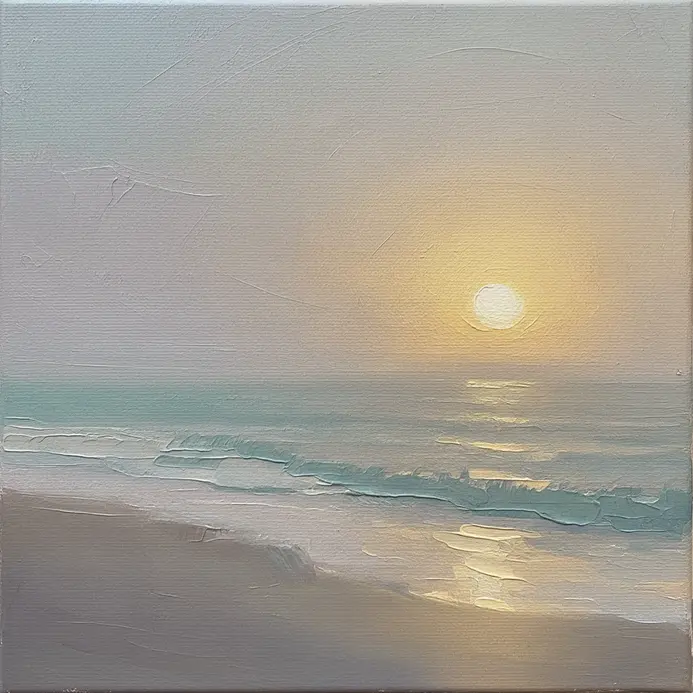
1. Paint a Soft Pastel Sunset Gradient Beach with Simple Blending
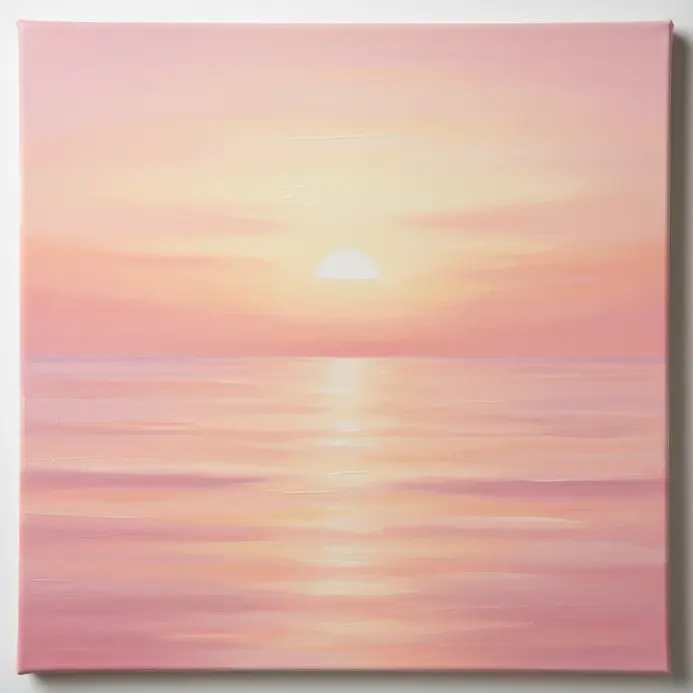
This one is my favorite way to unwind, and trying this easy acrylic beach painting for beginners scene shows how simple tricks create complex effects. You will layer your light pastel colors in bands and then gently blend the edges together with your finger. Start with yellow at the top, then move down through orange, pink, and finally a soft purple near the horizon. Isn’t that a lovely, soothing palette? The magic happens when you use a clean finger or a soft blending stump for smoother transitions in your artwork. to soften each color transition. Use light, circular motions to coax the pigments together without scrubbing. This technique creates that seamless, luminous gradient that makes a sunset feel so peaceful. I love how forgiving it is because you can always add more color or blend a little more. For the ocean and sand, use light blue and beige, blending them softly into the sky. It all comes together into a tranquil scene that feels fresh and calming, perfect for an easy beach painting. If you enjoy this serene style, you will find more inspiration in these easy landscape paintings. Feel proud of your soft, blended masterpiece.
2. Bright Noon Sky Ocean View: Achieve Clear Color Separation
Ever notice how a real beach scene has that crisp, clean line between sky and sea, which you can achieve with a step-by-step tutorial? It’s a trickier effect to paint than you might think, but any easy acrylic beach painting for beginners tutorial proves it works when you focus on the key details. Paint your bright, warm sky first and let it dry completely. Then, mix a slightly darker, cooler blue for the ocean and paint right up to the dry sky’s edge with a steady hand. The key is to work in distinct layers and use phthalo blue on your horizon line. different values to separate the elements. I love using a fine liner brush for that final horizon line to keep it sharp. This works because the value contrast creates instant depth, and the dry layer stops the colors from blending into a muddy mess. Try it and feel the satisfaction of a perfectly defined seascape.
3. Create a Stormy Grey Horizon Seascape Scene with Layered Washes
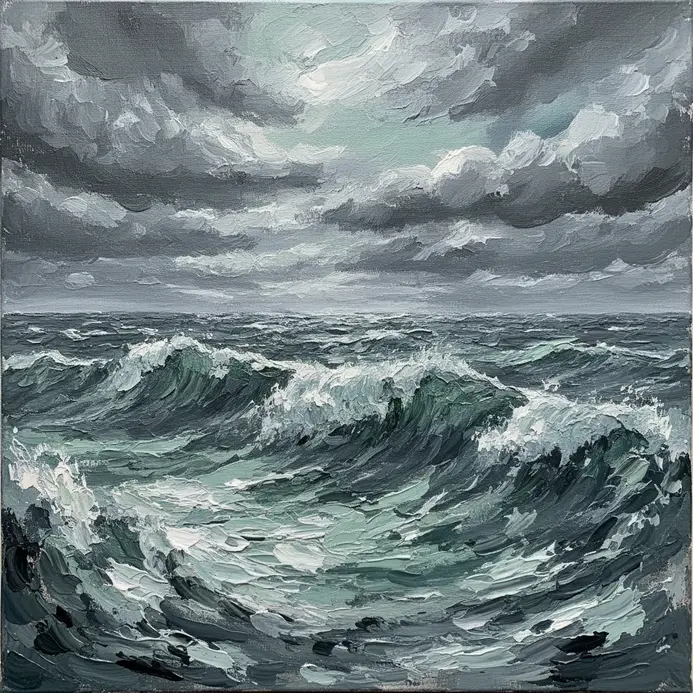
Ever wanted to capture a moody, dramatic sea without a rainbow of colors? This one is all about the power of grey, and following this easy acrylic beach painting for beginners guide helps you control those atmospheric washes perfectly. You start with a very light, watery wash of your primary grey over the entire sky and distant ocean area. Let that dry completely, then build up darker, atmospheric layers for the clouds and waves. I love how this technique creates incredible depth and a real sense of atmosphere. Your key is using transparent washes. Keep your paint diluted so each new layer shows a bit of the one beneath it, mimicking the subtle light in a storm. This builds a luminous, complex scene from simple steps. For a great next step, check out these beginner acrylic painting ideas to build your skills. Remember, patience is your friend here. Let each wash dry fully before adding the next to keep those beautiful, distinct layers. You will be amazed at the moody masterpiece you create.
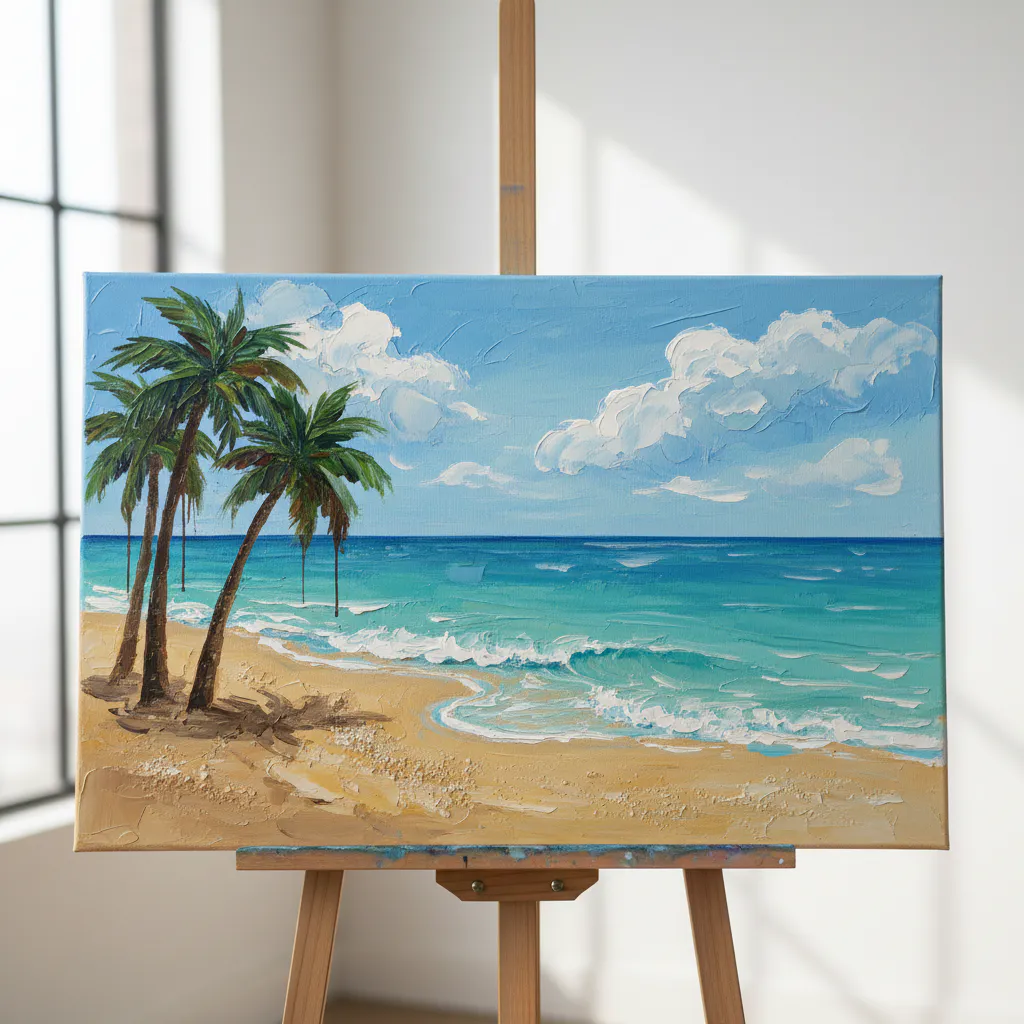
4. Golden Hour Sand Dune Landscape: Capture Warm Light and Shadow
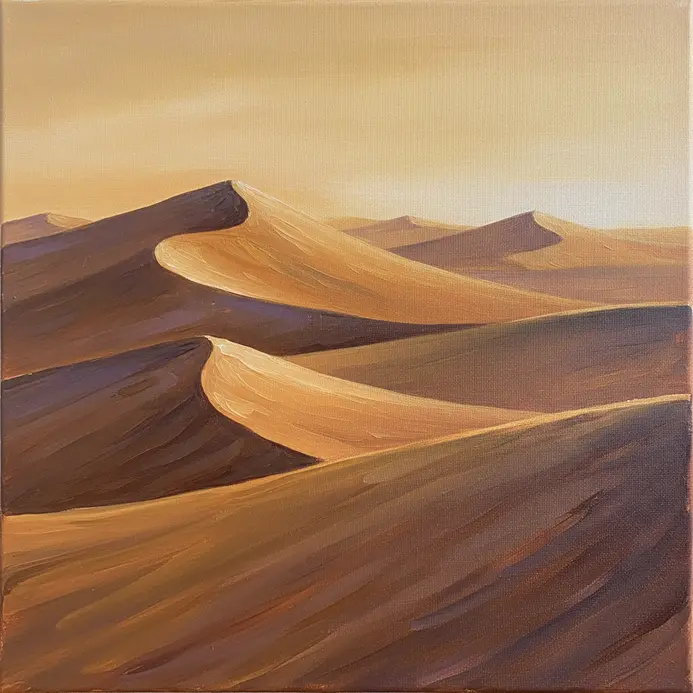
Ever wondered how to make a simple sand dune look truly magical? The secret is all about timing, which is a core lesson in any easy acrylic beach painting for beginners. You want to paint when the sun is low, casting those beautiful long, raking shadows that define every curve and ripple in the sand. This warm light will turn the whole scene a gorgeous orange and yellow. I love starting with a simple sky wash in those golden tones. Then, I block in the shadow shapes first, using a cool blue or purple. This instantly creates the depth and form of the dune. The lit sand areas are painted over that, using warm yellows and oranges mixed with a bit of your base sand color. Trust me, those shadows are not only dark spots but shape definers. It is so satisfying to see a flat shape suddenly look three-dimensional with just light and shadow. For your next project, try this technique on other easy first paintings to practice capturing light in your artwork. Does that not look stunning?
5. Build a Deep Blue Night Tide Painting with a Glowing Moon
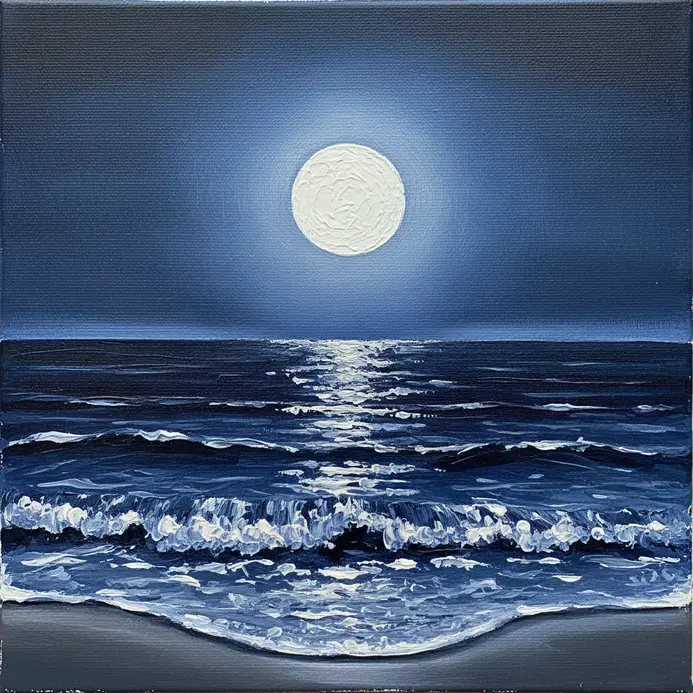
Who would have thought a night sky could be so simple and stunning? This easy acrylic beach painting for beginners routine focuses on that magical feeling where the deep ocean meets a starless sky. Start by washing your canvas with a mix of Ultramarine Blue and a touch of black to set your moody, dark base. I love how this instantly establishes the atmosphere. Next, use a round brush to paint your moon with a pale yellow core, then soften its edges with white to create that signature glow. The real magic happens when you pull that light down into the water with soft, horizontal strokes for the moon’s reflection. Ever tried painting water at night? It is surprisingly forgiving. The key is to keep your brushstrokes loose and let the colors blend on the canvas. Finally, use a fan brush with a bit of pure white to suggest the soft crests of waves and distant foam. The contrast between the dark blues and that single point of light makes the whole piece feel serene and powerful. Does that not look stunning?
6. Clifftop Ocean Shoreline Composition: Strong Horizon and Foreground
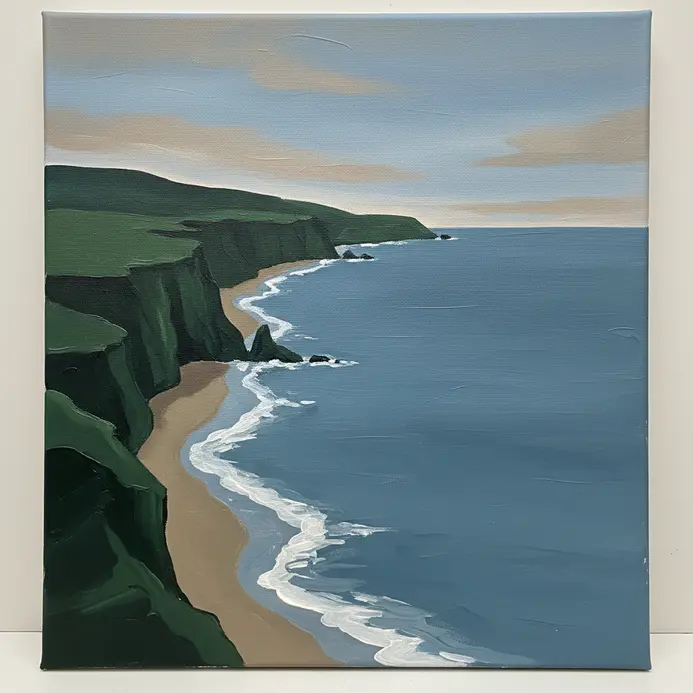
Ever wondered how to make your seascape feel truly vast? This composition is your secret, and placing the easy acrylic beach painting for beginners horizon correctly sets the entire foundation. Start by drawing your horizon line first, placing it on the upper or lower third of your canvas. This simple rule instantly creates a feeling of scale and prevents a boring, split-in-half look. Trust me on this one, it is the most important line you will draw. Next, build out a detailed foreground in your easy beach painting. Add some textured rocks or a grassy cliff edge to draw the viewer right into the scene. This area gives your painting depth and a point of interest. For more manageable practice, try this setup on one of those small painting projects you have been considering. Finally, paint your ocean with gentle, horizontal strokes, letting the colors blend softly. That strong horizon you established will anchor everything beautifully. Feel the satisfaction of creating real depth with just a few strategic choices.
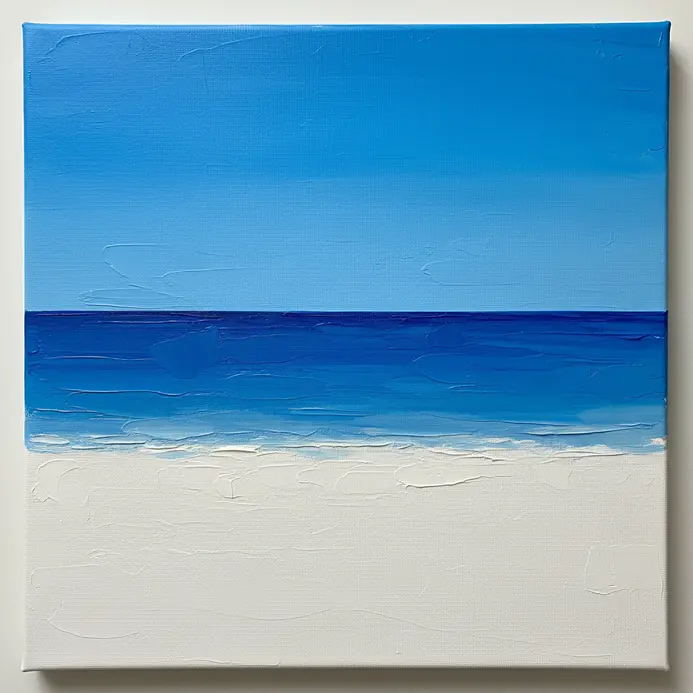
7. Minimalist White Sand Beach View: Simplify Your Shapes and Colors
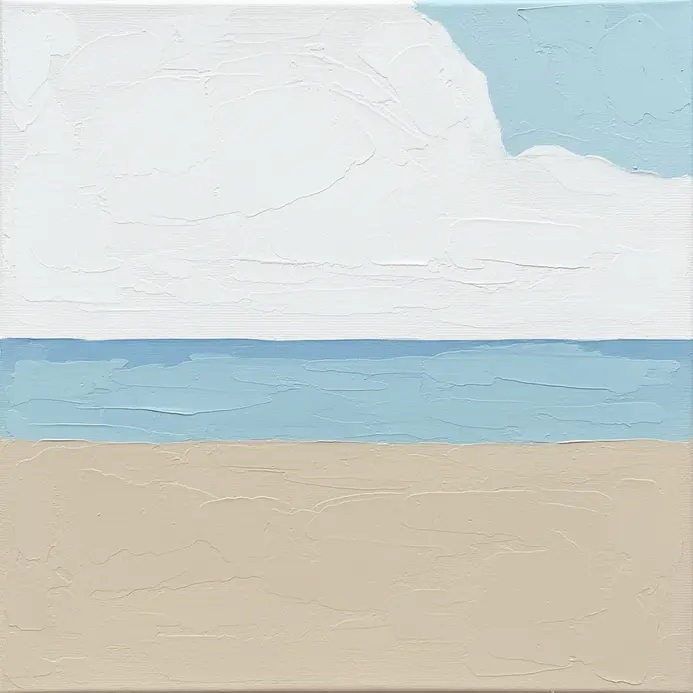
Ever feel overwhelmed trying to paint every tiny detail? This approach is your secret weapon for mastering an easy acrylic beach painting for beginners. You strip the scene down to its most basic shapes and a handful of colors. I love how this instantly creates a feeling of vast, peaceful space without any fuss. Focus on three clean blocks: a soft blue sky, a calm teal ocean, and a huge expanse of warm white sand. Use a large flat brush to lay down these big, smooth areas of color. Keep your horizon line straight and high to emphasize that beautiful negative space. It teaches you how powerful simplicity can be. Resist the urge to add palm trees or shells everywhere. A single, simple silhouette in the distance is all you need. This style is perfect for small formats, so grab a little canvas and give it a try. You can find great mini canvas painting inspiration to start. Feel that serene calm when you step back.
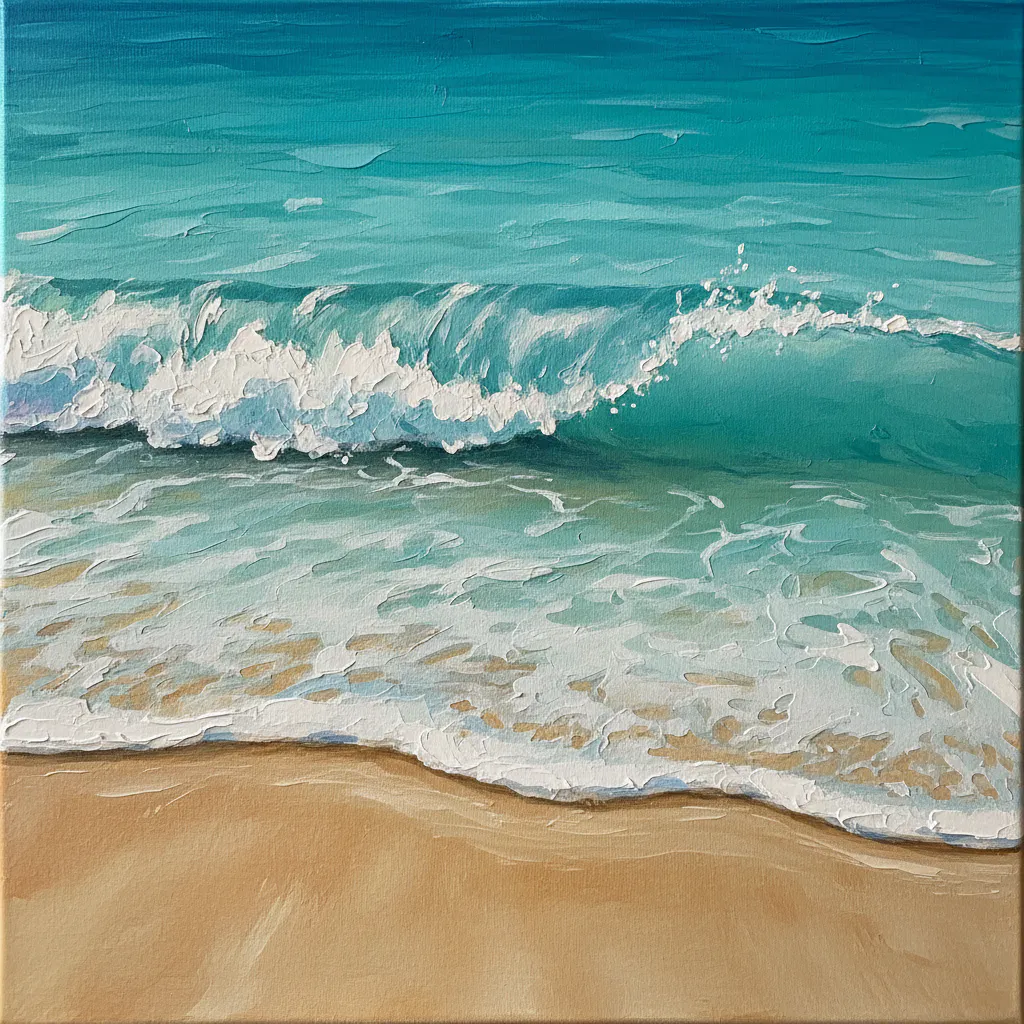
8. Turquoise Tropical Water Shoreline Scene: Vibrant Color Blocking
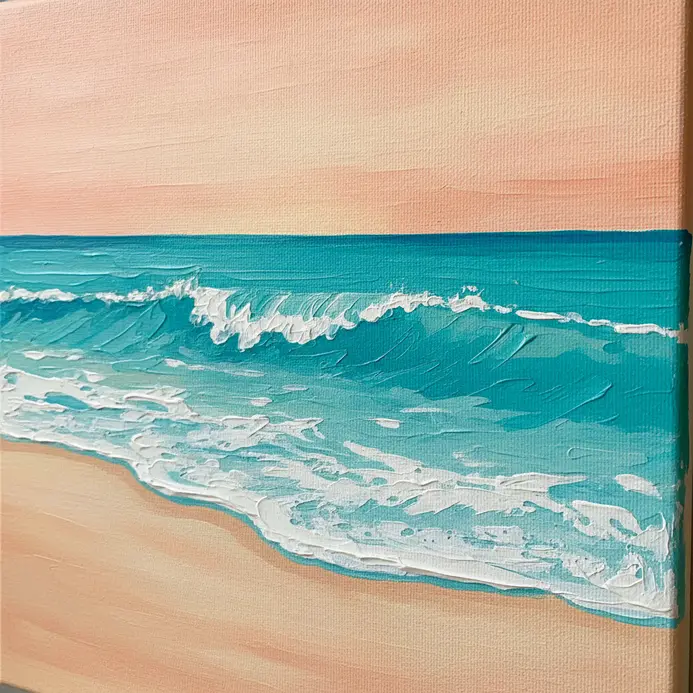
Ever feel like a tropical scene is too complex to capture? This approach strips it down, making an easy acrylic beach painting for beginners completely manageable. You will paint in distinct, bold shapes like a modern poster, using a step-by-step tutorial for beginners. flat brush to create a solid block of turquoise water, a sharp line of golden sand, and a simple sky. Think of it as assembling a puzzle with just a few, perfectly chosen pieces. I love how this method removes the pressure of detail and focuses on pure, vibrant color. Your key tool here is masking tape. Use it to tape off the shoreline line before you paint, ensuring you get that crisp, clean edge between your water and sand blocks. Let each color dry completely before removing the tape or painting the block right next to it. This prevents the colors from bleeding together and keeps everything looking sharp and intentional. It is a simple trick with a huge payoff. The high contrast between your warm sand and cool water creates an instant, energetic vibe that feels both simple and sophisticated. Why does this work so well? Your final piece will have that gorgeous, stylized look that is so satisfying to achieve. Give it a try and feel the tropical warmth come to life on your canvas.
9. Add Foamy Wave Crest Seascape Detail with a Dry Brush Technique
Ever wondered how artists create that light, airy foam on waves? This is my go-to trick, and practicing this easy acrylic beach painting for beginners step makes it simpler than it looks. The secret is the dry brush technique. You will load a stiff brush with very little white paint, wipe most of it off, and then lightly drag it across your dry wave crests. This creates a broken, textured effect that mimics real sea spray perfectly. I love this step because it adds instant realism and movement. The key is ensuring your underlying wave color is completely dry first. Then, use a small flat brush and work with feathery, horizontal strokes. It is so satisfying to see those bright, translucent highlights appear. Abstract painting techniques can also help refine your edge control here. Feel the freshness of the ocean come to life on your canvas.
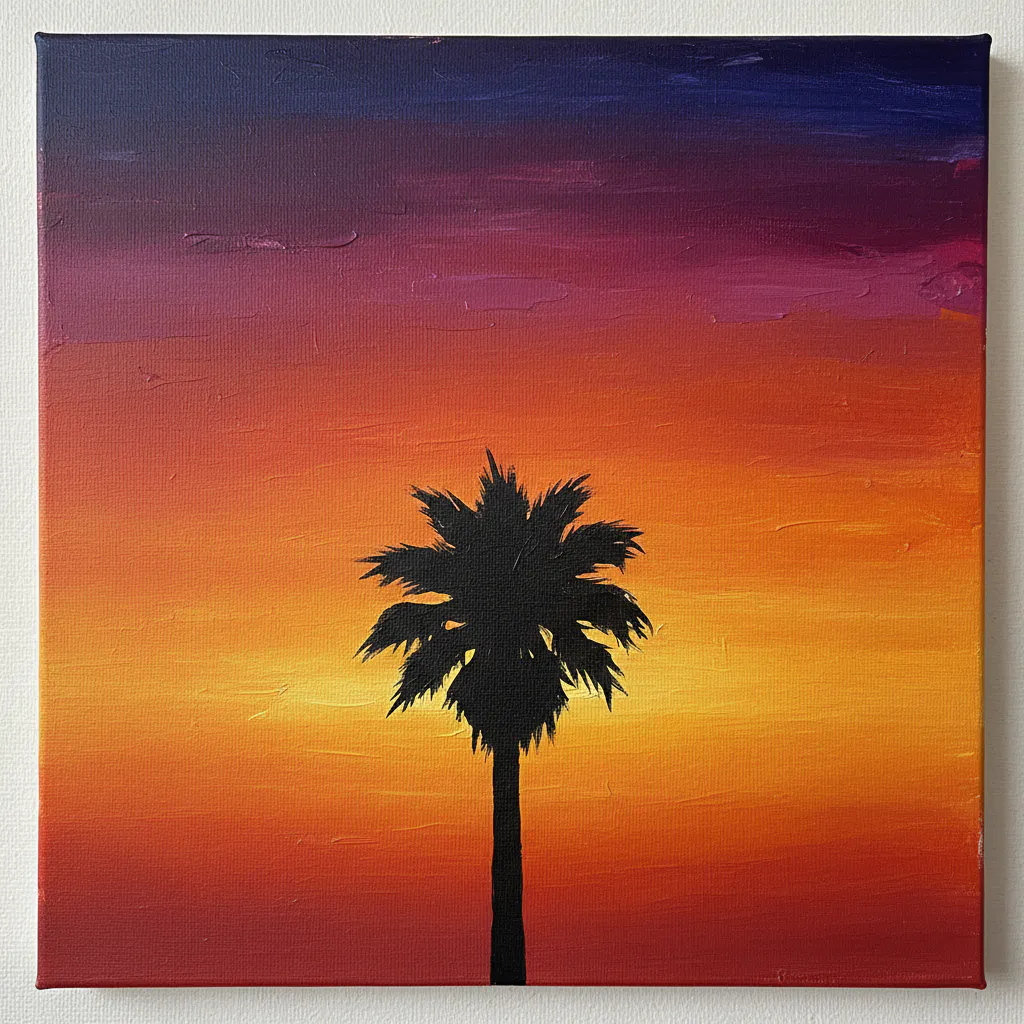
10. Palm Tree Silhouette Beach Vista: Bold Shapes Against a Sunset
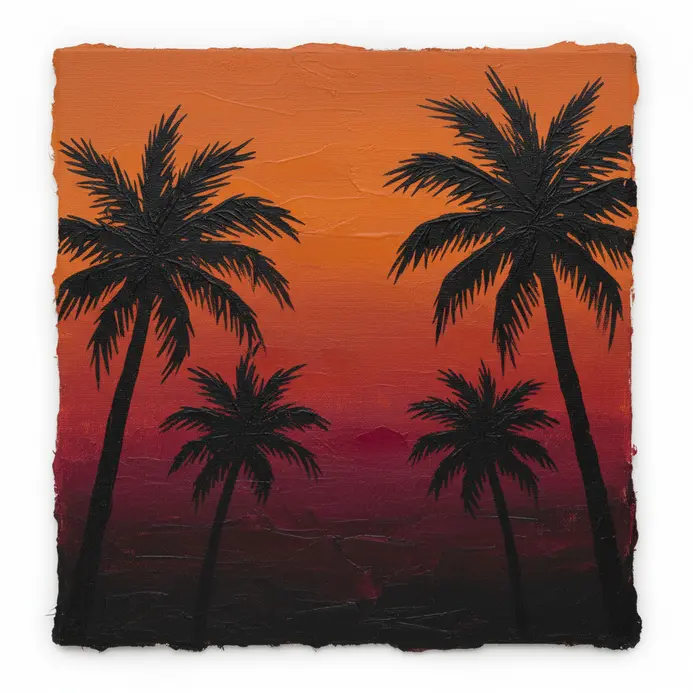
Who knew such a dramatic scene could be so straightforward to paint? I love how this easy acrylic beach painting for beginners composition uses simple, solid shapes to create a powerful feeling of a tropical escape. You will start by blending a gorgeous sunset gradient for the sky, moving from deep purples down to fiery oranges right at the horizon. Let that layer dry completely, then paint a calm ocean reflecting those warm colors. The magic happens next. Lightly sketch a few palm trees, then fill them in with solid black paint. Using a fine-tipped round brush is key for getting those sharp, detailed fronds that make the silhouette pop. Isn’t it satisfying to see those bold, dark trees stand out against your bright background? It creates instant drama and a real sense of peace. For another great coastal subject, you can learn to paint beautiful lighthouses with a similar approach.
11. Misty Morning Coastal Shore View: Achieve Soft Atmospheric Blending
Ever wondered how to paint a scene that feels more like a dream than a photograph? This misty shore view is perfect for that, and understanding the basics of an easy acrylic beach painting for beginners helps you control those soft transitions. You will start with thin, muted washes for the sky and sea, then build up soft layers using a slow-dry blending medium to keep the acrylics workable. Gently blend each new color into the last with a soft brush, letting the horizon and distant landforms melt together. The magic happens because you work from the background forward, keeping everything hazy. I love using a light touch with a large flat brush for those initial washes, it sets the perfect tranquil mood. This technique creates incredible depth and a peaceful feeling, which is why it is so satisfying to master. Your biggest ally here is patience. Work in thin layers and let the blending do the work. When those soft transitions finally click into place, you will feel a real sense of calm accomplishment.
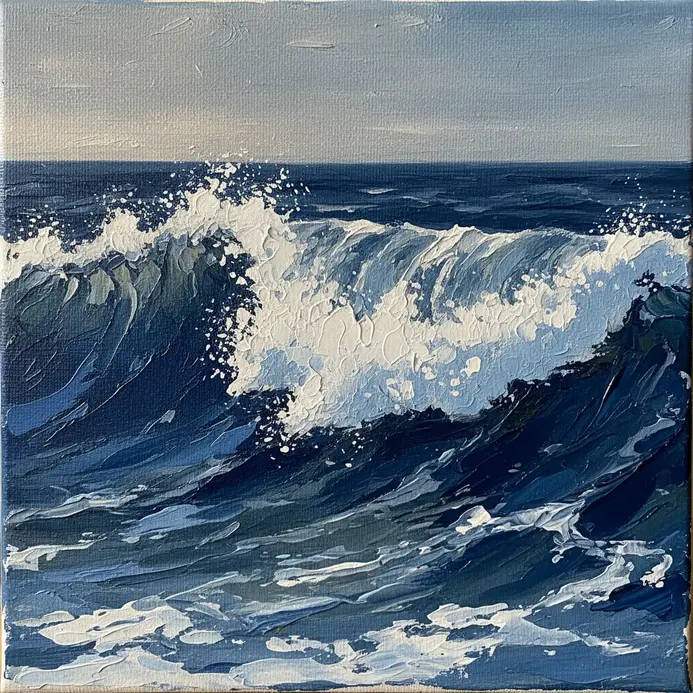
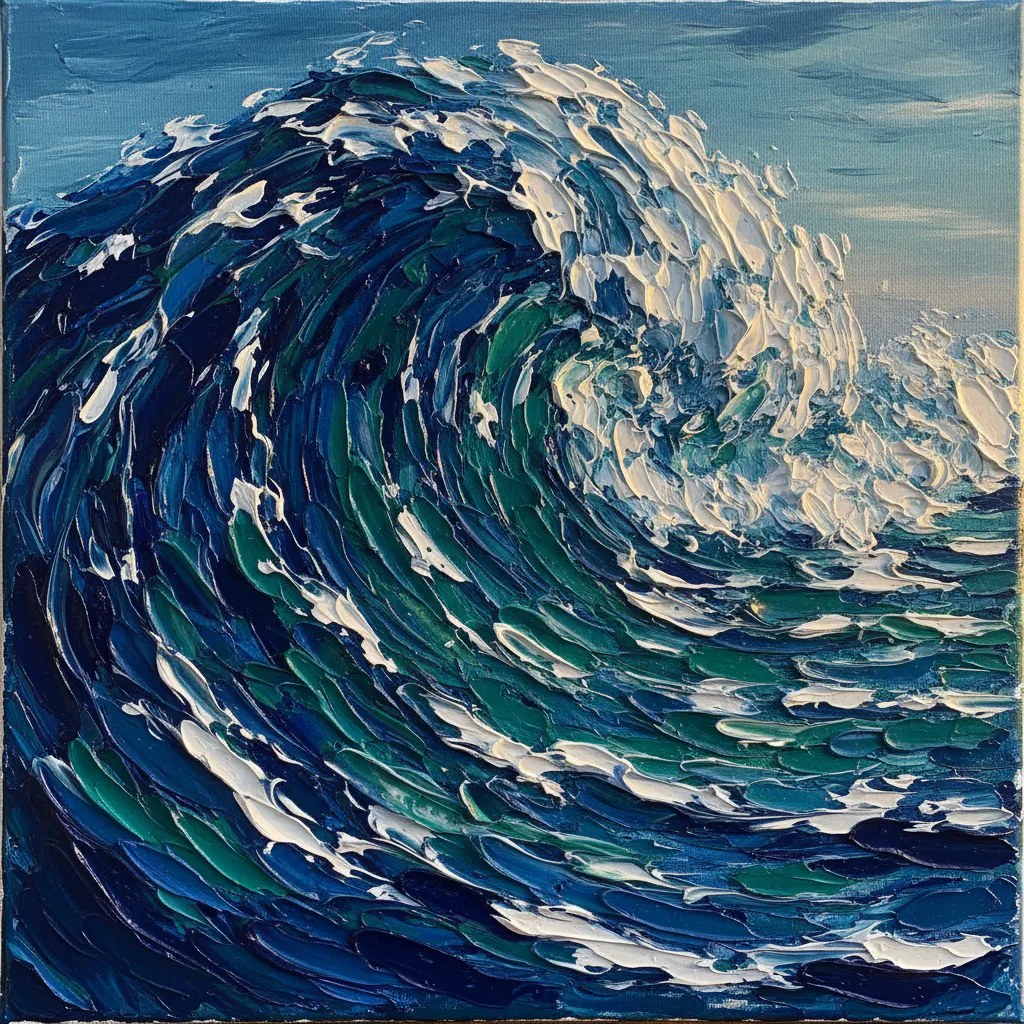
12. Bright Summer Surf Break Painting: Dynamic Whitewater and Motion
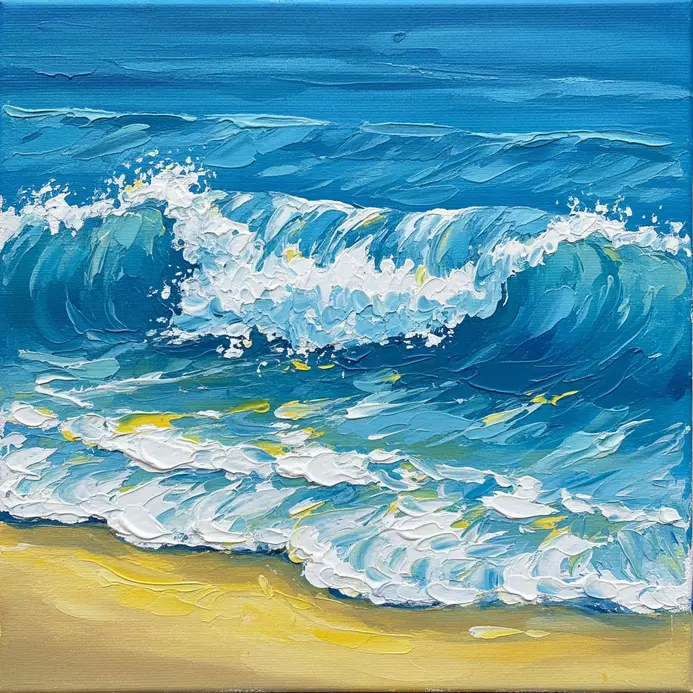
Ever wanted to capture the raw energy of a crashing summer wave? This one is all about that exhilarating splash moment, proving an easy acrylic beach painting for beginners does not require complicated tools. You will start by laying down a base of deep turquoise and vibrant aquamarine to build the wave’s form, incorporating phthalo blue for added depth. Then, the real fun begins with the thick white impasto. Use a palette knife or a stiff brush to pile on the paint, following the explosive direction of the water. Trust me, this is where the magic happens. Vary your whites from cool to warm tones to show how light hits the spray. Add quick streaks of golden yellow on the crest and deep blue shadows in the troughs for contrast. This technique works because the chunky texture makes the foam look so real you can almost feel the ocean spray in your artwork. For a different kind of vibrant project, you can also try an easy beach painting. explore oil pastel art. Does that not look stunning?
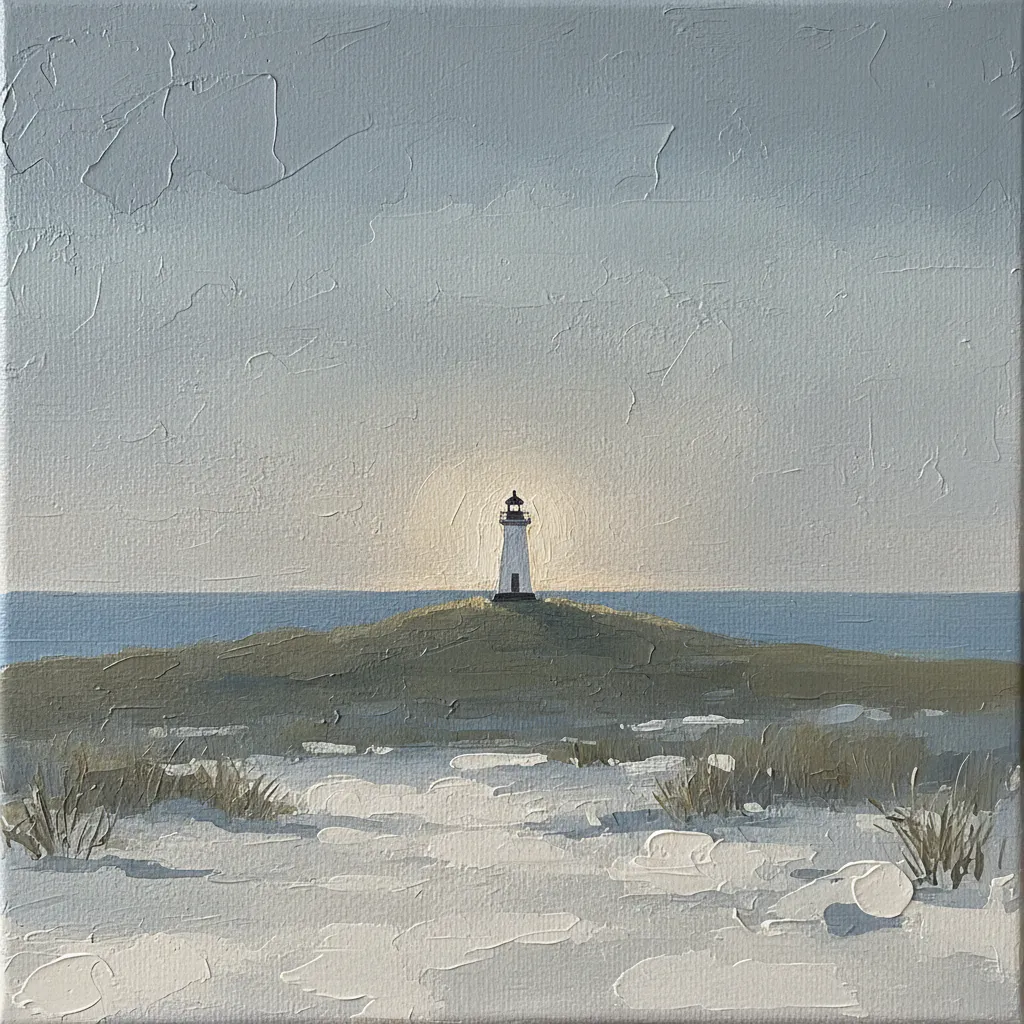
13. Lighthouse Shoreline Sunset Acrylic Piece: A Focal Point in the Distance
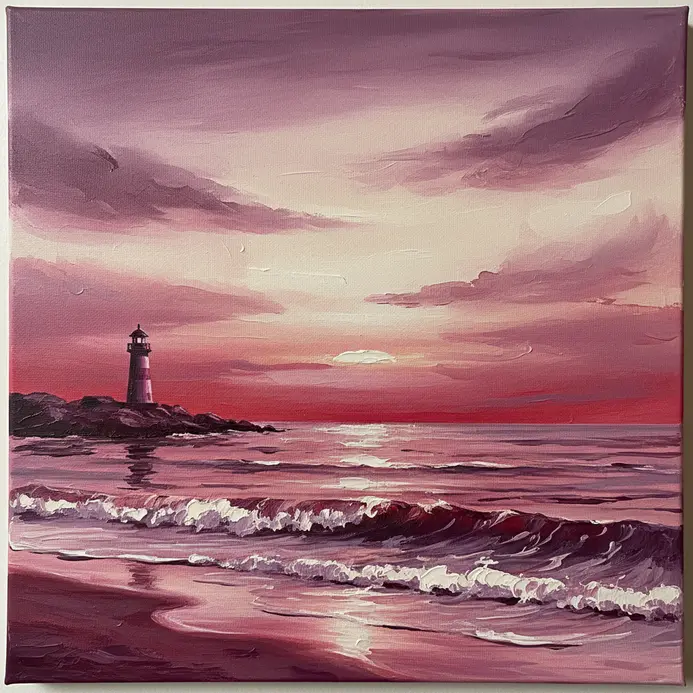
Ever tried to capture the feeling of a distant, hopeful beacon at dusk? This one looks impressive, but following this easy acrylic beach painting for beginners guide makes the process wonderfully straightforward. You will start by lightly sketching your horizon and that small lighthouse shape far away. Then, the magic happens with the sunset color gradient. Use large, sweeping strokes to blend those warm reds, oranges, and purples across your sky, letting them reflect softly in the water below. Your shoreline in the foreground gives you a chance to play with texture using a small flat brush for rocks and sand. The real key is keeping your lighthouse tiny and simple to sell that sense of vast distance. Trust me, resisting the urge to add too much detail there makes the whole piece feel more expansive and peaceful. Does that not sound satisfying? Once you get the hang of this focal point technique, you might find yourself drawn to other serene subjects, like these easy still life subjects.
14. Pier Silhouette Beach Horizon View: Strong Linear Perspective
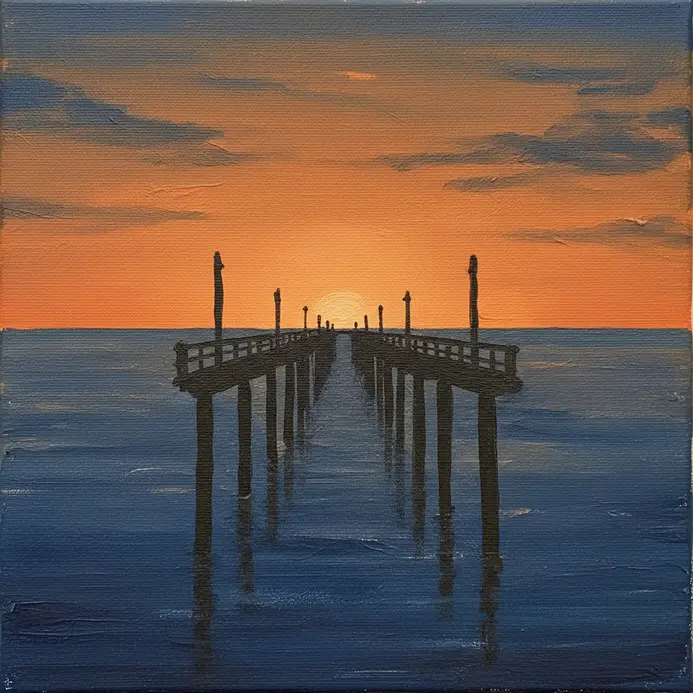
This composition looks so dramatic, but it is built on a simple secret that makes it surprisingly beginner friendly. The trick is using a single vanishing point on your horizon line. You will draw the pier’s parallel lines so they all converge toward that one spot, making it look like it stretches far into the distance. I love how this one simple rule creates such a convincing sense of depth. Once your perspective lines are in place, you get to have fun with the sky. Paint a gorgeous sunset or sunrise wash behind the pier. The final, satisfying step is painting the pier itself as a solid, dark silhouette. Use a flat brush to get those crisp, clean edges against the bright background. See how it instantly pops? That is the magic of strong linear perspective.
15. Distant Sailboat Coastal Water Scene: Create Depth with Scale
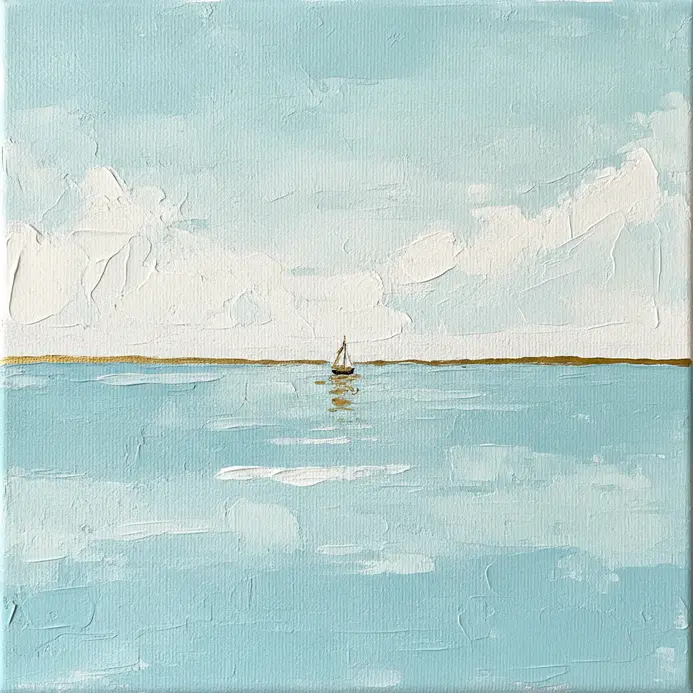
Ever wonder how to make a sailboat look genuinely far away on your canvas? Follow this easy beach painting tutorial for beginners. This trick is all about playing with size. Paint your closest sailboats larger with clear details like rigging. Then, make each subsequent boat smaller and simpler, with the ones on the horizon being tiny silhouettes. This diminishing scale is what instantly creates that feeling of deep, expansive space. To really sell the distance, remember that air itself softens and blurs things. Your foreground water should have individual wavelets, while the distant sea appears flat and calm. A high horizon line gives you plenty of room to show this beautiful recession. For a fantastic change of pace, try these techniques in watercolor painting for beginners. Trust me, seeing that depth appear is incredibly satisfying.
Applying Protective Varnish For Longevity
Once your painting is completely dry, a single coat of matte acrylic varnish locks in all your work and protects it from dust and UV light. This final step is non-negotiable because it brings a uniform sheen to your surface, ensuring your carefully layered blues and whites have the same finish. Apply it with a clean, wide brush in thin, even strokes, working in one direction to avoid bubbles. The varnish also deepens the colors slightly, making your ocean look richer and more vibrant, just like the real thing. It takes two minutes but safeguards weeks of work, letting you enjoy your finished seascape for years without worrying about the pigments fading or the surface getting damaged.
More Easy Acrylic Beach Painting For Beginners Gallery


Conclusion
You started with a blank canvas and a bit of hesitation, and now you have a collection of techniques to bring the beach to life. Each of these easy acrylic beach painting for beginners projects builds your understanding of how light, color, and simple brushwork create atmosphere. The real joy comes from seeing your own interpretation take shape. For your next project, pick a scene from your favorite memory and use these methods to paint it. Your personal connection to the place will shine through in every stroke.
FAQs
Q: What basic materials do I need to start an acrylic beach painting for beginners?
A: The essential material list includes acrylic paints (basic colors plus white and brown for mixing), a range of brushes (flat, round, and fan), a primed canvas or acrylic paper, a palette, water container, paper towels, and an easel or flat surface. Optional items: palette knife, sponge for texture, and a reference photo or video for guidance.
Q: How do I paint the sky—what shade and colors should I use?
A: For a believable beach sky, blend a pale blue with varying amounts of white to create gradient shades from horizon to zenith. Add a touch of ultramarine or cerulean for depth and mix tiny amounts of brown or gray if you want a muted, realistic shade. Use horizontal strokes and a large flat brush to smooth transitions.
Q: Can you give a step by step tutorial for painting sand and water?
A: Start with a base layer: block in a warm pale brown or tan for sand and a pale blue for distant water. Add mid-tones and highlights—dab lighter beige and white on sand for texture, and use layered blues, greens, and white for waves. Finish with small brushwork for foam and reflections. A step by step tutorial video can help visually demonstrate brush pressure and blending.
Q: What instruction helps with creating realistic waves and foam?
A: Instruction often emphasizes observation and layering: paint the darker underlayer of the wave first, then add lighter crest details with quick, curved strokes and a final dab of white to suggest foam. Use a fan brush or a stiff round brush for splatter effects, and adjust the shade of white with a tiny bit of blue or brown to match lighting.
Q: How can beginners learn how to paint clouds and distant elements without overworking the painting?
A: Keep clouds soft by using a dry brush or lightly dabbing a soft brush and then blending edges with a clean, dry brush. Use pale blue and white for distant elements and reduce contrast and detail to push them back. Learning to paint with acrylics includes knowing when to stop—avoid excessive layering that muddies colors.


