


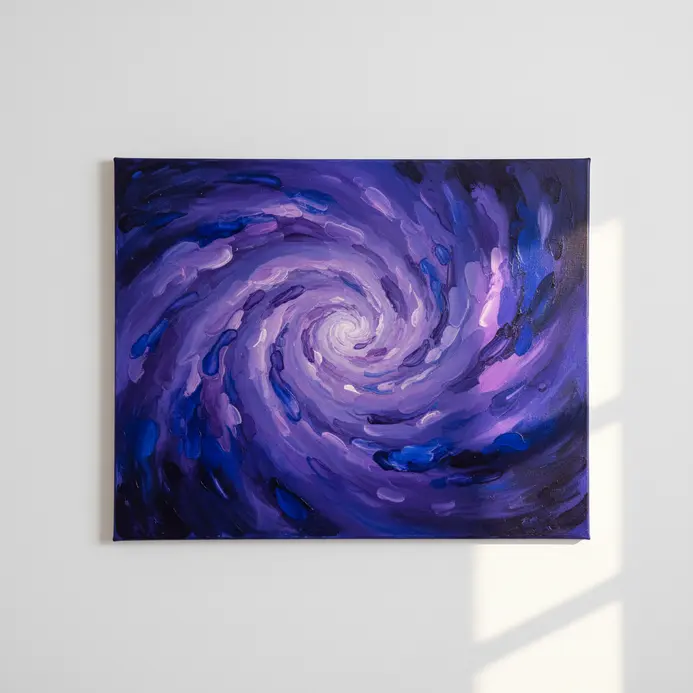
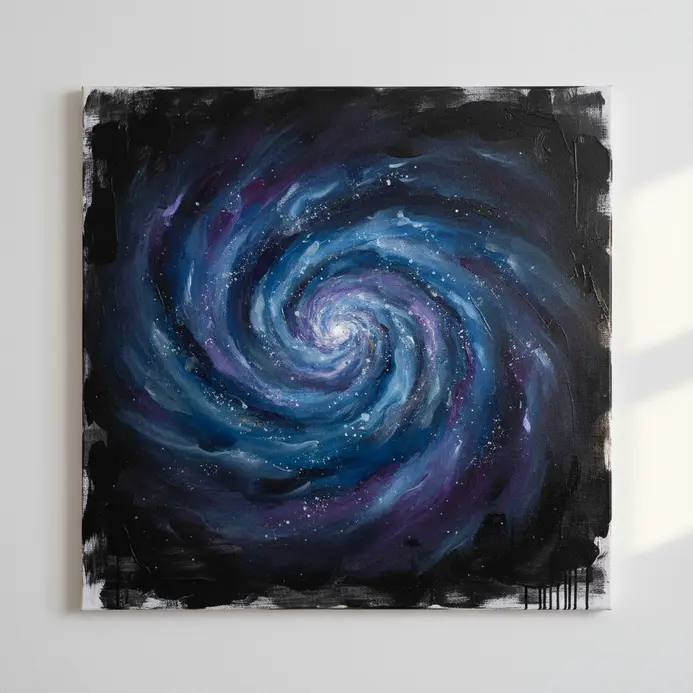
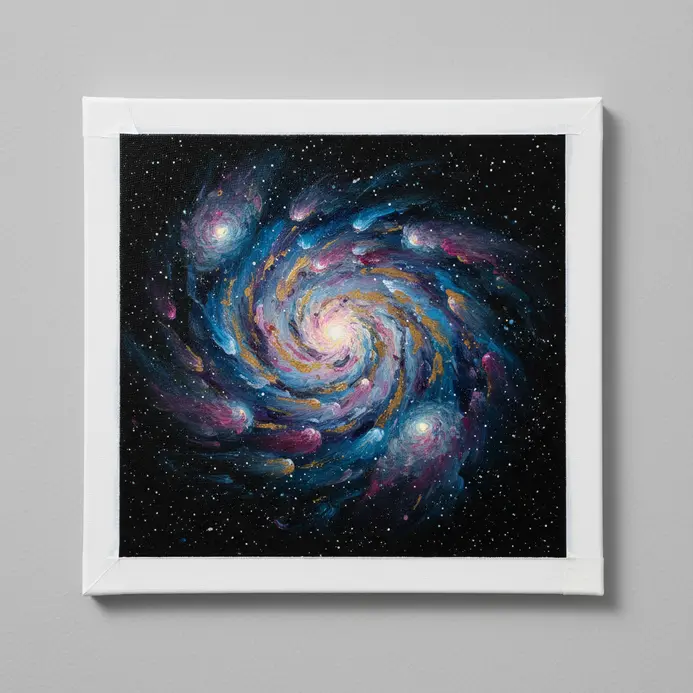
Color Palette Selection For Atmospheric Cosmic Depth
The fastest way to create that deep space feeling during an easy acrylic galaxy painting for beginners is with a simple trio of pure, high-chroma paints. Start with a tube of phthalo blue for your coolest core shadows, then add a rich dioxazine purple and a bright magenta for your nebula clouds. Trust me, you want to avoid premixed black for your base, as it tends to look flat. Mix your own dark background from your blues and purples with a tiny touch of burnt umber to give it a more natural, atmospheric depth. The good news is that keeping your jewel tones separate on the palette, and only blending them lightly on the canvas, prevents that muddy gray look we all dread. A vibrant orange or teal highlight dotted in last makes those clouds pop against the darkness.
Essential Brushes For Achieving Soft Nebula Transitions
Your most used tool when following an easy acrylic galaxy painting for beginners will be a simple, inexpensive makeup sponge. Tear off a small piece, dip a corner into thinned paint, and use a gentle dabbing motion to build up soft, transparent layers of color. You will need a medium flat brush to quickly lay down your dark cosmic background without visible strokes. Then, grab a small round brush with a decent point to pull and blend your wet paint into those wispy transitions. Here is the thing, a stiff-bristled old toothbrush is non-negotiable for your starfield. Flicking white paint from its bristles gives you a perfectly random, fine splatter that looks infinitely more authentic than painting dots by hand. This stippling technique creates incredible texture and depth with almost no effort.
1. Secure Your Canvas with Masking Tape for a Clean Start
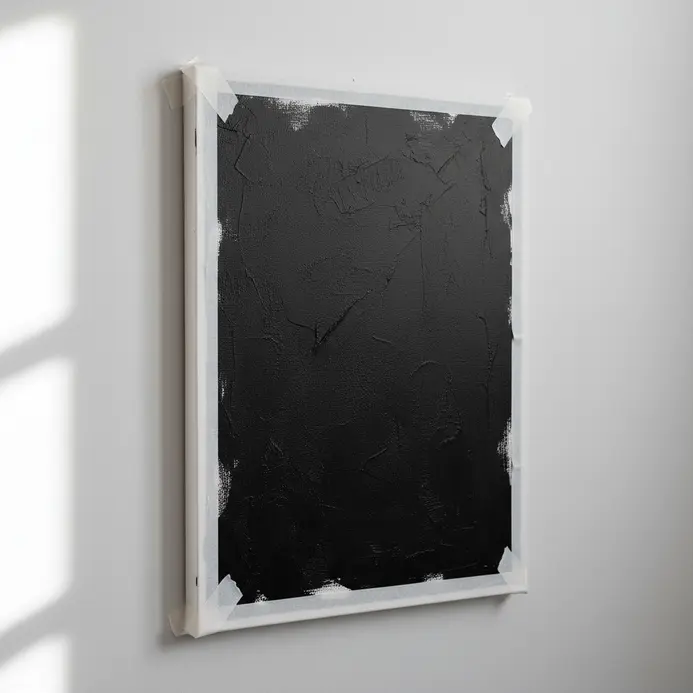
Ever wonder how to get those super crisp edges while preparing an easy acrylic galaxy painting for beginners? It is all about a clean start with masking tape. I always press the tape down firmly with a credit card along the edge where my paint will go. This creates a perfect seal to stop the acrylics from bleeding under. It works because a tight seal gives you control over your borders, letting you focus on the fun nebula swirls later. For your next project, check out these easy acrylic painting ideas to build your skills.
2. Cover the Canvas with a Solid Black Base: Lay the Foundation for Space
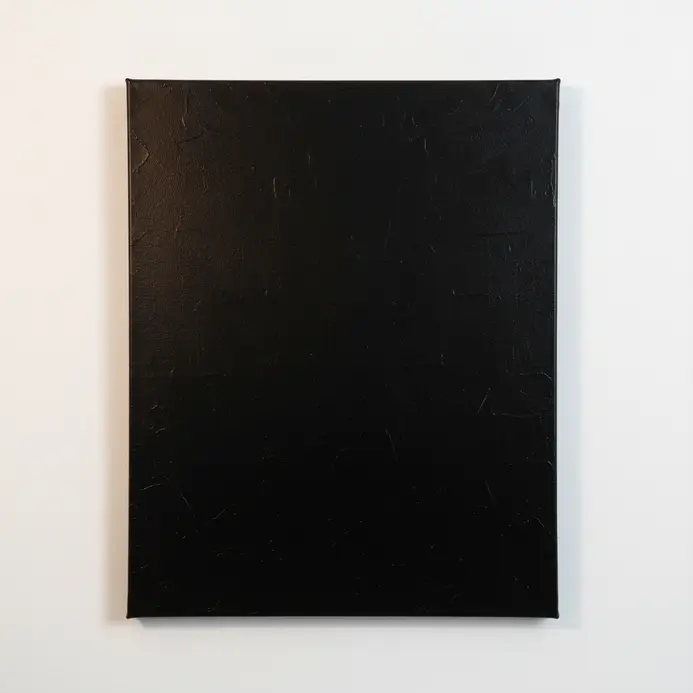
Ever feel a little intimidated by a blank white canvas while attempting an easy acrylic galaxy painting for beginners? Trust me, this first step is your best friend. You will start by creating a new layer precisely for your background. Grab your paint bucket tool, set the color to pure black, and fill that section completely. It feels simple, but this dark void is what makes all your future stars and colors pop with incredible contrast. I love how it instantly creates that feeling of deep, endless space. See how dramatic it looks already? That is your perfect foundation.
3. Apply Dark Blue Layers Over the Black Background
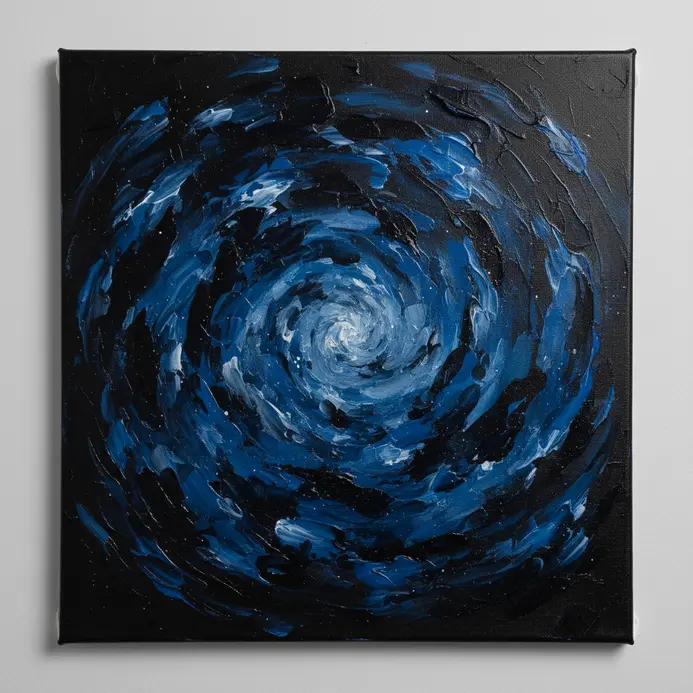
This step is where the magic begins to form. See how that pure black feels a bit flat once you start your easy acrylic galaxy painting for beginners? I love watching a night sky get its first hint of atmosphere. You will take your brush and start applying dark blue acrylic paint right over the dried black. Do not cover it completely. Let the black peek through in patches, creating a sense of incredible depth.
Trust me, this layered look is what makes space feel endless, not a flat wall of color. It works because the black acts as a deep shadow, making your blues look richer and more mysterious. For a smooth transition into other cosmic subjects, you might enjoy exploring easy still life paintings next. Does that not start to look like a real night sky?
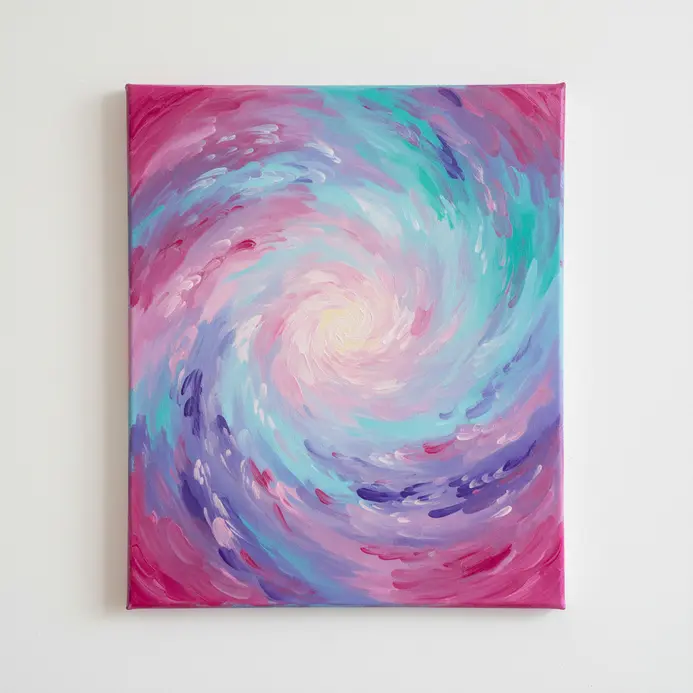
4. Blend Violet Hues into Blue Patches: Add Depth to Your Galaxy
Ever notice how flat a solid blue area can look? This simple blend is your secret weapon for cosmic depth. Start with your base blue shapes, then introduce a violet hue into the edges and centers of those patches. Use a soft, fluffy brush and work the colors together with light, circular strokes to create a gentle, glowing transition.
This works because blue and violet are neighbors on the color wheel, so they blend beautifully to mimic the layered gases of a real nebula. It adds luminosity and realism to your composition. easy things to draw.
5. Allow the Background Layer to Dry Completely
I know the excitement to keep painting feels intense, but patience matters here. Allowing the background layer to dry completely guarantees success for your easy acrylic galaxy painting for beginners. Acrylics might feel dry in minutes, but a thicker application needs longer.
Humidity slows things down, so if your room feels damp, expect to wait a bit. Gently test a corner with your knuckle – no tackiness means you are good to go. This patience keeps your white stars bright and prevents colors from bleeding together. Trust me, that crisp separation is what makes a painting pop with depth.
6. Mix Nebula Colors on Your Paint Palette: Prepare for Vibrancy
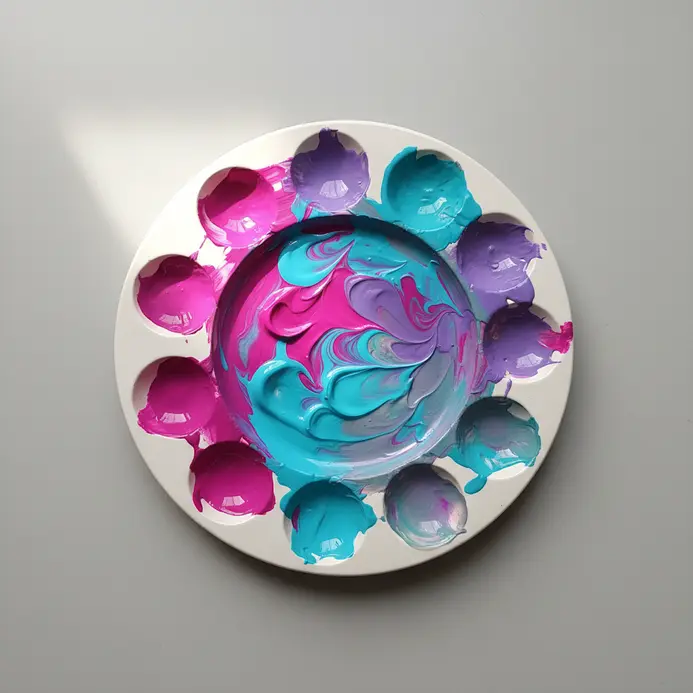
Ever stared at a photo of a nebula and wondered how to capture those glowing hues? This step is where the color mixing happens. Instead of using random shades, mix Dioxazine Purple with Ultramarine Blue to create rich, cosmic depths. I always add a glazing medium to keep the colors luminous and build up smooth layers. This works because it mimics how light filters through gas and dust in space. Remember, nebulae get their vibrant reds from hydrogen and ethereal blues from oxygen. Avoid pure black; mix deep blues with a touch of brown for richer darks. Trust me, preparing a generous palette prevents mid-painting panic and lets you focus on the fun. abstract painting ideas for beginners and feel the joy of painting.
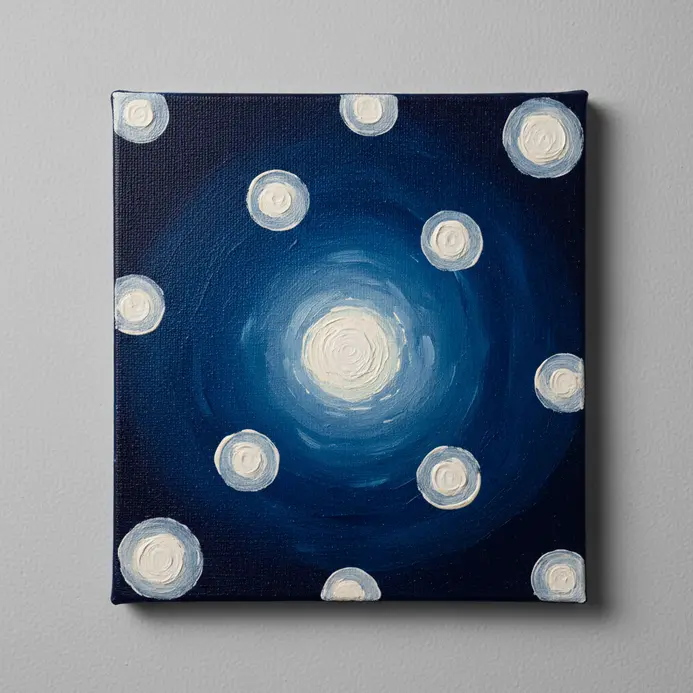
7. Stipple Magenta Paint in a Circular Center
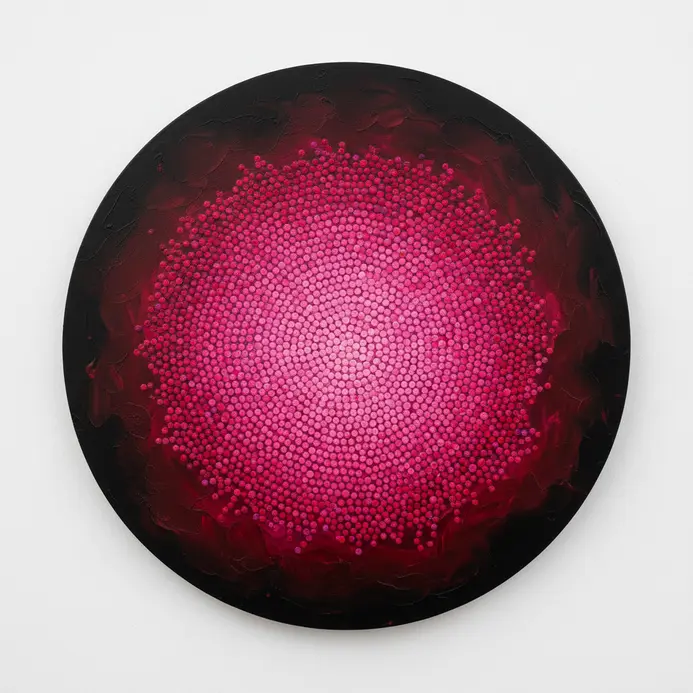
Ever wondered how artists get that perfect starry texture on canvas? It is simpler than you might expect. You will use a vibrant magenta paint and apply it as tiny, individual dots within a defined circle for an easy acrylic galaxy painting for beginners.
Start with a light hand and create a denser cluster of dots in the very center. Then, let the dots become more sparse as you move towards the circle’s edge for a soft, blended look. This variation in density gives your artwork real depth and a magical feel.
Try this on a small scale first to get the hang of it. You will find it is a fantastic way to add intricate detail without needing perfect brush control. For a great starting point, check out these easy mini canvas painting ideas.
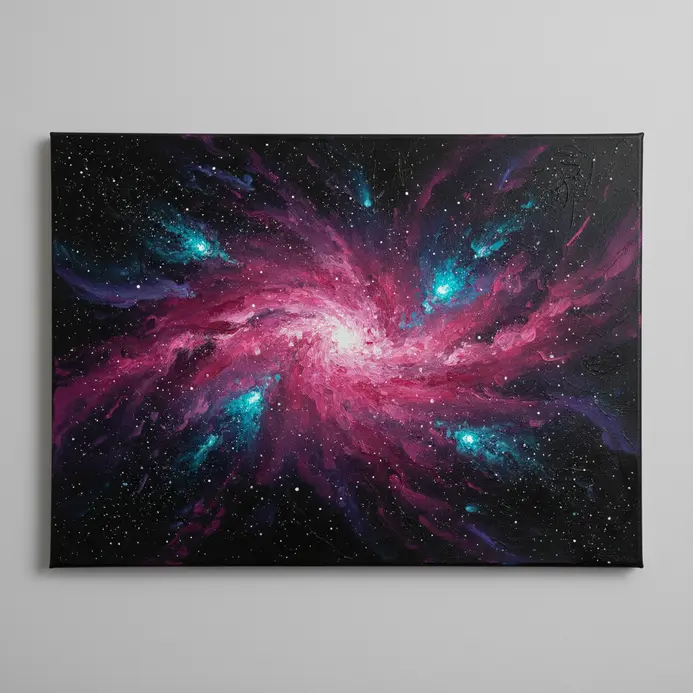
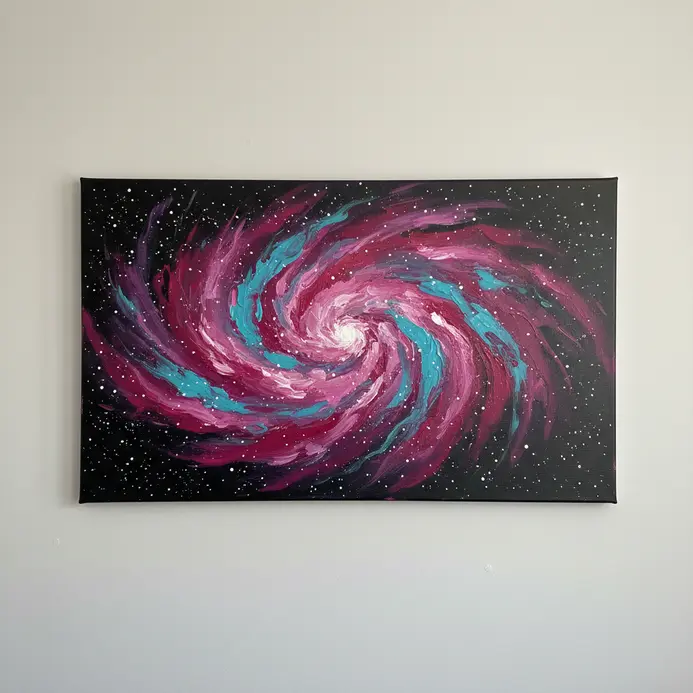
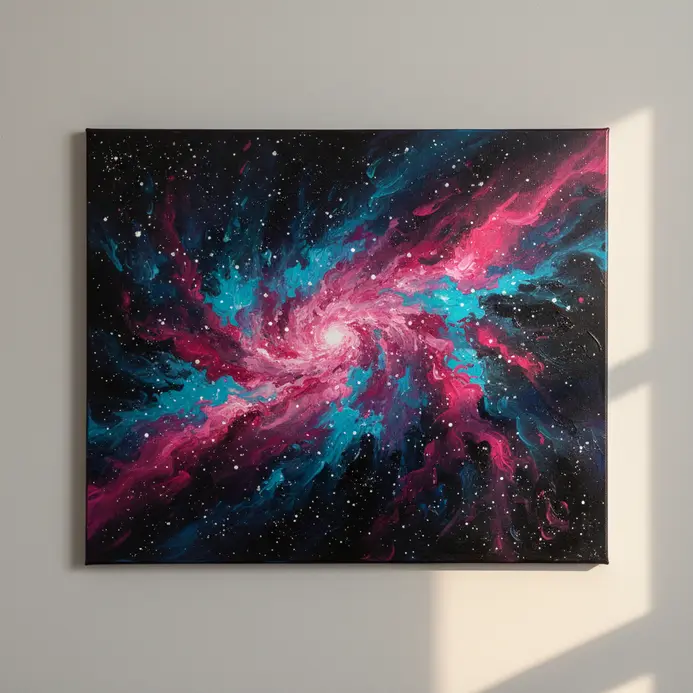
8. Layer Turquoise Around the Magenta Nebula Core: Build Color Contrast
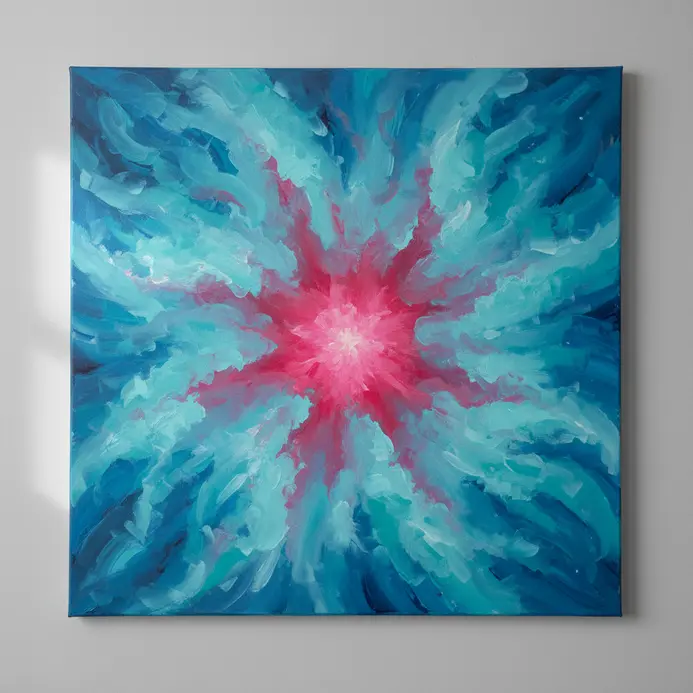
Ever tried to make a color pop on the canvas? This technique shows you exactly how. Once your magenta core glows, pick up a soft brush and load it with a mid-tone turquoise. Start with a semi-transparent application just outside the magenta, creating a feathered aura that lets pink glow through. Swirl that turquoise outward in loose, wispy tendrils, adding darker shades as you go to build depth.
Why does this work so well? The cool turquoise and warm magenta create a vibrant temperature contrast that feels alive. I love watching the nebula suddenly gain dimension. Your key is to avoid harsh lines. Keep everything soft and blended, and watch your scene take shape.
9. Softly Blend the Edges of Nebula Colors
Ever wondered how those dreamy cosmic clouds achieve their soft, glowing look? The secret rests entirely in the blending phase. After laying down your distinct color zones during an easy acrylic galaxy painting for beginners, grab a soft airbrush with low opacity. Gently paint over the boundaries using small circular motions to build seamless gradients. This creates the natural diffusion of gas and dust you see in real space photographs.
I love this step because it turns harsh color blocks into something ethereal and full of depth. celestial painting inspirations. Your nebula will feel alive and magical once finished.
10. Dry Brush White Paint for a Soft Glow Effect
Ever wondered how those miniature stars get their subtle shimmer? The secret is using a dry brush technique. You dip the tip of a stiff brush into white paint, then wipe almost all of it off on a paper towel until the brush feels nearly dry. Then, you skim it lightly over your highest points where light would naturally hit. It creates a broken layer of pigment that catches the light beautifully.
I love this step because it adds instant depth without covering up your beautiful colors underneath. It makes your whole painting feel alive. For more ways to build your skills with different mediums, try some easy oil painting for beginners. Isn’t that glow effect stunning?
11. Dilute White Paint with a Little Water

Ever wondered how artists create that soft, misty look for cosmic clouds? This little trick helps build atmospheric effects. You simply add drops of water to your white acrylic paint on your palette. Mix it until it has a slightly runny, milky consistency. This thinned paint glides smoothly, letting you build up translucent layers of distant stars.
Why does this work so well? It gives you control over opacity. You can create everything from a faint, wispy haze to a brighter cluster of stars by adjusting how many layers you apply. Trust me, turning a flat dot into a glowing element changes everything. Try it and watch your deep space scene come alive.
12. Splatter the White Mixture for Distant Stars: Create Kinetic Energy
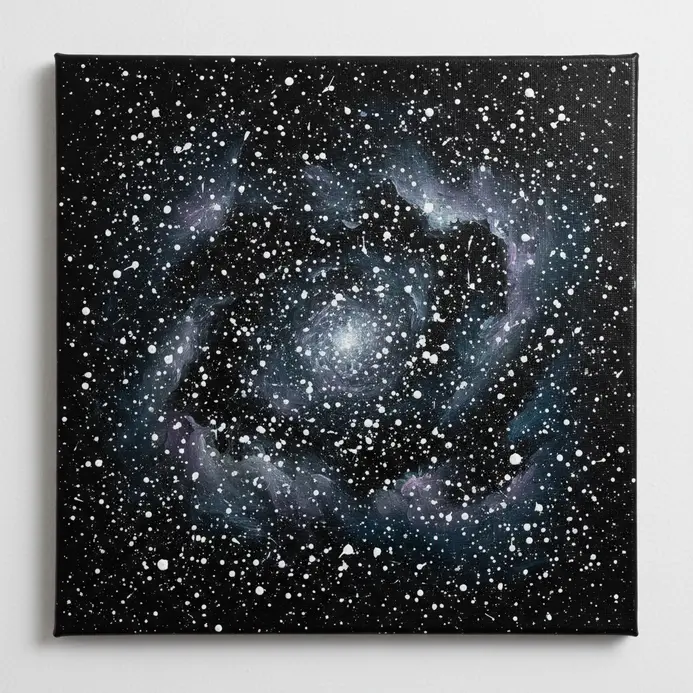
Ever wondered how artists make tiny, random stars look natural on a large canvas? This step lets you embrace messy, creative fun. I love splattering techniques during an easy acrylic galaxy painting for beginners because the results feel spontaneous. You will create a white paint mixture thinned to heavy cream and flick it onto your canvas.
You can use an old toothbrush or tap a loaded brush against another to create a mist of fine dots. This works because the kinetic energy from your flicking motion mimics the random distribution of stars in space. For a great way to practice loose techniques, check out beginner landscape painting techniques. Seeing those little white specks appear feels magical.
13. Twist Your Brush to Paint Larger Stars
Ever felt like your stars look too small and uniform across the board? The fix is simpler than you might assume. Instead of dabbing your brush, try a deliberate twisting motion as you press down. Load your brush with white paint, press it onto the canvas, and rotate your wrist slightly before lifting. This action pushes more paint out and creates a beautiful, irregular burst shape.
I love this technique because it adds instant dynamism and scale. Those textured clusters become bright focal points in your deep space scene. It is all about building on your basic dotting skills. Give it a try and feel how much more dramatic your cosmos becomes.
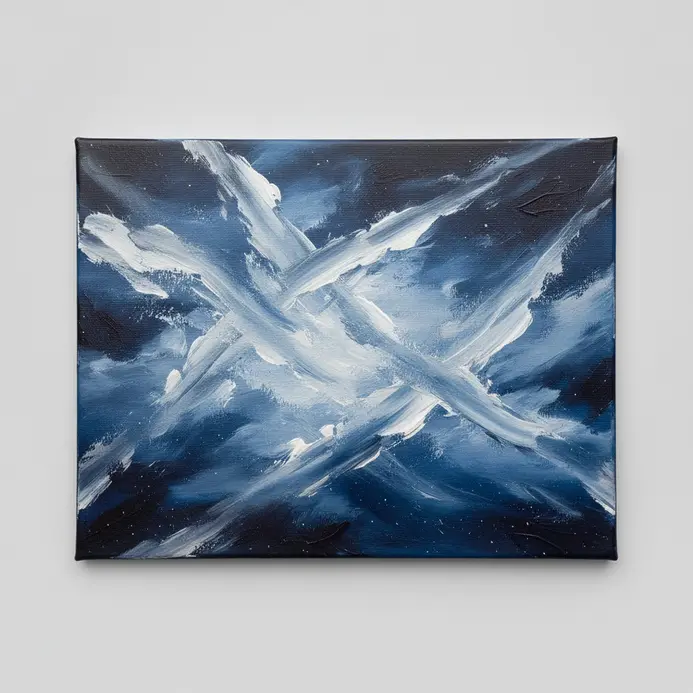
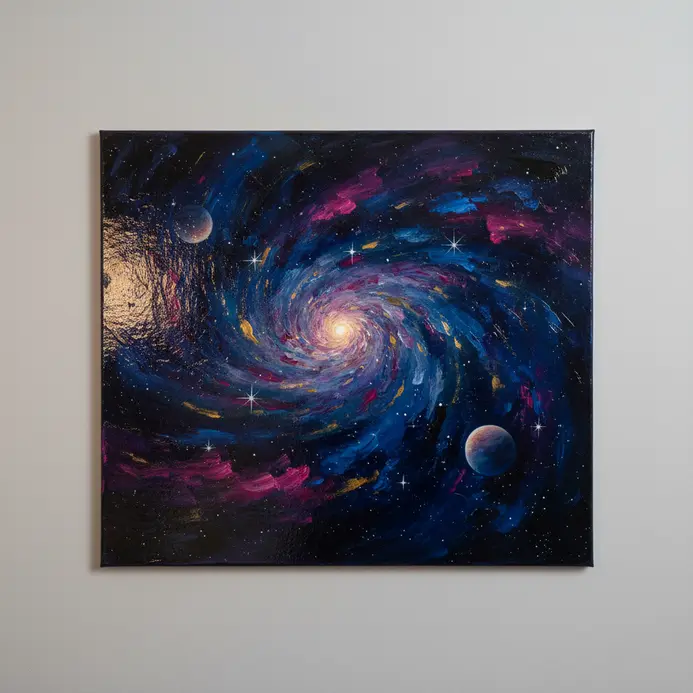
14. Paint a Thin Crescent Moon with White: Add a Celestial Detail
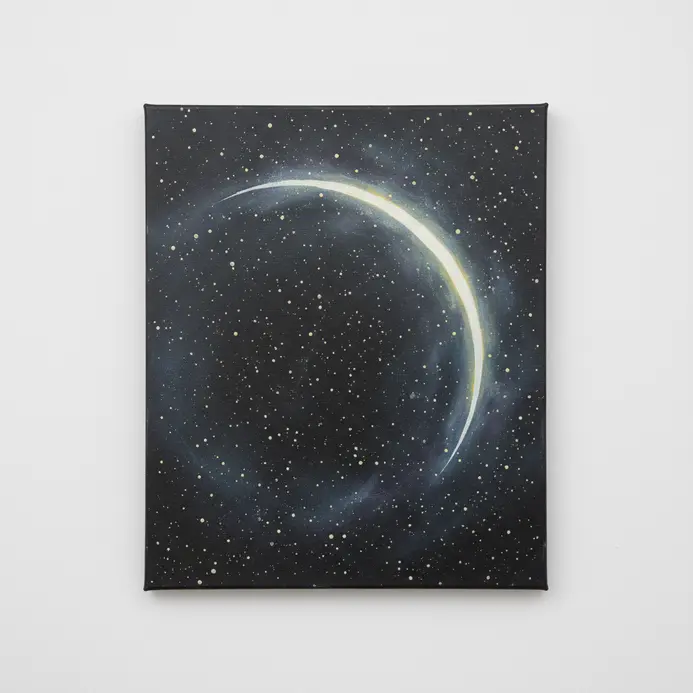
Who would have thought a simple curve could add visual interest to your sky? I love this step because it gives your work a recognizable focal point. The trick is to think of it as part of a hidden circle. Use your fine liner brush to paint two parallel curves, then connect the tips to form the horns.
This works because the shape creates beautiful contrast against the deep space colors. easy things to paint. Feel the satisfaction of placing that perfect detail.
15. Detail Tiny Constellations with a Fine Liner
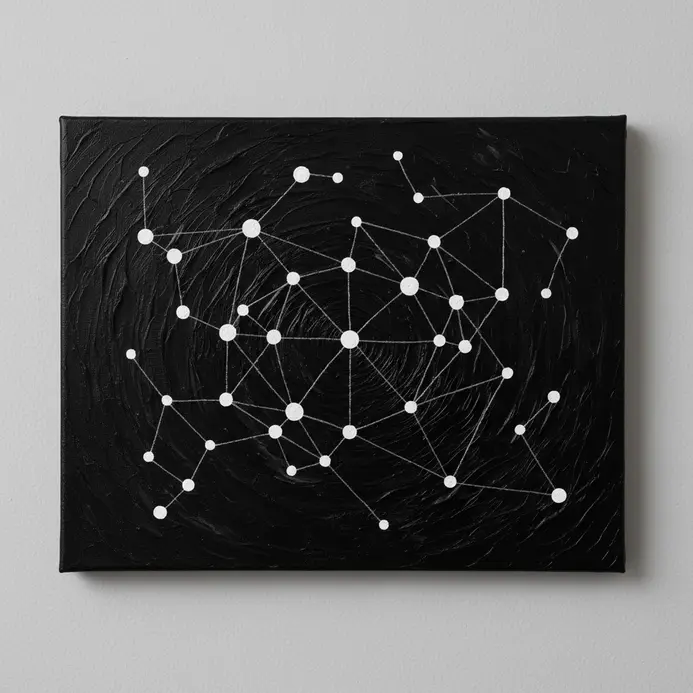
Ever wondered how precise star patterns form inside a finished canvas piece? This phase transforms loose color swirls into a recognizable night sky. Mapping out constellations gives your easy acrylic galaxy painting for beginners an authentic, scientific feel. You will use a fine liner pen to create delicate dots and connect them into groups.
Start with a light pencil sketch to mark your main stars, then use the pen’s tiny tip to dot them in. Vary your pressure for bright and faint points, and use a star chart app for guidance. It is satisfying when dots suddenly form recognizable patterns overhead!
16. Add a Glowing Halo Around Large Stars: Enhance Luminosity
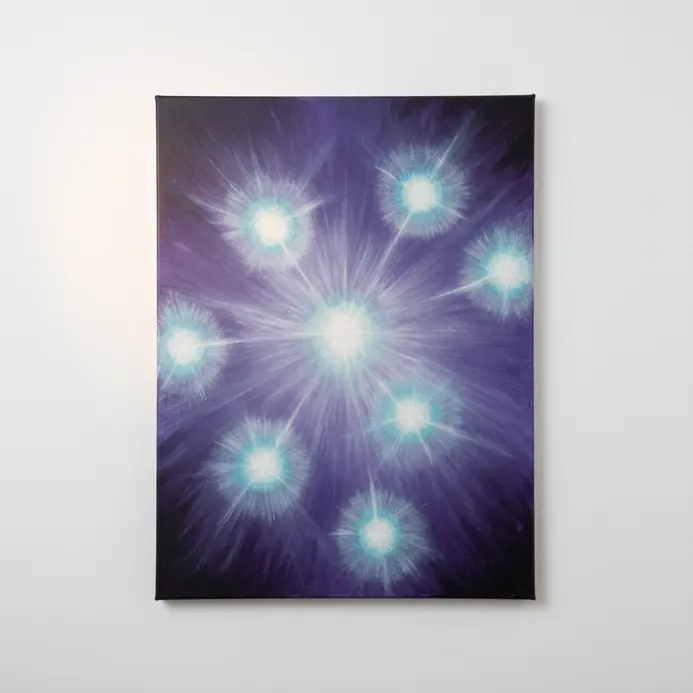
Ever feel like your biggest stars sit flat instead of shining brightly? This adjustment makes them look dynamic and energetic. The goal creates a soft, diffused glow radiating from the core, avoiding harsh outlines. I often use a slightly larger, blurred version of the star as my base layer.
Try building up the glow with multiple translucent layers to create a realistic sense of depth. That luminous effect is what makes a shape look truly radiant. For the best results, set that halo layer to a Screen blend mode. This makes it interact with your background like actual light, adding brightness without muddying your colors. Does that not look stunning?
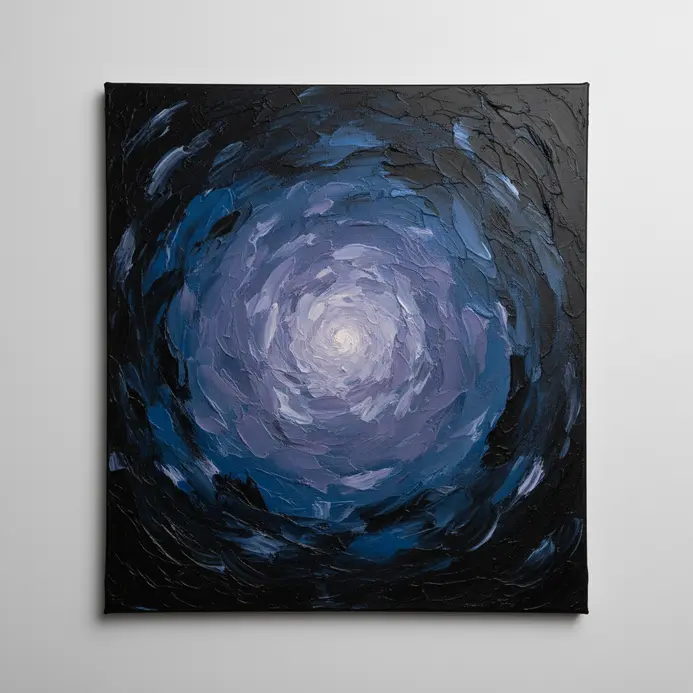
17. Outline Nebula Clouds with Light Blue
Ever wondered how soft, glowing clouds look deep and airy on canvas? The answer rests in strategic light blue outlining. I prefer tracing nebula edges with a soft baby blue shade to generate internal illumination. This creates an internal glow that makes the gas look lit from within.
Think of it like tracing cloud boundaries with a faint, cool light. Blend the outline gently inward, letting it fade naturally into surrounding dark areas. This simple step builds incredible depth and makes your scene feel vast. For your next practice session, check out small painting ideas for beginners. Feel that cosmic magic come to life.
18. Deepen Shadow Corners with a Black Wash: Increase Dramatic Contrast
Ever wondered how bright stars look incredibly luminous against a dark background? Artists often rely on strategic shadow placement. A black wash serves as a thin, translucent layer for the darkest corners of your easy acrylic galaxy painting for beginners. Mix a small amount of black paint with water, then softly brush it far from your light source.
I love this trick because it makes your illuminated colors pop forward while the dark corners visually recede, creating amazing depth. This method builds mood and corrects flat spots. For more beginner-friendly projects, explore easy acrylic painting ideas.
19. Verify Color Balance Across the Canvas Surface
Ever step back from your artwork and notice one area feels slightly off? This verification stage guarantees a harmonious final result. It means checking that your purples, blues, and blacks remain consistent everywhere on the canvas, preventing unwanted tints from sneaking in. I complete this inspection under consistent lighting to trust my visual perception. It makes your entire scene feel unified with your original vision, and that final look feels incredibly rewarding.
20. Correct Edges with Black Touchup Paint: Refine Your Composition
This minor adjustment might seem unimportant, yet it transforms the entire look. After all your blending and splattering, inspect the borders closely. Look for tiny white gaps or fuzzy spots that disrupt clean lines.
Grab a fine-tipped permanent marker or a tiny brush with black paint to trace carefully along those boundaries. This defines everything and hides small mistakes instantly. It works because our eyes are drawn to clean, sharp boundaries. For a similar sense of deliberate composition, explore easy still life paintings. Go slowly, use good light, and enjoy a truly finished piece.
21. Remove Masking Tape for a Clean Border
You waited patiently for your paint to dry, and now arrives the exciting moment. Pulling off that masking tape feels satisfying when executed correctly. The entire process depends on precise timing and proper angle.
Remove the material while your surface is dry to the touch but not fully hardened. Then, pull back slowly at a sharp forty-five-degree angle away from your painted section. This shearing action gives you perfect, sharp lines. Leaving tape too long causes messy edges, so timing matters. I love this final step because it instantly makes your work look polished. easy things to draw. Feel that pride when your crisp border is revealed.
22. Examine Your Painting Under Natural Lighting: Assess True Colors
Ever step back from your painting, only to find the colors shift in artificial light? I check my work under natural daylight. It is the only illumination that shows your pigments as they truly appear, revealing if your blues look too green or your purples lean red.
Take your canvas to an area with indirect light, like near a north-facing window. Direct sun is too harsh and tricks your eyes. This simple check helps you see the overall contrast and values clearly. Try it now and feel confident your piece will look amazing anywhere.
23. Apply Clear Varnish for a Protective Finish
You put hours into your cosmic scene, and this final step guarantees longevity. The trick is picking the right acrylic varnish. I always choose a water-based formula because it dries clear and prevents yellowing over time. Apply it in thin, even strokes with a soft brush after your work cures fully.
This creates a hard shield against dust, moisture, and sunlight exposure. abstract painting ideas for beginners. Feel proud knowing your art stays protected.
24. Sign Your Art in the Bottom Corner Area: Claim Your Creation

You poured your heart into your masterpiece, so add a final personal touch. That signature serves as your official stamp and a proud declaration of authorship. I love this part because it feels like sealing a letter to the universe.
Grab a fine-tipped brush or a permanent art marker in a contrasting shade against your dark background. Inscribe your name clearly in the bottom right corner, keeping it subtle. This simple act transforms your project into genuine artwork with provenance and authenticity. It creates a lasting record of your artistic journey. Feel that pride as you claim your creation. For your next project, you might try these techniques on an easy mini canvas painting.
25. Prepare a Display Area for Your Final Artwork
Ever notice how some canvases look significantly more vibrant in certain rooms? Proper placement elevates your entire presentation before the frame touches the wall. Think of your selected spot as the ideal stage for a finished easy acrylic galaxy painting for beginners.
Start by choosing a location with soft, consistent light, avoiding direct sun exposure. A neutral-colored wall allows your cosmic hues to shine without competition. I always wipe the surface with a soft microfiber cloth to remove dust before hanging. This simple prep work makes your piece look professionally presented, turning it into a true focal point.
Sealing Finished Cosmic Artworks For Long Term Preservation
Applying a final matte varnish layer protects your hard work from dust and UV exposure. Spray applications work beautifully because they distribute mist evenly without disturbing delicate paint layers or blurring tiny stars. Make sure your work is completely dry before you start, ideally waiting twenty-four hours.
Work in a ventilated space and apply two light coats from a foot away, letting each dry fully. This seals in the contrast between your dark background and bright nebulas, locking vibrant hues in your easy acrylic galaxy painting for beginners. It takes two minutes but protects weeks of creative effort.
Conclusion
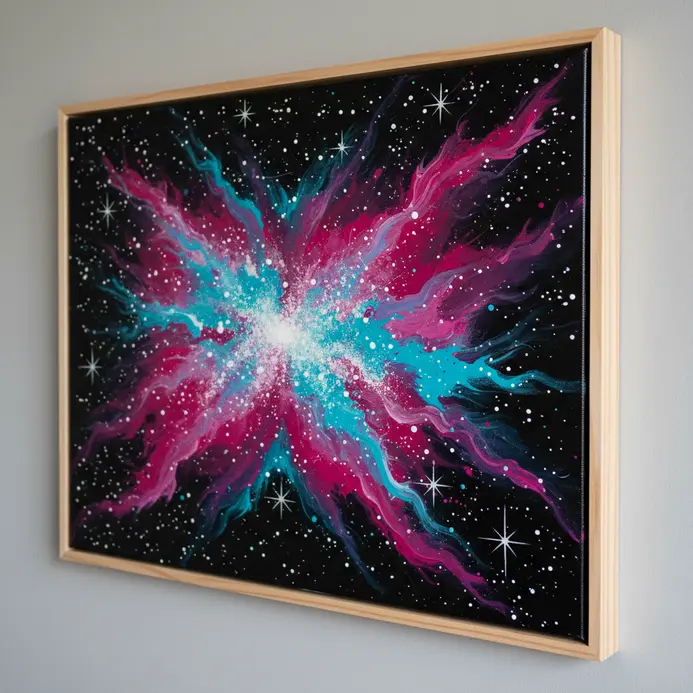
Completing your easy acrylic galaxy painting for beginners feels like a genuine creative victory. You transformed basic supplies into a window toward distant stars, capturing both depth and cosmic light. Your finished work holds atmospheric layers and scattered starlight, proving your patience paid off.
As you appreciate your canvas, remember each painted stroke reflects your growing confidence. Try experimenting with new color pairings or adding planetary shapes to your next attempt. Keep exploring the creative process, because every session teaches you something new. Your artistic journey begins now, and the cosmos offers endless inspiration.
FAQs
Q: What type of acrylic paint is best for galaxy paintings?
A: Artist-grade heavy-body acrylics provide intense saturation and blend smoothly across the surface. Student-grade paints function similarly but require additional applications. Starting with deep pigments ensures accurate cosmic shading.
Q: How do I prevent my colors from turning muddy when blending?
A: Work quickly while the paint remains wet, using gentle circular motions. Allow underlying sections to partially set before introducing new shades. Switching to a clean brush between color families prevents unwanted gray tones.
Q: What is the best way to create realistic stars?
A: Thinning white acrylic paint with water and flicking it using a stiff toothbrush yields naturally distributed specks. Practicing on scrap material first controls splatter size. Layering larger brushed dots afterward adds visual hierarchy.
Q: Can I use a different color for the background?
A: Deep indigo, charcoal gray, or navy blue provide striking alternatives to pure black. Maintaining sufficient darkness ensures nebula highlights remain visible. Testing your base coat on a small canvas confirms color harmony before full application.
Q: How should I varnish my finished painting?
A: Brush or spray a clear acrylic sealant once the surface fully cures. Applying thin, even layers prevents cracking or pooling. A proper finish preserves pigment vibrancy and shields against environmental wear.


