


What You Will Need
You need a simple pencil, an eraser, and some white paper. A standard HB pencil works well for light guide lines. You might also like a ruler for straight lines at the start, a black pen for final outlines, and colored pencils for adding color later. None of these supplies need to be expensive. You likely have everything you need to begin How to Draw a Flower.
How to Use This Step-by-Step Tutorial
Follow each step in order, as they build upon the previous one. Sketch your initial guide shapes lightly, as you will erase them later to reveal your final drawing. Slight imperfections in these early stages are normal. This construction method means your flower will grow more recognizable with every step, and it keeps How to Draw a Flower simple to follow.
1. Sketch the Central Circle to Anchor Your Flower’s Core
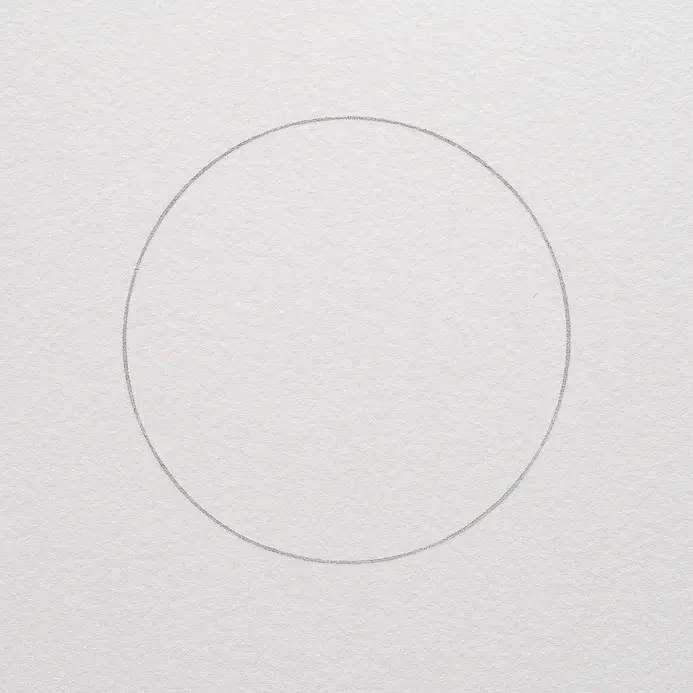
This first circle is your flower’s command center. It determines the size of every petal and leaf you’ll draw next, so getting it right sets you up for success. When you study How to Draw a Flower, this center mark becomes the anchor for the rest of the sketch. Take a sharp HB pencil and apply the lightest pressure you can. Pivot from your elbow, not your wrist, and make two or three light, overlapping arcs to form a loose circle in the center of your paper. Think of this as a whisper on the page, not a permanent outline. Leave more space on one side of the circle to plan for the direction your petals will flow. Ghost the motion in the air a few times before your pencil touches the paper. This builds muscle memory for a smooth, confident line and prevents the shaky circles that come from drawing with just your fingers, making it an easy step-by-step process.
2. Radiating Guidelines: The Secret to Perfect Petal Placement

Let’s move from the center circle to the framework that will give your flower its perfect shape. This step is all about creating the invisible structure that ensures every petal sits exactly where it should. In How to Draw a Flower, these light guides keep the bloom balanced without making the page feel crowded. With a sharp pencil, draw four very light lines radiating from the center point you established. Think of a clock face and sketch lines toward 12, 3, 6, and 9 o’clock. These are your primary spokes. Now, add four more lines between them, so you have eight evenly spaced guidelines coming from the center like the sun’s rays. Keep this sketch so faint you can barely see it. Use a ruler for the straight lines if you want precision, but a slightly wobbly, hand-drawn line often looks more natural in the final drawing. The goal is a guide, not a prison, allowing for artistic freedom in your perspective.
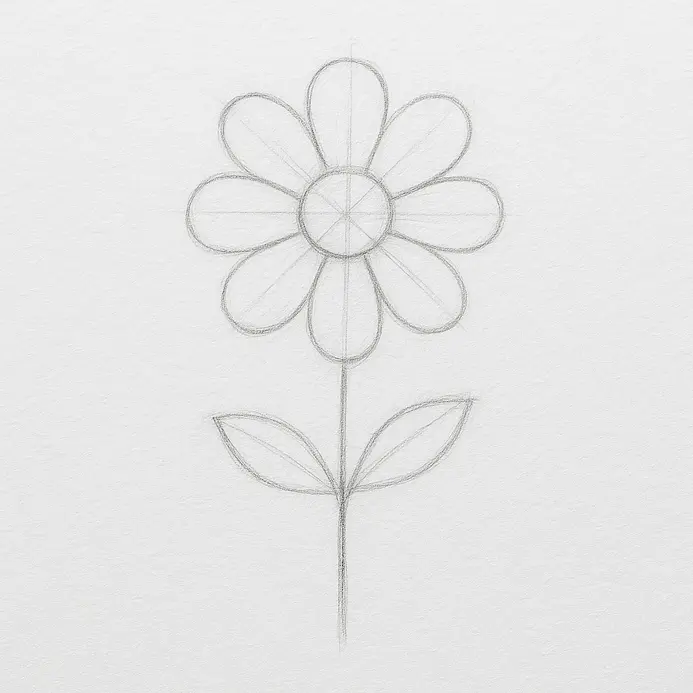
3. How Do You Shape Each Petal? Start with Ovals and Teardrops
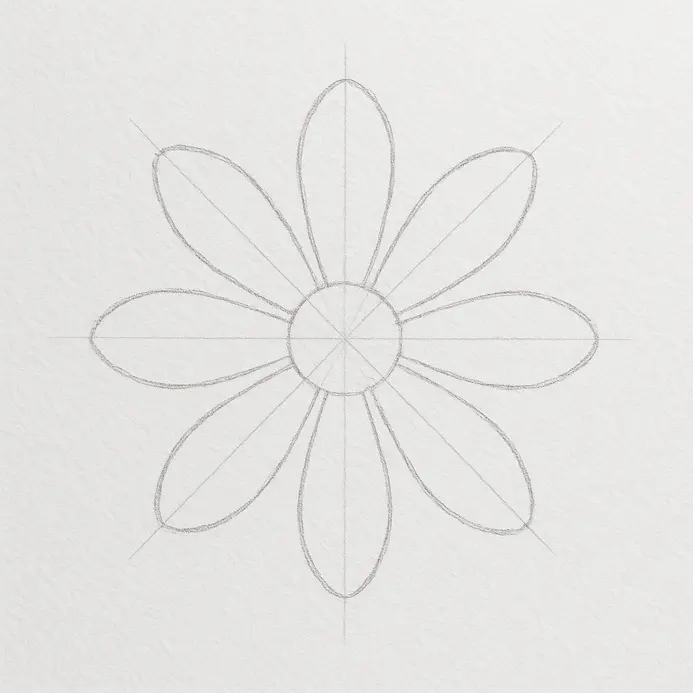
This step is where your flower drawing gets its volume and personality. Instead of drawing a flat outline, we use simple foundation shapes to build petals that look three-dimensional. If you are learning How to Draw a Flower for the first time, this shape-first method keeps the process easy to control. Let’s begin with the oval technique for broad, rounded petals like on a rose or daisy. With a light pencil touch, sketch a simple oval where you want the petal. This oval is your guide for the petal’s overall mass and direction. Now, draw your final, darker petal outline so it hugs this oval. Your final line might make one end a bit pointier or add a gentle wave, but the oval ensures the petal keeps its full, rounded form. For elegant, tapered petals like on a lily, switch to the teardrop technique. Lightly draw a teardrop shape, usually with the rounded end at the flower’s center. Your final outline follows this graceful curve, softening the point into a delicate tip. Remember, these light construction lines are just for you to sculpt around, so keep that pressure gentle. A common mistake is skipping this foundation step, which leads to flat, inconsistent petals. Drawing the shape first guarantees every petal has believable volume before you add any details.
4. The Stem and Leaves: Building a Strong Botanical Foundation
Now we give our flower the strong foundation it needs to stand tall and support its bloom. In this step, you’ll sketch the stem and its primary leaves, establishing the structure that makes your drawing look alive and rooted. How to Draw a Flower becomes more convincing when the stem and leaves feel anchored to the bloom, especially in a sunflower. Start by drawing a single, slightly curved line extending down from the base of your flower’s center. This is your main stem. Keep your pencil pressure light to allow for adjustments. About halfway down this line, on one side, sketch a small, angled line branching off. This is the start of a leaf’s stem, called the petiole. From the end of this small line, draw the basic leaf shape. Think of a long, soft teardrop or oval with a pointed tip. Connect this shape back to the small branch line to complete the leaf’s outline, creating a cute composition. Repeat this process on the opposite side of the main stem, varying the angle and size of the leaf for a natural look. A common mistake is drawing leaves that look glued flat to the stem. To avoid this, make sure your small branch lines angle away from the main stem before you draw the leaf shape. This creates the realistic, dimensional attachment you see in real plants, especially in a sunflower.
5. Refine Geometric Shapes into Flowing, Organic Petal Forms
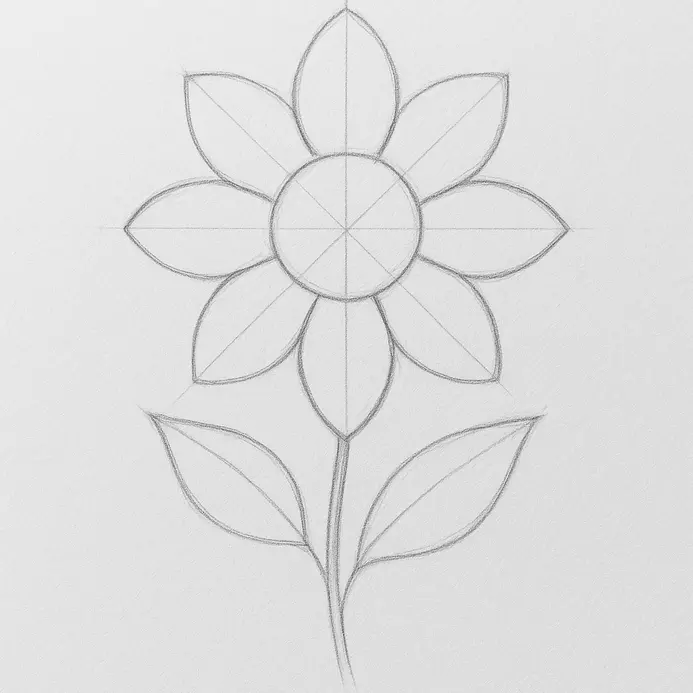
Alright, so you have those basic geometric shapes sketched out; now let’s add some perspective to enhance your art. Great start. Now, let us transform them into flowing, organic petals that look alive. This refinement step is crucial because it turns stiff outlines into soft, natural forms, and it is a core part of learning How to Draw a Flower. Take your light sketch of a teardrop or wedge, and with a fresh stroke, redraw the silhouette. Use your whole arm to make a confident curve, and do not be afraid to deviate from the original lines. Introduce asymmetry by making one side of the petal slightly different. Add subtle waves or nicks along the edges, and vary your pencil pressure heavier at the base for structure and lighter at the tip for delicacy. Sketch in light flow lines to show surface movement, then gently erase the initial geometric guides. Watch out for making both sides identical. Real petals are imperfect, so those slight variations make your drawing believable and beautiful.
6. Texture Details That Bring Your Flower Center to Life
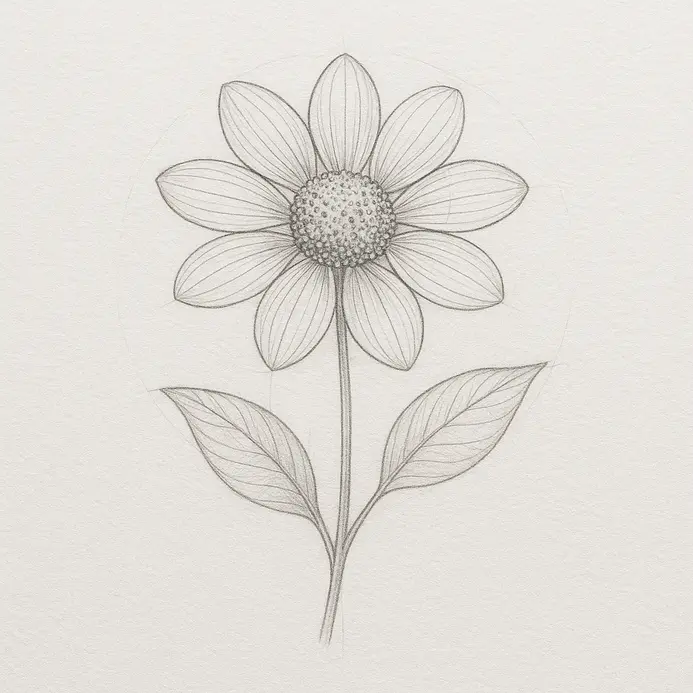
Detailed pencil work showing textured dots in the flower center and delicate vein lines on the petals. Now that your flower petals are sketched, let’s zoom in on the cute center. Adding texture here is what transforms a simple shape into a believable bloom, and it’s a fun part of learning How to Draw a Flower. Fine surface marks also help the center stand out from the smoother petal shapes. Start by choosing your texture approach. For a fuzzy center, stippling is your best friend—use a mechanical pencil to dot countless tiny marks, varying pressure for light and shadow. If you’re aiming for a granular look, sketch thin stamens first, then add fine dots along them to mimic pollen. For spiky textures, like on a thistle, draw short, radiating lines from the center using hatching. Always build these textures gradually, layering dots or lines to create depth without overworking the area. Connect each mark to your light source by adding more density on the shadowed side. Keep your texture elements proportional to the flower size. Tiny dots for small centers, slightly larger for bigger ones, and always vary the spacing to avoid a flat, artificial appearance.
7. Ready for Final Lines? Draw with Confident, Varied Strokes

Alright, we’ve got our light sketch ready, and now it’s time for the exciting part—laying down those final, confident lines. This step transforms your flower drawing from a plan into a lively piece with real character. In learning How to Draw a Flower, this phase is where you inject movement and depth, making all the difference. Let’s get started with our favorite drawing project. Begin with the petal edges. Draw long, flowing lines from your shoulder, following each curve from base to tip in one fluid motion. Vary your pressure within the stroke—press harder at the base or where petals overlap, and lighten up towards the tips to create volume. For stems, use a single, decisive contour line with a slight taper. Add delicate details like leaf veins with quick, flicking strokes that start thick and end fine. Use broken lines for soft edges or background elements, and remember to rotate your paper for the most comfortable angle while drawing flowers. Keep this in mind: A confident line with a little imperfection has more life than a hesitant, overworked one. So, commit to your strokes and resist the urge to erase and redraw constantly.
8. Inking and Cleaning: The Step That Makes Your Drawing Pop
Now we transform your light pencil sketch into a bold, finished piece. This stage is where your flower drawing gains its professional polish and visual impact. We turn those tentative lines into confident, permanent marks, and How to Draw a Flower starts to feel complete at this stage. Grab your inking tool. Starting at the top of your drawing, trace over the main outline of your flower petals. Use smooth, continuous strokes, following the pencil lines you carefully laid down earlier. Apply slightly more pressure on the lines facing away from your imaginary light source to make them thicker. This line weight variation instantly creates depth, making your petals look rounded and real in your art. Move systematically to avoid smearing the wet ink. Work from left to right if you are right-handed, carefully defining each stem and leaf. Connect all your shapes with clean, decisive lines. Let the ink dry completely before you even think about the next step. Once the ink is dry, take a kneaded eraser and gently lift away all the pencil sketch lines underneath. You are left with a crisp, clean ink drawing that is ready to scan or display. The contrast is what makes it pop off the page.
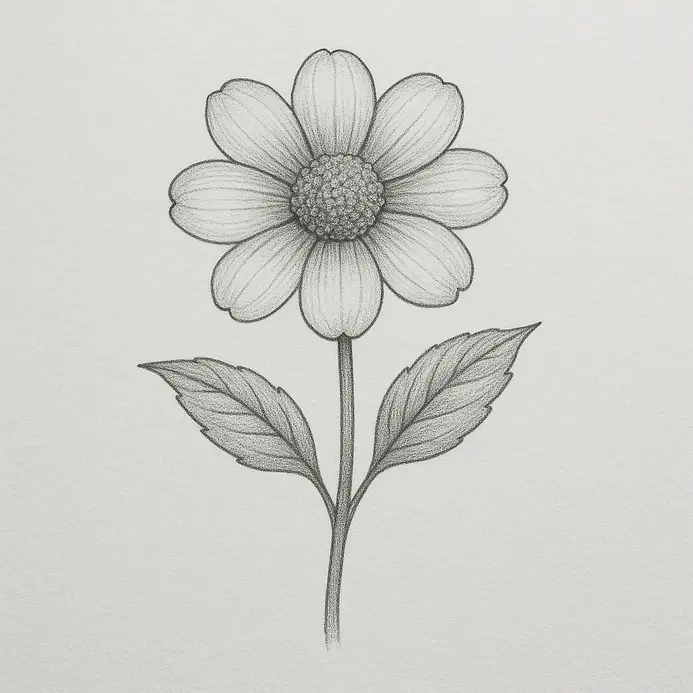
9. Shade Following Petal Curves to Add Depth and Dimension

This is where your flat sketch starts to pop off the page, transforming into a vibrant art piece. We’re going to make those petals feel soft, rounded, and three-dimensional by using light and shadow. It is all about convincing the eye that the paper has depth, and How to Draw a Flower improves quickly once shading follows the form. First, decide where your light is coming from and stick with it. I like a top-left source for a natural look. Now, look at your petal outline. The area most directly facing your imaginary light stays clean—that’s your highlight. Using a 2B pencil and very light pressure, start shading the area opposite the light, letting your pencil strokes follow the curve of the petal. Your strokes should curve, not go straight across. Build up darkness gradually as the surface turns away from the light, creating a soft gradient from light to dark. The magic touch is adding a sliver of reflected light right along the darkest edge. Lightly erase or avoid shading a thin line there. This subtle bounce of light makes the petal look rounded instead of flat. Avoid the common mistake of shading everything evenly. Let the pencil do the work of describing the form.
10. Apply Color with Layered Techniques for a Vibrant Finish

Now we build the color and life into our flower drawing. This step transforms your line work into a vibrant, dimensional piece. We are going to apply color in thin, transparent layers to create depth that a single flat color simply cannot achieve, and How to Draw a Flower reaches its final stage here. Start by lightly applying your lightest base colors to the petals, leaves, and stem. Use a colored pencil with a very light touch or a marker with a quick, feathery stroke. Let’s keep this first layer loose and avoid filling the shapes completely solid. The goal is to establish where the main colors live while letting the white of the paper show through in spots for natural highlights. Why does this work so well? Layering color creates optical mixing, where your eye blends the separate layers into a richer, more complex hue than any single pencil could provide. It is the key to making your flower look real and lively. For your next layer, take a slightly darker or more saturated version of the same color. Apply it only to the areas where you want more depth, like the base of a petal or the side of a stem facing away from your light source. Use the side of your pencil point for smooth coverage. Multiple thin layers always beat one thick, waxy layer that flattens your drawing.
Tips to Improve Your Drawing
Try drawing the flower a second time from memory after you finish the tutorial. Practice the petal shapes separately on another sheet of paper to build confidence. Experiment with changing the flower’s size to see how proportions shift. Consider adding simple shading or a background to your completed drawing.
Conclusion
Congratulations on completing your flower drawing. You have mastered the fundamental approach of using guide shapes to build structure, adding details, and finalizing with confident lines. To improve, practice drawing the flower again from memory, experiment with different sizes, or incorporate simple backgrounds. For your next project, try drawing a bouquet or more complex floral arrangements to expand your skills. Display your artwork proudly to celebrate your progress in learning How to Draw a Flower.
FAQs
Q: What are the basic steps on how to draw a flower?
A: Start with a simple instruction: sketch a small circle for the center, add a bud or oval for the outline of a blossom, then draw petals outward from the center. Keep shapes loose, integrate lines for the stem and leaves, and refine with a brush or pencil. This step-by-step sequence reduces complexity and makes the process easy to follow.
Q: Which materials should I use to draw a flower for best effect?
A: Choose materials based on the effect you want: graphite pencils for precise lines, a soft brush or brush pens for painterly strokes, and colored pencils or watercolors for bright, pink, or subtle tones. Paper weight and texture also affect the final look; heavier paper suits water-based materials while smooth paper is better for fine line work.
Q: Can you show 3 different ways to draw petals?
A: Yes: 1) Simple rounded petals that consist of two lines meeting at a point, 2) pointed petals drawn with quick outward strokes to create a star-like blossom, and 3) ruffled petals made with short overlapping strokes for a complex, layered effect. Each type of flower calls for a different petal style.
Q: How do I draw a realistic bud and blossom?
A: Begin with a small teardrop for the bud, add gentle contour lines to suggest folds, then sketch the blossom with overlapping petals that open outwards. Pay attention to light and shadow to give the bud and blossom volume, and use drawing tips like soft shading and varied line weight to increase realism.
Q: Which type of flower is best for beginners to practice?
A: Start with simple, forgiving shapes like daisies or cosmos because their petals are uniform and easy to repeat. These types of flowers allow you to focus on symmetry and spacing rather than complicated petal anatomy, making them ideal for learning drawing fundamentals.


