

Preparing Porous Surfaces for Durable Adhesion
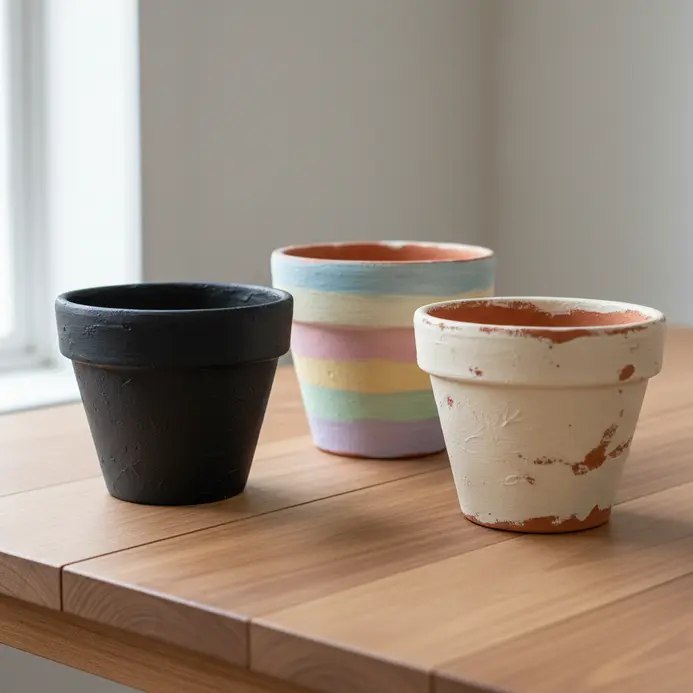
Your paint will peel within weeks if you skip scrubbing the pot with soap and water first. Terracotta raw, dusty surface holds onto manufacturing residue and oils from your hands, creating a barrier that ruins every aesthetic terracotta pot painting attempt until you wash it clean. Trust me, I learned this the hard way. You want to follow that wash with a quick sanding using medium-grit paper to scuff up the smooth finish, which gives your primer something to grab. The goal is not to remove the pot character but to create a perfect, toothy base. Once you rinse away the dust and let it dry completely, you are ready for the next step, which is the real game-changer for longevity. I have saved a few of those pots, and the extra prep time always pays off.
Selecting Interior Liners for Moisture Protection
A simple flexible plastic pot liner slipped inside your painted terracotta pot stops moisture damage at the source. The good news is these are cheap and easy to find at any garden center. Here is the thing: terracotta breathes, which is great for your plant roots but terrible for your paint job, as that migrating moisture will push the paint right off the exterior over time. You can also use a waterproof sealant brushed onto the interior, but I prefer the liner method because it is foolproof and lets the painted pot itself still breathe naturally. This one choice protects all your hard work and keeps your aesthetic terracotta pot painting looking fresh through every season.
1. Paint a Matte Black Minimalist Color Block Pot
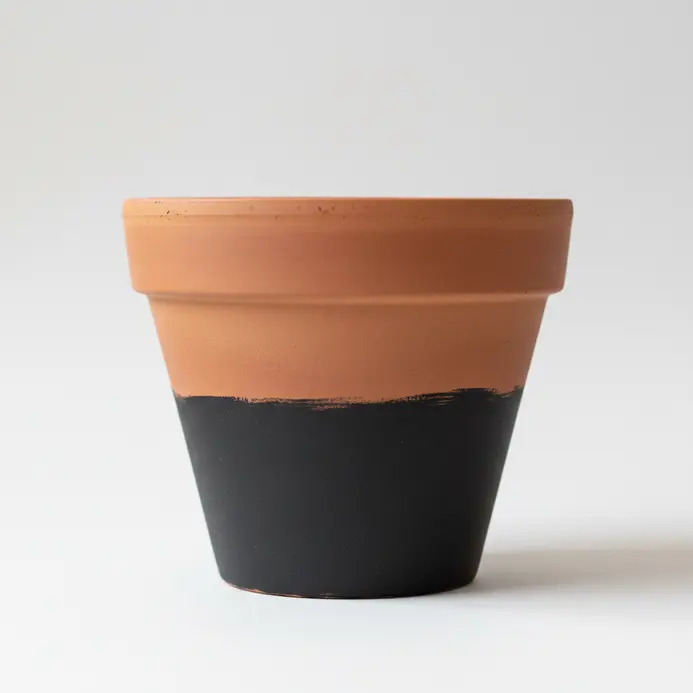
This one looks strikingly modern but is surprisingly simple to pull off. The secret is in the meticulous taping and a smooth application of matte black spray paint. You will love the crisp contrast between the painted section and the natural clay. Trust me, the key to a flawless finish is taking your time with the prep. Scrub your pot clean and let it dry completely overnight before you even think about applying color. This prevents any peeling later on. For a ton of other Creative Flower Pot Painting Ideas, that initial prep step is always your best friend before starting your next aesthetic terracotta pot painting session. Doesn’t that clean, graphic look feel so satisfying and chic next to your favorite plant?
2. Create a Soft Sage Geometric Triangle Pattern Pot

This style looks so modern but is surprisingly approachable. The key is using high-quality painter’s tape to create those crisp, clean lines for your triangle shapes. Paint your base coat, let it cure, then mark out your geometric pattern with a pencil and ruler before taping. I love how the soft sage green feels calming and earthy against a neutral background during your next aesthetic terracotta pot painting project. For the cleanest lines, remove the tape while the sage paint is still a bit wet. This little trick helps prevent any peeling and gives you that sharp, professional look, especially when using a foam brush. Does that not feel wonderfully satisfying?
3. Apply Gold Leaf to a Dipped Terracotta Rim Pot
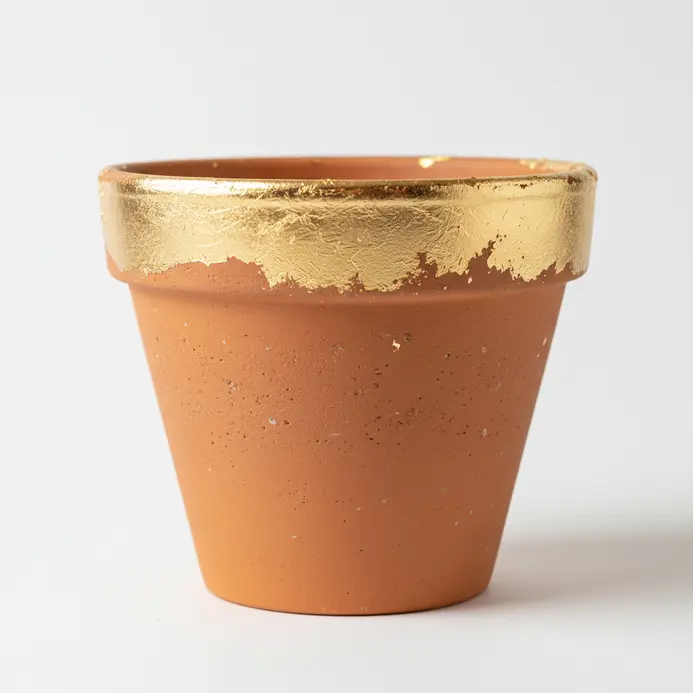
This one looks so fancy, but the secret is in the tacky gilding size. You apply a thin layer of this adhesive to your painted rim and wait until it feels sticky, not wet. Then you gently lay down the delicate gold leaf sheets and burnish them smooth. I love how this instantly turns a simple pot into a statement piece. Your biggest win is patience. Let the size dry to that perfect tacky stage. Use cotton gloves to handle the leaf and avoid fingerprints. It creates a gorgeous, reflective finish that contrasts beautifully with the earthy clay and elevates your aesthetic terracotta pot painting results. Keep practicing with metallic finishes and watch your confidence grow.
4. Achieve Bohemian Style with White Mandala Detail on a Clay Pot
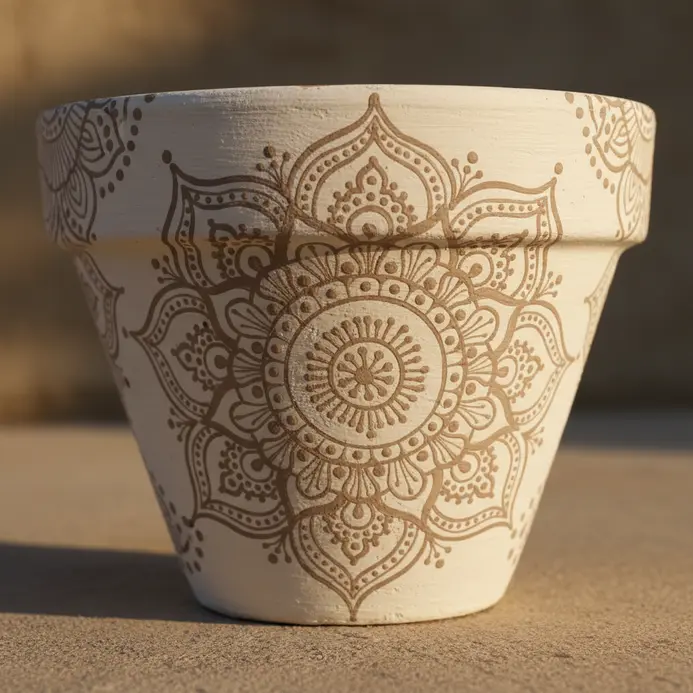
Bohemian decor is all about free-spirited charm, and what better way to capture it than with a hand-painted mandala on the top of the pot? It might look complicated, but trust me, it’s a relaxing process when you use a foam brush. Start by lightly sketching your design on a clean, dry clay surface using a light pencil. Then, with a fine-tipped brush, paint the white lines and use dotting tools for perfect circles. I love how the natural clay contrasts with the bright white paint, making your aesthetic terracotta pot painting truly stand out in any room. This combo works because it blends organic texture with precise artistry, giving your plant home a unique, global-inspired vibe. Take your time and let each layer dry completely to avoid smudges. You’ll feel so proud when your bohemian pot is complete! For more inspiration, browse these Creative Flower Pot Painting Ideas.
5. Blend Abstract Neutral Earth Tone Swirls on a Pot
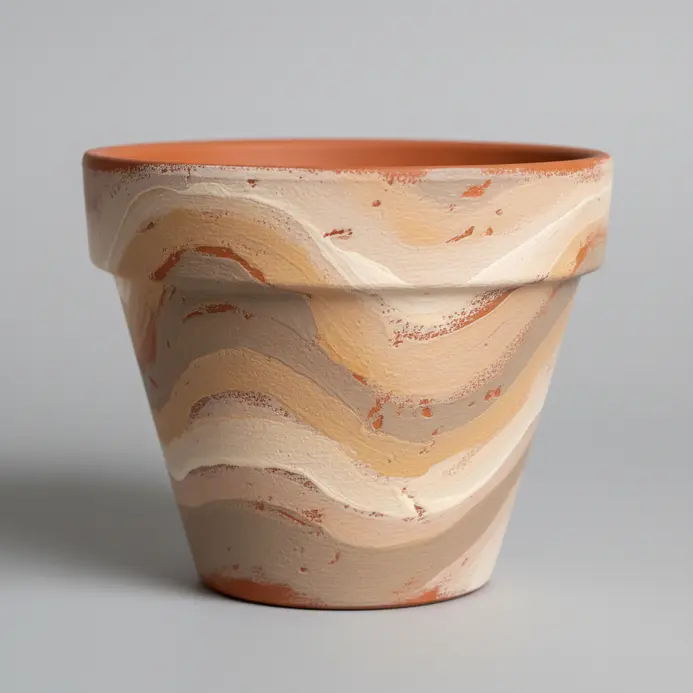
This style looks complex, but trust me, it is surprisingly forgiving and fast. You will apply a few neutral paints in loose, organic swirls and then use a soft blending brush to soften the edges before the acrylic dries. The magic happens when those separate colors flow into each other, creating beautiful, natural-looking gradients that define your aesthetic terracotta pot painting project. I love how this technique results in a sophisticated, modern pot that feels calming and grounded. Your key to success is working in thin layers and blending quickly. Isn’t it satisfying to watch those soft transitions appear?
6. Outline a Modern Scandinavian White Line Grid Pot

This one is deceptively simple but gives such a clean, modern look. You start with a neutral matte pot in a soft color like light grey or pale clay. Then, using a steady hand and a fine paintbrush, you apply a crisp white grid of squares or diamonds to the top of the pot. The magic is in keeping the lines thin and maintaining that airy feel while practicing your next aesthetic terracotta pot painting session. I love how this graphic detail adds interest without clutter. It is perfect for a sleek indoor plant display. Feel that sense of calm, modern style as your collection grows.
7. Paint a Vintage Floral Folk Art Design on a Clay Pot
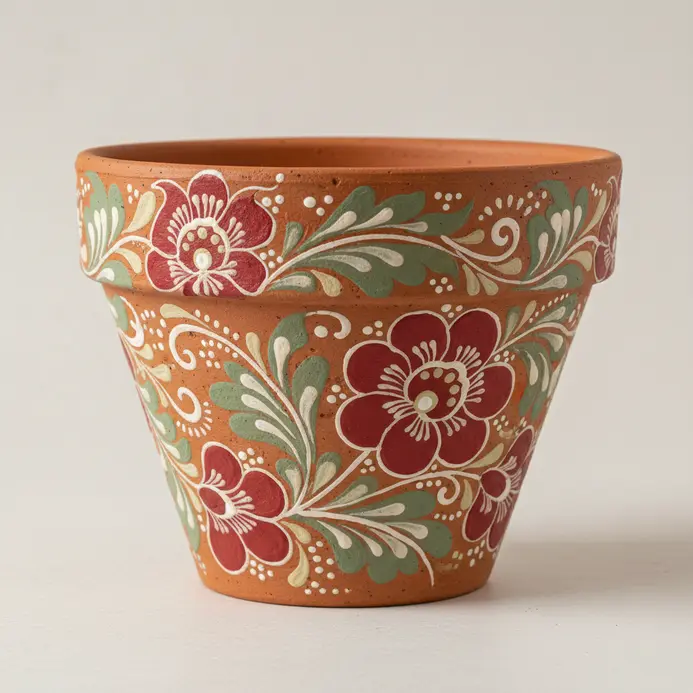
Does a vintage floral folk art design sound intimidating? It is not, because the charm lies in the simple, hand-painted feel. After your base coat is dry, use round brushes to paint stylized blooms that expand your aesthetic terracotta pot painting skills. Add simple leaf shapes and connect them with curving stems using a liner brush for those fine details. I love how this technique lets you build a whole whimsical garden scene. Remember to use thin layers of acrylic paint to avoid a heavy, cracked look. The final, crucial step is to protect your artwork with a waterproof outdoor sealer. For a whole collection of charming motifs to try, check out these Creative Flower Pot Painting Ideas. Your finished pot will have such a lovely, personal touch.
8. Build Texture with a Sand Infused Terracotta Salt Pot
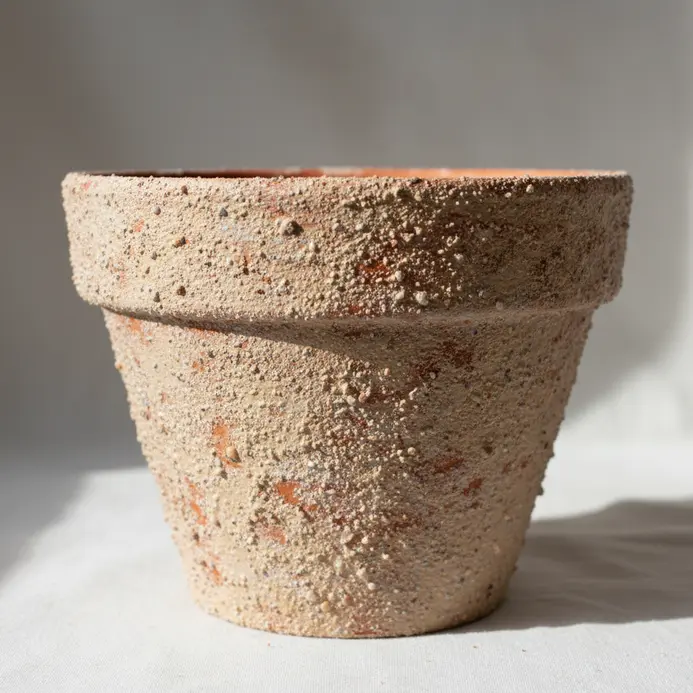
Ever wondered how those rustic pots get their unique, grippy feel before your next aesthetic terracotta pot painting session? The secret is mixing fine play sand directly into your clay before shaping. You will knead it in until the gritty texture is consistent, then form your little salt pot by hand. I love how this gives you control over the final look. After firing, the unglazed surface is key for both the texture and the pot function. The natural porosity absorbs moisture, which keeps your salt free-flowing and prevents clumping. It is a wonderfully satisfying project that yields a practical kitchen item.
9. Create a Mid Century Modern Yellow Starburst Pot
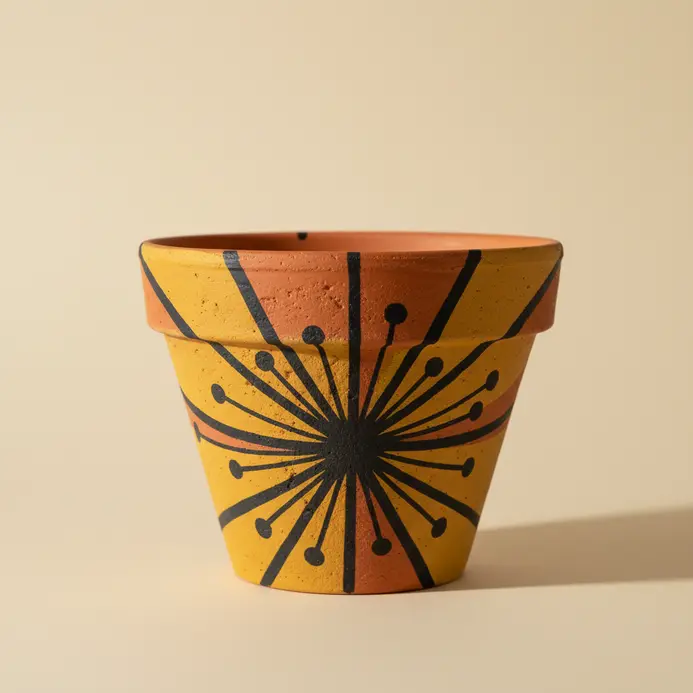
This one looks complex but is so satisfying to pull off. Start by priming your pot and painting it with a bold Mid-Century Modern yellow. Once dry, sketch a central point and use a ruler to draw crisp, radiating lines for your starburst. Carefully fill in those lines with your accent color, like teal or white, using a fine-tipped brush for precision. The graphic contrast creates a playful, retro vibe that feels instantly nostalgic during an aesthetic terracotta pot painting afternoon. I love how this single statement piece can brighten a whole corner. For more bold and cheerful flower pot painting ideas, let your creativity run wild.
10. Add Boho Flair with a Speckled Polka Dot Terracotta Pot
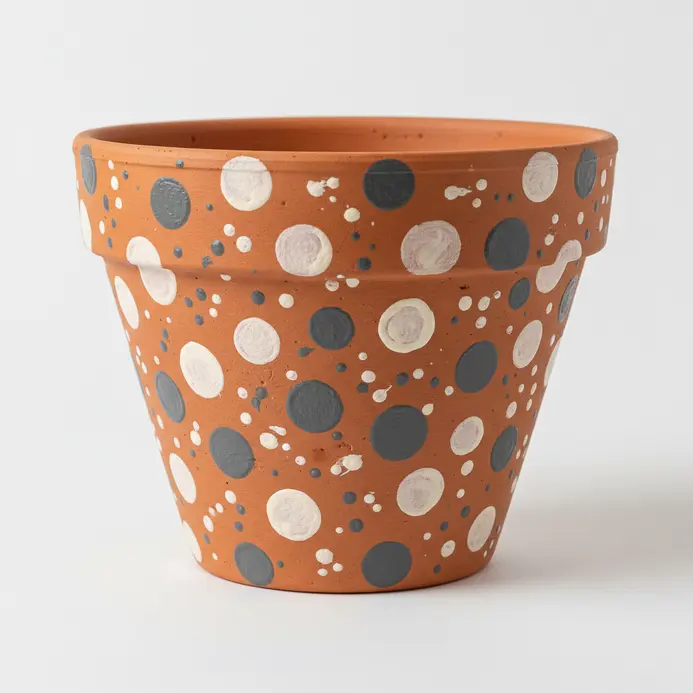
Who would have thought a few simple dots create such a relaxed, artistic look? The key is embracing imperfection. Dip a cotton swab or pencil eraser into your paint and start dotting, varying sizes and spacing for that organic, speckled effect. I love how this freeform technique turns a plain container into a boho-chic statement piece for any aesthetic terracotta pot painting routine. It is a wonderfully simple way to personalize your planters and add a unique charm to your space. Keep experimenting with dot patterns until you find your favorite style.
11. Capture Mediterranean Style with a Blue and White Tile Pot

Ever wish you could bring a little coastal villa charm to your painted pot or windowsill? This project does exactly that by covering a plain pot with blue and white tiles. You will arrange small mosaic pieces in a pattern, then fill the gaps with white grout. The result is a textured, vibrant piece full of visual interest that feels like a holiday souvenir. I love how this style instantly creates a focal point that pairs perfectly with your next coastal aesthetic terracotta pot painting adventure. It works because the classic color combo is so transportive and works with almost any decor. Pro tip: wear safety goggles and gloves This technique works wonders if you are breaking your own tiles for a rustic look indoors. Does that not feel like a perfect sunny day project?
12. Paint Pastel Rainbow Horizontal Stripes on a Pot
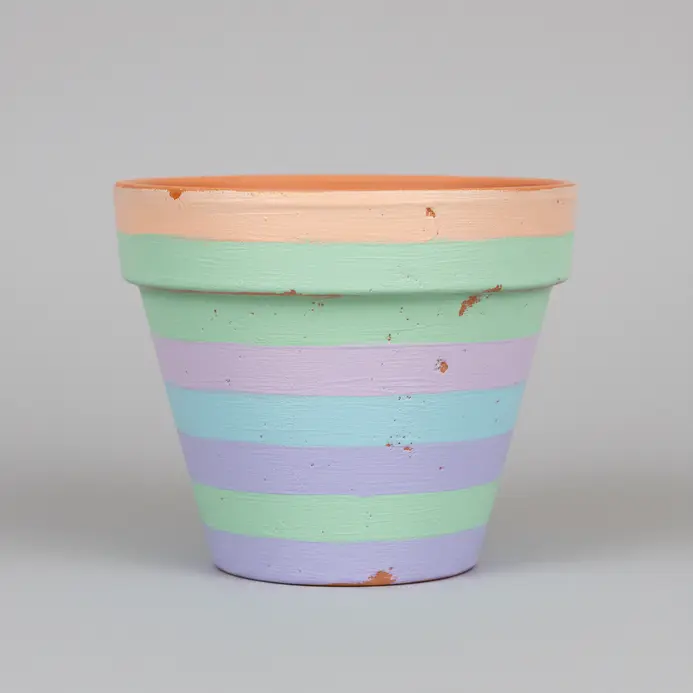
This style looks complex, but trust me, it’s just a series of neat, taped-off bands. You start by marking your stripes with a pencil and ruler, then use good quality painter’s tape to create crisp edges. Paint each stripe with soft pastel colors, letting each one dry completely before moving to the next. The magic happens when you peel the tape off to reveal those perfect, clean lines. It is a super satisfying transformation that proves every aesthetic terracotta pot painting project can start with simple taped bands. For even more inspiration on unique designs, check out these Creative Flower Pot Painting Ideas. I love how this project brings a light and airy feel to any space. Try it and feel the happiness those pastel rainbow stripes bring.
13. Achieve a Minimalist Look with a Drip Paint Effect Pot
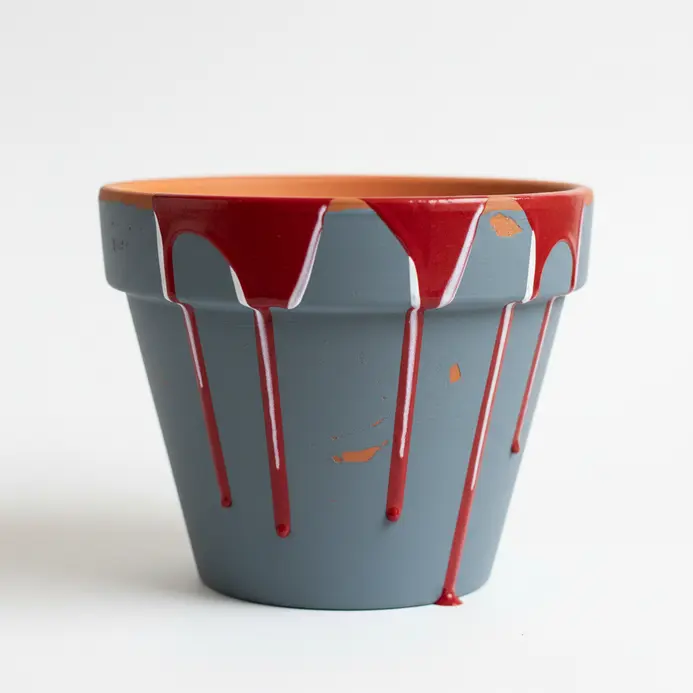
Ever wondered how to get that effortlessly cool, abstract look when you paint the pot? This drip paint effect is your answer for adding flair to the entire pot. It looks like modern art, but the technique is wonderfully simple. You just apply a fluid paint to the rim of your pot and let gravity do the work, creating those perfect, natural drips down the sides. I love how this process turns a plain pot into a unique statement piece that simplifies your entire aesthetic terracotta pot painting workflow. The key is getting your paint consistency exactly right. If it is too thick, it will not drip well, and if it is too thin, it will run everywhere. A pro tip? Always elevate your pot on an overturned bowl or blocks while it dries. This keeps the drips clean and prevents a messy pool of paint at the bottom. Try it and feel the satisfaction of creating something so stylish.
14. Layer a Rustic Distressed Grey Wash on a Clay Pot
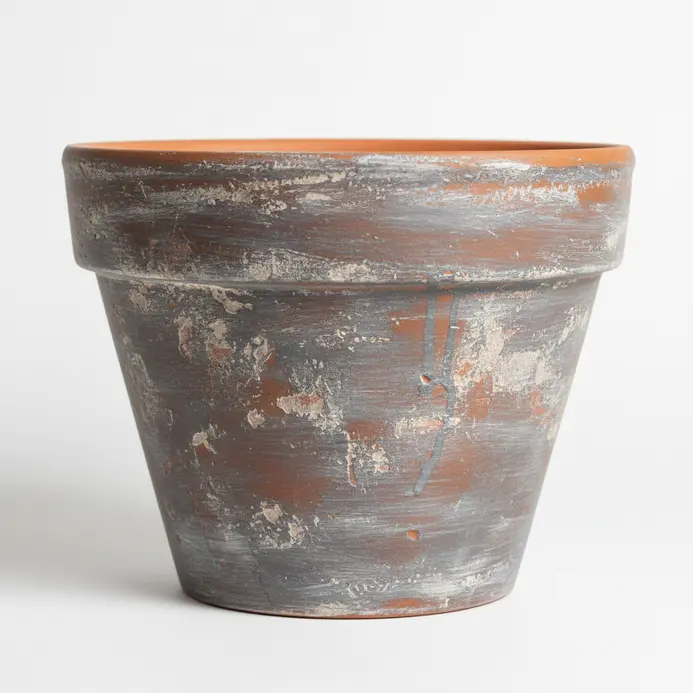
This is one of my favorite ways to make a new pot look like a cherished antique. The secret is all in the watery paint mix. You apply a very thin grey wash, let it set for a moment, and then wipe it away from the high points and edges with a rag. That immediate wipe back is what creates the beautiful, uneven layers of color. It works well because you are tinting the surface while letting natural texture guide your aesthetic terracotta pot painting vision. For a full collection of projects that use similar layering techniques, browse these Creative Flower Pot Painting Ideas. Trust me, the feeling when you step back and see that perfectly weathered finish is pure satisfaction.
15. Stencil a Whimsical Botanical Leaf Motif Pattern Pot
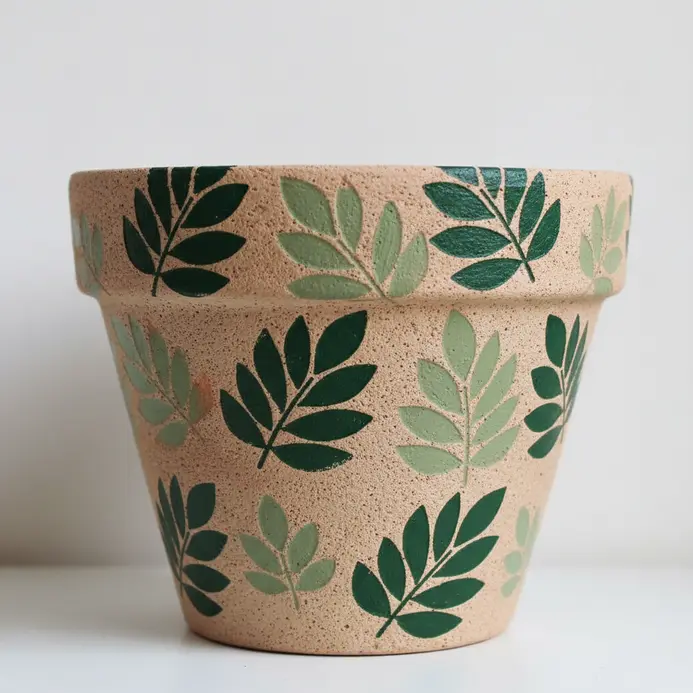
Ever wanted to try a stenciled design with a twist? This botanical leaf motif is a delightful method that is easier than it looks. Start with a clean, dry pot to ensure the paint adheres well. Grab a botanical leaf stencil and pick out some playful paint colors like mint green or coral. Secure the stencil with low-tack tape so it doesn’t move while you work. Use a nearly dry foam brush to achieve a textured finish. stencil brush to dab the paint through the stencil in an up-and-down motion. This prevents bleeding and gives you sharp, beautiful leaf designs. After dabbing, carefully peel off the stencil to reveal your pattern. Allow it to dry completely before adding more motifs. Create a scattered pattern or a repeating border to match your decor. Why is this so satisfying? It transforms a plain pot into personalized art that elevates any aesthetic terracotta pot painting collection in minutes. It’s a fantastic way to add personality to your garden or indoor plants with minimal effort. Remember to let each section dry before moving the stencil. Your finished piece will look professionally crafted.
16. Paint a Bold Navy Chevron Patterned Clay Pot
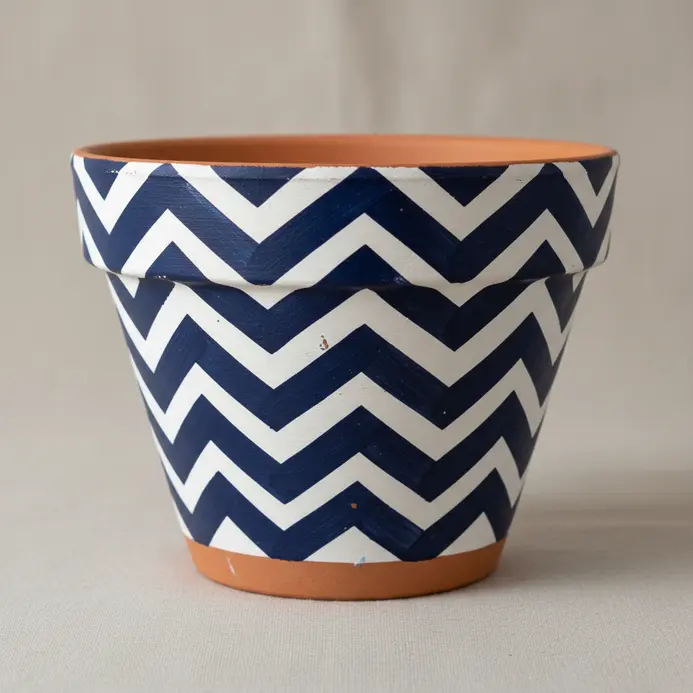
Ever wanted a clay container that looks like a modern art piece? This chevron pattern is surprisingly simple with the right prep. The secret is a flawless white base coat and high-quality painter’s tape for those sharp lines. You will lightly mark your V-shape guidelines with a pencil and ruler before carefully laying down the tape. Then, apply your bold navy paint within the taped areas. Trust me, pulling the tape off while the paint is wet gives you the crispest results for a sharp aesthetic terracotta pot painting finish. The contrast of that deep blue against the white creates a stunning geometric statement. Does that not look stunning? The sharp angles instantly draw the eye.
17. Blend a Sunset Ombre Gradient on a Terracotta Pot
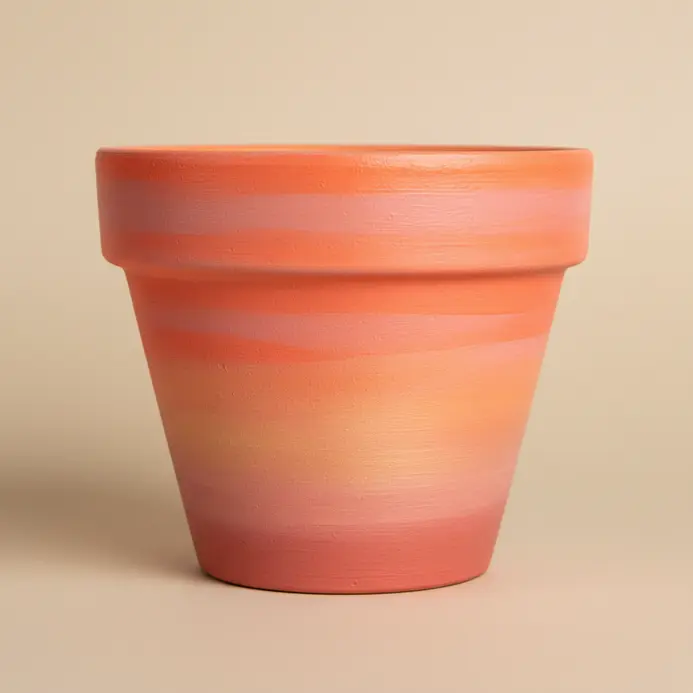
Who says a clay pot has to stay plain? This sunset ombre technique creates a stunning, soft glow that looks far more complex than it is. You will apply your acrylic paints in a wet-on-wet progression, starting with light yellow at the bottom and moving up through orange and red. The magic happens when you use a damp blending brush to gently merge those colors before they dry, creating that seamless gradient effect. I love how forgiving this method is. If a line looks too harsh, you go back in with a damp brush and soften it. The key is working quickly and keeping your paints moist. Trust me, seeing those sunset colors blend on the pot surface is incredibly satisfying during a relaxed aesthetic terracotta pot painting session.
18. Add Art Deco Flair with a Gold Arch Design Pot

This one looks so elegant, but the secret is painter’s tape. You lightly sketch a graceful arch on your clean pot, then mask it off with tape for crisp lines. Apply thin coats of gold paint, let each dry fully, and peel the tape away to reveal a perfect, geometric motif. The contrast of warm clay and metallic gold creates such a luxurious, vintage vibe that elevates any plant display. I love how this project turns a simple container into a statement piece with only a few careful steps. Keep your edges sharp for maximum visual impact.
19. Highlight a Natural Speckled Clay Pot with a Painted Rim
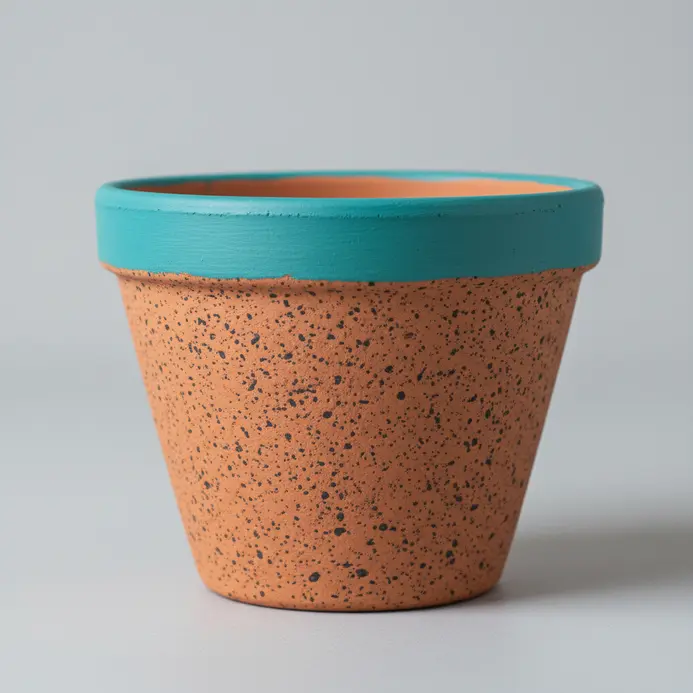
This is one of my favorite tricks for adding personality to a simple container. You let the beautiful, raw texture of the speckled clay shine through while framing it with a crisp band of color on the rim. Start by cleaning your pot well and letting it dry completely. Then, wrap a line of high-quality painter’s tape around the rim to mask off your painting area. Apply your chosen acrylic or ceramic paint in light, even coats. When you peel the tape away, that sharp line creates such a satisfying contrast. It makes the pot feel intentional and custom, like it was made specifically for your space. Try a metallic gold for a bit of glam or a deep navy for a modern look. Your eyes will naturally follow that rim detail. The process takes under an hour but looks like it took all afternoon. It’s a perfect weekend project for beginners.
20. Paint a Chalky Terracotta Pot with a Peach Sun Motif
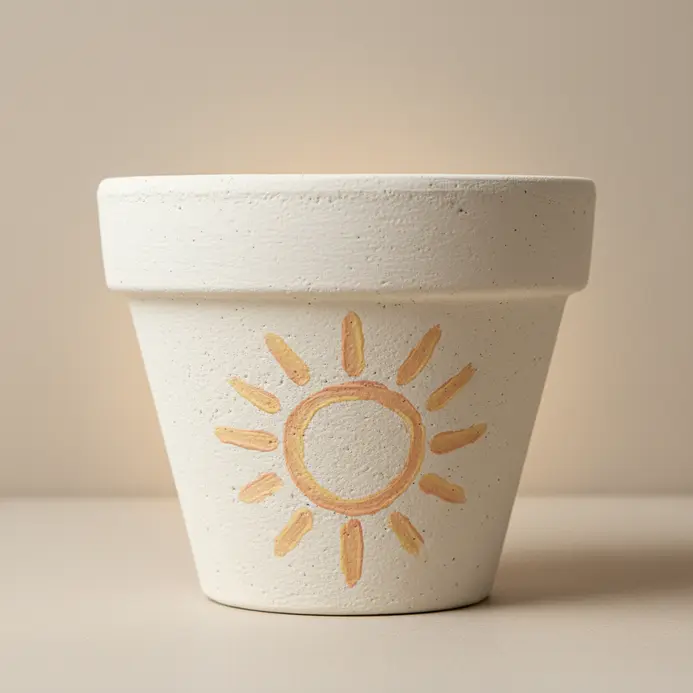
Who would have thought a little sun could bring so much warmth to a simple pot? I love this one. You will start by applying a thin, even base coat of chalk paint in a light neutral color and letting it dry completely. Then, sketch your sun and fill it in with a soft, warm peach shade. This works well because the matte, rustic texture perfectly complements the cheerful, handmade feel of the motif. For a huge range of other charming designs, check out these Creative Flower Pot Painting Ideas. Feel that sunny satisfaction when you are done. The matte finish gives a soft, vintage appeal.
21. Create a Monochromatic Grey Stippled Texture Clay Pot
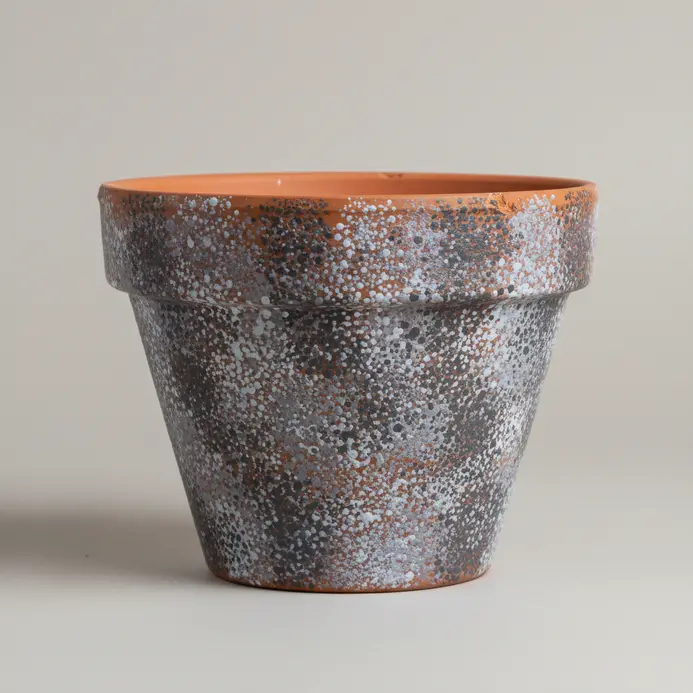
This one feels sophisticated, but it is only about building up layers of tiny dots. You will use different shades of grey and tools like a stippling brush or a sponge to dab on the paint, creating a beautiful, organic texture. Vary the dot size and density to add depth, all within that calming monochrome palette. I love how this technique turns a simple pot into a modern, tactile piece. It is incredibly satisfying to watch the texture emerge from all those individual marks. For a whole collection of beautiful pot projects, check out these Creative Flower Pot Painting Ideas to spark your next creation. Keep your strokes light and controlled.
22. Apply Simple Blush Pink Thin Stripes to a Pot
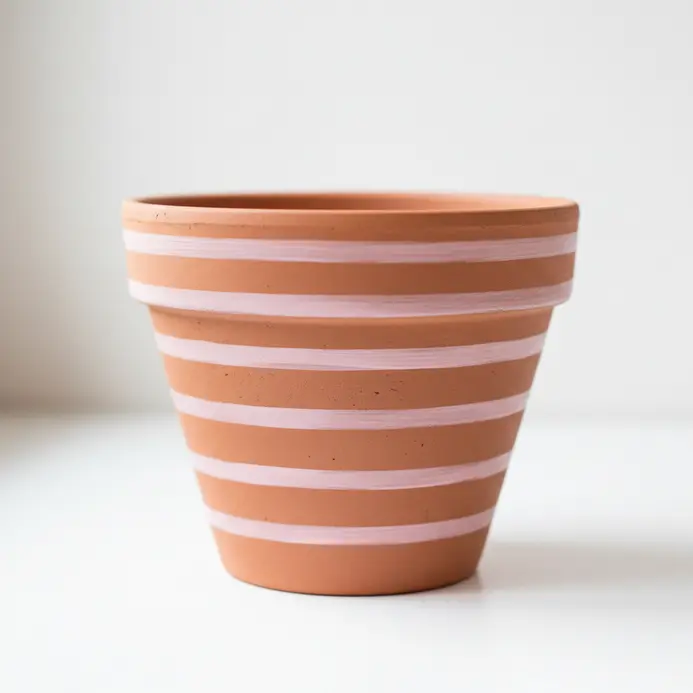
This one looks so elegant, but the secret is a simple trick. You will use thin painter’s tape to mark off your stripes before applying a soft blush pink paint. This ensures your lines are perfectly crisp and straight, giving your pot a clean, modern look. I love how this technique turns a basic container into a chic decorative piece. Why does it work so well when you apply two coats of paint? The sharp contrast between the stripes and the base color creates instant visual interest without any complicated brushwork. Trust me, pulling that tape away to reveal perfect lines is incredibly satisfying.
23. Paint a Tribal Patterned Black and White Pot
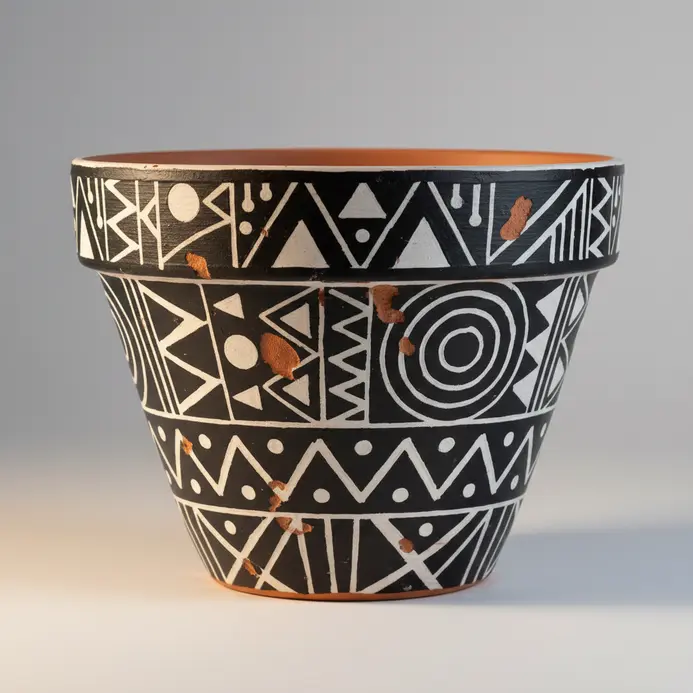
Who would have thought such a bold graphic look is so beginner friendly? Start by sketching your chosen geometric shapes lightly onto your primed terracotta pot. Then, block in the main black and white areas, letting each color dry fully before adding the next to keep those crisp lines. This stark contrast creates a modern aesthetic that feels both sophisticated and handmade. I love how the repetition of simple lines and chevrons builds a complex, eye-catching pattern on the entire pot. Feel proud when you step back and see that striking graphic statement you created. The bold contrast works beautifully in minimalist spaces.
24. Add a Vibrant Primary Color Splash Accent to a Pot
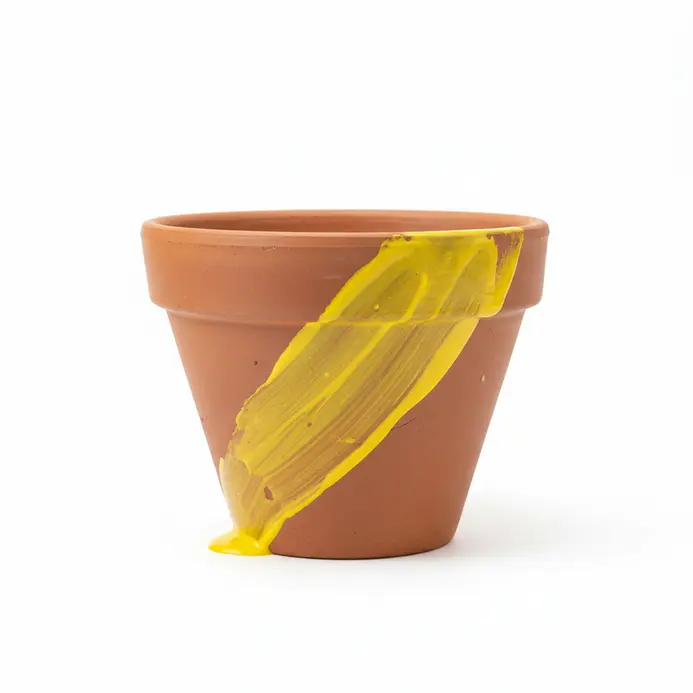
Ever wondered how those artistic, paint-splashed pots are made? This technique looks dynamic, but it is honestly one of the easiest ways to add a modern pop to your space. You simply choose a bold primary color and flick, dab, or drip it onto your clean pot in a loose, energetic pattern. Let the first layer dry completely before adding more for depth, and always finish with a clear acrylic sealer to protect your work. I love this because it feels spontaneous and looks professionally artistic. For endless ways to personalize your planters, browse these Creative Flower Pot Painting Ideas. Let your wrist stay loose and enjoy the controlled chaos. The result always surprises me in the best way.
25. Achieve an Elegant Cream Painted Ceramic Look Pot
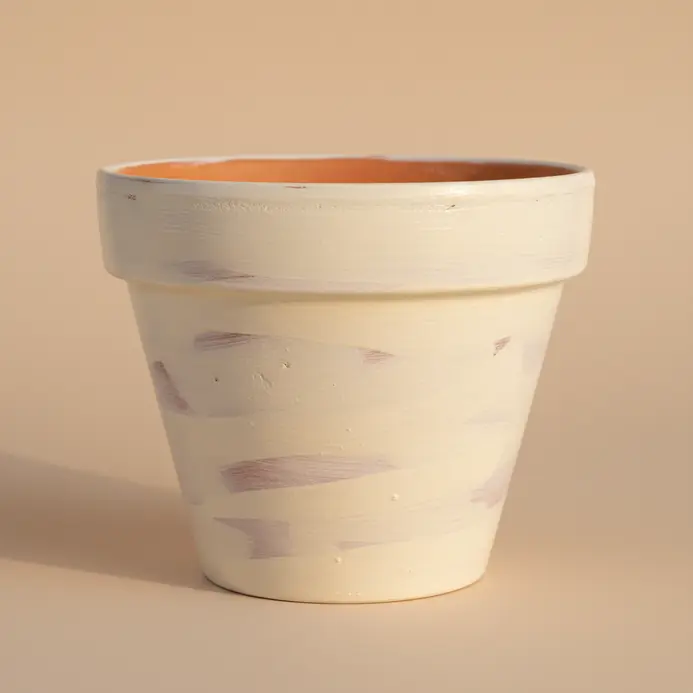
Who would have thought such a sophisticated finish was so simple to create? This technique is my go-to for making an entire pot look like an expensive, artisan ceramic piece. Start with a thorough scrub and let it dry completely. Then, apply a A thin coat of primer is essential before applying the best paint for your project. to ensure your paint sticks and lasts. Paint on several thin, even layers of your cream-colored paint, letting each one dry fully. Sound complicated? It is not. The magic is in the build-up of those thin coats, which gives you that smooth, solid finish you see on high-end pots. I love how the warm, neutral cream color feels timeless and elegant. It makes your plants look instantly refined. For the final touch, protect all your hard work with a clear A matte sealer is perfect for finishing your painted pot project.. Feel that satisfaction of creating something truly beautiful for your home. The ceramic finish fools everyone into thinking it’s store-bought.
Applying UV Resistant Sealers for Plant Longevity
A final matte acrylic varnish with UV protection is non-negotiable for pots that will live in sunny spots. Without it, even the best acrylic paints will fade from sun exposure, and daily watering splashes soften your design. You will notice that a matte finish looks more natural and does not create a shiny, plastic-like coat that competes with your aesthetic. Apply two thin, even coats, letting the first dry fully before adding the second. This top layer locks everything in place, from your detailed brushstrokes to that perfect color blend, ensuring your pot stays as beautiful as the day you finished it. I never skip this step on outdoor pieces. It makes a noticeable difference over several months.
Conclusion
The best part of working with clay is how it lets you create a perfect match for your plant personality and your own style. Each painted container becomes a little piece of your home story. My best advice is to start with a design that feels exciting but not intimidating. A simple color block or a painted rim can have a huge impact. Gather your favorite colors, find a quiet spot, and enjoy the process of making something uniquely yours. The right pot makes your plant feel settled, and a bit of careful aesthetic terracotta pot painting makes your whole space feel more personal and complete. Keep building your collection slowly. You will notice your confidence grow with every finished piece. Happy creating!
FAQs
Q: How do I prepare a terracotta pot before painting for the best results?
A: Start by scrubbing the terra-cotta surface with a damp cloth to remove dust and salts, then let the pot completely dry. If the pot was previously planted, remove soil and plant babies and cover the bottom to catch loose debris. Lightly sand any rough spots on the surface of the pot and wipe with a damp cloth again. Working in a well-ventilated area, lay down a drop cloth and make sure the pot is unpainted and pot completely dry before applying primer or paint.
Q: What is the best paint to use on terra cotta pots for an aesthetic terracotta pot painting?
A: For most craft projects, acrylic craft paints and water-based craft paint are ideal because they adhere well and are easy to work with. Many people like to use acrylic craft or latex paints for outdoor pots because they hold up well. For inside of the pot or where plants touch the surface, choose non-toxic, water-based options. If you want long-lasting color, apply a spray primer to save time and then use pots with acrylic layers.
Q: Should I seal the paint on my painted terra cotta pots, and how do I seal them?
A: Yes, you will likely want to seal to protect your design. After the paint is fully dry and the pot has been allowed to pot to dry for the recommended curing time, apply a top coat or seal—such as a clear acrylic sealer or varnish—over the entire pot, including the side of the pot and around the pot mouth. Make sure to seal the inside of the pot only if the seal is labeled safe for plants. Applying a thick coat or multiple thin coats will help the seal hold up well in direct sunlight and moisture.
Q: What brushes and tools should I use for a step-by-step tutorial on painting clay pots?
A: Use a variety of paint brush sizes: a flat brush for base coats, a round brush for details, and a small liner brush for fine lines. For some effects, a foam brush or sponge works well to overlap colors smoothly. Keep a damp cloth nearby to wipe brushes between colors. For an easy DIY finish, try stenciling with a craft store stencil or using painter’s tape to create clean edges.
Q: How do I prevent paint from chipping off terra cotta pots when exposed to the elements?
A: To prevent chipping, start with a spray primer to save time and create a good bond, then use water-based acrylic craft paints designed for outdoor use. Allow each layer to dry fully and avoid applying a very thick coat in one go; multiple thin coats give the best results. Finish with a durable top coat labeled for exterior use and ensure pots are placed in a well-ventilated area to cure. Consider keeping pots out of harsh direct sunlight when possible to reduce fading.