


Navigating Paper Weights and Absorption Properties
Your paper choice makes or breaks an abstract watercolor before you even wet your brush. The good news is you need only one type to start: a sheet of 140lb (300gsm) watercolor paper. This weight is your non-negotiable foundation because it withstands the heavy washes and repeated layering without buckling, which would distort the beautiful, fluid pigment movement you want. That buckling on thinner paper creates puddles that lead to muddy color mixing you want to avoid. This specific paper weight absorbs water at the perfect rate, giving you a controlled window to work with those lovely blooms and backruns. Trust me, investing in this paper solves half the common beginner problems instantly.
Curating Minimalist Color Palettes for Cohesion
Limiting your palette to three to five colors is the fastest path to a harmonious abstract piece. We all want to use every gorgeous paint in our collection, but over-mixing six or seven pigments is the surest way to create a murky, dull finish. Instead, select one dominant hue, a supporting color, and an accent. You will notice how these few colors, layered with the medium’s inherent translucency, create incredible depth and visual interest on their own. Approaching an easy abstract watercolor painting starts with embracing that restraint, forcing you to explore value and saturation within a family. Let the water-to-pigment ratio and the paper’s surface texture do the complex work for you.
1. Create a Wet on Wet Indigo Ombre Wash
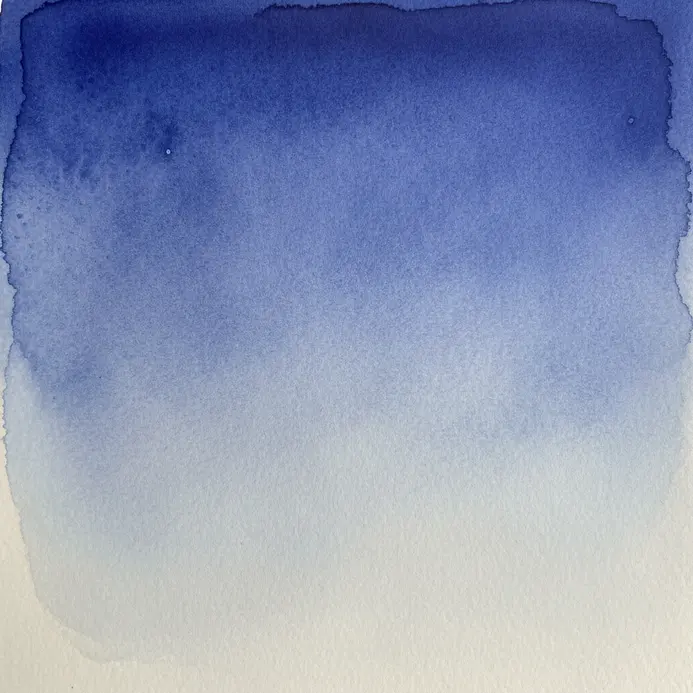
Ever wondered how artists get those dreamy, blended backgrounds? It all starts with mastering this wet on wet technique. You begin by thoroughly soaking your watercolor paper, then apply successive washes of indigo from light to dark. The magic happens as the wet surface lets the pigments flow and merge, creating that smooth, gradual fade. I love this because it feels like the paint is doing half the work for you, producing a stunning, ethereal effect with minimal effort. Pro tip: mix three distinct shades of indigo wash before you even touch the paper. This prevents you from rushing and ensures your ombre transition stays seamless. Trust me, once you see that perfect gradient bloom, you will feel incredibly proud.
2. Salt Infused Golden Ochre Clouds: Add Instant Organic Texture

Ever wondered how painters get those soft, speckled textures that look so natural? This technique is a fantastic little secret. You start by laying down a generous wash of warm golden ochre paint. While it’s still wet and glistening, you sprinkle salt right onto the surface. As it dries, the salt pulls the pigment into beautiful, organic patterns perfect for abstract clouds. I love this one because it feels almost like magic. The salt does the hard work for you, creating depth and movement you could never achieve with a brush alone. Try it and feel the satisfaction of brushing off those crystals to reveal your textured masterpiece.
3. Apply Plastic Wrap for a Cerulean Blue Textured Field
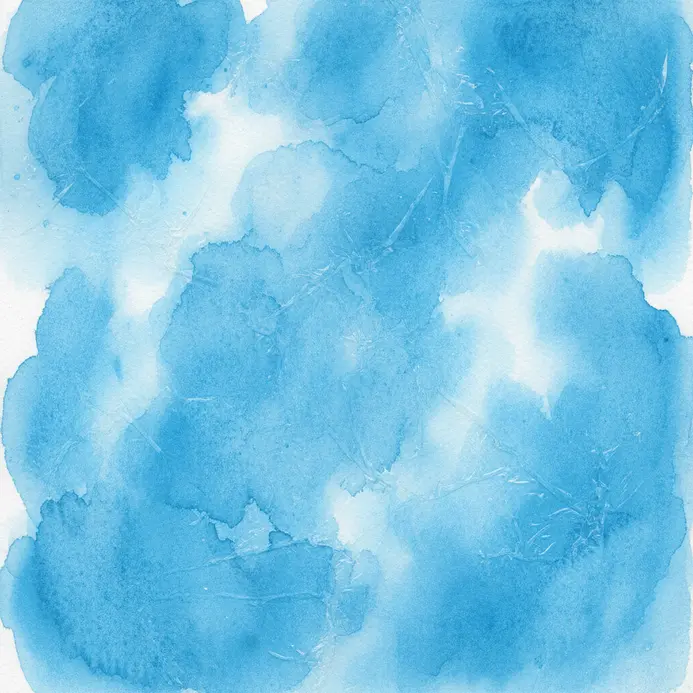
Trying an easy abstract watercolor painting with crinkled plastic yields pure magic from a simple trick. While your cerulean blue wash If your paint is still super juicy, gently lay a crumpled piece of plastic wrap right on top for a unique texture in your final painting. Do not smooth it out. The crinkles are what create the beautiful, organic patterns as the paint slowly dries underneath. I love this technique because it builds depth and atmosphere without requiring detailed drawing skills. Peeling off the dry wrap to reveal your unique textured field is incredibly satisfying.
4. Blend Soft Edge Blurred Crimson Blooms
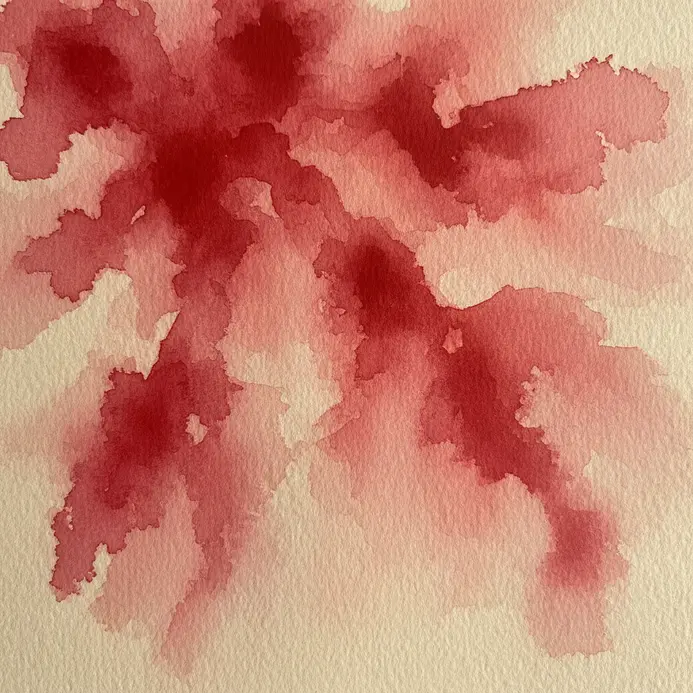
Who would have thought that soft, dreamy flowers could be so beginner-friendly? The core secret to any easy abstract watercolor painting is simply letting the water handle the blending. First, wet the paper where you want your blooms, then drop in diluted crimson paint. Watch as it spreads into those beautiful, soft blurred edges all on its own. This style works because it captures a romantic, ethereal mood that feels both warm and personal. I love how forgiving this is. For a deep dive into controlling washes and other Essential watercolor painting techniques are crucial for aspiring watercolor artists., that’s my go-to resource. Trust me, you will feel so proud when those crimson blooms melt together.
5. Masking Fluid Geometric White Lines: Define Sharp Negative Space
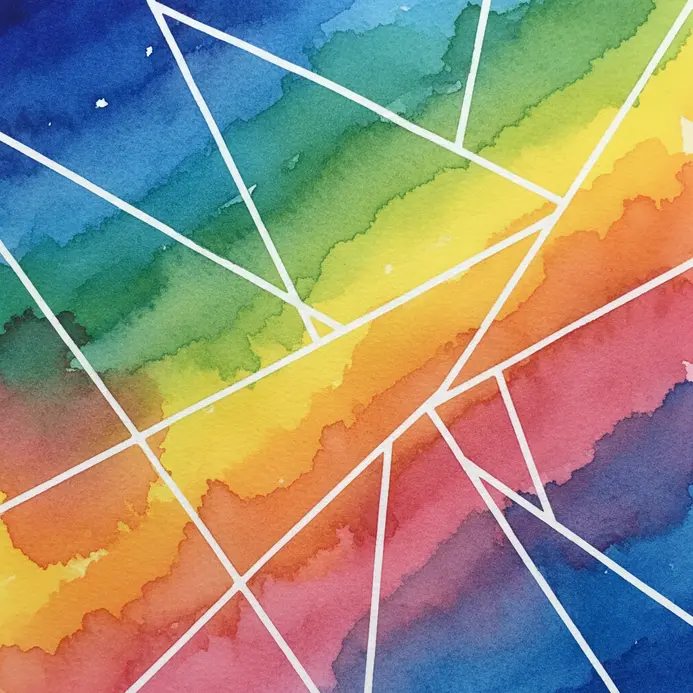
Ever wondered how artists get those perfectly sharp white lines in a watercolor? Defining crisp lines for an easy abstract watercolor painting reveals a neat trick. You paint over a latex masking fluid Applied in geometric shapes, these designs can elevate your landscape painting. Once the paint is dry, you peel the fluid away to reveal crisp, unpainted lines against your colorful background. This defines the negative space with such clean, modern contrast. I love how it makes the white areas feel like an active part of the design. For a sharp look, use a ruling pen for your lines and let everything dry completely before peeling. The final reveal is so satisfying.
6. Add Splattered Ink Neon Accents as an Overlay
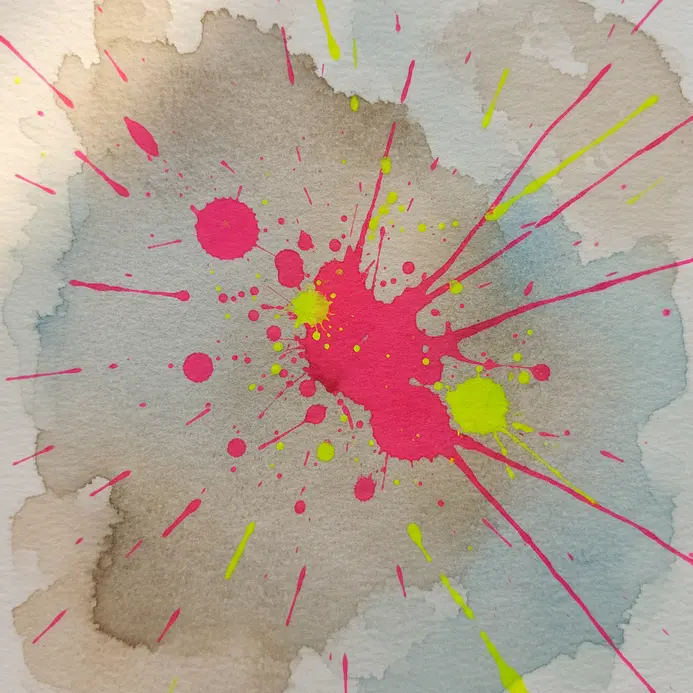
Ever wondered how to make your painting feel modern and energetic with some abstract painting ideas? This overlay is your secret weapon. I love how it takes the raw, organic look of ink splatter textures and transforms them with a vibrant, glowing color. You simply import a splatter image into your software, apply a neon color overlay, and then add an outer glow effect to make it pop. The contrast between the chaotic splatters and the artificial light is incredibly striking. For a fantastic way to blend this edgy look with softer styles, explore some playful whimsical watercolor ideas. Try it on top of a dried watercolor wash and watch your piece come alive with a futuristic feel. Does that not look stunning?
7. Paint Sharp Chisel Stroke Cobalt Rectangles
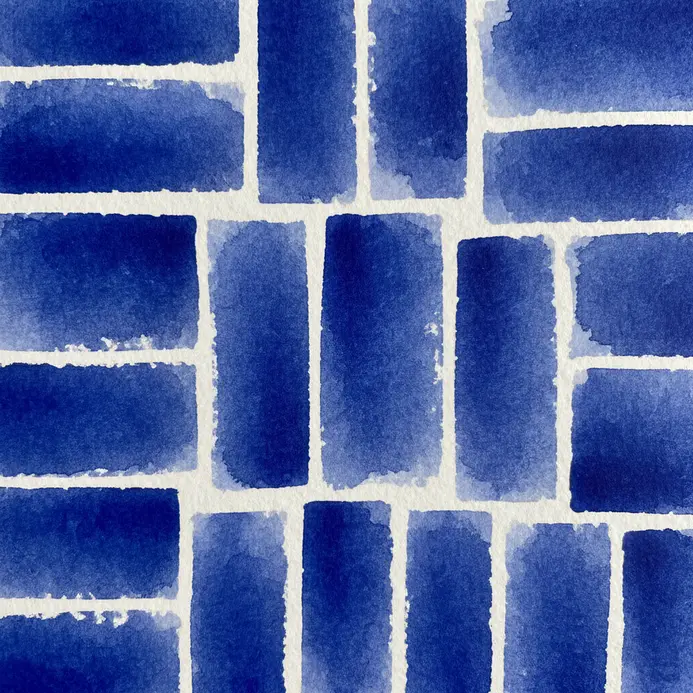
Mastering this brush trick ensures your easy abstract watercolor painting looks crisp and modern. The magic comes from using a flat brush on its side. Load it with vibrant cobalt blue, then press the flat edge firmly onto your surface to create a clean rectangle. Vary the sizes and angles for a dynamic composition. Why does it work so well? The sharp edges and bold color create a stunning graphic contrast that feels both deliberate and fresh. I love how each stroke feels decisive. For a great next step after mastering these shapes, explore ideas for abstract painting for beginners.
8. Layer Translucent Primary Color Slices
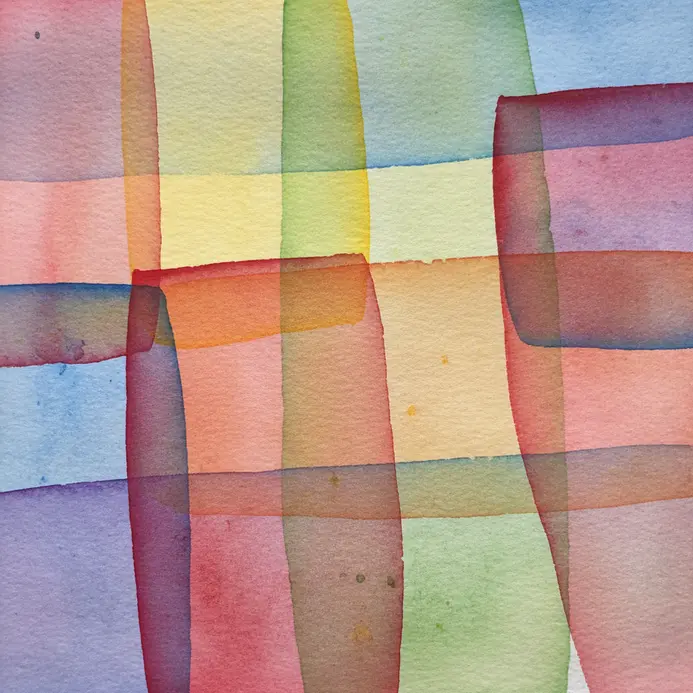
This one is pure magic and looks way more complex than it is. Layering translucent colors creates a beautiful easy abstract watercolor painting depth, so start with a simple geometric shape using a diluted primary color and let it dry completely. Then, paint a second shape that overlaps the first, using a different primary. In the overlap, a brand new color appears right on the paper. How cool is that? It works because the light bounces off the paper through the thin layers, mixing the colors optically for you. That optical mixing gives you such a clean, vibrant glow. My favorite tip is to be patient and let each layer dry fully. The crisp, clean edges you get from waiting are so satisfying.
9. Form Feathered Edge Emerald Ink Blots
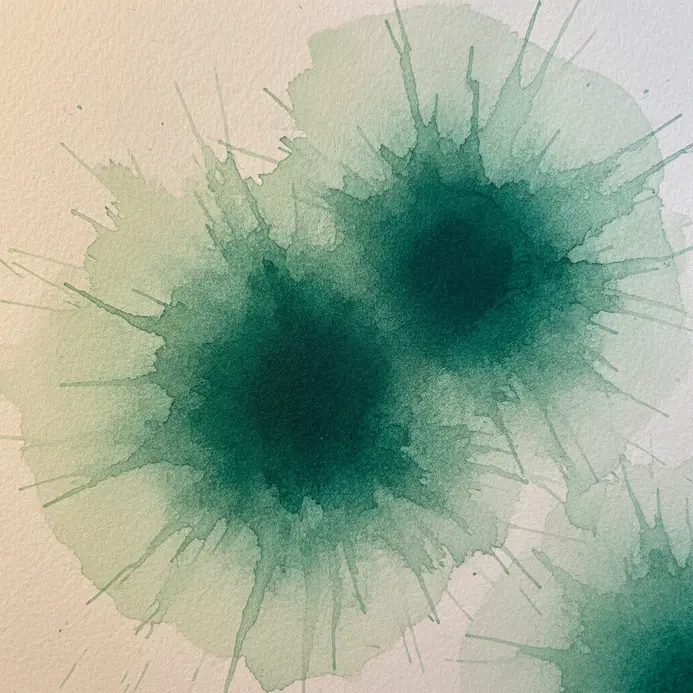
Ever wondered how to get those soft, dreamy shapes in your work? Achieving that dreamy soft edge in an easy abstract watercolor painting relies entirely on wet paper. Apply your emerald ink only to a damp, shiny area of your watercolor paper. Watch as it spreads and feathers out into an organic, unrepeatable form. You can gently tilt the page or even use a straw to guide the flow for more interesting shapes. I love this technique because it feels like a happy accident every time. The soft edges create such lovely depth and a natural look. For a different approach to exploring color and form, check out these watercolor painting ideas. realistic watercolor painting concepts. Just remember to let each blot dry completely before moving on. It is so satisfying to see the final result.
10. Use a Dry Brush for Charcoal Grey Texture
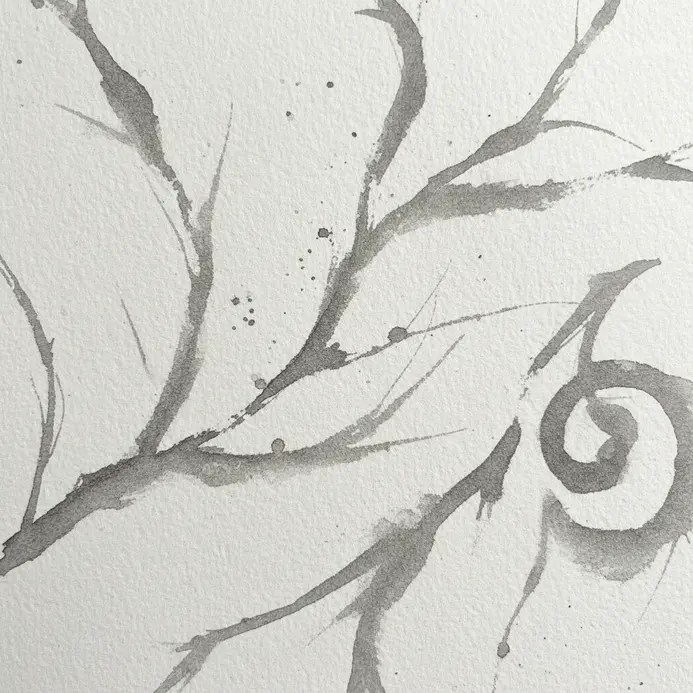
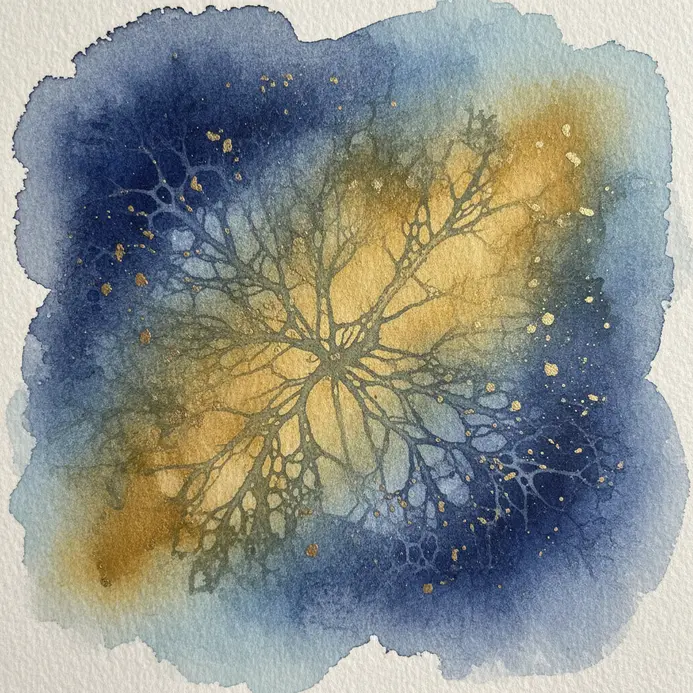
Ever wondered how artists get that gritty, atmospheric feel in their sketches? The secret is a technique called dry brushing, and trust me, it is simpler than it looks. You are going to use a stiff bristle brush with barely any charcoal on it, dragging it lightly across textured paper. The brush skips over the surface, leaving behind a broken, dusty mark that catches on the paper’s tooth, perfect for watercolor painting ideas. This method is perfect for adding subtle depth and mimicking rough surfaces like stone or weathered wood. You build up those nuanced greys gradually with light layers, which feels incredibly satisfying as the texture emerges. It is a fantastic way to add a touch of realism to your abstract work, and you can get more inspiration for moody, textured pieces from these simple watercolor galaxy concepts. My favorite part? It forces you to slow down and let the materials do their thing. Feel the magic when those organic, imperfect marks start to define your space.
11. Achieve Starburst Effects with Rubbing Alcohol on Violet Spheres

Experimenting with alcohol creates an easy abstract watercolor painting that feels like pure cosmic art. Ever wondered how those perfect star-like patterns form? Paint your violet sphere with watercolor, and while it’s still wet, use a dropper to add a drop of rubbing alcohol. The alcohol pushes the pigment away in a radial burst as it evaporates, leaving that stunning, ethereal pattern behind. I love this technique because it introduces an element of happy chance. You get unique, unrepeatable designs every single time. For the best results, make sure your paint is visibly wet and start with a small drop of alcohol. Try it and feel that thrill when a perfect starburst appears.
12. Capture Floating Pigment in Burnt Sienna Puddles
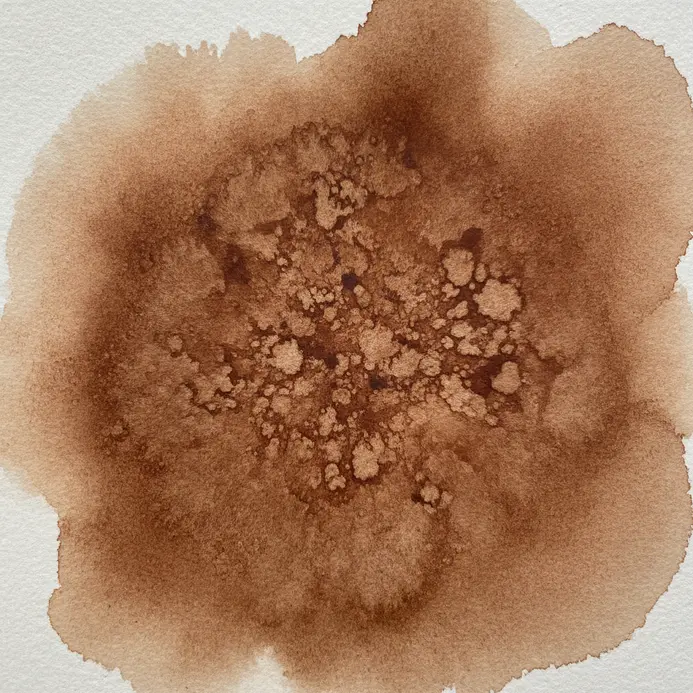
Ever wondered how artists get those beautiful, speckled textures in their work? Capturing floating pigment in your easy abstract watercolor painting means letting the medium do its own thing. You start by creating a wet puddle on cold-press paper with a large brush. Then, you drop a creamy, concentrated mix of burnt sienna right into the center and watch it bloom. I love how the heavier pigment particles settle into the paper’s texture while lighter ones seem to float. The magic happens because burnt sienna is a granulating pigment. Its particles clump and settle in a unique way, creating natural depth and movement. Isn’t it satisfying to see those organic patterns form on their own? For a great next step, check out these simple things beginners can paint to practice your new skills. Feel the joy of controlled chaos.
13. Scratch Texture into a Deep Forest Green Wash
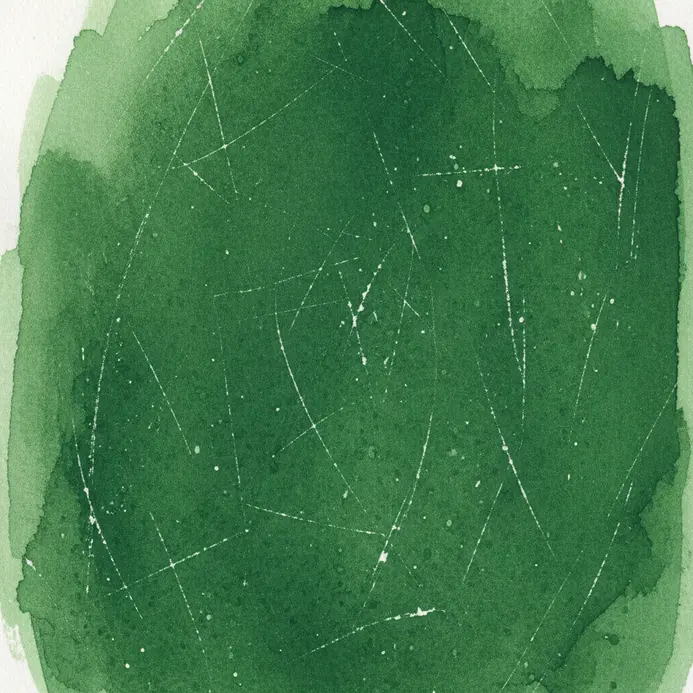
Who would have thought scratching your paint could feel so satisfying and look so good? This trick is all about timing. Apply a rich, dark deep forest green wash and wait for that perfect damp stage. Then, use a credit card or toothpick to gently scratch lines and patterns into the surface, revealing the lighter paper underneath. It works because you are creating instant, organic texture that mimics things like tree bark or moss. Trust me on this one, finding that ‘sweet spot’ for wetness makes all the difference. Try it and feel the magic of adding tactile depth to your work.
14. Create a Pitted Texture Landscape with Water Droplets
Creating a pitted texture landscape for an abstract watercolor painting for beginners can be a fun challenge. easy abstract watercolor painting sounds complex, but the core idea stays beautifully simple. You start with a flat plane and subdivide it to add lots of geometry. Then, you use a Noise Texture node to generate the random pits and craters, controlling their depth with a ColorRamp for sharp definition. Why does it work so well? The combination of organic, pitted ground with perfectly smooth, reflective water droplets creates a stunning contrast that feels both digital and primal. It is a fantastic way to practice surface manipulation, and you can find more small beginner painting ideas to translate these digital textures into physical art. Feel that creative spark when your first digital landscape comes to life through a tutorial.
15. Blend a Bleeding Sunset Gradient Orange Haze
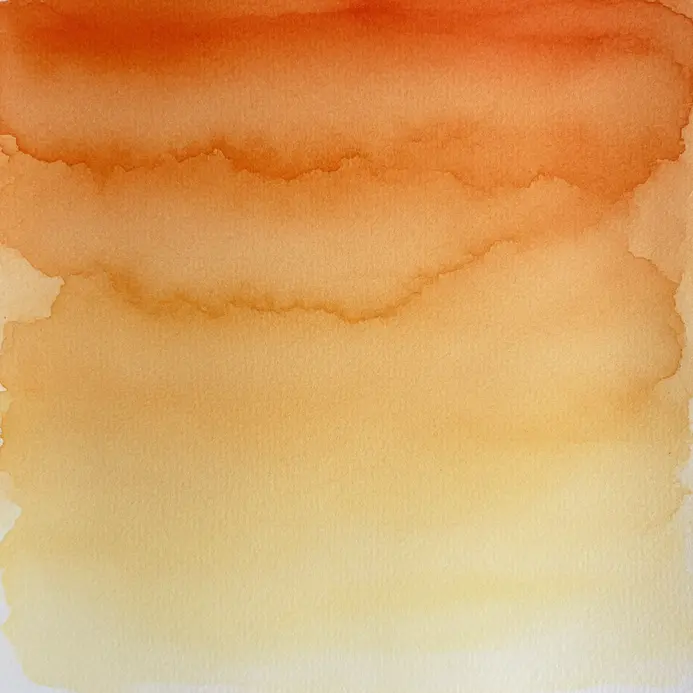
Ever wondered how digital art gets that soft, dreamy sunset look? This one is all about letting your colors melt together. Start by creating a linear or radial gradient with deep reds, oranges, and yellows. Then, use a blur or smudge tool to soften those lines, letting the hues bleed into each other like real light. Next, add a new layer filled with a soft orange and set it to a Soft Light or Overlay blend mode. Lower the opacity to create that warm, translucent haze that pulls everything together. I love how this single step transforms a flat gradient into a glowing, atmospheric scene. For a different kind of simple inspiration, check out these simple minimalist painting concepts. Doesn’t that look stunning? The trick is keeping everything soft and gradual, avoiding harsh edges. Feel the warmth of your creation when it comes together.
16. Sponge Texture with Muted Earth Tones

Who would have thought a simple kitchen sponge could create such a beautifully organic texture? I love this one because it feels like you are painting with nature itself. Instead of using your brush, try dabbing your paper with a damp natural sponge loaded with watery paint. The key is to use a gentle touch and let the colors blend softly on the surface. Avoid uniform patterns and let the sponge’s irregular pores create the magic. Stick to a palette of soft browns, greys, and sage greens to keep that earthy, grounded feel. The result is a wonderfully tactile piece that feels calm and sophisticated. Feel that warm, natural serenity in your finished work.
17. Paint Dripping Ink Monochrome Vertical Lines
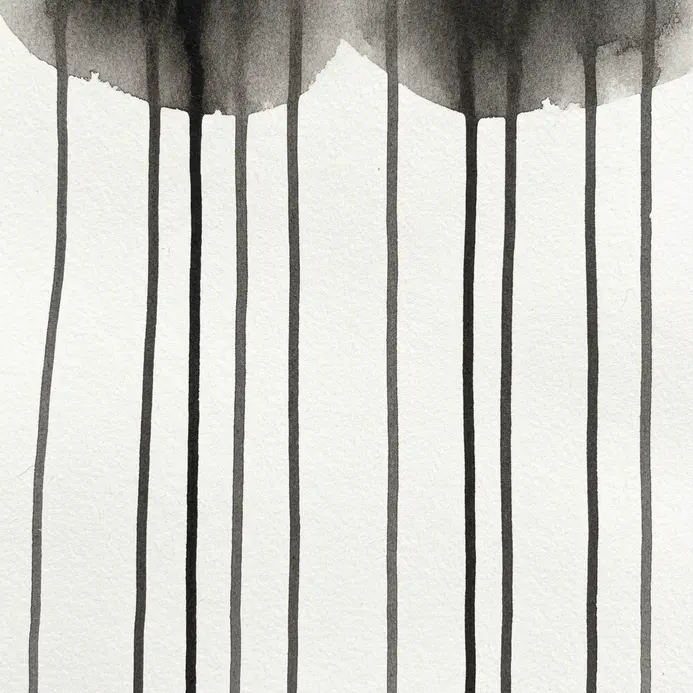
Ever wondered how to create dramatic art with almost zero brushwork? Designing an easy abstract watercolor painting with dripping ink means you simply let gravity handle the work. You dilute a rich black India ink and apply drops along the top of a vertical surface. Watch as each droplet races downward, forming unique vertical lines with beautiful, organic variations in thickness. The monochrome palette forces you to see the powerful play of light, shadow, and texture. I love how this method blends a little planning with a lot of happy accident. Your main job is to find the perfect ink consistency and then let go. For a whole world of inspiring ink painting ideas that play with similar fluidity, there is plenty to explore. Trust me, seeing those stark, elegant lines form is incredibly satisfying.
18. Layer Glazed Pastel Multi Layered Squares
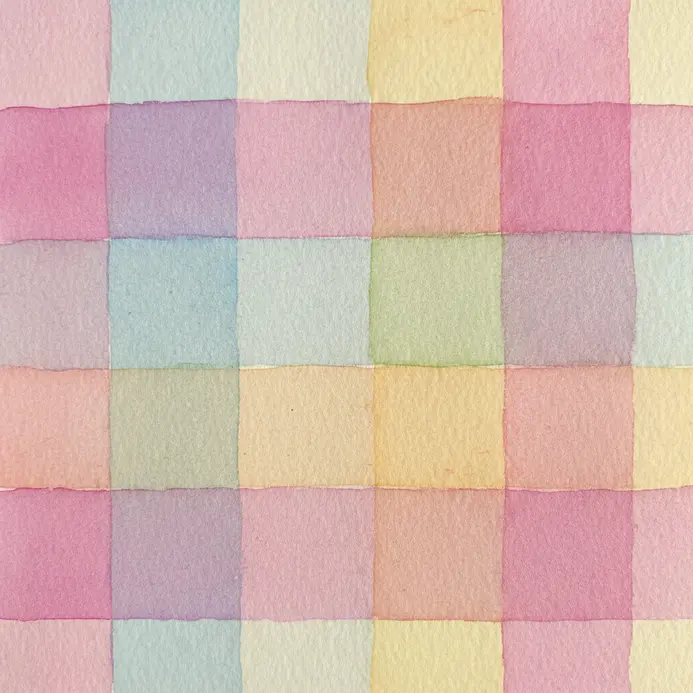
Ever wondered how to translate those stunning, delicate dessert layers into your watercolor work? This idea is all about building depth with soft, transparent color. Start by painting a simple square on your paper. Then, with very diluted paint, wash over it with a second pastel color square that overlaps slightly. Let it dry, then add a third, and a fourth, letting each new layer peek through the last. The magic is in the luminous effect you get from so many thin glazes. I love how this creates a sense of quiet, geometric depth without any harsh lines, reminiscent of simple abstract watercolor painting. For a different kind of layered color inspiration, check out this guide to abstract watercolor painting for beginners. creative watercolor tattoo inspiration. Try it and feel the calm satisfaction of watching your colors softly stack.
19. Form Floating Bubble Soft Magenta Rings
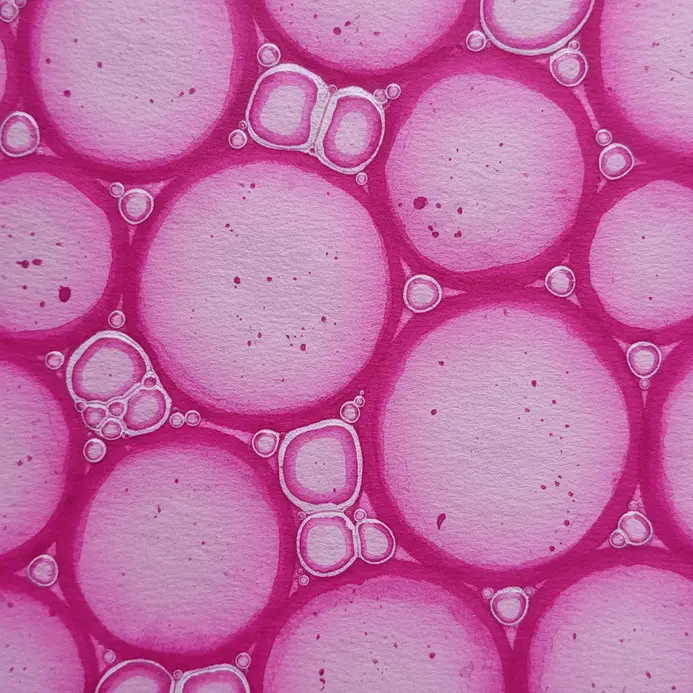
Doesn’t the idea of painting floating bubbles sound intimidating? It is way easier than you think. I love this one because it leans entirely on a wet-on-wet technique. Start with a damp area of paper and drop in super-diluted magenta to form soft, blooming circles. While the paint is still damp, use a clean brush to gently lift edges, creating that perfect bubble-like transparency. It works so well because the water does most of the work, giving you those ethereal, weightless forms. Try it and feel the magic of watching those soft rings appear.
20. Use Crinkled Paper to Imprint Teal Veins
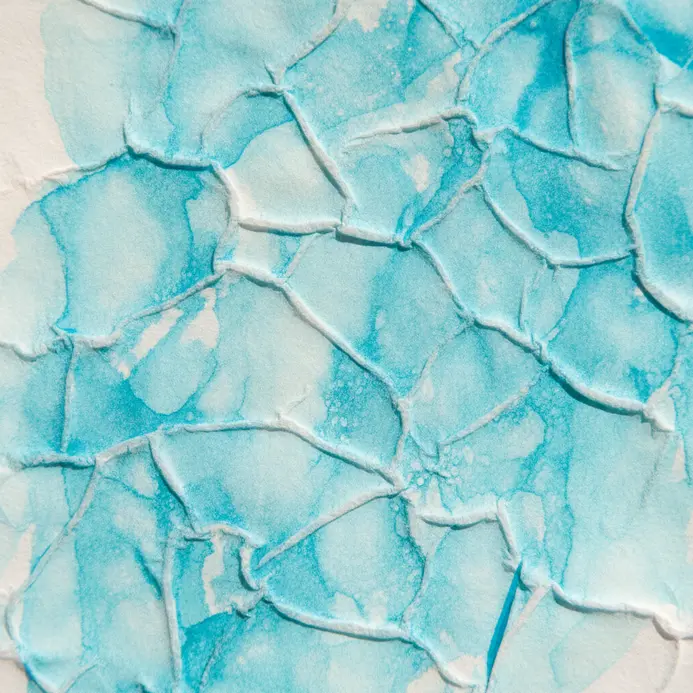
Using crinkled paper adds fine texture to your easy abstract watercolor painting with surprising magic. You’ll take a piece of tissue paper, crinkle it into a tight ball, and then gently flatten it out. Next, you dab a thinned teal watercolor or ink onto only the raised ridges of the paper before pressing it onto your canvas. When you peel it away, you’ll reveal a delicate, web-like pattern of veins that feels organic and totally unique. It works because you’re letting the natural creases in the paper do the detailed drawing for you. For a beautiful, soft effect, try this with some soft pastel watercolor paintings as a base layer. Feel that creative surprise when you lift the paper!
21. Create a Spilled Coffee Effect with Sepia Washes
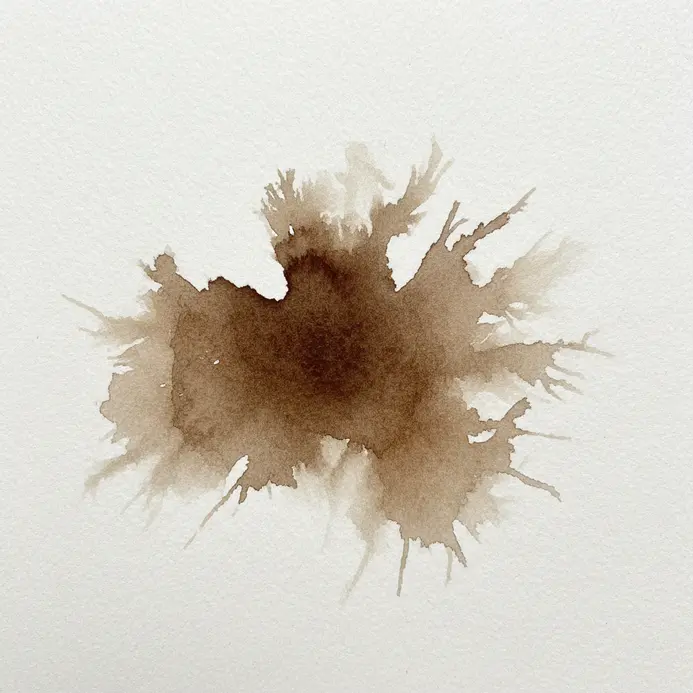
This is one of those effects that looks so authentic, you will want to touch the screen. It is all about creating warm, vintage character with a few clever digital washes. Start with a sepia photo filter to give your base a unified brownish tone. Then, use custom coffee stain brushes with varied opacity to add those perfect, irregular spills. I love how experimenting with layer blend modes like Multiply makes the stains look naturally soaked into the paper. Trust me, the key is subtlety and variation to avoid a fake, stamped-on look. For a completely different but equally lovely approach to gentle color, you might enjoy exploring soft pastel watercolor paintings. Does that not add a wonderful touch of age and story?
22. Add Metallic Gold Flake Abstract Highlights
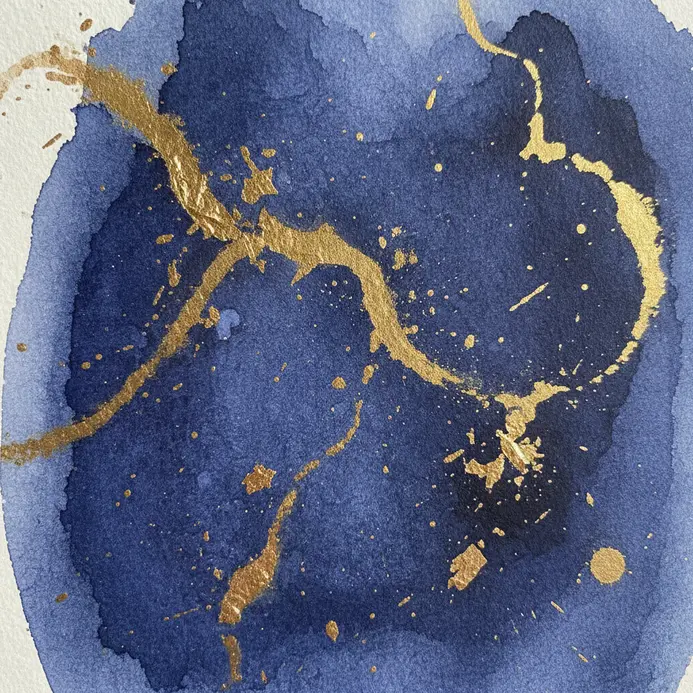
Ever wondered how artists get that magical, shimmery look in their work? This is your secret. Apply a thin layer of water-based sizing to your dry painting in loose, abstract patterns and let it get tacky. Then, sprinkle on loose metallic flakes and press them down gently. It is so satisfying because the light catches each flake differently, adding a dynamic, luxurious feel you have to see in person. Trust me, let that sizing get properly tacky first, and you will love the opulent result.
23. Define Negative Space with Circular White Gaps
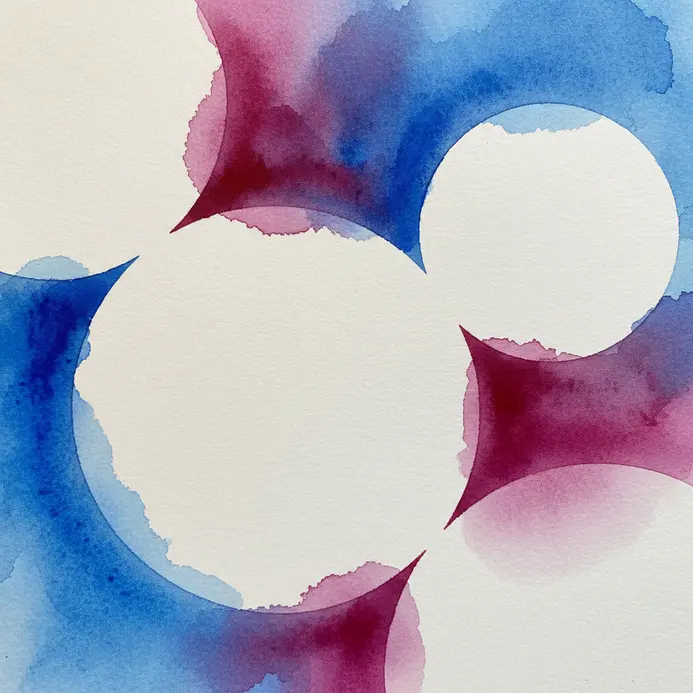
Ever wondered how those clever dot patterns actually work? This technique is all about what you leave out. You start by picturing a shape, then place white circular gaps strategically around it. The darker background color between the circles magically forms your subject. It looks complex, but your brain does the hard work of connecting the dots. I love this one because it feels so clever and minimal. It creates a clean, sophisticated look with very simple elements. For a deeper dive into foundational skills, check out these essential watercolor painting techniques. Try it and feel the satisfaction when that hidden image emerges.
24. Build Depth with Stippled Textured Indigo Midnight
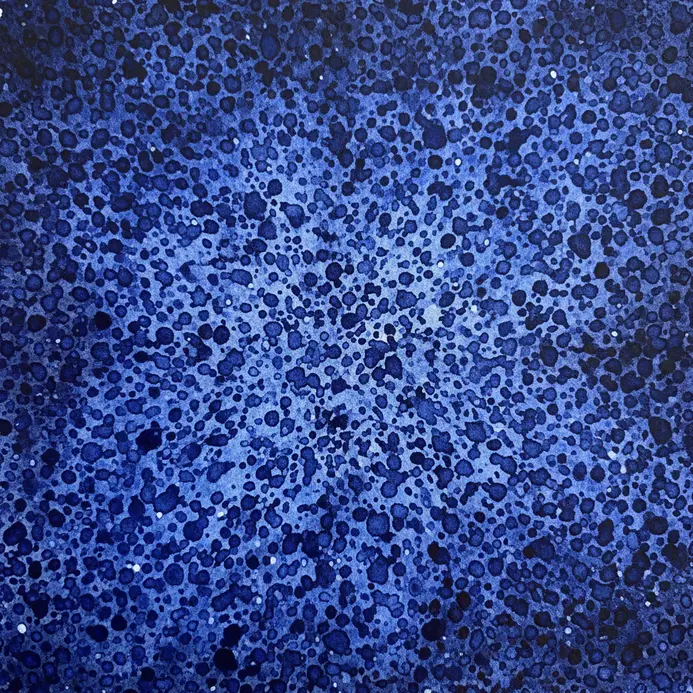
Ever wondered how those tiny dots can create such a sense of vast, mysterious space? Building depth in an easy abstract watercolor painting through stippling meets the moody magic of an indigo midnight palette. You start with a deep indigo wash for your background, then use a brush or pen to build texture with small dots. The trick is to vary the dot density, placing them closer together for darker, closer elements and letting them fade out for lighter, distant areas. It feels like sculpting light and shadow with the tip of your tool. Trust me, the satisfaction comes when you step back and see that deep, cosmic depth appear from a simple pattern of dots. Your painting will have a rich, nocturnal feel that is simply stunning.
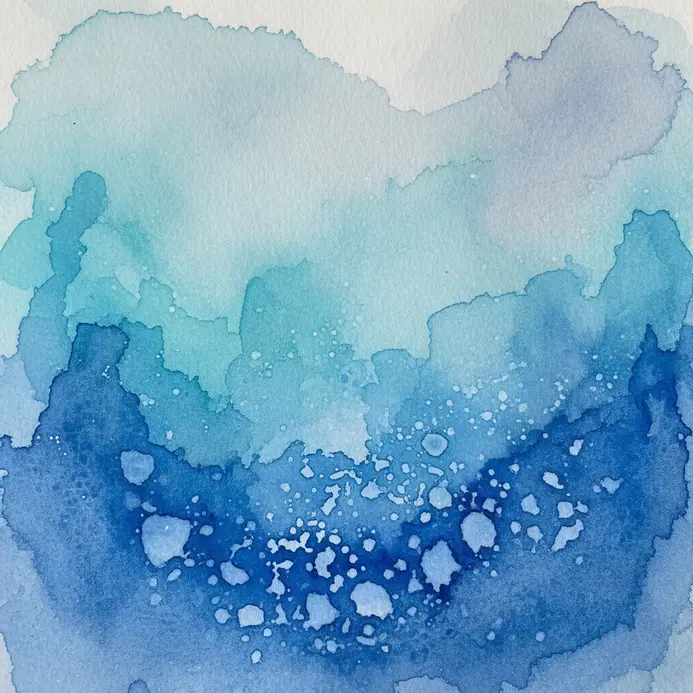
25. Paint Salted Turquoise Ocean Wave Patterns
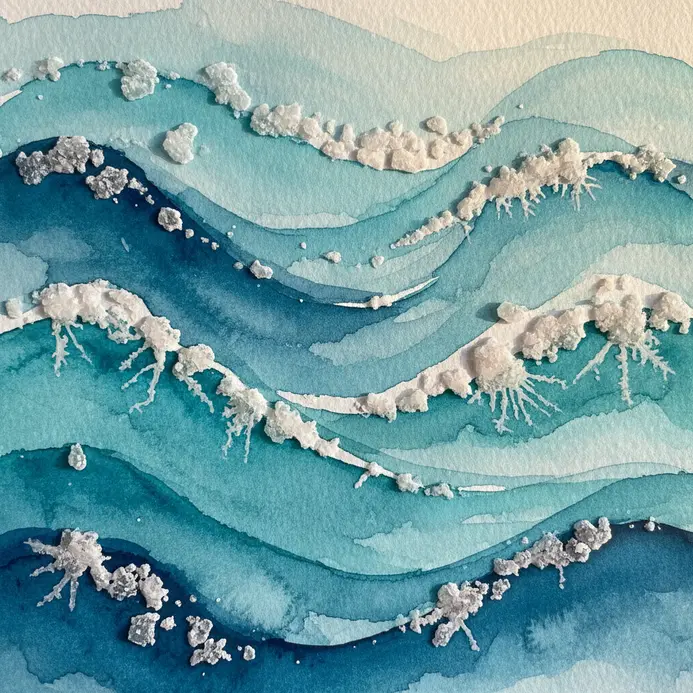
Who would have thought salt could be a paintbrush? This one is a fun textural surprise. Start with a wash of vibrant turquoise for your ocean base. While it is still wet, sprinkle table salt or sea salt onto areas where you want foam and spray. As it dries, the salt pulls the pigment, creating beautiful, crystalline patterns. Then, use a fan brush to dab in some white for the frothy wave crests. The contrast between the smooth turquoise water and the granular texture is what makes this so effective. Trust me, watching the salt work its magic is the best part. Just remember to let it dry completely before brushing the salt away. You will be left with a textured, dynamic seascape that feels alive. Does that not look stunning?
Mounting Finished Works for Gallery Display
A simple, clean mat and frame protects your watercolor and makes it look professional. You want to avoid any mounting method that traps moisture or uses adhesives directly on the paper. The standard is a conservation-grade mat board with acid-free hinging tape, which holds your painting securely without damaging the fibers. This setup also creates a crucial air gap between the glass and your artwork, preventing condensation, which is essential for preserving landscape paintings. For the final presentation, choose UV-protective glass to shield those delicate, transparent pigments from fading over time. This thoughtful finishing touch honors the weeks of work and spontaneous joy you captured in the paint.
Conclusion
The real joy of working with watercolor is in those moments when the paint does something beautiful you did not plan. Each of these easy abstract watercolor painting designs is really an invitation to start a conversation with your materials. My best advice for your next step is to pick your favorite technique from this list—maybe the salt clouds or the plastic wrap texture—and use it as the foundation for three completely different color combinations. See how the same method tells a different story. The most satisfying abstract art comes from following your curiosity, not a set of strict rules, so keep playing with these ideas.
FAQs
Q: What supplies do I need to start an easy abstract watercolor painting?
A: You only need a few basic supply items to get started: watercolor paper, a small set of paints, a couple of different brush sizes, a jar for clean water, a palette or plate to mix colors, and paper towels. These essentials let watercolor artists and beginners start painting without worrying about complex materials, and they’re perfect for beginners who want to play around and explore different techniques.
Q: How do I prevent my paper from warping when using watercolor?
A: To prevent warp, stretch your watercolor paper before your painting session by soaking it briefly and taping it to a board, or use heavier weight paper designed for watercolors. Working with light washes and drying layers fully between applications can also reduce warping. If you don’t want to stretch, try working on a thicker pad or use a backing board to keep the paper flat while you enjoy painting.
Q: What are some easy abstract watercolor exercises for beginners?
A: Simple exercises include wet-on-wet washes, color blending using a color wheel to choose harmonious hues, and playing with salt or plastic wrap textures. Try an exercise where you drop a few colors into a wet sheet and watch how they manipulate and mix—this helps you understand flow and layering, and it’s a low-pressure way to get started and build confidence in your art journey.
Q: How many layers of paint should I use in an easy abstract watercolor?
A: Start with one to three translucent layers of paint, allowing each layer to dry before adding the next. A thin layer of paint creates luminous effects and lets you manipulate colors without muddying them. Remember that watercolor is often about layering light to dark, so less is more; multiple thin layers are usually better than a single heavy layer of paint.
Q: Can I use different brushes for abstract watercolor techniques?
A: Yes—using different brush shapes and sizes helps you explore a range of marks and techniques. Use a large flat or mop brush for washes and a round or liner brush for details and lively strokes. Swapping brushes during a painting session encourages experimentation and lets you play around with texture, edges, and the way pigments lay down on the paper.


