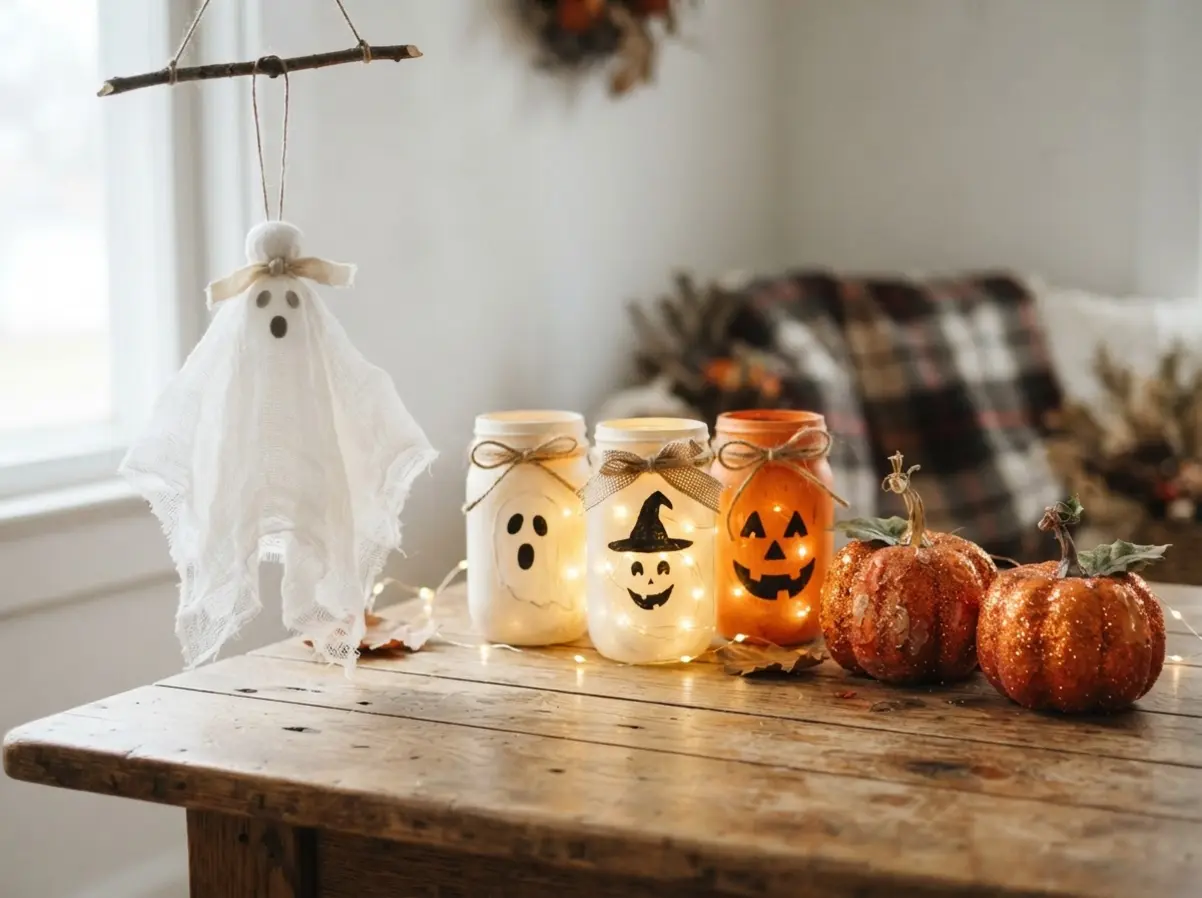


Planning Safe Zones For Guests And Decor
Keep every cord off the walking path by placing battery-operated lights inside props or along furniture edges, never across doorways, which aligns with our core safety guidelines for DIY Halloween Decoration and Party Ideas. Guests need a clear route from the entrance to seating, food, bathrooms, and exits, especially when costumes limit vision. Secure tall cardboard tombstones and hanging silhouettes with removable hooks rated for their weight, then check them at eye level for loose corners. Leave railings, stair edges, and fire doors open, since guests often reach for support in dim rooms.
Set paper, cheesecloth, and faux spiderwebs well away from candle flames, heaters, and serving dishes. Battery lighting suits family parties because it reduces heat near children, pets, food, and fabric. Keep craft surfaces separate from food-safe trays, boards, and serving utensils.
Coordinating Colors Across Rooms And Tables
Repeat two colors and one shape across the entryway, table, and photo area to make separate spaces feel connected, a simple trick often highlighted in DIY Halloween Decoration and Party Ideas tutorials. Matte black, bone white, and muted orange suit a classic haunted-house setting, while white pumpkins with one plum or dark green accent create a cleaner modern look. Choose one accent color before buying paper, paint, napkins, and table labels, since extra shades quickly make a small room feel crowded. Carry the same bat, moon, or jar motif at different sizes so the arrangement feels intentional without covering every surface.
Use matte black cardstock for crisp window silhouettes and garlands, then balance it with lighter table pieces. Keep food labels readable against the tablecloth, and reserve metallic accents for one small focal area rather than mixing them throughout the room.
1. Cheesecloth Ghost Hanging Decoration With Soft Layers
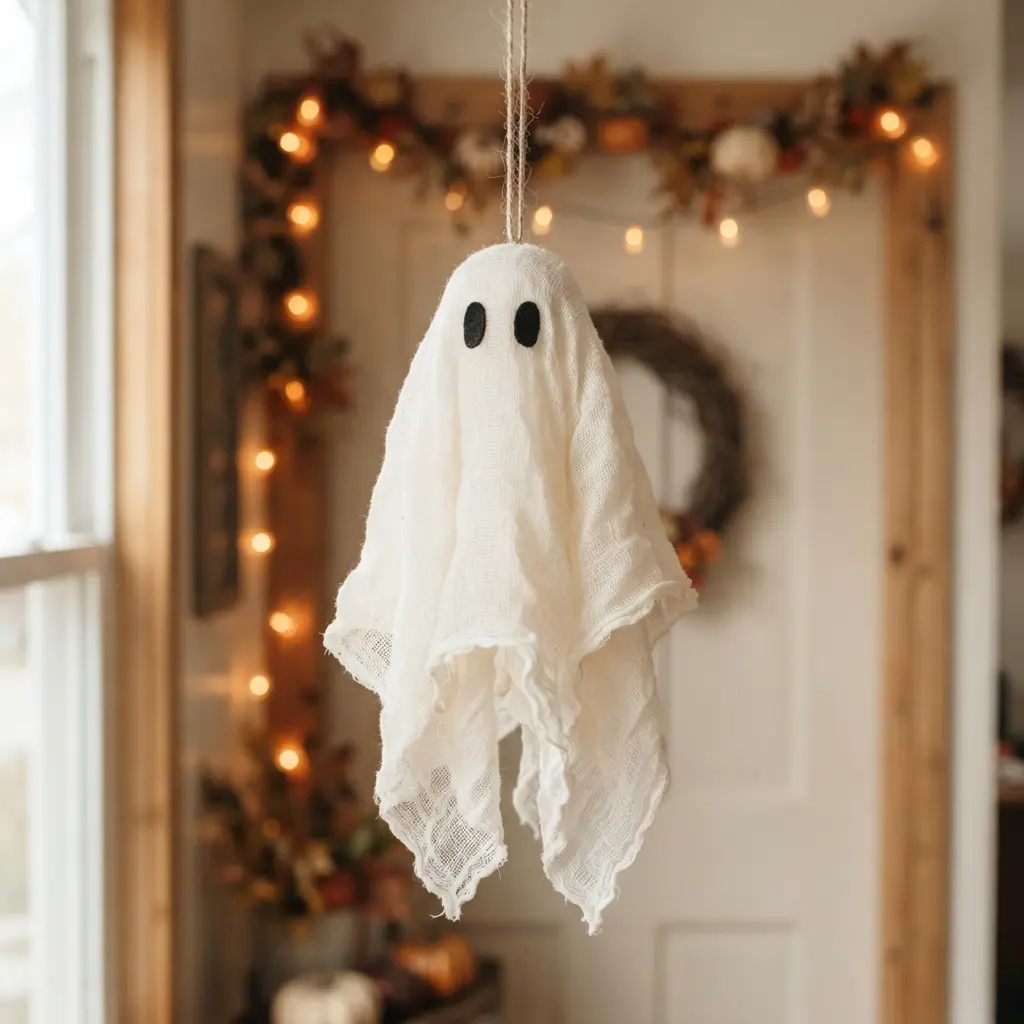
Ever wondered how plain cheesecloth turns into a floating ghost? I love this project because the finished shape looks delicate, yet the steps feel easy and relaxed, making it a staple for any DIY Halloween Decoration and Party Ideas collection.
Start with a balloon or foam ball for the head. Mix equal parts white glue and water, dip several cheesecloth pieces, and drape them over the form. Vary the lengths for loose, uneven edges, then let everything dry overnight before removing the form.
Add black felt eyes, secure fishing line at the top, and hang your ghost from a ceiling, doorway, porch, or tree branch. Place a battery-operated LED light inside for a soft eerie glow. The layered fabric creates an airy texture and gentle movement.
2. LED Lit Haunted Mason Jars for Mantel Decor
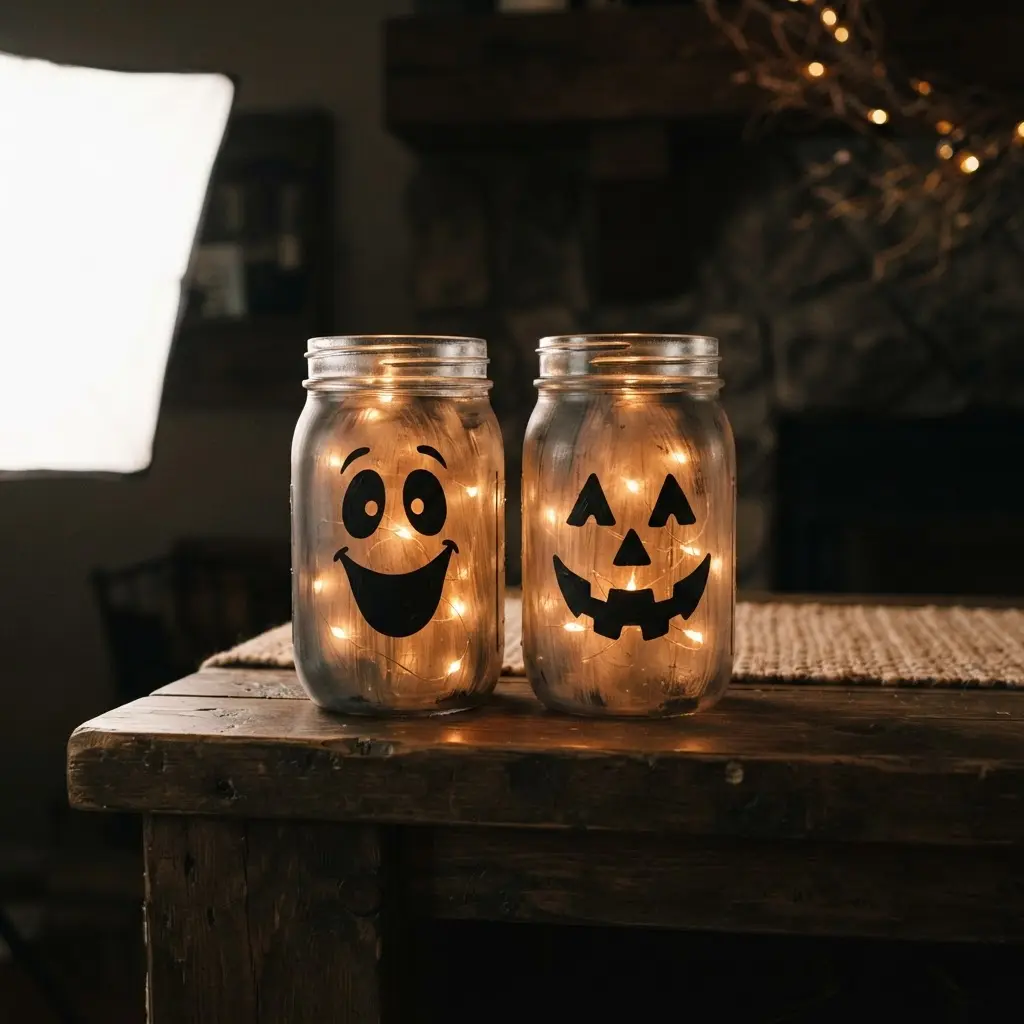
This one turns plain mason jars into glowing mantel accents with almost no fuss, a detail that fits perfectly into our DIY Halloween Decoration and Party Ideas framework. I love how each jar takes on its own haunted personality, especially beside pumpkins and fall greenery.
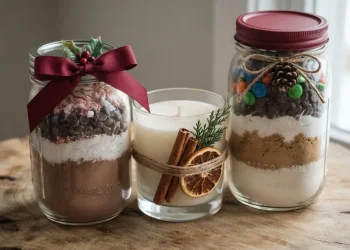
Paint ghost faces, creepy eyes, or haunted-house silhouettes on the glass, then wrap black gauze around the rim. Add battery-operated LED tea lights inside for a warm white or flickering amber glow. Sound complicated? It isn’t.
Finish with twine, ribbon, or a tiny plastic spider, then place the jars at varying heights across the mantel. The glass spreads the light softly, while each painted detail adds character. Trust me on this one, a simple height change makes the whole display feel more dramatic.
3. Dripping Wax Faux Candle Display With LED Glow
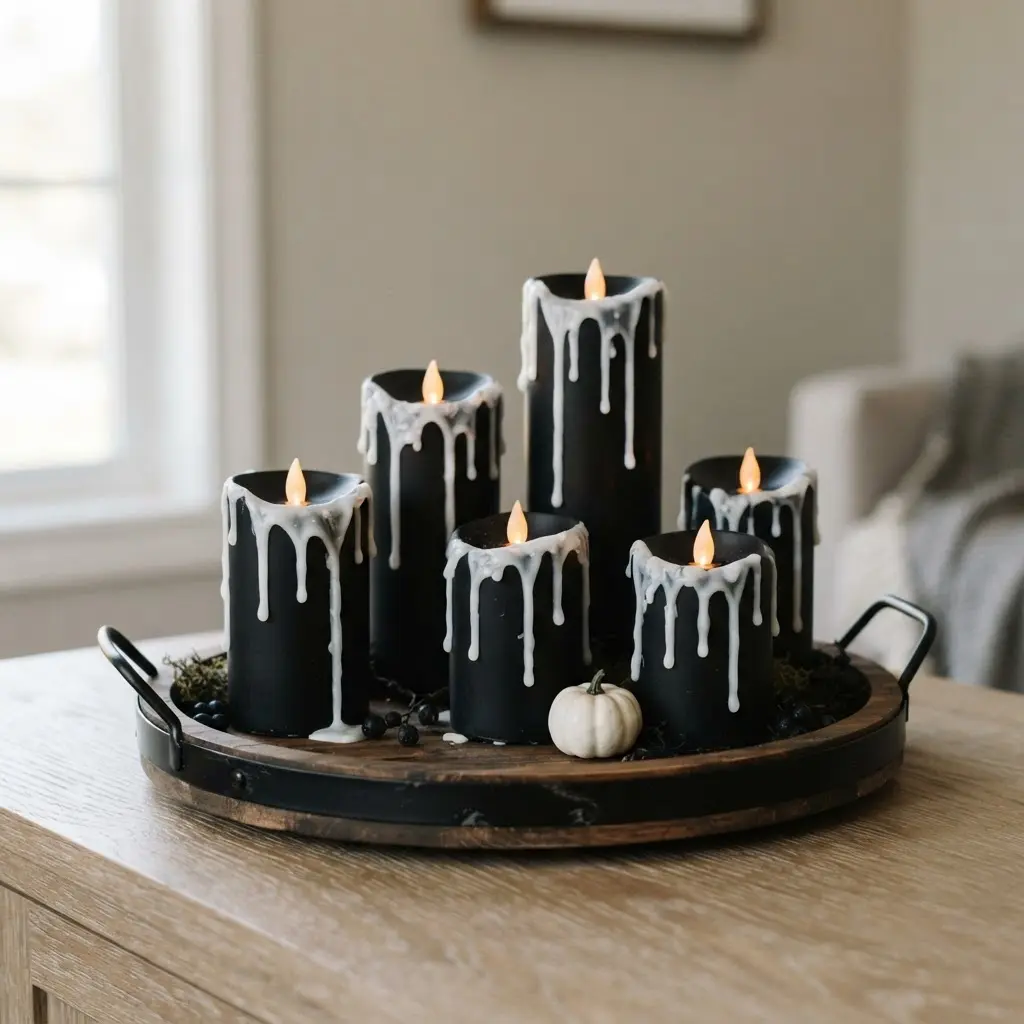
This one is my favorite because it gives a spooky table display without an open flame. Sound complicated? It is not, and it remains one of the most reliable entries in our DIY Halloween Decoration and Party Ideas list.
Place LED tea lights inside small jars, then add uneven trails of hot glue around each rim for a melted-wax look. Paint the jars in soft ivory or charcoal, leaving small gaps for the glow to shine through. LED tea lights keep the setup gentle for busy party spaces.
The uneven drips catch the light and make each faux candle feel handmade. I love grouping three jars at different heights on a tray with dark fabric underneath. Let the paint dry fully before switching on the lights, and keep the glue drips varied instead of perfectly matched.
4. Weathered Cardboard Tombstone Yard Markers in Gray
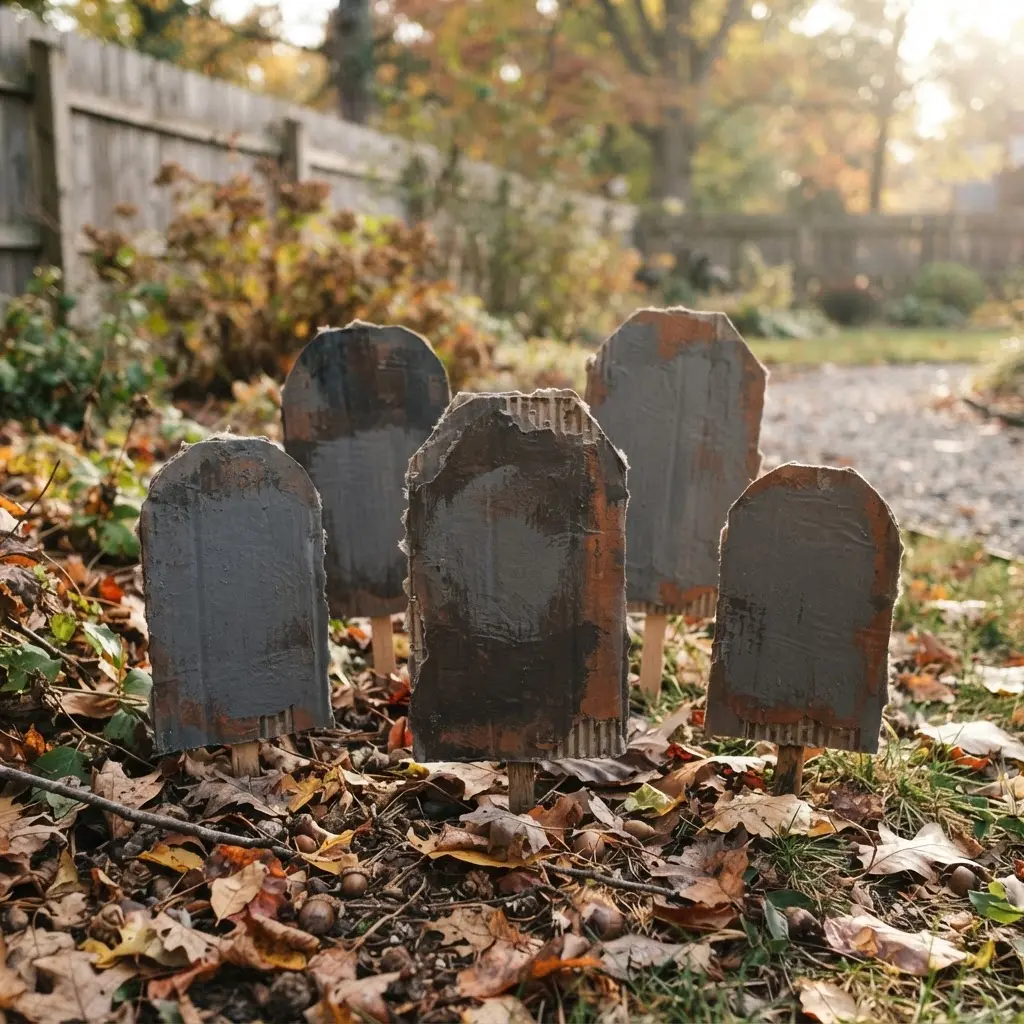
Gray cardboard tombstones standing through the grass give the yard a quiet, worn Halloween look, with each marker shaped like a simple gravestone. Start with gray cardboard, sketch a tombstone silhouette, and cut it out with care, which perfectly demonstrates our DIY Halloween Decoration and Party Ideas approach.
Add soft, uneven gray shading so the surface looks aged rather than fresh. Isn’t it satisfying when a plain sheet begins to resemble a row of old yard markers? I love how this simple form creates a clear Halloween scene without taking much space.
Set each piece along a path, near the garden, or around the party area so guests notice the spooky marker effect as they arrive. Keep the shapes broad and easy to read from a distance, and place them on firm ground. A quick check after windy weather keeps your display looking tidy.
5. Cotton Webbed Spiderweb Doorway Entrance With Spiders
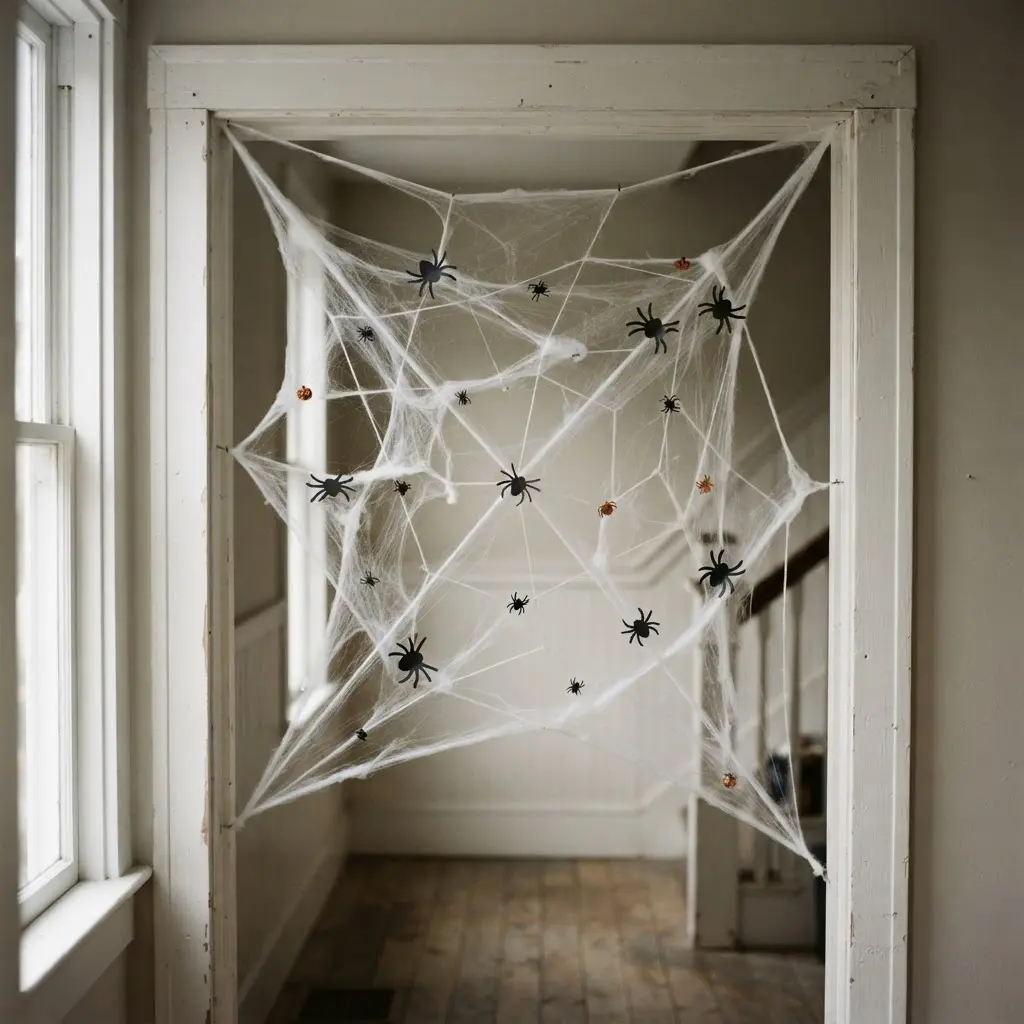
Many people stretch spiderweb cotton in tidy lines, but uneven pulls create the neglected look you want. Sound complicated? It is not, and this technique remains a classic within any DIY Halloween Decoration and Party Ideas plan. Cover the door frame with thick cotton webbing, pulling some sections wide and leaving others bunched.
Tuck large plastic spiders through the web, then hang an oversized one above the entrance with clear fishing line. Add dim purple or orange light and an “Enter If You Dare” sign near the frame. I love how this setup turns a plain doorway into an instant party focal point. Pro tip: keep the lowest hanging spider above head height so guests enter safely and still get a fun surprise.
6. Monster Paper Front Door Facade in Bold Colors
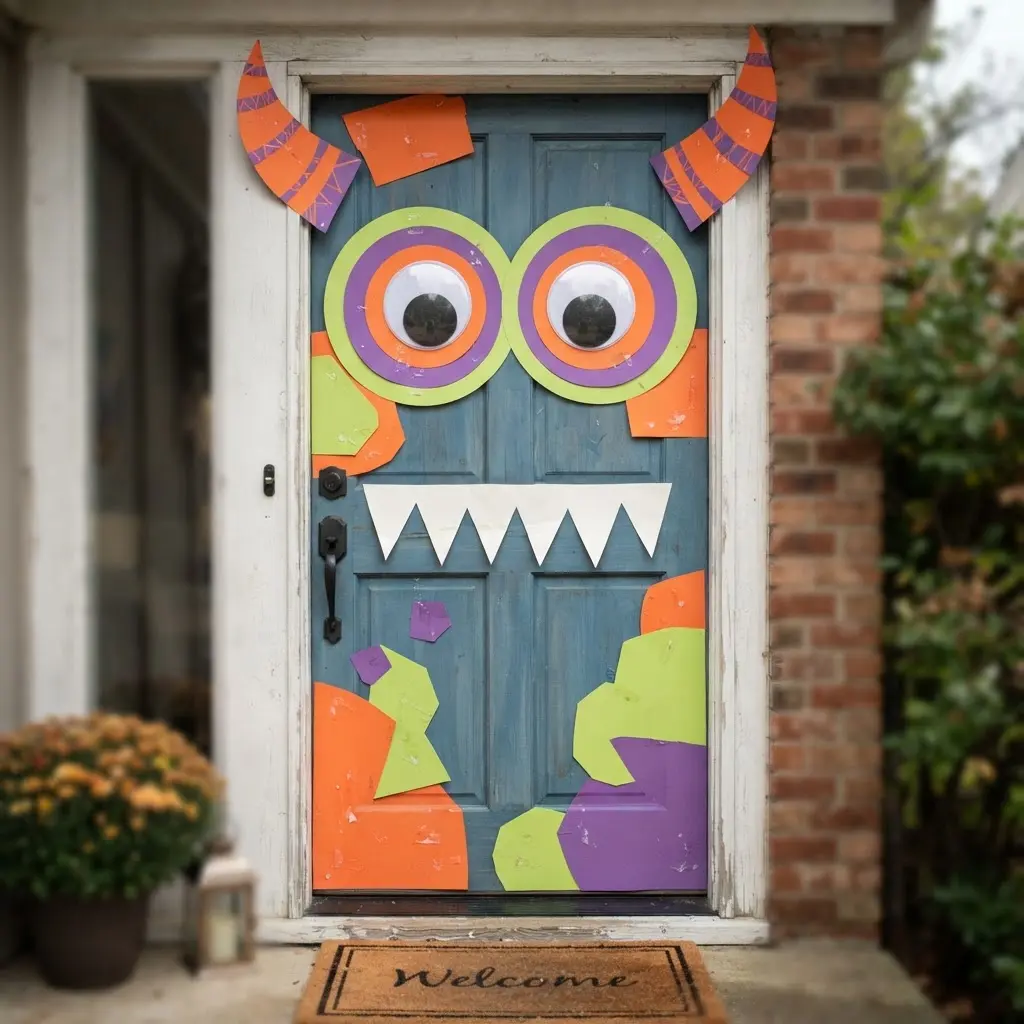
Grab colored cardstock in purple, green, orange, or blue, then cut a face large enough to cover your door, an essential first step for DIY Halloween Decoration and Party Ideas creators. Add mismatched eyes, a wide silly mouth, jagged white teeth, horns, ears, and thick eyebrows. Keep several teeth around the doorknob so the handle stays usable.
Layer foam board details over the cardstock for raised spots, scales, or spikes without adding much weight. I love how bold color pairs, such as lime green with purple, make every feature easy to see from the walkway. Finish with paper footprints and a sign reading “Enter If You Dare!” Doesn’t this playful monster make the entrance feel ready for Halloween?
7. Glowing Labeled Witch Potion Bottles With Green Light
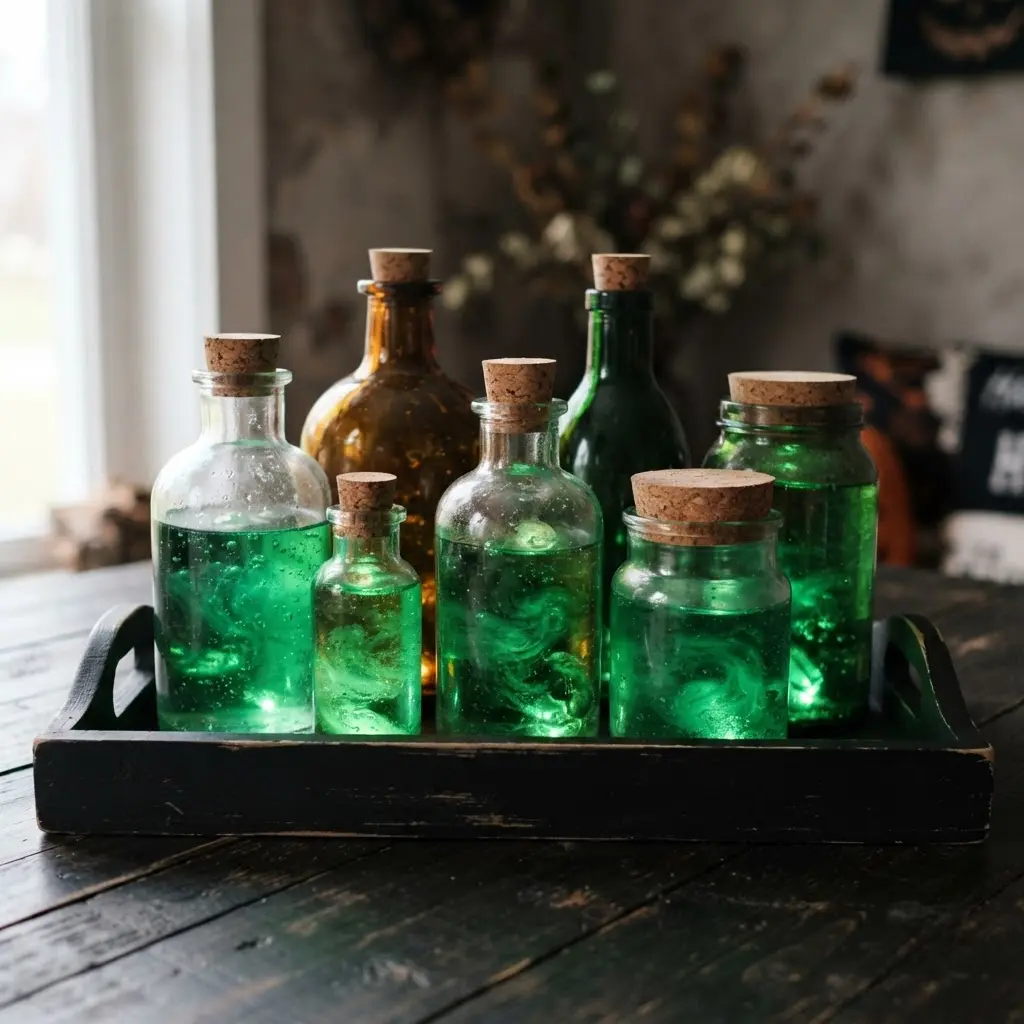
Ever wondered how old bottles become the star of a spooky table? Arrange old glass bottles on a dark wooden surface, then add cork stoppers and handwritten labels such as “Dragon’s Breath,” “Moonwater,” and “Toxic Elixir,” which aligns with our DIY Halloween Decoration and Party Ideas vision. Place green lighting inside or beneath the bottles, following the device instructions, so the liquid appears to glow from within.
Surround the group with dried herbs, bones, and a few spell ingredients, leaving the glass fronts clear. Keep labels facing forward so guests read each potion name through the green glow. I love how the dark wood, mist, reflections, and soft shadows create a gothic laboratory feel without crowding the display.
Check every light and bottle setup for safe use before guests arrive.
8. Black Cardstock Hanging Bat Swarm Across a Wall
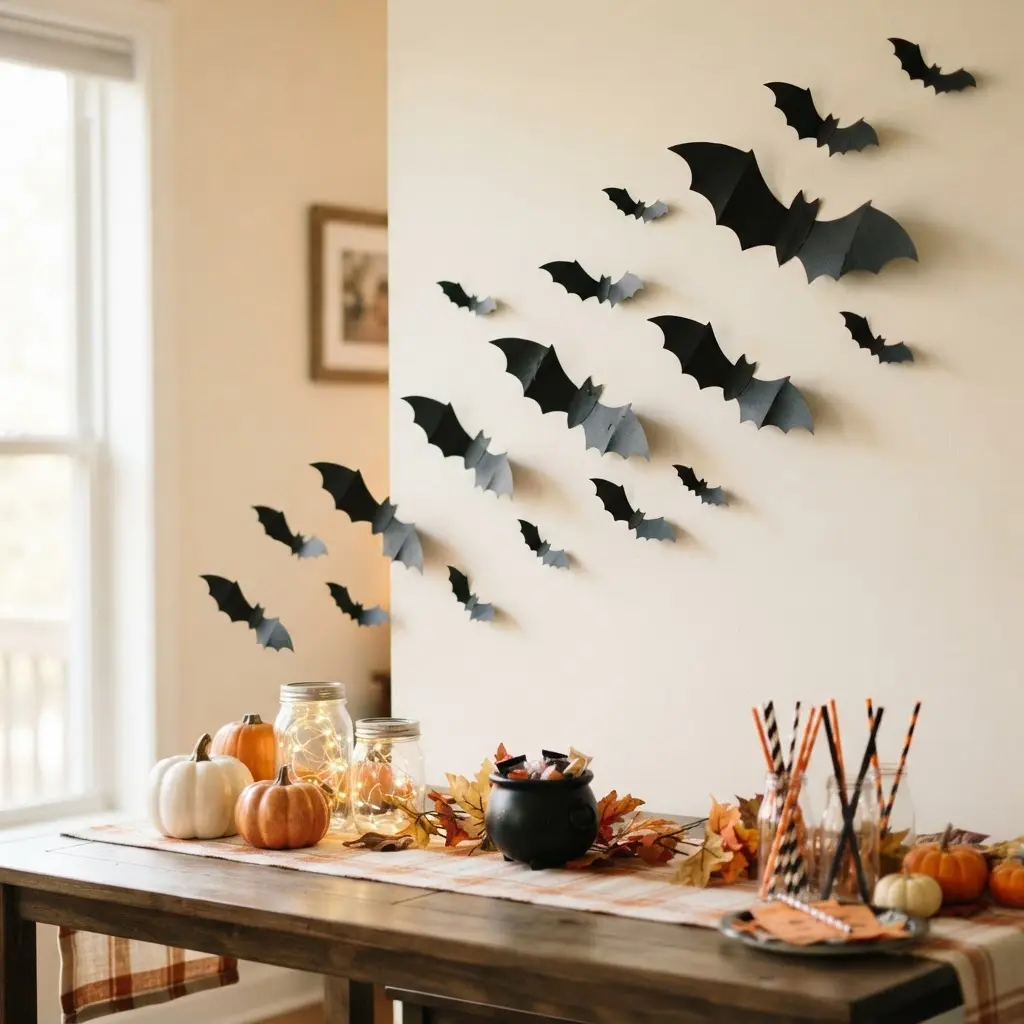
This wall display gives a plain room instant Halloween character with a handful of paper shapes. Cut small, medium, and large bats from black cardstock, then gently fold each wing upward, a quick method that fits neatly into DIY Halloween Decoration and Party Ideas planning. Arrange them in a curved, rising path, keeping the first group close and spacing later bats farther apart. Sound complicated? It is not.
Use removable adhesive on the wall, then suspend a few bats with black thread near a doorway, staircase, or fireplace. I love how the varied sizes make the swarm feel active without adding much cost or clutter. Keep the hanging pieces sparse, and enjoy the satisfying lift they bring to your Halloween party space.
9. Window Silhouette Black Paper Cutouts With Moonlight
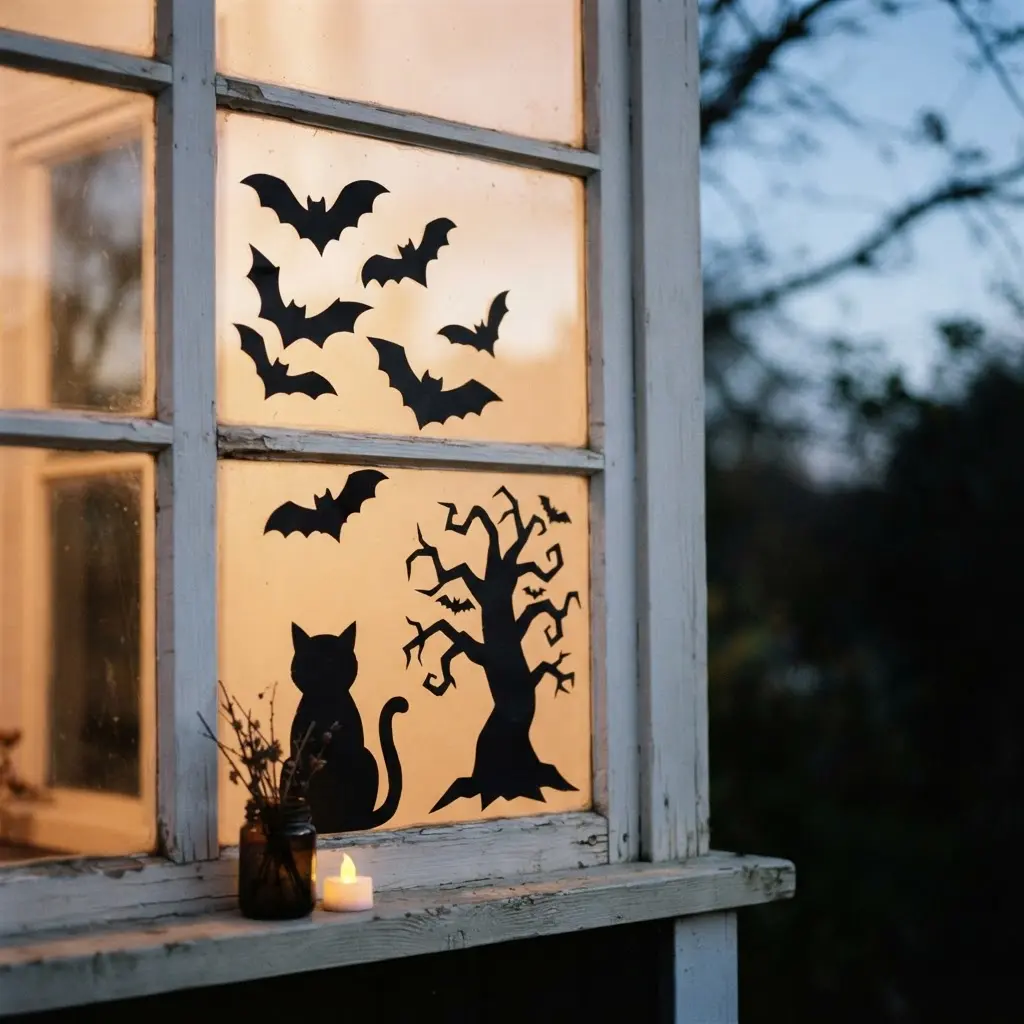
This one is a favorite of mine because it gives a window such a mysterious nighttime look. Sound complicated? It isn’t, which is why it ranks high in any DIY Halloween Decoration and Party Ideas guide. Cut black paper into branches, birds, cats, and distant rooftops, keeping each shape clear and easy to recognize. Arrange them over a midnight-blue background with a full-moon circle behind the main scene.
Build a layered silhouette scene by placing some shapes close to the window and others farther from the moon. Add silver-blue lighting so crisp shadows stretch across the wall and floor. The strong contrast and handmade paper edges create depth without needing many supplies.
Keep the moon visible as your focal point, then enjoy the spooky story your window tells.
10. Halloween Themed Streamer Photo Backdrop in Orange
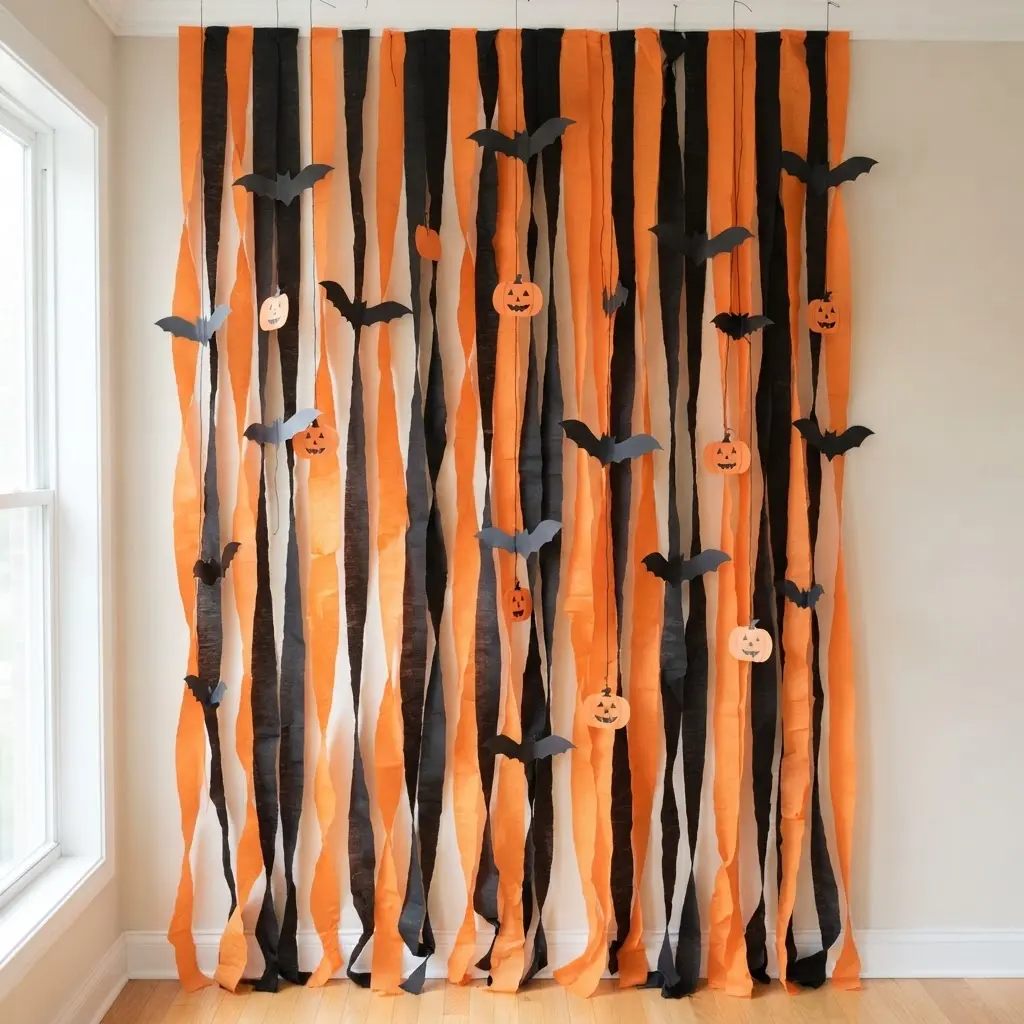
The finished backdrop glows with warm orange lighting, with streamers hanging in loose layers behind a cheerful photo spot. Black and purple shapes break up the color, while bats, ghosts, pumpkins, and spiderwebs give every snapshot a playful spooky touch, a setup that perfectly matches our DIY Halloween Decoration and Party Ideas standards. Isn’t the color mix inviting?
Start with layered orange streamers, securing each strip so guests do not pull them loose. Spread the decorations across the backdrop, then place the bold “Happy Halloween” sign where faces will not cover it. I love adding small pumpkin pieces near the edges for balance. Keep the lighting warm enough to show the streamer texture, and your party photos will feel festive without looking crowded.
11. Spooky Prop Filled Photo Booth With Playful Signs
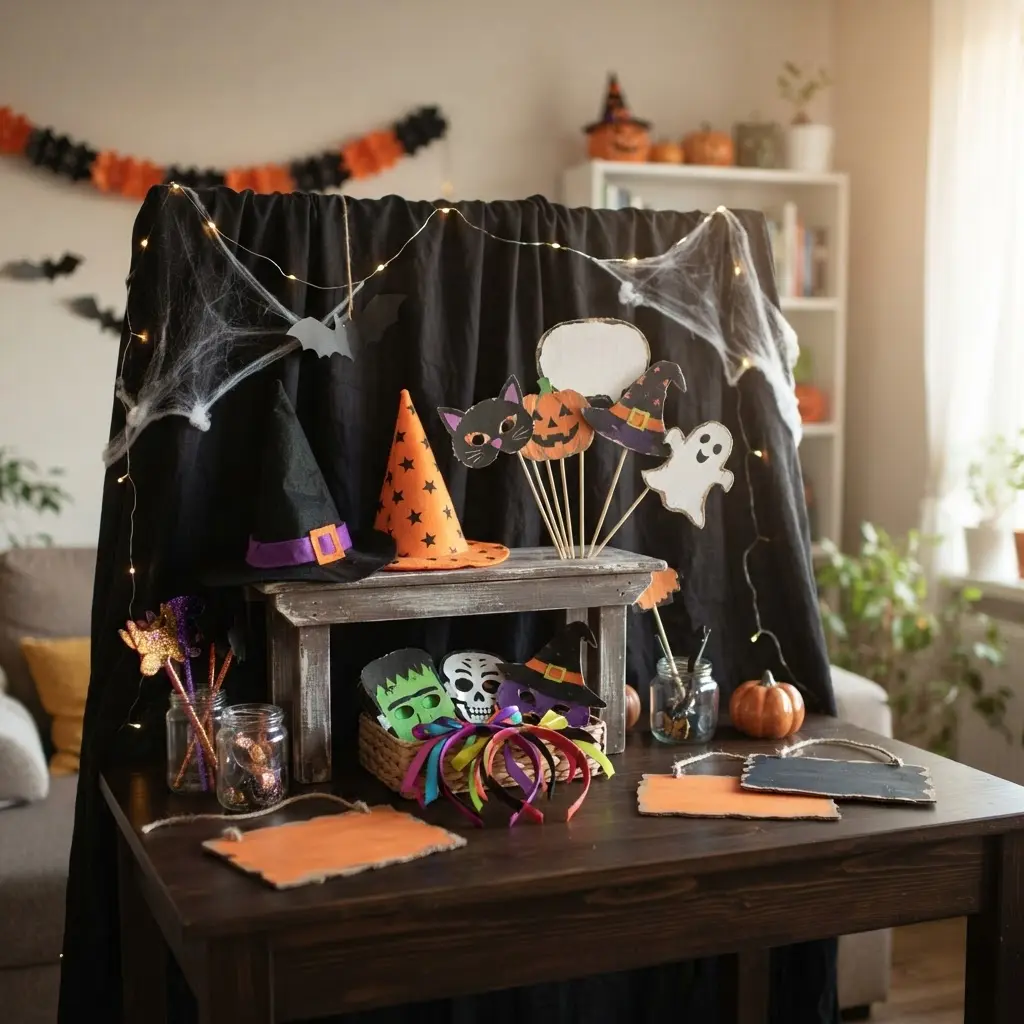
Many hosts pile every accessory onto one surface, but a crowded prop station slows the fun. Start with a black, purple, and orange backdrop, then add faux spiderwebs, hanging bats, pumpkins, and eerie string lights. Keep a small table or barrel beside it for witch hats, capes, fangs, sunglasses, skeleton gloves, and speech bubbles, which keeps your DIY Halloween Decoration and Party Ideas layout organized. Is a spooky booth only meant to frighten guests?
I love adding signs reading “Creep It Real” and “Too Cute to Spook” because silly poses bring out more smiles. Place “Pick a Prop and Strike a Spooky Pose!” where everyone sees it, and supervise tiny pieces around young children. The setup works because decoration and entertainment share one cheerful spot.
Trust me, guests will linger for photos and enjoy the playful Halloween atmosphere.
12. Halloween Themed Charcuterie Snack Board With Shapes
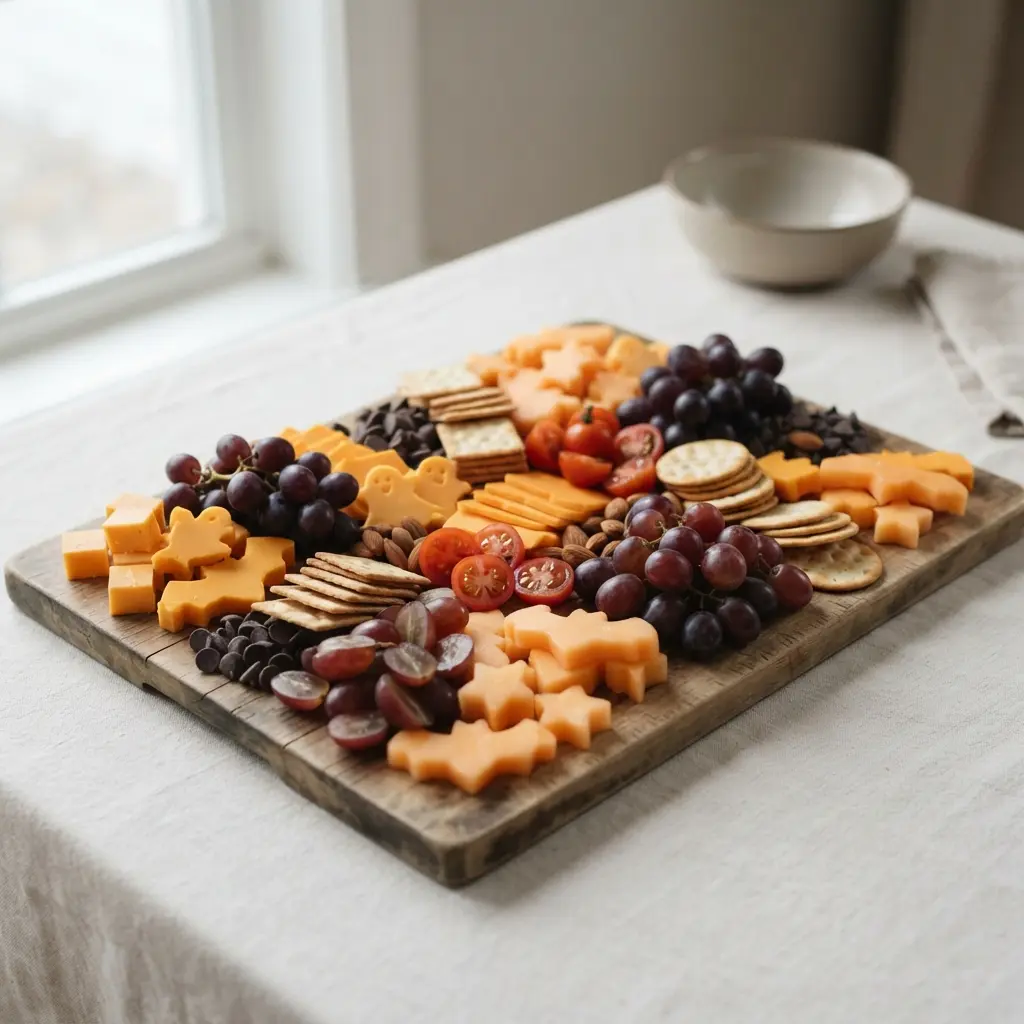
Grab a black or orange serving board and place the largest cheese shapes first. Cut mozzarella or brie into ghosts, orange cheddar into pumpkins, and dark crackers, chocolate, or salami into bats, an edible technique featured in many DIY Halloween Decoration and Party Ideas roundups. Isn’t it satisfying to see the spooky shapes appear so quickly?
Fill open spaces with crackers, pretzels, grapes, nuts, dried fruit, olives, and Halloween candy, then tuck in small bowls of dip or candy corn. Add edible eyes to grapes, blueberries, and mozzarella balls for monster bites, while prosciutto strips wrapped around cream cheese create easy mummies. I love how the strong color contrast keeps every shape visible.
Leave breathing room so each snack stays easy to recognize.
13. Crescent Dough Wrapped Mummy Dogs With Mustard Eyes

Want a spooky party bite with almost no fuss? I love these crescent-wrapped mummy dogs because familiar hot dogs become playful Halloween food in minutes, making them a reliable entry in our DIY Halloween Decoration and Party Ideas food section. Cut refrigerated crescent dough into thin strips, then wind them around each hot dog with small gaps between the bands.
Leave one end open for the face, and keep the wrapping loose enough for the hot dog to show through. Set them on a parchment-lined baking sheet and bake at 375°F (190°C) for 12 to 15 minutes, until golden brown. Cool for a few minutes before adding two tiny mustard eyes, then serve with ketchup or extra mustard for dipping.
The separated strips and warm color make the spooky shape Easy halloween face painting ideas, and the finished tray feels cheerful rather than fussy. Trust me on this tip: thin strips give each mummy a cleaner look.
14. Decorated Face Monster Fruit Cups With Colorful Labels
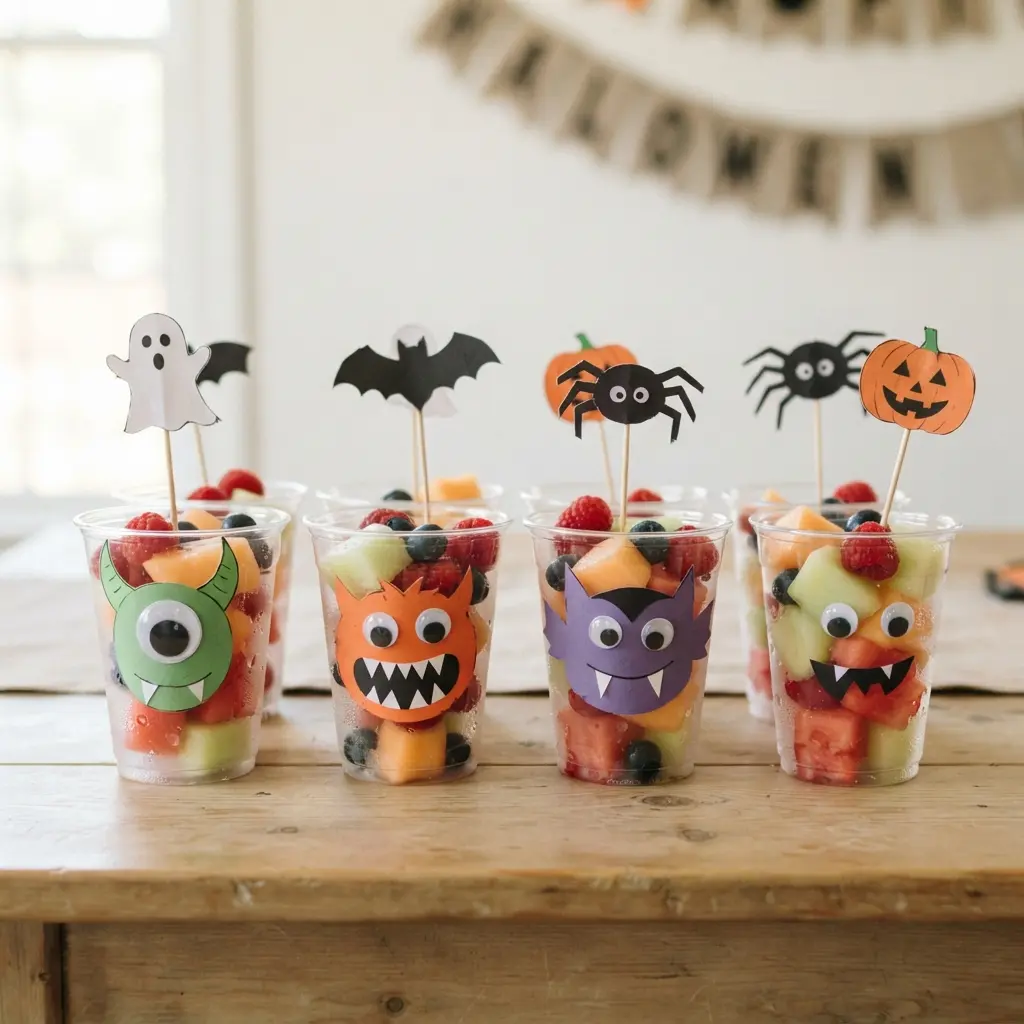
These party treats turn a snack table into a playful Halloween display. Fill clear cups with prepared fruit, then give each one a silly monster face using food-safe decorations or simple fruit details, a quick addition to your DIY Halloween Decoration and Party Ideas spread. Add colorful labels with names such as “Boo Berry” or “Goblin Grapes” to help guests spot each snack quickly.
Sound complicated? It isn’t. I love how different faces make the cups feel personal, even with a simple setup. Keep the labels bold and easy to read, and place the cups together for a cheerful treat station. Your guests will smile before they take the first bite.
15. Gummy Worm Infused Witch Punch With Green Foam
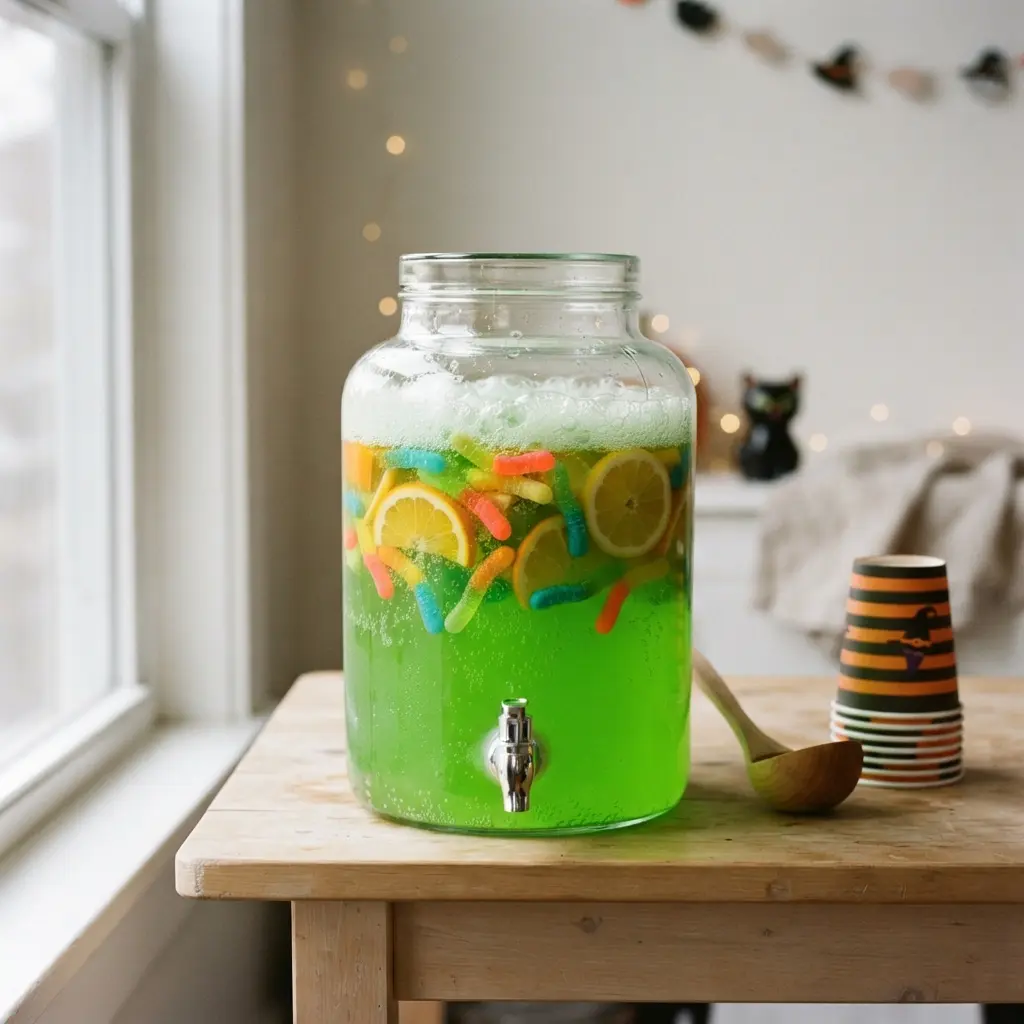
This punch is one of my favorite Halloween party drinks because it looks wild with little effort, a beverage staple within DIY Halloween Decoration and Party Ideas guides. Soak gummy worms in pineapple juice for at least 30 minutes, then chill them while you prepare the other ingredients. Add lime sherbet, pineapple juice, green apple juice or limeade, and ice to a punch bowl. Sound complicated? It is not.
Pour in chilled lemon-lime soda at the last moment, stirring gently as the sherbet fizzes into a frothy green brew. Spoon or pipe green whipped cream onto each glass, then add a lime slice and one extra candy worm. The bright color, fizz, and chewy candy give every serving a playful witch-brew look.
I love how the soaked worms carry pineapple flavor into the drink while staying fun to spot. Keep the cream at soft peaks so it sits neatly on top instead of turning grainy. Serve right away for the fullest foam and freshest fizz.
16. Black Olive Spider Deviled Eggs on a Serving Tray
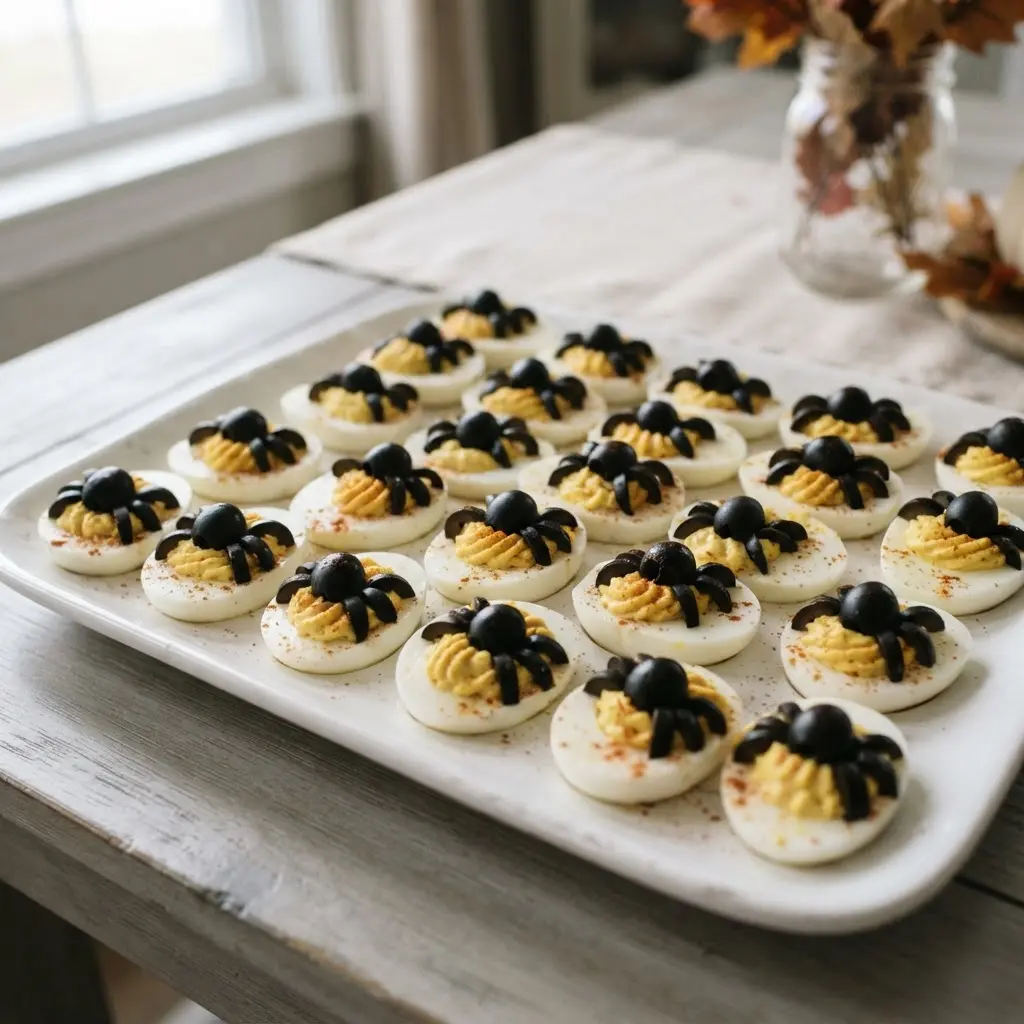
Glossy black olive spiders perch on creamy deviled eggs, turning a serving tray into a playful Halloween centerpiece. Sound complicated? It is not, which makes this appetizer a reliable choice for DIY Halloween Decoration and Party Ideas hosts. Pipe or spoon the filling into halved eggs, then top each one with an olive body and thin olive strips for legs. A piping bag gives the filling neat ridges, though a small spoon works well too.
I love how this edible display adds spooky detail without extra decorations. Arrange the eggs on a dark tray, keep them chilled until serving, and add a few parsley leaves for color. Make the spider legs short and even so each egg stays easy to pick up. Feel proud when guests spot the tiny spiders!
17. Dirt Topped Graveyard Brownies With Cookie Tombstones
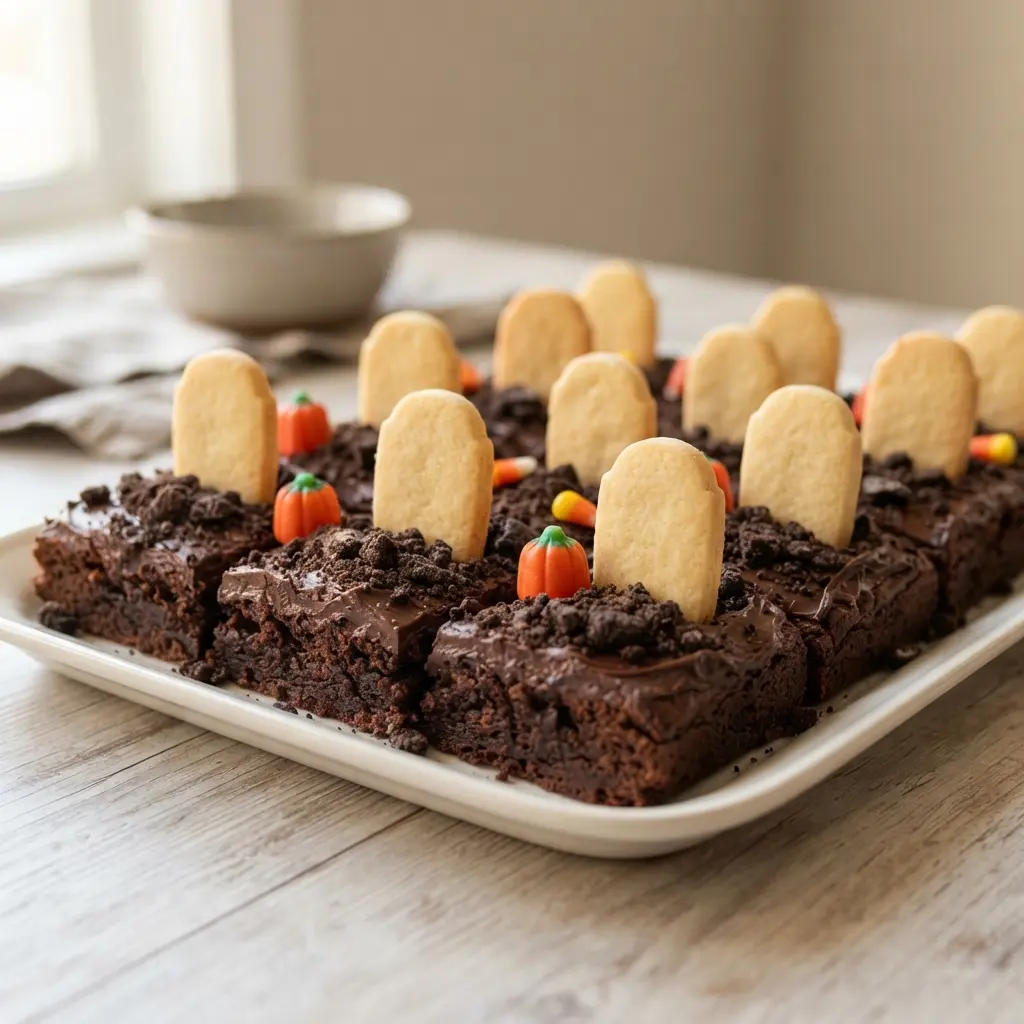
A common mistake is topping warm brownies, which makes frosting slide and cookie crumbs clump. Cool the brownies fully, then spread on chocolate frosting and cover it with finely crushed sandwich cookies, following the exact method outlined in our DIY Halloween Decoration and Party Ideas baking notes. Ever wondered how the tombstones stay upright? Press 12 to 16 iced sugar cookies into the surface only after their thick gray icing has set.
Use black icing for RIP, Boo, cracks, or tiny crosses, then add gummy worms, candy pumpkins, and green icing grass between the cookies. I love how the gray, black, and chocolate tones make this easy party centerpiece look instantly like a tiny cemetery. Cut it into squares at room temperature, and leave enough crumb-covered space so every detail stays visible.
18. Pumpkin Shaped Cheese Ball Appetizer With Cracker Stem
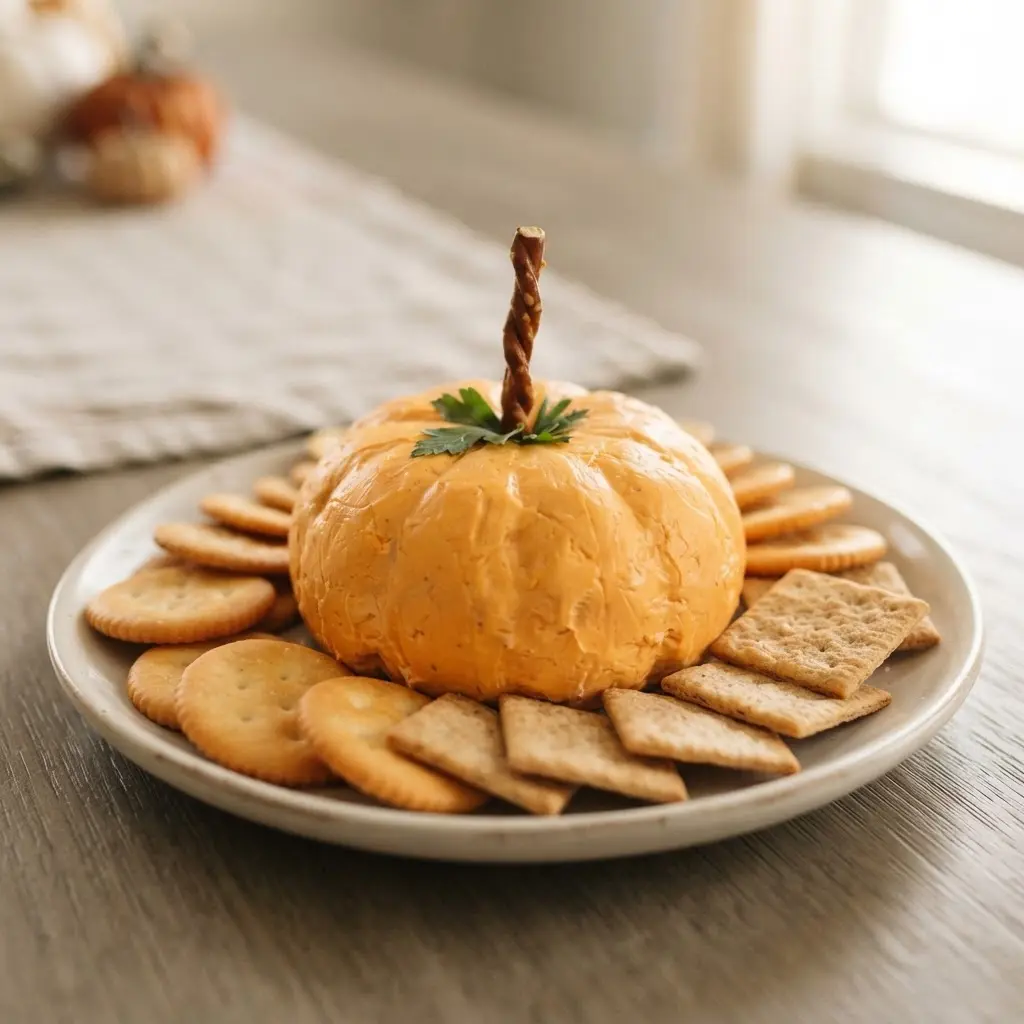
Beat softened cream cheese and sour cream until smooth, then stir in shredded cheddar, pepper jack, chives, garlic powder, onion powder, smoked paprika, salt, and pepper. Chill the mixture for 30 to 60 minutes, shape it into a ball with plastic wrap, and gently flatten the top and bottom, a process that fits neatly into any DIY Halloween Decoration and Party Ideas prep schedule. Roll it in crushed orange cheese crackers, press soft vertical ridges around the sides, and tuck a small cracker or pretzel into the top.
Sound complicated? It is not, and I love how this easy party appetizer becomes a pumpkin centerpiece. Chill it again before serving for a neat shape, then set out crackers, vegetables, or apple slices.
19. Creative Labeled Halloween Candy Bowls for Guests
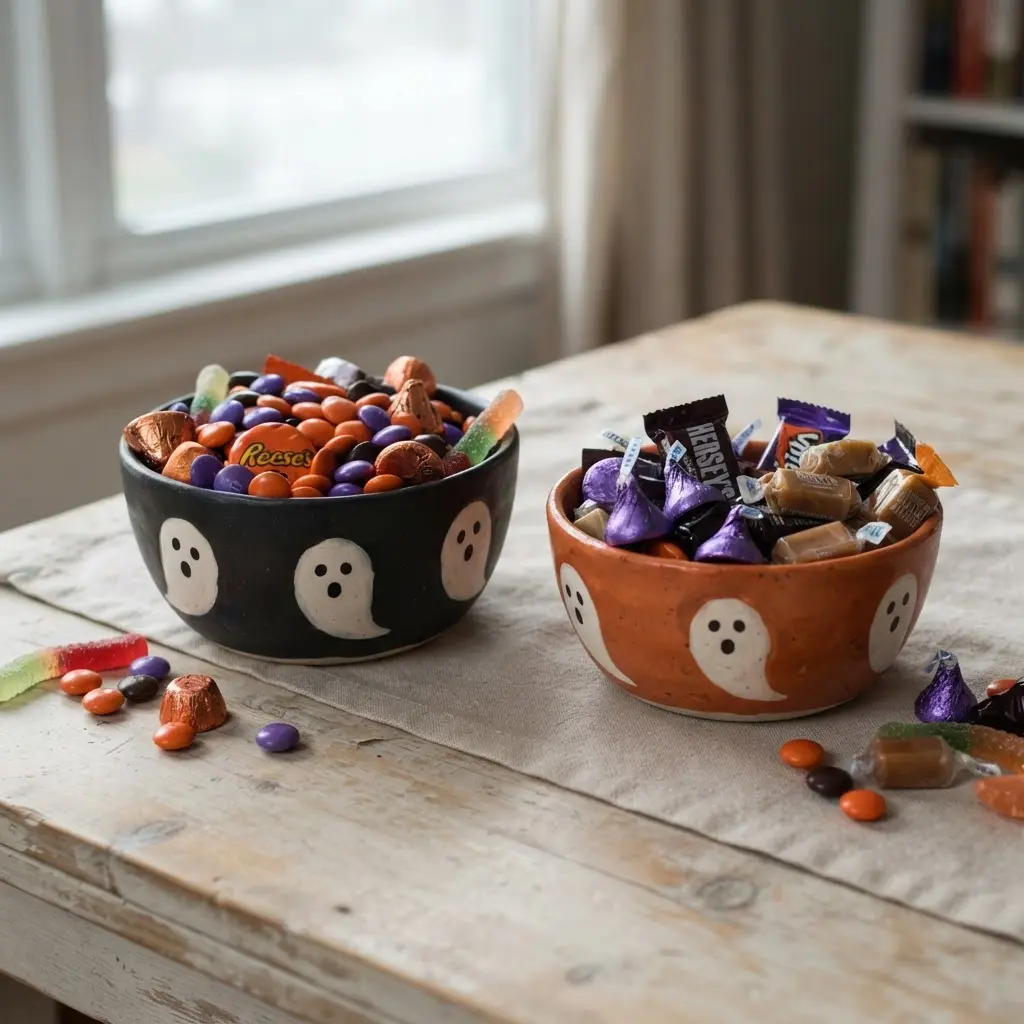
Want a candy bowl guests will talk about before grabbing a treat? Start with a large decorative bowl, then fill it with sweets matching one playful label, such as “Witch’s Warts,” “Vampire Bites,” or “Monster Munch,” a quick addition to your DIY Halloween Decoration and Party Ideas display. I love grouping green, purple, orange, and red candies so the display feels planned rather than crowded. Set a bold warning sign beside the bowl, where every visitor sees it first. Trust me, “Take One…If You Dare!” adds instant humor, while a small cauldron gives potion labels extra personality.
Keep the setup simple and let the candy colors do the work.
20. Painted Pumpkin Contest Display Station With Name Cards
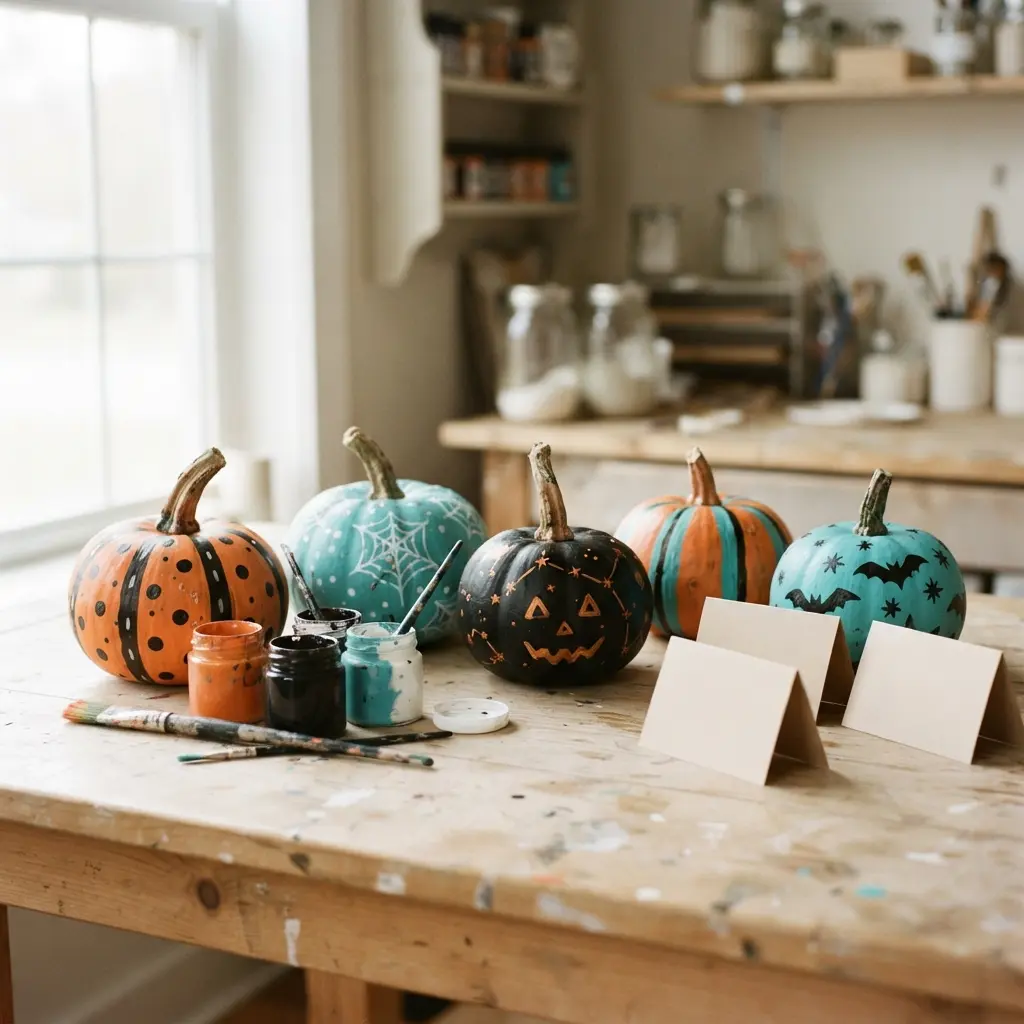
This station turns painted pumpkins into the evening’s cheerful centerpiece. I love arranging entries on tiered tables, wooden crates, or hay bales so each design stands clear against a fall backdrop, a layout that matches our DIY Halloween Decoration and Party Ideas event planning. Add autumn leaves, mini pumpkins, chalkboard signs, and battery-operated lights for a warm finish.
Place a name card beside each entry with the participant, pumpkin title, and category, then post signs for Most Creative, Funniest Design, or People’s Choice. Sound complicated? Not at all. Voting slips or coloured tokens give guests an easy way to choose favourites, while the organised layout keeps judging fair. Pro tip: prepare the name-card template before guests arrive, and enjoy seeing every artist feel proud.
21. Indoor Halloween Themed Scavenger Hunt With Clue Cards
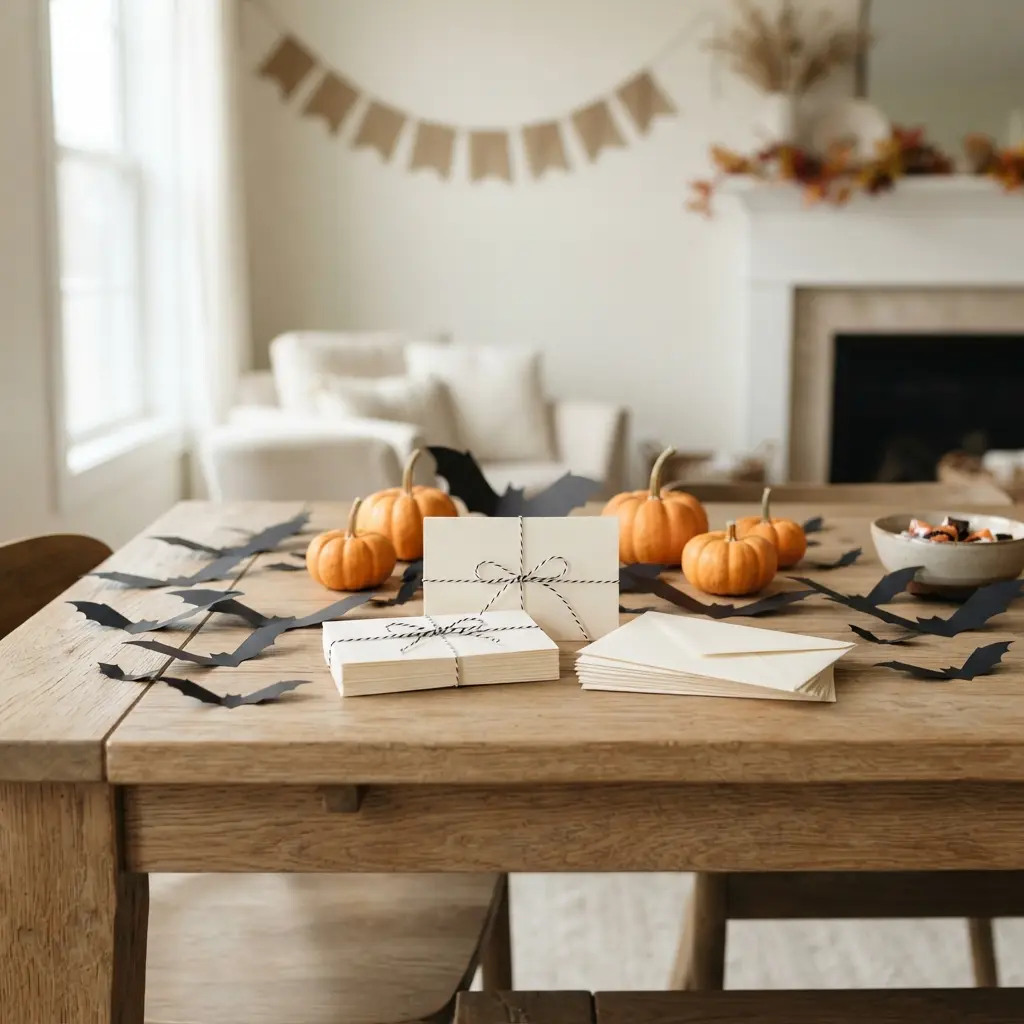
This is one of my favorite party activities because ordinary rooms turn into spooky stops. Prepare rhyming clue cards, label the starter, then hide each following card near shoes, the sofa, kitchen counter, refrigerator, mirror, bed, bookshelf, and bathroom, keeping your DIY Halloween Decoration and Party Ideas schedule on track. Each riddle points players toward the next spot, while the final card leads to a bowl of candy, glow sticks, or goodie bags. Sound complicated? It is not.
Use sturdy cardstock with large writing for younger children, plus picture hints for early readers. Test the route before guests arrive, and keep cards away from ovens, medicine, cleaning supplies, sharp objects, and blocked walkways. A short route through one or two rooms suits toddlers best. I love the happy excitement when everyone finds the final treasure bowl together.
22. Mystery Texture Touch Sensory Boxes With Covered Openings
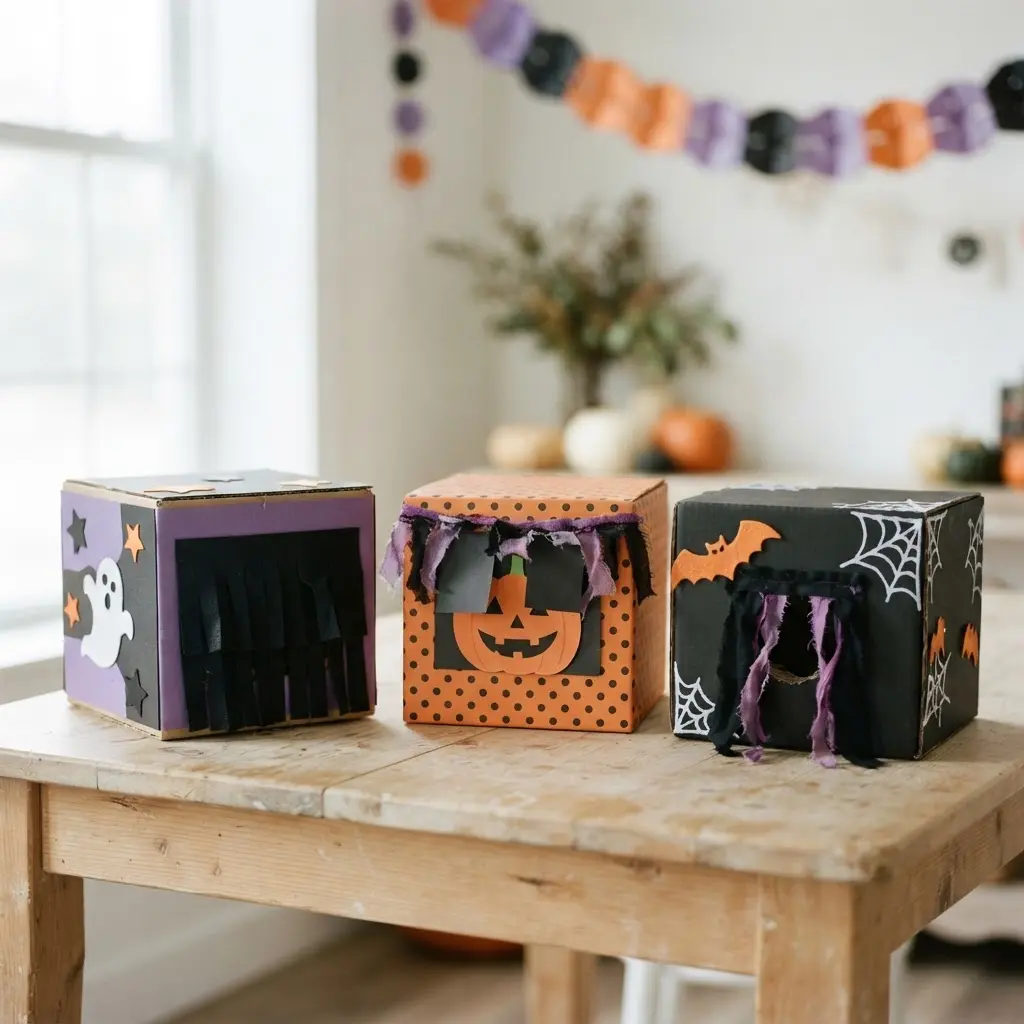
Soft pom-poms, rough sandpaper, and smooth stones wait inside numbered boxes, while fabric openings hide every clue. Will anyone guess each object without seeing it? Cut a hand-sized opening in a small cardboard or tissue box, cover it with fabric or a sock, then secure the edges with tape, an engaging craft featured in many DIY Halloween Decoration and Party Ideas activity lists. Add one safe texture per box and place a number on the front.
Invite guests to feel, describe, and guess before revealing the answer. I love how this party game builds tactile vocabulary and friendly turn-taking through clues such as “fuzzy,” “hard,” or “bumpy.” Choose large, non-toxic items, and avoid sharp, fragile, allergenic, or choking-hazard materials. Keep an adult nearby throughout play.
Numbered boxes keep the mystery intact.
23. Faux Skeleton Bone Table Centerpiece With Black Cloth
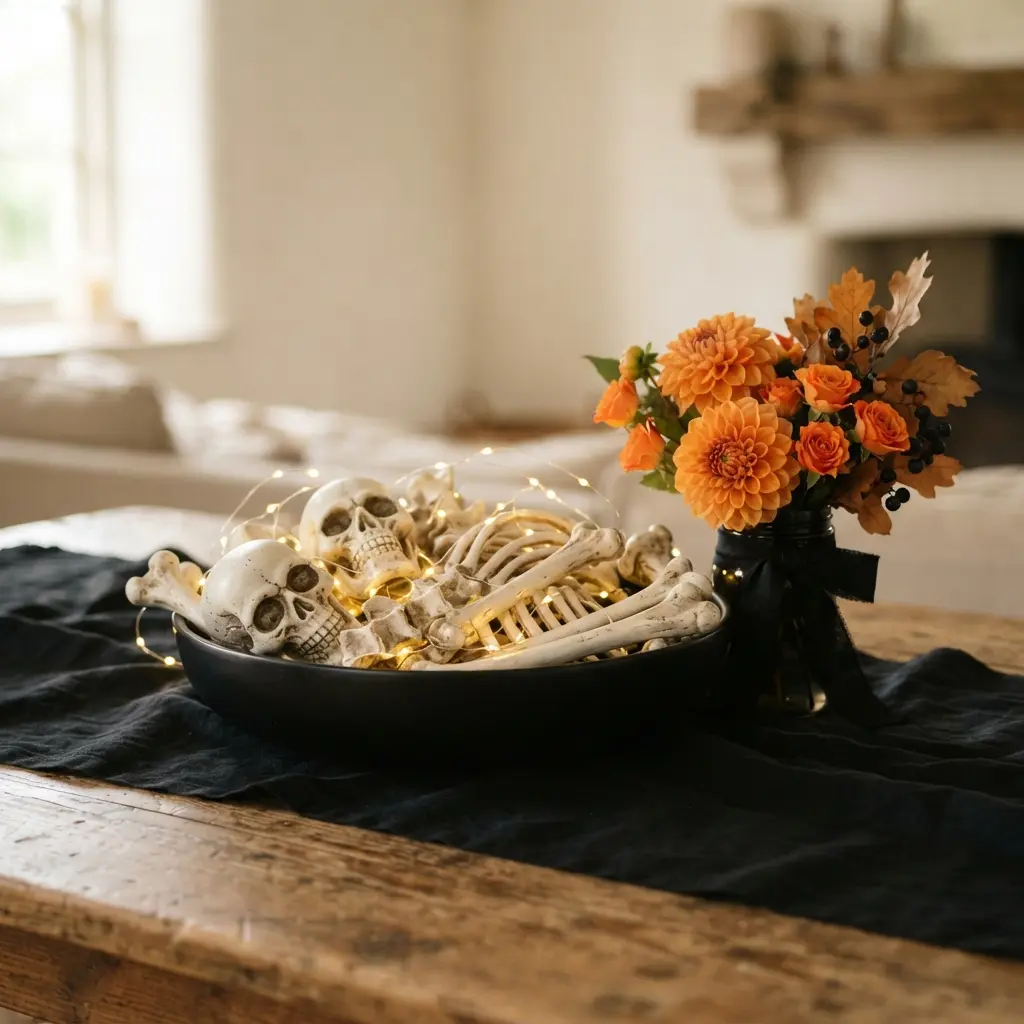
A common mistake is piling on extra decorations until the bones disappear. Instead, start with a black cloth foundation, draping it over the table so soft folds frame the display, which remains a reliable step for DIY Halloween Decoration and Party Ideas table settings. Spread faux skeleton bones across the fabric, then place a skull near the center as a clear focal point.
I love adding battery-operated candles or tiny LED lights around the edges, keeping every light visible without open flames. The pale bones pop against the dark cloth, giving your Halloween table a gothic look with little effort. Keep black roses sparse, and leave space for plates and serving dishes. Sound simple? It is, and the finished centerpiece feels wonderfully spooky.
24. Neon Green Slime Filled Vials With Cork Tops
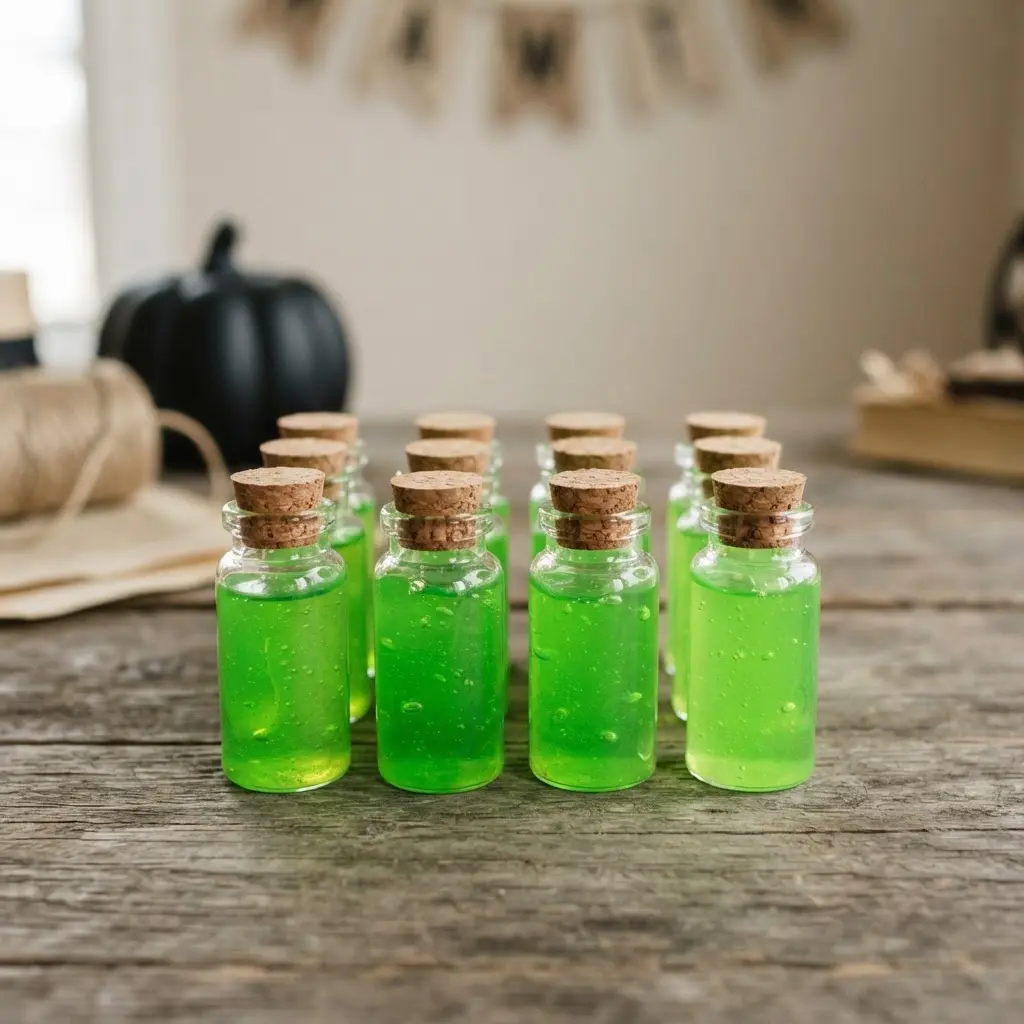
Set clean, dry vials on a protected surface, then spoon in neon green slime through a narrow funnel. Ever tried filling potion bottles this way? Leave space above the slime for each cork, press it in firmly, and wipe the rim before moving on, a simple technique that fits perfectly into DIY Halloween Decoration and Party Ideas projects.
I love how the thick green filling shows through the glass while the natural cork gives each piece an old-fashioned apothecary look. Keep finished vials on a washable tray, since overfilling pushes slime out during sealing.
25. Glitter Covered Pumpkin Table Accents in Orange
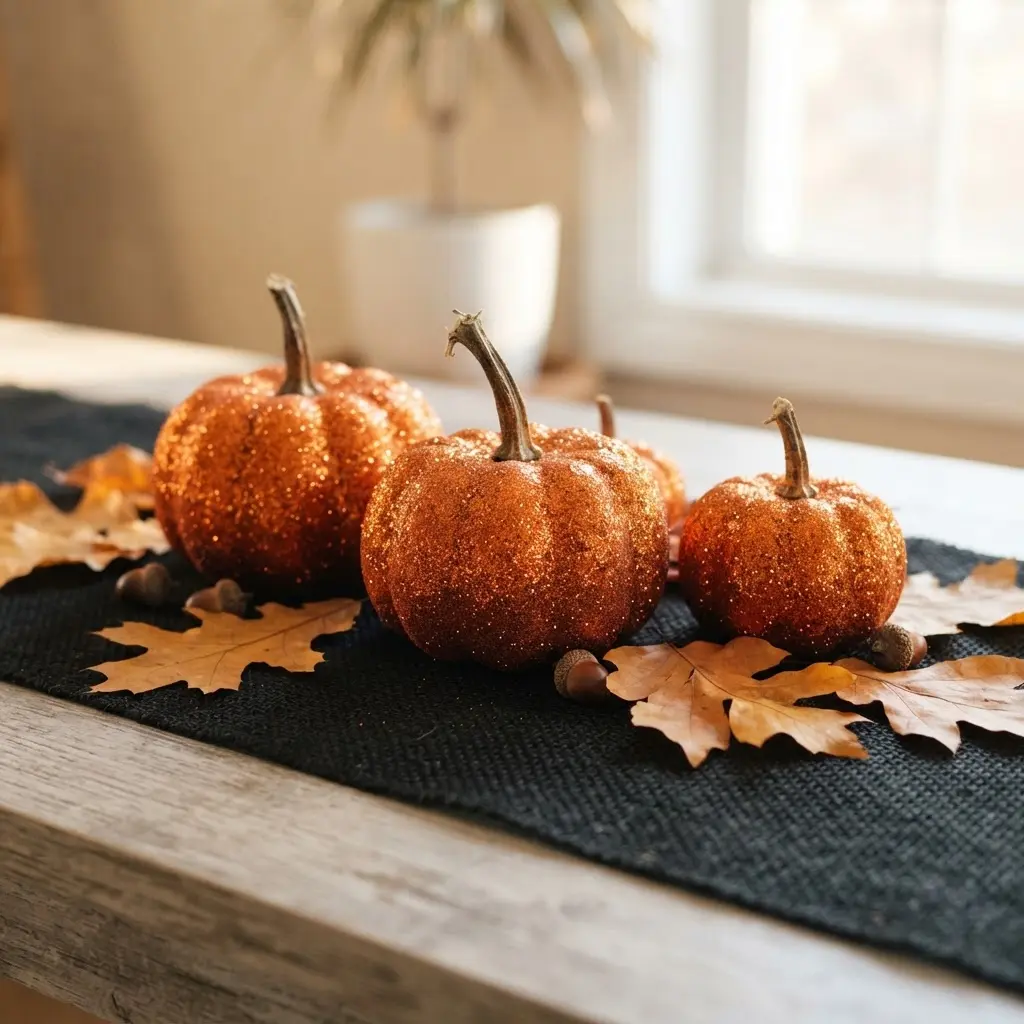
Want a little sparkle on your Halloween table? Start with a pumpkin-shaped tabletop accent and give its surface an orange base, adding a bright touch to your DIY Halloween Decoration and Party Ideas spread. A small form suits a centerpiece, while several accents create a cheerful line along the table.
Apply a surface-appropriate adhesive in small sections, then shake orange glitter over each area. Turn the pumpkin gently so the coating reaches its curves, and let it dry fully before moving it. Place it on a tray or cloth during the project to catch loose glitter.
I love how the familiar pumpkin shape feels festive while the shine adds party energy. Keep the accent away from open flames, then enjoy the sparkle.
26. Fabric Scrap Halloween Wreath Decor With Felt Shapes
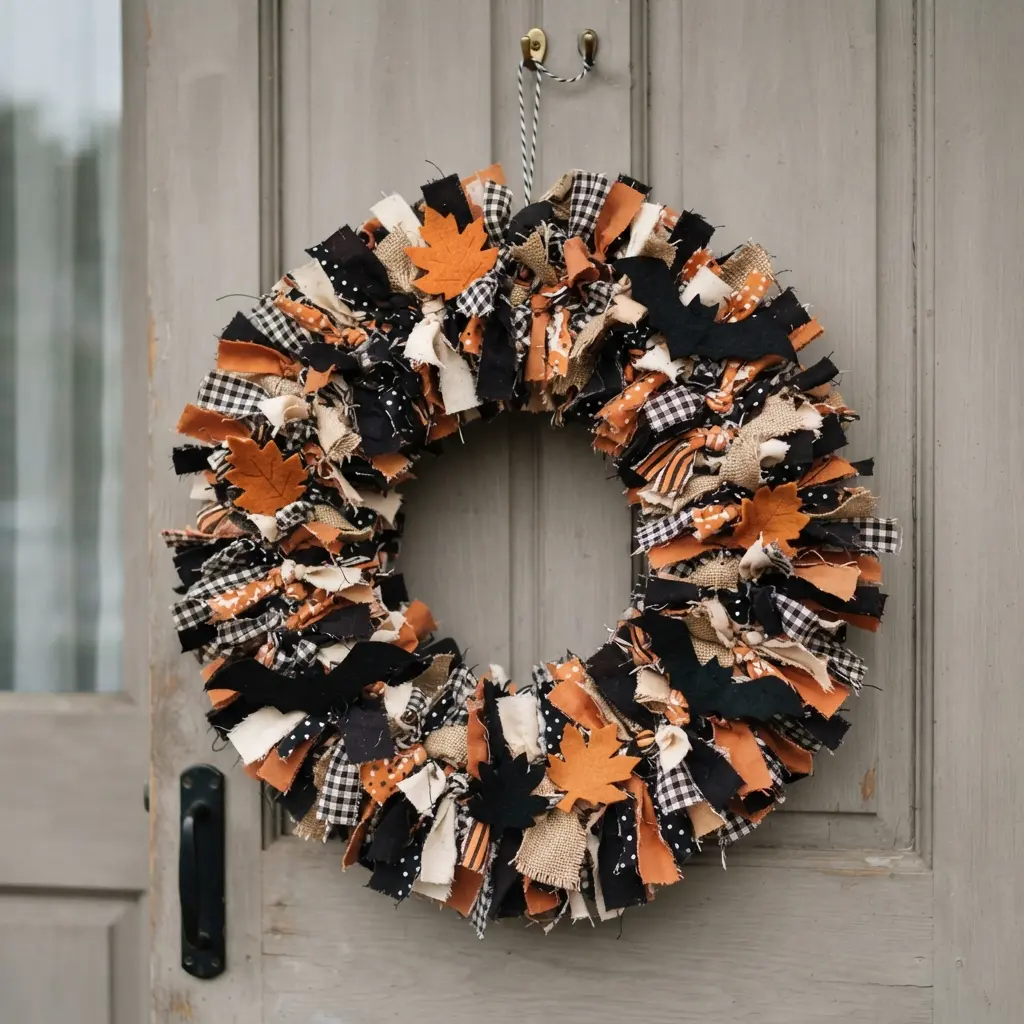
This wreath turns leftover fabric into a soft, festive door accent with plenty of personality. Tie 1–2-inch-wide, 6–8-inch-long strips around a foam, grapevine, or wire form, alternating plaid, burlap, denim, orange, purple, and black pieces. Cover the wreath form fully before adding felt pumpkins, ghosts, bats, or cats, a method that aligns perfectly with our DIY Halloween Decoration and Party Ideas upcycling tips.
Layer small felt details, then secure each shape with hot glue and finish with a large ribbon bow. Sound complicated? It isn’t, and I love how the knotted texture makes basic shapes look full and cheerful. Pro tip: arrange every decoration first so the front feels balanced, then attach a sturdy hanging loop to the back and enjoy your spooky welcome.
27. Witch Hat Ceiling Suspension Display With Hanging Stars
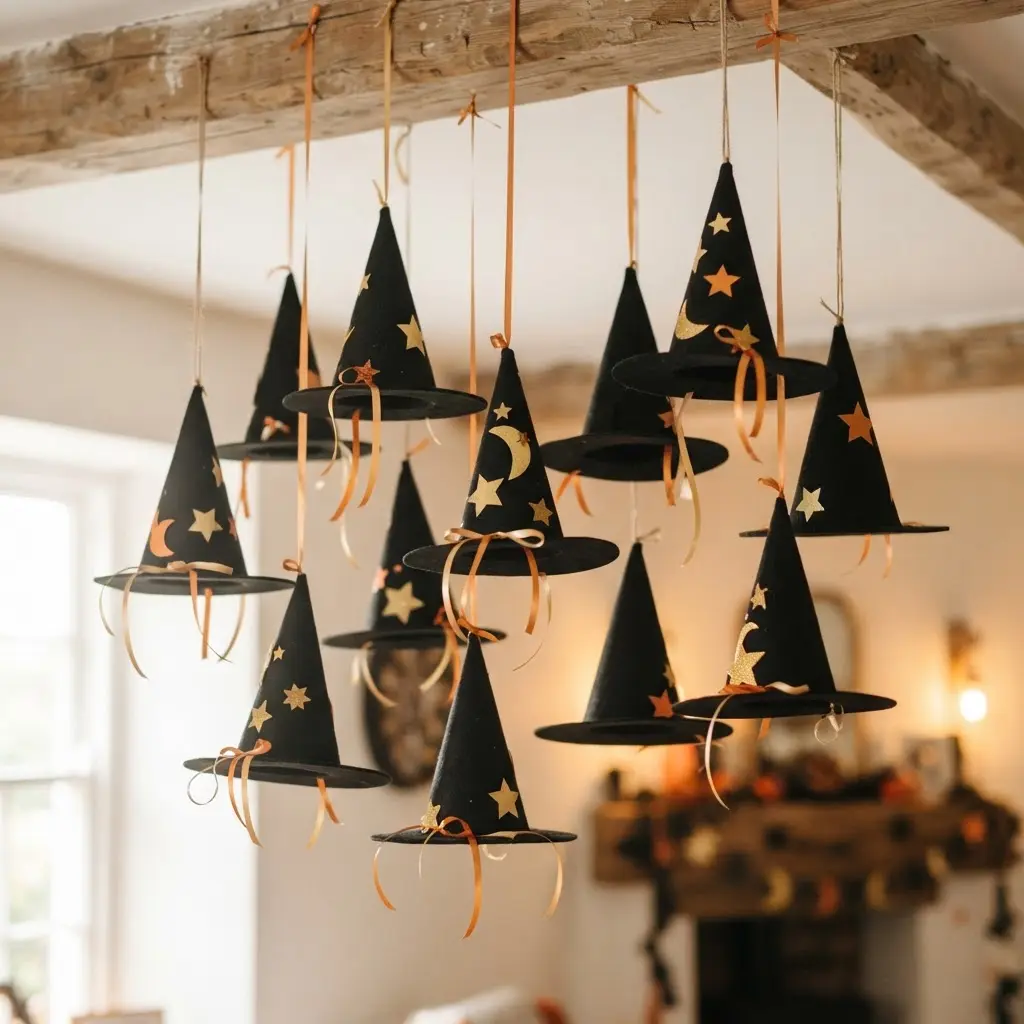
I love this display because a few witch hats turn an empty ceiling into a playful night scene. Sound complicated? It is not, which explains why it remains popular in any DIY Halloween Decoration and Party Ideas guide. Map a loose spiral above an entryway or dessert table, then hang each hat at a different height with removable ceiling hooks and clear fishing line.
Slide silver or gold stars beneath each brim so they seem to fall, then add crescent moons, battery-operated fairy lights, and short wisps of purple tulle. The varied heights give the cluster movement and keep the arrangement from looking stiff. Trust me on this one: warm-white lights feel soft, while purple lights bring stronger Halloween energy. Secure every line well and keep the display clear of heads.
28. Vampire Cape Party Costume Station With Mirror
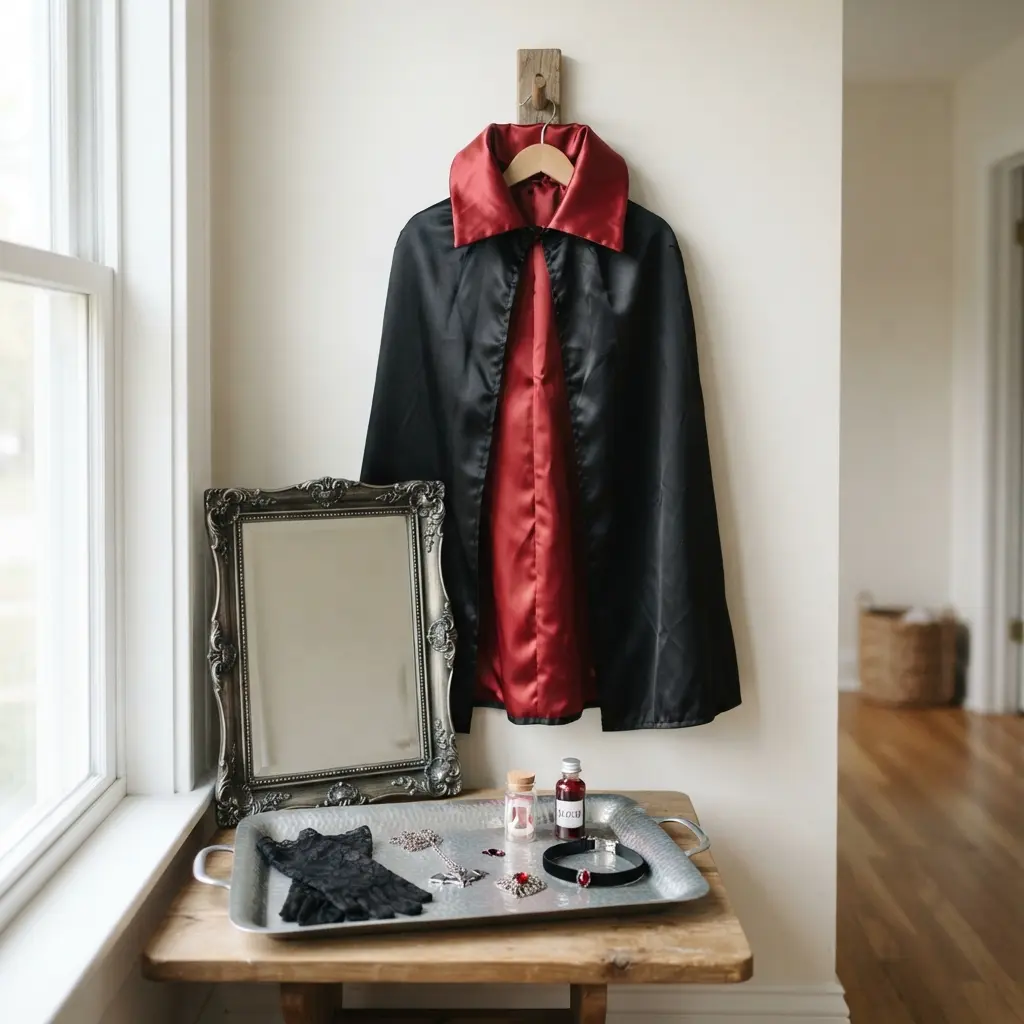
Black velvet catches the candle flicker while dark red roses deepen the gothic mood. Ever wondered how a costume display becomes a party activity? Start with a freestanding mirror beside a small table or clothing rack, then place capes where guests easily browse and try them on, keeping your DIY Halloween Decoration and Party Ideas entertainment zone organized. Arrange ornate collars, faux fangs, gothic hats, and elegant accessories nearby.
Add cobwebs, roses, LED candles, and a “Choose Your Look” sign so everyone understands the station at once. I love how the mirror turns each finished outfit into a photo moment. Keep every piece within easy reach, and use LED candles near fabric for a safer setup.
29. Orange String Light Mantel Garland With Black Leaves
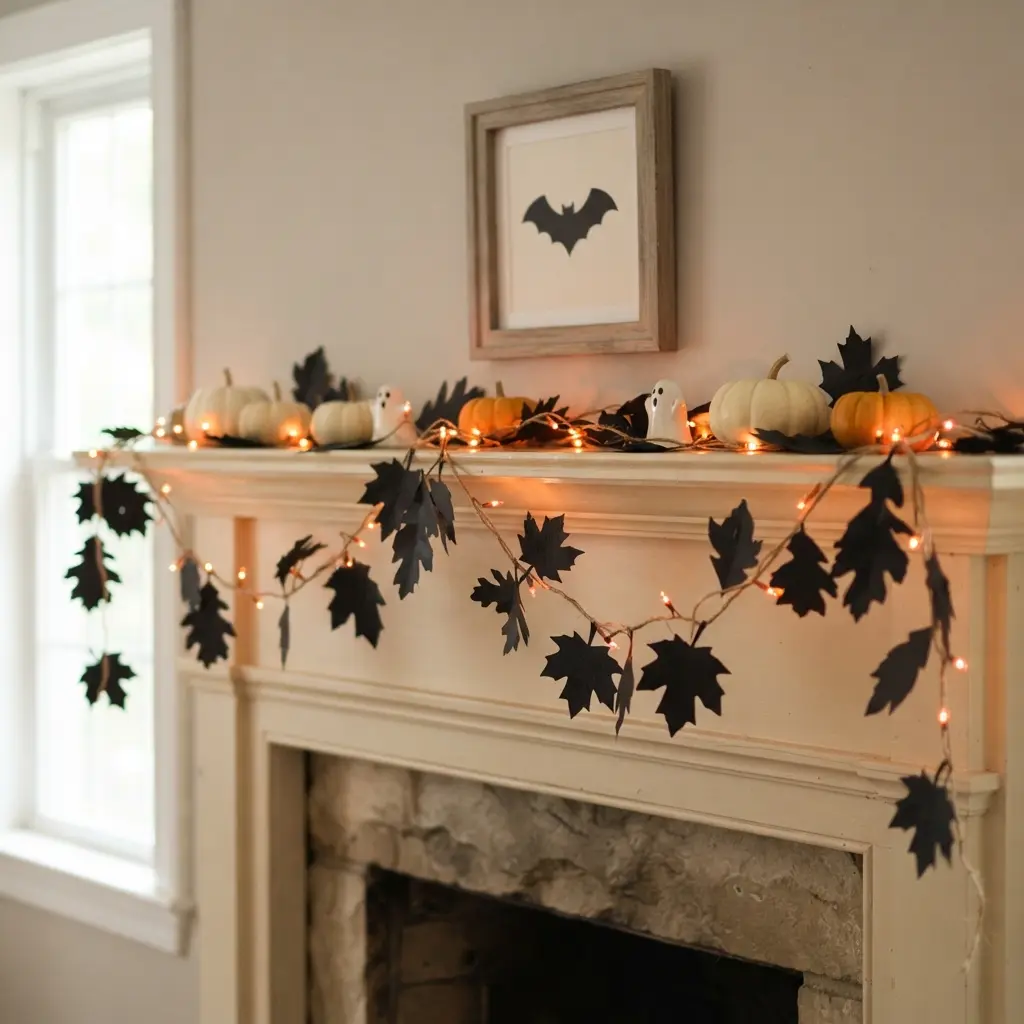
A common mistake is hiding orange lights beneath too many leaves. Keep the orange light strand visible along the front, so the mantel glows while black shapes stay easy to see, a lighting tip that supports every DIY Halloween Decoration and Party Ideas mantel setup. Drape a mantel garland across the shelf, then place lights along its edge or weave them through the greenery. Tuck black leaves into open spaces, varying their angles. Sound complicated? It isn’t.
I love how this quick setup gives a plain mantel a Halloween look. The orange-and-black palette works because the glow adds warmth while the leaves provide crisp contrast. Spread them evenly, check the strand sits securely, and adjust crowded spots from a few steps away. Trust me, the finished display feels cheerful and ready for guests.
30. Stenciled Burlap Halloween Table Runner With Pumpkins
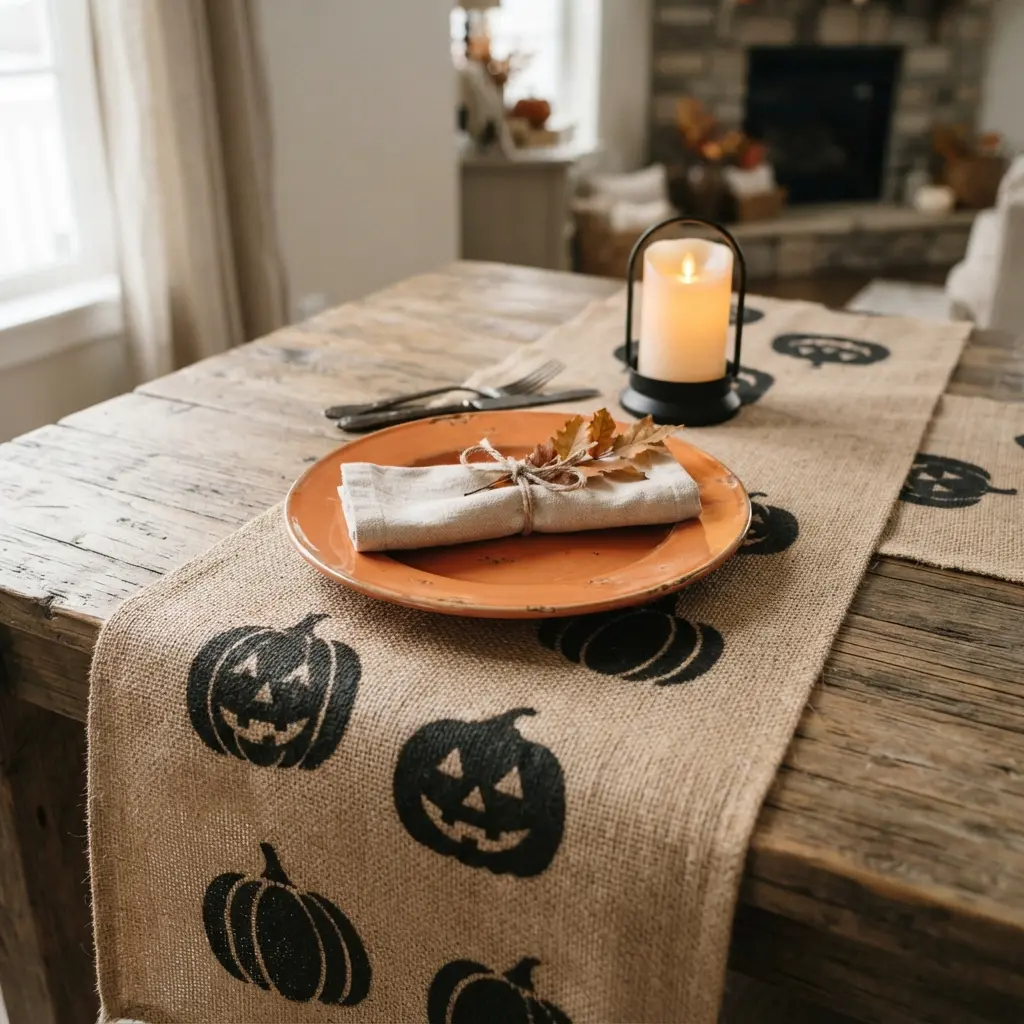
Lay the burlap runner over protective cardboard, smooth it flat, and tape a pumpkin stencil firmly in place. Dab a small amount of black, orange, or white fabric paint through the openings, lifting the stencil straight up before moving along the runner, following the exact steps in our DIY Halloween Decoration and Party Ideas craft notes. Allow each pumpkin to dry before adding the next one, then let the finished paint cure according to its label.
Why risk muddy edges? Light dabbing keeps paint from bleeding through the open weave, and I love how the finished pattern brings farmhouse warmth to black plates, orange napkins, mini pumpkins, and candleholders. Let it dry fully, set the table, and feel proud.
Storing Handmade Props For Next Halloween
Store cardboard props flat in a dry, cool closet, with acid-free tissue between painted faces to prevent scuffs and color transfer. Remove batteries from string lights, jars, and battery-operated lanterns before storage, since leaked cells damage contacts and nearby paper, a crucial step for long-term DIY Halloween Decoration and Party Ideas planning. Fold cheesecloth loosely rather than compressing it, and keep faux spiderwebs in a sealed bag so fibers do not catch on other decorations. Label archival storage boxes by room or theme, which cuts next year’s setup time and keeps matching pieces together. Small silhouettes fit inside folders, while corrugated cardboard tombstones need broad shelves or a vertical slot with support. Store hooks, twine, and paint markers in a separate tool pouch. Check every prop for dampness before closing the container, and keep food-contact items away from painted surfaces.
Conclusion
A few handmade details can make a home feel more personal, especially when guests notice the time and care behind each piece. Choose one focal area, arrange the largest decorations first, and add smaller details afterward, following the core principles of any successful DIY Halloween Decoration and Party Ideas plan. Battery-operated lights keep evening decorating simple and safer around guests. Store reusable pieces in labeled boxes so your favorite ideas are ready for next season.
FAQs
Q: What materials work best for budget Halloween decorations?
A: Use mason jars, cardstock, cardboard, cheesecloth, fabric scraps, cotton webbing, and leftover paint. Battery-operated LED lights add a soft glow without open flames.
Q: How do I keep homemade Halloween decor from looking crowded?
A: Choose one main display area and repeat two or three colors across it. Leave open space around larger pieces so each detail stays easy to see.
Q: Are battery lights safer than candles for a party?
A: Battery-operated LED lights suit busy rooms and tables with food or fabric nearby. Keep wires secured and place lights where guests will not trip over them.
Q: How early should I prepare Halloween party food?
A: Prepare dry snacks, labels, dessert decorations, and serving pieces one day ahead. Assemble fresh fruit, punch, and chilled foods close to serving time.
Q: How do I store handmade Halloween decorations after the party?
A: Clean food-safe pieces before storage and place paper items in flat folders or shallow boxes. Wrap fragile jars and label each box by room or display area.