


This simple, hands-on process gives everyone a role, from building the base shape to adding the final splash of color. It is about the messy, joyful act of making something from nothing. We have gathered fifteen simple ideas that start with balloons, tubes, and boxes from your recycling bin. Each project guides you through building a sturdy base and finishing with personality, so you focus on the fun part.
Structuring Armatures With Recycled Household Materials
The shape of your final sculpture is locked in by your initial armature, so choose a base that naturally matches your final vision. We tend to skip this step, but trust me on this: starting with a balloon for a round animal head or a cardboard tube for a simple vase gives you a head start for easy paper mache crafts.
For flat, rigid shapes like a mask, you want to use stacked cardboard cutouts and secure them with masking tape before you even touch the paste. That tape prevents warping as the wet paper dries. Your finished piece feels solid and professional when you build this internal skeleton from materials you already have, like plastic bottles or egg cartons.
These recycled items add ears or noses quickly. The good news is, this step takes minutes. It saves hours of frustration trying to fix a wobbly form later.
Custom Paste Ratios For Optimal Drying Times
Your paste recipe directly controls how long your project takes to dry and how strong it becomes. A flour and water slurry remains the top choice for easy paper mache crafts, but adding a tablespoon of white PVA glue creates a stronger bond and a slightly faster drying time.
The key is to keep each layer thin and smooth to avoid trapping moisture, which remains a common pitfall. You will notice a huge difference if you also add a pinch of salt to the flour paste, as it helps inhibit mold growth during that crucial drying phase.
For the cleanest finish on your top layer, switch to using torn paper towels dipped in a glue-heavy mix. This final shell dries hard and provides a beautifully smooth, uniform surface ready for painting.
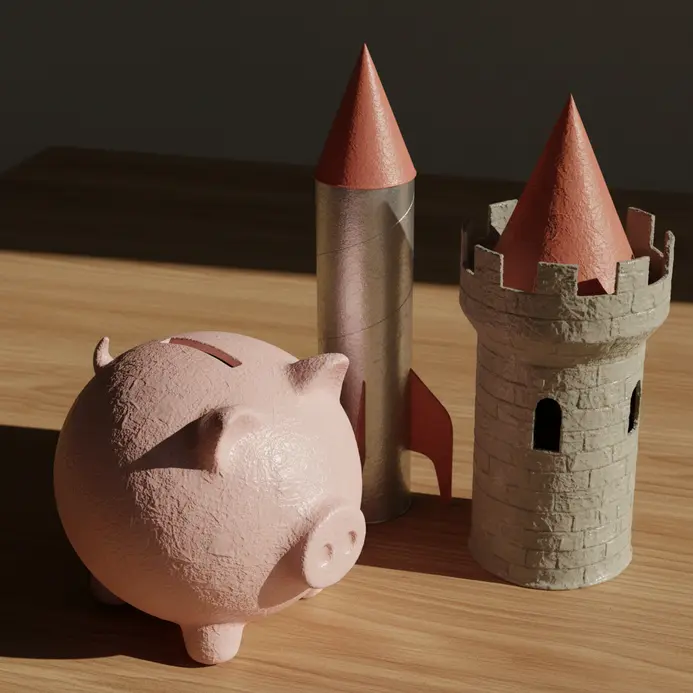
1. Build a Round Balloon Piggy Bank Sculpture
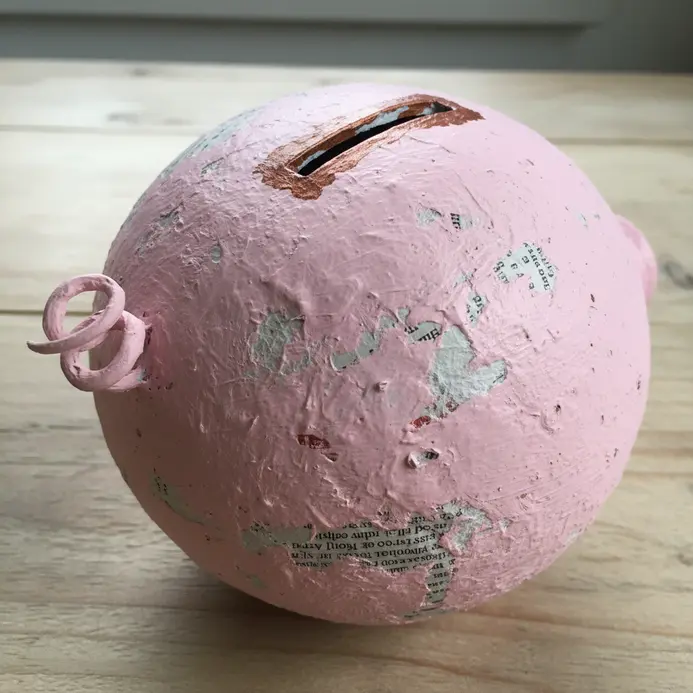
Does a homemade piggy bank sound complicated? It stands out as one of those classic, messy, and wonderfully rewarding easy paper mache crafts. You start with a simple balloon as your core shape. Cover it in three to five layers of newspaper strips soaked in a flour and water paste, letting it dry completely between each coat.
I love how this slow build-up creates a rock-hard, hollow base that is perfect for saving coins. The magic happens when you add the personality. Once the base is dry, you cut a coin slot and attach cardboard ears, a snout, and a curly tail with masking tape.
Cover those additions with a final layer of papier-mâché to blend them in. Then, prime it with white gesso before painting it a cheerful pink. This step makes your acrylic paint colors pop and hides any newsprint.
It works because you are not making a simple bank; you are sculpting a fun, durable character. For more techniques to shape your creations, you can always explore paper mache sculpting techniques. Feel proud when you drop that first coin into your handmade masterpiece.
2. Assemble a Cardboard Tube Space Rocket Ship

Ever wondered how to turn recycling into a space adventure? This project looks complex, but it truly takes under 10 minutes. You will build a classic rocket with a main body from a large cardboard tube, a pointed nose cone, and fins at the base.
I love this one because you get to design your own spacecraft. The process delivers a hands-on construction project for families. You will cut a circle for the cone, shape it, and glue it to your tube.
Then you will design and attach sturdy fins for stability. Once the structure dries, the real fun begins with paint and decorations. This rocket design shows why tube structures excel in easy paper mache crafts.
Why does this work so well? It offers a fun, tangible way for families to engage in creative play and learn basic engineering. Pro tip: use a hot glue gun for quick, strong bonds when attaching those fins. You will feel proud of your work when that rocket is ready for launch.
3. Create a Newspaper Strip Dinosaur Mask Design
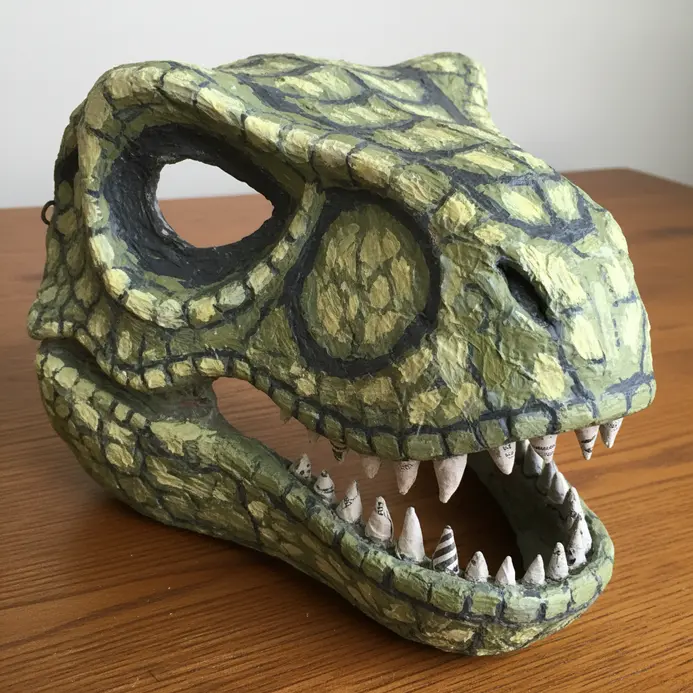
Who would have thought old newspapers could become a fearsome dinosaur? This project relies on a simple, sturdy technique for easy paper mache crafts. You will start by shaping a cardboard base for the dinosaur head, taping together the snout and brow.
Then, you layer strips of newspaper soaked in a simple glue paste over the whole form. The real magic happens as you build up those layers. You will smooth each strip over the contours, creating the textured features and strong jawline.
I love how the newspaper print adds a unique, organic pattern to the finished mask. It remains a fantastic way to make a durable costume piece from everyday materials. For even more projects to enjoy, check out these more easy crafts for kids.
Your key to success? Make sure you squeeze off excess paste from each strip before applying it. This prevents a soggy mess and helps your mask dry strong. Feel the pride when you hold your prehistoric masterpiece.
4. Construct a Cereal Box Castle Turret Structure
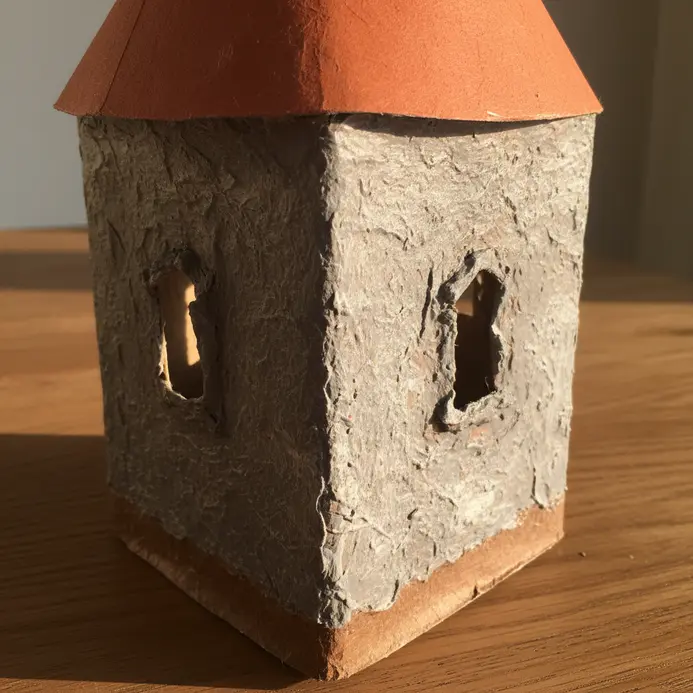
This turret looks impressive but uses recycled materials you already keep at home. You start by stacking a few cereal boxes to form the main tower body, making sure they align perfectly. I love using a hot glue gun for this step because it holds everything together fast.
Then, you cut battlements into the top box for that classic castle look. For extra stability, especially if you are building a taller turret, glue your first box onto a larger cardboard base. You can even turn the boxes inside out so the plain side faces out, which makes painting much easier.
Once your structure sets, let your imagination run wild with paint and other decorations to create your tower. This project turns recycling into a fun family activity. You can find more inspiration for creative outings with these spooky Halloween craft ideas.
Building turrets like this ranks among the most satisfying easy paper mache crafts for beginners. Feel proud of your upcycled masterpiece.
5. Form a Balloon Based Globe Desk Ornament
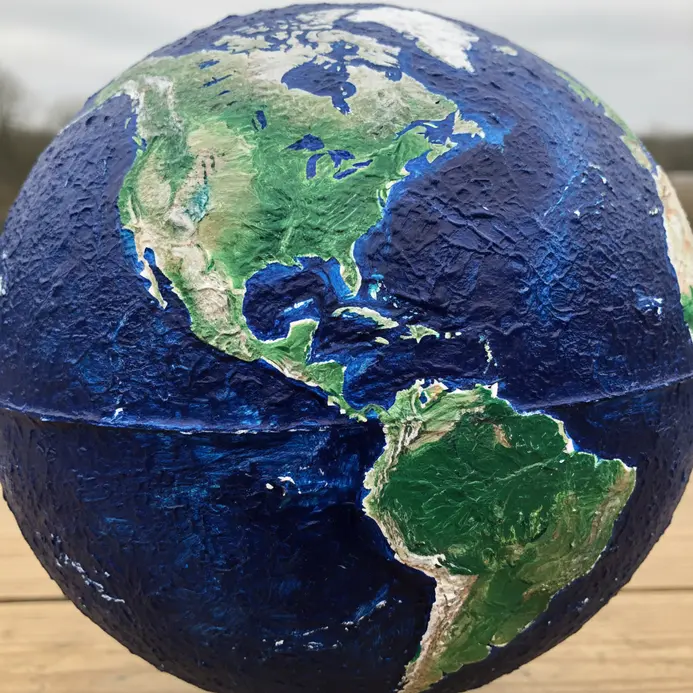
Who knew a simple balloon could become a perfect little planet for your desk? This project remains a classic for a reason. You will start by covering an inflated balloon with strips of paper soaked in your paper mache paste, building up several layers to create a strong, hollow shell.
After it dries completely, you pop the balloon and pull it out. What makes this so satisfying is how the balloon does the hard work of creating that round shape. Letting each layer dry fully remains the secret to a globe that will not warp or collapse.
Mastering balloon molds opens so many doors for creative easy paper mache crafts. Then comes the painting stage, where you add continents and oceans to make it your own unique world. Is there anything more cheerful than a handmade globe on your shelf?
6. Make Cardboard Flower Petal Wall Art
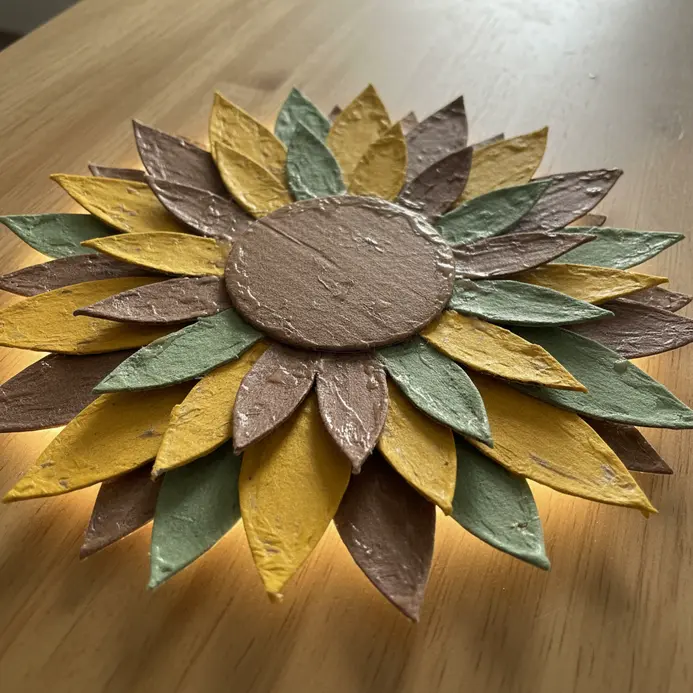
Ever wondered how those gorgeous, textured floral wall pieces are made? They look complex, but trust me, this project stays wonderfully approachable. It all starts with designing a simple petal template and tracing it onto repurposed cardboard.
The real magic happens when you curl and bend each cut piece to give it lifelike dimension before assembly. I love this part because shaping the petals feels incredibly satisfying. You will see flat shapes transform into something that feels real.
Using a hot glue gun makes attaching everything quick and secure. This technique builds layers to create depth and shadow, which makes the final piece pop off your wall. These floral designs consistently rank among the most beautiful easy paper mache crafts.
It stays a fantastic way to add a unique, eco-friendly statement to a room. Check out festive Christmas craft ideas for more inspiration. Feel proud of your beautiful, handmade art.
7. Build a Bottle Based Alien Creature Figure
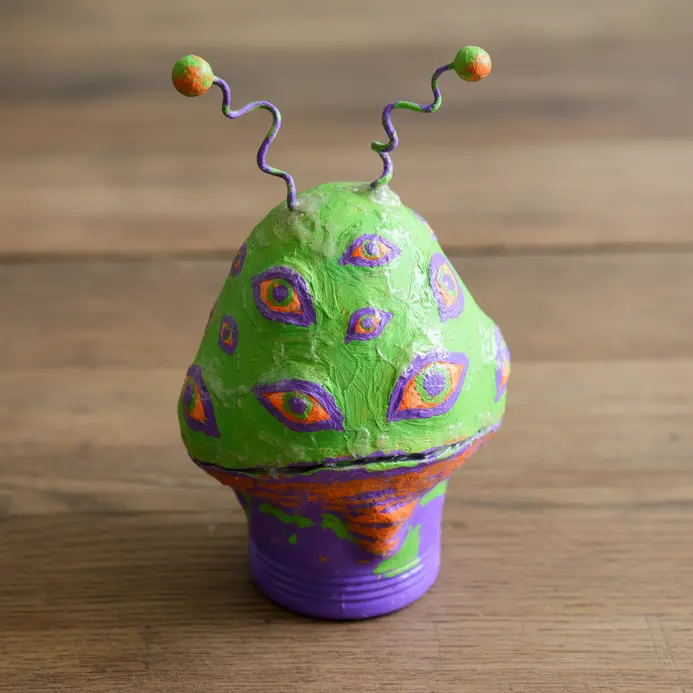
Who would have thought empty bottles could transform into a fantastic space creature? The trick starts with a simple sketch, then use a hot glue gun to build the core structure. Connect your main bottles for the body and limbs, adding texture with things like foil or wire.
This bottle recycling method shows how versatile easy paper mache crafts truly are. Then, apply layers of paste and strips for a smooth, paintable surface. This works so well because the bottles give you a sturdy, free armature to build upon.
I love how this project turns recycling into a real sculpture. After painting, you will have a one-of-a-kind art piece. It remains a perfect project to try with kids, much like these fun Easter crafts for preschoolers.
8. Craft a Balloon Fruit Bowl Serving Decor

Who would have thought a simple balloon could become such a beautiful bowl? This project creates a functional, decorative piece perfect for holding fruit or snacks. You will use an inflated balloon as your mold, wrapping it with your chosen material like yarn or paper strips soaked in a stiffener.
The absolute key to success is coating the balloon with petroleum jelly first. Trust me on this one. This step ensures your hard work peels away cleanly once everything is dry. Apply your saturated material to the bottom half of the balloon, building up a nice, sturdy shape.
It works because the balloon gives you that perfect organic curve you do not easily sculpt by hand. After letting it dry completely for a day, you pop the balloon to reveal your unique, lightweight serving bowl. Mastering bowl molds elevates your approach to easy paper mache crafts.
Feel the pride of making something so useful and artistic.
9. Assemble a Cardboard Box Pirate Treasure Chest
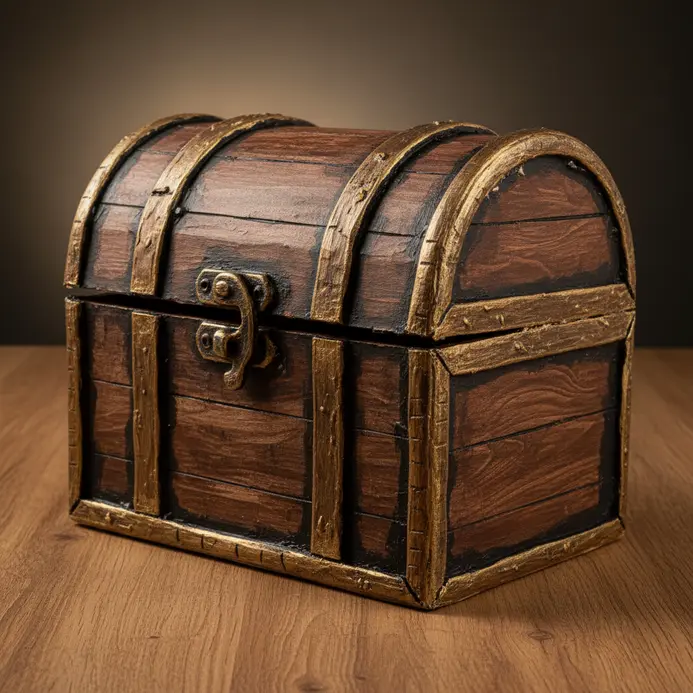
Who would have thought a shipping box could bring so much pirate adventure alive? This project remains a fantastic family day craft activity to do together. You will start by transforming a sturdy rectangular box, using its own flaps to create a hinged lid.
The back flap stays put as your hinge, while you cut off the front and trim the sides to shape. Cover the whole thing with brown paper or paint to get that classic wooden look. Once your base structure sets, the real fun begins with decoration.
I love adding painted-on hinges and a big clasp with black and gold paint. You can sponge on some brown for a distressed, weathered effect. For a final magical touch, fill it with plastic gold coins and glittering beads.
Is there anything more satisfying than hearing that lid creak open on a chest you made yourself? Exploring box structures expands your library of easy paper mache crafts.
10. Build a Tube Based Robot Body Figure
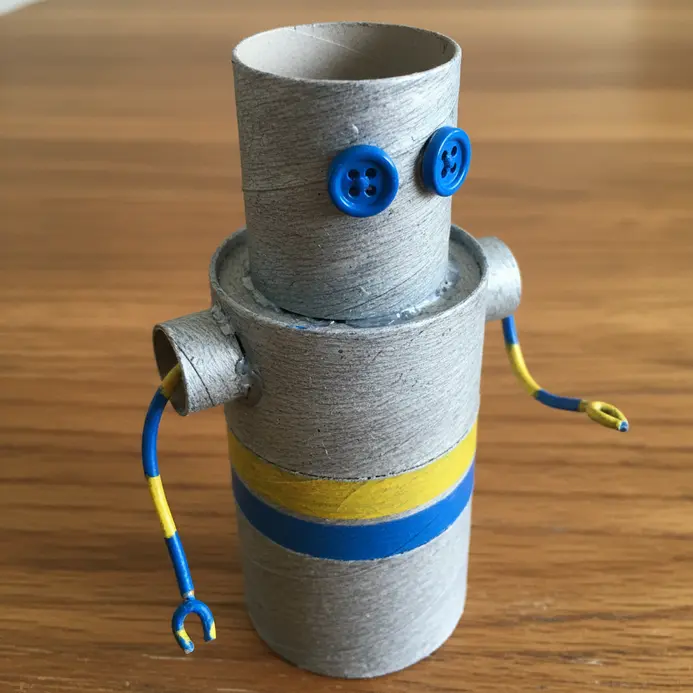
Ever wanted to build a robot that looks like it walked out of a factory or a sci-fi movie? This tube-based figure delivers the perfect solution. Start by sketching your design, focusing on how tubes form limbs and a torso. The secret involves choosing your material first.
I love using cardboard tubes for a lightweight, beginner-friendly version you paint any color. Cut them to size and connect them with hot glue for a static model, or use bolts for movable joints. These cylindrical shapes consistently drive innovation in modern easy paper mache crafts.
Why does this work so well? Tubes give an instant industrial look that proves satisfying to assemble. Your robot will hold great presence on a shelf. For another project using common household items, check out these creative popsicle stick crafts.
Feel proud of your mechanical masterpiece.
11. Form a Newspaper Heart Shaped Trinket Dish
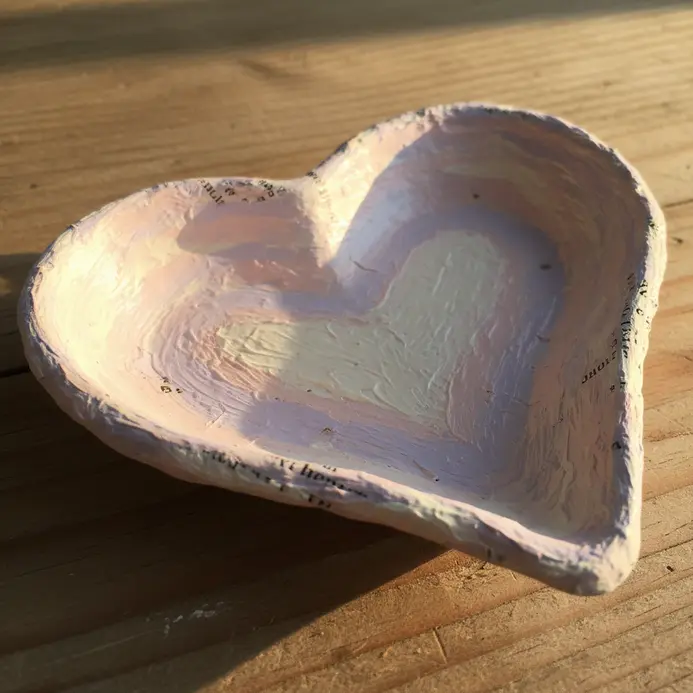
Ever wanted a little dish to hold your rings or keys? This one stays charming and surprisingly sturdy. Start by tearing black and white newspaper into strips instead of cutting them. Trust me, torn edges blend way better for a smooth finish later.
Cover your heart-shaped mold with plastic wrap, then dip each strip into a mix of white glue and water. Layer them on, smoothing out bubbles as you go. You will need several layers to get a nice, strong dish.
Let it dry completely before you pop it off the mold. That drying patience stays key. Once it sits out, you sand it smooth, paint it your favorite color, and seal it.
Crafting heart dishes ranks among the most delicate easy paper mache crafts. You will love having this sweet, handmade spot for your little treasures.
12. Create a Balloon Tropical Fish Wall Hanging
This project delivers so much fun and looks more complicated than it truly is. You will create a vibrant school of fish using the pinch twist technique on long twisting balloons. Inflate your 260Q balloons and twist a series of connected bubbles to form the segmented, rounded body.
Then, attach contrasting fins and tails for a playful shape. It works because the balloons naturally give you those flowing, organic curves that mimic real tropical fish so well. I love using a low temp hot glue gun to carefully attach all the parts.
The final touch involves adding eyes with a permanent marker and hanging your creation with clear fishing line. Explore simple clothespin crafts for kids for more fun. Doesn’t that sound like a cheerful project?
The burst of color makes your space feel fresh and lively.
13. Build a Cereal Box Laptop Toy Replica
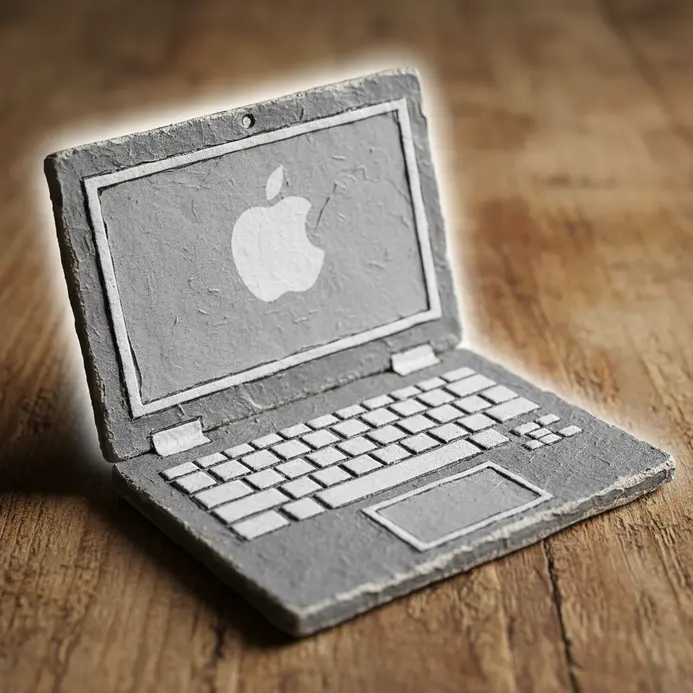
Who would have thought a cereal box could look so professional? This project turns a simple cardboard rectangle into a surprisingly realistic play laptop. You will flatten the box and cut it into a large shape, then create a crisp scored hinge line with a dull knife before folding.
Glue on printed or hand-drawn screen and keyboard images, and you hold a perfect prop for imaginative play. I love how this gives a second life to household trash, making it both creative and eco-friendly. The key to a sturdy, good-looking result involves adding a layer of reinforcing poster board behind your printed elements.
This prevents flimsiness and makes the toy last through many play sessions. For another great way to use simple materials, you can always discover easy perler bead crafts. Trust me, the look on a child’s face when they open their very own laptop brings pure joy.
Feel proud of your clever upcycling skills.
14. Make a Bowl Molded Halloween Pumpkin Jackolantern
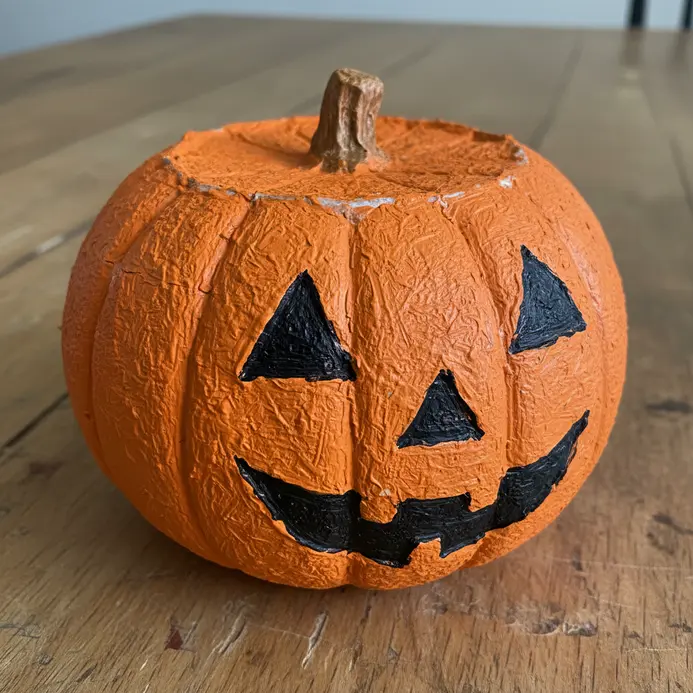
Ever wondered how to make a perfectly round pumpkin? Using a mixing bowl as your mold stays the secret. You layer strips of pasted newspaper right over the outside of a plastic-wrapped bowl to build up the shell. After it dries, you pop it off to reveal this wonderfully hollow, uniform shape ready to paint.
I love this method because it stays forgiving and creates a sturdy base. You will apply about three to five layers, letting each one dry fully in between. This patience pays off with a structure that will not collapse when you carve its silly or spooky face.
The hollow center holds a battery-operated tea light or candy perfectly. My go-to tip? Make sure you tear your newspaper instead of cutting it. Those feathered edges blend together smoothly for a professional finish.
Paint it a classic orange, add a black face, and glue on a twisted paper stem. Does that not look stunning on your doorstep?
15. Construct a Cardboard Guitar String Instrument Replica
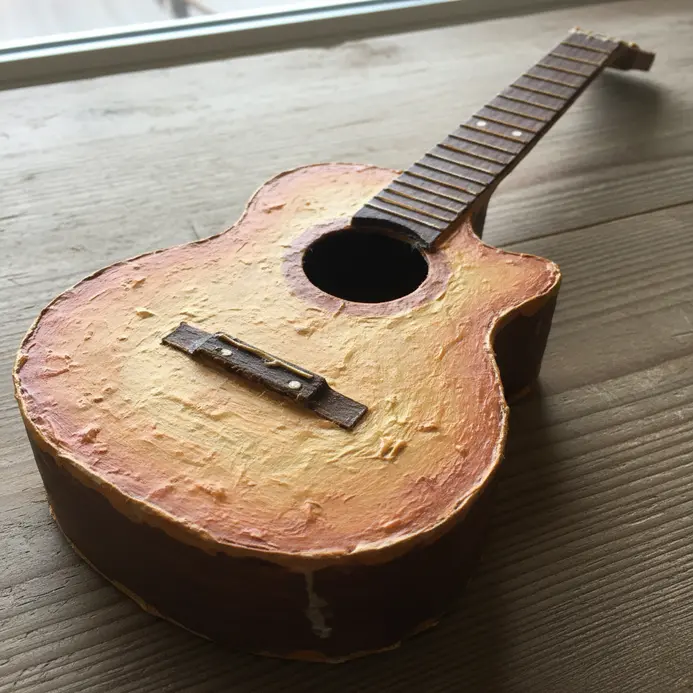
Who would have thought you could build a guitar from a cardboard box? This project looks detailed, but it stays surprisingly straightforward once you start layering. Draw your guitar shape on sturdy cardboard, then cut multiple identical pieces for the body, neck, and headstock.
Laminate them together with white school glue to create a solid, three-dimensional form. After assembly, painting transforms it into a convincing replica. Add yarn or string for the strings and small details with markers.
It stays a fantastic, low-cost prop for imaginative play and feels incredibly satisfying to complete. For a fun twist, this project pairs wonderfully with simple Father’s Day crafts for a musical gift.
Varnishing Techniques For Moisture Resistant Finishes
One layer of matte acrylic varnish takes two minutes to apply and protects weeks of work from fingerprints, dust, and humidity. I see too many beautiful projects get damaged because this final seal gets skipped. You want to use a brush-on varnish for control, especially over painted details, ensuring you get into every little crevice.
Apply it in a well-ventilated area and let the first coat dry completely before adding a second for extra durability. This top coat locks in your colors and gives the entire piece a consistent, professional look, whether you choose matte or a subtle satin sheen. Your sculpture becomes sturdy enough for everyday handling and display, turning a fun activity into a lasting treasure.
Conclusion
The best part of these projects is seeing a cereal box or a balloon become a treasure chest or a globe. It reminds you that creativity does not need special supplies, only a little time and imagination. Easy paper mache crafts are a wonderful way to spend an afternoon, leaving you with a colorful reminder of your teamwork.
My best piece of advice is to let each layer dry completely before adding the next one; patience here makes the painting stage much smoother. Keep your paste simple, involve everyone in the decorating, and enjoy the process of building something uniquely yours together.
FAQs
Q: What is the simplest paper mache paste for kids?
A: Mix one part flour with two parts water until smooth. This paste is safe, easy to clean, and works well for most basic projects. Let each layer dry completely before adding the next.
Q: How long does paper mache take to dry?
A: Drying time depends on humidity and paste thickness. Thin layers over a balloon often dry overnight. Thicker projects or those in humid areas take a full day between coats.
Q: Can I paint paper mache with any type of paint?
A: Acrylic paints work best. They provide bright, opaque coverage and dry quickly. Always apply a base coat of white paint or gesso first for the truest colors.
Q: Why does my paper mache project feel soggy?
A: Using too much paste or not letting layers dry fully causes sogginess. Wring out newspaper strips thoroughly before applying. Patience between layers remains key for a solid structure.
Q: What household items make good bases for paper mache?
A: Balloons, cardboard tubes, plastic bottles, and cereal boxes serve as perfect bases. Use masking tape to attach different shapes before you start layering with paper.


