


I remember my first projects were small charms, and that remains the perfect way to learn. The secret is beginning with simple shapes and clear goals. This guide focuses on charming miniatures and gifts that steadily build your confidence. Let us get those hands moving and turn a vibrant block of material into something truly special.
Conditioning Techniques for Consistent Clay Pliability
Your finished piece will snap if your material is under-conditioned, so knead it until it feels like soft taffy and holds a smooth shape without cracking. This physical manipulation warms the medium from the friction of your hands, which distributes the pigments and plasticizers evenly for perfect structural integrity. You will know it is ready when you roll a thin snake and bend it into a tight loop without any splits. Trust me on this, rushing this step guarantees a brittle charm.
Use the warmth of your palms and roll the material into a log, folding and rolling repeatedly. Hand kneading prevents weak spots that cause breakage after baking. This foundational work saves countless hours of frustration later.
Essential Workspace Preparation for Dust Free Sculpting
A single stray cat hair or speck of dust will bake permanently into your miniature’s surface, so start with a non-porous work tile you will wipe clean with alcohol. I use a smooth ceramic tile because it stays cool and provides a firm base for rolling and cutting. Keep a lint-free cloth and some rubbing alcohol nearby to wipe your hands and tools frequently.
Before you start a new detail, glance at the material under a good light to spot any embedded fuzz. This simple habit makes the difference between a piece that looks handmade and one that looks polished. Regular cleaning maintains your workspace standards.
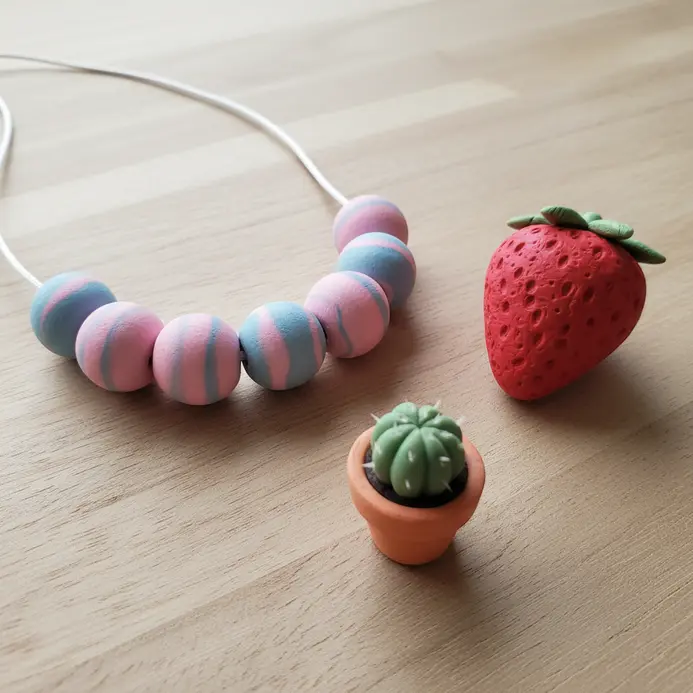
1. Create Marbled Pastel Polymer Clay Beads for a Simple Necklace
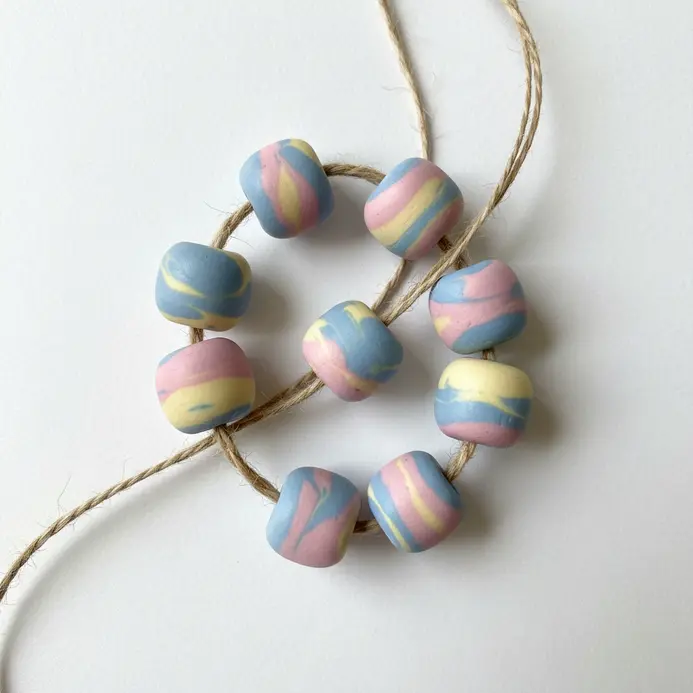
This project looks detailed, but the marbling technique is wonderfully forgiving. When testing polymer clay ideas for beginners, start by conditioning separate pieces of white clay and a few pastel colors. Roll each into snakes, twist them together, then fold and twist again a few times to create those soft, swirling patterns without overmixing.
Roll the marbled log thick, cut even sections, and shape them into beads. Pierce a hole through each with a needle tool before baking. The beauty is that every single bead turns out unique, giving your necklace a special, handmade charm. For another simple project using similar skills, try these DIY keychain crafts.
2. Make a Simple Strawberry Food Charm Pendant: A Sweet First Sculpt
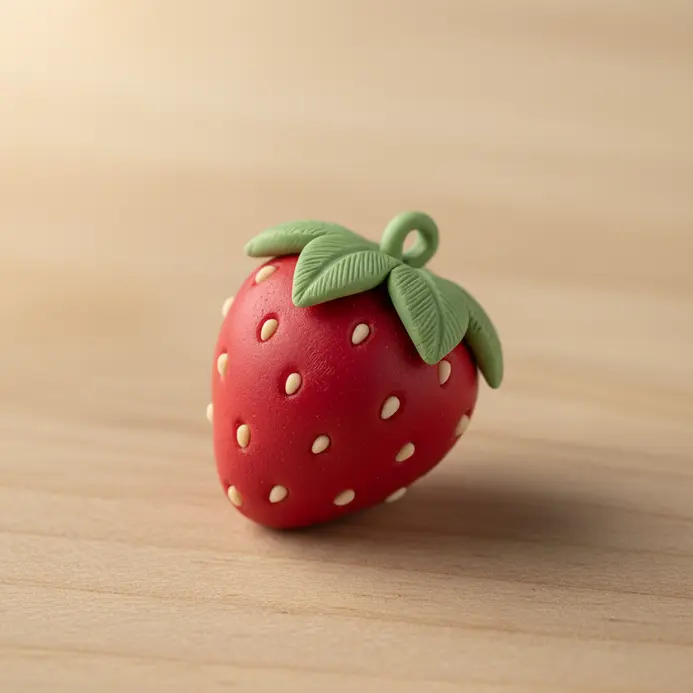
This shape surprised me when I first tried it. A tiny, realistic strawberry charm looks complex but serves as a perfect first sculpt. You will quickly see why exploring polymer clay ideas for beginners leads to such rewarding results. Start by shaping a small piece of red material into a teardrop, then press tiny indentations with a needle tool for seeds.
Attach a little green clay cap to the top and carefully insert an eye pin before baking. It works so well because you learn fundamental techniques without pressure, and the cute result is instantly rewarding. Trust me, you will love wearing your first handmade charm.
3. Build a Flat Heart Initial Keychain Tag with Clean Edges
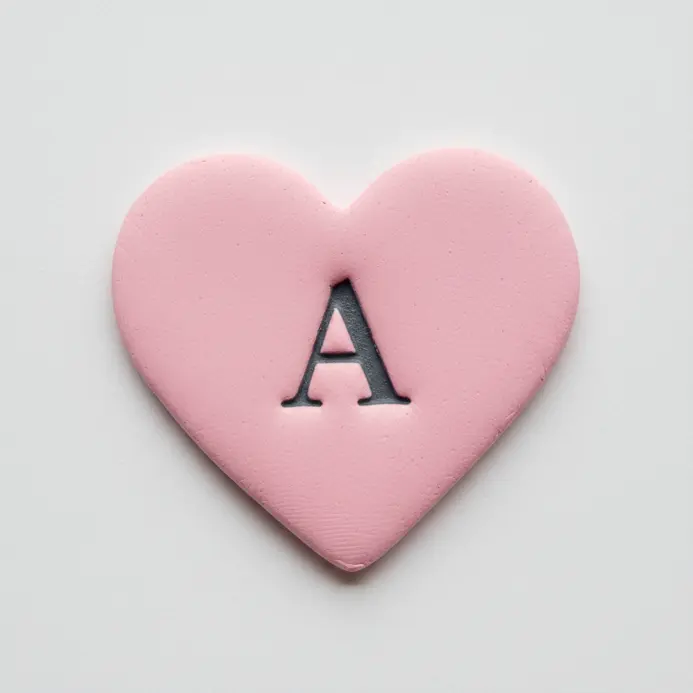
Ever wondered how to make a simple keychain look professionally crafted? When practicing polymer clay ideas for beginners, you must focus on those crisp, clean edges. Roll out your conditioned material to an even thickness, then press your heart-shaped cutter straight down and lift it straight up. Press your chosen initial stamp firmly into the center.
I love how this small detail transforms a basic shape into a polished, personalized accessory. It is a perfect first project because you get a useful, giftable item right away. For more inspiration on related creative crafting ideas, check out that link.
4. Form a Miniature Chocolate Chip Cookie Charm from Simple Balls
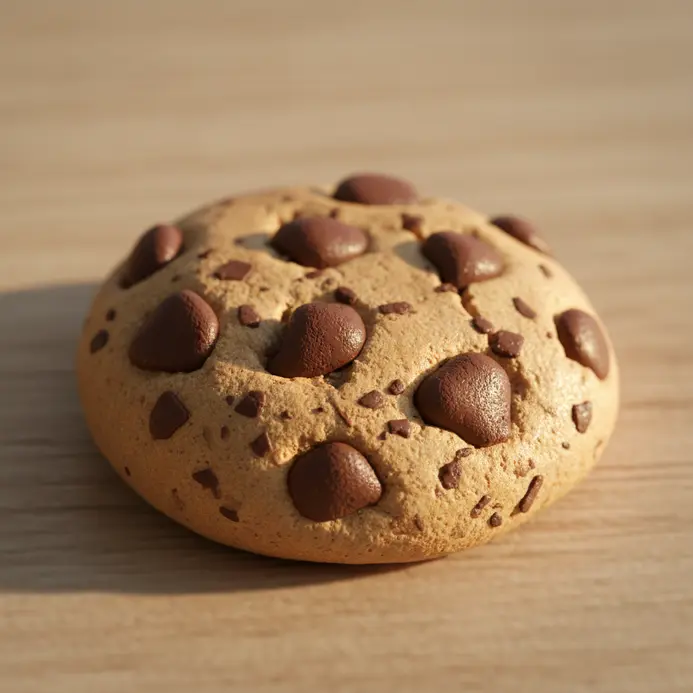
One of the most rewarding polymer clay ideas for beginners looks like a bakery treat but starts with two simple balls. Roll your light tan material into a ball and gently flatten it into a slightly lumpy disc, because real cookies are never perfect. Then, use a needle tool to poke tiny holes all over the surface for that classic crumbly texture.
Roll your dark brown material into a thin snake and pinch off little pieces to form your chocolate chips. Press them in randomly, with some half buried, and you instantly have believable chips. It works because the contrast between the smooth chips and textured base is so visually satisfying. Bake it, add a jump ring, and you have a sweet charm perfect for a necklace or keychain. This simple project is a fantastic way to practice fundamental skills that apply to all sorts of Halloween craft projects and other miniature foods.
5. Texture Stamped Circle Clay Magnet: Add Pattern with Household Items
Many creators exploring polymer clay ideas for beginners find their junk drawer holds perfect art supplies. This project is all about making a functional magnet by pressing found household items into a material circle. Roll out your conditioned batch, cut a neat shape, and then start stamping. I love how a piece of lace or the bottom of a bottle cap creates such a detailed, one-of-a-kind pattern right before your eyes.
Let the material dry fully, then add a magnet to the back. The real magic is in the tactile, visual interest each unique impression adds. It is a wonderfully accessible project that turns everyday objects into personal decor. Feel that creative spark when you see your finished piece on the fridge.
6. Build a Cartoon Kitten Clay Keychain Charm with Basic Shapes
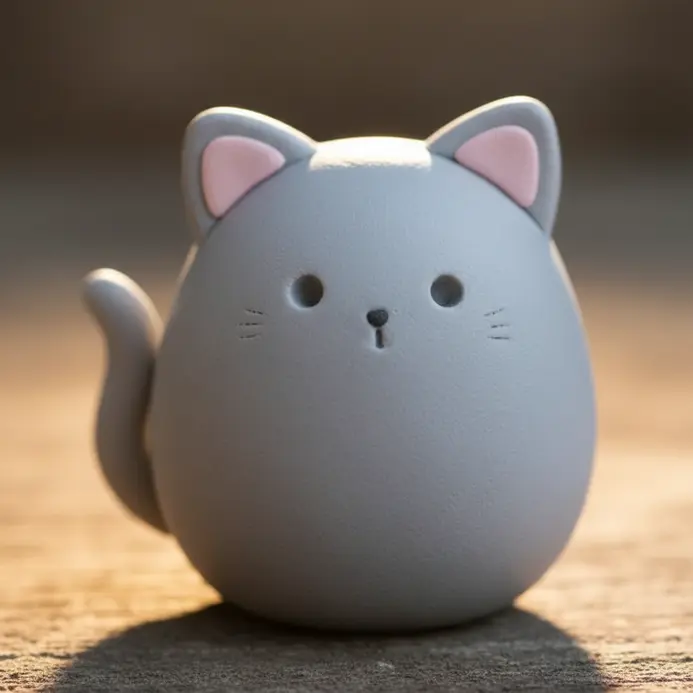
This remains the perfect first charm project because it relies entirely on simple, rounded shapes. You will roll a sphere for the head, smaller ovals for the muzzle, and tiny triangles for the ears. When reviewing polymer clay ideas for beginners, remember that cartoon styles are wonderfully forgiving. Press these shapes together firmly, then add little black eyes and a pink nose for that classic look.
Your kitten will look adorable even if your shapes are not perfectly symmetrical. Make sure to condition your clay thoroughly to avoid any cracks. This is a fantastic way to make a personalized gift. Christmas craft projects offer great follow-ups. Does that not sound like a lovely next step?
7. Layer Geometric Coaster Set Designs with Contrasting Colors
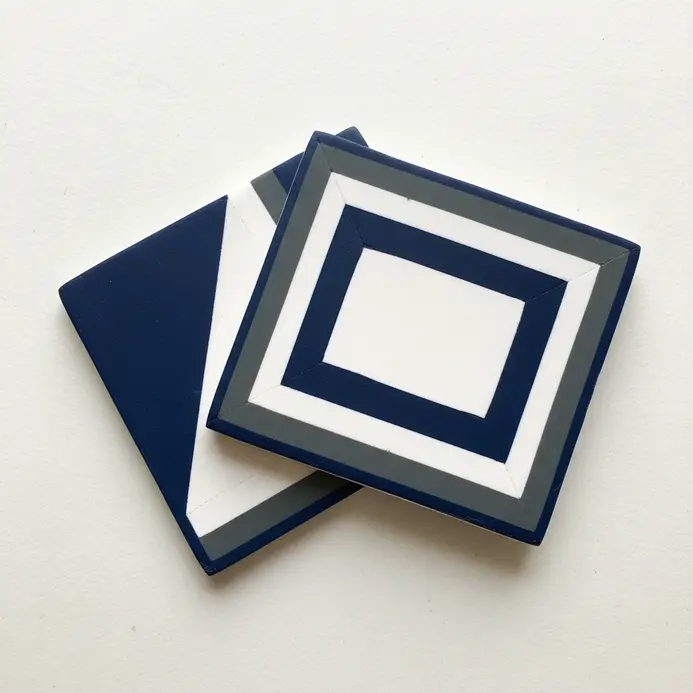
Another set of popular polymer clay ideas for beginners relies on stacking flat sheets of polymer clay cut into shapes like circles and squares, using colors that pop against each other. This approach looks incredibly modern but rests on a simple principle. Press them together, bake, and you have got a set of stunning, functional coasters. I love how the graphic design comes from color contrast, not complicated sculpting.
For a bold look, try a classic complementary pair like blue and orange. Your first set will look fantastic, and the process is incredibly satisfying. You will find plenty of doodle art inspiration to fuel your creative color combinations.
8. Make a Tiny Polymer Clay Cactus Planter for Your Desk
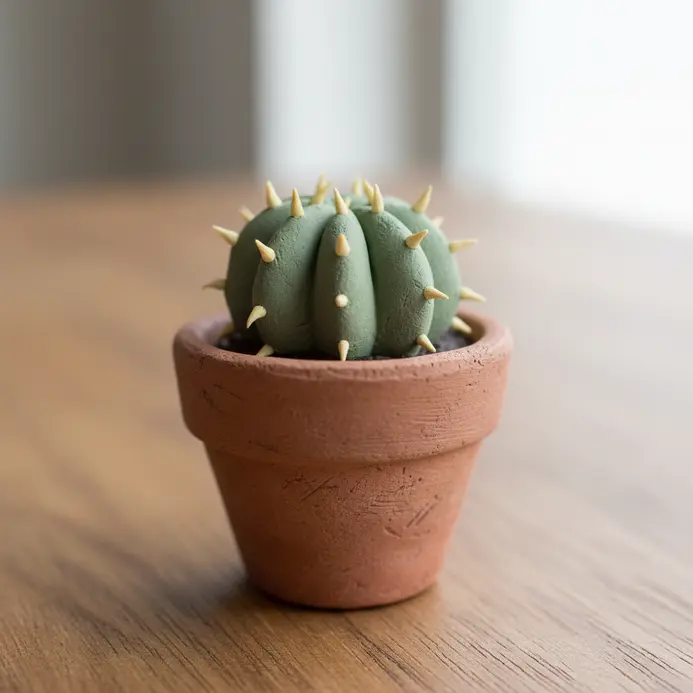
This option stands out among recommended polymer clay ideas for beginners because it brings life to your workspace without any watering needed. You will start by shaping a small pot from terracotta-colored clay, pressing a brown ‘soil’ layer inside. Then, sculpt your cactus from green material and use a toothpick to add texture for those tiny spines.
Why does it work so well? It is a quick, satisfying project that feels like sculpting a miniature garden. Trust me, you will love seeing your cheerful little cactus on your desk every day.
9. Create Rainbow Stripe Arch Earrings with Thin Clay Logs

Curious makers often ask how seamless stripes appear in these polymer clay ideas for beginners, but the technique stays approachable. You start by rolling each color into thin sheets and cutting them into uniform strips. Arrange them in rainbow order, press them together, and then roll the whole stack into a tight, thin log. That clay extruder works as a lifesaver here for getting those logs perfectly even.
Once baked, you slice the log and gently bend each piece into a delicate arch shape. The result is a pair of vibrant earrings with distinct, curved color bands. I love how this method turns simple strips into such a detailed, textured look. You will feel so proud wearing your handmade statement pieces. For more inspiration on other easy beginner drawing ideas, explore that link for creative cross-over projects.
10. Build a Miniature Donut with Sprinkles Charm for a Fun Project
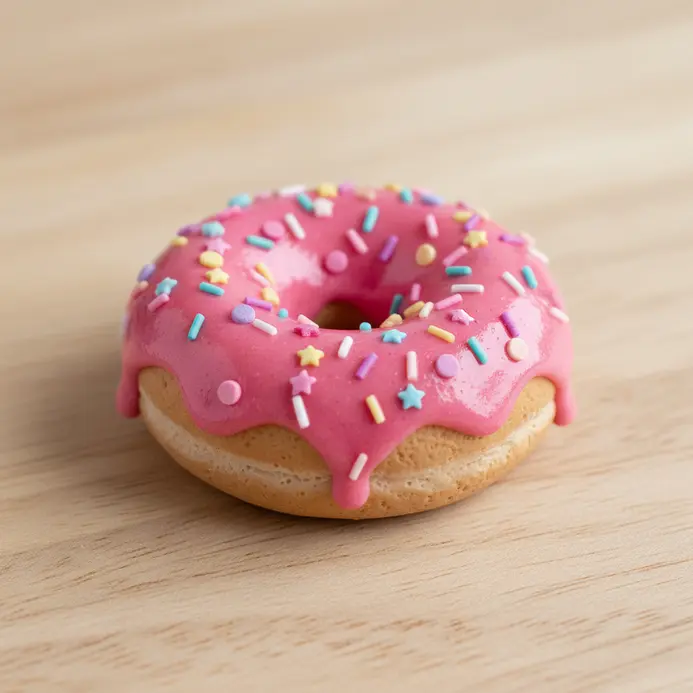
You will quickly discover that many polymer clay ideas for beginners involve shaping tiny, playful treats that bring a smile. Start by rolling your light brown clay into a small ball and flattening it. Then, poke a hole right through the center to create that classic donut shape. Next, roll out a thin sheet of your icing color and drape it over the top. This is where you get creative with colors. Finally, press in tiny, bright sprinkles for that perfect finish. Does it not feel satisfying to see such a cute charm come together?
This project is wonderfully forgiving and makes a great gift. Explore these ideas for miniature creations to expand your repertoire.
11. Leaf Imprinted Clay Trinket Dish: Capture Nature’s Texture
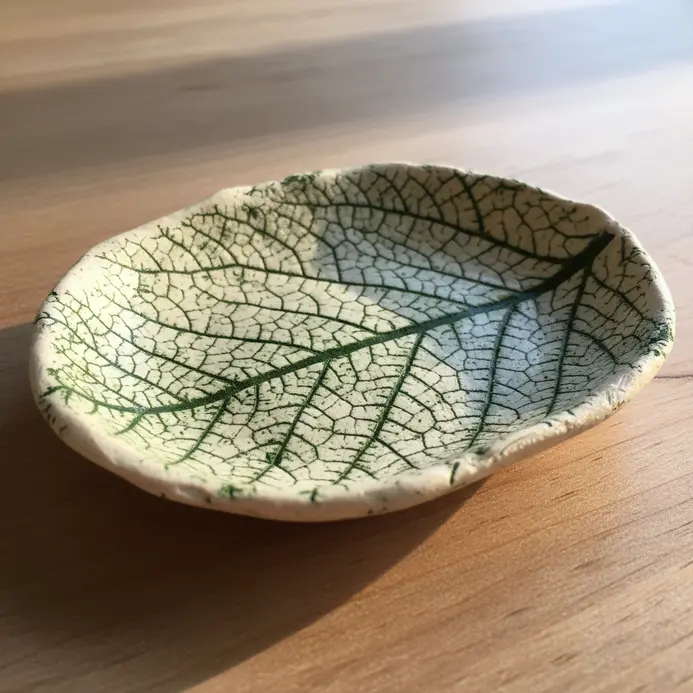
Pressing natural textures stands out as a standout choice in polymer clay ideas for beginners, creating boutique-quality finishes. Roll out your material on some parchment paper, then press a fresh leaf with strong veins right into the surface. I love how every single vein and detail gets captured perfectly, making each dish completely unique.
Once your imprint is set, you gently shape it over a small bowl to create that perfect little dish curve. Let it dry completely, then seal it with a clear varnish for protection. You will adore the rustic, natural look it brings to your space.
12. Make Polka Dot Flat Stud Earrings with a Simple Tool
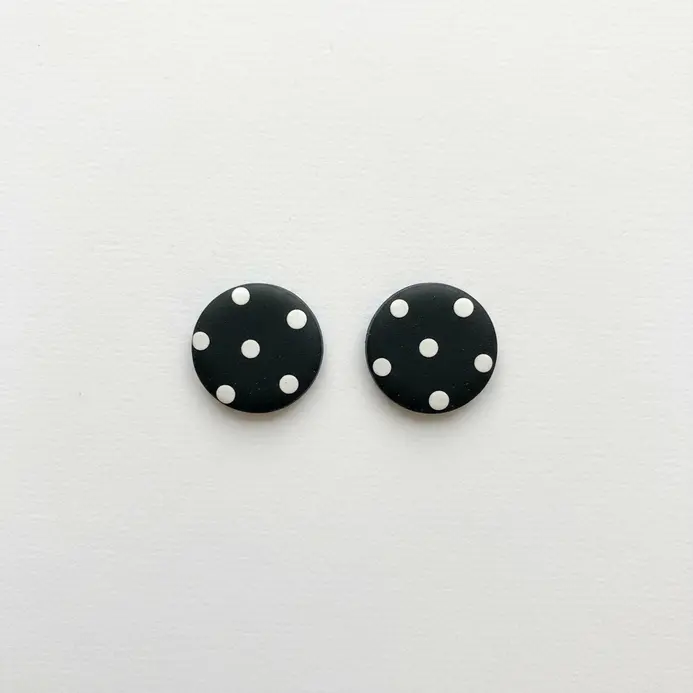
Mastering dot placement ranks highly in my collection of polymer clay ideas for beginners, proving a toothpick creates a clean graphic pattern. Roll out your base color and cut circles to fit your earring blanks. Then, use the tip of your tool to gently press tiny dots of contrasting material onto the surface.
If your first dot is not perfect, you will smooth it out and try again. The small scale means you use minimal materials and get a finished pair of earrings fast. Review these ideas for miniature creations for further practice. My go-to tip is to practice your dot spacing on a scrap piece first. Achieving that uniform look feels incredibly satisfying once you get the hang of it.
13. Build a Cute Mushroom Forest Clay Figurine from Cones and Domes
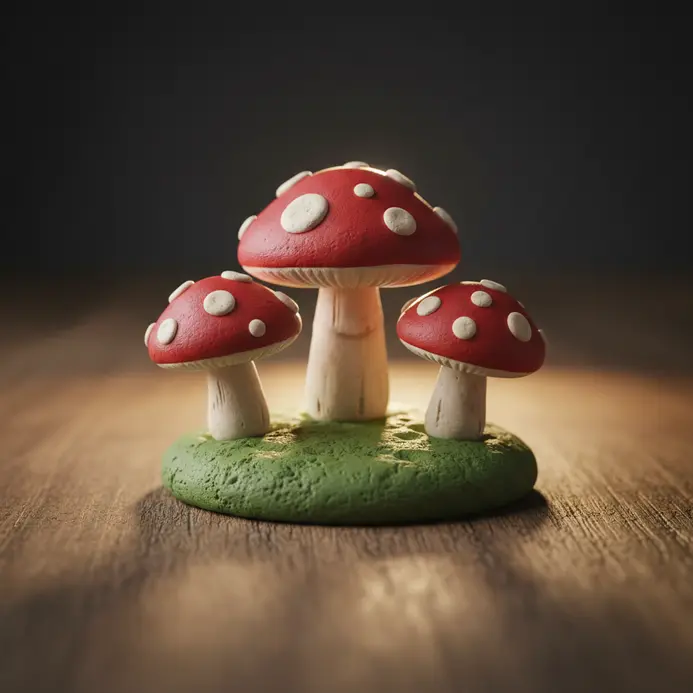
Combining basic geometry appears frequently in polymer clay ideas for beginners, turning simple forms into forest scenes. Start by rolling a small ball of material into a cone for the stem, pressing the wider end flat so it stands up. For the cap, roll a larger ball and gently flatten one side into a perfect little dome.
Attach them with a dab of water and smooth the seam. The magic is in the variations you will make. Is it not satisfying to see a whole forest sprout from these two basic shapes?
14. Create Star Shape Clay Gift Tags for a Personal Touch
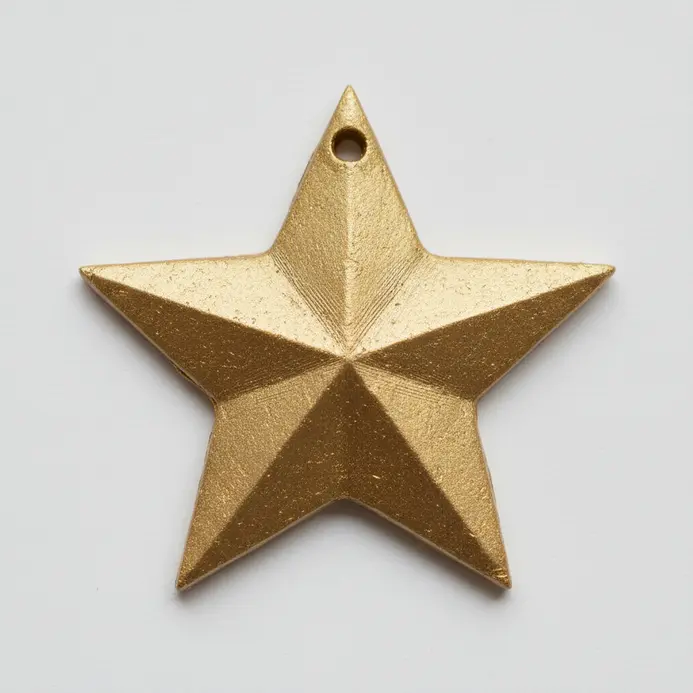
Adding personal touches remains a strong theme in polymer clay ideas for beginners, transforming plain shapes into heartfelt tags. Roll out your clay to a consistent thickness and press down with a star-shaped cookie cutter. Punch a hole at the top before it dries, then decorate with stamps or a little paint.
It works because this personal tag becomes a keepsake long after the wrapping paper is gone. For a festive twist, you will turn these into ornaments for DIY wind chime projects. Feel the joy of giving something made only by you.
15. Form a Miniature Sliced Watermelon Wedge Charm
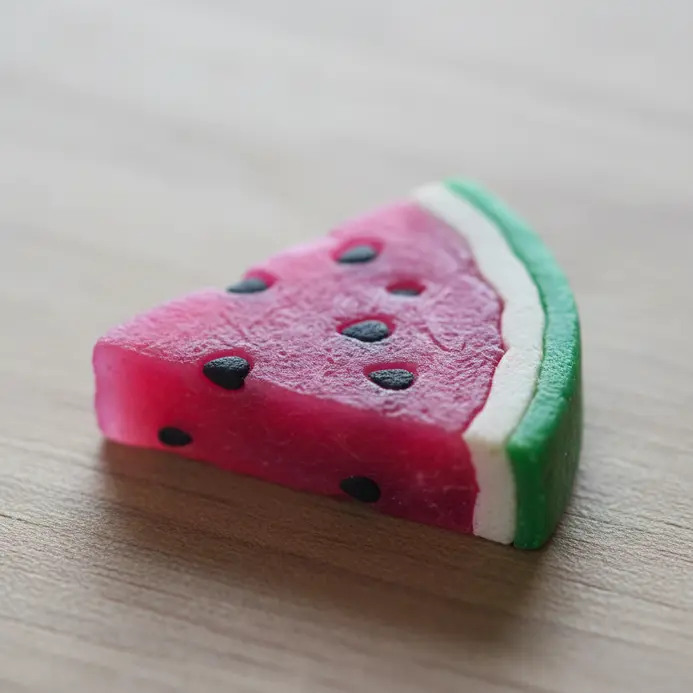
Stacking colored layers ranks among essential polymer clay ideas for beginners, producing instantly recognizable fruit slices. You will start by conditioning and rolling out three colored sheets. Stack them in order, roll them into a log, and then slice it into discs. Cut each disc in half to get that perfect wedge shape.
Press tiny bits of black clay into the red center for seeds. It works because the bright, cheerful colors are instantly recognizable and so satisfying to create. Once baked, you have a perfect little charm for a necklace or keychain. Explore more creative art and craft ideas for your next project.
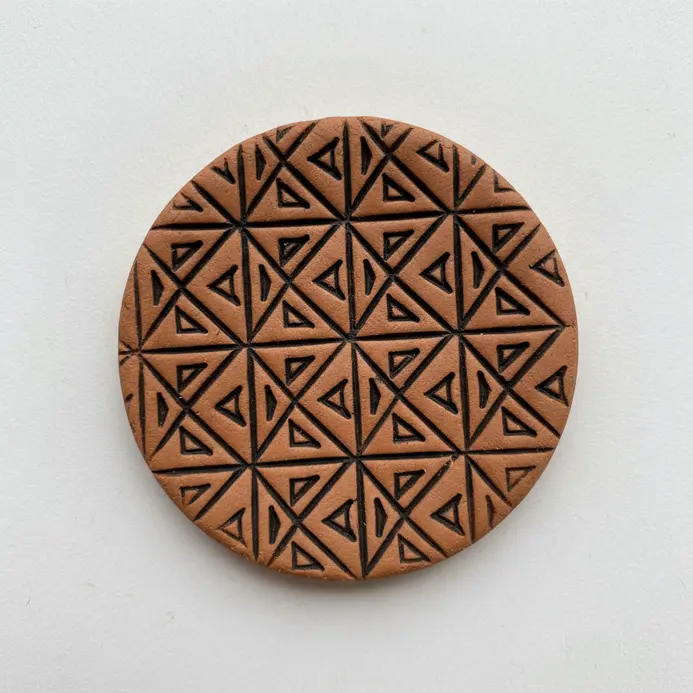
16. Textured Floral Pattern Clay Coaster: Use a Stamp for Detail
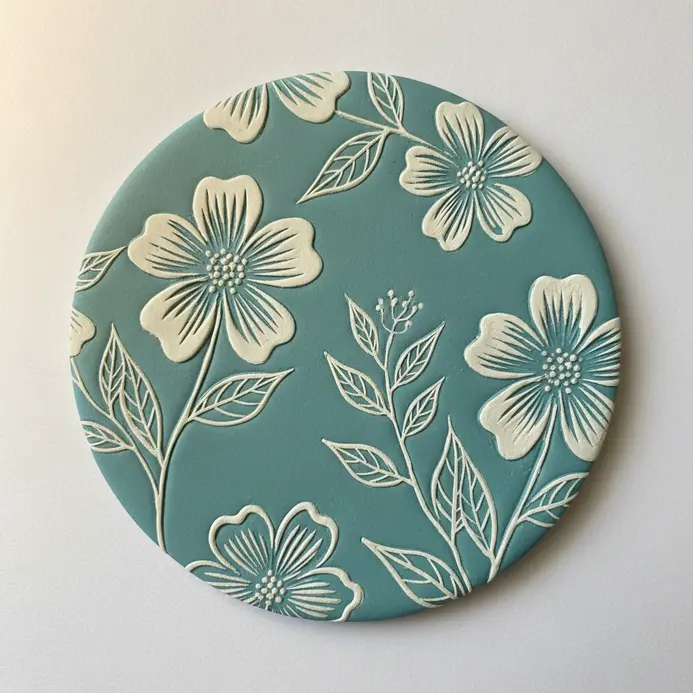
Using household stamps appears in many polymer clay ideas for beginners, allowing anyone to press elegant floral patterns effortlessly. You will simply roll out your clay and press a rubber stamp into the surface to create a beautiful, detailed pattern. The key is applying even pressure so every petal and leaf comes out crisp and clear.
I love how this technique transforms a plain clay disk into a piece of functional art. It works so well because the stamped texture adds a professional, handmade feel that a simple painted design simply will not match. Try it and feel the satisfaction of creating a coaster that is both pretty and practical.
17. Build a Round Clay Bead Necklace Pendant with a Centerpiece
Focusing on a strong centerpiece remains crucial for these polymer clay ideas for beginners, turning simple discs into statement pendants. You begin by rolling and cutting your main polymer clay disc to the size you like. The magic happens when you add your focal point, like a contrasting color dot, a stamped texture, or a tiny sculpted flower right in the center.
What I love is how this one simple element makes the whole piece look intentional and polished. It works because the clean, round shape lets your unique centerpiece truly shine. For your first try, keep the design simple and focus on getting a secure bond. You will feel so proud wearing your handmade creation. Find more inspiration for small, wearable projects with these DIY keychain crafts.
18. Make a Tiny Pizza Slice Food Charm with Layered Toppings

Layering realistic toppings shows up in several polymer clay ideas for beginners, proving that miniature food charms require patience but little skill. Start with a thin beige clay base shaped like a slice, then add a thin red ‘sauce’ layer, leaving a border for the crust. The magic happens when you roll white material even thinner for the cheese and press on tiny, flat toppings like pepperoni or mushrooms.
The charm works so well because that 3D, layered look gives it undeniable realism at a miniature scale. Trust me, the key is keeping everything thin. It is a fun way to create a cute charm, and you will find more creative crafting ideas for your next project.
19. Stamp Botanical Clay Plant Markers for Your Garden
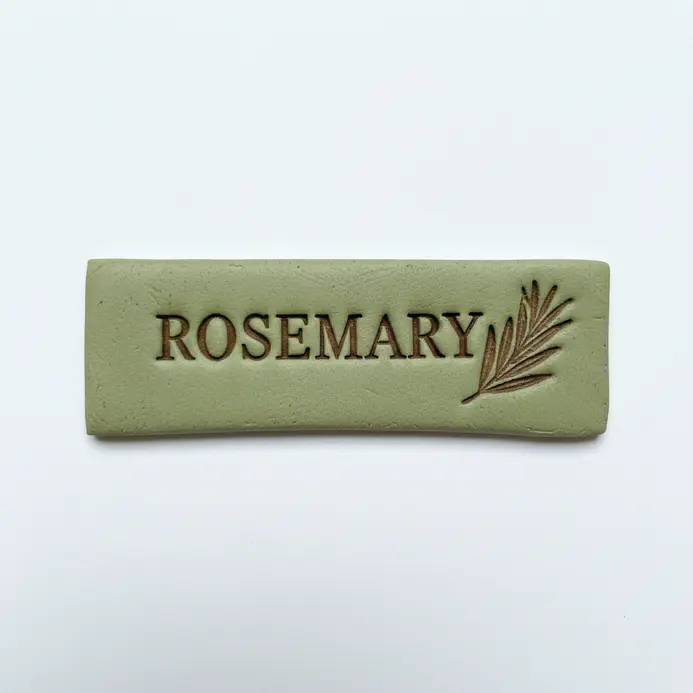
Marking garden plants naturally fits within polymer clay ideas for beginners, offering both utility and artistic expression. Roll out your conditioned clay to at least a quarter inch thick, then cut out simple shapes like rectangles or leaves. Press in your alphabet stamps for the plant names and add a pretty botanical impression with a leaf or flower stamp.
It is so satisfying to create something both beautiful and useful for your own space. My go-to tip? Do not skip the final step of applying a waterproof outdoor sealant to protect your work from the rain and sun. Feel proud every time you spot your handmade markers in the garden.
20. Form a Simple Cone Shape Candy Corn for Halloween
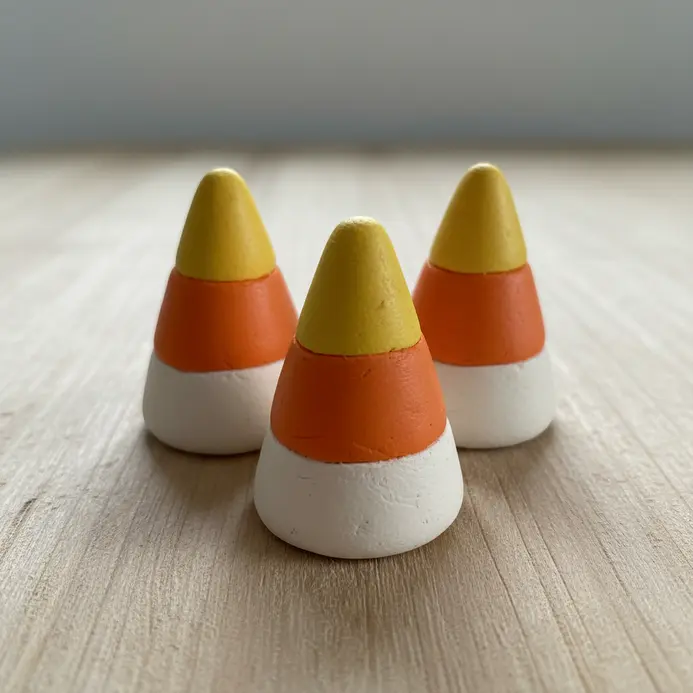
Tapering sharp angles works beautifully in these polymer clay ideas for beginners, yielding festive seasonal decorations with crisp color separation. You will roll three flat strips into a neat cone. Start with a long yellow rectangle, add a medium orange one, then top it with a short white strip. Then, you roll them tightly from one end while tapering gently to form the point. This stylized shape is perfect because it is simple to control and keeps the colors distinct.
I love this one for its miniature charm. The key is using a sharp craft knife for clean cuts and baking on a sheet of parchment paper. It makes a wonderful seasonal charm, and you will find more fun Halloween craft projects to pair it with. Feel proud of your festive little creation!
21. Build a Blueberry Muffin Miniature Food Charm
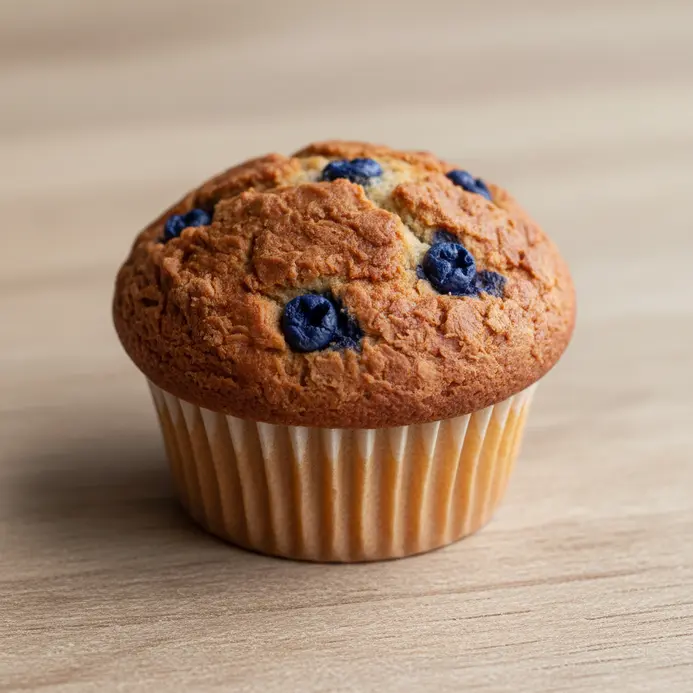
Who would have thought you will shape a muffin without an oven? This miniature food charm is a delight to make and wear. You will form a small dome of beige material, then gently press in tiny dark blue clay for the blueberries. Use a toothpick to create a craggy texture on the top, focusing on that realistic baked look.
Trust me on this one, the secret is to vary the size and placement of your blueberries for a natural appearance. After baking, you add optional shading with soft pastels for extra depth. This charm works so well because it captures a cozy, comforting treat in perfect miniature form. Try it and feel proud when you have a delicious-looking charm ready for a keychain or bracelet. For a fun seasonal twist, these miniature skills are perfect for Christmas craft projects too.
22. Create an Abstract Speckled Clay Magnet Set with Contrast
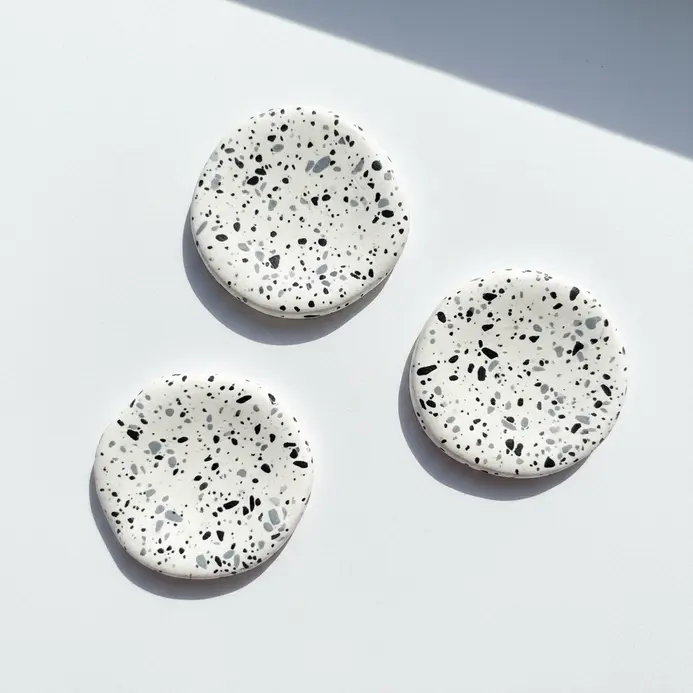
This project looks modern and artistic, but it is incredibly forgiving for a first try. You will start by forming a few abstract shapes, making sure one side is perfectly flat. After they dry, paint them in bold, contrasting base colors like black and white. The real magic happens when you flick speckles on with an old toothbrush, adding instant texture and depth.
Why does this work so well? The combination of organic shapes and high-contrast colors creates a striking, gallery-worthy look. For a pro finish, let the paint dry fully before using a strong adhesive to attach your magnets. You will love how these unique pieces brighten up your fridge.
23. Make a Minimalist Clay Alphabet Letter Charm
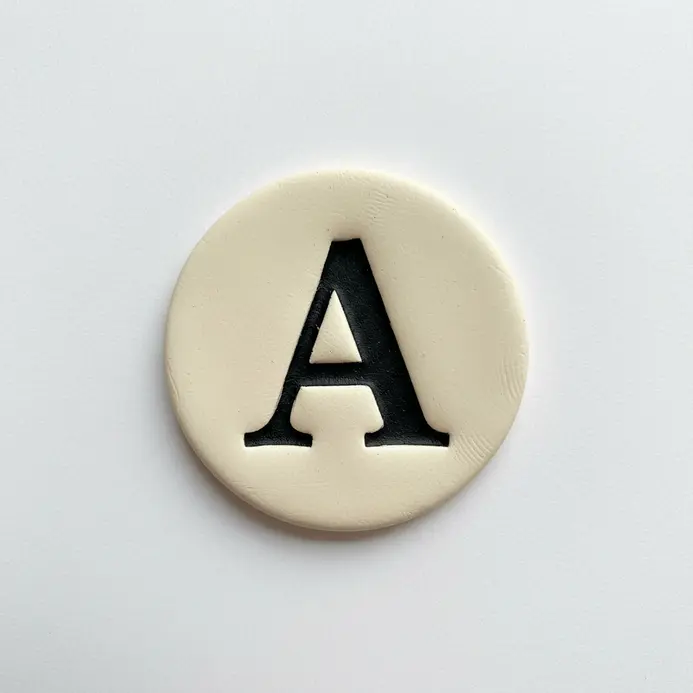
Ever wanted to make something personal and chic but felt intimidated? This is your perfect starting point. I love how a simple letter charm feels so elegant. Start by rolling your conditioned polymer clay into a thin, even sheet.
Use a printed template and a craft knife to cut out a clean letter shape, then poke a small hole at the top for a jump ring. Bake it, then sand the edges smooth with wet/dry sandpaper for that flawless finish. The clean design is incredibly versatile, letting you create meaningful initials without any fuss. For more doodle art inspiration, check out that link.
24. Build a Small Clay Turtle Keychain Figurine
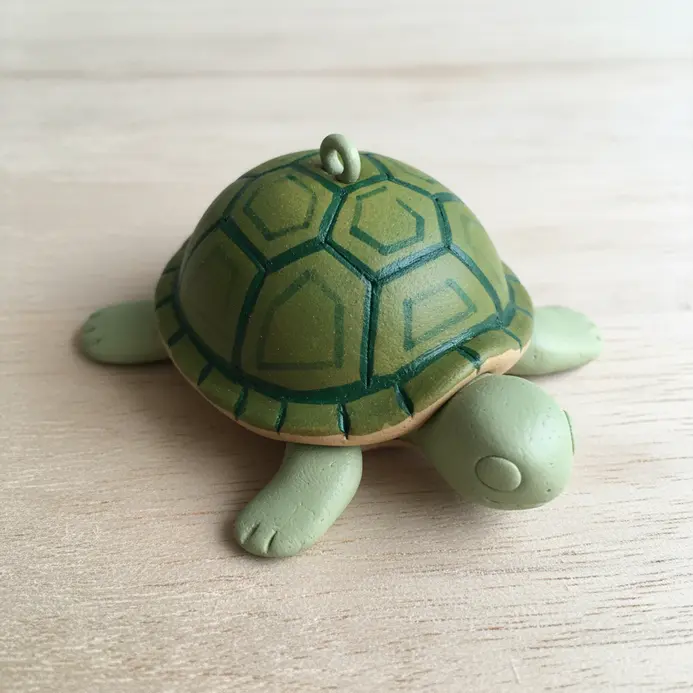
This little turtle is so much cuter than you might expect. Start by rolling your main shell color into a ball and gently flattening it into a dome. For the body, attach a small teardrop head and four little oval legs underneath. The most important step is using a needle tool to create a clean hole for the eye pin before you bake it.
Why does this work so well? The small size is incredibly forgiving, letting you focus on the simple, satisfying shapes. I love how a tiny dot of black material instantly gives it personality. For a fun next step, check out some easy beginner drawing ideas to sketch out your next creature design. Feel proud of your new handmade accessory!
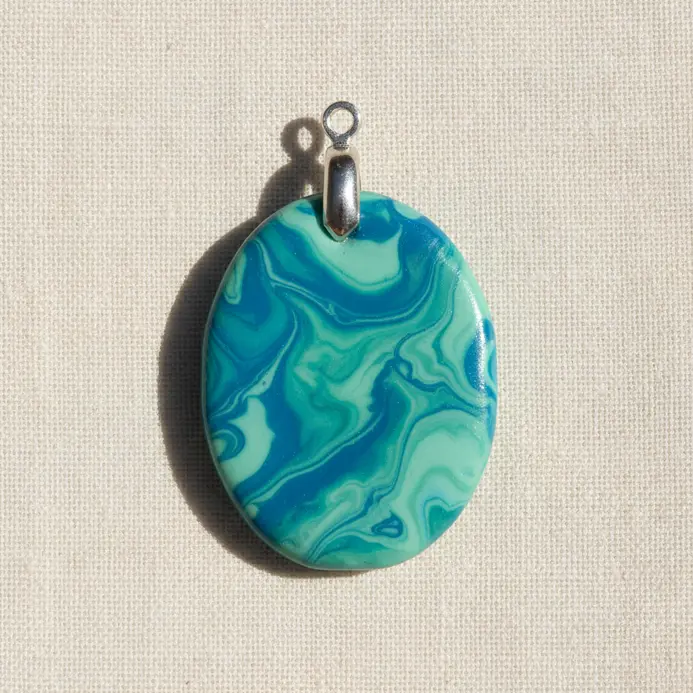
25. Create a Swirled Color Polymer Clay Pendant with a Bail
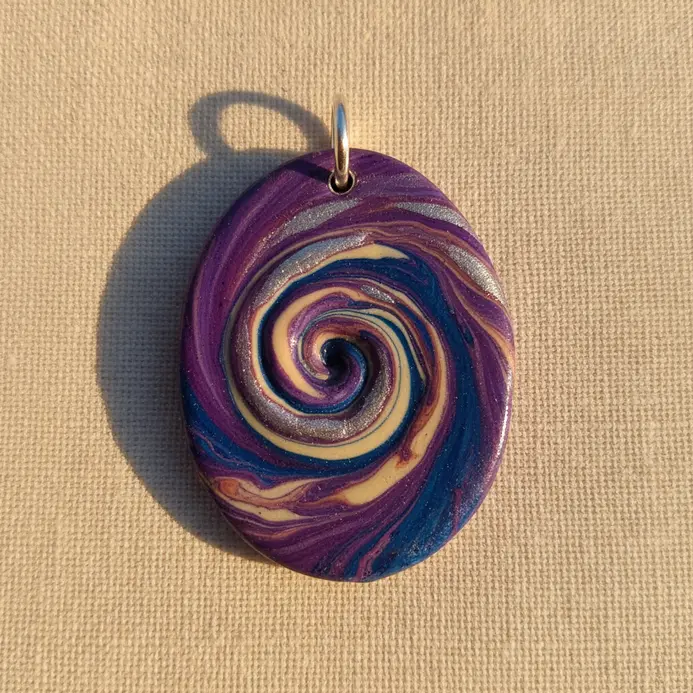
This one is my absolute favorite for newcomers. It looks like a professional piece of jewelry, but the process is wonderfully simple. Start by twisting a few contrasting clay colors together into a log, then roll and flatten it to reveal your unique marbled pattern. Cut out your pendant shape and form the necklace loop, or bail, directly from the material itself.
Why does it work so well? That integrated bail gives your pendant a clean, finished look that feels totally handmade. A common tip is to avoid over-twisting your colors. Trust me, a few gentle folds creates those beautiful, distinct swirls you are after. Feel how satisfying it is to wear your own creation.
Curing and Hardware Attachment Methods for Longevity
An oven thermometer is your best friend because home ovens are notoriously inaccurate and a few degrees too hot will scorch your clay. Bake your pieces on an index card or a dedicated baking sheet to prevent shiny spots, and let them cool completely in the oven to avoid thermal shock cracks. For attaching jump rings to make charms, create a clean perforation with a needle tool before baking. After curing, open a glued ring into the hole with two-part epoxy.
This method creates a mechanical bond far stronger than glue alone. Your patience here ensures your tiny sculptures survive being handled and worn.
Conclusion
The best part about working with polymer clay is watching a simple idea in your head become a real, tangible object you hold. Each of these projects is a stepping stone, helping you get comfortable with the material’s feel and how it behaves. My best advice is to keep your first pieces small and focus on the fun of making rather than perfection. Those little charms and magnets hold extra value because you made them yourself. As you explore these polymer clay ideas for beginners, you will find your own style and favorite things to create. I hope this list gives you the friendly nudge you needed to start squishing, shaping, and baking your own colorful world.
FAQs
Q: What is the most important thing for a beginner to know before baking polymer clay?
A: Condition your material thoroughly until it is soft and pliable. This prevents cracking and makes shaping much easier. Also, use an oven thermometer to ensure your appliance reaches the correct temperature listed on your package for even baking.
Q: How do I prevent dust and lint from sticking to my polymer clay projects?
A: Work on a dedicated, smooth surface like a ceramic tile or a sheet of glass. Wipe your hands with a damp cloth frequently and keep your workspace tidy. Store unused material in sealed plastic bags to keep it dust-free.
Q: Can I use regular kitchen tools with polymer clay?
A: It is best to keep tools dedicated solely to crafting. Once used for clay, kitchen items should never return to food preparation. Simple craft blades, acrylic rollers, and needle tools are safe, effective, and inexpensive to start with.
Q: Why did my baked polymer clay piece break or feel brittle?
A: This often happens if the material was not conditioned enough before shaping or if it was heated at the wrong temperature. Undercured pieces tend to weaken quickly. Always follow the package instructions for time and temperature, and make sure your oven is accurately calibrated.
Q: How should I finish my polymer clay charms after baking?
A: Let your pieces cool completely. You will then sand any rough edges with fine-grit paper. For a glossy surface, apply a thin, even coat of a clear varnish or glaze made specifically for the medium, allowing it to dry fully.


