


Establishing Cohesive Color Palettes For Layouts
The fastest way to unify a page with diy scrapbook ideas is following the 60-30-10 rule, where you pick a dominant, a secondary, and a single accent shade. Your dominant color covers sixty percent of the real estate, usually as your background cardstock or large photo mats. The secondary color fills thirty percent with supporting patterned paper strips or smaller photo layers.
That final ten percent is your pop of personality, reserved for a few intentional embellishments like a die-cut flower or a handwritten quote. This system forces you to edit your supply collection and prevents that cluttered feeling we all dread. You will notice your page feels organized and your focal image gets the attention it deserves. Trust me on this, it simplifies every single layout you make.
Selecting Archival Grade Adhesives And Paper
Your best defense against yellowed photos when applying diy scrapbook ideas is acid-free and lignin-free paper paired with the right adhesive. Cardstock and patterned paper labeled as archival will not break down and damage your photographs over decades. For sticking things down, you want a permanent adhesive runner designed for paper projects, not a standard glue from the office drawer. Apply a thin line around the edges of photos and a full X across the back of larger cardstock pieces to prevent dreaded curling.
The good news is that modern acid-free adhesives dry clear and hold strong without soaking through delicate vellum. Your finished piece will stay flat and your cherished memories will remain vibrant. This one supply choice makes all the difference for a long-lasting album.
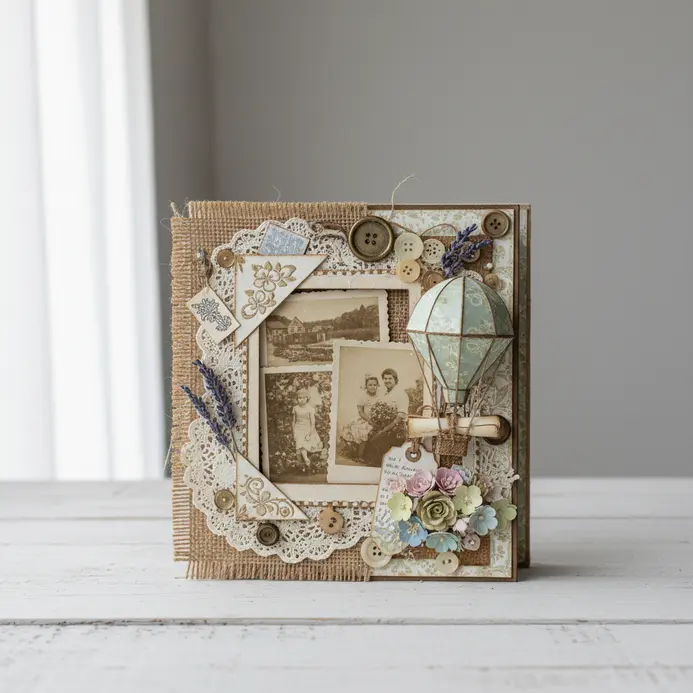
1. Build a Layered Travel Map Collage Page
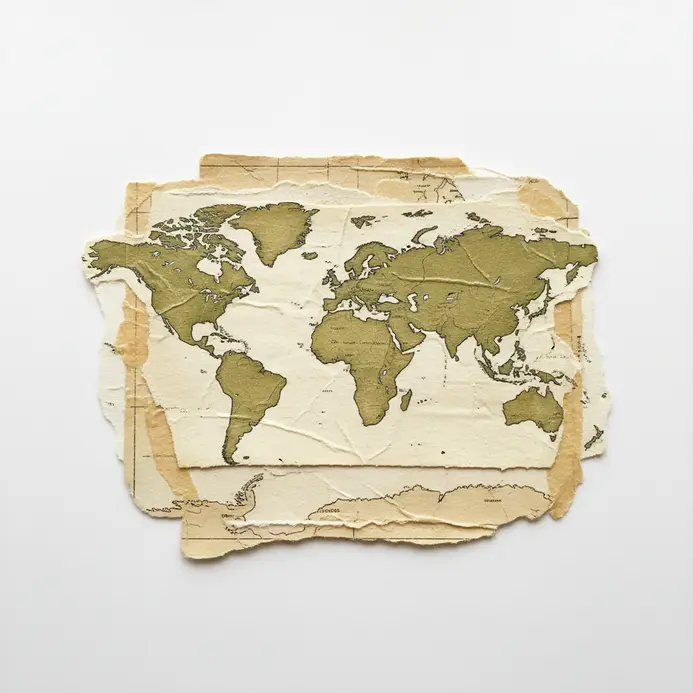
Ever feel like your travel photos need a more dynamic home? This project turns a simple map into a textured story of your trip. Start by securing a vintage map to your page as the base. Layer on photos, tickets, and postcards, using foam adhesive dots to create a beautiful sense of depth. This approach stands out among practical diy scrapbook ideas because it naturally guides the eye across your journey.
I love how this technique lets you physically touch your memories. The result is a deeply personal piece of art that celebrates your adventures. unique DIY accessory ideas.
2. Create a Minimalist Monochrome Portrait Layout
Ever felt like your pages are getting a bit too busy for these diy scrapbook ideas? This layout strips everything back to focus purely on emotion and memory. Start with a powerful black and white portrait, then mount it on a sheet of solid gray cardstock. I love how the huge amount of negative space makes your subject feel timeless and important.
Add a single, subtle embellishment like a tiny monochrome letter sticker if you need a touch of pattern. It works because removing color forces you to see light, shadow, and expression in a whole new way. Trust me, the final look is stunningly sophisticated.
3. Assemble an Interactive Pocket Flap Keepsake Page
Have you ever wanted to make your pages more hands-on? Assembling an interactive pocket flap keepsake page is a fantastic addition to diy scrapbook ideas for turning simple layouts into discovery experiences. You’ll need to sketch your design first, then cut and score sturdy cardstock for the base and pockets. Use reliable adhesive to attach flaps that open and close, perhaps with magnets for a clean finish.
This method works because it engages the viewer physically, making each memory more memorable. A pro tip: always dry-fit your elements before gluing. For additional inspiration on personalized projects, explore personal mini canvas ideas.
4. Apply a Vintage Floral Washi Tape Border

Doesn’t a vintage floral border instantly elevate your diy scrapbook ideas with instant charm? I love how forgiving this step is when you peel your chosen washi tape slowly and press it along your page’s edge, smoothing out any air bubbles as you go. For a truly polished look at the corners, try the overlap and trim method. It creates a fantastic, clean finish that feels so intentional. Your page gets a beautiful, soft frame that highlights your memories perfectly. This technique is a quick way to add a personal touch to your work. For more project inspiration, look into unique DIY accessory ideas too.
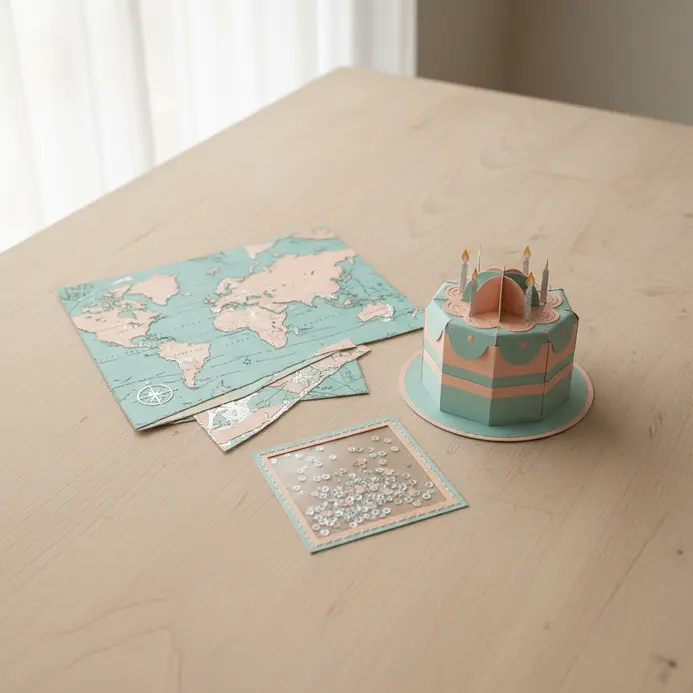
5. Construct a Dimensional Pop Up Cake Page
This one surprised me while exploring diy scrapbook ideas because it looks complex but is all about precise folds. You will create a multi-tiered cake that stands up from the page. Start with a sturdy cardstock base page and score it horizontally. Then, build each cake tier as a separate pop-up box using the same material. Assemble them along the center fold, one above the other.
The key is allowing enough space so each tier pops up without snagging. Trust me, using a craft knife for your cuts makes all the difference for clean, accurate lines. Once your structure is solid, the real fun begins with decoration.
Add cardstock cutouts for frosting, glitter, or little candles. Your page will have such a celebratory touch and a fantastic wow factor. Isn’t that satisfying?
6. Form a Structured Grid Daily Life Layout
Forming a structured grid daily life layout stands out among practical diy scrapbook ideas because it brings order to your creative time. I love this approach because it turns your schedule into a visual map you can see at a glance. Start by choosing a weekly time horizon and block out your fixed commitments like work and sleep.
Next, color code your categories, assigning a unique shade for health, hobbies, and chores. This visual system helps you spot where your passion projects fit and ensures you schedule necessary downtime. For a creative touch, try painting small elements on your planner tabs to personalize your system. The real payoff is feeling in control, with a balanced plan that supports both your hobby and your well being.
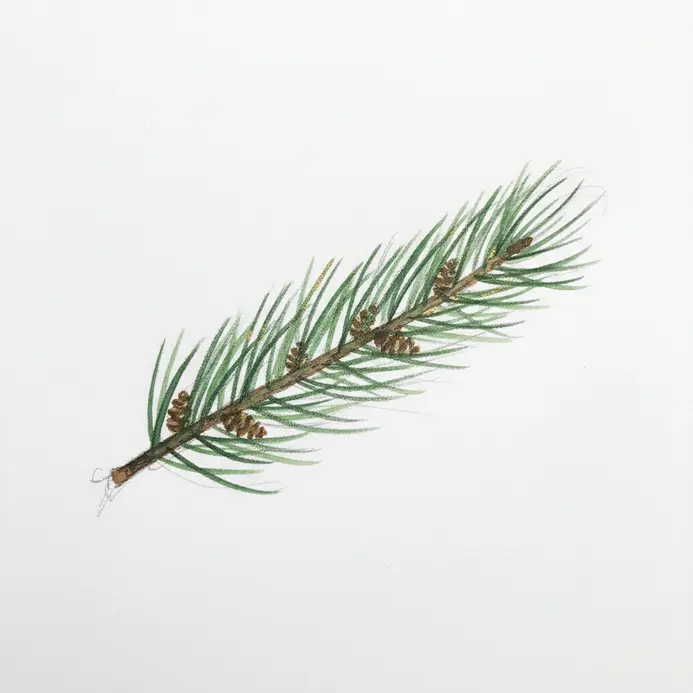
7. Stamp a Hand Stamped Archival Botanical Background
This one looks so elegant, yet it remains a top choice among diy scrapbook ideas due to its wonderfully forgiving process. You will start by stamping your largest botanical stamps with the lightest archival ink, letting some images drift off the page. Next, layer in medium shades and finally add dark accents with tiny, detailed stamps. The key is building those overlapping layers for a rich, deep effect.
Why does it work so well? The archival inks guarantee your beautiful background will last for years without fading. I love how this technique adds instant texture and a personal touch to any scrapbook page. For a fun twist, try pairing this stamped look with some melted crayon embellishments for a truly unique mixed media feel.
8. Add a Rustic Button Cluster Accent Piece
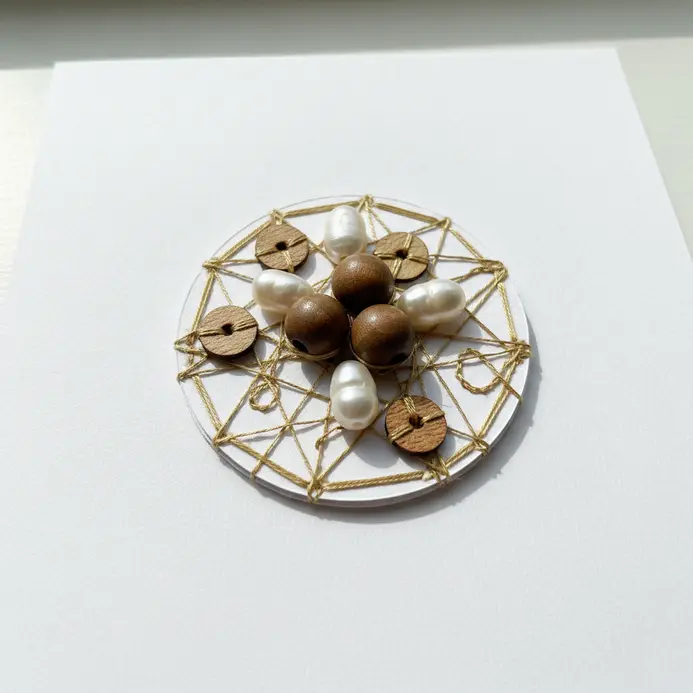
Have you ever noticed how rustic diy scrapbook ideas use simple buttons to completely transform a page? This one is a favorite of mine because it looks detailed but is wonderfully simple to do. You start by gathering a mix of wood and bone buttons in earthy tones like cream and dusty blue, then play with arranging them into a loose, overlapping cluster. The key is to layer a larger anchor button first and tuck smaller ones around it for depth.
Once you love the arrangement, you can attach it. For paper, I recommend a strong craft glue, pressing each button firmly and letting it dry completely. This little accent adds a charming, vintage texture that makes your memory page feel cozy and personal. Try it and feel the handmade warmth it brings.
9. Make a Shaker Box Sequin Window Layout
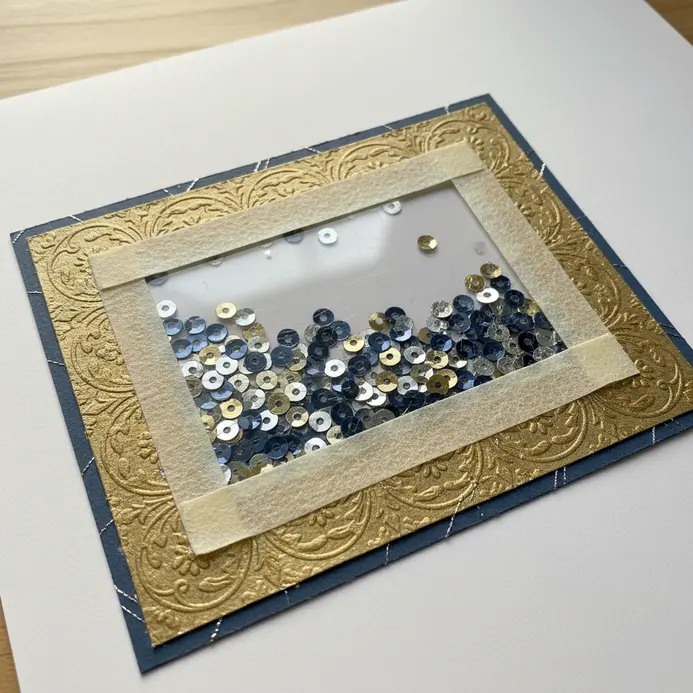
Creating a shaker box sequin window layout is a fantastic addition to diy scrapbook ideas for adding interactive play. You will create a layered window using cardstock and a piece of clear acetate. I love this part. The trick is to build a sealed well with foam tape around the opening before adding your sequins.
Then, carefully press the window frame over your base layer to trap the bits inside. You will love the playful, interactive touch it adds to your page. decorative home decor crafts. Trust me, that first shake is pure joy.
10. Blend a Mixed Media Ink Wash Backdrop
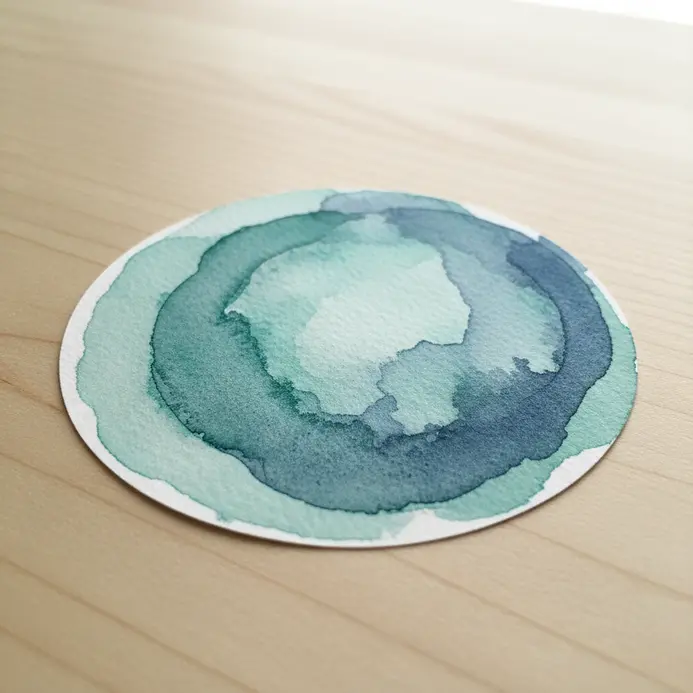
Blending a mixed media ink wash backdrop proves why diy scrapbook ideas benefit from embracing unpredictability. I always start by taping down heavyweight watercolor paper to keep it flat. Then, dilute your favorite inks – acrylic inks are great for permanent layers, while watercolors offer reworkability – and use a large, soft brush to apply washes on a damp surface for seamless blends. Introduce texture by sprinkling salt or laying plastic wrap while wet.
This technique shines because it gives each page a unique character. You’ll love how these backdrops make your photos and embellishments pop. Pro tip: work quickly and let layers dry between applications. It’s ideal for holiday themes, and for more holiday craft project ideas, this resource is handy.
11. Layer an Embossed Texture Cardstock Border Strip
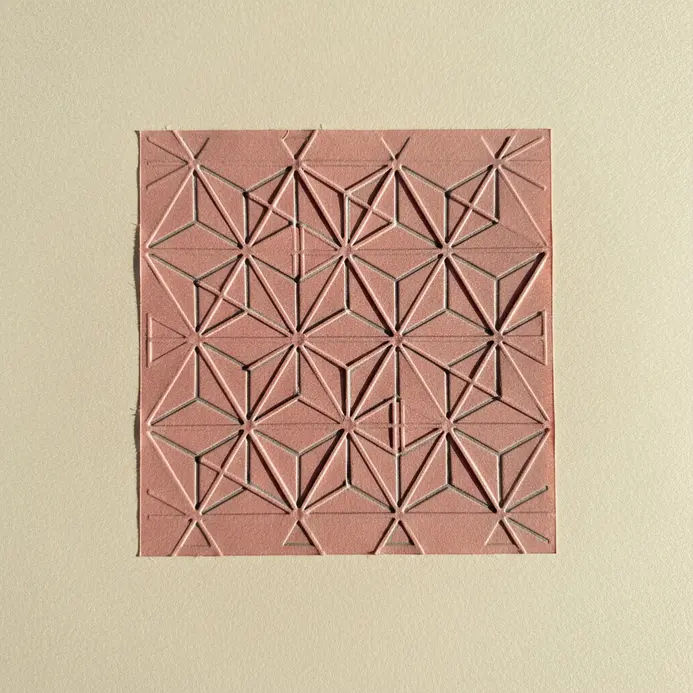
Layering an embossed texture cardstock border strip ranks highly in professional diy scrapbook ideas for building dimension. You begin by preparing your embossed texture cardstock strip, either from a pre-made piece or by running medium-weight cardstock through a die-cutting machine. I love how this adds a subtle, touchable pattern to your scrapbook page or card. Dry fit the strip on your base layer to plan the perfect placement.
Then, apply a thin layer of your chosen adhesive. The real magic is in the burnishing step, where you press it down firmly to make sure it stays put. This method works so well because it builds beautiful dimension without any complicated steps. Trust me, the professional finish you get from that extra texture is incredibly satisfying.
12. Write a Hand Lettered Calligraphy Title Card
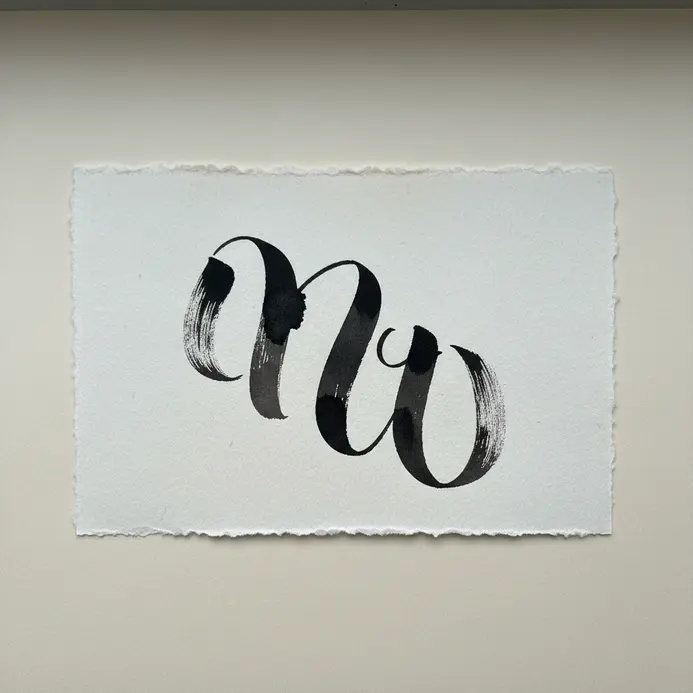
Writing a hand lettered calligraphy title card is one of those diy scrapbook ideas that adds deeply personal elegance. You start by sketching your phrase with a light pencil on smooth paper. Then, you go over it with your favorite pen, using firm pressure on downstrokes and light pressure on upstrokes to create that classic calligraphy look. This adds a deeply personal and elegant touch to your project, far beyond any sticker or printed font.
I love this method because it makes your page feel truly one of a kind. For a fun seasonal twist, you can adapt this technique for fun Halloween craft ideas too. Try it and feel the satisfaction of seeing your own beautiful handwriting become a focal point.
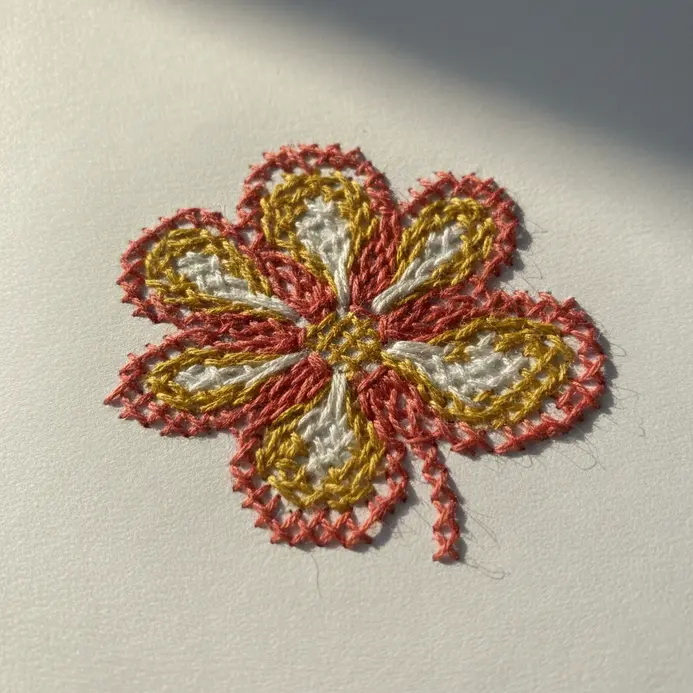
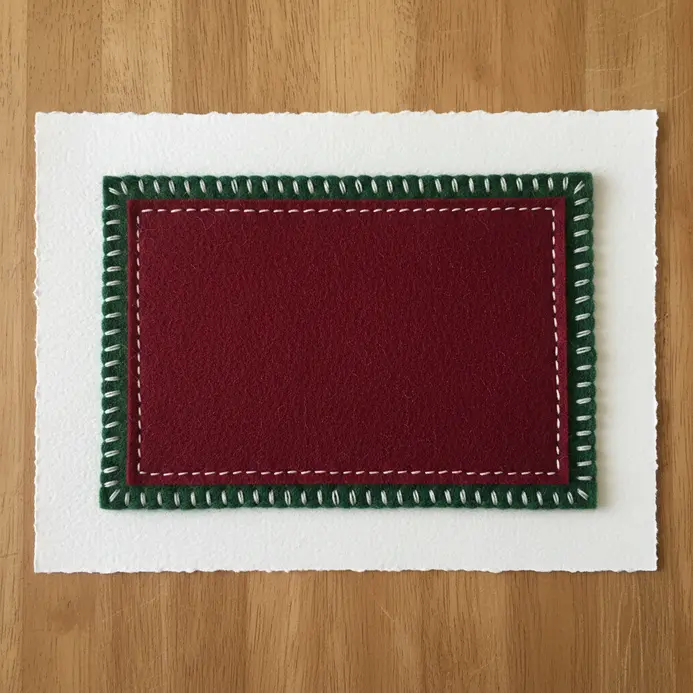
13. Stitch a Sewn Edge Fabric Scrap Frame
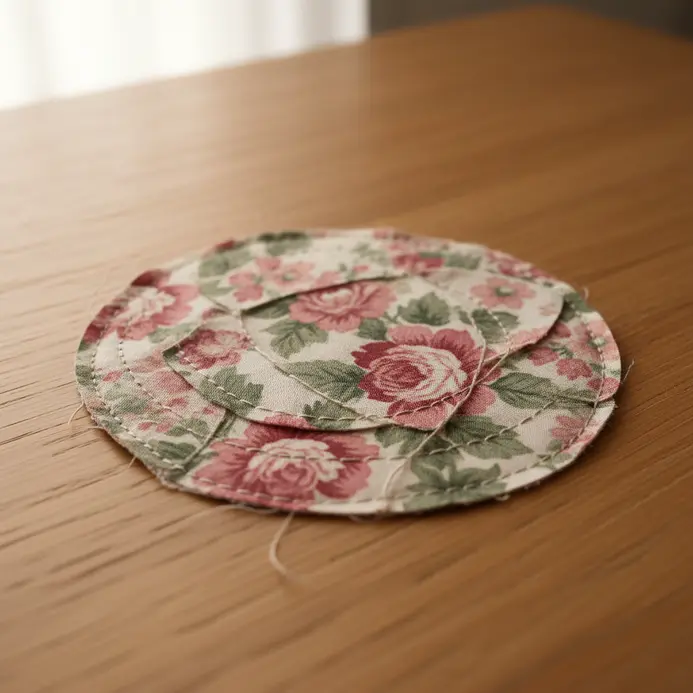
Stitching a sewn edge fabric scrap frame transforms leftover materials into standout diy scrapbook ideas. You will arrange and glue your fabric scraps onto a frame backing, overlapping them to create a colorful patchwork. After trimming the edges, you get to stitch decorative lines around the whole piece, which adds amazing texture and secures everything in place. It feels so satisfying because you are turning forgotten bits into a beautiful, one-of-a-kind piece.
I love how the stitching becomes a design element itself. Try it and feel proud of your unique creation.
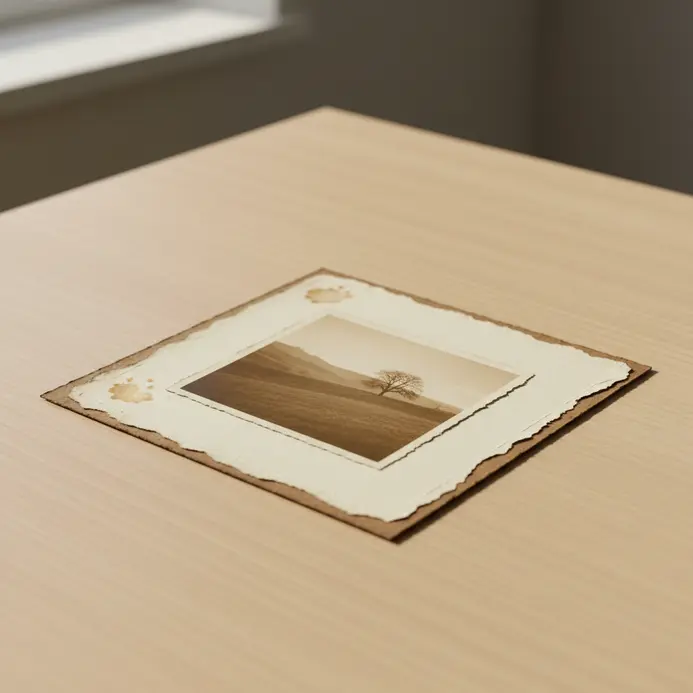
14. Preserve a Pressed Flower Wedding Memory Page
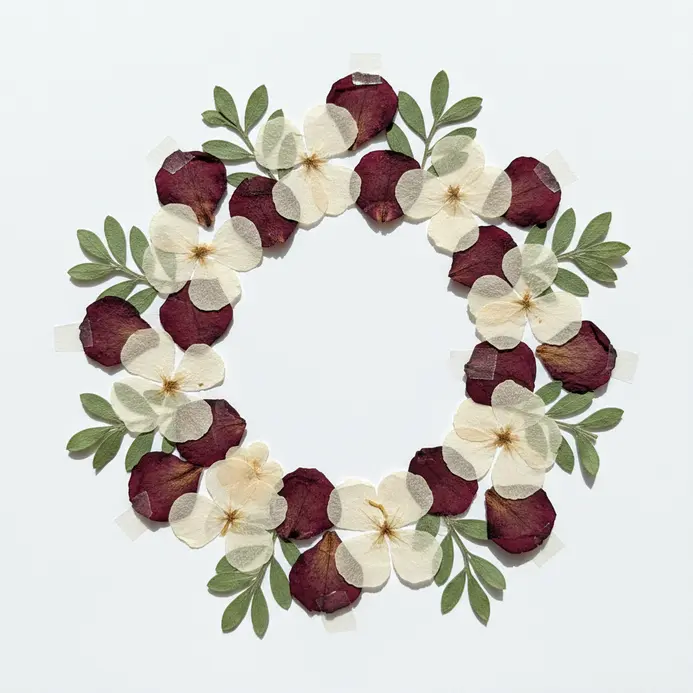
Isn’t it a shame when those beautiful wedding flowers wilt? Preserving a pressed flower wedding memory page highlights how diy scrapbook ideas capture delicate beauty forever. You will press the blooms from your bouquet or centerpieces, then arrange them on acid-free paper with archival glue. The key is to press them within a day or two of your wedding for the best color.
I love adding a small photo or a piece of wedding ribbon to the page for an extra personal touch. Once your design is set, frame it under UV-protective glass to keep the colors from fading. This creates a stunning, meaningful display you will cherish. unique DIY accessory ideas.
15. Chart a Baby Milestone Growth Chart Layout
Ever feel like your baby’s early months are just a blur of wonderful firsts? Charting a baby milestone growth chart layout shows why diy scrapbook ideas slow down time for precious moments. You can map out their height and weight on a timeline, then add photos and notes for big moments like rolling over or saying “mama.” I love using a dedicated journal page for each month to keep it organized. This works because it turns fleeting memories into a lasting, visual story you will treasure.
Need a creative spot for monthly photos? Check out these personal mini canvas ideas to add a special touch.
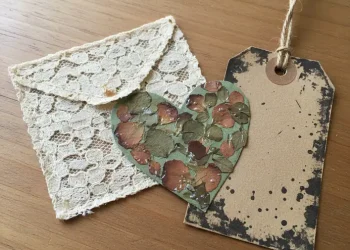
16. Compose a Free Form Collage Ephemera Collection
Composing a free form collage ephemera collection proves that intuitive diy scrapbook ideas remove strict rules entirely. I love the tactile process of sorting through items like yellowed book pages, delicate lace, and pressed petals. You will arrange them intuitively on your page, letting the textures and muted colors guide your composition. Secure each piece with a matte gel medium and use tweezers for the tiniest items.
This approach works because it allows your personal creativity to flow freely. Embrace the frayed edges and happy accidents for a truly meaningful piece.
17. Paint a Watercolor Splatter Family Tree Page
Painting a watercolor splatter family tree page demonstrates how diy scrapbook ideas bring organic energy to rigid layouts. I love how the watercolor splatter technique adds an organic, free-flowing background. You will lightly sketch your tree layout, then use a brush to flick paint onto the page, creating colorful bursts and blooms. Once the paint dries, you add all the names and dates with a fine-tip pen.
The magic happens because the artistic splatters make your family history feel personal and alive, not just a list on a page. For another way to add a personal touch to your projects, explore these unique DIY accessory ideas.
18. Detail a Stitched Thread Photo Corner
Detailing a stitched thread photo corner reminds us that practical diy scrapbook ideas secure pictures without harsh adhesives. It is not complicated at all. Start by cutting a small triangle from a piece of patterned paper or cardstock and lightly positioning it on your page. Then, use a paper piercer to pre-punch your stitch holes before threading your needle with embroidery floss to sew it down.
This method secures your pictures without any glue, making it perfect for preserving old photos. For another way to add a handmade element to your projects, check out ideas for painting small elements. The result is a unique, textured corner that feels special every time you see it.
19. Frame with a Transparent Vellum Overlay
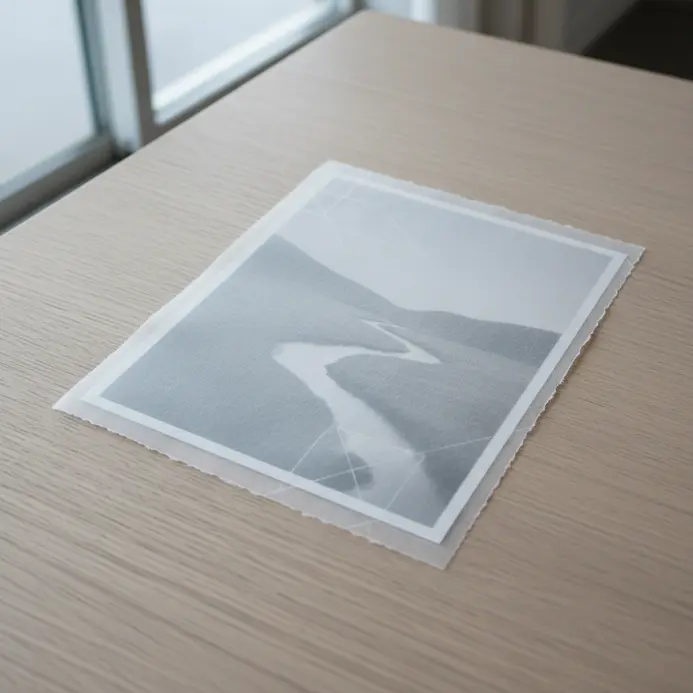
Ever wanted to make a photo or quote feel dreamy and soft? A transparent vellum overlay is your secret weapon. You create or cut out a simple frame from cardstock, then layer a piece of vellum right over the top. I love how this instantly adds depth and a gentle, elegant touch to your page.
It works because the vellum acts like a soft filter, reducing visual clutter while letting the beauty beneath shine through. Just be sure to use tiny, clear glue dots to attach it, so your adhesive stays invisible. Incorporating this layer elevates standard diy scrapbook ideas with effortless grace.
20. Craft a Decorative Die Cut Paper Flower
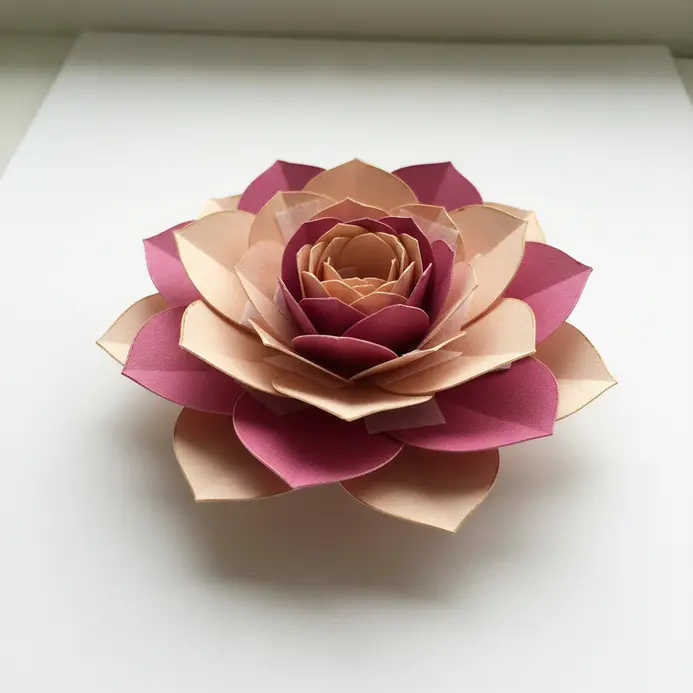
Ever wondered how makers create those perfect, intricate blooms? This one surprised me – it looks complex but takes under ten minutes once you get the hang of it. Designing floral accents ranks highly in diy scrapbook ideas because you can use a die-cutting machine to cut your petal shapes from cardstock. Then shape each one with a ball stylus on a foam pad to give them realistic curl and dimension.
The trick is building your flower from the outside in, layering and offsetting each petal ring as you glue them together. I love this one because it lets you add a truly custom floral element to any page. For a fun twist, try adding some colorful melted crayon embellishments to the center of your flower for extra texture and sparkle.
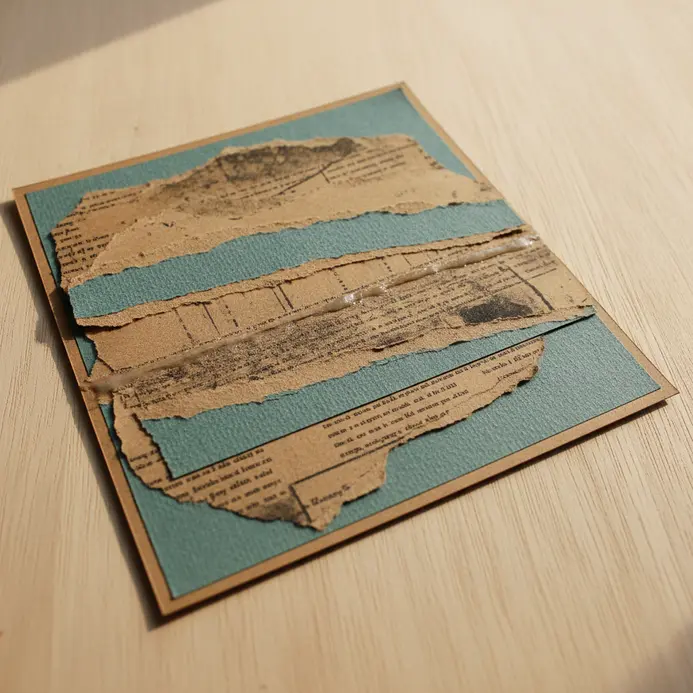
21. Patch a Geometric Pattern Paper Page
Ever accidentally tear a favorite patterned page? This repair technique shows how adaptive diy scrapbook ideas can salvage a memory. You cut a precise piece of matching or contrasting geometric paper and adhere it over the spot. For a seamless fix, use a craft knife and metal ruler to align the pattern perfectly. For a decorative touch, layer different shapes to create a cool collage effect.
It works because it turns a potential disaster into a creative opportunity, adding new layers and personality. Pro tip: apply a thin layer of glue stick to prevent warping and smooth it down firmly. This approach to repair can inspire other creative paper design ideas for your home, like decorative home decor crafts.
22. Distress a Sepia Tone Vintage Scrapbook
Ever wondered how to make a brand new album look like a cherished family heirloom? The secret is in the layers. Applying age effects represents classic diy scrapbook ideas that give pages history. Start with a strong coffee wash to give your pages that foundational aged tint. Then, gently sand the corners and spine to mimic natural wear. I love adding subtle tears with my fingers and darkening those edges with a bit of sepia ink.
My best tip? Practice your distressing on some spare cardstock first. You will be amazed at how these simple touches add so much character to your memory keeping.
23. Arrange a Rainbow Spectrum Photo Grid Layout
Ever feel like your photos need a burst of joyful energy? This layout uses the classic ROYGBIV order to create a stunning visual flow. Start by sorting your pictures into color categories, focusing on the dominant color in each one. I love using a simple square crop for every image to keep that perfect grid look clean and intentional.
Arrange them in rows or columns, moving smoothly from red to violet. The magic is in the transition—try placing a photo with both orange and yellow elements between those pure color sections. It is incredibly satisfying to step back and see your memories form a cohesive, colorful spectrum. Following this structure elevates standard diy scrapbook ideas into vibrant art. holiday craft project ideas to add a festive touch to your creativity.
24. Pocket a Thematic Holiday Stocking Page
This interactive page looks detailed, but it is a joy to assemble. Tucking seasonal elements ranks highly among festive diy scrapbook ideas. You will create a sturdy pocket from festive paper and tuck a decorated paper stocking inside, perfect for holding a small photo or a sweet holiday message. I love how it adds a playful, personal touch to your memory keeping.
Start by making your pocket with a strong liquid glue on the folded tabs to ensure it stays put. Then, cut out your stocking shape from patterned cardstock and add embellishments like glitter or tiny charms. Isn’t it satisfying to make a page you can actually play with? fun Halloween craft ideas to keep the creativity flowing all year.
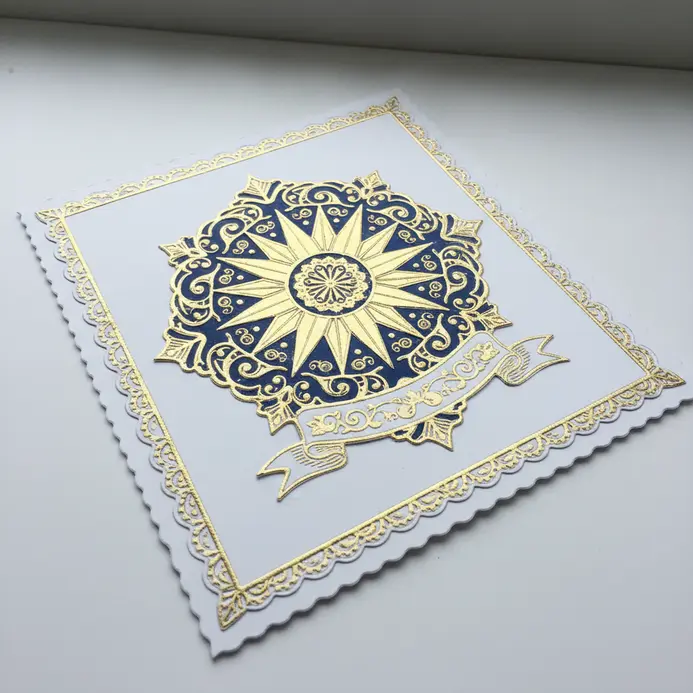
25. Accent with a Sophisticated Metallic Foil Detail
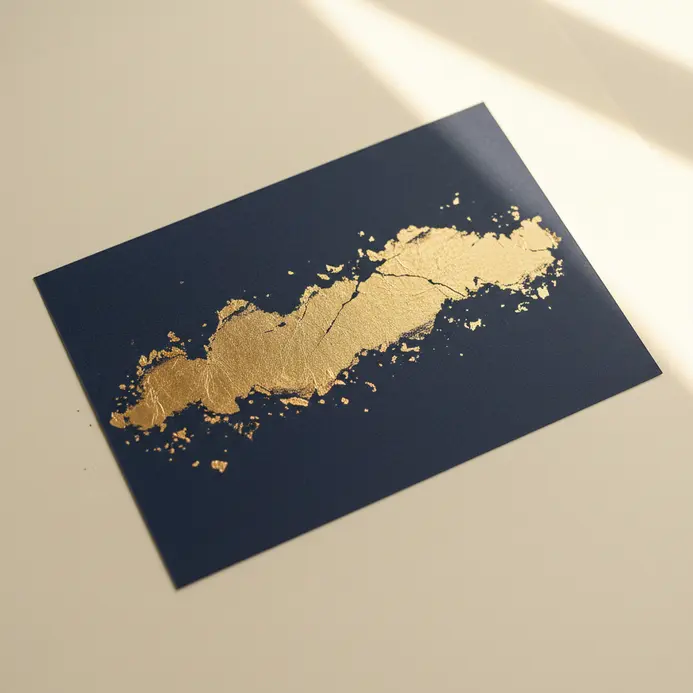
Ever wondered how to make a page shimmer without looking too flashy? Adding a metallic foil detail is your secret weapon. Polishing your layouts with reflective materials defines premium diy scrapbook ideas. I love this technique for highlighting a special photo corner or a meaningful quote on a title page. It creates a beautiful, tactile contrast against matte cardstock.
You can achieve this look at home with a simple laminator and some foil transfer sheets. Just run your design through with the foil sheet on top, and watch the magic happen. This touch of luxury makes your memory feel extra celebratory and special. My tip is to start small, like foiling just the first letter of a name or a single flower element. It draws the eye perfectly without overwhelming your whole layout. Try it and feel the pride when that light catches your page.
Long Term Protection And Album Storage
After you have finished your beautiful page, slide it into a clear archival page protector before placing it in the album. These sleeves act as a physical barrier against dust, fingerprints, and accidental moisture spills that could ruin your work. Look for protectors made from polypropylene or polyester, as these are the most stable plastics and will not off-gas over time.
Store your filled album upright on a shelf, not stacked under heavy objects, to keep the spine straight and prevent embellishments from getting crushed. Keep the album in a cool, dry place away from direct sunlight to stop colors from fading. This final step ensures all your effort and passion is preserved for future generations to enjoy. Your project deserves this simple layer of defense.
Conclusion
So, did any of these layouts spark a story you are ready to tell? Look at the ideas you have gathered—that is real creative fuel right there. The best diy scrapbook ideas are not the most complex ones, but the ones that feel authentically yours, where every element, from a simple washi tape border to a hand-lettered title, adds to your personal narrative.
My best piece of advice is to start with the memory that feels most urgent to capture, and let the supplies you love guide the design. Pick your favorite concept, gather your photos and ephemera, and get started on a page you will treasure.
FAQs
Q: What are the essential supplies I need to start?
A: Begin with quality cardstock, archival adhesive, a paper trimmer, and decorative papers. Washi tape and a few packs of themed die-cuts provide easy accents without clutter.
Q: How do I avoid a cluttered look on my page?
A: Establish one clear focal point, like a main photo. Use a structured grid or balanced visual triangle to arrange other components. Leave intentional white space around your focal point.
Q: What is the best way to include journaling?
A: Treat journaling as a core design element. Write on a separate card tucked into a pocket, use a pre-printed tag, or create a dedicated column. Handwriting adds a personal touch.
Q: Can I use regular glue for my scrapbook?
A: Avoid regular white glue or glue sticks. They can warp paper and damage photos over time. Use acid-free, photo-safe adhesive dots, tape runners, or liquid glue for longevity.
Q: How do I choose a color scheme for a layout?
A: Pull two or three dominant colors from your main photograph. Use those colors for your cardstock, mats, and embellishments. A neutral background helps the photo and chosen colors stand out.


