

Line Weight Planning For Skin Longevity
Keep the thinnest internal marks at about 0.35 mm or wider when planning a cyber sigilism tattoo for lasting readability. A 3RL needle grouping gives a qualified tattoo artist fine control, while a 5RL creates a firmer black edge for major hooks, claws, and outer spikes. Reserve the narrowest lines for open areas, since dense circuitry and overlapping sigils blur sooner when ink sits too close together. Strong black ink keeps the silhouette readable, while white ink inside tiny marks often fades into uneven texture during healing. Ask for a clear difference between structural lines and decorative scratches, so every jagged terminal does not compete for equal attention, especially when evaluating cyber sigilism tattoo ideas. Your artist should match needle grouping, saturation, and skin placement to the final scale rather than shrinking a complex reference until its voids disappear.
Placement Mapping For Curves And Negative Space
Map the design on a full-size printable stencil before choosing a placement, since a central void needs room to stay open as skin bends. Forearms suit long vertical sigils with a strong central axis, while shoulders and calves support wider hooks that follow rounded anatomy. Ribs and sternum areas need extra attention because breathing and torso movement change spacing between pointed terminals. Leave clean negative space beside circuit references and blade-like tips, rather than filling every gap with micro-lines. Photograph the stencil from several angles while your body moves, then check whether the aperture still reads as an intentional shape when exploring cyber sigilism tattoo ideas. Large placement protects small internal marks from visual crowding, especially when a neo-tribal silhouette mixes curves with sharp blackwork. Ask your tattoo artist to adjust the axis around muscle flow, not force perfect symmetry onto a naturally uneven surface.
1. Symmetrical Forearm Circuitry Wrap Tattoo with Bold Negative Space
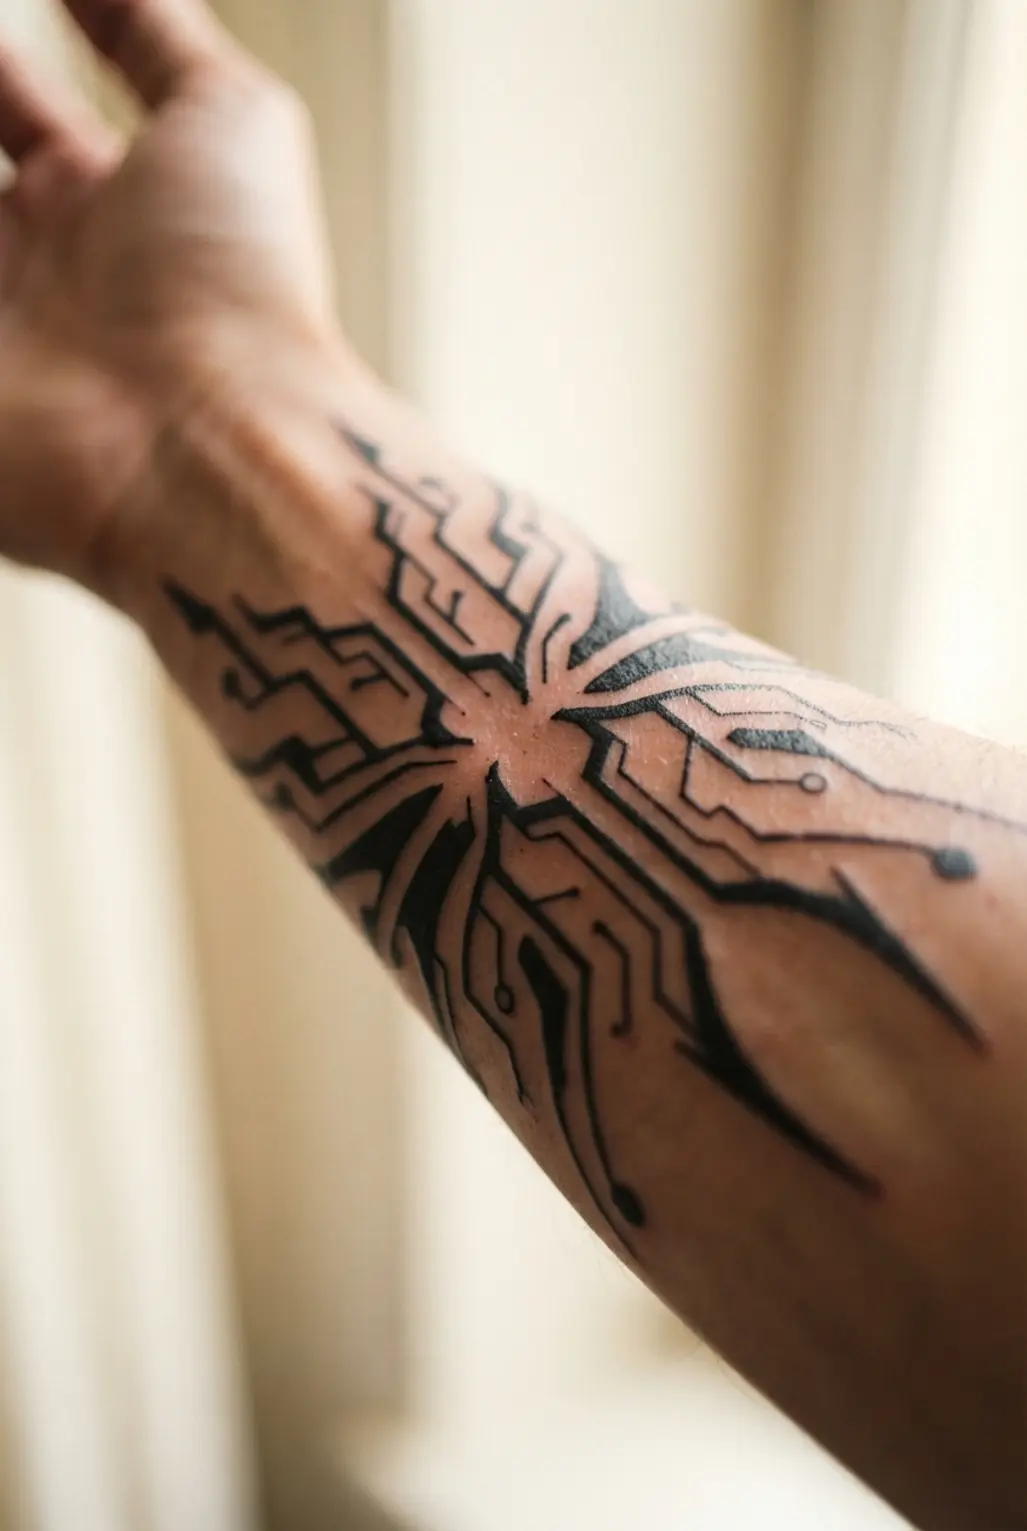
Ever wondered how a forearm tattoo keeps its symmetry as your arm turns? Start with a central vertical pathway, then mirror angular panels, nodes, terminals, and thin connector lines across the inner and outer forearm. Leave wide skin channels between each circuitry group, with solid black sections kept selective so the pattern stays crisp instead of becoming one dark block. I love how the taper toward the wrist and elbow makes the wrap feel measured, while small circles or hexagons add neat connection points. Ask your tattoo artist to check the stencil from every angle before lining begins. Trust me, consistent negative space makes this futuristic blackwork feel sharp and balanced, a hallmark of cyber sigilism tattoo ideas.
2. Minimalist Finger Thorns and Lines for Sharp Detail
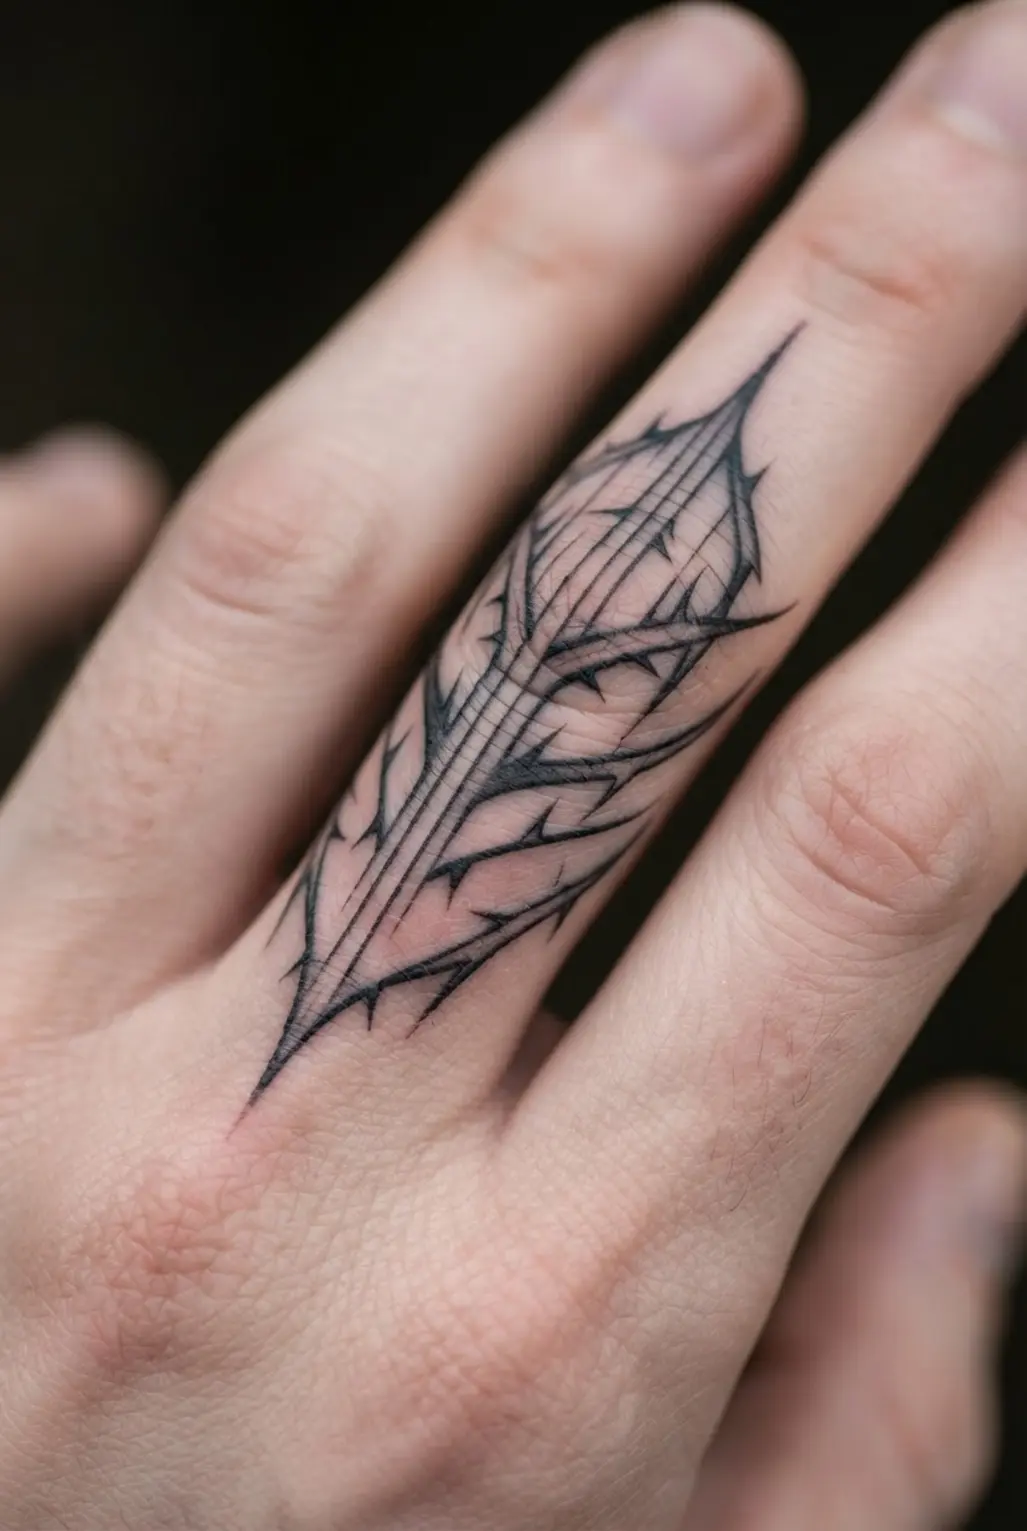
These finger thorns feel crisp and personal, with ultra-fine lines curling gently around the narrow space. Start by mapping the motif along the finger, then place each pointed detail with clean, even spacing. A placement plan helps you check the wrap before tattooing, while restrained scale keeps the pattern airy instead of crowded. Isn’t it satisfying when every point looks deliberate, much like the finest cyber sigilism tattoo ideas? I love how the edgy shape stays elegant from every angle.
Keep the points slim and controlled as the linework follows the finger’s curve. Blunt tips, uneven gaps, or too many marks quickly muddy the look, especially on such a visible placement. The thorn accents give the design more bite without adding clutter. Trust me, test the wrap alignment on paper or a stencil, then let your tattoo artist adjust the scale for your finger. Your finished piece will feel light, precise, and quietly bold.
3. Angular Spine Sigil Blackwork Design with Balanced Symmetry
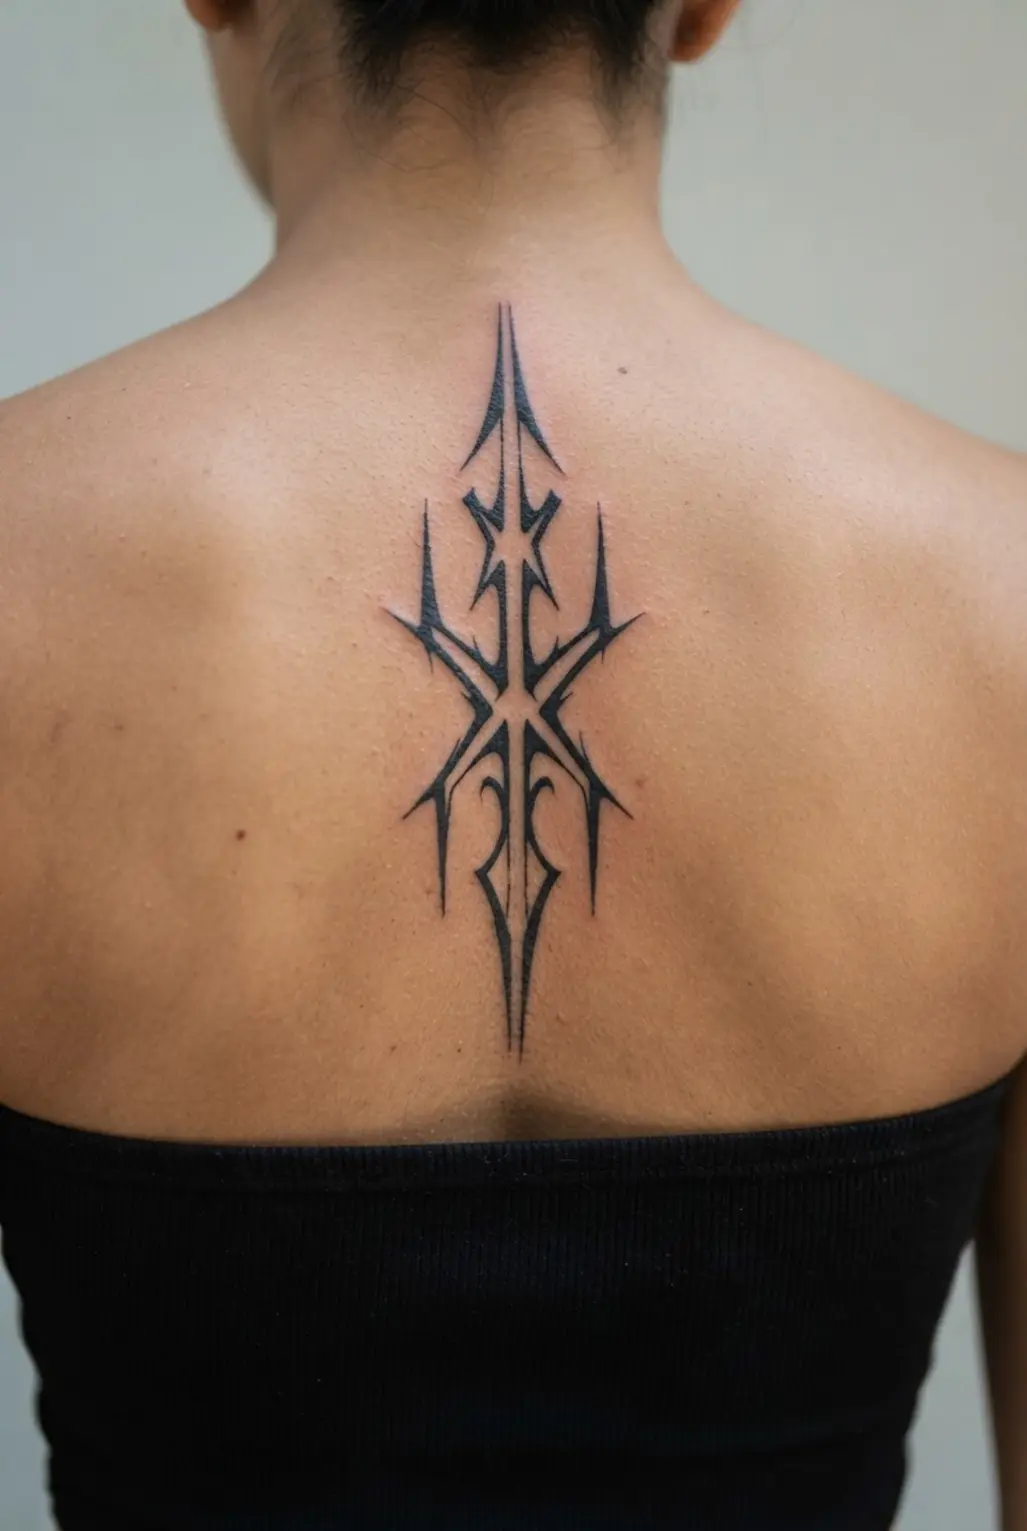
This one is a favorite because the spine gives the whole piece clean order. Sound complicated? It isn’t. Start with a central spine axis, then place an elongated diamond or hexagonal emblem between the shoulder blades. Add an abstract rune at its center, followed by mirrored triangles, wedges, and chevrons. Keep each side measured against the same guide, since even a small shift will show across the back. I love how symmetry makes the dense design easy to read, which directly supports effective cyber sigilism tattoo ideas. Trust your artist to choose line weights and filling tools suited to your skin, and check the stencil from several angles before the first mark.
Extend the pattern toward the sacrum with segments narrowing as they descend. Leave deliberate negative-space gaps between adjoining shapes, then combine crisp fine-line geometry with solid black sections. The high-contrast finish stays bold without shading or color, while pointed details toward the neck or lower back add direction. Trust me, this structural clarity ensures longevity on the back.
4. Abstract Chest Sternum Glyph Tattoo: Centered Occult Linework

The finished piece draws the eye with a small diamond near the upper sternum, crisp angular lines, and crescent arcs fading into open skin. Ever wondered why this layout feels so balanced? Its strength comes from a central vertical axis following the breastbone from chest to solar plexus.
Begin with a precise stencil, then place dots, triangles, planetary marks, and fine radiating lines on both sides. Keep each detail airy, and taper the lower point before it reaches the upper abdomen. I love this one because fine-line blackwork gives the occult design a clean, personal feel without copying a recognizable symbol. Pro tip: ask your artist to check symmetry while you stand naturally, since chest movement shifts the placement and refines your cyber sigilism tattoo ideas.
5. Razor Blade Butterfly Shoulder Piece with High-Contrast Wings

Many people think a razor-blade butterfly needs endless tiny details, but crowded wings quickly hide its shape. Start across the shoulder cap, letting angular wings reach toward the collarbone and upper arm. Keep the silhouette symmetry around a soft organic body. Is it too sharp for a butterfly? I love the tension between delicate anatomy and deep blackwork.
Fill outer wing sections with solid black, leaving clean negative-space breaks between geometric panels. Add selective highlights for polished metal, plus a few dots, cracks, or thorn-like marks near the body. Save reflective lines for key edges, since every blade does not need the same shine when reviewing cyber sigilism tattoo ideas.
Ask your artist to map shoulder contours before the stencil goes on. Optional drips or red accents suit a darker mood, yet restraint keeps the blackwork clear. Protect the negative space so the design stays readable as fine details soften over time.
6. Lower Back Cybernetic Tribal Arc: Clean Y2K Geometry
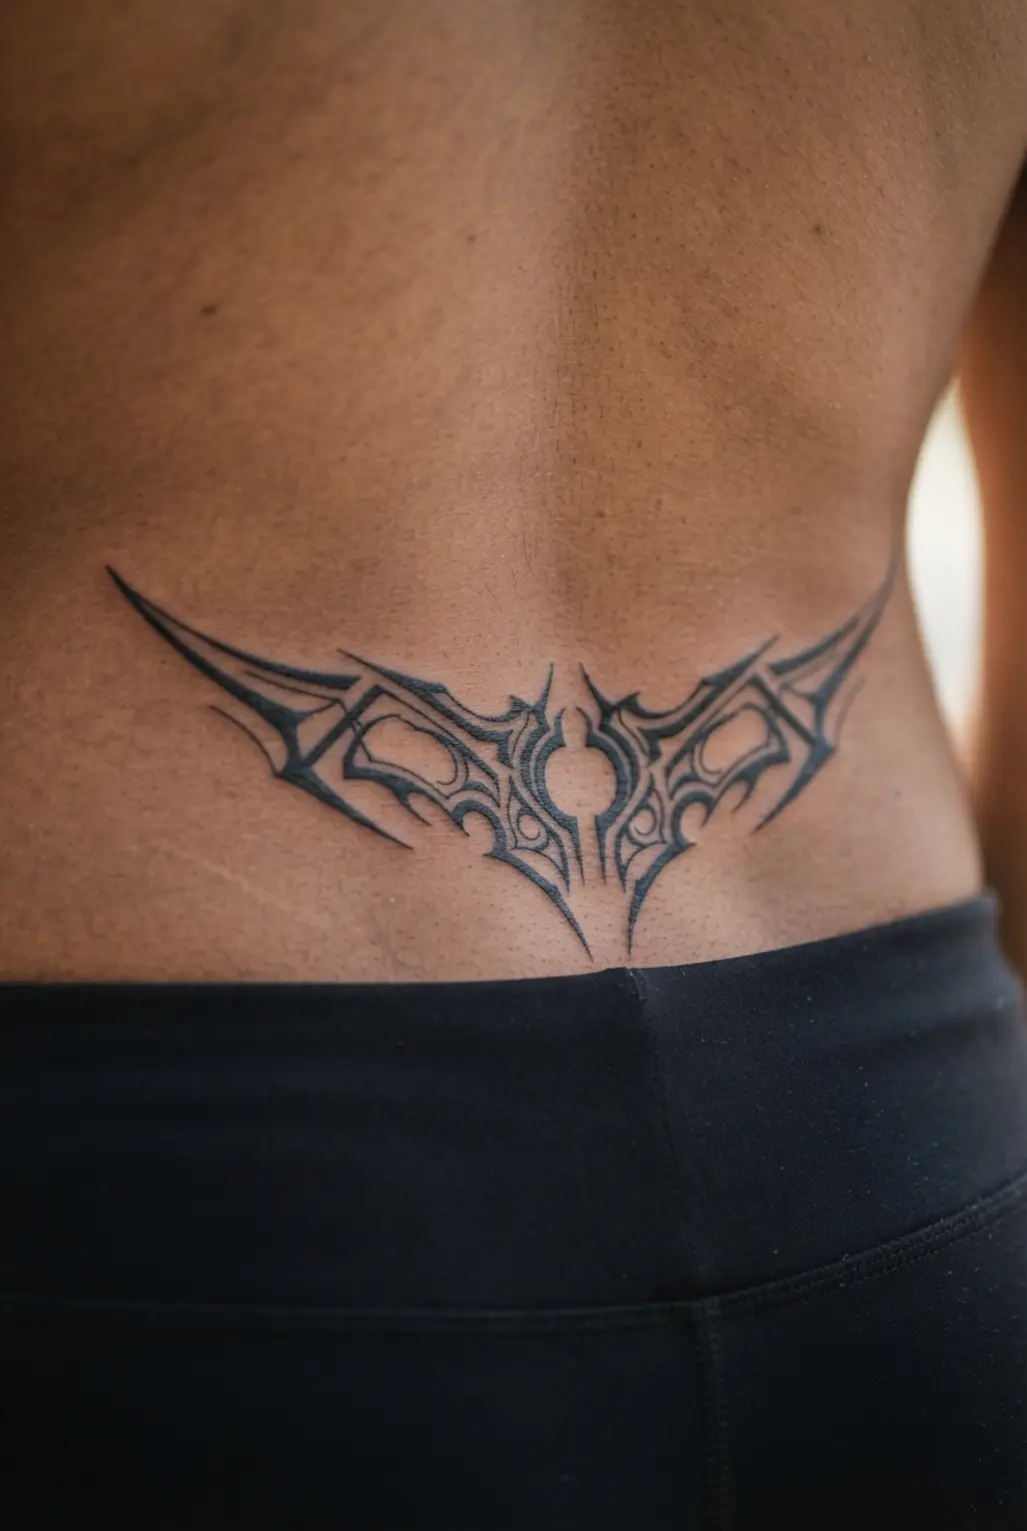
Lay a symmetry stencil across the lower back, following its natural horizontal curve from the center outward. Mirror each cybernetic tribal contour toward the hips, keeping the taper even and the line weight thin to medium. Add rounded Y2K corners, small cutouts, and circuit-like breaks while leaving open panels between each path. Sound complicated? Clean spacing keeps the polished chrome impression light instead of heavy, matching the best cyber sigilism tattoo ideas.
I love how the mirrored layout feels sleek, rebellious, and neat once both sides settle into place. Black ink leads the design, while blue, silver, or icy-white accents bring a cool interface finish. Use restrained shading, since dense fills erase the liquid-plastic look and muddy the geometry. Trust me, a final symmetry check matters more than extra detail, so your artist should adjust the arc to your anatomy before tattooing.
7. Geometric Thigh Exoskeleton Pattern Tattoo for Strong Muscle Flow
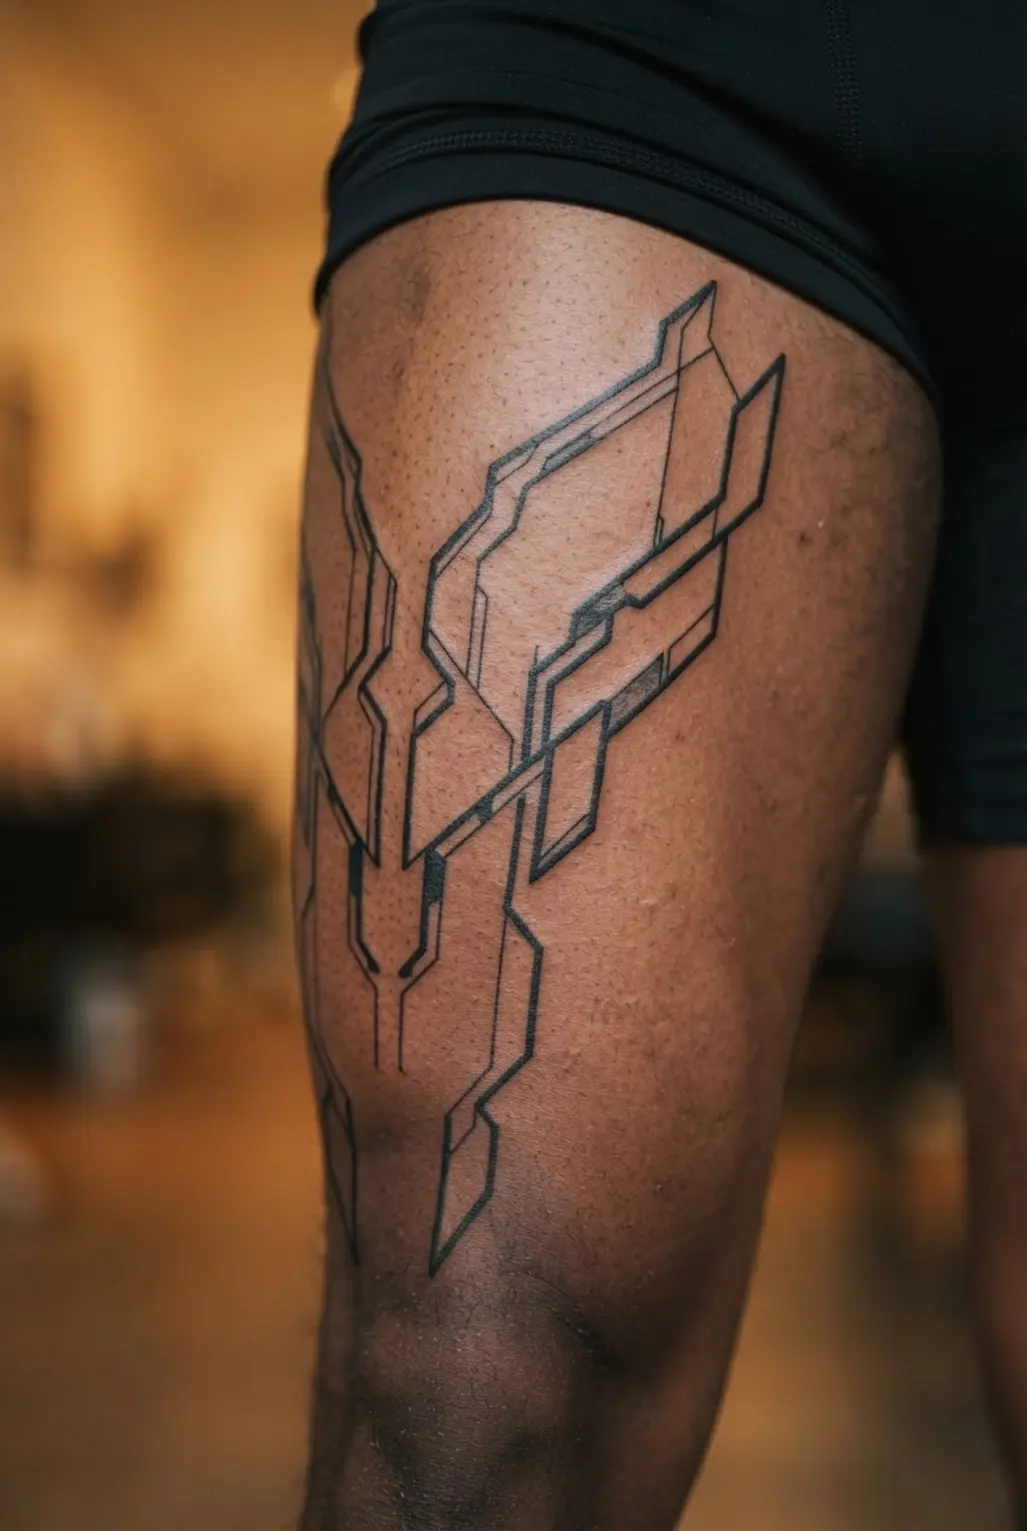
Want a thigh tattoo to feel structured without looking like a machine? Start with a hip-to-knee layout, then place angular panels along the quadriceps and outer thigh. Add long tapered lines, plus a diamond, hexagon, or triangle above the knee, while leaving small skin gaps between sections.
I love how this blackwork pattern follows the leg’s muscle flow instead of sitting flat on the skin. Connect a few shapes toward the kneecap or hamstring, but keep the joint open and easy to read. Optional dot work between panels adds depth without burying the clean geometry, just as seen in proven cyber sigilism tattoo ideas. Trust your artist to check the stencil while your leg is standing and relaxed. Keep the layout semi-symmetrical when your anatomy needs it, and protect plenty of negative space. For small finger tattoo placements, this approach feels athletic, futuristic, and crisp.
8. Wrist Wrapping Digital Rune Glyph with Open Spacing

This wrist piece feels light, sharp, and futuristic from the first glance. Start by mapping a curved path around the wrist, then place angular rune marks, broken lines, and small geometric signs along it with generous open negative space. Vary each glyph’s scale and angle slightly, so the band feels hand-drawn instead of stamped. Why crowd the design when every mark looks better with room to breathe?
I love how clean black linework keeps the digital rune style focused while the wrist’s curve makes the pattern feel natural. Ask a qualified tattoo artist to check spacing with a custom stencil before any ink goes in, since crowded symbols lose clarity and the composition feels heavier, a lesson learned from top cyber sigilism tattoo ideas. Keep corners crisp, leave gaps inside broken marks, and let the open areas guide the rhythm. Trust me, this placement feels fresh and balanced when the spacing stays intentional.
9. Ankle Tendril and Thorn Design in Bold Blackwork
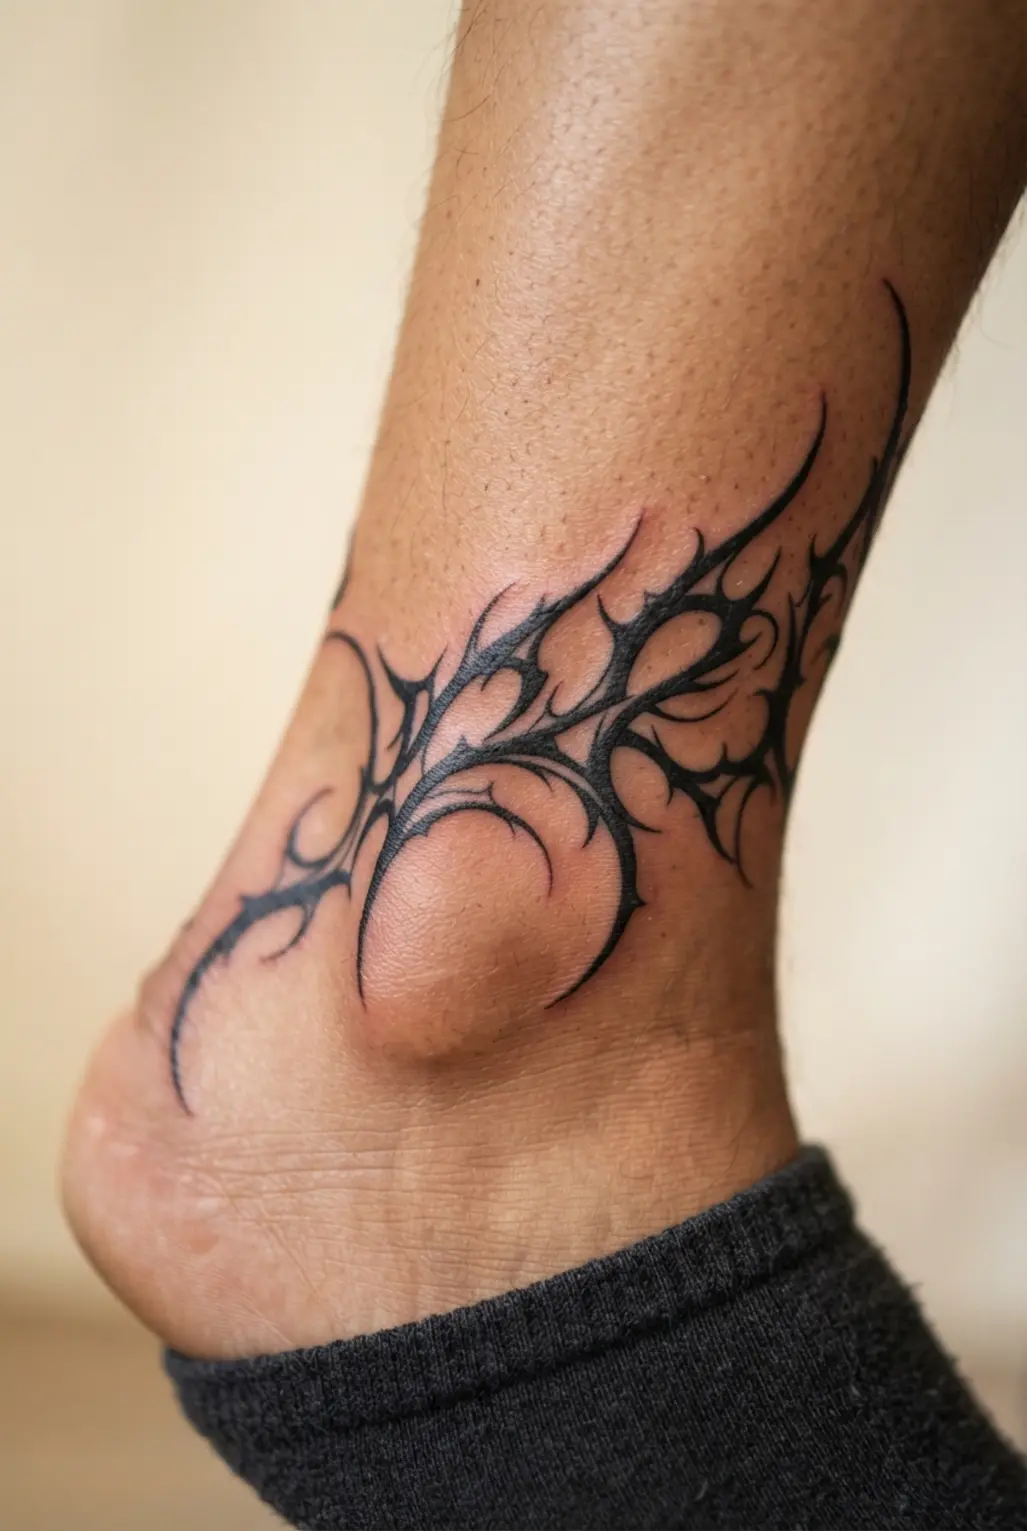
This is one of my favorite cyber-inspired placements because the ankle gives thorny lines a natural curve. Start with a curved ankle stencil, letting narrow tendrils taper onto the foot and lower calf. Add elongated thorn points, saturated black leaves, and a few outlined leaves, leaving clean breaks of skin between each group. Sound complicated? It is not, but the stencil must stay loose enough to avoid a crowded band. I find that studying successful cyber sigilism tattoo ideas often reveals this same loose planning.
The asymmetry gives this neo-tribal piece a dark, elegant edge while keeping every shape readable from different angles. Trust me on this one: build the outer lines first, then fill selected leaves with black ink while protecting the negative space. Keep the thorn tips clear and vary the leaf shapes for an organic finish. Your ankle will look bold, sharp, and beautifully balanced.
10. Nape Neck Halo Sigil Tattoo: Minimal Circular Structure

A thin black halo at the nape sits beneath the hairline, forming a crisp circle with three neat breaks and a tiny diamond in the center. Ever wondered why such a spare shape feels so intentional? I love how its symmetry stays quiet until your hair is tied up, a quiet charm found in refined cyber sigilism tattoo ideas.
Keep the design near one to two inches wide, with clear negative space between the ring and central mark. A centered stencil helps check alignment while your neck rests naturally, since the curve and hairline affect the final position. Ask for an artist skilled in delicate geometric linework, then preserve the open sections so they look deliberate rather than uneven. The unfinished halo suggests focus, renewal, and an open path forward. Trust me, this discreet piece feels wonderfully personal.
11. Ribcage Armor Style Bio-Tribal Tattoo with Curved Panels
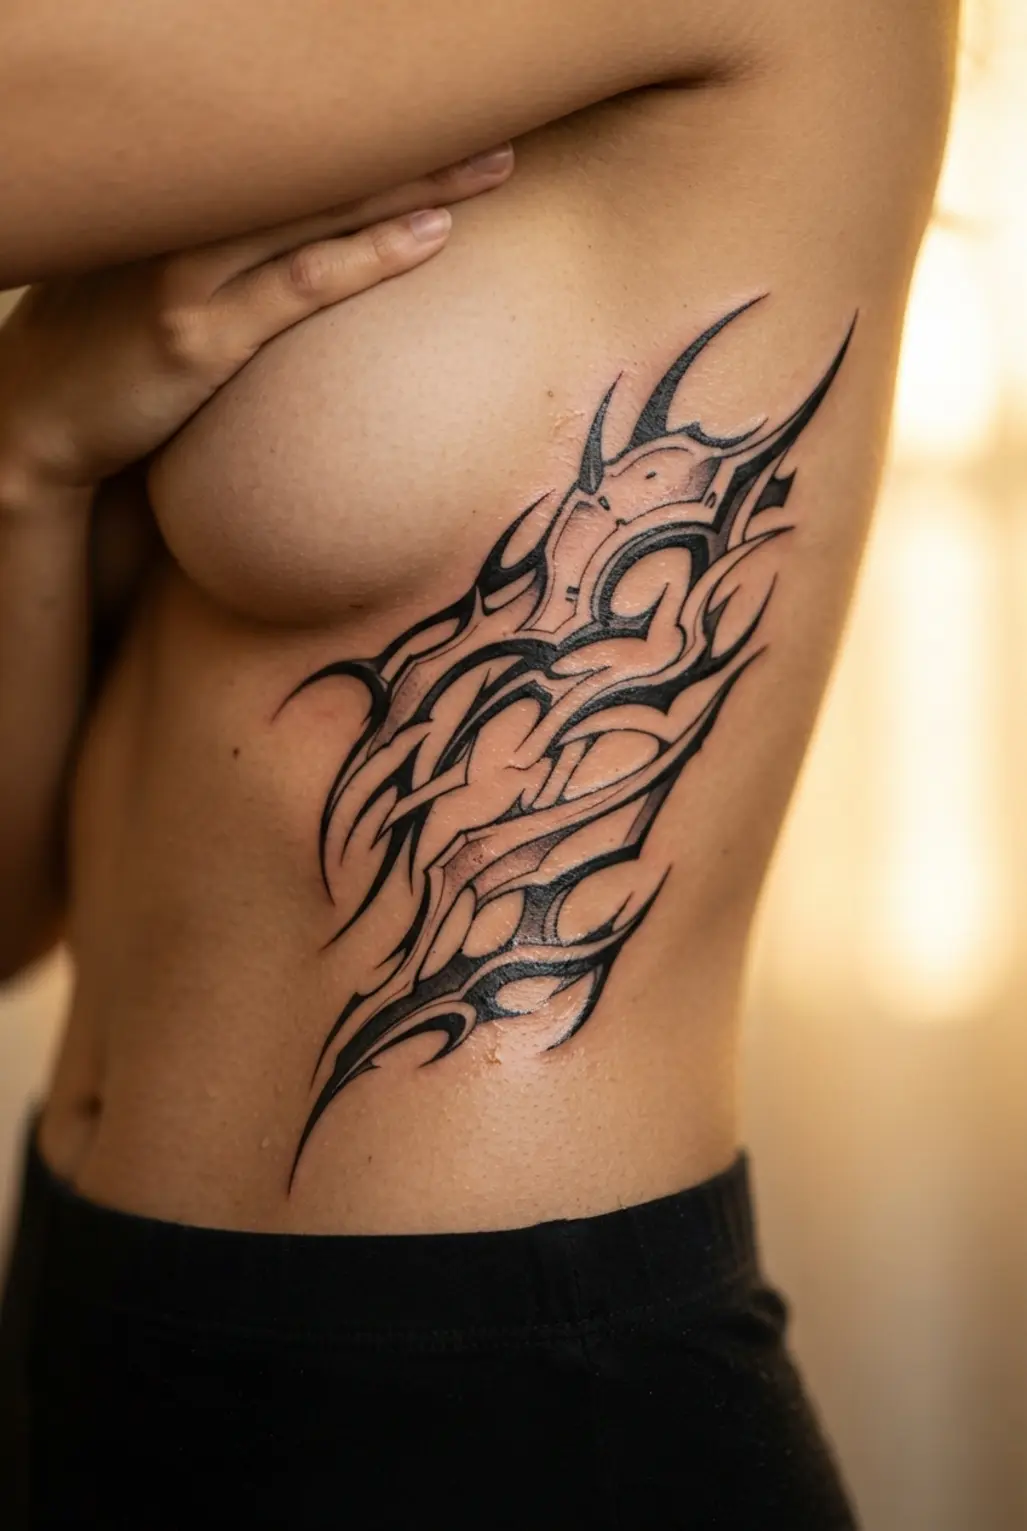
Many people treat the ribcage like a flat canvas, but its curves need to guide every line. Start with a sternum-centered emblem, then sweep matching panels along both sides beneath the chest.
Leave slim negative-space gaps between overlapping plates, adding tapered tribal points, smooth tubing, and tendrils as the design moves toward the abdomen and waist. Black-and-gray shading beneath each layer gives the armor depth without burying the clean linework.
Sound complicated? It is not. I love how the symmetry feels ordered while the diagonal lower panels keep the piece moving across your body, a technique I always note in cyber sigilism tattoo ideas. Trust me on this one: keep the lower edges tapered and plan the stencil on the body, not as a flat sheet. Selected panels reaching toward the back create a graceful wraparound finish with body-shaped stencil planning.
12. Shoulder Cap Mechanical Wing Sigil: Sharp Layered Forms

Start with a central angular blade down the deltoid, then fan three to five tapered plates toward the upper arm and collarbone. Ever tried building a wing from armor panels instead of feathers? Add narrow vents, hinge points, and triangular gaps while keeping the silhouette sharp.
Use dark recessed sections beneath each overlapping plate so the layers stay clear from a distance. I love how the heavy outer contour gives this cybernetic emblem a firm edge, while medium interior lines reveal bolts, seams, and segmented joints up close, a layering approach seen in detailed cyber sigilism tattoo ideas. Before tattooing, test a curved shoulder stencil with the arm relaxed and moving. The rounded deltoid gives the sigil a natural armored flow, but too many small details will blur over time, so protect the larger negative spaces. Trust me, clean spacing makes the finished piece feel crisp and proud.
13. Inner Bicep Glitch Script Tattoo with Varied Line Weight
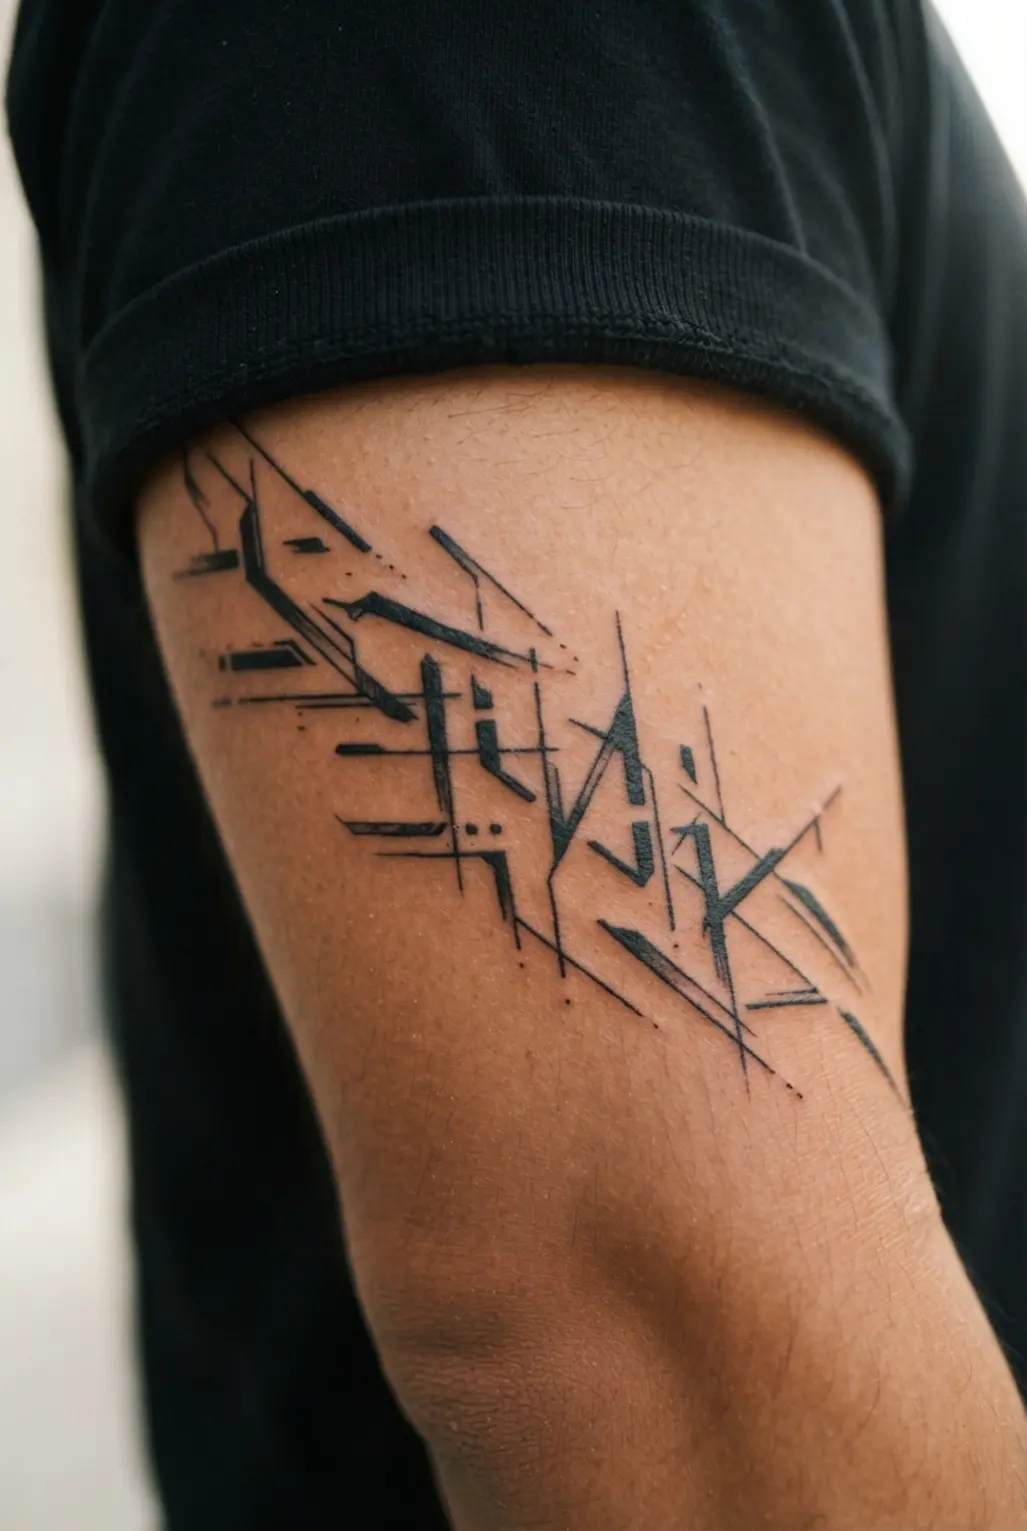
Ever wondered how script looks both polished and slightly broken? Start with a meaningful word or short phrase, then place it vertically along the inner bicep’s natural curve. Build each letter with delicate hairlines and confident, heavier downstrokes over a black ink foundation. Offset a few outlines, split selected terminals, and add tiny horizontal fragments for a restrained digital glitch.
I love how the narrow placement gives the phrase a personal feel while the varied line weight keeps it easy to read, which aligns with the strongest cyber sigilism tattoo ideas. Keep the distortion selective, since too many pixel breaks will weaken the lettering. Muted red, blue, or gray accents work best in small sections rather than across every letter. Pro tip: check the stencil with your arm relaxed before booking, so the script follows your shape and still feels balanced.
14. Calf Flowing Cybernetic Serpent Design for Vertical Movement

This calf piece looks sleek from the first outline, with a narrow S-shaped serpent running from above the ankle toward the upper calf. Start with the vertical S-curve, then place the head high, angle it outward, and let the tail taper into a slight ankle wrap.
Sound complicated? It is not. Add alternating scales and metal plates, then thread in cables, vents, pistons, and thin energy channels while keeping each detail spaced. I love how black-and-gray shading separates soft body bends from hard machinery, while one neon accent in the eyes or spine gives the guardian a crisp focal point for your cyber sigilism tattoo ideas. Keep the background sparse with a few pixels or circuit lines, so the calf stays long, clean, and full of movement.
15. Hand Back Abstract Shield Sigil with Crisp Negative Space
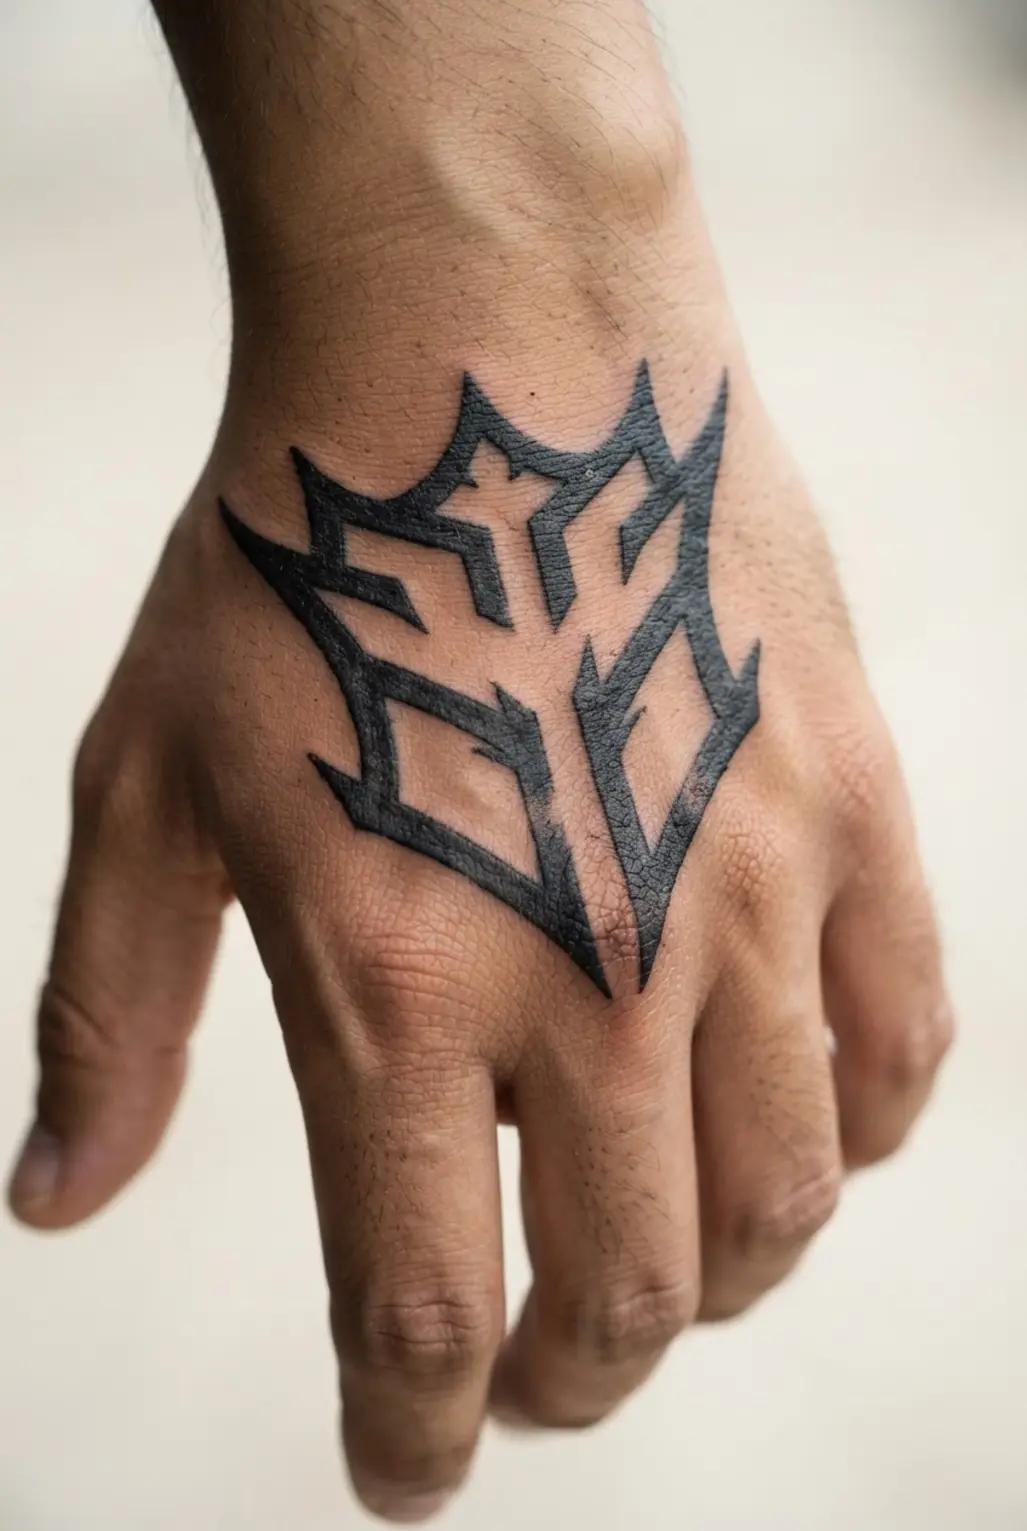
I love this one because the hand placement gives a small sigil a strong, graphic presence. Sound complicated? It is not: start with a shield-like outer contour, then place a firm central spine along the hand’s visual center.
Build balanced angular points on both sides, using thick black linework and leaving deliberate openings between each section. Keep every edge crisp, with no shading, gradients, or extra ornament, so the open skin stays clean and easy to read. The negative space makes the emblem feel lighter while the shield form suggests protection and resilience, a trait shared by all successful cyber sigilism tattoo ideas. Before tattooing, check the stencil from several angles and confirm the symmetry follows the hand rather than fighting it. Trust me, preserving those open spaces gives this sigil its refined finish. Feel proud when the structure stays sharp.
16. Collarbone Symmetrical Thorned Symbol Tattoo: Centered Blackwork
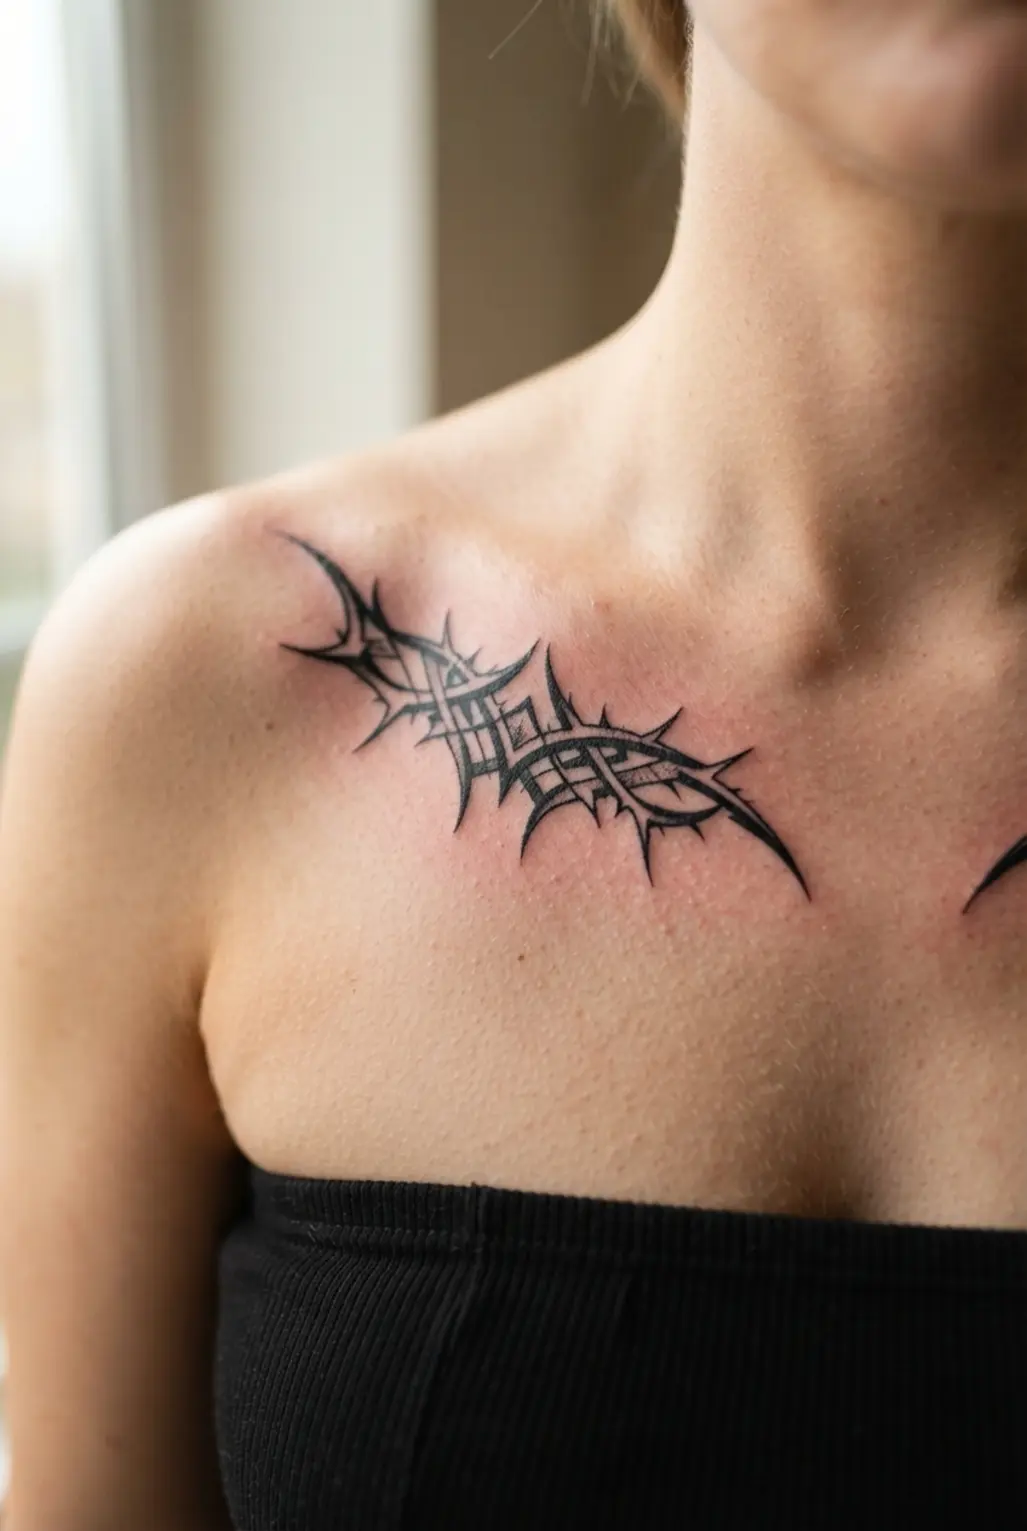
The finished piece sits beneath the collarbones in crisp black ink, with thorn points reaching outward and a compact diamond fixed over the sternum. Does a centered shape sound hard to balance? Start with a sternum-centered stencil, then mark the vertical axis before drawing mirrored branches with a slight upward curve. Keep the gaps between each branch open, and taper every spike toward the collarbones.
I love how the solid blackwork feels fierce without heavy shading, a principle that guides strong cyber sigilism tattoo ideas. Use skin-safe marking supplies to check both sides before the needlework begins, then add tiny dotwork near the tips only if the outer spacing still feels calm. Keep the central symbol small, since equal branches and clean negative space give this protective crest its strongest look.
17. Face Glitch Aesthetic Minimalist Tattoo with Fine Spacing
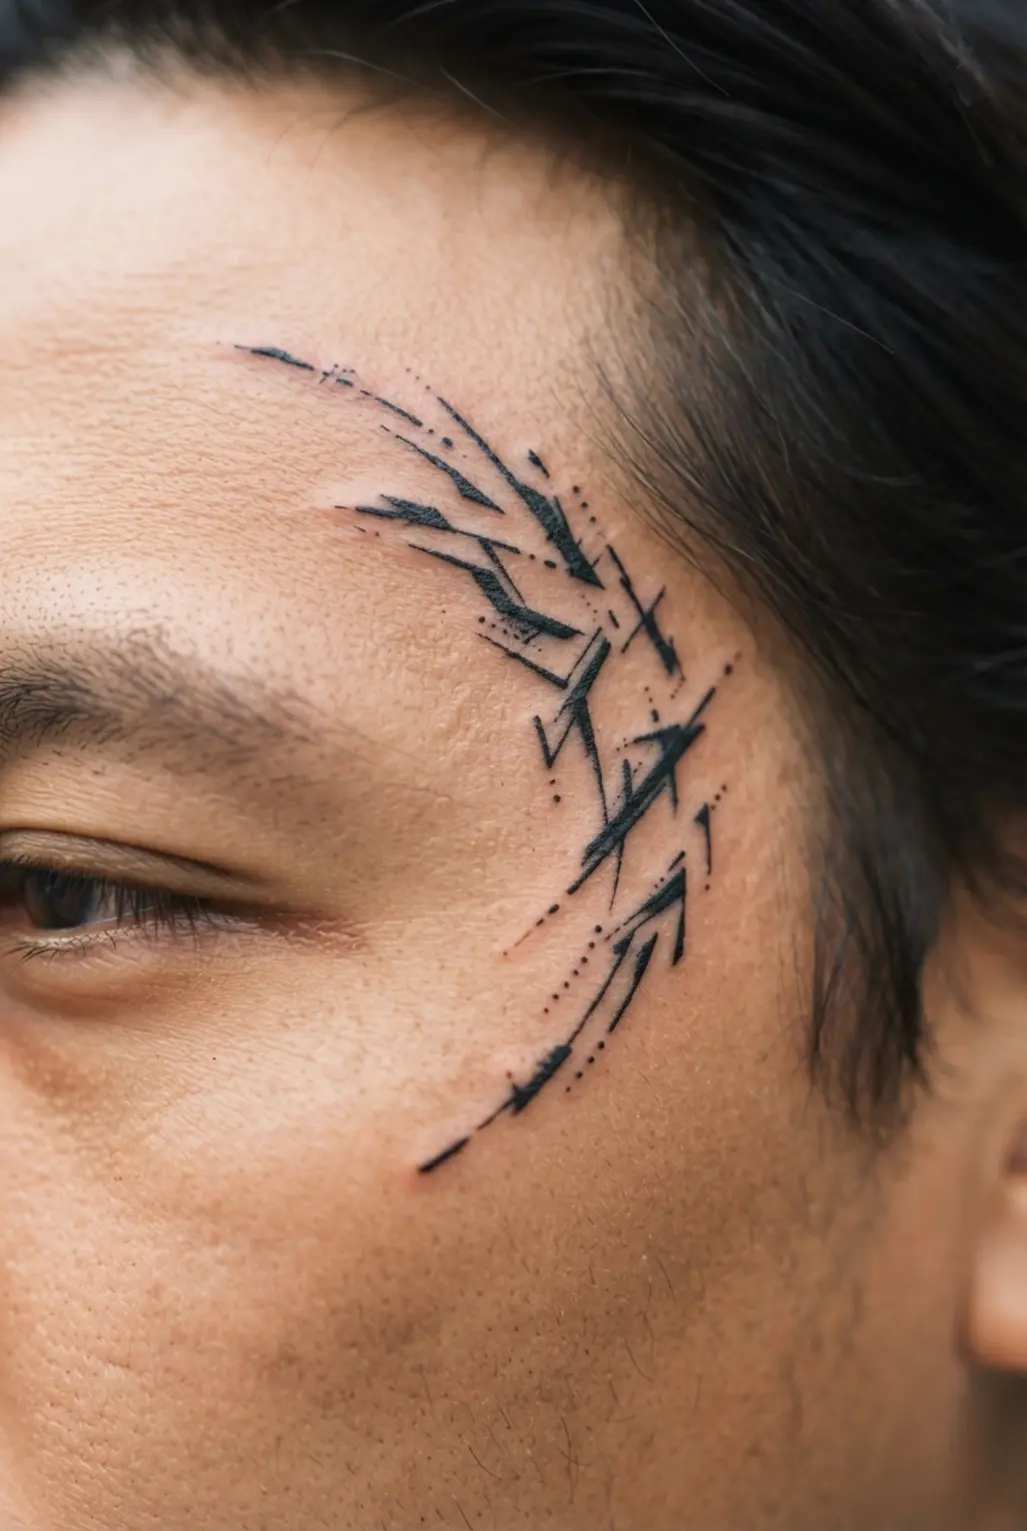
Many people think a glitch face needs dense shading, but restraint gives it its clean digital edge. Start with an incomplete facial outline, then offset one eye, the nose, or the lips by a small amount. Add thin horizontal breaks and a few minimalist geometric tattoo designs, leaving even gaps between every disconnected line. Sound complicated? It is not. I love how the face stays recognizable while the open skin keeps the piece light, a balance sought in most cyber sigilism tattoo ideas.
Ask your artist about a fine-line setup suited to the chosen placement, whether it sits on the forearm, wrist, collarbone, upper arm, or behind the ear. Keep the design in clean black ink and skip heavy shading, since extra weight hides the spacing. Your artist should check how the skin moves before setting the final size. Trust me on this one: consistent gaps matter more than extra fragments, and the finished piece feels crisp, personal, and futuristic.
18. Upper Arm Concentric Circuit Ring for a Clean Wrap
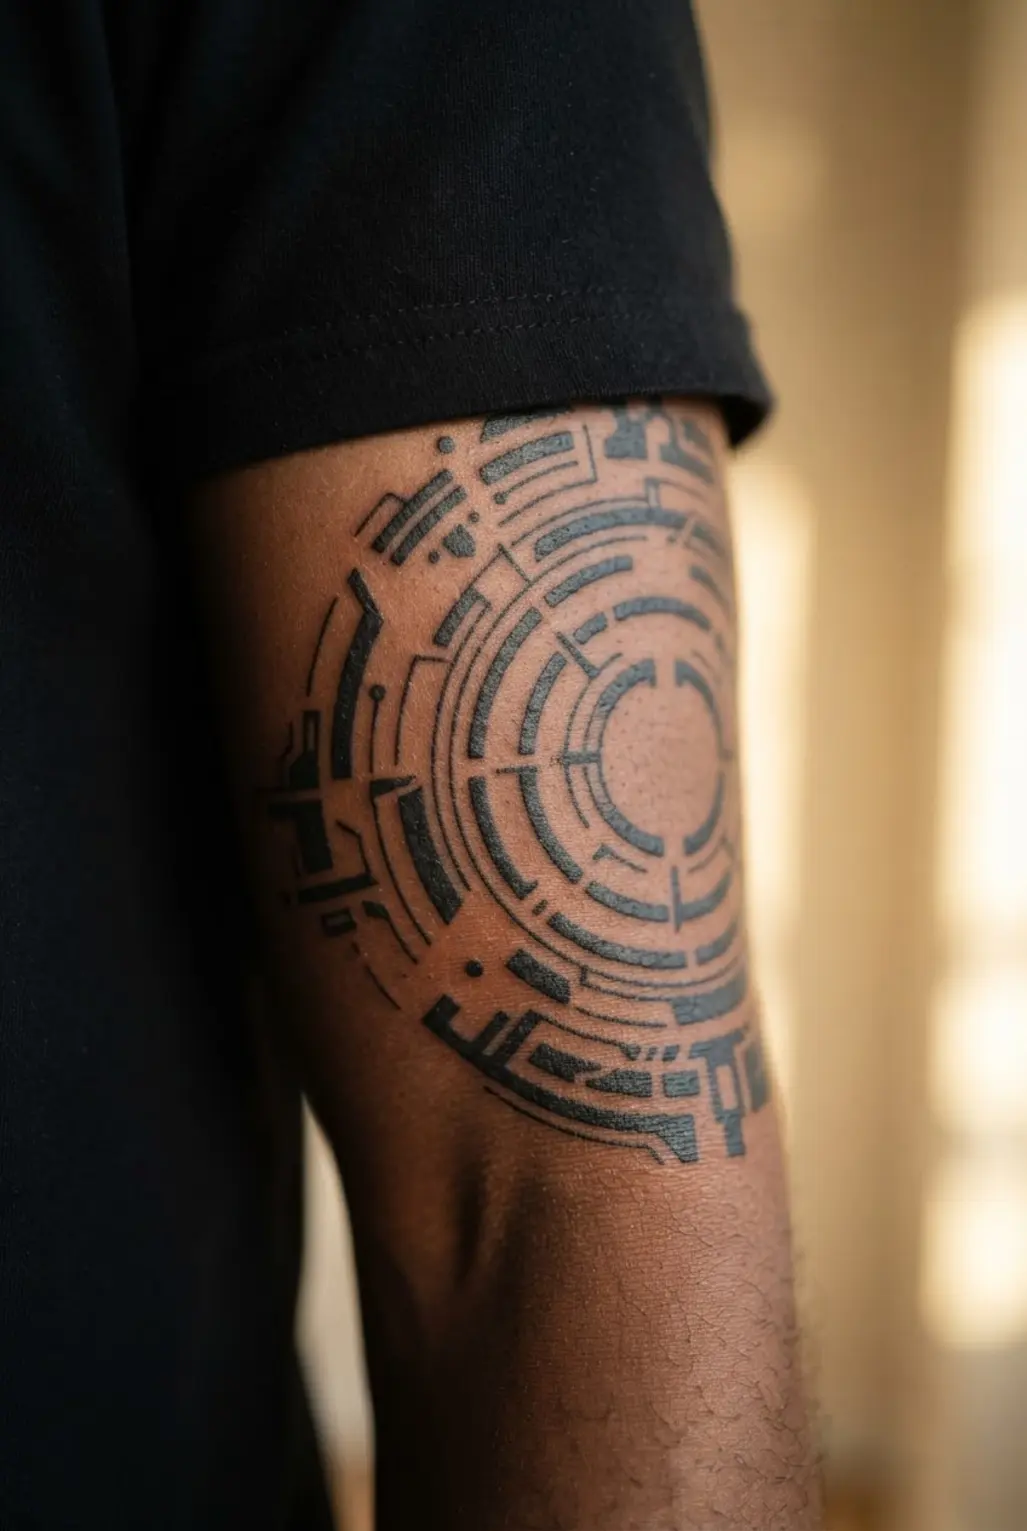
Map the full upper-arm wrap with a bold neck tattoo placement ideas, checking the front, side, and back before any ink touches skin. Draw three to five slim rings with even gaps, then shape the sides slightly inward so they follow the arm’s contour. Sound complicated? It’s not. The clean band starts with patient spacing.
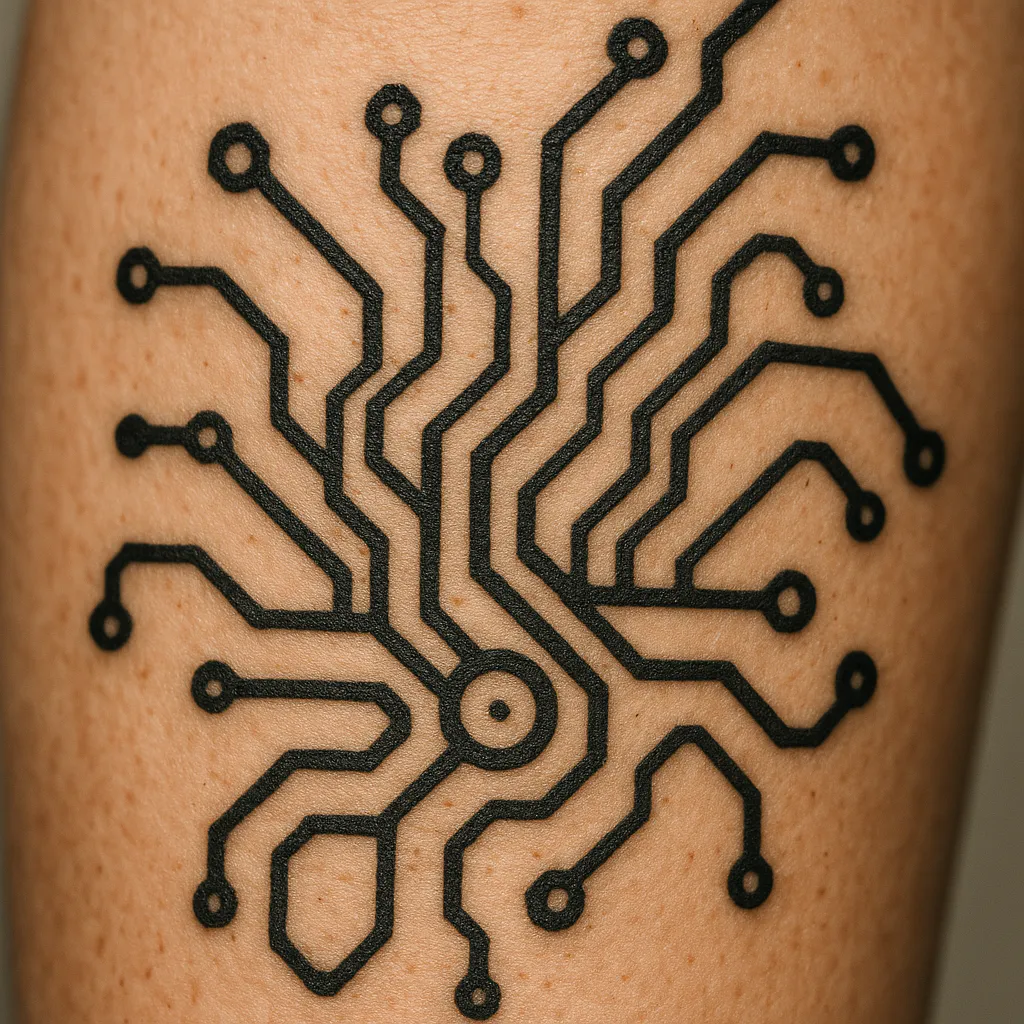
Add small square nodes, angular pathways, and short breaks only after the main lines look balanced. Keep the circuit details light, with open skin between each mark and little or no shading. I love how the continuous ring gives cyber sigilism tattoo ideas a tidy upper-arm shape without making the design feel heavy.
Pro tip: ask your artist to review the wrap from several angles before starting the fine-line blackwork. Consistent line weight matters more than extra detail, so remove crowded nodes rather than squeezing them into narrow spaces. Feel proud when the ring stays crisp from every view.
19. Full Leg Wrap Occult Sigil with Connected Spikes
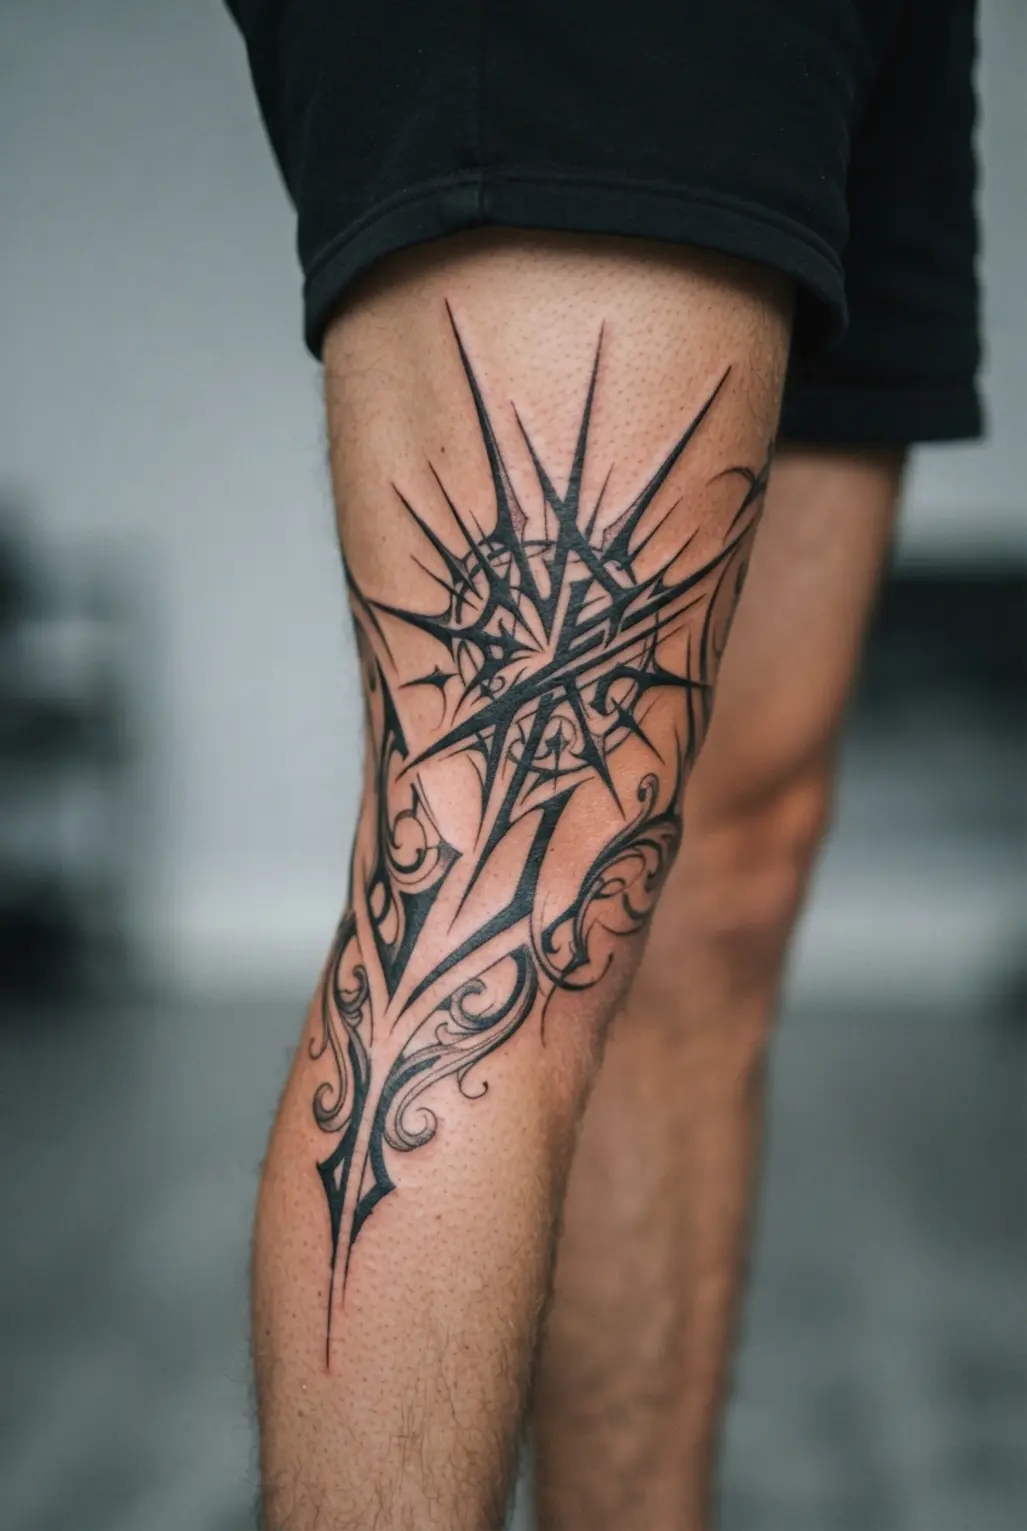
Want a leg tattoo with movement from every angle? I love this occult sigil because its central geometric symbol sits across the thigh and knee, then sends angular runes and crescent shapes down the calf. Start with one continuous layout, leaving clean negative-space channels between each section so the symbols stay readable as the leg bends. I often suggest mapping this carefully when gathering cyber sigilism tattoo ideas.
Build the spikes as connected branches, repeating their sharp points around the calf and ankle instead of treating each area as separate artwork. Blackwork gives the wrap a bold finish, while fine-line geometry, dot work, or a small red accent adds controlled detail to your design. Trust me, planning the full 360-degree view first makes every curve feel intentional. Ask your tattoo artist to check the knee and ankle flow before any ink begins, then enjoy the strong, unified result.
20. Elbow Starburst Cybernetic Glyph Tattoo: Radial Blackwork

This elbow piece feels bold, clean, and perfectly suited to a futuristic style. Center the radial mechanical node over the elbow cap, then spread eight or twelve sharp rays across the upper arm and forearm.
Keep broken rings, armor plates, circuit traces, and tiny glyphs spaced around the center so every detail stays readable. Sound complicated? It isn’t, once the main symmetry is set first. I love how heavier blackwork near the joint gives the piece a strong focal point, while tapered lines follow the arm’s movement when planning cyber sigilism tattoo ideas. Trust me, protect the negative-space channels before adding small marks, and the finished design will feel crisp from every angle.
Healing Checks For Crisp Fine Detail
Fine detail needs a quiet healing period of roughly two to four weeks before you judge line sharpness or ink density. Follow your artist’s aftercare instructions, keep hands clean around the tattoo, and avoid picking flakes or scabs during peeling. A fragrance-free aftercare lotion supports comfortable healing without adding perfume or harsh active ingredients to freshly tattooed skin. Early dryness, mild redness, and surface flaking often change the first impression, so wait until the skin feels settled before requesting an assessment, which helps secure the best results for cyber sigilism tattoo ideas. Sun exposure after healing gradually weakens black saturation, so daily sunscreen helps preserve contrast once your artist confirms the area has closed. Contact a qualified healthcare professional for unusual worsening symptoms, and ask your tattoo artist about any linework concern.
Conclusion
So, how did your design session feel? Your interest in sharp glyphs, thorned lines, circuitry, and neo-tribal curves says something personal about how you want your tattoo to look and feel. These cyber sigilism tattoo ideas give you room to choose a small symbol, a balanced wrap, or a larger piece with strong body flow. Before meeting your artist, save two or three references, mark the placement you prefer, and note which details matter most to you. Ask for enough spacing around spikes and circuits so the design stays easy to read as it settles over time. I love when a bold tattoo still feels connected to the person wearing it. Pick the design you keep returning to, bring your notes to the consultation, and let your next piece reflect your own taste with confidence.
FAQs
Q: How do I keep a cyber sigilism tattoo from looking too crowded?
A: Use open negative space between spikes, circuits, and glyphs. Give the artist a clear size range so small details have room to stay readable, which prevents visual clutter during healing.
Q: Which body placements suit cyber sigilism tattoos best?
A: Forearms, calves, thighs, shoulders, ribs, and the spine suit flowing blackwork. Choose a placement where the lines follow the body without bunching at a joint, ensuring long-term readability and comfort.
Q: What should I bring to a cyber sigilism tattoo consultation?
A: Bring reference images, a photo of your preferred placement, and notes about size and line weight. Mark the symbols or shapes you want kept in the final concept to help the artist visualize your preferences quickly.
Q: Does bold blackwork hurt more than a small line tattoo?
A: Sensation varies with placement, size, and personal tolerance. Ribs, elbows, hands, and the spine often feel more sensitive than areas with softer padding, so pace your sessions accordingly.
Q: How large should a detailed cyber sigilism tattoo be?
A: Give detailed circuits and glyphs enough room for clear spacing. Your artist should scale the design around its smallest lines and the movement of your chosen placement, typically starting at three inches for clarity.