


Observing Natural Branch Structure And Light Direction
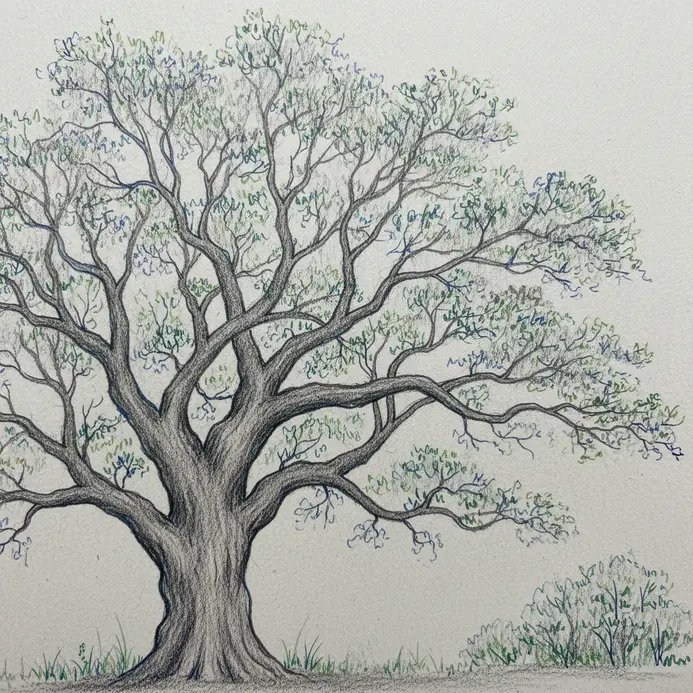
Your first painting will look artificial if you invent the branches, so start by looking at a photo of a real tree. Trust me on this, you will notice that branches never sprout in perfect opposite pairs. They grow in clusters, with smaller twigs angling up toward the light. This creates a distinct play of light and shadow, which is a great foundation when exploring tree painting ideas for beginners.
A common mistake is painting the entire canopy as one flat, green mass. Instead, look for the dark, cool shadows inside the foliage and the warm, bright highlights on top where the sun hits. Your painting gains instant depth when you block in these light and dark clusters first, before adding any detail. This approach captures the true volume of the tree.
Selecting Brushes For Texture And Fine Detail
A single round brush will fight you the whole way, so grab a fan brush for your foliage. Here is the thing, that fan brush is perfect for stippling and dabbing to create the soft, aggregate shape of leaves without painting a single one. You want a flat brush for the broad planes of the trunk, as it makes blocking in those initial shadow areas much faster. For the delicate, tapering tips of branches, nothing beats a rigger or liner brush.
Its long, thin bristles hold a lot of paint and let you pull a graceful, thinning line with one confident stroke. This variety of tools lets you build texture efficiently, which is key for a natural look. Mastering your tool selection opens up endless tree painting ideas for beginners to practice with.
1. Paint an Acrylic Minimalist Black Winter Silhouette
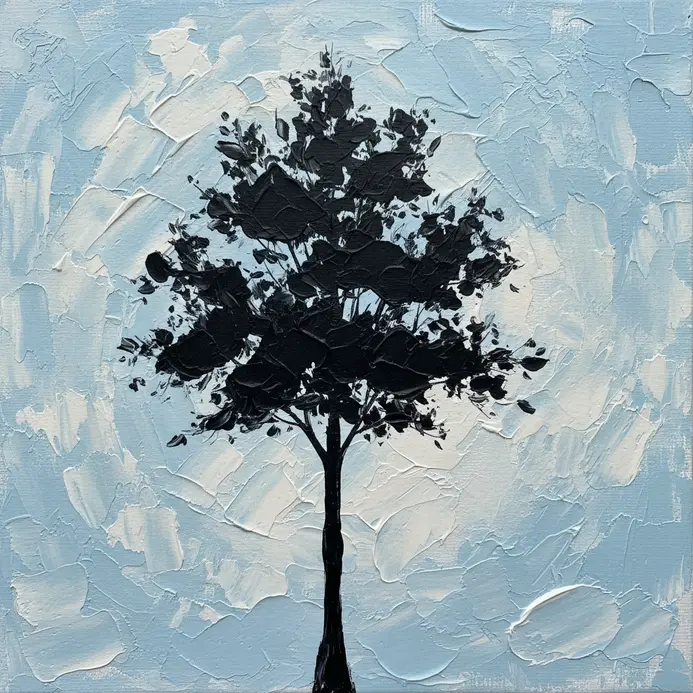
Who would have thought a painting so striking could be so simple? You will focus on bold, simplified shapes like bare trees against a soft, muted background. I love how the high contrast creates instant depth and a serene winter mood. Start with a light background, let it dry fully, then paint your silhouette with opaque black.
This works because it is all about form and negative space, not tiny details. Try it and feel the satisfaction of creating something so elegant. easy acrylic painting ideas.
2. Watercolor Soft Focus Autumn Birch Forest: Achieve Gentle Blends
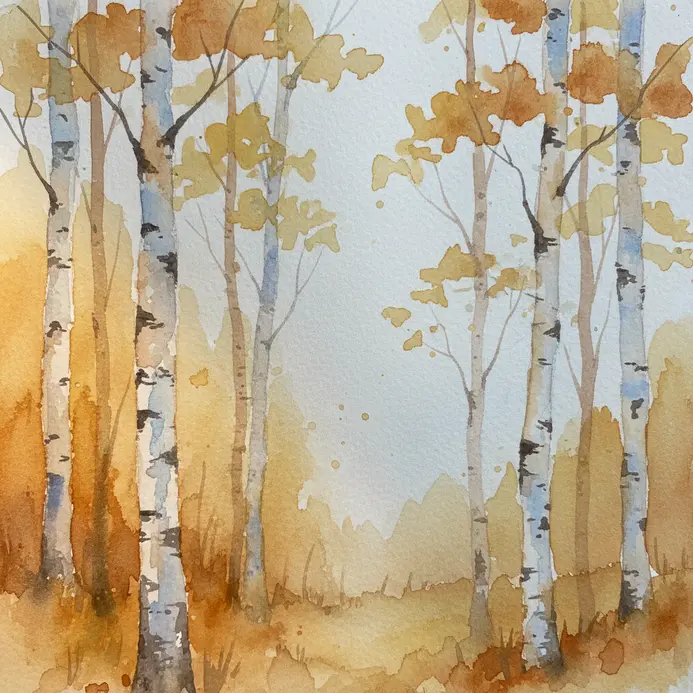
This one is so dreamy. It looks complex but the wet-on-wet technique does most of the work for you. Start by taping your paper down and brushing the entire surface with clean water until it glistens. While it’s still wet, drop in a very diluted sky blue at the top, then immediately add soft washes of autumn greens and yellows for the distant, hazy foliage. Let the colors bloom and mingle on the damp paper.
Why does this work so well? The soft focus effect is incredibly forgiving. You are not painting sharp details, just beautiful atmospheric blends. My go-to tip? Use way more water than you think you need. That is the secret to those gentle, ethereal transitions. Feel the magic as the colors flow together.
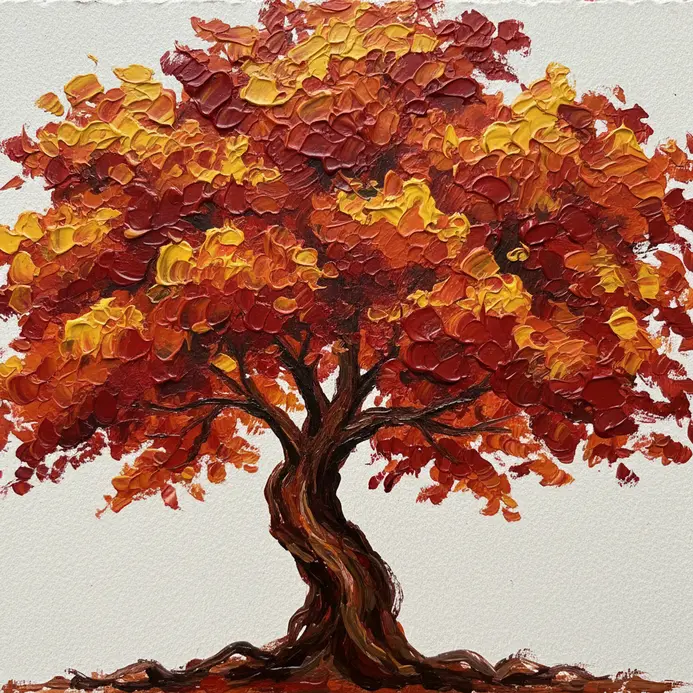
3. Apply a Palette Knife to Create an Impasto Green Oak Tree
Ever wondered how to make a painting feel almost touchable? This technique creates a wonderfully textured tree that looks like it is growing right off the canvas. Load a palette knife with thick paint and use bold strokes to build up the trunk and leafy crown. I love this because the visible, sculptural marks feel so expressive and alive.
Trust me, do not be shy with the paint thickness and you will feel that satisfying, dimensional payoff. Adding this heavy texture method expands your tree painting ideas for beginners in unexpected ways.
4. Build Fan Brush Evergreens in a Snowy Landscape
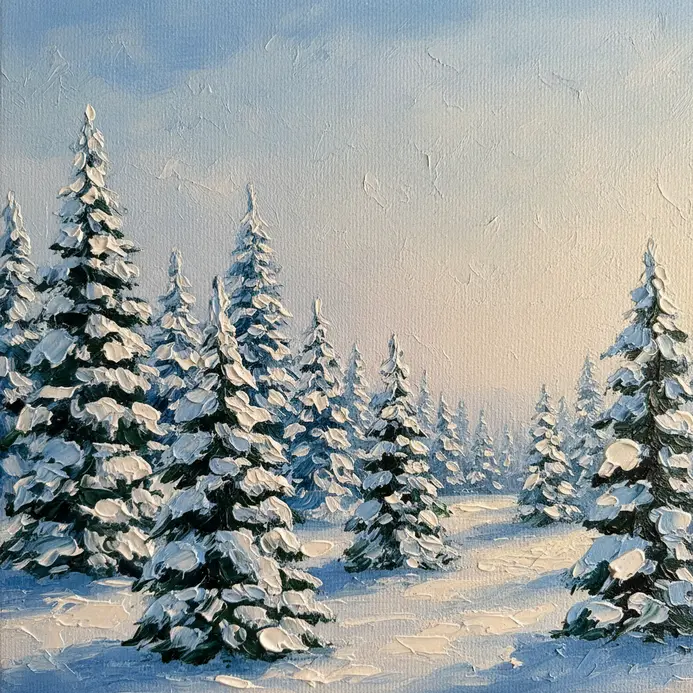
This technique looks so complex, but trust me, it is one of the simplest ways to paint convincing trees. You will start with your snowy background, then use a fan brush loaded with dark green paint. Begin with a light touch at the top for a pointed tip, then gently press downward to build out the layered, needle-like branches. It is all about that soft, varied pressure to create depth and volume.
The magic is in how the splayed bristles do the texturing work for you, making those winter evergreens look wonderfully realistic. easy watercolor painting ideas. Feel the satisfaction as your snowy landscape comes to life.
5. Create a Dot Painting Pointillism Cherry Blossom Branch
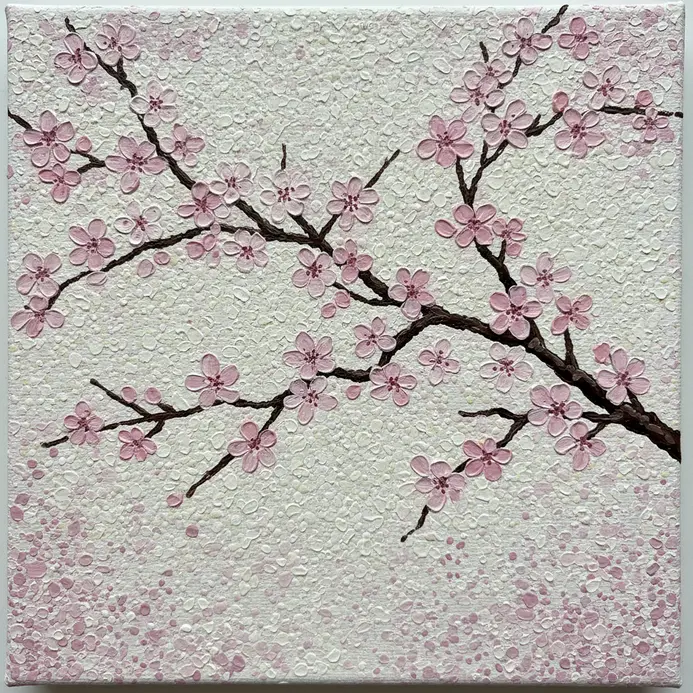
Ever wondered how all those tiny dots blend into a beautiful picture? This cherry blossom project uses the pointillism technique, where you build the image entirely from small, distinct dots. Start with a light pencil sketch of a branch, then use a round brush or even a toothpick to apply dots of pink, white, and brown. I love how the clusters of color come together to form those delicate blossoms right before your eyes.
It works so well because the dot pattern naturally mimics the soft, clustered look of real petals. Trust me, the key is to vary your dot sizes and build up the color slowly. Practicing this patient method reinforces solid tree painting ideas for beginners who want to work slower.
6. Use a Sponge to Dab a Summer Foliage Canopy
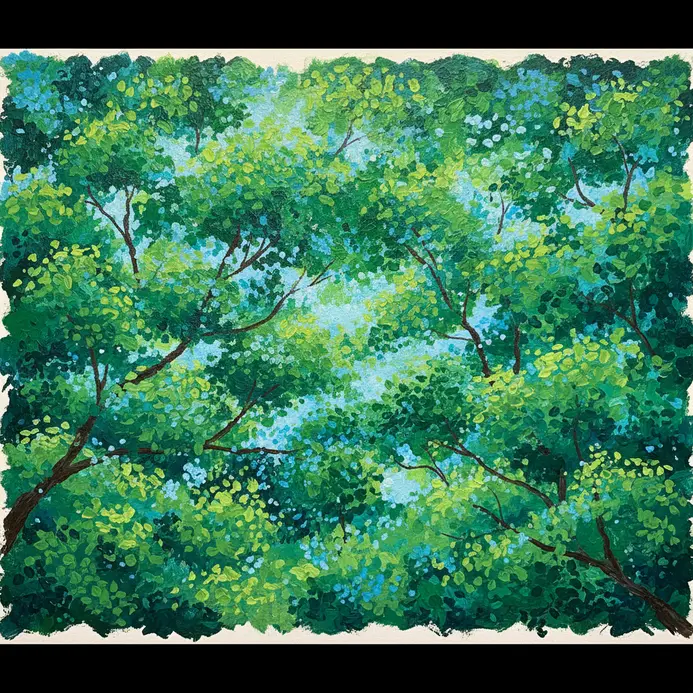
Ever feel like your painted trees look a bit too perfect and neat? This technique fixes that beautifully. You will load a natural sea sponge with your green paint, blot off the excess, and gently dab to create a textured, leafy canopy. The irregular sponge surface naturally mimics the clustered look of real foliage, which is so hard to get with a brush alone. It is incredibly forgiving and fast, making it one of my favorite beginner-friendly methods for a lush, airy effect. If you enjoy this textural approach, you might also like exploring easy oil painting for beginners for more rich, layered techniques.
7. Stipple a Detailed Cedar Trunk for Realistic Texture

Ever wondered how artists create such realistic tree bark? Stippling is the secret. You will start with a light pencil sketch of the trunk’s shape and its deep ridges. Then, using a fine-tipped 005 pen, you build texture with tiny dots, placing more in the shadows and fewer on the highlights. I love how this gradual layering mimics the shaggy, fibrous look of cedar. Trust me, the payoff is immense when you see that realistic depth emerge purely from dots.
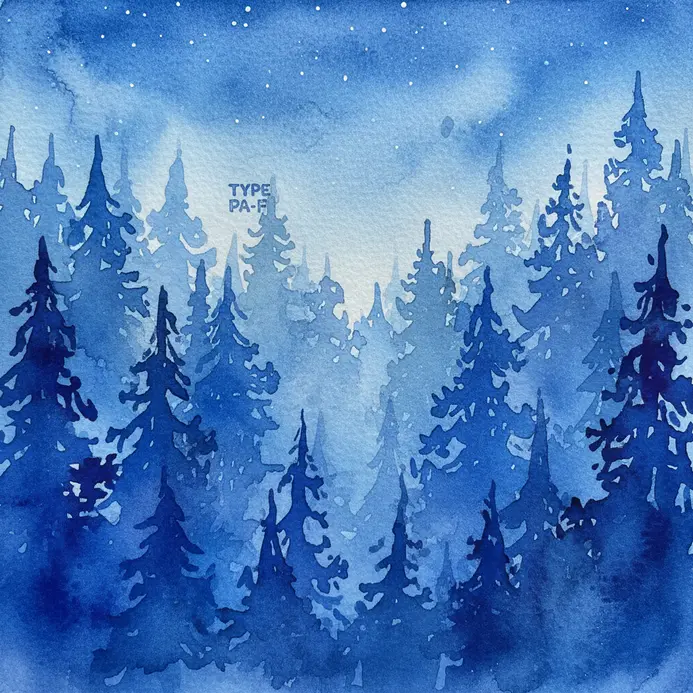
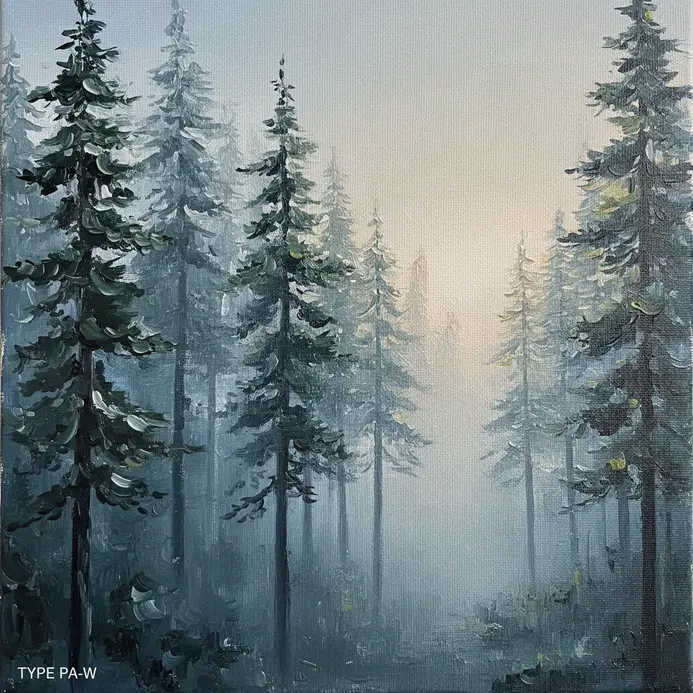
8. Paint a Watercolor Wash for a Misty Distant Pine Forest
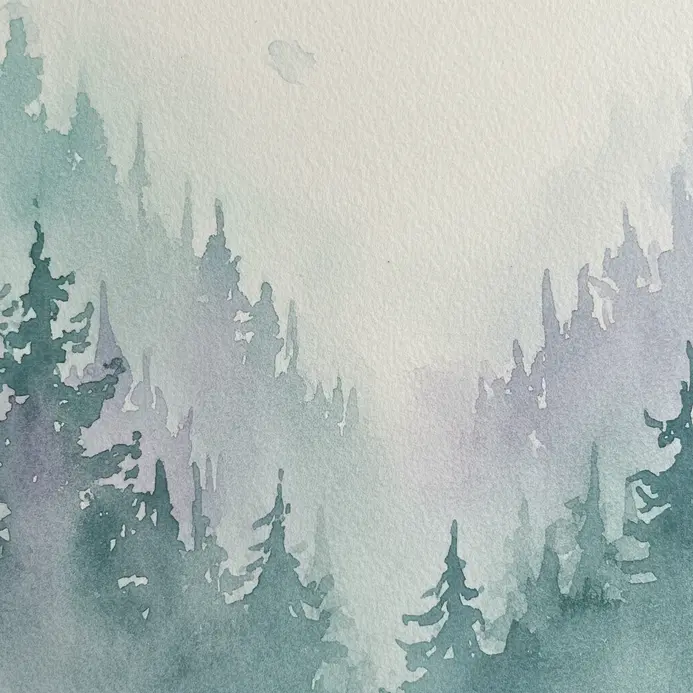
Ever wondered how to create that soft, dreamy distance in a landscape? This technique uses a very diluted watercolor wash to build up layers of trees, starting with the lightest, most distant ones. You will paint soft, irregular lines for the far pine trees, focusing on shape over detail. I love how this teaches you the core principle of atmospheric perspective so effortlessly.
The payoff is a beautifully ethereal scene that feels both serene and deep. Keep your water-to-paint ratio high to maintain that airy quality.
9. Capture an Acrylic Sunset Gradient with a Palm Tree Silhouette
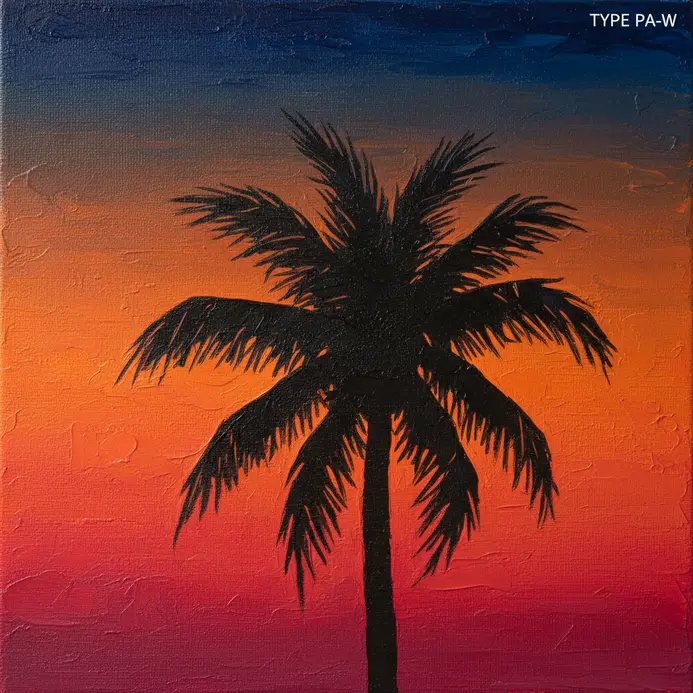
This one looks like a pro painted it, but the method is surprisingly accessible. You will create a vibrant sky that blends from yellow to blue, then paint a sharp black palm tree against it. Work quickly with a large flat brush to blend the wet acrylics for a smooth gradient. That stark silhouette against the colorful sky creates a stunning contrast that is so satisfying to achieve. easy landscape drawing ideas.
10. Dry Brush Technique for Rustic Bark Texture
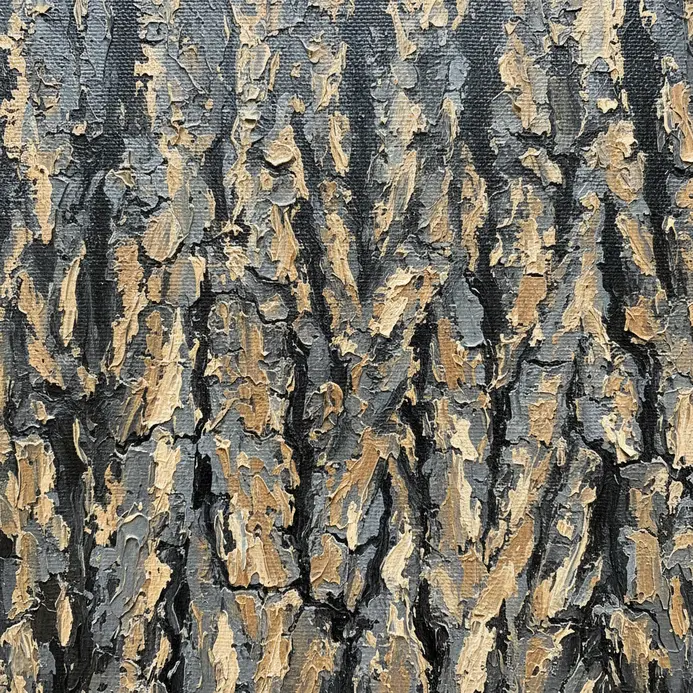
Ever wondered how to paint bark that looks rough and real? The trick is to use a stiff bristle brush that is almost dry. You load it with a tiny bit of paint, wipe most of it off on a paper towel, and then lightly drag it over your dry base color. I love this because it creates those broken, scratchy marks that mimic cracks and ridges perfectly.
It feels so satisfying when those subtle textures start to build up and your tree comes to life. Applying this simple dry-scrape method unlocks fresh tree painting ideas for beginners.
11. Paint a Bright Yellow Spring Willow Tree Study
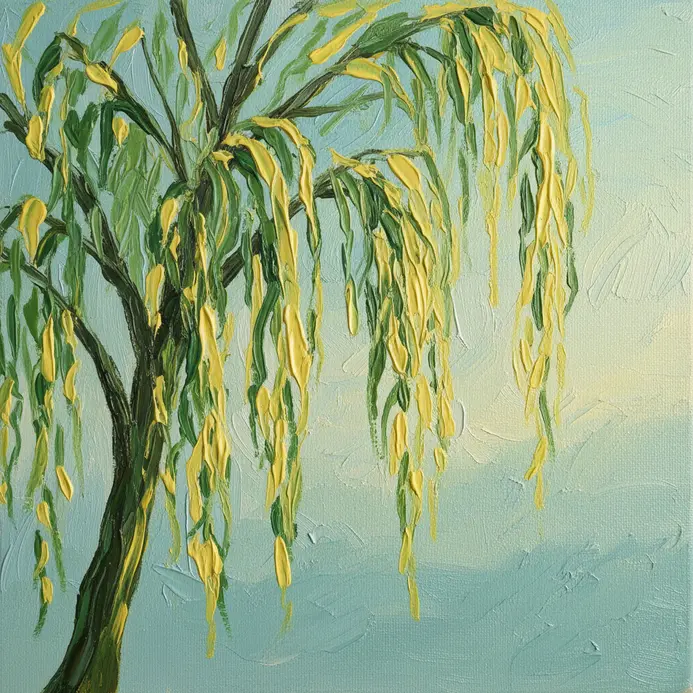
Ever notice how a willow tree looks electric in early spring? The trick is using those bright, almost neon yellows and yellow-greens for the foliage. Start with a light pencil sketch of the drooping shape, then apply a warm, watery lemon yellow wash for your base layer. I love how this captures the fresh, airy feel of new leaves.
Build up the foliage with loose, gestural strokes, letting your brush flow to keep the branches graceful. Avoid dark greens, and instead mix your own vibrant shades from yellow and a touch of sap green. This study is so satisfying because it feels like bottling up springtime. landscape paintings for beginners.
12. Negative Space White Tree: A Simple Painting Approach
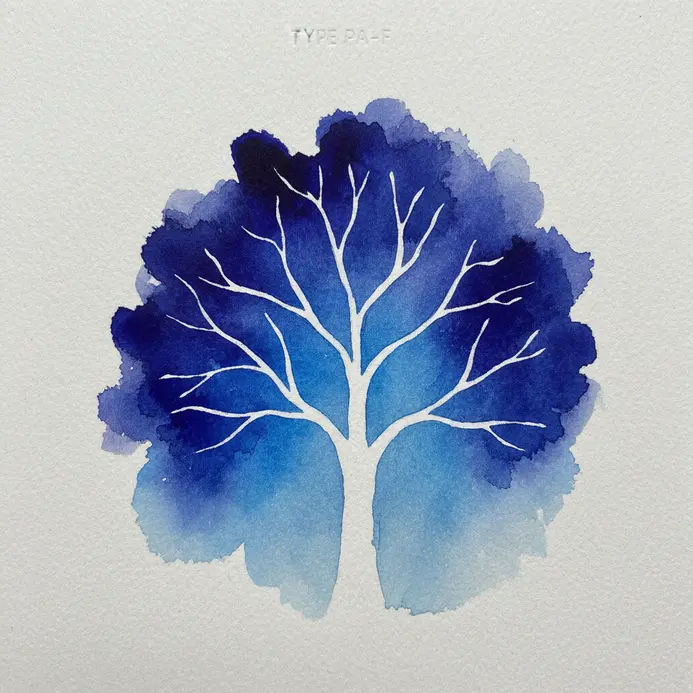
This is one of my favorite ways to paint a tree because it looks so complex but is incredibly simple. You let the tree appear by painting the dark sky or ground around it with a small liner brush. Instead of painting the branches, you carefully fill in the spaces between them. The result is a luminous white tree that seems to glow against a deep blue or purple background. It feels magical when your careful work reveals that elegant shape.
13. Layer Detailed Ink and Watercolor for an Aspen Grove

Ever wondered how to capture that light, airy feel of an aspen grove? Start with a light pencil sketch of those slender trunks and foliage masses. Then, trace your main lines with a waterproof ink pen to create a permanent guide. I love how this sets a solid foundation.
Next, build up gentle watercolor washes. Use transparent layers of yellow ochre and sap green for the leaves and shadows on the white bark. Let each layer dry completely before adding the next. This layering technique builds incredible depth. Finally, go back in with your finest pen to add the bark signature dark eyes and tiny twigs. Isn’t it satisfying to see that intricate detail pop? Feel proud of your realistic forest scene.
14. Finger Paint an Abstract Colorful Autumn Tree
Ever thought you needed a brush to paint a great autumn tree? This one is all about using your hands. Start with a simple trunk using your index finger and brown paint. Then, dab and swirl your fingers in warm yellows and oranges above it, adding reds for depth. The direct blending creates a gorgeous, textured canopy full of feeling. It works because you get to play with color and texture without any pressure.
I love how the messy, layered result captures the season’s energy perfectly. For a perfect small project, try this on a mini canvas painting for beginners. Ditching traditional brushes opens playful tree painting ideas for beginners.
15. Form Geometric Triangle Based Modern Pine Trees
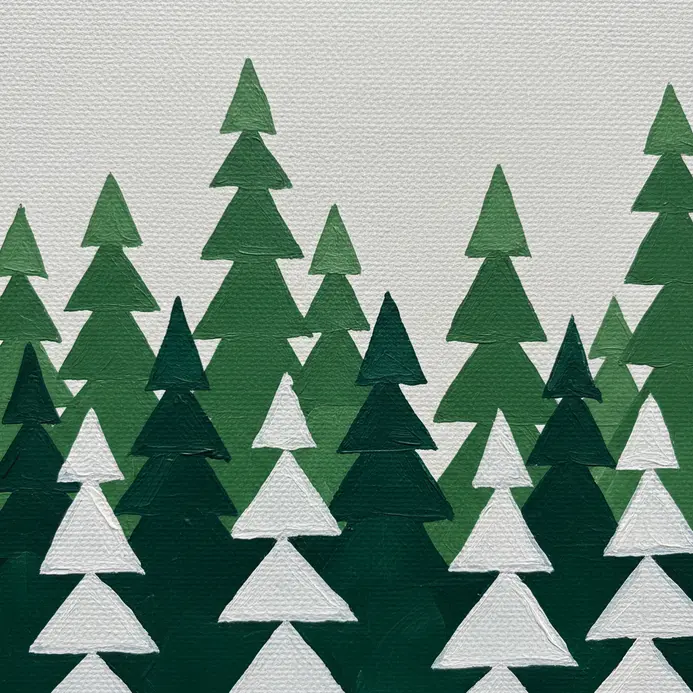
Who would have thought crisp, angular trees could feel so serene? Start with a simple flat brush to paint a large triangle for your pine tree silhouette. Then, paint smaller, intersecting triangles inside it to build the faceted, modern look. This style works because it turns a natural form into a satisfying, structured graphic. Trust me, you will love the clean, polished result.
16. Blend Loose Watercolor with a Wet on Wet Redwood
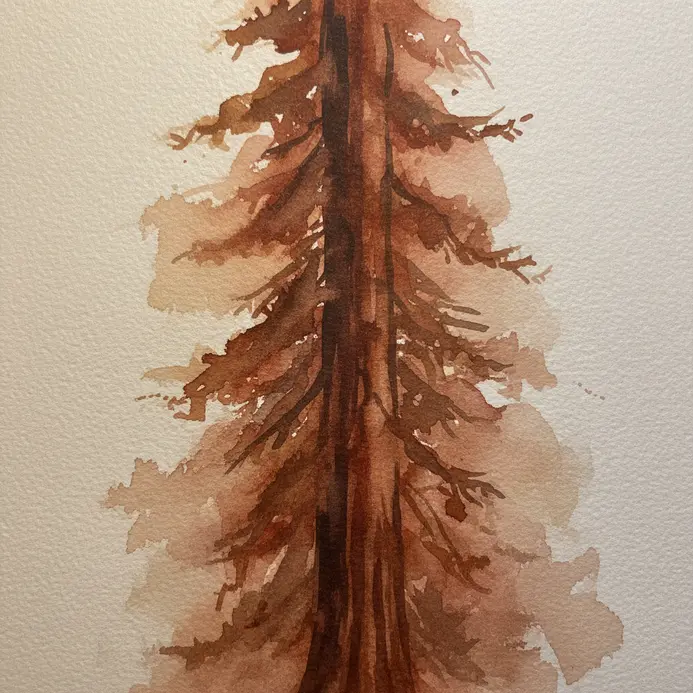
This one feels like magic, doesn’t it? You start with a sheet of cold press watercolor paper that is evenly damp and glistening. Then, drop in your earthy redwood trunk colors like Burnt Sienna and let them bloom into soft, atmospheric shapes. The paint does the work, creating those misty, towering forms for you. I love how this method embraces spontaneity for a beautiful result.
small painting ideas for beginners. Watch how the water carries the pigment to build natural gradients.
17. Sketch a Single Branch Watercolor Botanical Study
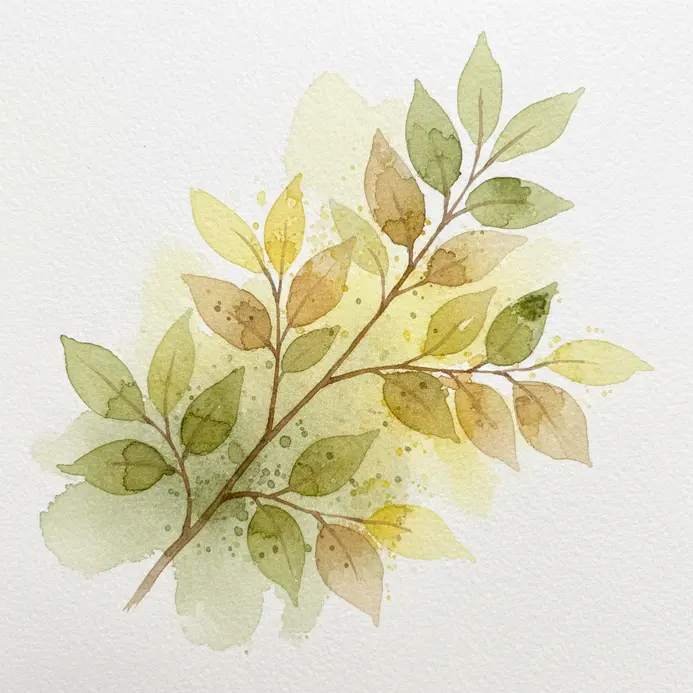
This is a surprisingly meditative way to paint. Start by finding a single interesting branch from your yard. Lightly sketch its main shape with a pencil, focusing on the overall flow and where the leaves attach. Then, build up your watercolor in soft, transparent layers. It works because you train your eye to see the beautiful details we normally miss. I love how this simple study feels so fresh and alive.
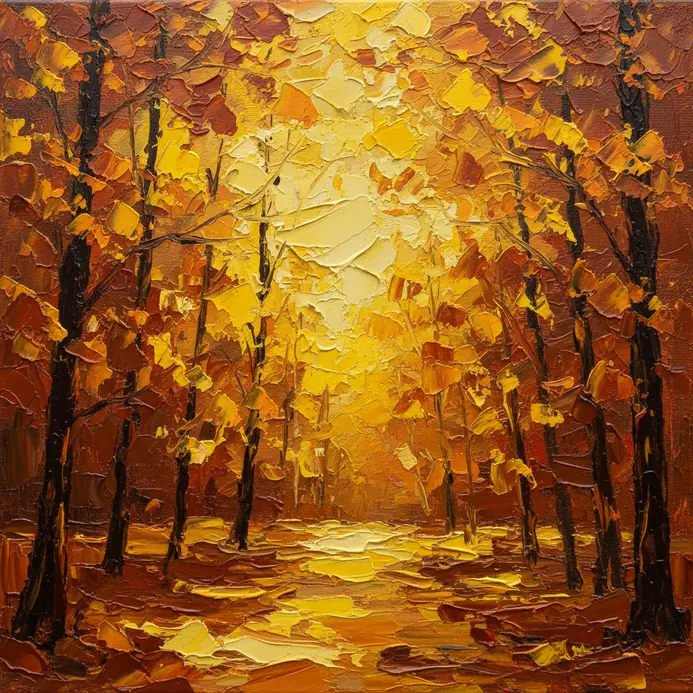
18. Apply Rich Oil Paint for a Golden Hour Fir Tree
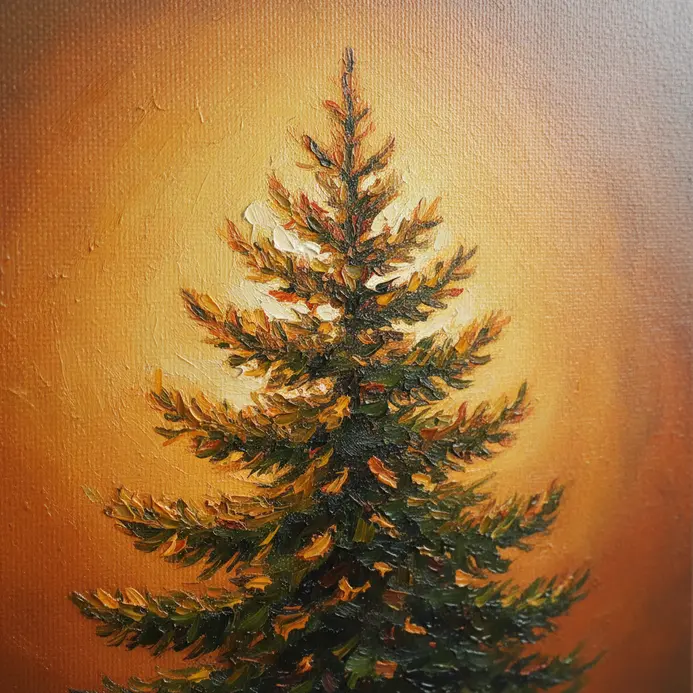
Doesn’t a tree glowing in that late afternoon sun just feel magical? Start by washing your canvas with a warm yellow for the light and a cool dark mix for the shadows. Then, use a flat brush to block in the tree’s main shape with a deep, cool green, saving the bright sky gaps. Now the fun part. Mix a vibrant orange-yellow for the sunlit side and apply thick, textured strokes to mimic the needles. I love how you can layer these rich colors to build that glowing depth. Trust me, letting your impasto highlights catch the light makes all the difference. Feel that warm, golden satisfaction when you step back.
19. Build a Soft Pastel Textured Forest Floor with a Tree
Ever thought soft pastels were only for smooth skies? This project is all about building texture from the ground up. Start with textured pastel paper in a mid-tone like gray or tan. Lightly sketch your tree, then block in the forest floor with dark shadows and earthy mid-tones, gently blending them into a soft wash.
The magic happens when you layer more pastel on top of that fixed base, letting the paper tooth grab the pigment for a beautifully textured, impressionistic look. It feels so satisfying to create that dreamy, natural depth. For a great starting point, check out these easy things to paint for beginners.
20. Use a Flat Brush for an Impressionist Cedar Cluster
Ever wondered how to paint a cedar dense foliage without getting lost in detail? Grab a large flat brush and loosely block in the cluster shape with a mid-tone green. Then, build texture with varied greens using short, choppy strokes, letting colors sit side-by-side. This works because the flat brush creates both broad shapes and specific textural marks, perfectly capturing the cedar character. Trust me, focus on the overall light and texture, not individual needles, and you will love the expressive result. Experimenting with quick strokes refines essential tree painting ideas for beginners.
21. Add Gold Leaf Accents to a Decorative Tree Silhouette
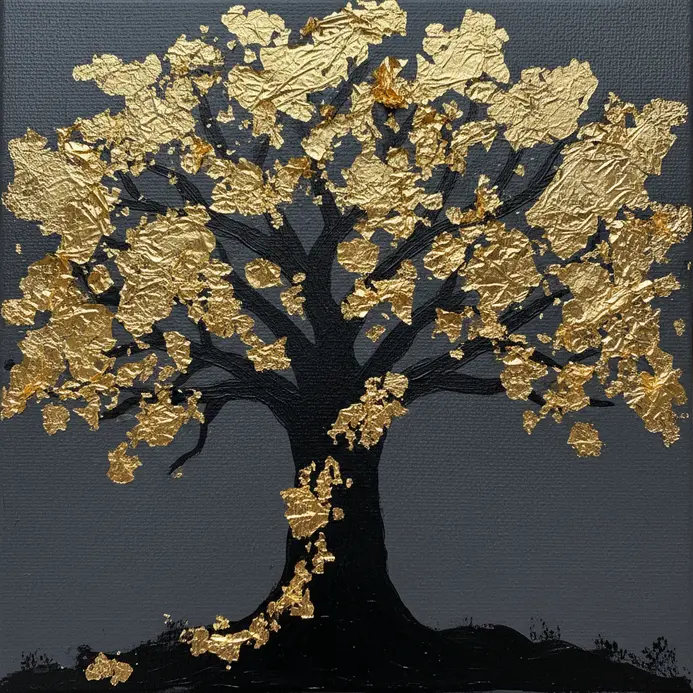
This one looks fancy but is surprisingly approachable. You will apply a gilding size adhesive to your prepared tree shape, wait for it to get tacky, and then press on sheets of transfer gold leaf. I love how it transforms a simple silhouette into something elegant and shimmering. For a different kind of beginner project that is equally rewarding, check out these easy animal painting ideas.
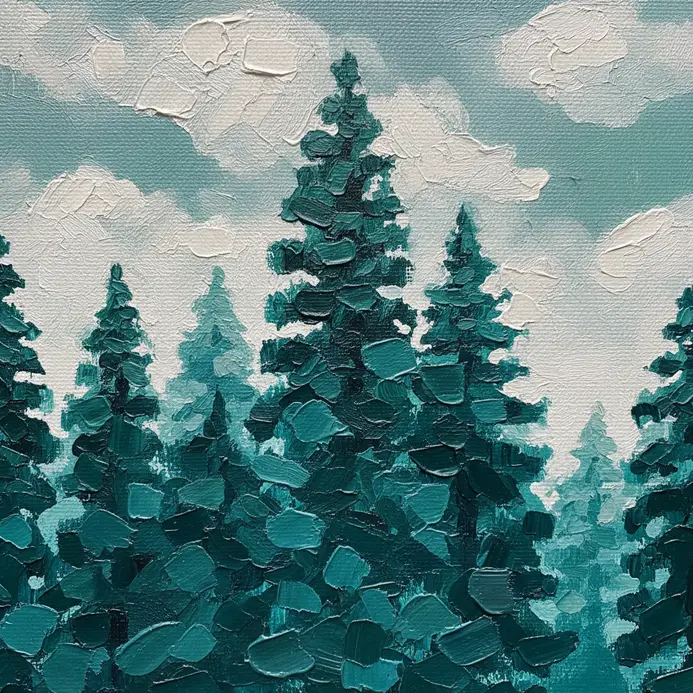
22. Paint a Monochromatic Blue Night Sky Pine Forest
This one creates such a serene, cool mood. You will work entirely in shades of blue, from a pale sky wash down to deep, almost black tree silhouettes. Start with your lightest blue wash for the sky, then layer darker blues to build the forest shapes. Focusing on value instead of color makes this surprisingly accessible and dramatic. Trust me, letting each layer dry before adding darker details is the key to that beautiful, misty depth.
23. Draw a Simplified Cartoon Style Storybook Tree
As kids, most of us drew this exact friendly shape. Start with a short, stout trunk that widens a little at the base. Then, above it, sketch a big, bumpy cloud-like crown using gentle curves. It looks complex, but trust me, its simplicity is the whole point. You just define the main shapes with a black marker, then fill it in with cheerful colors if you want. This style works because its rounded, whimsical look is instantly recognizable and so satisfying to create. Your finished piece will look like it stepped right out of a favorite children’s book.
24. Layer Multi Colored Leaves for a Vibrant Maple Tree
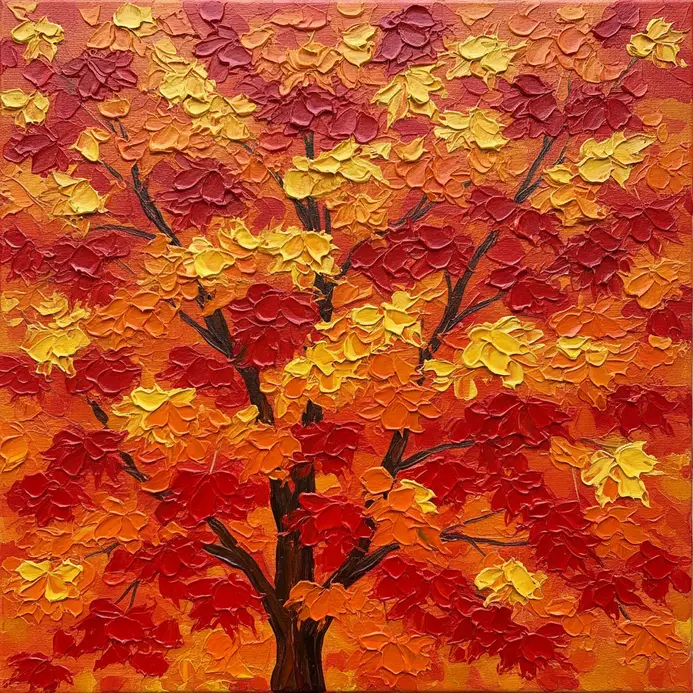
Ever wondered how to capture the crazy glow of a fall maple? This technique looks complex, but it is all about simple layering. Start with a warm, light base, then dab on your yellows, oranges, and reds using a small round brush. I love letting the colors overlap without overmixing, which keeps them vibrant.
Next, tuck in some deeper burgundy and olive green for shadows inside the canopy. Finish with tiny pops of your brightest yellow on the sunlit edges. This works because real autumn leaves are never just one flat color. ink painting ideas for inspiration and see how different mediums handle color. Feel that satisfying depth come to life.
25. Compose a Vertical Painting of a Tall Cedar Forest
This one feels almost magical, doesn’t it? A tall, narrow canvas is your secret weapon here. You will start by sketching those towering trunks receding into the distance, then block in a dense canopy of deep greens. The real magic happens when you add dappled sunlight with soft golds, making the mossy foreground glow. I love how this low-angle perspective makes you feel like you are standing right there in the quiet forest. Trust me, focusing on that dramatic light and shadow is what makes this painting so immersive and satisfying to finish. Working vertically naturally enhances tree painting ideas for beginners.
26. Outline a Detailed Pencil Sketch with Colored Ink Tree
Ever worried about making a mistake with permanent ink? This method solves that. You first build a complete drawing using a detailed pencil sketch. This lets you figure out all the shapes, shadows, and textures before you touch any color. I love how this gives you total control and confidence.
Once your graphite foundation is solid, you trace over it with vibrant, fluid inks. The contrast between the precise sketch and the lively color is stunning. It is a fantastic way to learn about form and value. You can even explore ink painting ideas for inspiration to see how others use this medium.
27. Achieve High Contrast with a White Trunk Birch Tree
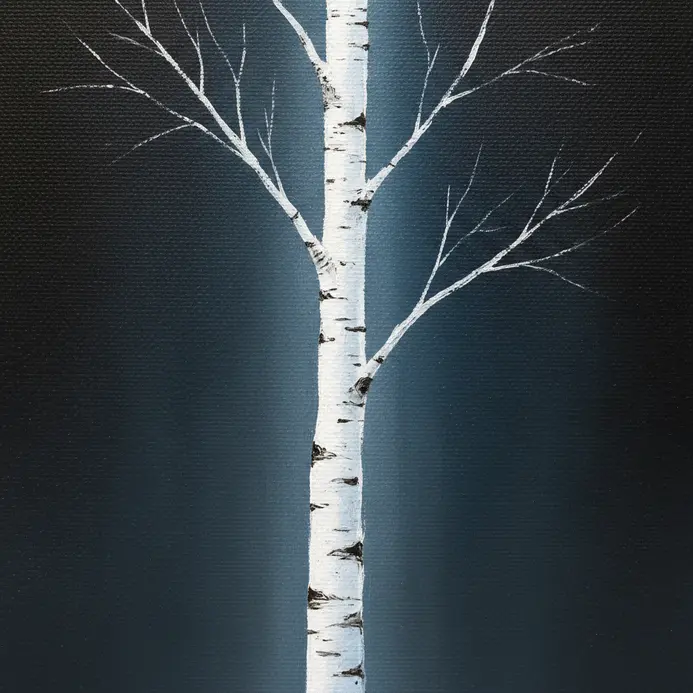
Ever wondered how to make a single tree pop in your painting? This idea is all about dramatic contrast. You will focus on a birch tree stark, white bark, making it stand out against a much darker background. I love how this creates an instant focal point, especially in a winter scene. The key is to place your bright trunk against something like dark evergreen trees or a deep-colored wall.
Why does this work so well? Your eye is naturally drawn to that brilliant spot of light against the dark. It is a simple trick with a huge payoff. Try it and feel the satisfaction of creating such a striking visual.
28. Apply Textured Palette Knife Strokes for a Fall Forest Scene
Ever wondered how to capture the wild, rugged feel of an autumn forest? Scoop up thick, buttery paint with your palette knife and press it onto the canvas. Use dabs, scrapes, and sweeps to build up the rough bark of trunks and the chaotic clusters of colorful leaves. I love how this technique lets you blend colors right on the surface for vibrant, broken color effects. Trust me, the thick, textured result feels incredibly satisfying and full of energy. Try it and feel the impasto come to life.
29. Blend a Soft Background for a Cherry Blossom Tree
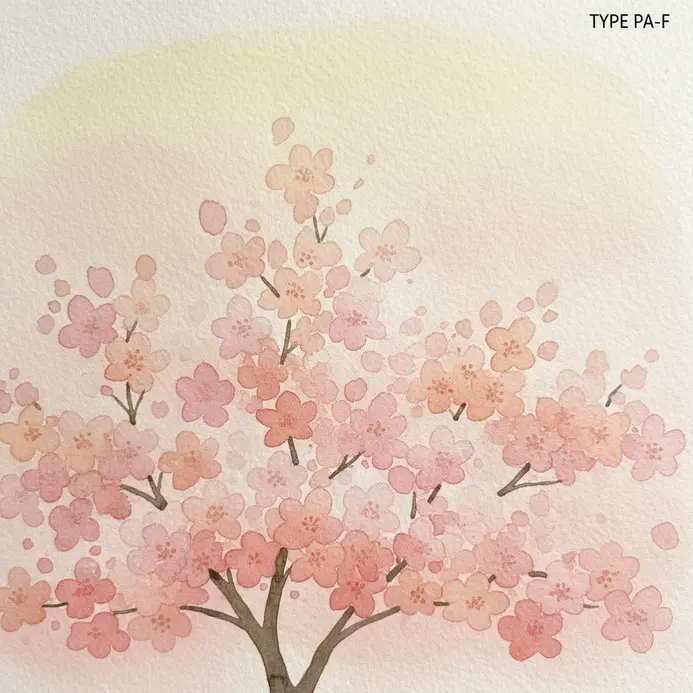
Ever wondered how to make those delicate cherry blossoms really pop? The secret is creating a beautiful, soft background that feels dreamy and out of focus. In painting, you achieve this by using a wet-on-wet blending technique with your background colors. Keep your brushstrokes loose and light, letting the colors gently merge together on the canvas.
This works because it makes the detailed tree your clear focal point, adding instant depth and serenity. easy acrylic painting ideas. Trust me, you will love the professional look this simple trick gives your work.
30. Create a Vibrant Acrylic Pop Art Style Tree
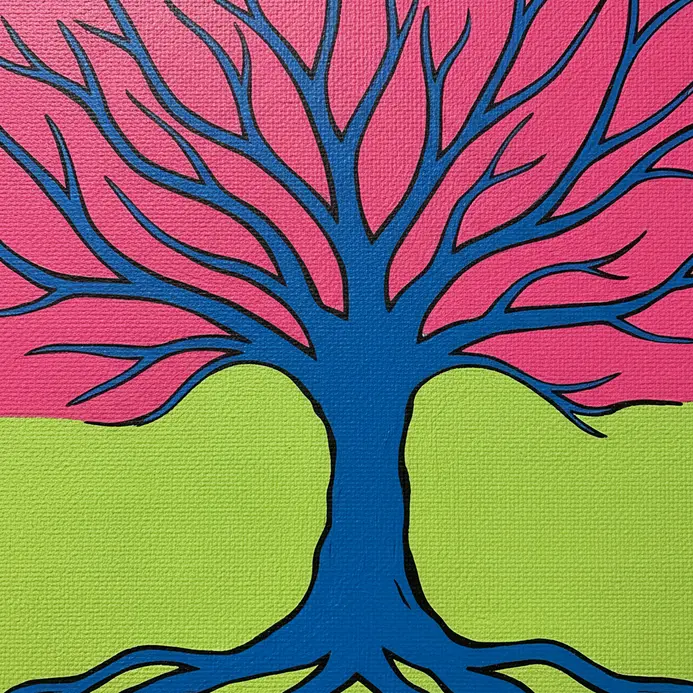
Who would have thought a simple tree could look like a comic book hero? This style is all about throwing realism out the window. Start by sketching a simple, bold tree shape on your canvas. Then, fill it in with flat areas of color using your most vibrant acrylics—think hot pink trunks and neon green leaves. Once dry, trace every shape with a thick black outline using a fine brush.
This works because the strong contrast makes everything pop right off the canvas. Trust me, embracing those unnatural colors is the most fun part.
Preserving Finished Paintings With Proper Varnish Applications
The fastest way to ruin weeks of work is skipping the sealant. One layer of matte varnish takes minutes and protects your painting from dust, UV light, and accidental smudges. For acrylic paintings, use an acrylic polymer varnish, which you can apply with a soft, wide brush once the paint is completely dry, usually after 24-48 hours. You want to avoid a glossy finish if you painted an atmospheric, hazy background, as matte will preserve that soft quality. Apply thin, even coats in a dust-free area, letting each dry fully. This final step locks in your colors and gives your finished piece a professional, unified surface that lasts — whether you’re working on landscapes, abstract art, or simple tree painting ideas for beginners.
Conclusion
Painting trees connects us to the quiet patterns and rhythms of the natural world in a uniquely personal way. Each of these projects is a small step toward capturing that feeling on your canvas. Remember, the goal is not a perfect botanical illustration, but the pleasure of seeing your own interpretation take shape. For your next project, pick one element you enjoyed—like the texture of bark or the softness of leaves—and focus a whole painting on exploring it further. These tree painting ideas for beginners are just the starting point for your own creative journey with nature.
FAQs
Q: What is the easiest type of paint for a beginner to use for trees?
A: Acrylic paint is often the most forgiving choice. It dries quickly, allows you to paint over mistakes, and works well for building texture. Watercolors are also great for soft, atmospheric trees but require a lighter touch.
Q: How do I paint leaves without making them look like blobs?
A: Focus on the overall shape of the leaf cluster instead of individual leaves. Use a specific brush, like a fan brush or a round brush, to dab or stipple color. Start with a darker base color and add lighter highlights on top.
Q: What brush should I use to paint pine needles?
A: A fan brush is excellent for creating the soft, needled texture of evergreens. Load the tip with paint and use quick, upward flicks. A small round brush works for more detailed, individual needles.
Q: How can I make my tree trunk look more realistic?
A: Avoid using just one flat brown. Mix several colors like burnt sienna, ultramarine blue, and white. Use a dry brush technique to drag lighter paint over a darker base, following the direction of the bark grooves.
Q: My tree colors look muddy. How do I fix this?
A: This often happens from over-mixing colors on the canvas. Let your base layer dry completely before adding the next. Use separate brushes for warm and cool colors, and clean your brush more often between mixes.


