


Critical Pigment Properties For Celestial Depth
Your deep indigo and violet transitions rely on transparent professional-grade pigments, not opaque black paint, which is exactly why gathering easy watercolor night sky painting ideas always starts with selecting the right pigment base. Trust me on this, that standard black tube creates a flat, muddy void instead of that rich, luminous depth you want. You need a base of Indigo layered with Dioxazine Purple for those subtle violet whispers. Payne’s Gray is your secret weapon for the darkest ambient shadows without losing transparency. The good news is, you build this depth by dropping concentrated pigment into a wet base wash, allowing it to bloom organically. This technique gives you the soft, seamless gradients that mimic a real night sky’s infinite space. Beginners often make the mistake of trying to mix these colors from cheaper student-grade paints, but that saturation simply is not there.
Optimal Paper Tensile Strength For Multiple Wash Layers
You need cold-press watercolor paper with a 140lb (300gsm) weight to handle the repeated soaking for a night sky. Lighter paper buckles instantly under that first heavy wash, ruining your smooth gradient before you even start. The heavier weight gives you the working time to layer transparent glazes without the surface pilling, which is a crucial step when following easy watercolor night sky painting ideas. This tensile strength is non-negotiable because a successful piece involves letting the paper stay damp while you work wet-on-wet. You will notice the difference immediately; the pigment settles into the tooth of the paper beautifully instead of beading up. It withstands the moisture needed for those nebulous blooms and the subsequent splatter for stars without warping. That sturdy foundation is what lets you achieve the high-contrast highlights against your deep shadows without fight.
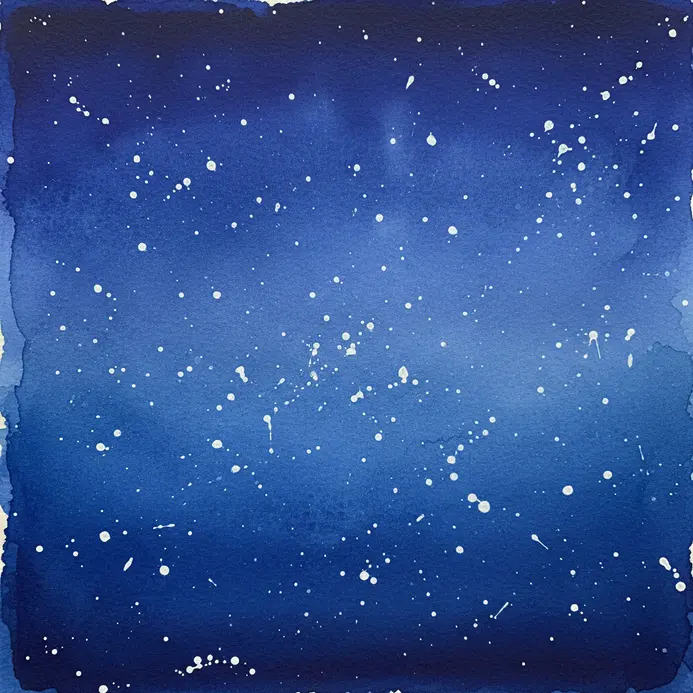
1. Paint a Simple Indigo Gradient Sky with White Stars
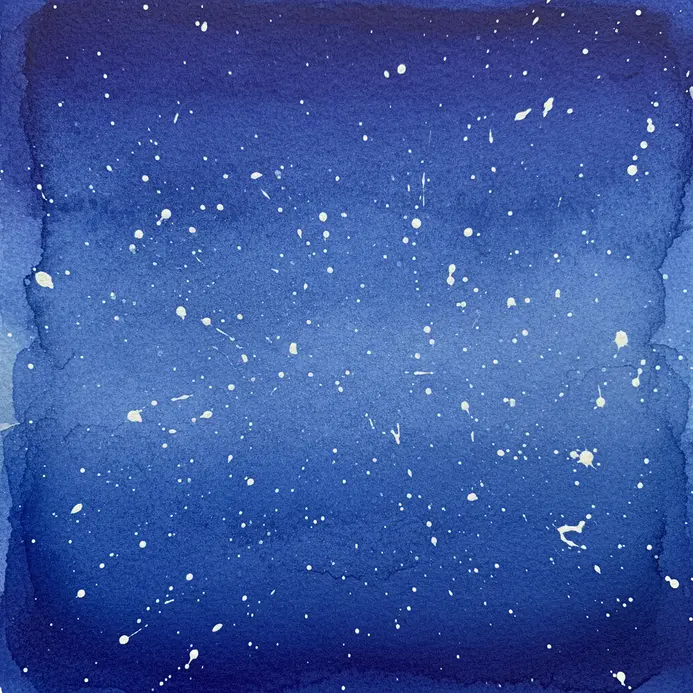
This is the perfect first step for anyone new to watercolor night skies. When testing easy watercolor night sky painting ideas, you will quickly learn that this approach looks so elegant, but the technique is wonderfully simple. You start by wetting your paper and applying a smooth wash of indigo watercolor, letting it fade from dark to light. Once that dreamy background dries, you get to add the magic by spattering or dotting on tiny white stars. I love how this project teaches you the essential wet-on-wet method while creating something beautiful. The contrast between the deep indigo gradient and the bright stars is instantly satisfying, which explains why beginners flock to these easy watercolor night sky painting ideas when building confidence. For a whole collection of projects that build on this foundational skill, check out these easy watercolor painting ideas. My go-to tip? Use white gouache for your stars so they really pop against the dark sky. Does that not look stunning when you are done?
2. Layer a Crescent Moon Behind a Pine Silhouette

This one surprised me. It looks detailed, but the technique is wonderfully simple. You start by painting your dark, gradient night sky and letting it dry completely. Next, carefully paint your bright crescent moon onto that dried background. The real magic happens when you paint the solid, dark shapes of the pine trees right over the top of the moon and sky, creating the layered depth you find in all successful easy watercolor night sky painting ideas. That layering order is what creates the beautiful sense of depth, making the moon appear to glow from behind the trees. It works because our eyes love that strong contrast between light and dark, which instantly makes a scene feel serene and dramatic. I love how this method turns a few basic shapes into a complete, evocative story. Try it and feel the satisfaction when that layered look comes together perfectly.
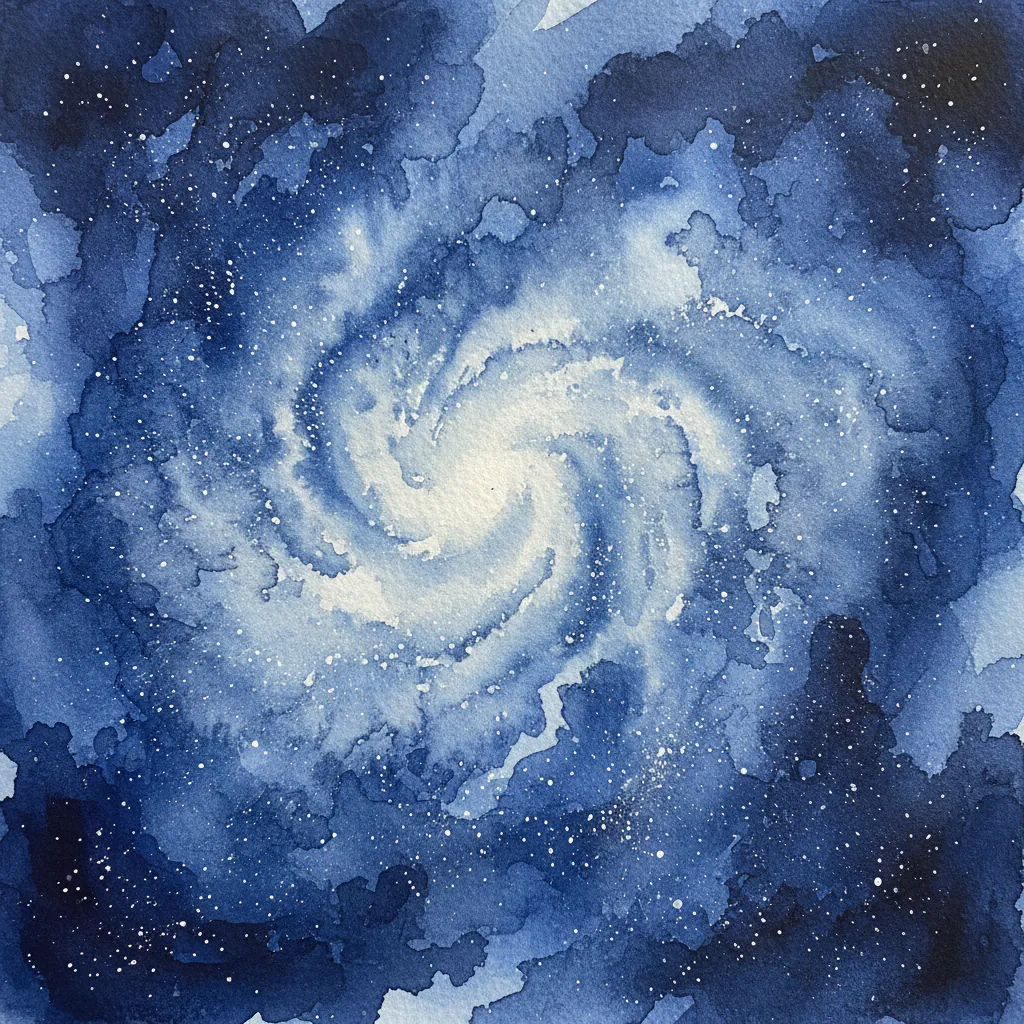
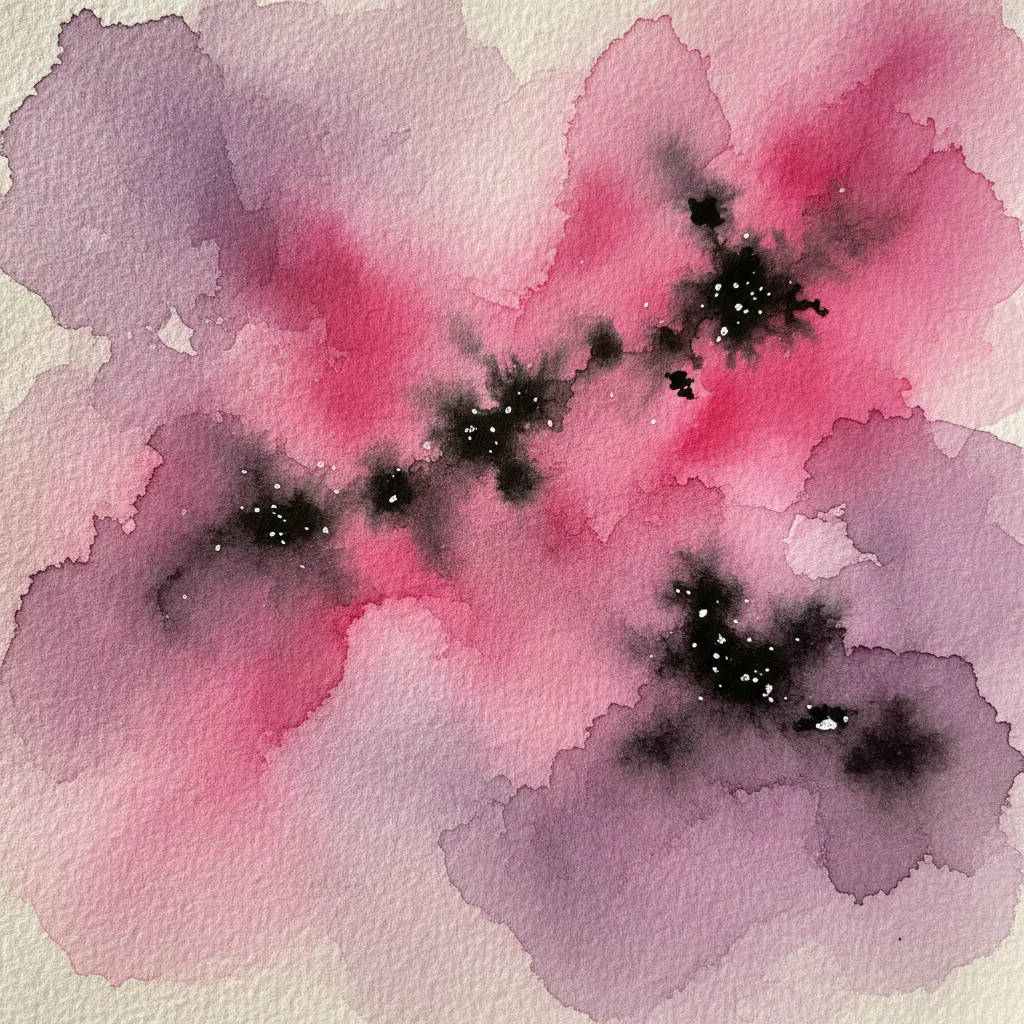
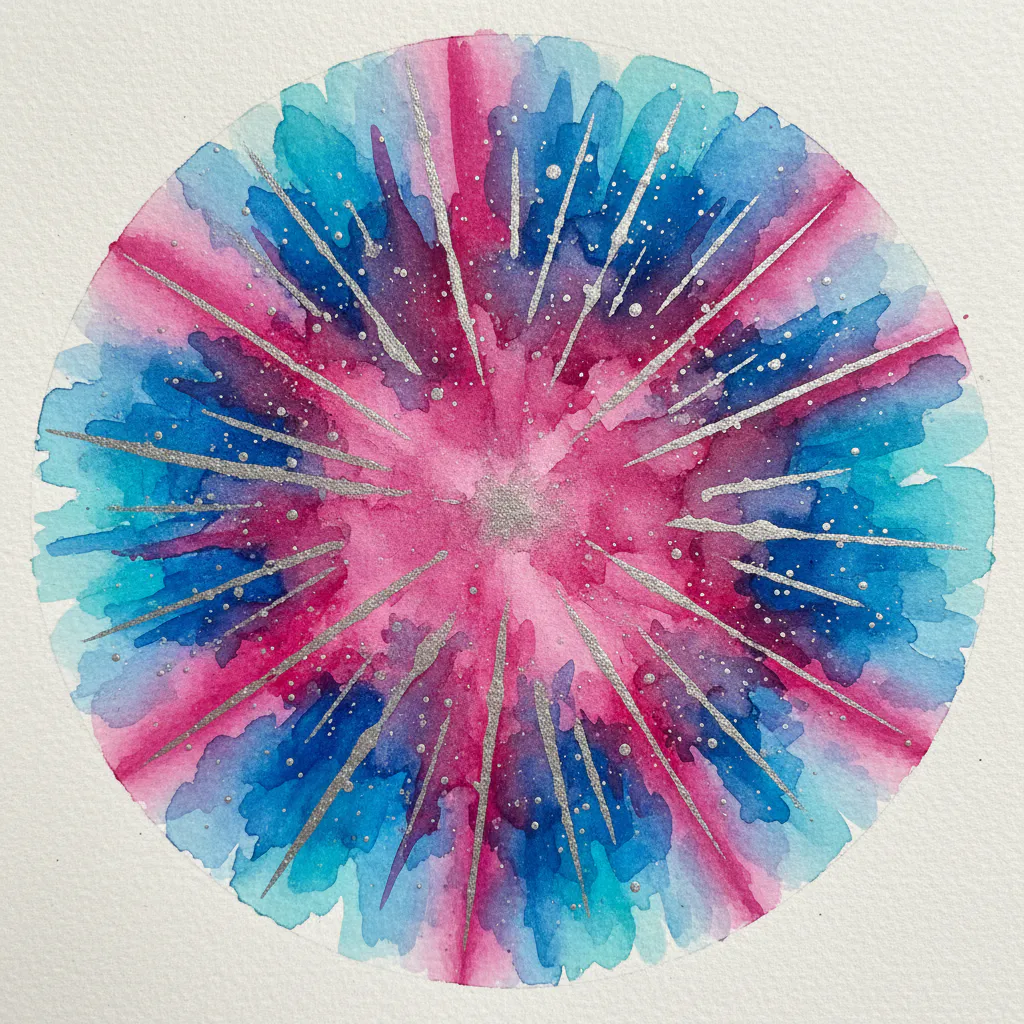
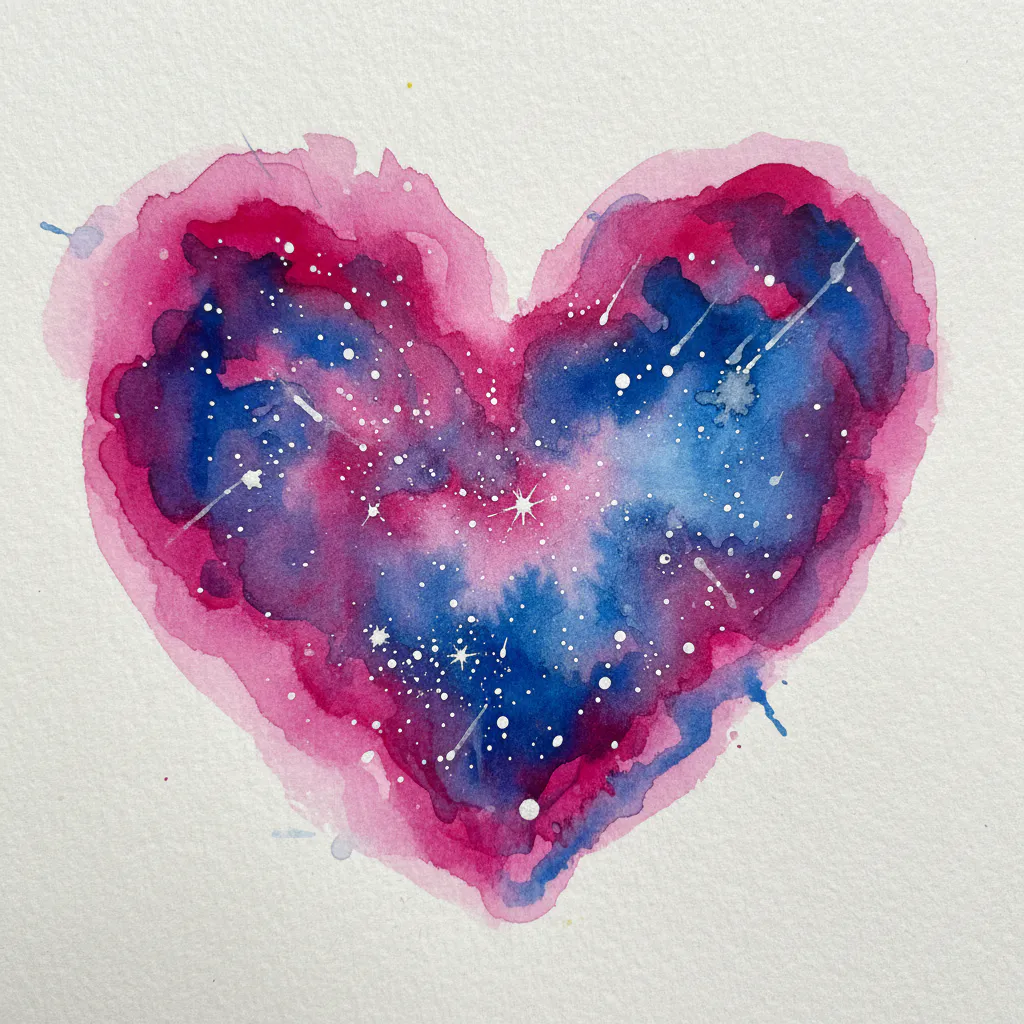
3. Create Galaxy Nebula Swirls with Violet Highlights
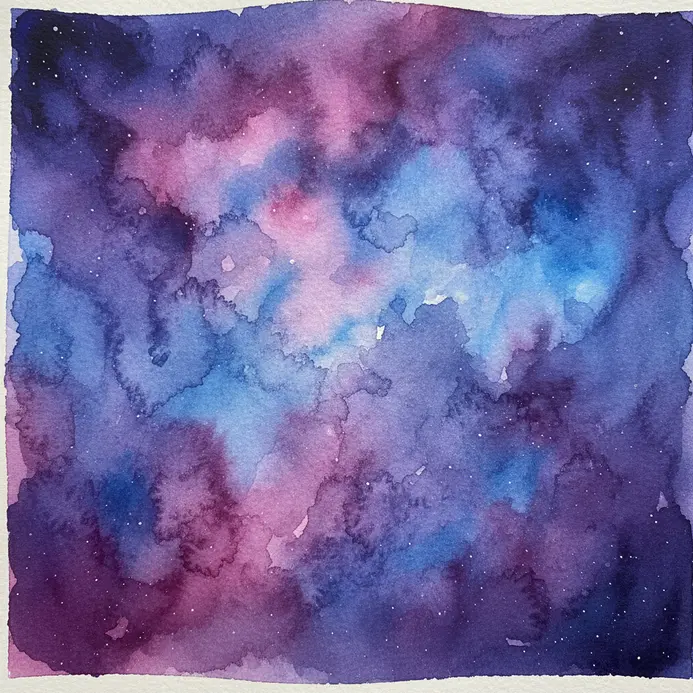
Ever wondered how those deep cosmic clouds get their glow? This one surprised me – it looks complex but really comes down to a few simple swirls, proving that many easy watercolor night sky painting ideas are simpler than they appear. You will start with a wet wash of deep blues and purples for your background. While it is still damp, drop in lighter blues and purples, using a circular motion to create soft, billowing nebula shapes. Now for the magic touch. Let the first layers dry just a bit, then add your vibrant violet highlights for a fun contrast. Dab on small amounts of fuchsia or magenta right into the swirling cores. I love this one because those violet pops create instant depth and light, making your painting look truly luminous. Try it and feel the cosmic wonder.
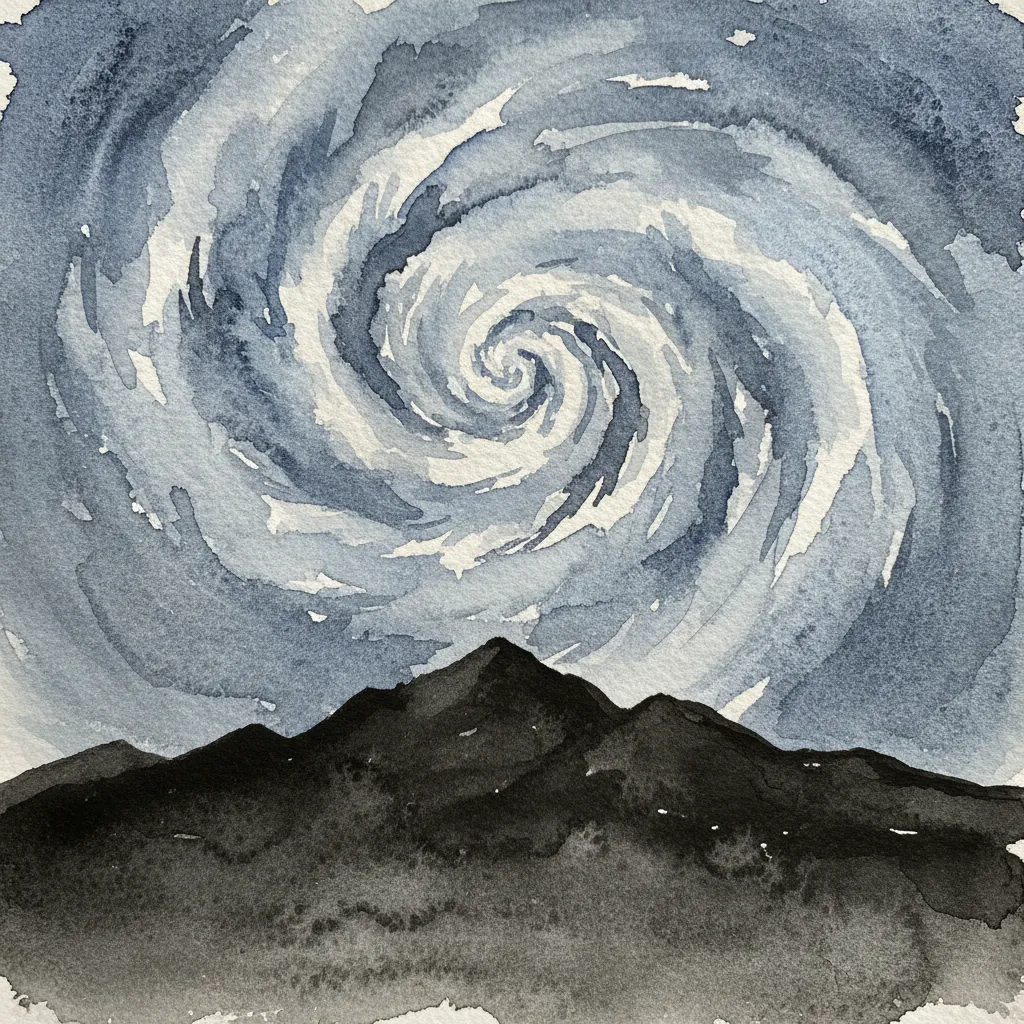
4. Block In a Mountain Range Under a Starlit Sky
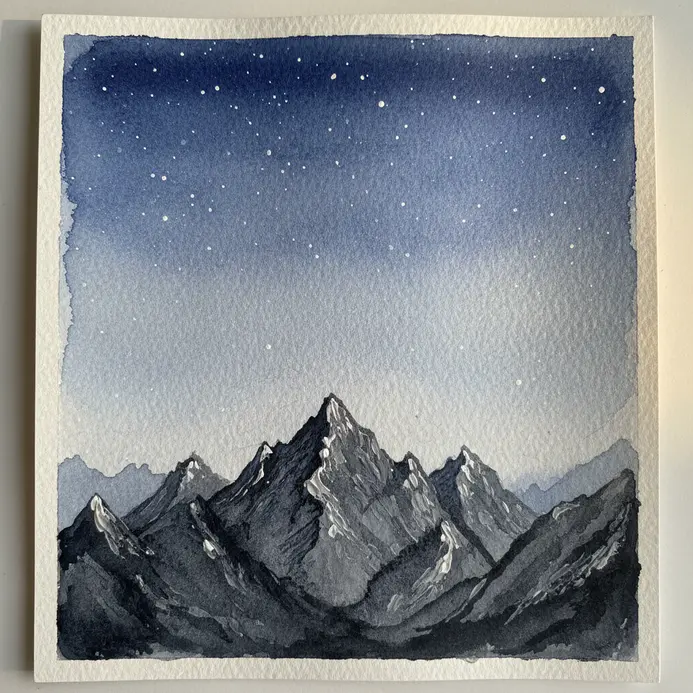
This one is so satisfying because you get to see the whole scene take shape almost instantly. Ever tried painting a night sky and felt the mountains were too fussy? The trick is to start by painting the entire mountain range as one solid, dark shape. Use a concentrated Payne’s Gray wash with a large brush to block in those strong, majestic silhouettes. Do not worry about details like crags or rocks at all right now. You are just laying down the foundational mass against where your stars will live, which mirrors how almost every set of easy watercolor night sky painting ideas teaches beginners to block shapes first. Once that mountain shape is dry, float in your deep night sky with a wet-on-wet mix of Ultramarine and Dioxazine Purple. This creates a beautiful, soft backdrop. The real magic happens when you add the stars. I love spattering white gouache with an old toothbrush for a natural, scattered effect, proving how foundational techniques drive successful easy watercolor night sky painting ideas. That strong dark shape you painted first makes every single star pop with incredible contrast. It feels dramatic and serene all at once.
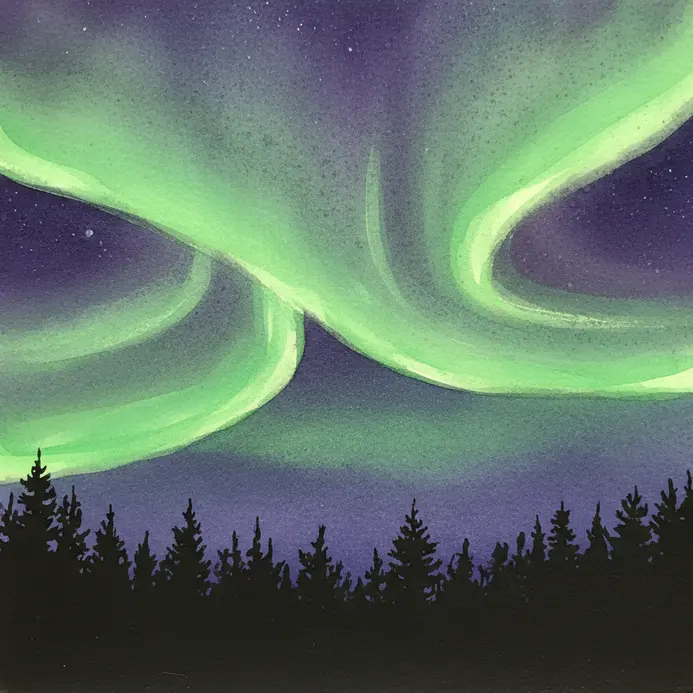
5. Capture the Aurora Borealis Over a Snowed Horizon
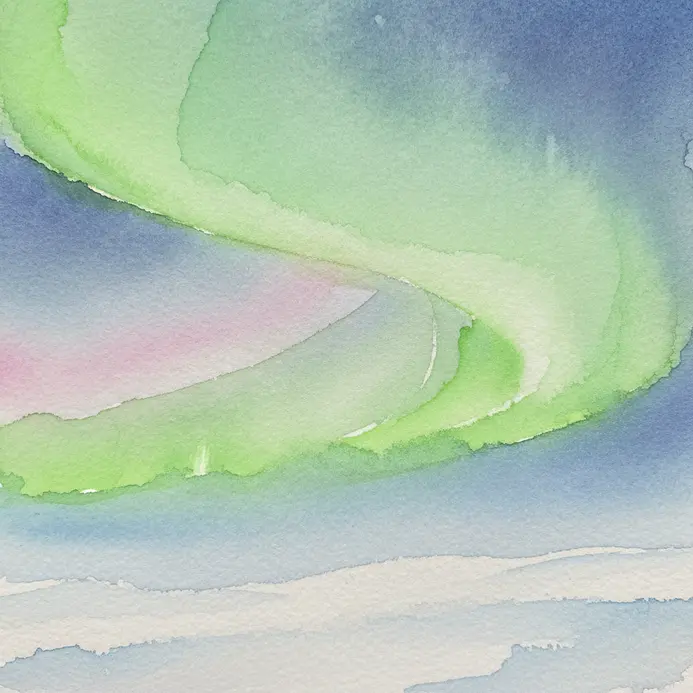
Ever wanted to capture one of nature’s most magical light shows? This idea is about bringing the dancing northern lights to your paper. Start with a dark wash for the night sky, then use a wet-on-wet technique to blend in those iconic green and purple aurora waves. The trick is keeping your brushwork loose and flowing, showing you how versatile easy watercolor night sky painting ideas can be for any random artist. I love how the soft glow looks against a crisp, white horizon. For the snowy foreground, use masking fluid to reserve those pure white hills before you even start painting the sky. This creates such a beautiful, stark contrast that makes the aurora pop. You will be amazed at how a few simple washes can create such a dramatic scene. Is not it satisfying to see those colors blend and flow? Feel the magic of creating your own polar night.
6. Achieve a Full Moon in a Cloudy Midnight Wash
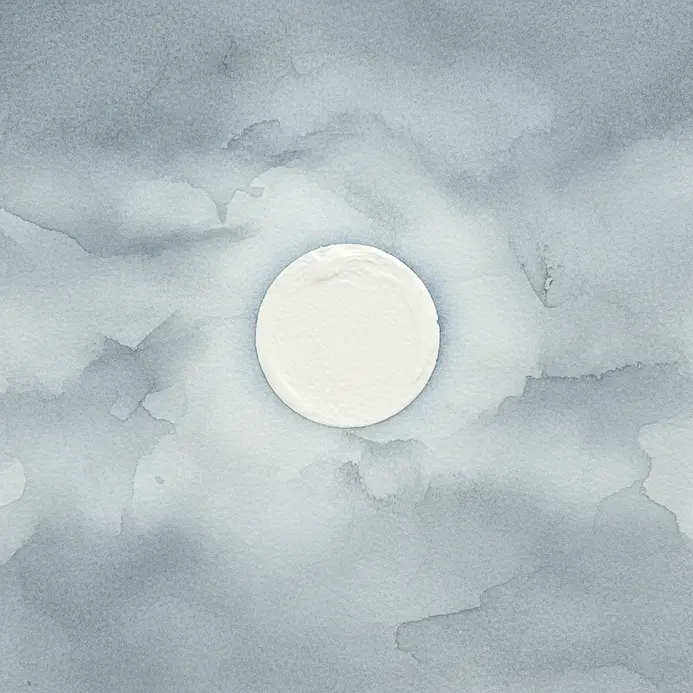
Ever wondered how to make a moon look like it’s glowing through mist? This one looks magical but is all about a simple trick. You start with a wet, dark wash using colors like indigo and Payne’s gray, letting them blend freely on the paper. The real secret is leaving a perfect circle of pure white paper untouched for your moon before you even start painting the sky, a trick found in my favorite easy watercolor night sky painting ideas. Once your initial wash is dry, you can add more layers to deepen the night and soften the moon’s edges with a damp brush. I love how this technique teaches you to plan your lights first. It feels so satisfying when that luminous circle emerges from the dark, cloudy layers. For a different kind of celestial magic, you might also enjoy these whimsical watercolor painting ideas.
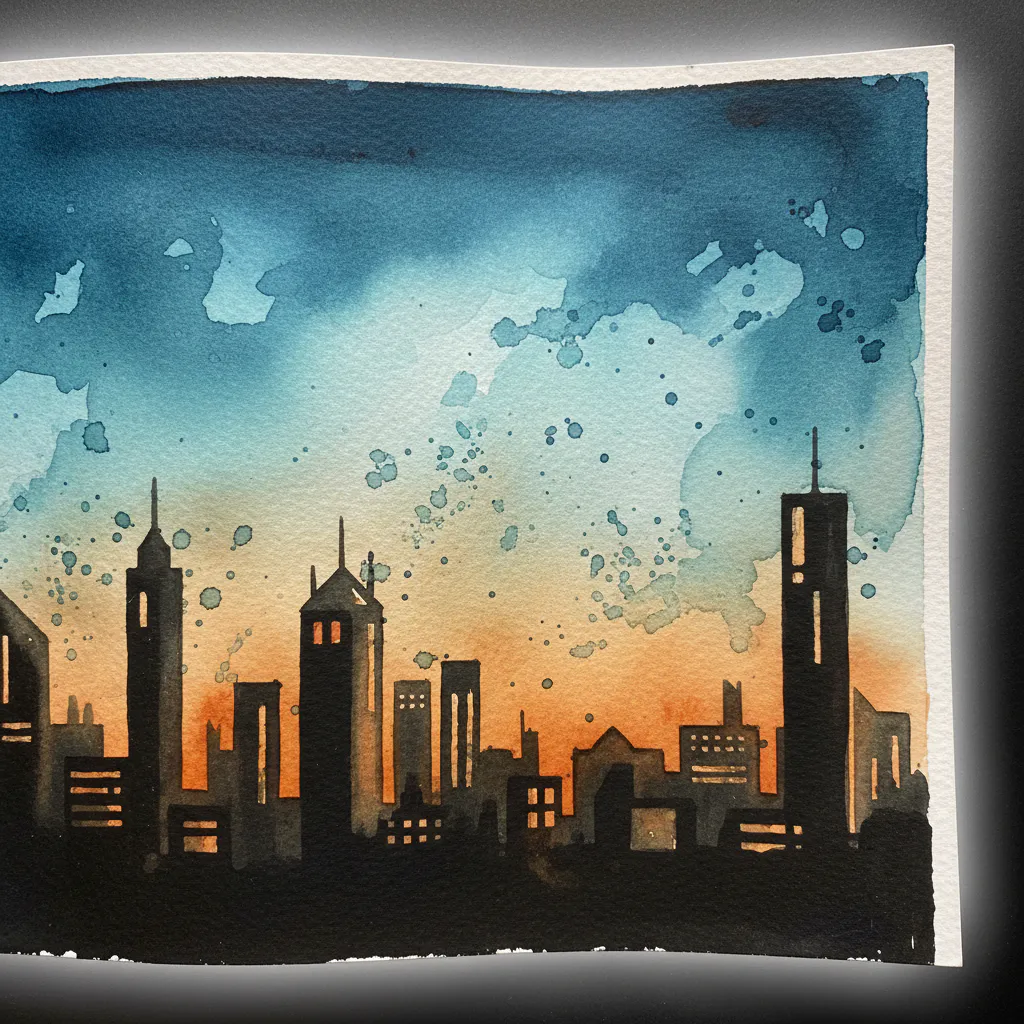
7. Outline a Cityscape Silhouette Against an Indigo Sky
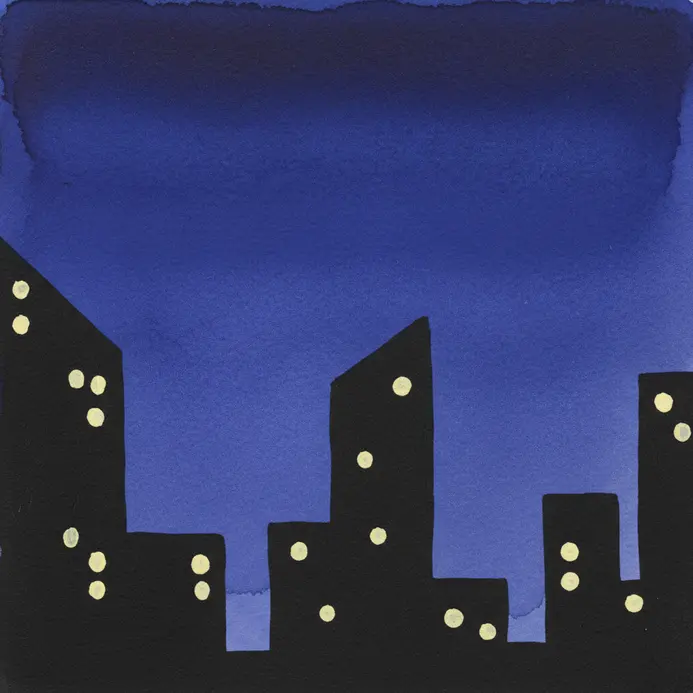
Ever wonder how to make a complex city look so moody and simple? This idea is my favorite trick for creating instant atmosphere. You start by painting a deep, varied indigo sky wash and let it dry completely. Then, with a small round brush and black paint, you draw the jagged outline of buildings against that luminous background. Focus on the shape of the skyline, not the details inside, which is exactly how the most accessible easy watercolor night sky painting ideas simplify urban scenes. Mix up your building heights and add a tiny moon or a few stars for a focal point. It works because the stark contrast is so visually powerful, turning a busy scene into a serene moment. Try it and feel the magic when that silhouette pops. For a similar celestial vibe, see easy watercolor galaxy painting.
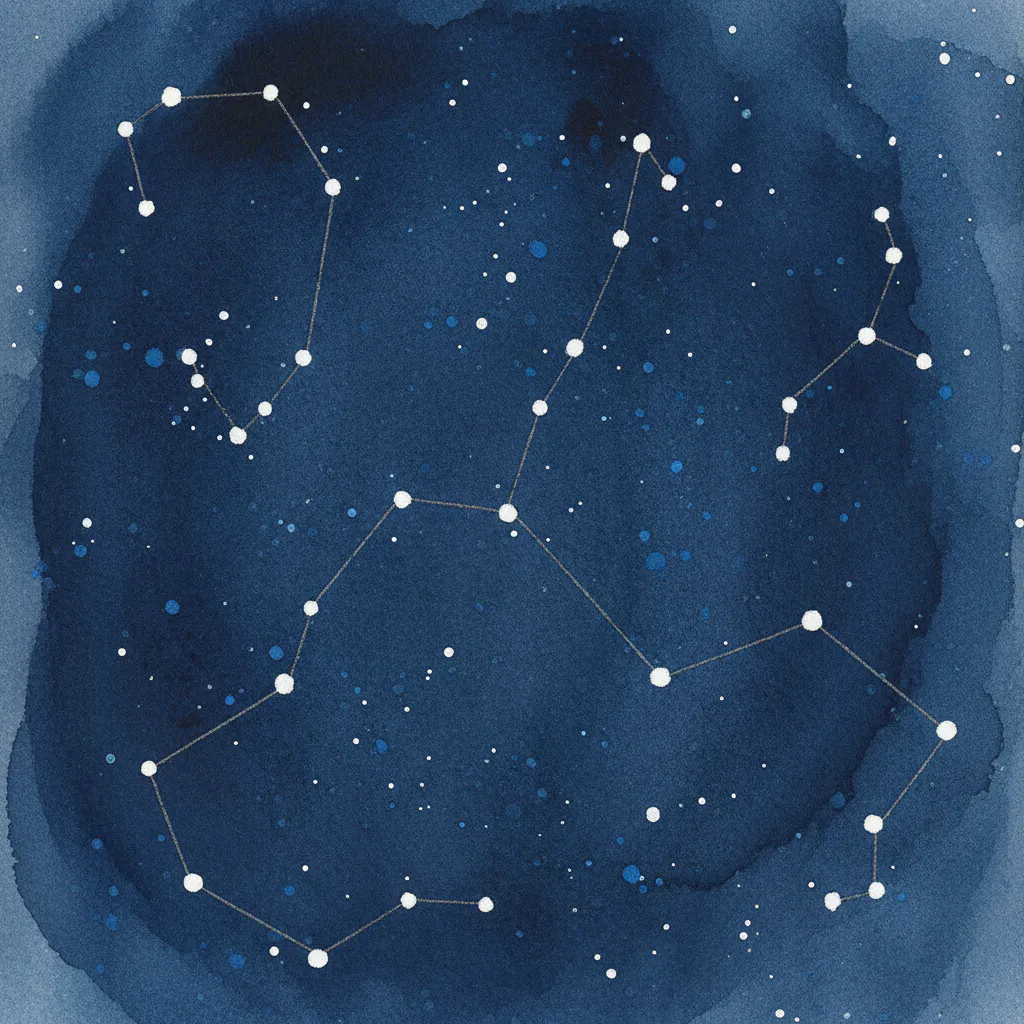
8. Draw a Constellation Map on a Deep Blue Wash
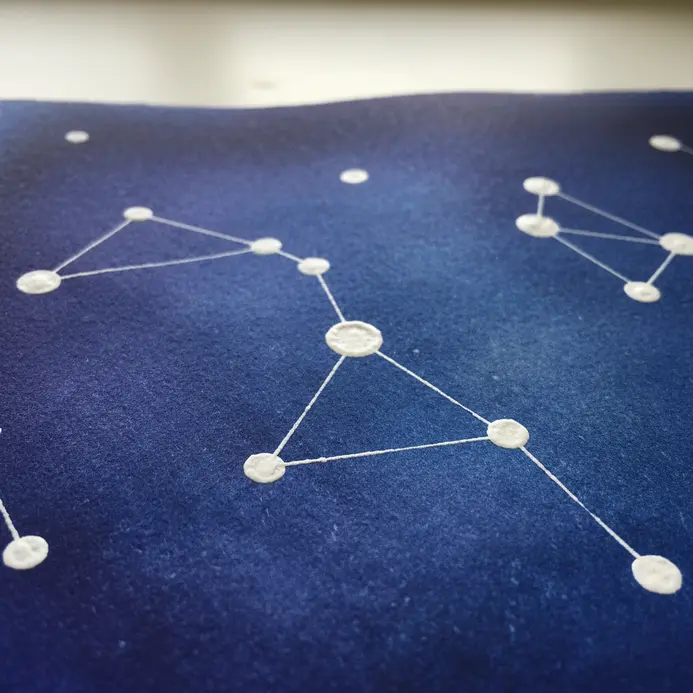
Ever looked up at the night sky and tried to trace those dot patterns with your finger? This project lets you capture that feeling on paper. Start by laying down a rich deep blue wash to create your cosmic backdrop. Once it is completely dry, use white gouache or a gel pen to dot in the stars and connect them into constellations like Orion or Ursa Major. I love this one because the stark contrast makes the stars look like they are actually twinkling against the infinite dark, and it reminds me of how easy watercolor night sky painting ideas often use astronomy for structure. Grab a reference image from an astronomy app to get your star placements right. Painting those fine constellation lines with a small round brush feels like you are charting your own little piece of the universe through your colourful creations. The whole process is surprisingly meditative and the final piece has such a serene, magical quality. Does that not look stunning?
9. Form a Distant Planet in a Starry Void
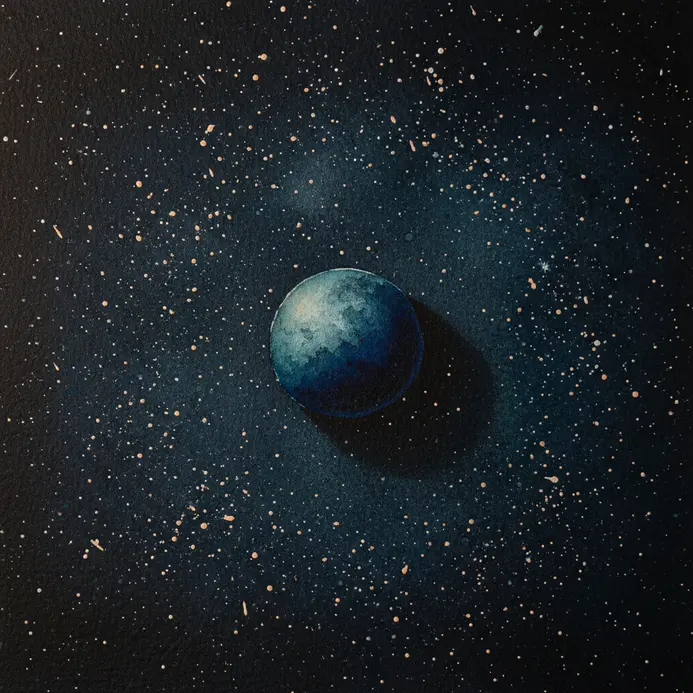
Ever wondered how to make a tiny world look truly far away? This technique is perfect for dreamers who want to create colourful masterpieces. You will start with a soft circular wash using a muted color on damp paper. Let that base dry, then add subtle shading along one edge to suggest a sphere. The key is keeping it small and soft. Avoid harsh edges that make it look like a sticker. I love how a simple shadow can create so much depth. For a cohesive look, ensure your star splatters are sparse around the planet. It is a wonderfully ethereal effect. Try it and feel the magic of creating your own little cosmos. If you enjoy blending colors for dreamy effects, you might also find inspiring watercolor tattoo ideas full of similar fluid beauty, which shows how adaptable easy watercolor night sky painting ideas really are.
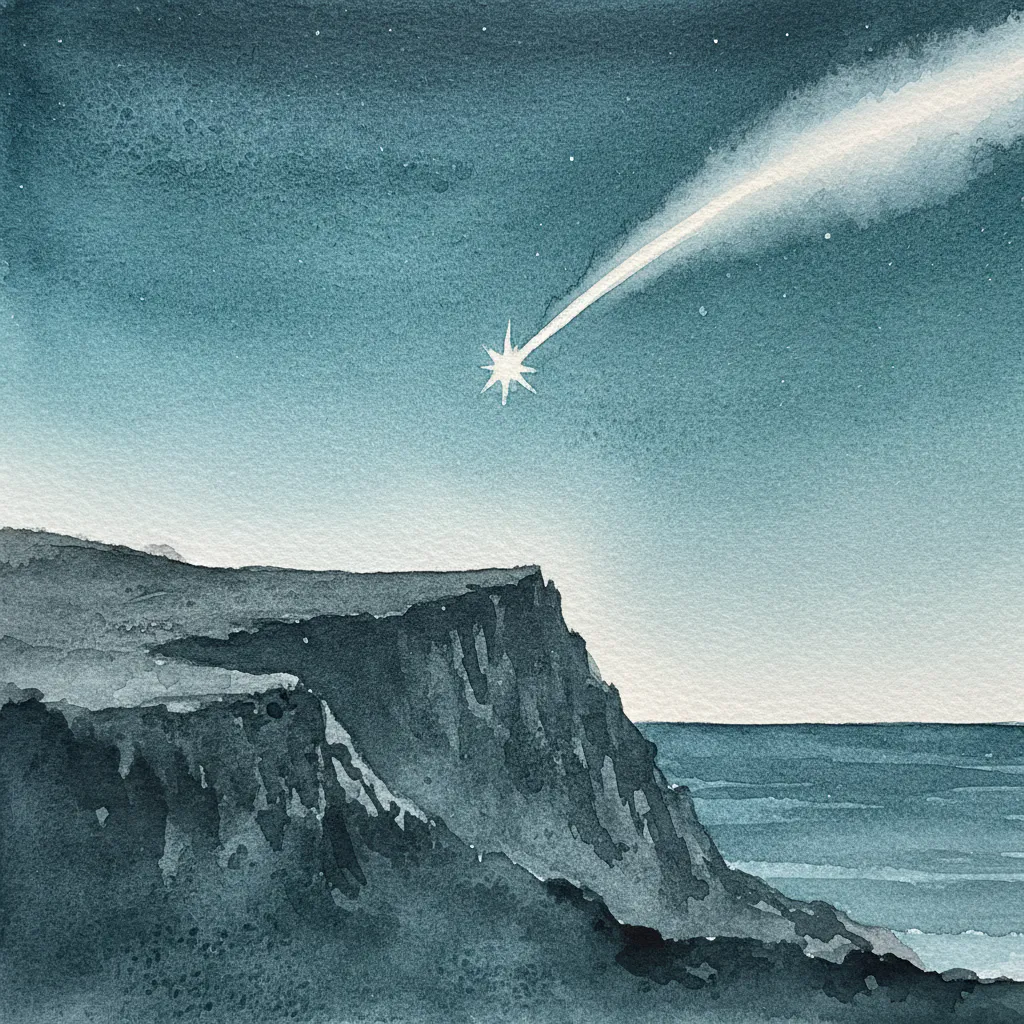
10. Add a Comet Streak Across a Purple Sky

Ever wondered how to get that perfect, glowing streak across your night sky painting? This one surprised me. It looks complex but is all about a simple, sweeping motion, making it easy to create beautiful art. You will start by loading your brush with a bright, watery mix of white or pale yellow. Then, with a confident flick of your wrist, you will pull a long, tapered line from your comet’s head. The key is using a soft-edged round brush and letting the paint fade naturally as you lift, which is why this technique appears in so many easy watercolor night sky painting ideas. Why does this work so well? That soft, diffused tail instantly creates a sense of speed and light against your purple background. It is a fantastic way to add dynamic movement. For a more integrated look, I love adding a subtle outer glow around the core with a clean, damp brush. This simple step makes your comet feel like it is truly burning through the atmosphere. If you want to explore more ways to paint celestial scenes, check out these more celestial painting ideas. Trust me, the feeling you get when that streak of light comes together is pure magic.
11. Sketch a Lighthouse Silhouette Against a Stormy Twilight
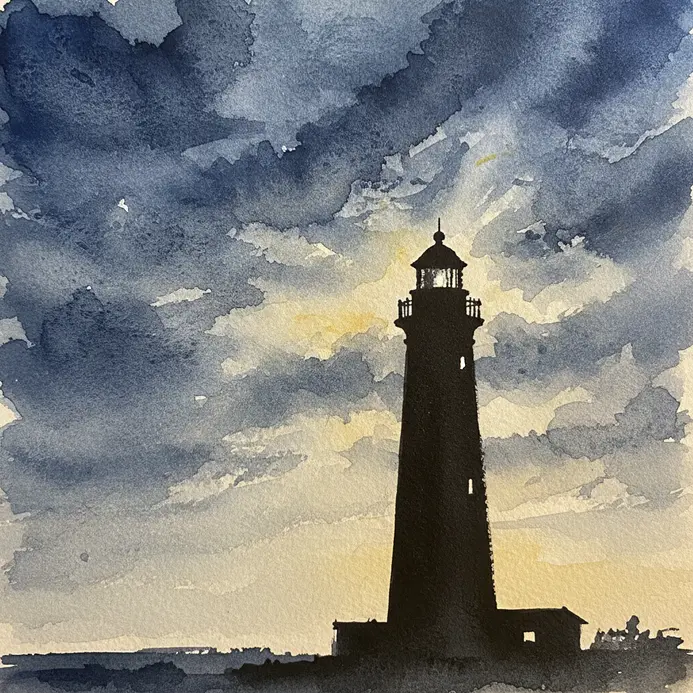
Ever feel like a dramatic, moody piece is out of reach? This lighthouse silhouette proves it is not. The magic is in the strong contrast. You will draw a solid, dark lighthouse with crisp edges against a swirling, layered graphite sky. Keep a lighter band on the horizon for that twilight glow, and use dark, horizontal strokes for the choppy sea. It works because your eye is drawn straight to that stark, iconic shape. Varying your pencil pressure for the clouds and water creates incredible depth and atmosphere, a principle that ties together dozens of easy watercolor night sky painting ideas. Trust me, the satisfaction comes from seeing that powerful silhouette emerge. Does that not look stunning?
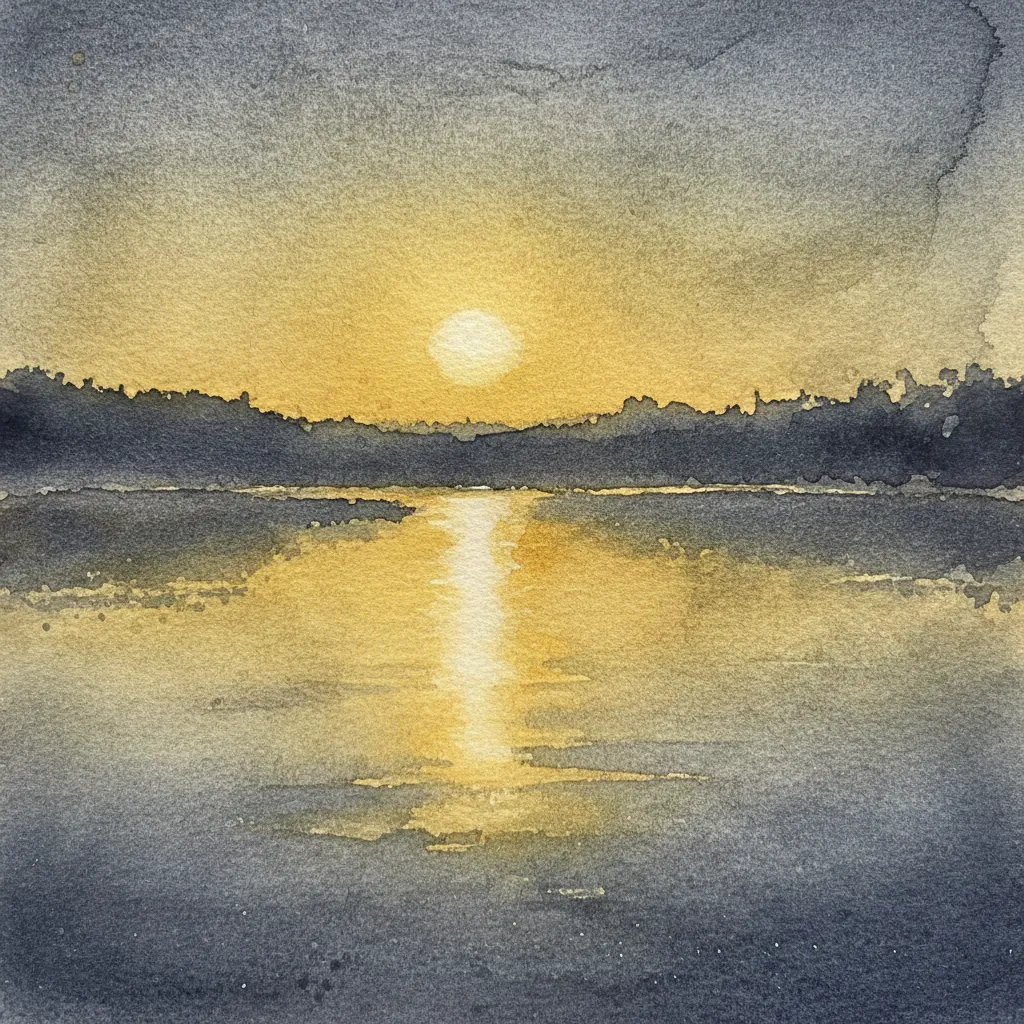
12. Paint an Ocean Reflection Under a Moonlight Scene
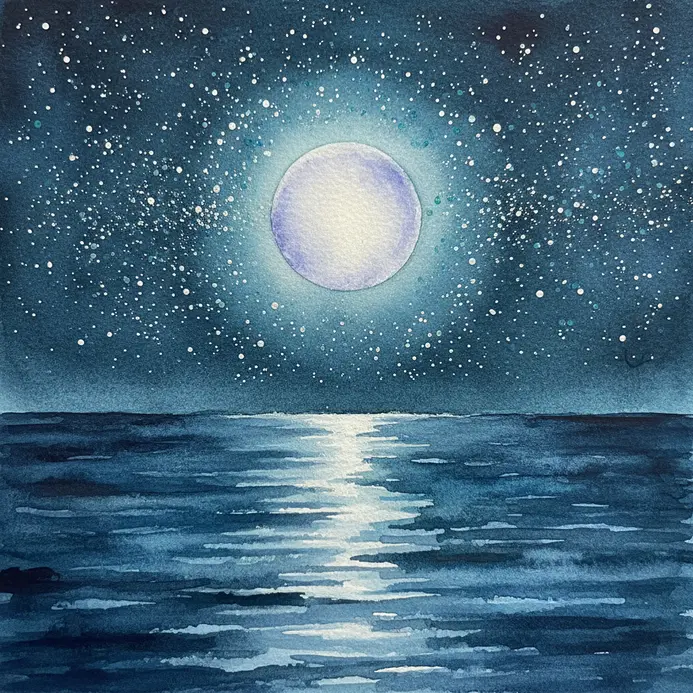
Ever wondered how to capture that shimmering, magical path of moonlight on the water? It looks complex, but I love this one because it’s all about building up dark, rich layers. Start with a deep wash of Ultramarine Blue and Dioxazine Purple for your sky and ocean, leaving a lighter area for the moon, which matches the setup in classic easy watercolor night sky painting ideas. Then, use a pale, cool yellow for the moon itself, not pure white, and drag that color down in a broken, elongated line to create the reflection on the dark water. This works because the dramatic contrast between the deep, reflective blues and that single luminous streak is instantly evocative. Your key is to study a reference image to see how the light truly shatters on the waves.
13. Blend a Flowing Ribbon Aurora and Pine Forest
This one surprised me. It looks magical and complex, but the blend is so much more approachable than you might think. Ever wondered how to make those glowing ribbons of light feel like they’re dancing over a forest? Start with a large soft brush on damp paper, sweeping in your aurora colours and letting them flow into soft ribbons for a fun effect. For the pines, let the sky dry a bit, then use the side of a round brush to build up dark, textured shapes, starting light in the distance and getting darker up close. It works because the contrast between the vibrant, flowing lights and the stoic, shadowy trees creates incredible depth and a dreamlike atmosphere. My go-to tip? Practice your painting tutorial techniques to enhance your skills. wet-on-wet technique for the sky on scrap paper first to avoid overworking and muddy colors. When you get that first soft ribbon of color to bloom, it feels absolutely stunning. For a different kind of beginner-friendly project that also plays with colour and form, you might enjoy these easy to create painting tutorials. abstract painting ideas for beginners.
14. Create a Small Desert Tent Under the Milky Way
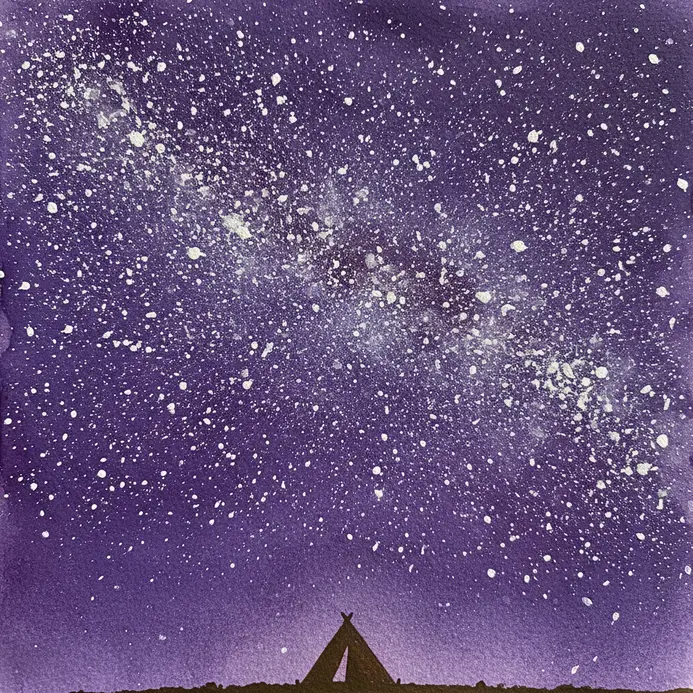
Ever wanted to paint a scene that feels both vast and wonderfully cozy? This one is a personal favorite for capturing that feeling of peaceful solitude. You will start by laying down a wash of deep blues and purples for the night sky, leaving a bright, dense streak for the Milky Way core. Trust me, letting the colors blend wet-on-wet creates the perfect ethereal glow, and it shows how atmospheric easy watercolor night sky painting ideas really are. Next, paint those gently rolling sand dunes in warm, muted tones. I love placing a simple, small tent in earthy colors slightly off-center. The magic happens when you add a tiny, warm yellow glow inside the tent, contrasting beautifully with the cool star light. Does that not sound like a satisfying contrast to paint night skies?
15. Arrange Symmetrical Moon Phases in a Night Sky
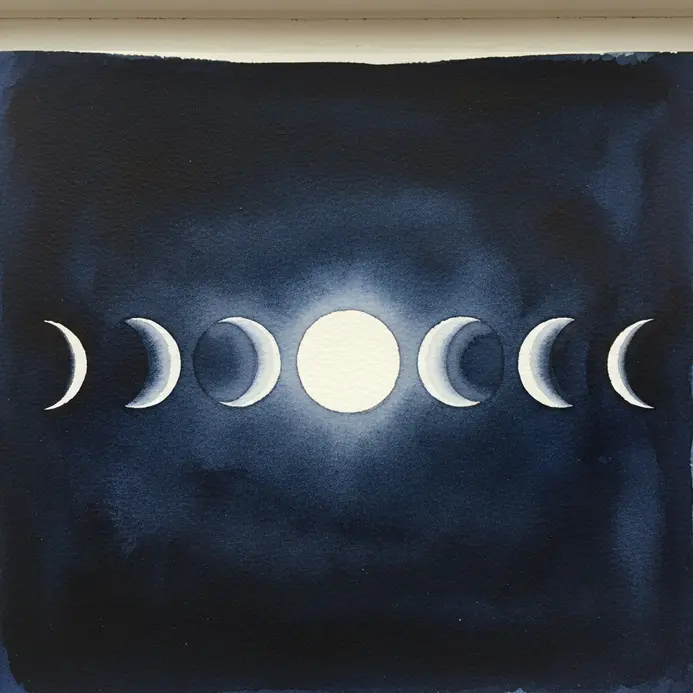
Ever looked up and wondered how to capture the moon’s whole cycle in one serene image? This idea is about creating a balanced, artistic chart of the eight main phases, not a literal sky. You will sketch them in a symmetrical pattern, maybe a circle around a full moon or mirrored pairs across your paper. I love using masking fluid to save the bright moon shapes before I paint the dark, blended wash of the starry night sky. Once that dries, you remove the fluid and paint gentle gray shadows on each crescent, quarter, and gibbous moon. The result feels orderly and dreamy all at once. Trust me, using a compass or template makes the symmetry perfect and keeps the painting relaxing, which proves that structured easy watercolor night sky painting ideas are just as achievable. It is a fantastic way to practice precise shapes and soft gradients. When you are looking for your next project, check out these small painting ideas for beginners. Does that not look stunning?
Framing Considerations For Archival Watercolor Preservation
You must use UV-protective glass or acrylic to shield your delicate pigments from fading over time. Direct sunlight will bleach those beautiful indigos and violets, so this is a critical step. A deep mat or spacer creates an air gap between the glass and the painting surface, preventing any potential moisture transfer. For the most archival presentation, choose an acid-free mat board and backing to ensure no discoloration touches your work. The frame itself should be sealed at the back with dust cover paper to keep environmental pollutants out, ensuring your finished collection of easy watercolor night sky painting ideas stays pristine for decades. This entire system protects the transparent glazes and paper integrity for years, letting that night sky stay as deep and vibrant as the day you finished it. Proper framing turns your painting into a lasting piece of serenity.
More Easy Watercolor Night Sky Painting Ideas Gallery
Conclusion
Your connection to the night sky is personal, whether it is a memory of a clear camping trip or the quiet peace of looking up from your own backyard. Translating that feeling onto paper is a rewarding practice. For your next step, pick one of these easy watercolor night sky painting ideas that resonated most, and paint it again, this time changing just one element, like the color of the sky or the shape of the silhouette. Each variation builds your intuition for water and pigment. The real magic happens not in perfecting a single piece, but in seeing how your confidence grows across all fifteen of these serene scenes.
FAQs
Q: What basic materials do I need to start a watercolor night sky painting?
A: To start a watercolor night sky painting you’ll need watercolor paper (140 lb/300 gsm recommended), a range of brushes (including a round for stars and a flat for washes), watercolor paints, a palette, masking tape to secure your paper and create clean edges, a cup of water for dips and rinsing, and paper towels to blot—these low-cost items form the essential content of your starter kit.
Q: How do I plan the composition or layout for a night sky watercolor?
A: Plan the composition by deciding which part of the sky will be the focal point (Milky Way, constellation, moon) and sketching light, simple guidelines. Use a low-intensity pencil to mark the horizon and any foreground silhouettes. It helps to search reference images to recommend star placement and lightest areas first; be careful not to overwork the paper.
Q: What is the best technique for painting a smooth gradient night sky?
A: For a smooth gradient, wet the entire sky area first with clean water (wet-on-wet) then apply diluted paint from the darkest tone down to the lightest, working quickly while the surface is damp. Tilt the paper or use a clean brush to help the paint flow; this sort of controlled blending creates a seamless wash and prevents hard edges.
Q: How can I paint stars and keep them looking natural rather than too uniform?
A: For natural-looking stars, vary the size and density: use a small round brush to dot larger stars, and flick a stiff brush or toothbrush for finer speckles. You can also lift paint with a damp clean brush to create soft star halos. Be careful not to overdo it—extra detail can make the sky look cluttered instead of quite atmospheric.
Q: Should I protect any parts of the painting before adding the wash, and what is the best way?
A: Use masking fluid or low-tack tape to protect the lightest parts like the moon or bright star clusters before applying dark washes. Apply with a fine tool or a dip into the masking fluid from the bottle; once the wash is dry, remove the mask carefully to reveal crisp highlights and preserve the paper’s natural whites.


