


Selecting Foundations And Adhesive Bonding Strengths
When exploring button art and craft ideas, heavy-bodied gel adhesives become your best friend for any canvas or wood foundation because they fill the gap under each round without flattening its shape. This specific formula gives you a generous open time to adjust your arrangement, but it also sets up strong enough to hold items at different heights for that dimensional surface you want. Industrial-strength clear formulas prevent that heartbreaking moment months later when a piece starts shedding its parts. You need to press each piece firmly into a generous dot of bonding agent to seat it, avoiding visible seepage that ruins your clean lines. The right bond means your finished work holds its tactile relief for years.
Curating Color Palettes From Found Button Collections
For most button art and craft ideas, the magic happens when you sort your found pieces by material first, grouping glossy plastic with matte wood and iridescent shell to see their true visual impact. This method reveals the subtle gradients within each type, letting you build a palette based on texture and light reflection, not simply flat hue. Limiting your palette to two or three dominant materials creates a cohesive piece rather than using every single piece you own. Place a small iridescent item over a larger matte one to create deliberate color-shifting patterns and depth. Your final arrangement should feel rich and dense, with minimal distracting background showing through.
1. Create a Pastel Floral Button Monogram Alphabet
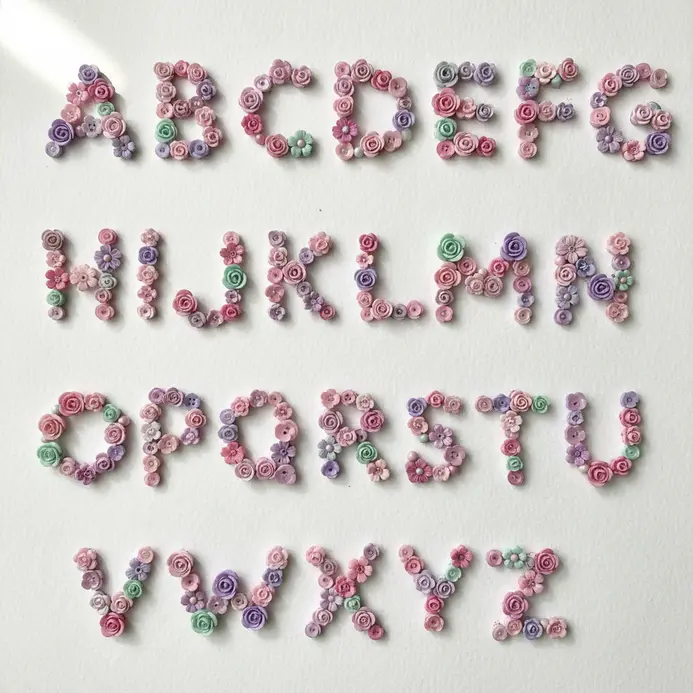
Ever wanted to make something that feels both personal and incredibly soft? This pastel monogram fits perfectly into your favorite button art and craft ideas and creates a gentle start. You will lightly trace a simple letter shape onto your base, then build it up using a variety of pastel buttons. Tuck tiny artificial flowers like roses or daisies into the gaps for a delicate, vintage-inspired touch.
It feels incredibly satisfying because the mix of textures and soft colors creates a gentle, whimsical effect. I appreciate that this makes a beautiful, personalized gift. For another project using small, colorful components, check out these easy perler bead crafts.
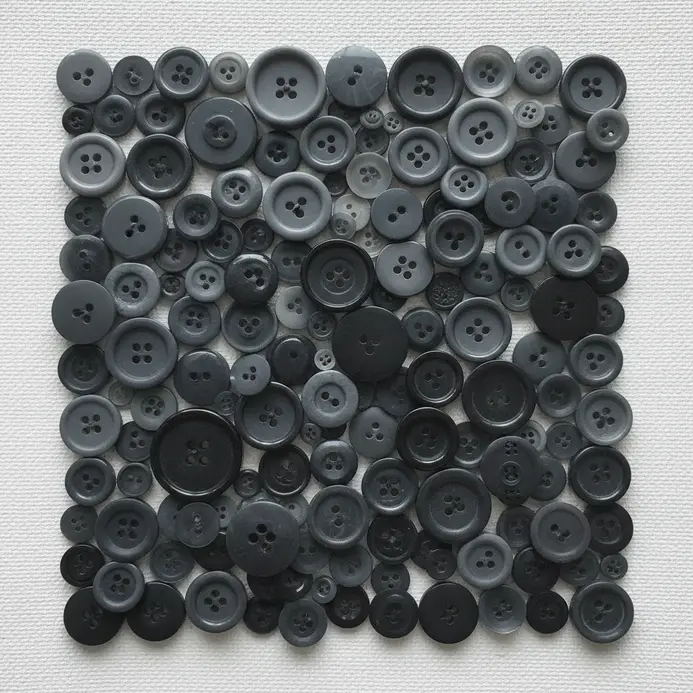
2. Build a Monochromatic Navy Button Mosaic Canvas
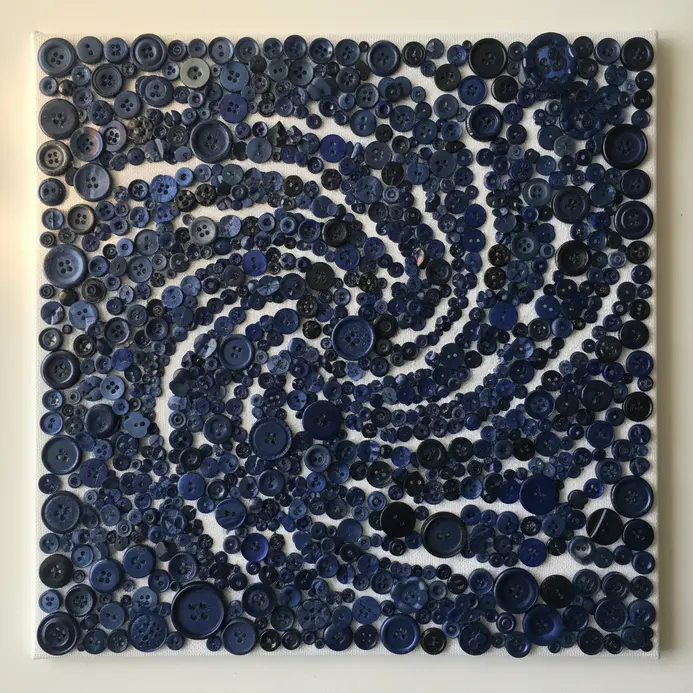
Ever wondered how a single color can look so dynamic? Gathering diverse navy rounds makes this entry among button art and craft ideas especially striking on any wall. You will arrange them on a canvas, creating a rich and sophisticated piece. The secret involves using a strong adhesive like E6000 to secure everything firmly. I love how the final result feels so elegant and tactile.
Trust me, the key depends on collecting a truly diverse assortment. That variety in shape and material gives your mosaic its incredible depth and stops it from looking flat. Does that not sound like a stunning statement piece?
3. Assemble a Vintage Brass Button Shadow Box
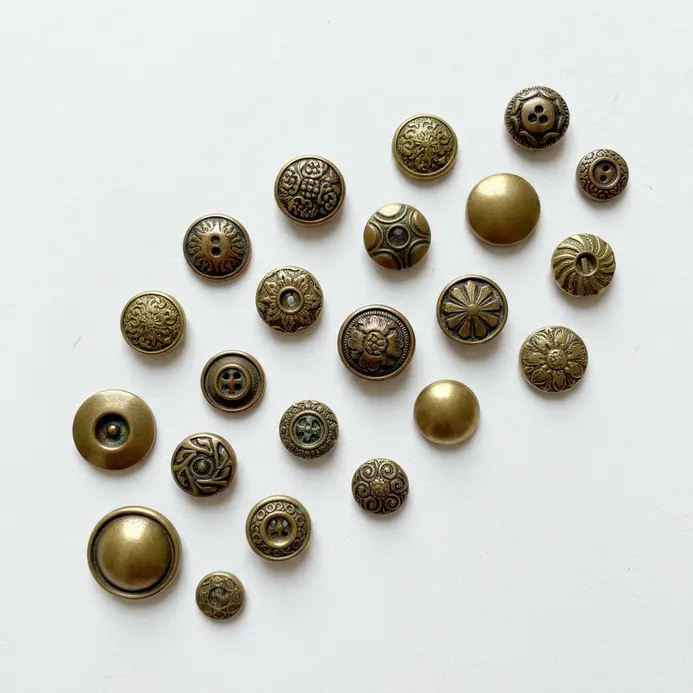
Ever wondered how to give a treasured collection the spotlight it deserves? Assembling pieces for a wooden frame ranks among the most elegant button art and craft ideas you can explore. I love the process of selecting a backing fabric in a rich, dark color to make those brass pieces pop. Arrange them thoughtfully on the fabric covered board, then sew them securely in place for a traditional look that will last.
It feels so satisfying to transform a pile of small finds into a single, stunning piece of wall art. You will feel proud every time you see it displayed.
4. Form a Miniature Button Tree Wall Art
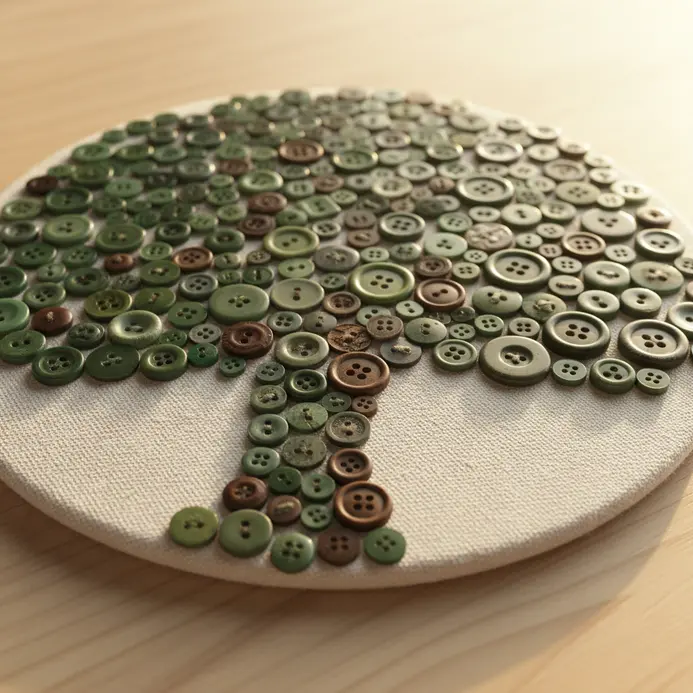
This little tree stands out among cozy button art and craft ideas because it looks detailed but remains simple to build. Start by drawing a simple trunk and branches on a small canvas with a pencil. Then, glue items in shades of green and brown along the branches to form the leafy canopy. I love how this turns a handful of spare rounds into a charming piece. For a similar project using small, colorful pieces, take a look at easy perler bead crafts. Does that not sound satisfying?
5. Make a Colorful Button Petal Flower Bouquet
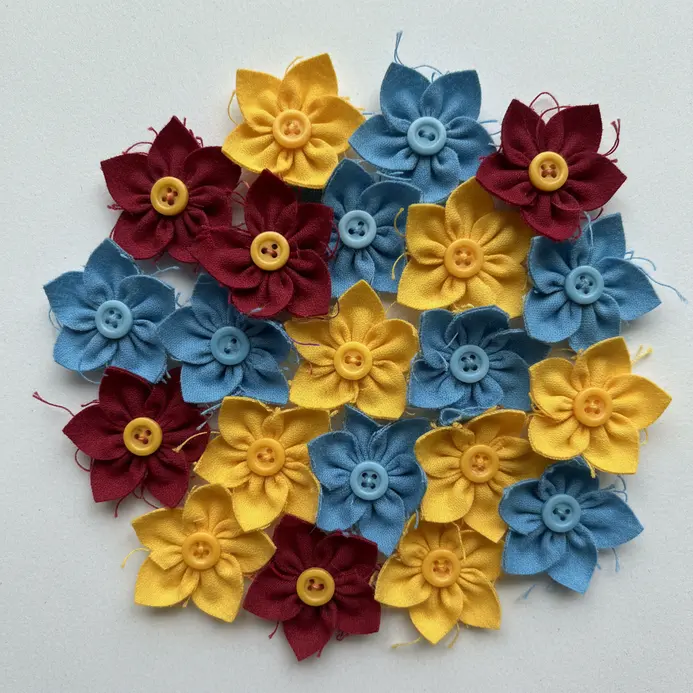
Ever looked at a jar of spare rounds and seen a garden? This flower project stands out in button art and craft ideas by layering pieces from largest to smallest. You will secure them with a hot glue gun before adding a central bead. You then attach floral wire stems and arrange your blooms in a vase. It works because you are giving forgotten materials a beautiful, permanent second life.
Planning your color scheme before attaching rounds makes the final bouquet much more satisfying. That preparation step truly pays off.
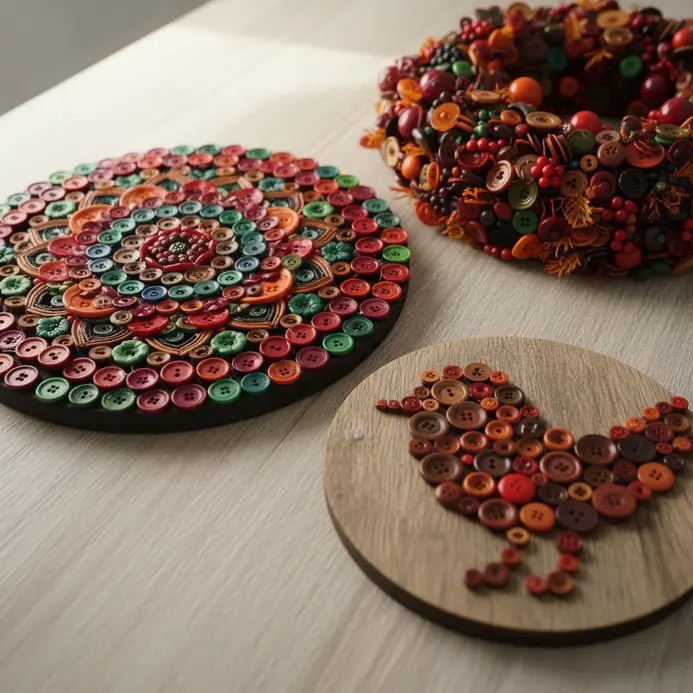
6. Build a Symmetrical Multi-Colored Button Mandala
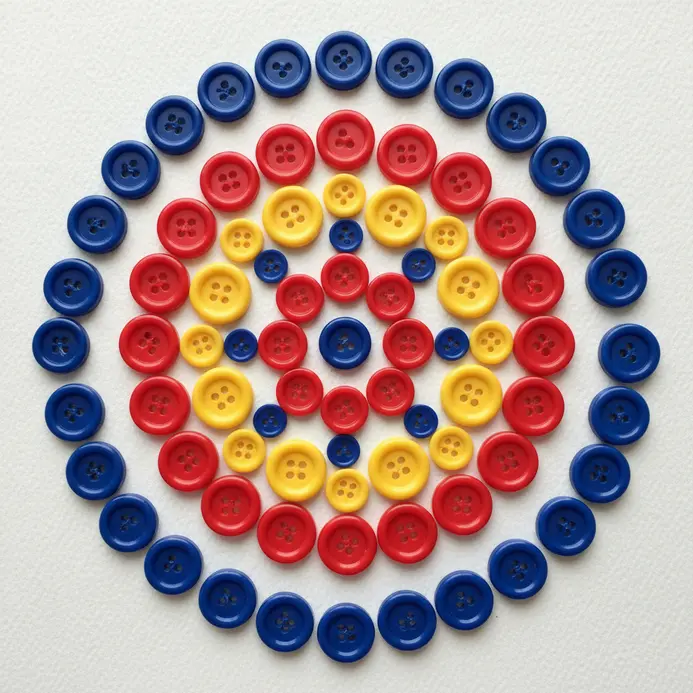
Ever thought a circular design had to be drawn? Placing patterns on canvas brings a calming rhythm to button art and craft ideas, building directly from your stash. Start by lightly drawing concentric circles and dividing lines on your canvas base to guide your symmetry. Then, place your rounds in a meditative rhythm, working outward from a central cluster and repeating colors and shapes in each segment. I love how this process feels both creative and calming.
The final piece serves as a stunning, tactile mosaic of color. For another project that repurposes small items, try these creative clothespin crafts for kids.
7. Layer a Button Wreath for Seasonal Decor
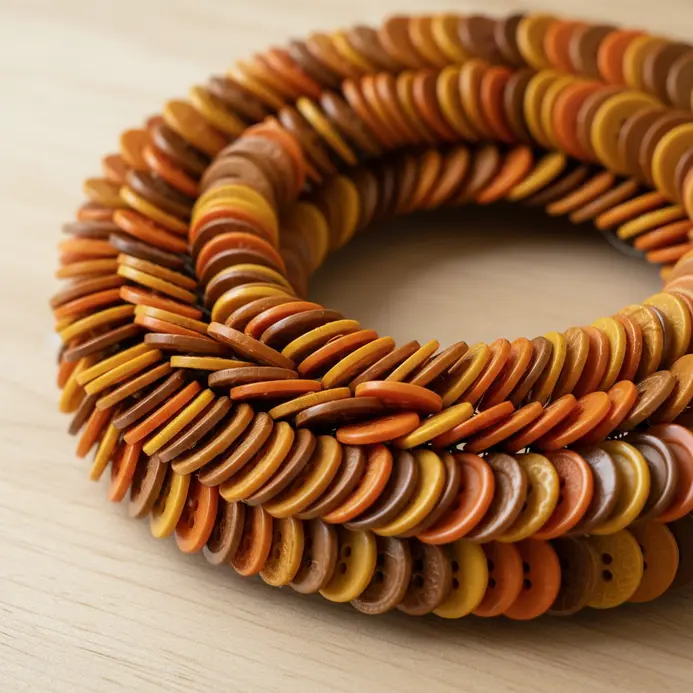
Who would have thought a simple collection could become your favorite year-round display? This layered wreath easily joins seasonal button art and craft ideas, creating a textured base you can dress up for any holiday. Start by gluing your larger buttons as the base layer onto a wrapped wreath form. Then, fill every gap with smaller ones, overlapping them to build up that wonderful, dense texture.
I love how durable and versatile this piece becomes. Attach your hanging loop before you glue a single round to avoid frustration later. You will feel proud when you swap out a simple bow to match the season.
8. Capture a Rustic Wood Button Bird Silhouette

This rustic bird design looks detailed yet belongs perfectly among simple button art and craft ideas because the process stays wonderfully direct. You start by lightly drawing a bird shape onto a painted canvas or wooden board. Then, you fill the outline with a mosaic of natural wood buttons, mixing sizes and tones for depth.
I love how the varied textures create a charming feel. Your arrangement dictates the final look, so take your time dry-fitting all the pieces before you apply any bonding agent. The finished display possesses such a warm, handcrafted personality.
9. Assemble Intricate Button Mosaic Geometric Shapes
Geometric patterns often seem challenging, yet precise sketching turns them into reliable button art and craft ideas that transform into vibrant wall pieces. Start by drawing your pattern to scale on your base, using a ruler and compass for exact lines. Then, sort your rounds by color and size before gluing them down to fill each shape.
I love how this methodical process turns into such a vibrant, textured result. It provides a fantastic way to clear out a storage bin and create striking decor. Consider comparing this method to some paper craft ideas for office desk projects.
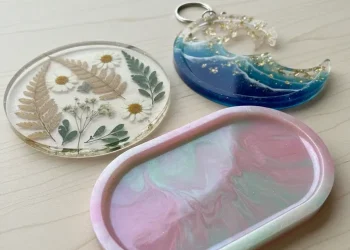
10. Create Pressed Flower Button Resin Pendants
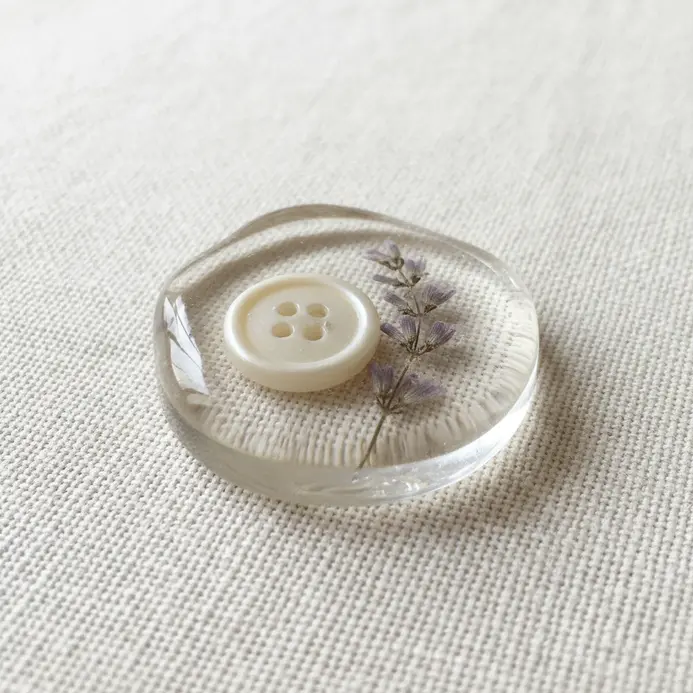
Ever wanted to wear a little piece of a beautiful garden? Setting dried flora into clear molds brings wearable beauty to button art and craft ideas without compromising delicate details. You will place tiny, dried flowers into a silicone button mold and fill it with clear epoxy resin. Once it cures, you hold a glossy, durable pendant that captures nature perfectly.
I love how this turns a fragile, temporary bloom into a lasting treasure. Trust me, the magic arrives when you pop the finished piece from the tray and see those petals suspended in clear resin. The result is absolutely stunning.
11. Apply Metallic Button Embellished Statement Clips
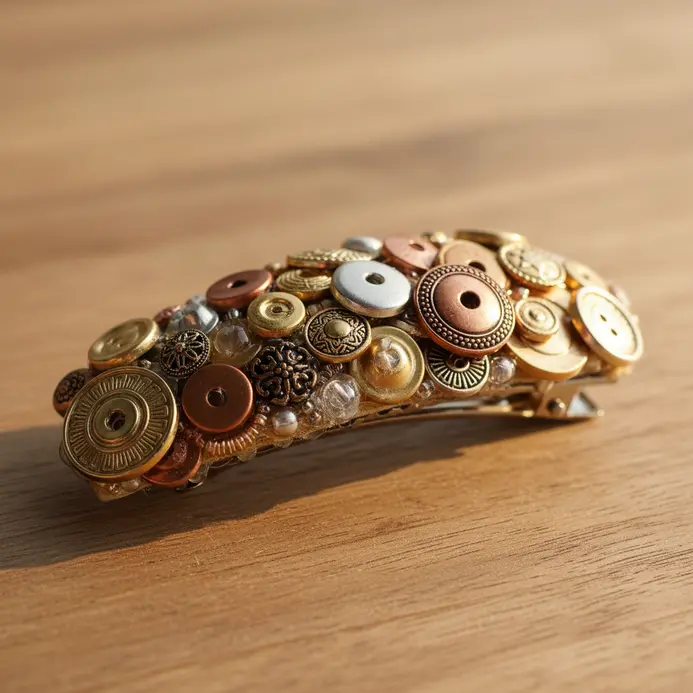
Ever feel like a plain hair clip or bag strap needs a bit of sparkle? Adding single decorative pieces instantly elevates modern button art and craft ideas without permanent changes. You simply select a gorgeous metallic button and attach it to your chosen clip. I love how a single, well-placed item adds such personality.
Your main choice involves picking the right fastener for the task. Use an alligator clip for hair, a brooch pin for jackets, or a magnetic one for delicate fabrics. Secure it firmly, adjust for balance, and you have a statement piece. Explore creative doily craft ideas for similar inspiration.
12. Build Stacked Button Design Drop Earrings
Ever wondered how to turn a random jar into something you would wear out? Stacking shank pieces onto wire hooks creates personalized jewelry that expands everyday button art and craft ideas. You will thread a piece of jewelry wire through a few shank rounds, making a little stack, and secure it with loops at both ends. Connect the top loop to an earring hook with a jump ring, and you are done.
The magic relies on the mix of textures and sizes you choose. It feels incredibly satisfying to see a playful, unique pair come together in minutes. Trust me, you will want to build pairs in every color scheme.
13. Make a Vintage Button Stretch Cord Bracelet
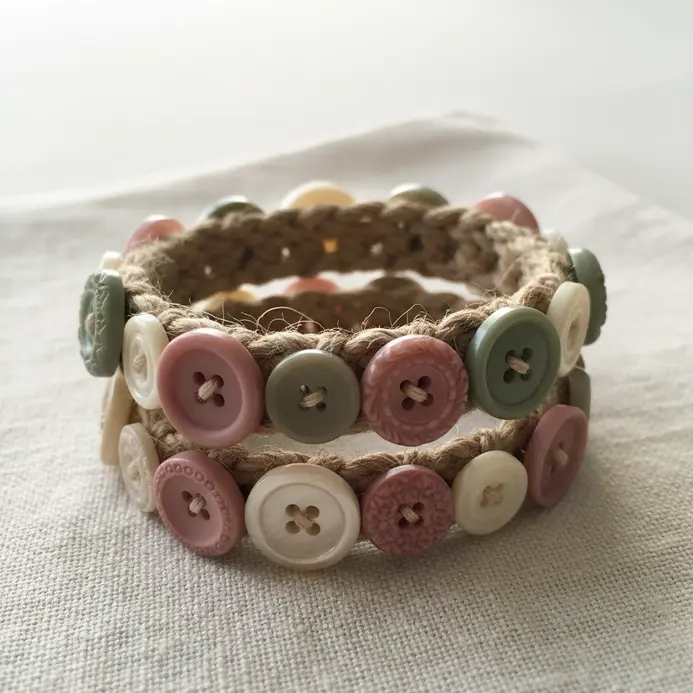
This one surprised me because it looks like a delicate heirloom while remaining among the fastest button art and craft ideas to complete in minutes. The secret involves choosing a reliable stretch cord. You simply thread your chosen vintage rounds, pushing them snugly together on the elastic. Once you reach your desired length, tie a strong knot and trim the ends.
Creating a unique piece of jewelry from forgotten treasures brings such immediate joy. The flexibility makes it comfortable for daily wear.
14. Embellish a Textured Button Picture Frame
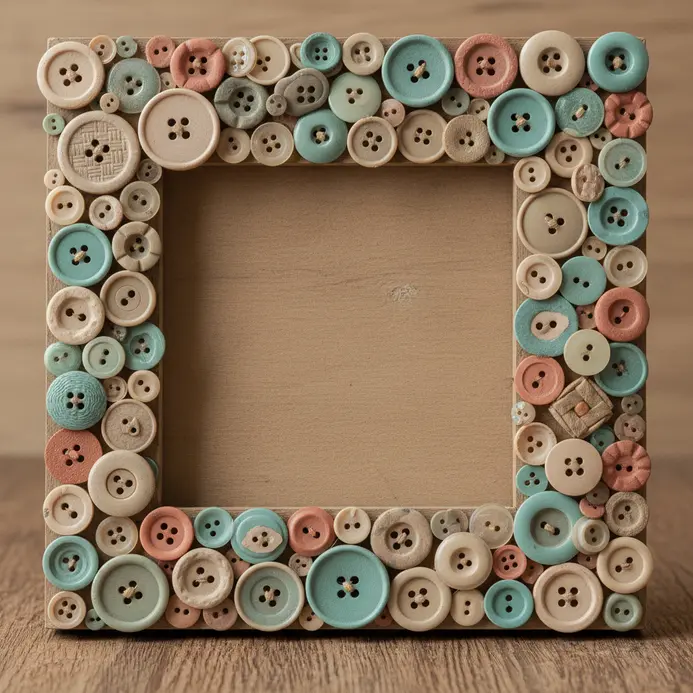
Ever wondered how to make a plain frame feel truly special? Covering wood borders turns basic decor into tactile button art and craft ideas you can admire daily. Start with a textured picture frame and gather a big pile of mismatched rounds. Plan your design by arranging them without adhesive first.
Trust me, this dry fit step saves frustration. Then, use a reliable craft adhesive to permanently attach your mosaic, working in small sections. The result provides a uniquely unique piece of decor that gives old items a beautiful purpose. Review various DIY wind chime ideas for similar projects.
15. Form a Whimsical Button Butterfly Wall Sculpture
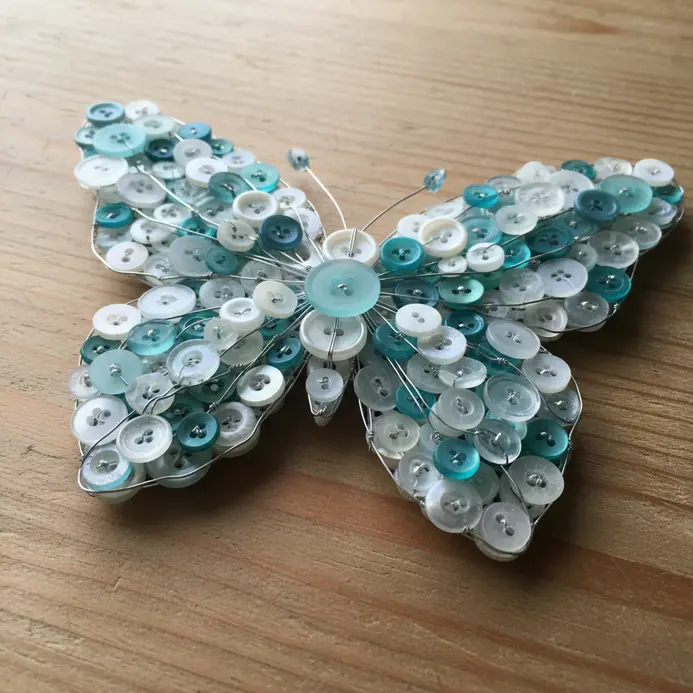
This whimsical butterfly sculpture looks detailed yet proves incredibly forgiving when you test new button art and craft ideas for a fun afternoon. You will start by cutting a simple butterfly shape from sturdy cardboard. Then comes the enjoyable step: arranging all your colorful, mismatched rounds into a beautiful pattern on the wings.
I love this step because there are no strict rules. Layer them, mix sizes, and play with colors until the shape feels balanced to you. The key is completing a dry layout first and snapping a picture before any adhesive touches a piece. This project transforms a humble storage jar into stunning decor.
16. String a Simple Button Garland Window Hanging
Who would have thought a humble jar could create such a cheerful display? Stringing colorful pieces onto floss generates bright button art and craft ideas that catch natural light beautifully. You will thread an assortment of rounds onto a long piece of fishing line or embroidery floss, arranging them by size and color as you go. The light catches them perfectly.
It remains a wonderfully direct project that turns forgotten bits into something special. This serves as an excellent activity to share with easy crafts for kids at home, keeping hands busy safely.
17. Craft a Minimalist Button Studded Fabric Cuff
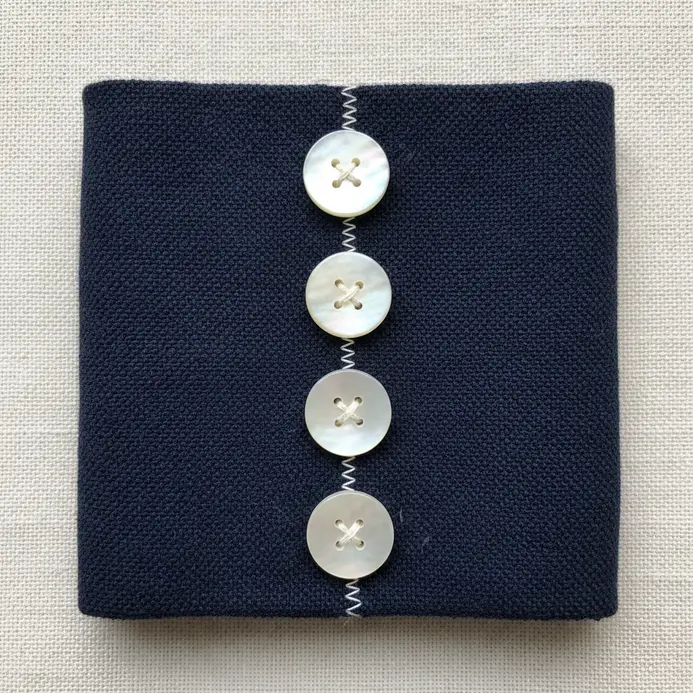
Ever wanted an accessory that feels custom yet remains direct to assemble? Stitching clean lines into fabric bands produces minimalist button art and craft ideas with polished hardware details. You will cut a strip of sturdy fabric like denim or canvas, fold and stitch it into a neat band. Then you add screw-back button studs as both the closure and decoration.
I love this piece because it pairs with so many outfits, delivering that satisfying touch of personal style without fuss. Try it and feel the immediate upgrade.
18. Build a Detailed Button Coastal Anchor Art
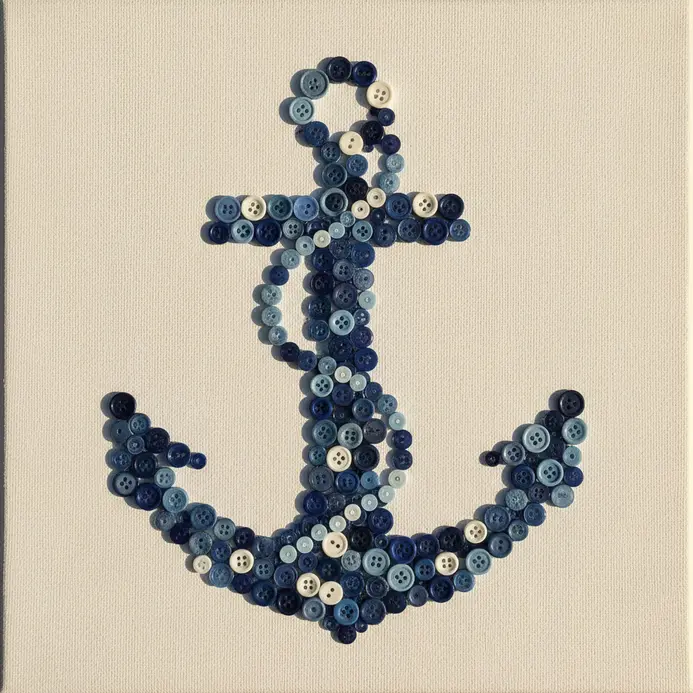
This coastal anchor picture looks detailed but stays remarkably approachable for anyone testing fresh button art and craft ideas on a weekend. You will outline an anchor on your canvas, then completely fill the shape by gluing down a huge assortment of rounds. I love starting with the largest buttons first to block out the main silhouette.
Filling every gap with smaller pieces in your chosen color palette creates wonderful texture. The result feels both nostalgic and fresh, adding a handmade touch to any room. That layering process brings deep satisfaction.
19. Create Abstract Layered Button Canvas Art
Ever wondered how to turn loose pieces into stunning decor? Layering assorted circles onto painted surfaces delivers abstract button art and craft ideas with rich depth. I love starting with a strong craft adhesive to secure my biggest rounds first, then filling every gap with smaller ones. The tactile result feels personal and unique, making it ideal for displaying a cherished collection. Pair this with other fun Halloween craft ideas for seasonal variety.
20. Make a Cute Button Heart Pattern Wall-Hanging
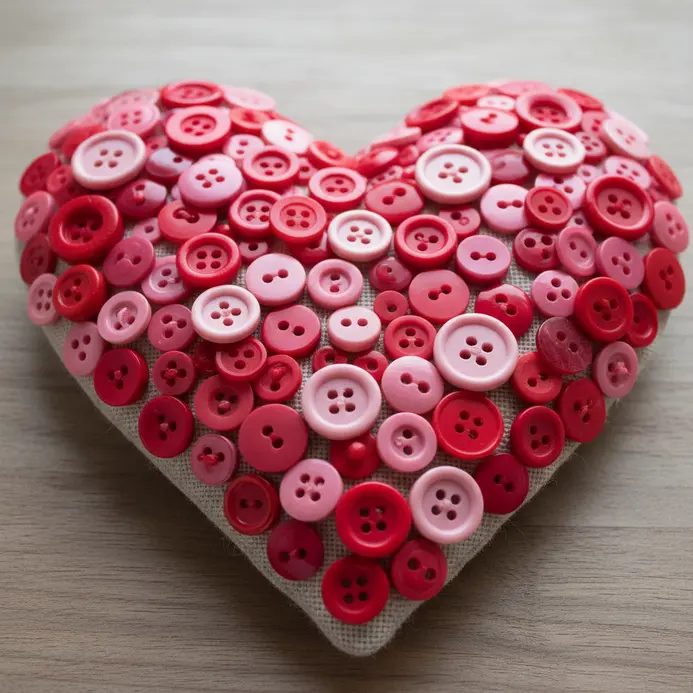
Who knew a jar of old rounds could become such a sweet display? Tracing simple shapes onto fabric bases generates charming button art and craft ideas for beginners seeking quick wins. You will arrange a mix onto a stretched canvas to create that three-dimensional look we love.
Your first step must be to do a dry fit. Lay out all your pieces inside your traced heart before touching any bonding agent. This lets you play with the pattern and fill gaps perfectly.
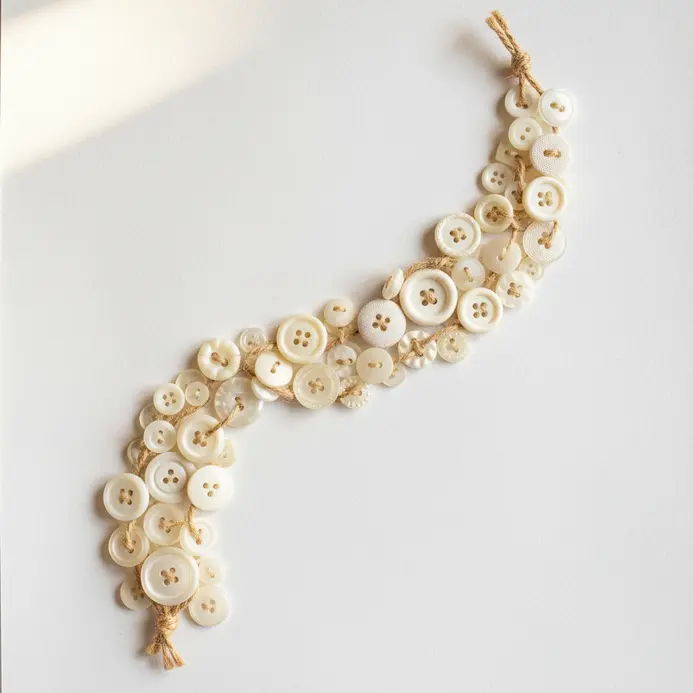
21. Assemble an Elegant Pearl Button Wedding Keepsake
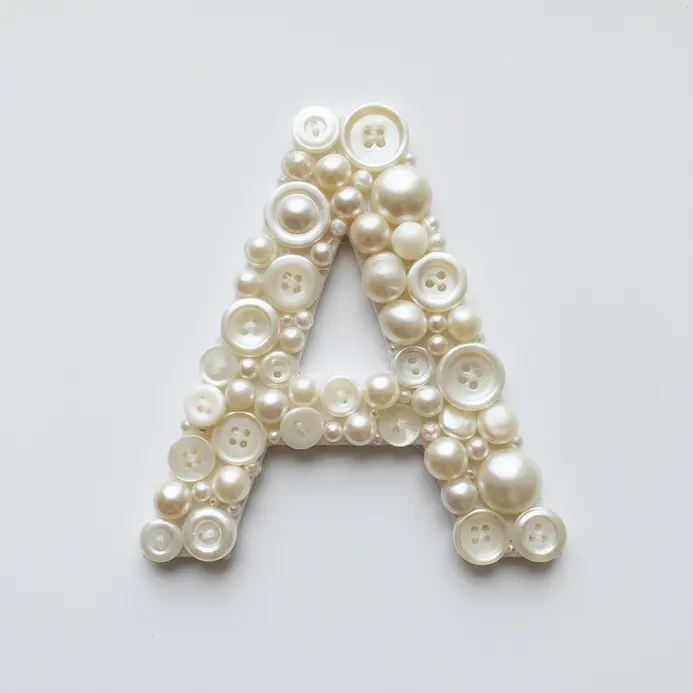
Who knew those delicate rounds from a wedding dress could become such a sentimental display? Preserving delicate pearls inside frames creates elegant button art and craft ideas for special keepsakes. You carefully arrange the pieces, mixing sizes and shades of cream and ivory, and secure them with acid-free glue.
The result forms a museum-quality piece that transforms garment details into a lasting memory. It feels deeply personal and looks beautiful daily. Explore simple Christmas craft ideas for more seasonal projects.
22. Embellish a Button Decorative Keepsake Box
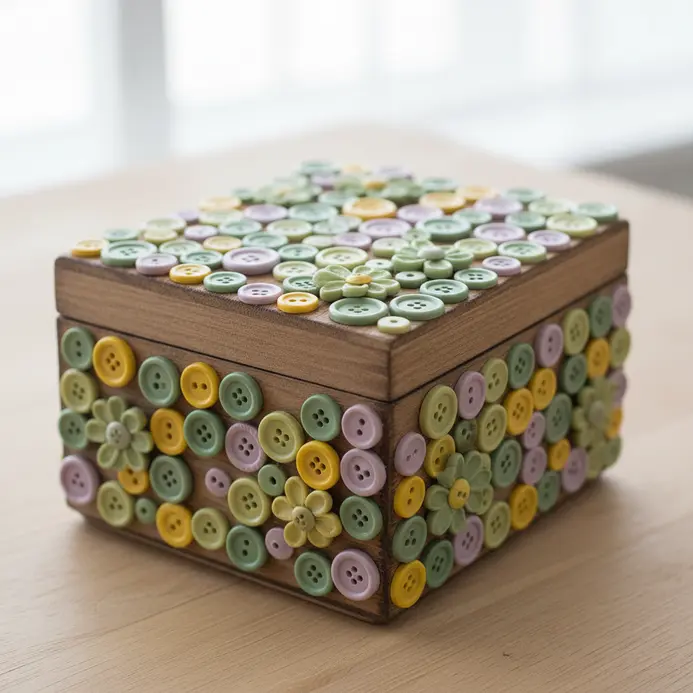
Who knew a simple box could become such a personal treasure? Designing floral motifs onto stained wood generates decorative button art and craft ideas you will proudly keep. You will start by planning the layout, laying your rounds on paper cut to the box dimensions.
Then, apply a strong craft glue to adhere them, creating a wonderfully tactile surface. The final container feels as special as the items it will eventually hold inside. Texture drives the entire charm here.
23. Form a Small Button Owl Branch Portrait
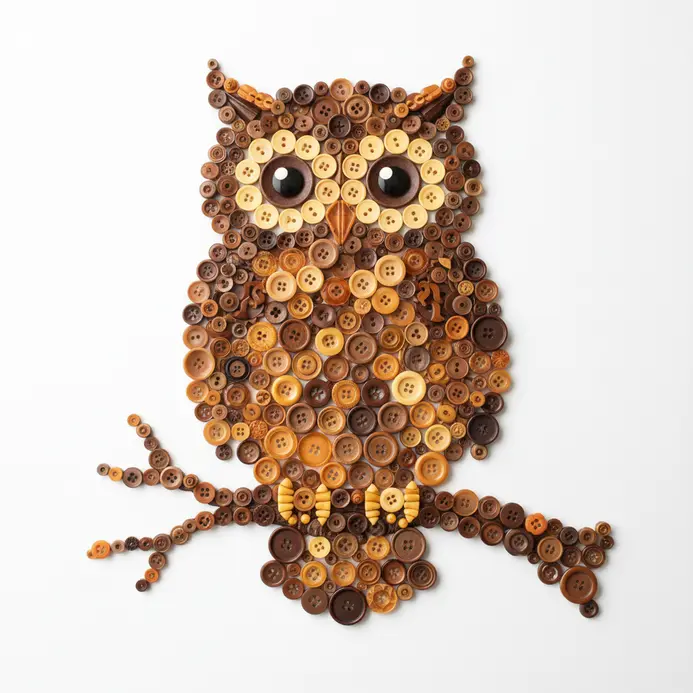
Ever wanted to make a little forest friend from your storage jar? Sketching animal shapes onto felt produces woodland designs that feel wonderfully handmade. Start by drawing an owl on brown felt and cutting it out. Then, glue a mosaic for the body, using larger ones for the eyes and a small triangle for the beak.
That transformation turns ordinary bits into rustic art. Trust me, seeing the finished creature perched on its branch brings immediate joy. The texture really shines here.
24. Create Bright Button Star Ornament Set
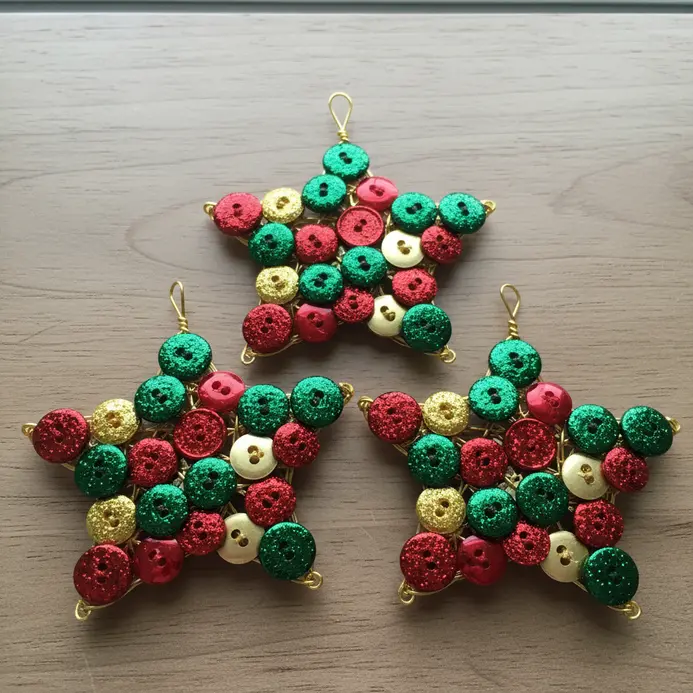
Ever wonder how to use that spare collection? Glowing bright pieces onto star blanks creates festive holiday projects you will enjoy. Grab a wooden star blank and start arranging your brightest rounds before you glue. I love layering large and small ones for added depth.
The vibrant mix yields cheerful, personalized decor that sparkles on a tree. For similar colorful inspiration, try this easy suncatcher craft for kids.
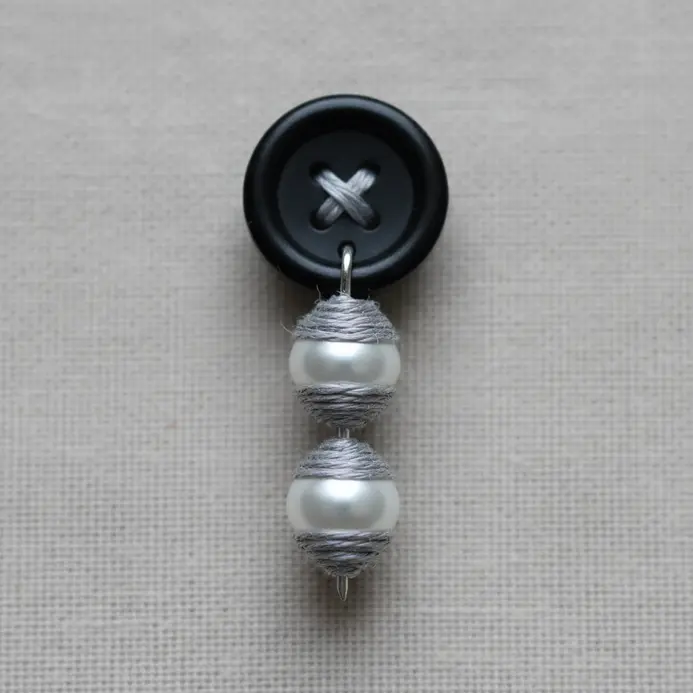
25. Make a Vintage Button Keyring Accessory
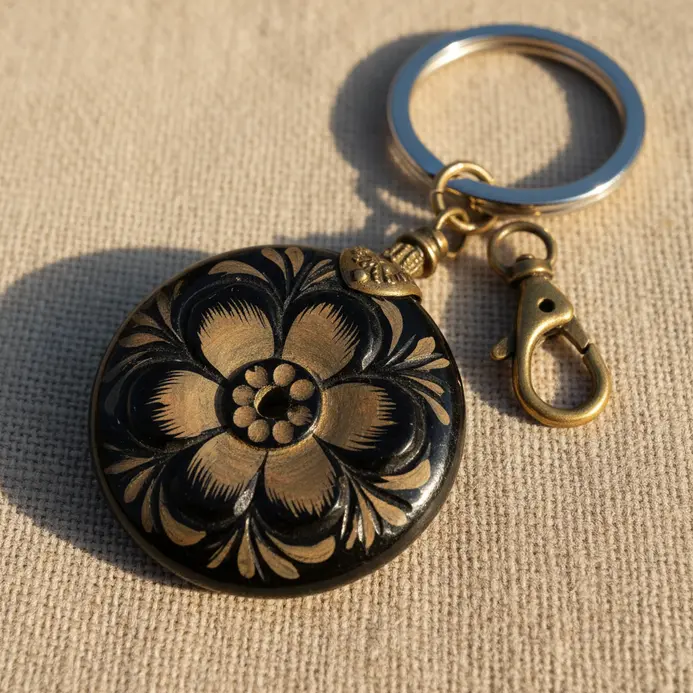
This remains my favorite type of project because it looks like a delicate antique find yet takes under fifteen minutes. Start by picking a few vintage shank buttons you love, mixing sizes and colors for charm. Use your round-nose pliers to twist open a jump ring, avoiding pulling it apart.
Thread it through a loop and onto your keyring, then twist it closed securely. The sound might feel technical, but it proves easy after one try. You will adore how each combination tells a different story.
26. Build Felted Button Forest Scenery Art
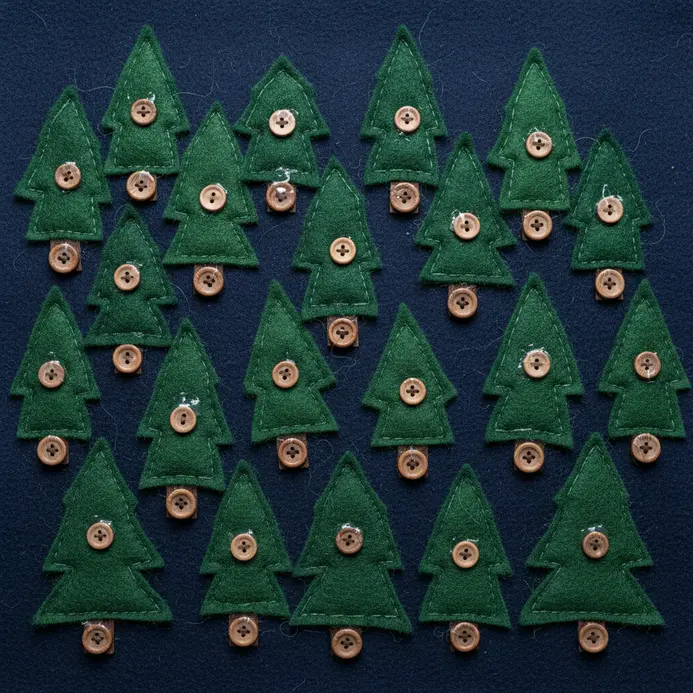
Ever thought of making a woodland scene you can touch? Combining a soft needle‑felted wool background with shiny textured rounds creates a gorgeous three-dimensional landscape. You will build up layers of green and brown roving for trees and ground, then attach pieces for trunks, leaves, and flowers.
The mix of materials delivers wonderful depth, and watching it assemble brings great satisfaction. Arrange all pieces first to perfect the composition before gluing anything down. See these colorful melted crayon art techniques for more inspiration.
27. Craft a Modern Geometric Button Table Runner
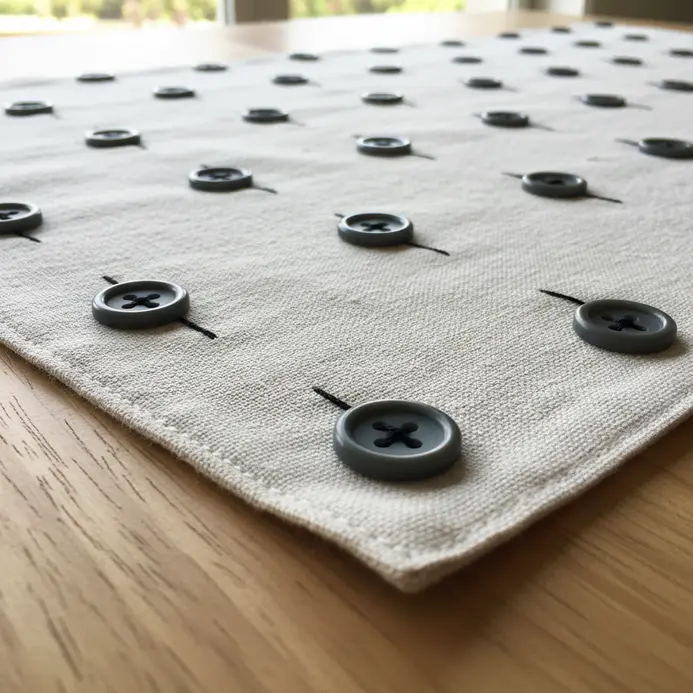
Who knew a simple table runner could become such a stunning art piece? Arranging rounds in clean, sharp patterns like triangles on a solid fabric base creates striking visual interest. I love how the combination of texture and modern lines builds something special for your dining space. Feel proud when those geometric shapes align perfectly.
28. Create a Textured Button Map Wall Mural
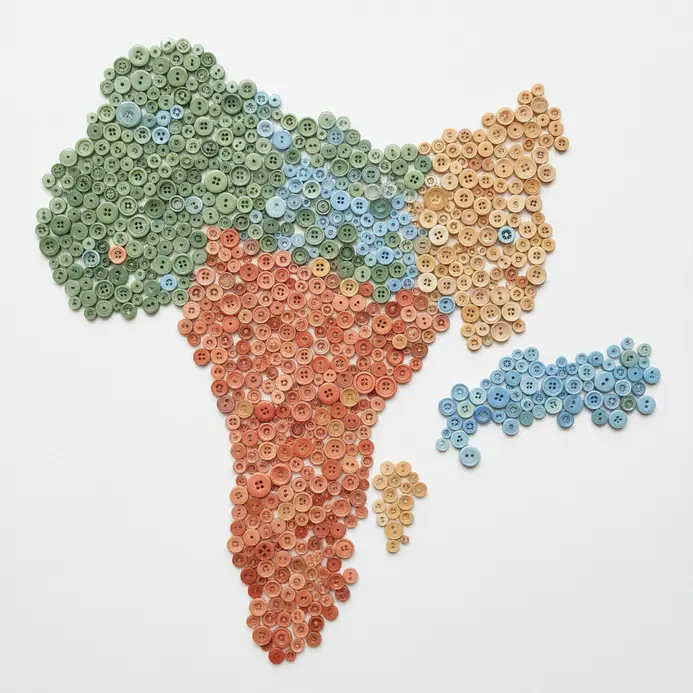
Ever feel like maps are a bit flat? Transforming a simple outline into a tactile masterpiece brings depth to blank walls. Start with a projected map outline on a painted board. Then, fill oceans with blue rounds and build land using sorted greens and browns.
I love how the mix of shiny, smooth, and bumpy pieces creates a landscape you want to touch. Texture tells a story of mountains and plains across the surface. Trust me, the final look delivers lasting impact.
29. Build a Rainbow Color Gradient Button Canvas
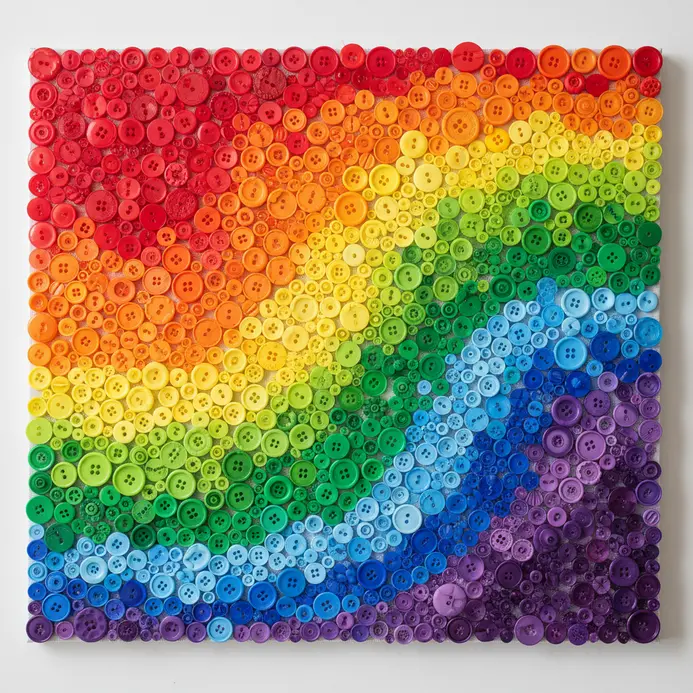
Ever wondered how those sleek, colorful displays on screens are made? Creating a vibrant smooth rainbow gradient using code handles the seamless visual transition. Define two color sets, one for the normal state and one for hover, letting the logic manage the shift. The immediate visual feedback makes it feel responsive and alive. It serves as a fantastic way to add a playful touch to a page while learning animation basics. For seasonal inspiration, try these festive wine bottle crafts.
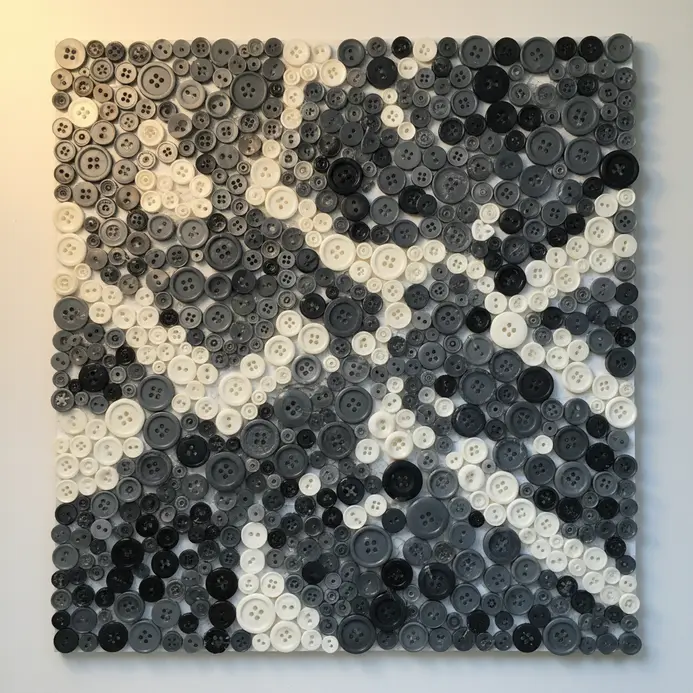
30. Assemble a Detailed Button Portrait Mosaic Panel
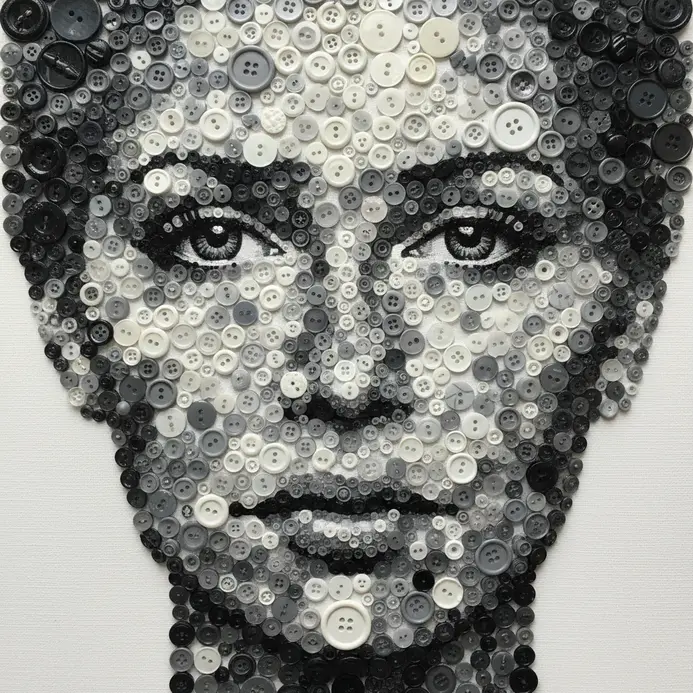
Ever wondered how loose rounds become a recognizable face? It relies on treating them as tiny, tactile pixels. You will start by sorting your vast collection by shade, then adhere them onto a sturdy wood panel following a reference image. Smaller pieces define delicate features like eyes, while larger ones fill background areas. The variety creates incredible depth, making the portrait feel alive. Does that not sound like a rewarding challenge?
Preserving Texture Through Clear Acrylic Sealant Finishes
A few light coats of a matte acrylic spray varnish serve as the final, essential step to lock in all that beautiful texture without adding distracting shine. This type of sealant settles into crevices, protecting the adhesive bond while stopping dust from collecting in hard-to-clean gaps. You want to apply it in a well-ventilated space, holding the can roughly twelve inches away and using a sweeping motion to avoid drips. This quick process safeguards weeks of careful work, ensuring the tactile relief remains the star. Your finished piece will display a uniform, protected surface that feels polished and complete.
Conclusion
Your collection serves as more than a simple stash of supplies. It acts as a palette of tiny histories and textures waiting to become something that reflects your eye for detail and handmade love. Picking one inspiration that speaks to you, gathering your favorites in a single color family, and arranging them without glue offers the perfect starting point. Let your hands play with the composition until the layout feels balanced. The real magic in these creative sessions happens in that quiet, tactile space of making, long before any adhesive dries completely.
FAQs
Q: What is the best adhesive for button art on canvas?
A: For a strong, flexible bond on canvas, a clear-drying craft glue like E6000 works well. It holds securely and dries transparent, allowing the texture to remain the focal point. Hot glue offers speed but can create visible strings and may not hold heavier pieces as permanently.
Q: How do I plan the layout for a button mosaic before gluing?
A: Start by sorting your pieces by color and size on a large tray. Lay your canvas flat and arrange rounds freely without adhesive, stepping back often to check the composition. Capture a clear photo of your final arrangement to serve as a reference guide and guide your gluing sequence.
Q: Can I mix button materials like wood, metal, and plastic in one piece?
A: Absolutely. Mixing materials adds wonderful depth and visual interest. Consider the final use of the display. For wall mounts, any combination works safely. For wearables like bracelets, ensure metal items stay lightweight and all surfaces remain smooth against skin.
Q: How can I make my button art look more modern and less like a kid’s craft?
A: Focus on a limited, sophisticated color palette like monochromes or soft pastels. Use intentional negative space in your layout instead of filling every surface area. Pay close attention to composition, treating rounds like brushstrokes, and select a high-quality base like stretched canvas or sealed wood.
Q: What should I do with buttons that have sharp or broken shanks on the back?
A: For safety and a flat backing surface, use wire cutters to carefully clip off the shank close to the base. You can then smooth rough plastic edges with a fine nail file. Always wear protective eyewear when cutting metal shanks to prevent injury.


