

Child-Safe Cutting And Adhesive Choices
Choose child-safe scissors with rounded tips and short blades for paper insects, since small hands gain better control around antennae and wing shapes. A washable glue stick keeps construction paper flat without soaking thin pieces, a reliable tip for Bee and Ladybug Crafts for Kids, while liquid school glue suits cardstock joints but needs drying time. Clean recycled cardboard works for sturdy puppets, though adults should check rough edges before children handle it. Keep tissue paper away from mouths because non-toxic materials still need adult supervision and small decorations pose choking risks. Child-safe washable tempera and water-based markers simplify cleanup after assembly. Short sessions prevent rushed cutting, especially when kids add black stripes or ladybug spots. A damp cloth nearby protects tables and sleeves.
Color Planning For Recognizable Insect Details
Pair yellow or golden bodies with black bands before adding details, since strong contrast makes bee shapes readable from across a room. Use golden construction paper for rounded bee bodies, then reserve black paper for stripes, heads, antennae, and legs. White or pale blue cardstock gives wings a clear edge, which helps with Bee and Ladybug Crafts for Kids, instead of letting them disappear against the body. Ladybugs need a red, orange, or yellow oval shell, a black head, a central shell line, and spots in a contrasting shade. Large matching spots look intentional, while uneven tiny dots often distract young makers. Keep flower petals and honeycomb marks larger than the insect’s smallest details. Washable crayons and water-based markers add facial features without muddying color blocks. A paper color sample beside the background reveals weak contrasts before assembly begins.
1. Bright Yellow Paper Plate Bee Craft Display
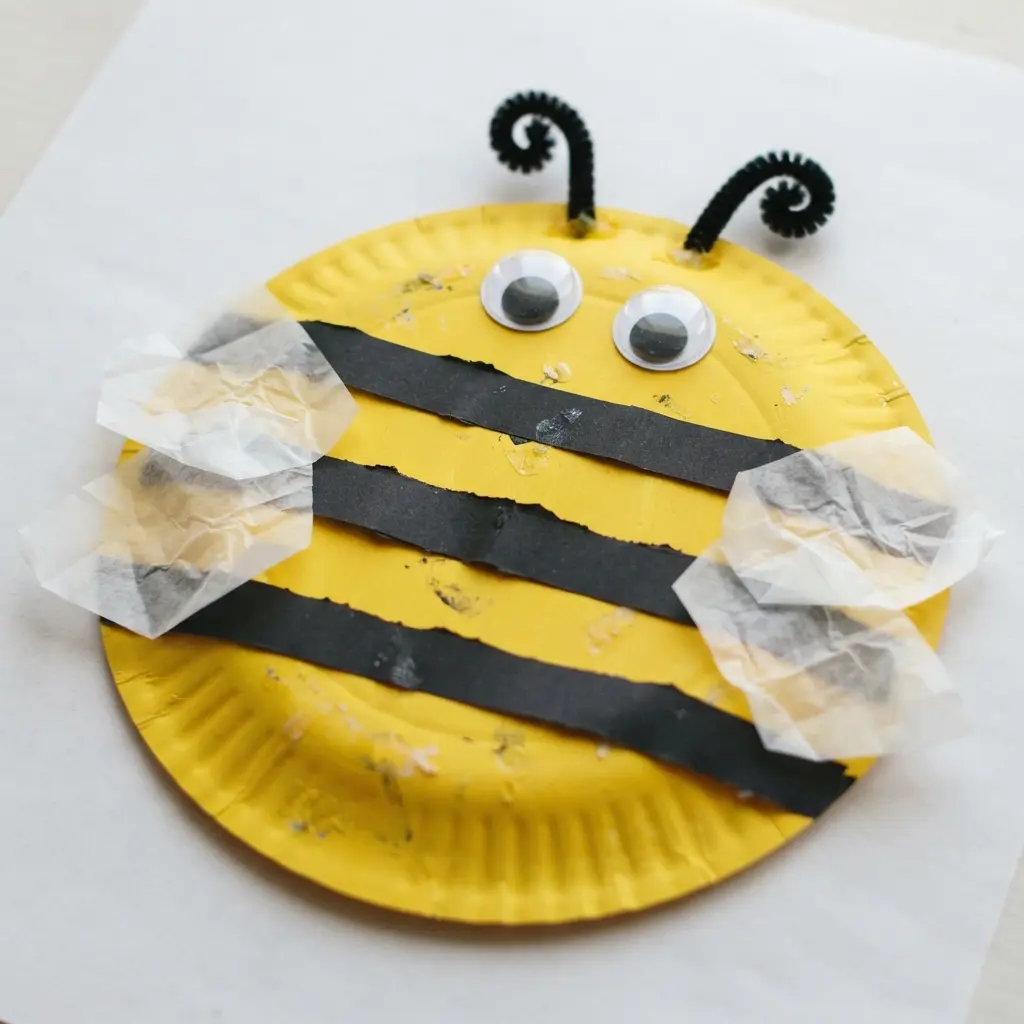
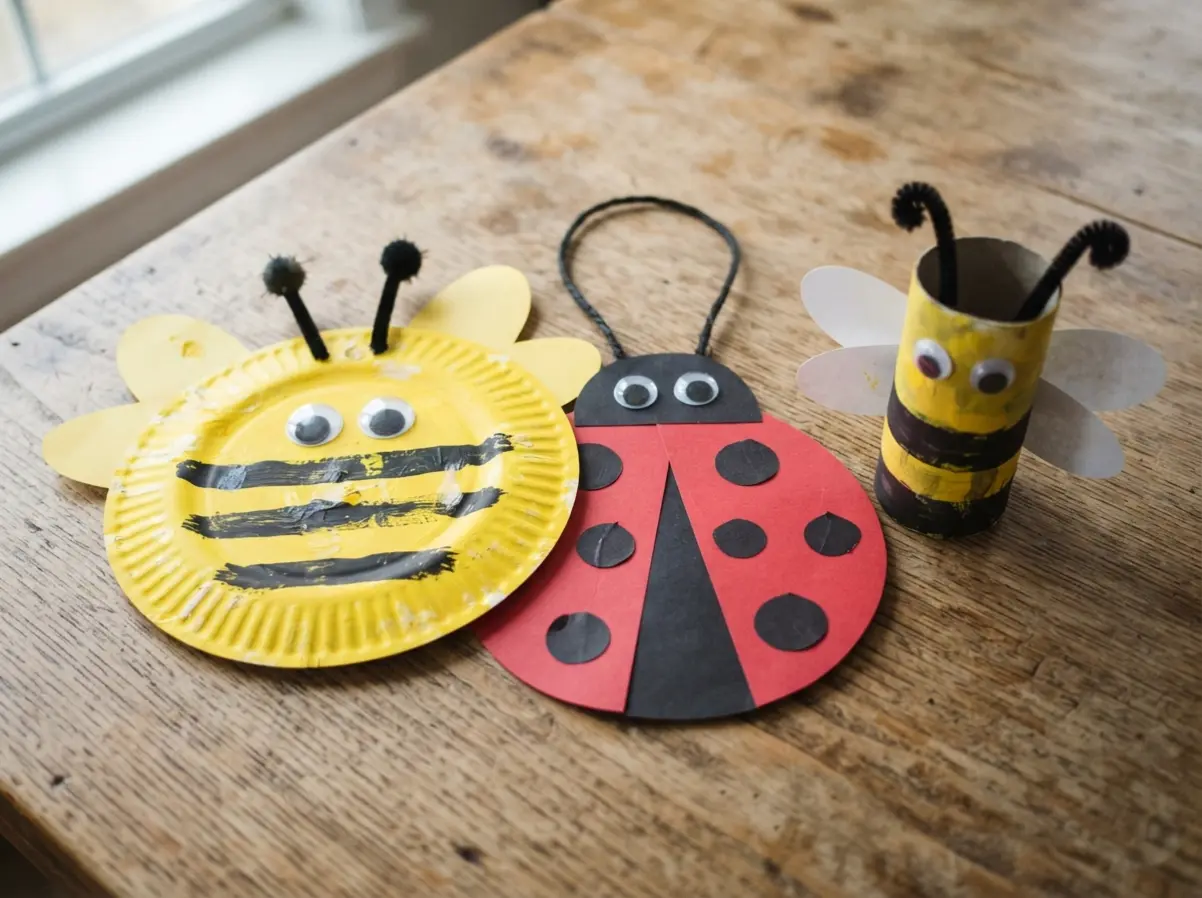
Ever wondered how a few paper plates turn into a cheerful classroom display? Start by painting each yellow paper plate bright yellow, then let the surface dry before adding two or three black stripes with paint or markers. Glue on googly eyes, draw a smiling face, and give every bee its own friendly expression.
Cut white paper or tissue into simple oval wings, then glue the paper wings to the back of each plate. Twist black pipe cleaners into short antennae and attach them after the facial details are finished. I love this order because the plate stays easy to handle while children add the stripes and faces.
Arrange the finished bees on blue or yellow background paper with paper flowers, honeycomb shapes, and a phrase such as “Bee Creative!” or “Our Classroom Is Buzzing with Learning!” Several bees create a welcoming classroom decoration, a common goal for Bee and Ladybug Crafts for Kids, while each child still contributes a personal piece. Use a small amount of glue for neater wings and eyes, and supervise scissors or tiny pieces. Feel proud when every bee joins the display.
2. Red Cardstock Ladybug Wall Hanging Decor
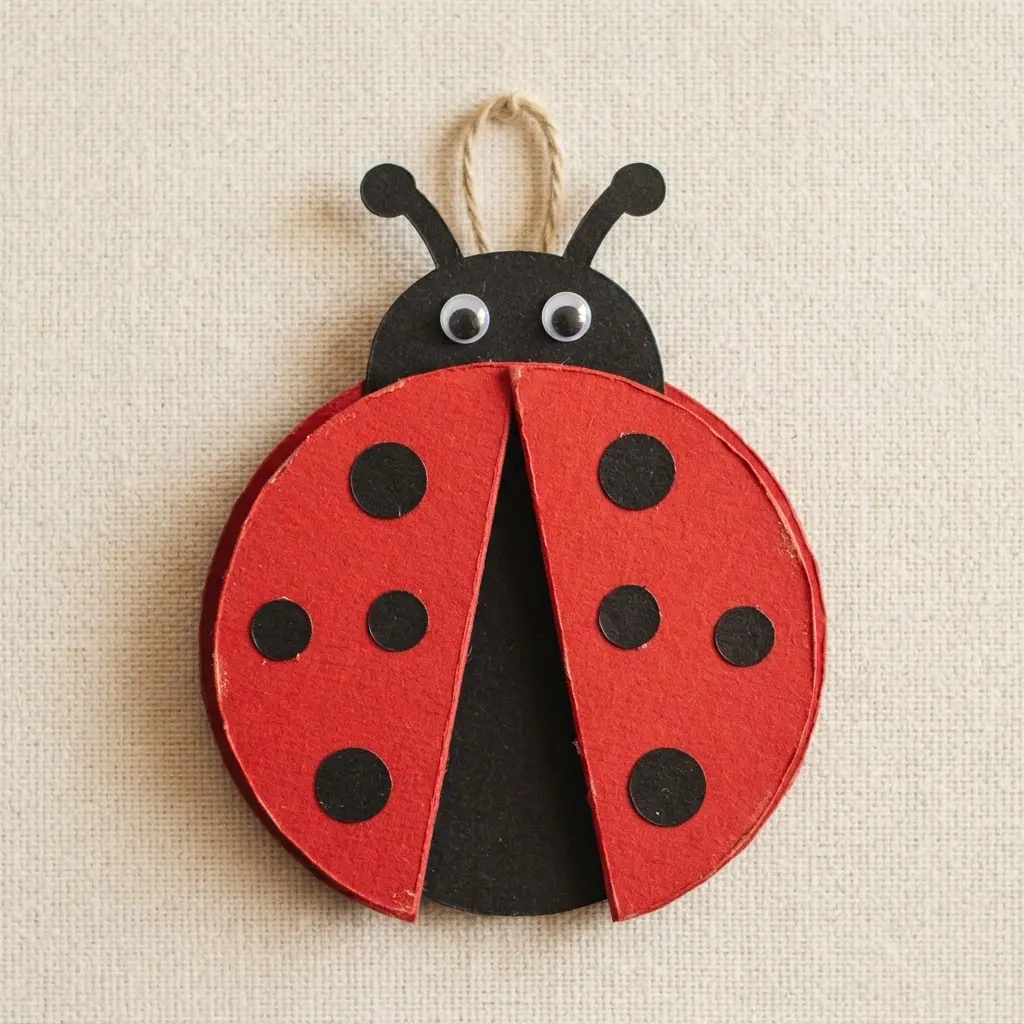
This ladybug wall hanging looks cheerful before you add a single spot, proving how accessible Bee and Ladybug Crafts for Kids can be for young makers. Start with a large red oval from cardstock, then glue a black semicircle along the top for the head. Add a center line with a black marker, keeping it clear while placing small black circles on both sides. Finish the face with googly eyes or white fun paper plate animal crafts, then cut two antennae and six legs.
Sound complicated? It isn’t. Attach the antennae and legs behind the body so the front stays neat, then punch a hole near the top before threading ribbon or string through it. I love this one because the red, black, and white palette makes the insect easy to recognize while giving kids practice with basic shapes. A green cardstock leaf or garden background adds extra color behind the finished hanging loop. Let the ladybug sway from a bedroom wall, classroom display, or sunny reading corner, and feel proud of this sweet paper decoration.
3. Toilet Paper Roll Bee Figure for Small Hands
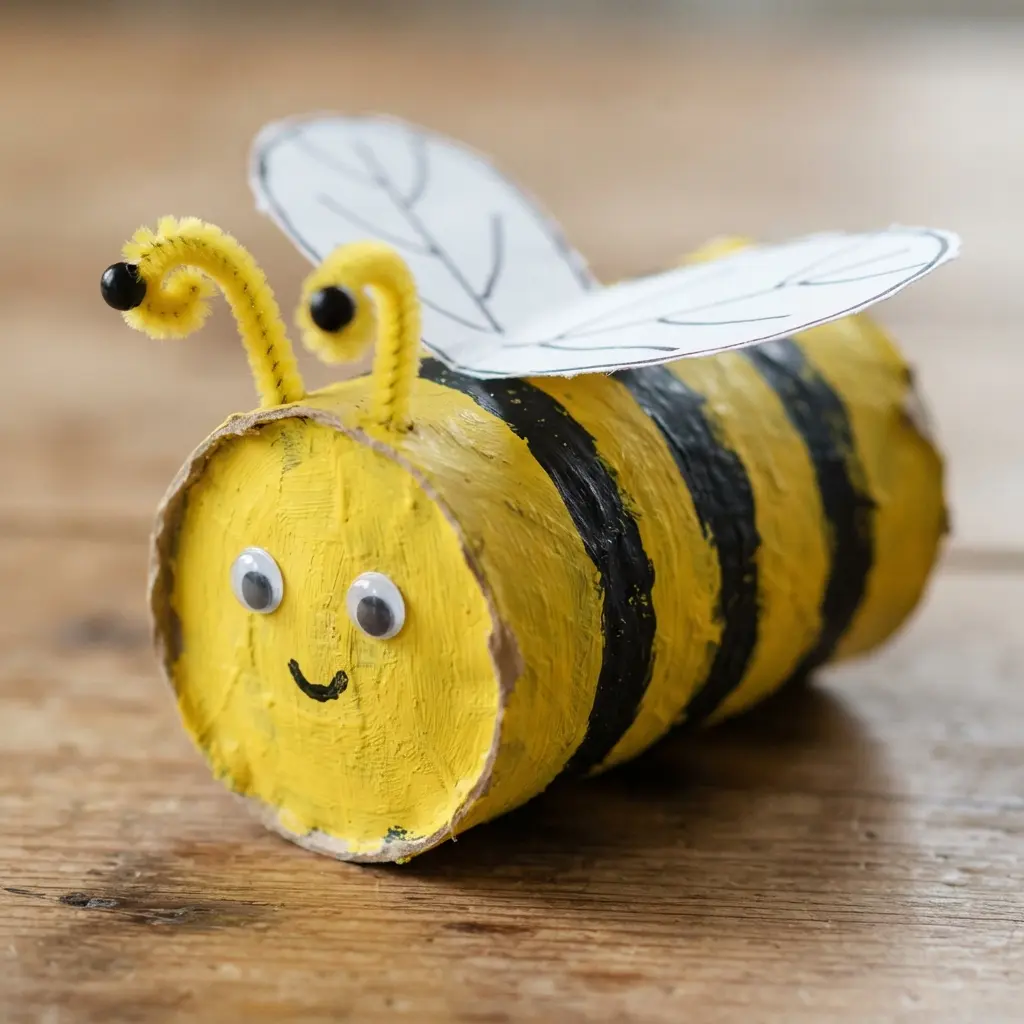
This one is a favorite because an empty cardboard tube becomes a cheerful bee with very little fuss. Start with a yellow-painted cardboard roll, using construction paper instead if drying time feels tricky. Once the base is dry, add two or three black stripes with paint, paper strips, or a marker. Glue pre-cut white wings to the back, then add googly eyes, a smile, and two short antennae. Sound complicated? It is not, and each step suits little fingers.
I love how this project gives children room to make choices while practising painting, gluing, and positioning. A pre-cut paper piece keeps the activity friendly for children still developing scissor skills, while child-safe scissors remain useful for older preschoolers. Keep yellow paint and glue on a covered surface, and wait until the roll is fully dry before adding decorations. Invite your child to add dots, extra stripes, or crayon details for personal flair. Watch their face brighten as a simple tube turns into a friendly buzzing figure.
4. Painted River Rock Ladybug Trio
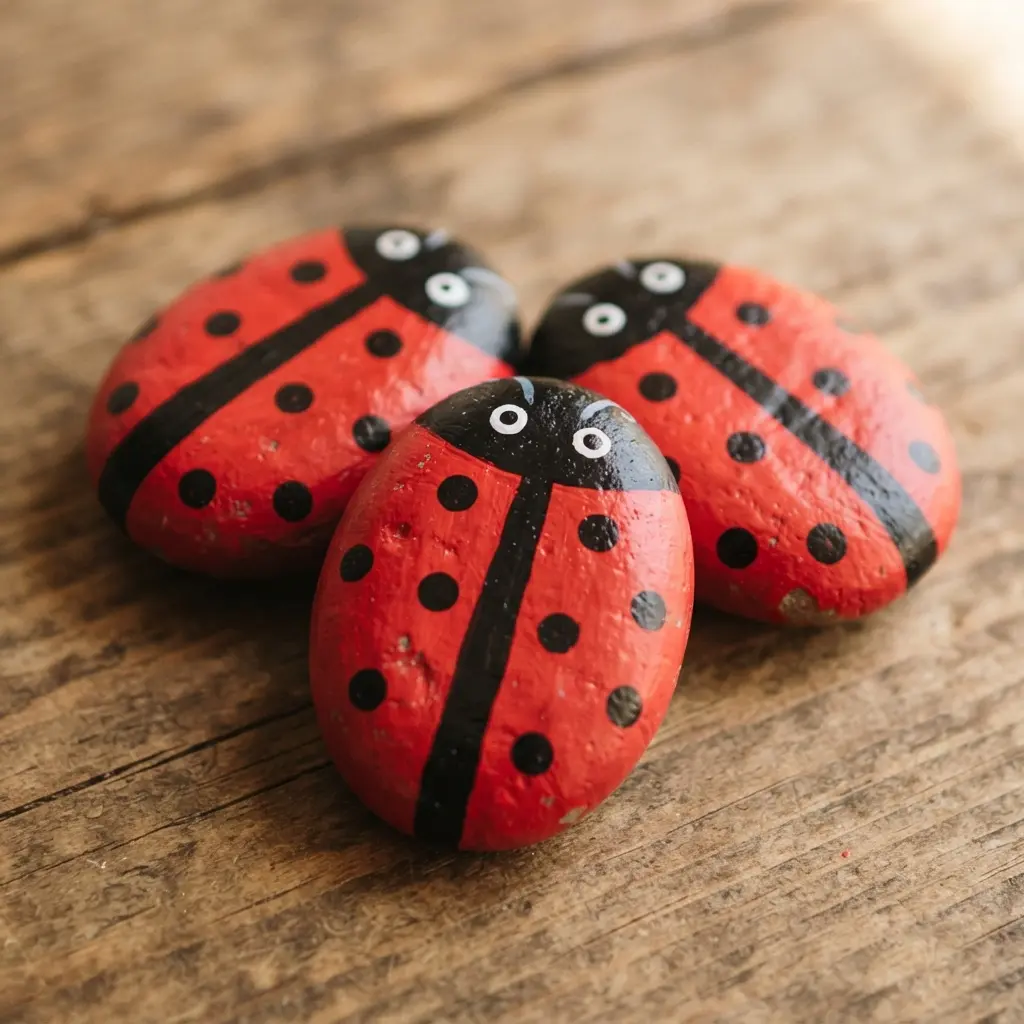
Three smooth stones lined up together look like a tiny ladybug family, with bright red backs, neat black spots, and shiny eyes. Ever tried making a whole insect group instead of painting one stone, a popular twist for Bee and Ladybug Crafts for Kids? I love how one large, one medium, and one small rock create an instant story for a garden or flowerpot. Start by washing the rocks and letting them dry fully before adding a red acrylic base coat.
Once the red paint dries, brush on a black head, a center line, and six spots per rock. Add white eyes with small black details, or press on googly eyes for a playful finish. A fine brush or black permanent marker helps keep each detail tidy, while a protected work surface keeps paint off the table. The clear outdoor sealant goes on only after every painted surface feels dry, with adult help during sealing. This trio feels satisfying because each stone has its own size and personality, yet the matching colors bring the group together. Set the finished ladybugs beside flowers, in a pot, or on a sunny shelf and feel proud of your cheerful little display.
5. Egg Carton Bumblebee Mobile Ornament
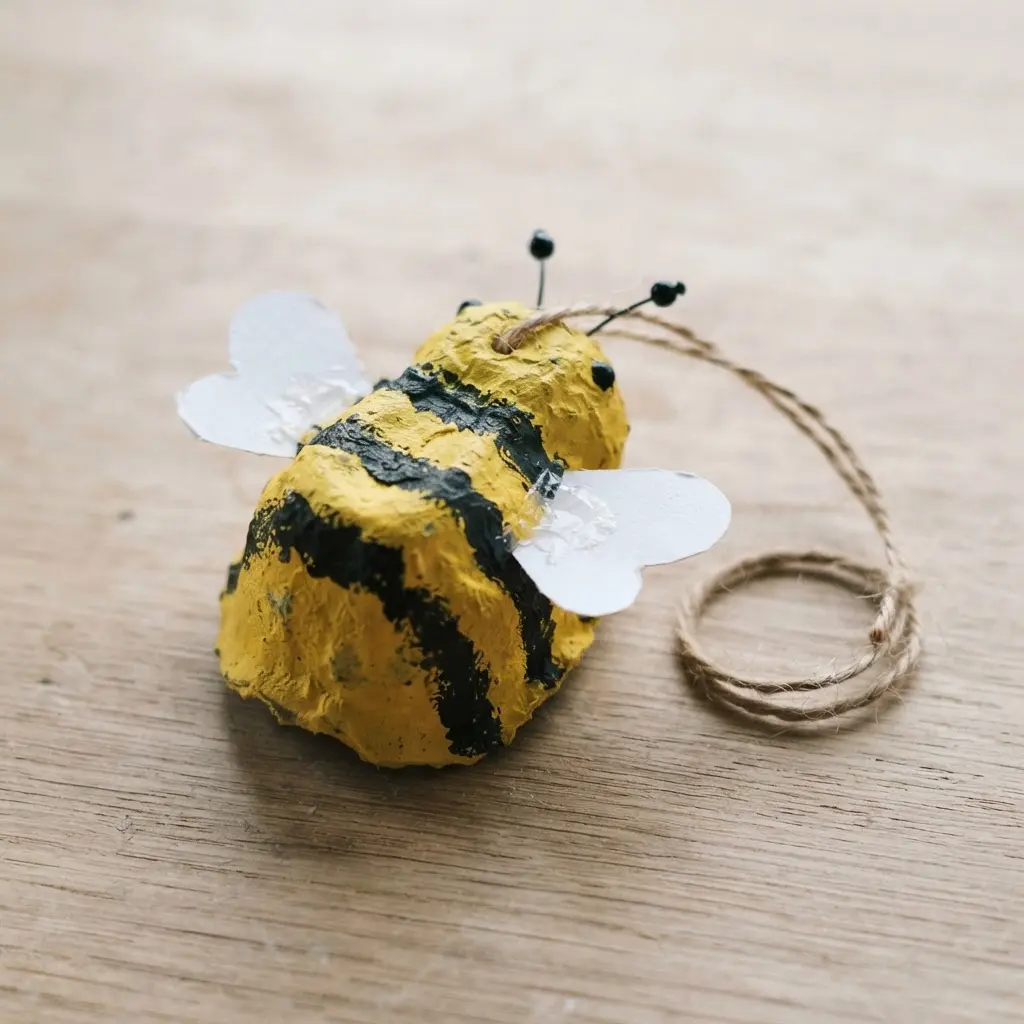
Wet yellow paint is the quickest way to smear bee stripes, so let the base coat dry fully first, a crucial reminder for Bee and Ladybug Crafts for Kids, before continuing. I love this project because one small cup becomes a cheerful bee body with hardly any fuss. Sound complicated? It is not.
Cut one intact cup from a cardboard carton, then cover it with yellow paint. Once dry, add two or three black stripes and paint a black head on the front. Use a marker for round eyes and a smiling mouth, giving each bee its own sweet expression.
Cut two white paper wings and glue them to the back, then punch a hole through the top. Thread string through the opening and tie it firmly. Make several bees, using varied string lengths so each one hangs at a different level from a wooden stick, straw, or pencil. Tie another piece of string to both ends of the crossbar for hanging. A few pipe-cleaner antennae or tiny paper flowers add extra detail. Your little mobile will sway gently and bring instant cheer to a bedroom or playroom.
6. Felt Handprint Bee Keepsake Banner
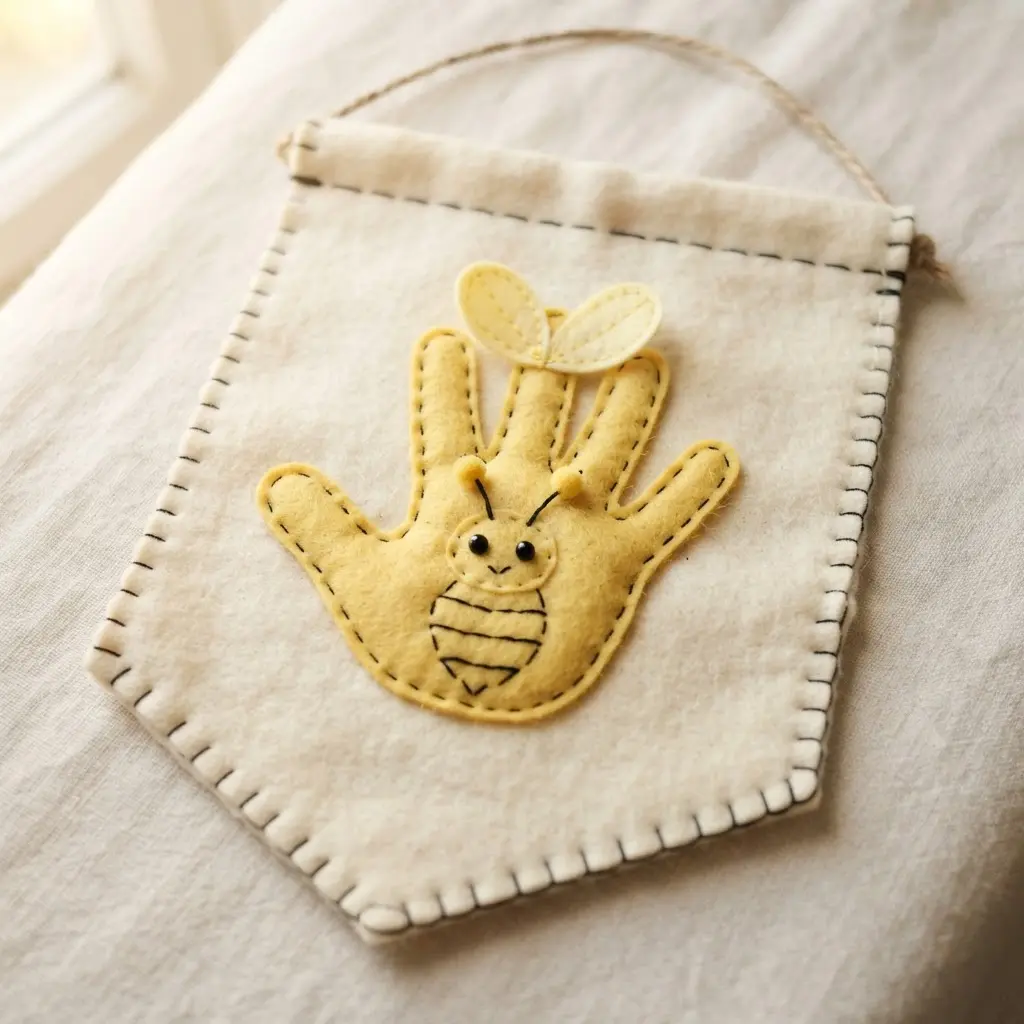
Place a child’s hand on yellow felt, trace around it with a pencil or fabric marker, and cut out the shape. Make one handprint for each bee, keeping the fingers spread so they form a playful outline. An adult should handle hot glue and guide younger children with scissors.
Across each palm, glue thin black felt strips for the bee’s body stripes. Add googly eyes, a small felt smile, two white felt wings behind the body, and short black yarn antennae at the top. Sound complicated? It’s really not, and the finished bees look sweet on green or blue felt flags.
Arrange the flags along ribbon, twine, or yarn, then attach one bee to each flag. Add lettering such as “Bee Happy” or “Sweet Memories,” and write the child’s name and date on the back for a personal keepsake. I love how this preserves each little handprint while giving every child a place in a classroom or spring display. Store the banner flat in a tissue-lined box, and feel proud each time those smiling bees return.
7. Coffee Filter Ladybug Wing Art
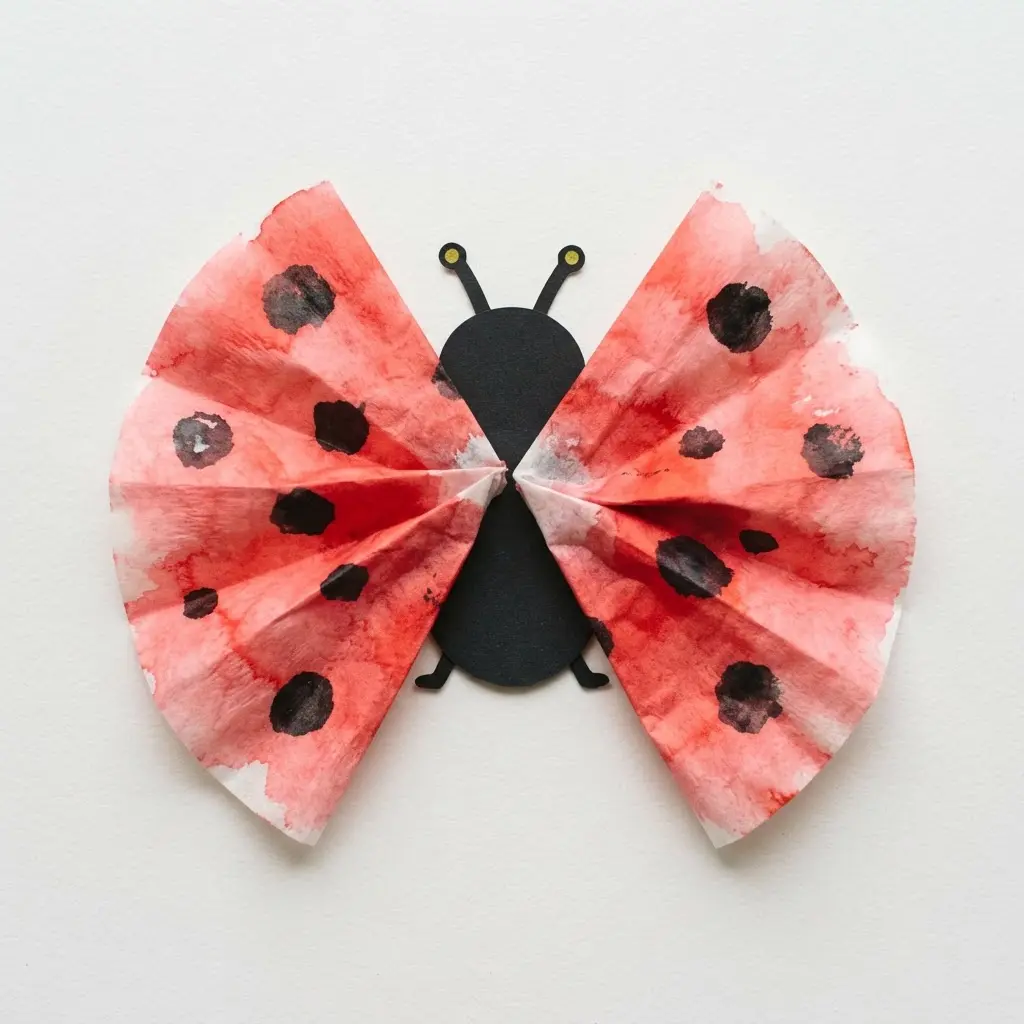
Ever wondered how a plain coffee filter turns into cheerful ladybug wings? I love this project because the paper takes color in a soft, speckled way, a lovely feature of Bee and Ladybug Crafts for Kids. Flatten a white coffee filter on a covered table, then fill it with red washable marker or watercolor. Add a few black spots, leaving red space between them for a clear pattern.
Lightly mist the surface with water from a spray bottle, or dab it with a damp paintbrush. Watch the red spread through the fibers while the black spots soften at the edges. Use a light touch, since too much water weakens the filter and muddies the colors. Set it aside until it feels fully dry before cutting.
Cut the dry filter in half and arrange both pieces behind a black construction-paper body. Glue the wings in place, then add googly eyes, pipe-cleaner antennae, and small paper legs. This project gives children practice with color blending, symmetry, cutting, and gluing in one cheerful activity. Trust me on this one: letting the wings dry first keeps the paper neat and sturdy, so the finished ladybug feels polished.
8. Clothespin Bee Finger Puppet Set
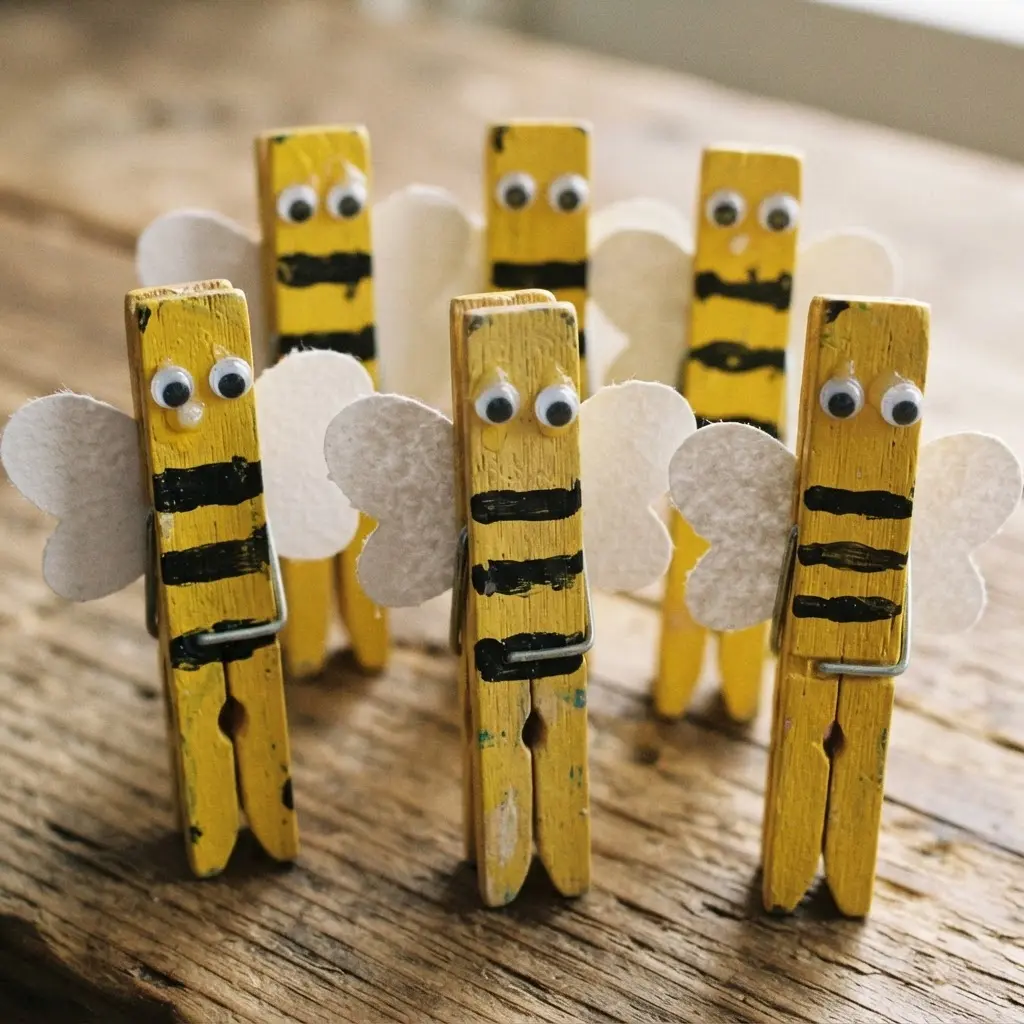
This little bee set brings instant smiles because each wooden clothespin becomes a tiny character for pretend play. Start with alternating yellow and black stripes, coloring the body before adding any decorations. Paint gives a rich finish, while markers keep the activity quick and tidy.
Once the stripes are dry, place googly eyes near the top, then cut small white paper or foam wings for the back. Twist short pieces of black pipe cleaner into antennae and secure them with craft glue. Sound complicated? It is not, and children get to color, cut, twist, and assemble in one cheerful project.
I love making a small bee family with different names and faces. Several puppets turn a few fingers into a lively puppet show, giving children an easy way to build group stories during pretend play. Keep the wings small, use a protected work surface, and wait until every glued piece is fully dry before clipping the bees onto fingers. Feel proud when each little bee gets its own personality.
9. Nature Leaf Bee Collage Picture
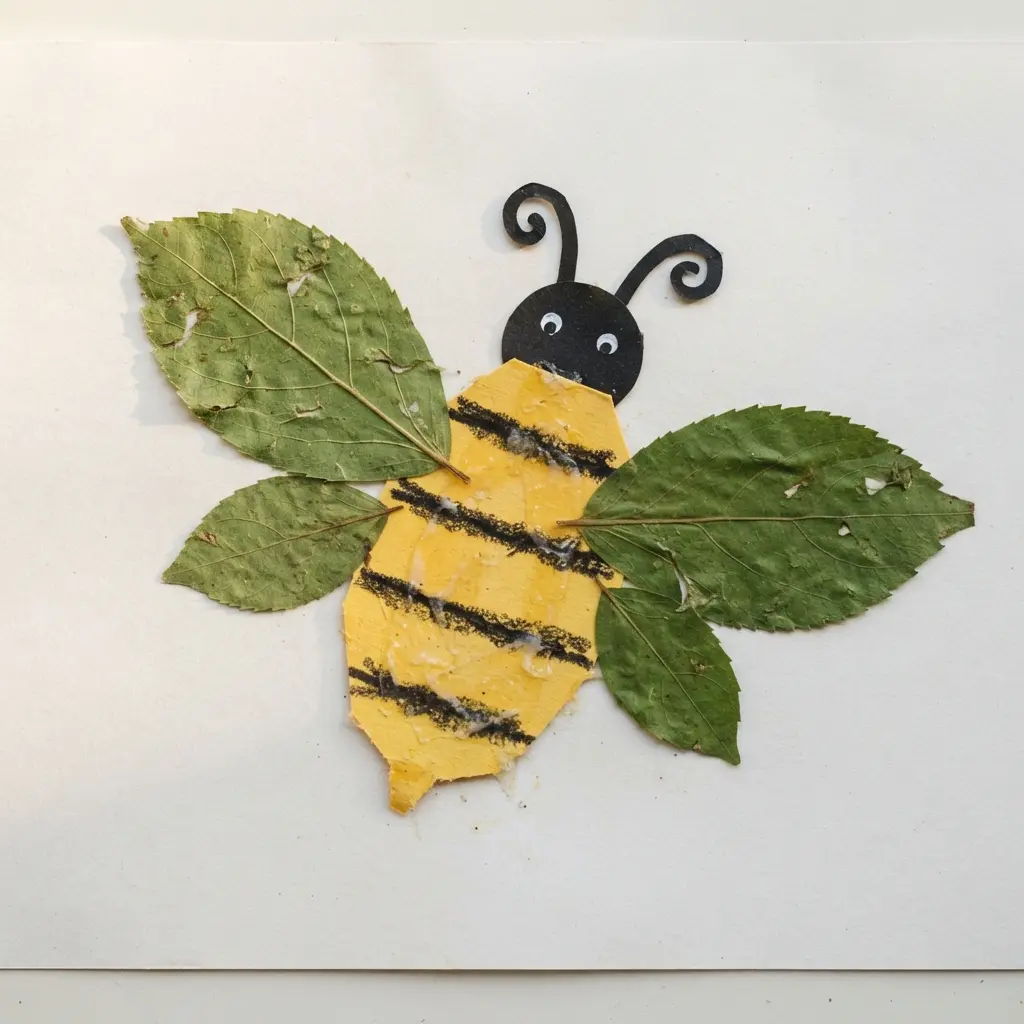
I love this leaf bee collage because kids get a sweet nature picture without needing advanced drawing skills. Start with a cream or pale green paper background, then cut a honeybee from golden yellow, brown, and cream paper. Add black stripes, a round head, tiny antennae, and two detailed wings with thin paper lines. Sound complicated? It is not, especially when each small piece is placed one at a time.
Arrange green leaves around the bee, leaving open space so the bee stays easy to spot. Add wildflowers, delicate vines, and a few botanical cutouts in soft colors, then layer selected pieces with folded paper or small spacer pieces for gentle depth. Use glue on the center of each shape while keeping some edges raised, and finish by pressing the picture flat under a book. The earthy palette feels calm, while the layered paper gives the scene a cheerful scrapbook look. Trust me on this one, detailed wings make the finished picture feel complete.
10. Button Mosaic Ladybug Table Decor
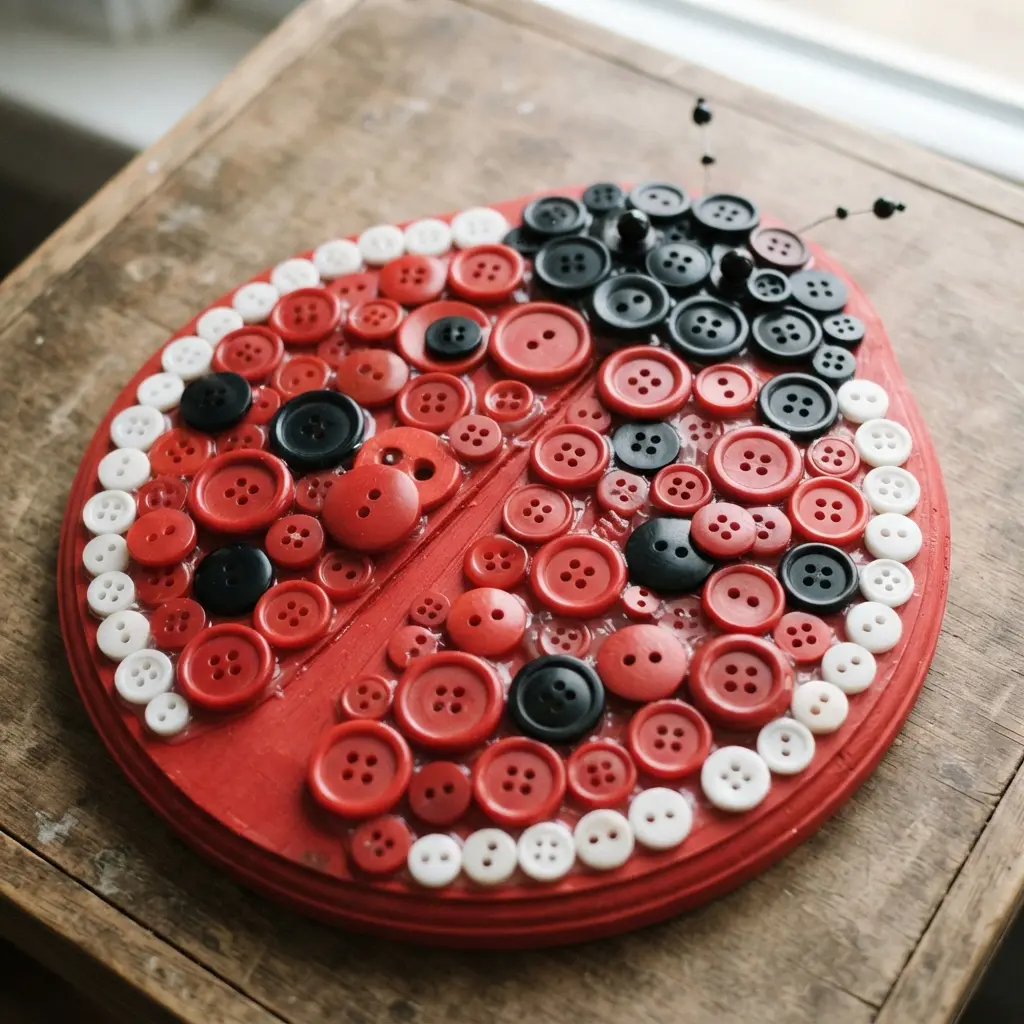
Red wings, glossy with raised red buttons, peek beneath neat black spots, a classic look for Bee and Ladybug Crafts for Kids. A pair of googly eyes gives the tiny face a playful look, while the textured surface feels fun under careful fingers. Sound complicated? This table decoration starts with a wooden ladybug shape, flat stone, or papier-mâché base.
Begin with a red-painted base, then leave it untouched until fully dry. Brush black paint over the head, center dividing line, and tiny facial details. Arrange red buttons across both wings first, shifting sizes until the coverage looks balanced, then glue each piece in place. Add black buttons as spots and finish the face with googly eyes or small white buttons. Attach the ladybug to a wooden stand, flowerpot, or decorative tray after the glue sets. Keep adult supervision nearby, since buttons and eyes are small parts.
I love this project because painted color blocks meet the raised texture of buttons in one cheerful centerpiece. The bold red, black, and white palette makes the insect easy to recognize, while the buttons add playful dimension. For a durable finish, brush on clear sealant only after paint and glue have dried completely. Set it on a dining table, entryway table, or spring display, and feel proud of your sweet little ladybug.
11. Popsicle Stick Bee Garden Marker
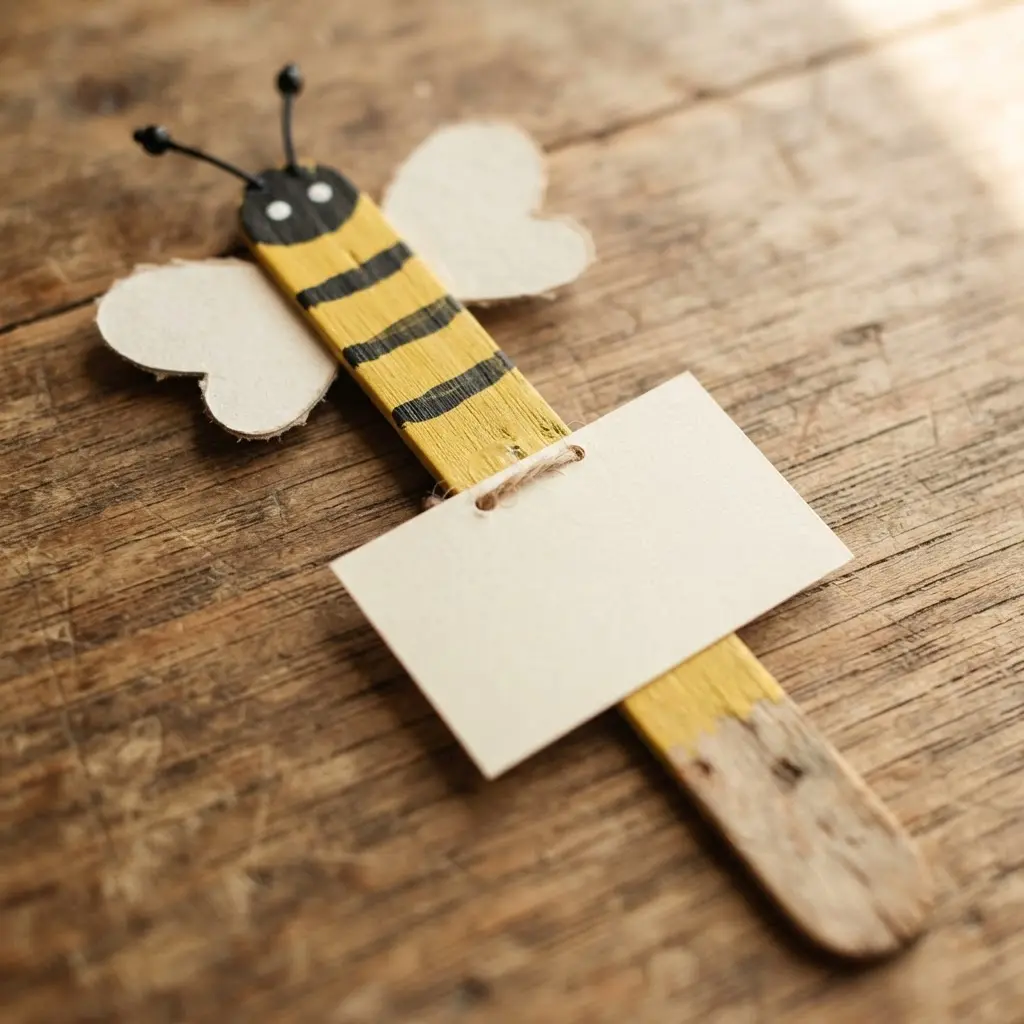
A garden marker does not need to look plain or serious. Paint one wooden popsicle stick yellow, then wait until the surface feels fully dry before adding two or three black stripes. Draw a tiny smile and eyes near the rounded end, or glue on small googly eyes for extra personality. Is it not satisfying when a simple label starts looking like a friendly little bee?
Cut two white wings from paper or foam and glue them near the top, keeping the plant name area clear below. Write Basil, Mint, or Flowers with a permanent outdoor marker, then brush on clear outdoor sealer with adult help. Let the paint, glue, and sealer dry completely before pushing the marker into soil. I love how this cheerful garden decoration gives children a hands-on role in organizing herbs and flowers. Keep the wings high, protect the lettering from rain, and enjoy seeing each bee point out a growing plant.
12. Construction Paper Ladybug Greeting Card
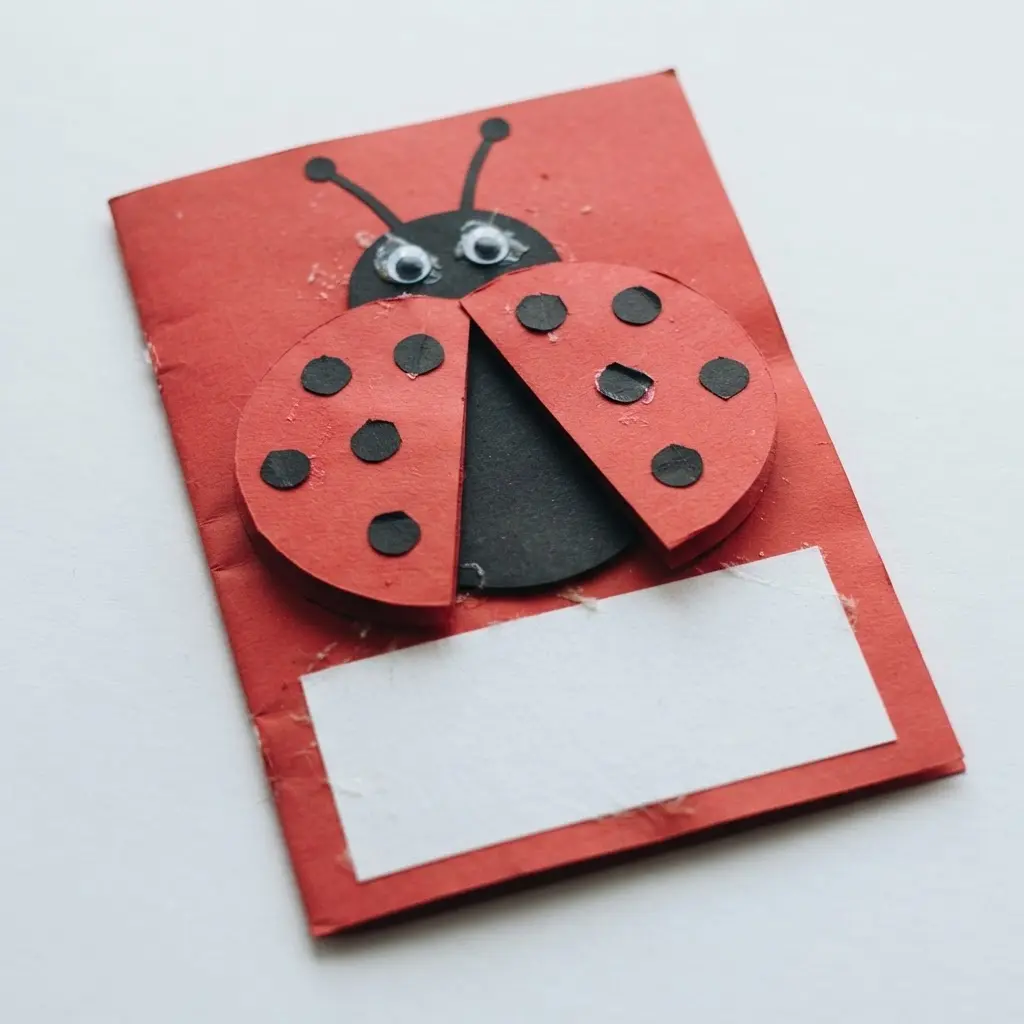
Fold a sheet of white paper or cardstock card base in half, pressing the crease firmly. Center a large red oval on the front, leaving room above for the head and around the edges for leaves or grass. This placement keeps the ladybug balanced and easy to recognize.
Add a small black circle for the head, then draw a black line down the red body to separate the wings. Give each wing several black spots with paper circles or a marker, then add googly eyes, antennae, and six little legs. Green construction-paper leaves or grass fill the background without hiding the ladybug. Sound complicated? It is not, and kids get to practice cutting, gluing, and drawing in one cheerful project.
I love how the bold colors make this greeting card feel personal before the message is even added. Wait until the paper pieces sit securely, then write “You are one of a kind!” or “Have a lovely day!” inside. Pro tip: use a small amount of glue for each piece so the paper stays smooth, then feel proud when your handmade card is ready to share.
13. Yarn Wrapped Bee Sensory Toy
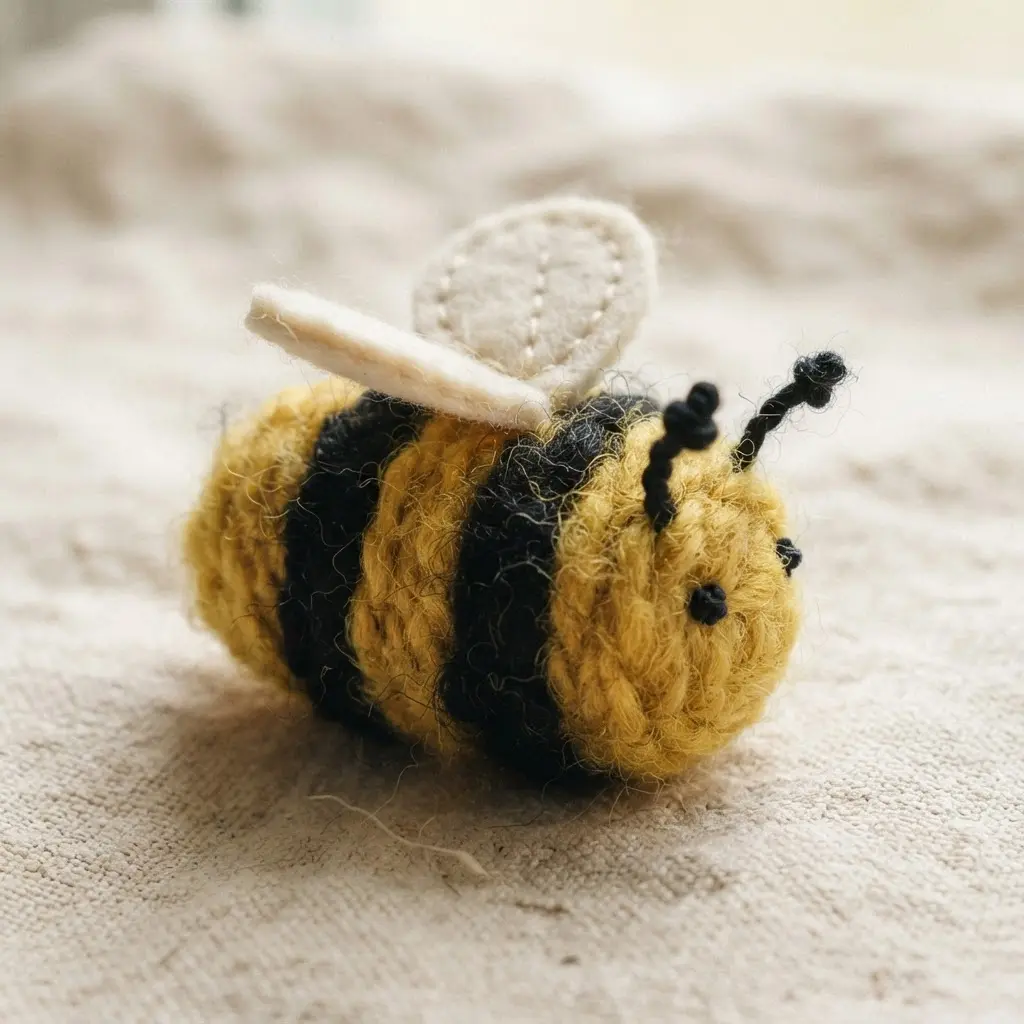
Ever tried turning a cardboard tube into a soft bee for little hands? Cover the tube with alternating bands of yellow and black yarn, adding a small dot of glue at the start and finish of each color. Press each strand close to the next so the stripes look neat and the surface feels pleasantly raised. I love how the bold colors invite children to name yellow and black while their fingers explore the fuzzy texture.
Add securely attached eyes, then cut two wings from yellow felt or foam and fasten them to the sides. Twist black pipe cleaners into short antennae and glue them on top, keeping every feature snug against the tube. Allow the glue to dry fully before play, since loose yarn or decorations might come away during handling. For toddlers, skip loose googly eyes and choose stitched or embroidered eyes instead, with close adult supervision around small parts. This cheerful sensory toy gives children a simple way to practice touch exploration, color recognition, and gentle pretend play.
14. Pom Pom Ladybug Magnets Collection
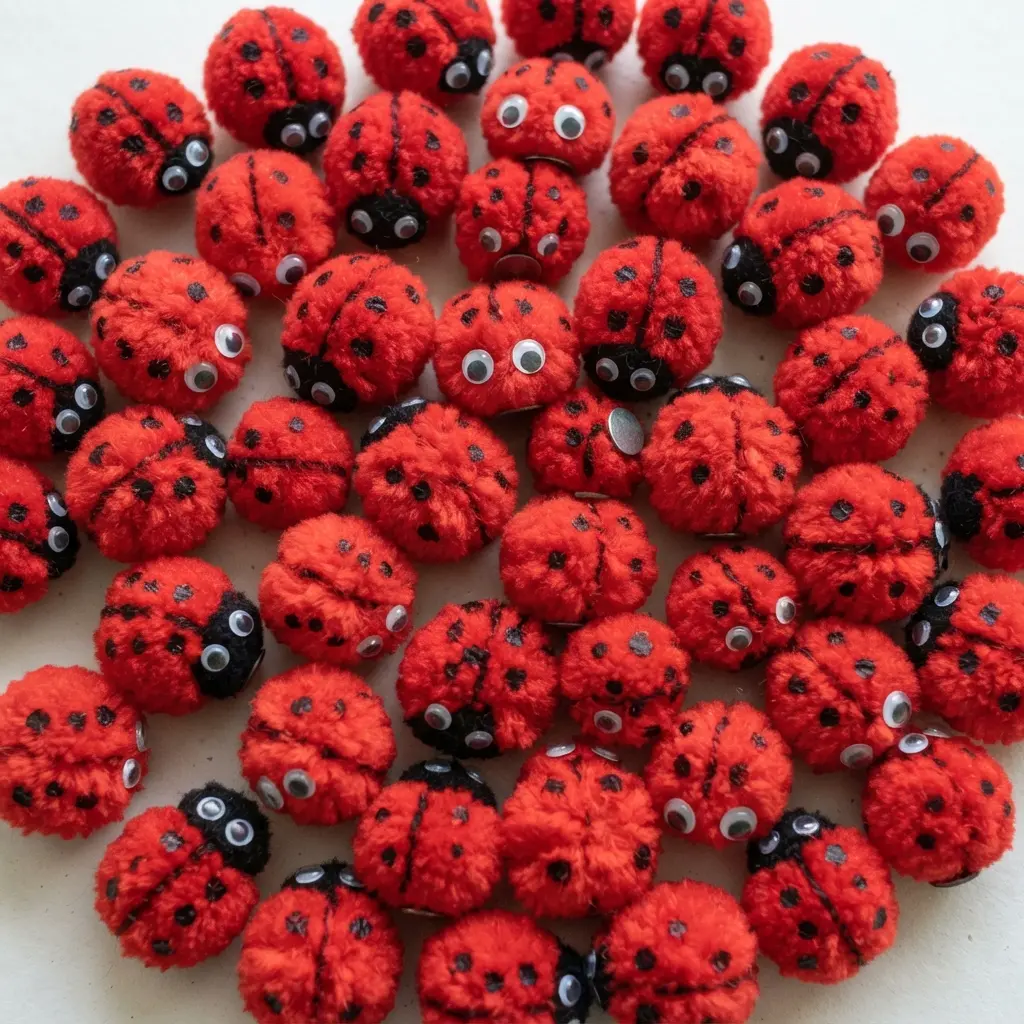
This one turns soft pom-poms into a cheerful set of ladybug magnets with almost no fuss. Start with a large red, black, or bright pom-pom for each body, then glue on a smaller black pom-pom as the head. Add googly eyes, black spots, and short pipe-cleaner antennae, giving every bug its own expression. Is there anything sweeter than a row of tiny faces waiting on the refrigerator? I love how children get to choose each color and pattern.
Use a small craft magnet on the back only after the face, spots, and antennae feel secure. A dab of glue holds lightweight pieces neatly, while paint or markers offer another way to add spots. Let each ladybug dry fully before placing it on a refrigerator, magnetic board, or locker, since loose parts and magnets need close adult supervision around young children. The rounded pom-pom bodies make this project satisfying because the collection grows with every new color. Trust me on this one: line them up together for a cheerful display, and feel proud of the finished set.
15. Paper Cup Bee Hive Diorama
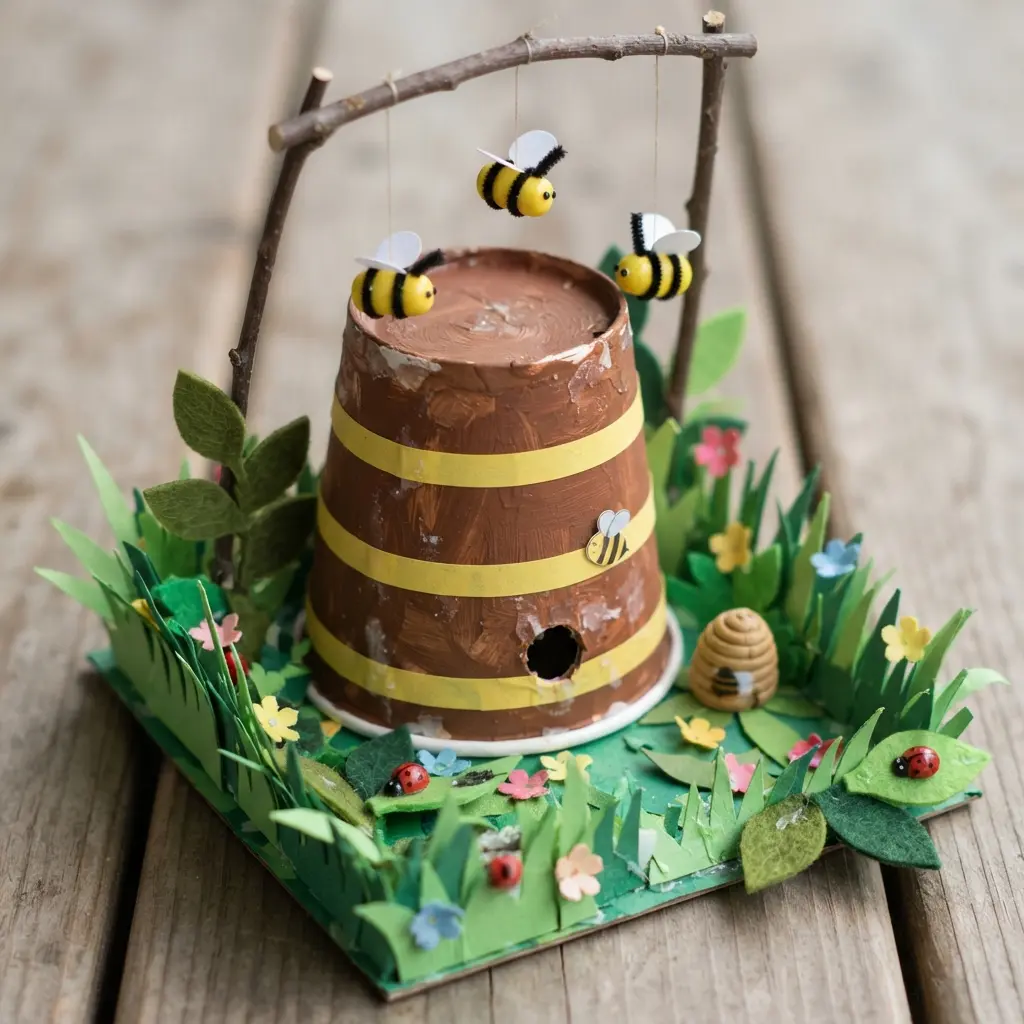
This one is a favorite because a few paper cups turn into a full little bee scene. Ever tried building a hive with layers? Paint two or three cups yellow and brown, let them dry, then stack and glue them into a rounded shape. Add curved lines around each cup and a small entrance near the bottom with a black marker.
Cover a cardboard base or paper plate with green paper, then add grass, flowers, leaves, and stems. Make bees from yellow paper ovals with black stripes, eyes, wings, and pipe-cleaner antennae, then place them near the hive. Short thread pieces hold flying bees above the scene, while small yellow hexagons show the honeycomb. Cotton-ball clouds and a paper sun finish the background. I love how children learn about colonies, worker bees, honey, and pollination while practising cutting, coloring, gluing, and three-dimensional assembly. Secure the cups before adding decorations, and use a protected work surface since paint and glue get messy. Feel proud when your tiny garden scene comes together.
Displaying Finished Bugs In A Garden Scene
Mount each finished insect on a cardstock garden panel with foam mounting squares so wings and bodies sit above painted grass without tearing the paper. Place bees near large flowers and honeycomb shapes, while ladybugs suit leaves, stems, and low garden borders. Leave open space around antennae and legs, since crowded details disappear when several bugs share one scene. A folded cardstock tab gives standing figures balance on a shelf, while punched holes support a simple indoor mobile. Keep the display away from damp windows, direct sunlight, and curious pets, all of which weaken paper or loosen adhesive. Add each child’s name and date on the back, then store the scene flat inside a large folder when the season changes.
Conclusion
A few bright shapes and familiar supplies can give your child something personal to hold, display, or share. These bee and ladybug crafts also create opportunities to talk about garden creatures, colors, and nature. Let your child choose the colors and place the eyes, spots, or wings before helping with tricky cutting. That small choice keeps the activity focused on their ideas and makes each finished project special.
With Bee and Ladybug Crafts for Kids, families can build simple traditions around seasonal bug art. Keep a small box of paper, glue, and markers nearby, and let creativity take over whenever inspiration strikes.
FAQs
Q: What glue works best for paper bee and ladybug projects?
A: White school glue works well for paper, cardstock, and lightweight decorations. Use tacky glue for felt, yarn, buttons, and heavier pieces, with adult help during application.
Q: Are these insect projects suitable for preschoolers?
A: Many projects suit preschoolers with adult help for cutting and small parts. Paper plates, large paper shapes, and washable paint are good starting choices.
Q: How do I make recycled insect projects last longer?
A: Let each painted layer dry before adding details. A clear water-based sealer can help protect rocks and sturdy decorations, with adult handling for the final coat.
Q: What supplies should I gather before starting?
A: Gather construction paper, washable paint, glue, child-safe scissors, googly eyes, pipe cleaners, and markers. Add paper plates, rolls, cups, cartons, rocks, or spare buttons based on the chosen project.
Q: How do I keep small craft pieces safe around young children?
A: Keep buttons, magnets, googly eyes, and small pom poms away from children who still put items in their mouths. Provide close adult supervision and store leftovers in a sealed container.