

Cardstock Weight Selection for Structural Base
The fastest way to ruin a beautiful handmade card is to use paper that warps under a light watercolor wash. You need a heavy 110lb cardstock for your base layer, trust me on this. This weight provides the structural integrity to keep your creation standing proudly on a mantle and prevents it from bending in the mail.
Think of it as the foundation for your entire design. A lighter 80lb paper works perfectly for your top decorative layers, but your main card body must be the heavyweight champion. This simple choice makes the difference between a project that feels flimsy and one that feels like a substantial gift.
Essential Adhesive Choices for Multi-Layer Designs
Liquid glue is the enemy of delicate vellum and tissue paper, causing instant wrinkles you cannot fix. For flat, smooth adhesion of papers and photo corners, you want a permanent acid-free adhesive runner. It lays down a clean, invisible line of glue that dries in seconds without any mess.
When you add die-cut shapes or stamped sentiments for that beautiful shadow effect, you need foam mounting squares. These little pads give your focal point that professional, floating dimension. The right sticky stuff keeps every element perfectly in place from your table to the recipient’s hands.
1. Create a Minimalist Watercolor Floral Frame Card
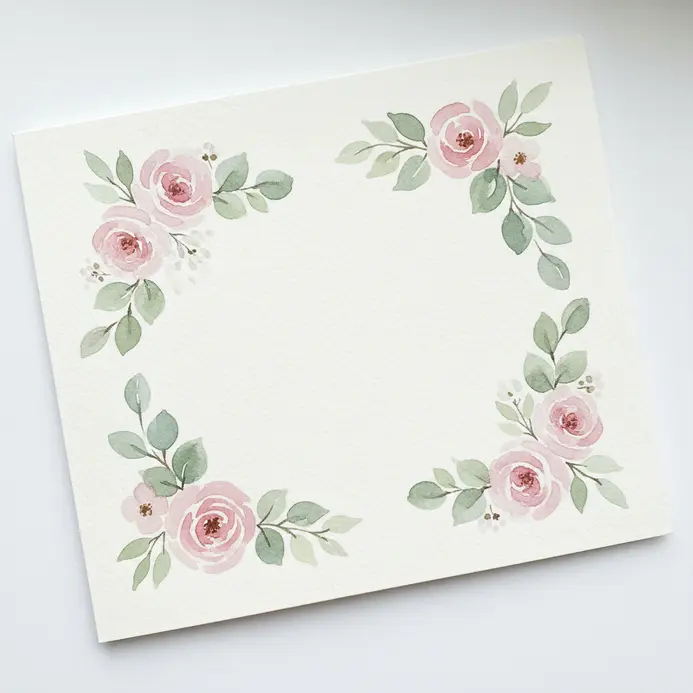
This looks complex, but it is one of the most relaxing ways to make a card. When you explore new diy greeting card ideas, starting with soft shapes always yields elegant results. I love how the muted colors feel so personal.
Start with a thick white cardstock base and a light pencil sketch of a rectangle. Using just a couple of paint colors and a small brush, dot in little flowers and leaves along your guide. The trick is to let the watercolor floral frame happen naturally and avoid filling every inch.
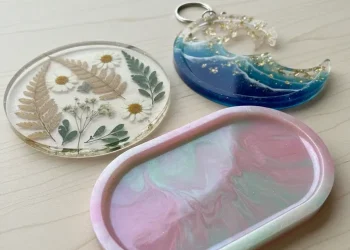
Let it dry completely before erasing your pencil lines. You can add a handwritten note inside the frame or leave it blank for the recipient. This style is perfect when you want a handmade gift that feels thoughtful but not fussy. Find more inspiration for personalized gifts with these creative DIY keychain projects.
2. Make a Pressed Flower Botanical Vellum Card
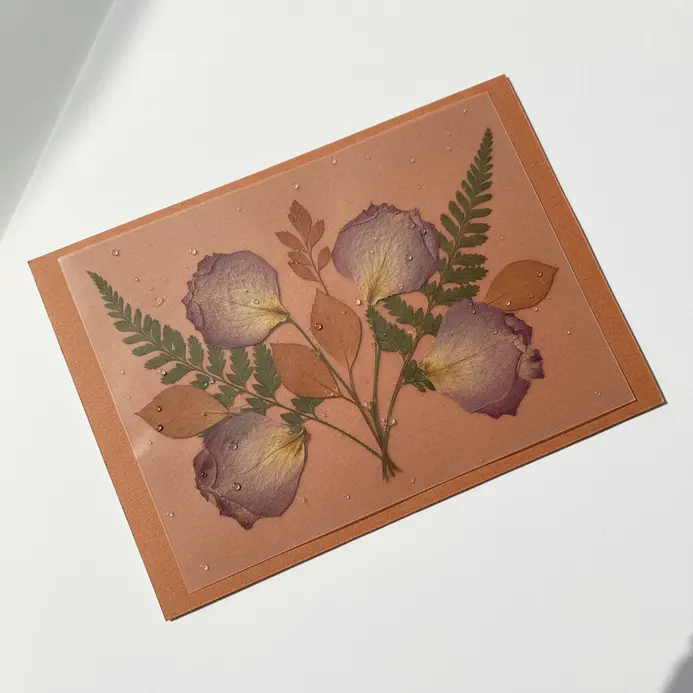
This card looks incredibly elegant but is surprisingly straightforward to put together. You will arrange your pressed flowers on a sheet of translucent vellum paper, securing them with a tiny dot of clear glue. Many diy greeting card ideas focus on nature, which is exactly why this botanical design works so well.
The real magic happens when you hold it up to the light, letting those natural colors glow through the background. My top tip involves using tweezers for placement and applying glue with a toothpick. This careful approach avoids any messy smudges on your delicate materials.
3. Build a Dimensional Geometric Origami Pyramid Card
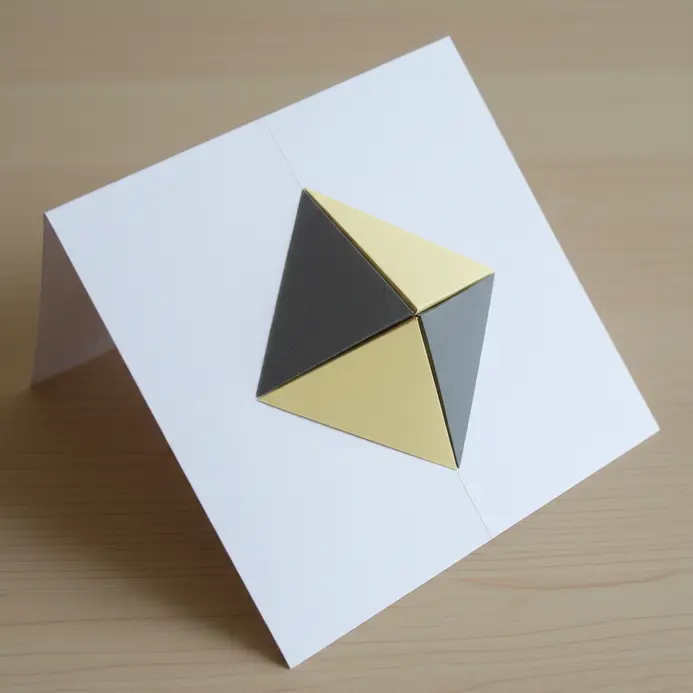
This one looks intimidating, but trust me, it is surprisingly methodical. You will score precise lines on small squares of cardstock, folding each into a water bomb base to create the pyramid faces. You will discover many diy greeting card ideas online, yet this pyramid fold stands out for its clever engineering.
Then, you attach them to a scored base inside your card. When you open it, the whole structure pops into a crisp, three-dimensional shape. That geometric pop-up creates a genuine moment of surprise and delight.
My go-to tip is to use double-sided tape for assembly to avoid any messy warping from liquid glue. Feel how satisfying it is when that pyramid snaps into place.
4. Add Gold Foil Calligraphy Script to a Simple Card
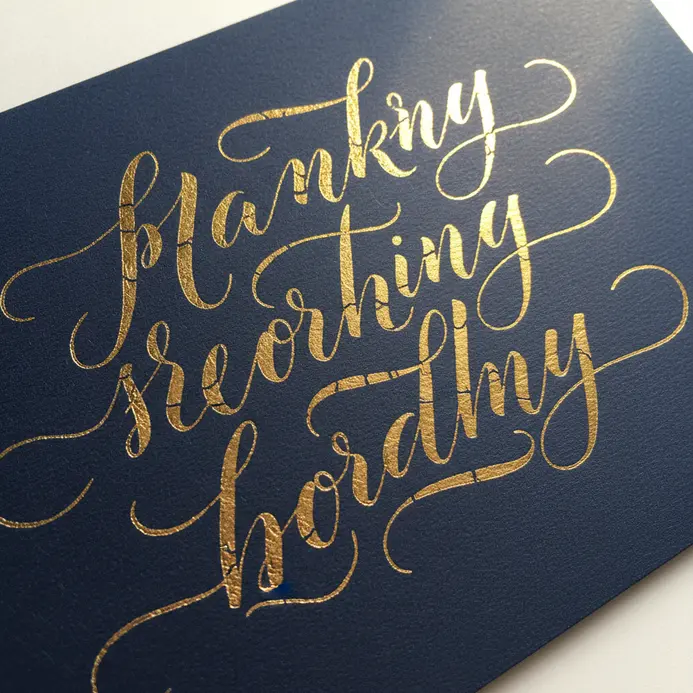
Ever wondered how cards get that gorgeous, shiny script? One of my favorite diy greeting card ideas for special occasions relies on a heat-activated foiling machine. You create your calligraphy design digitally, print it with a laser printer, and run it through the machine with gold foil on top.
It feels luxurious and special. I love how it turns simple cardstock into a premium gift in minutes. If you enjoy making simple Halloween craft projects, you will adore this elegant technique.
5. Layer a Paper Cutout Skyline Scene Card
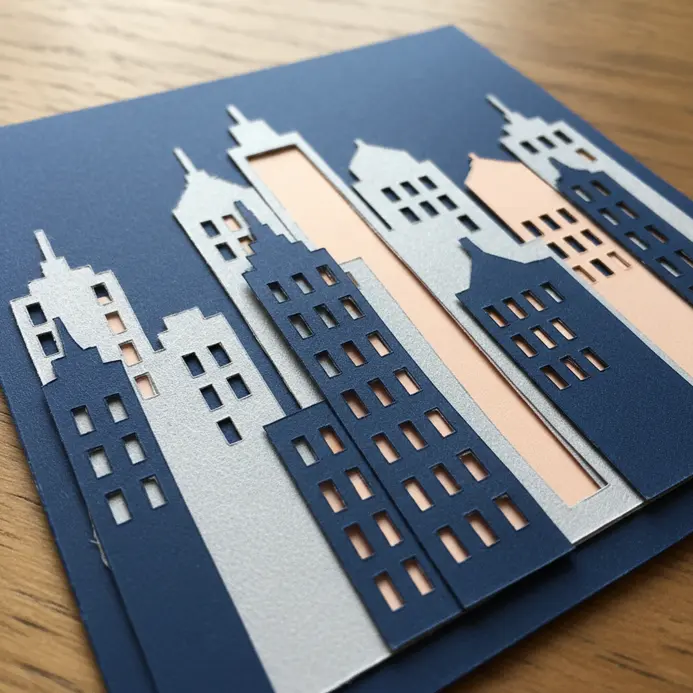
Ever wondered how to make a card that looks like a tiny 3D cityscape? You build it up with several paper cutout layers, starting with a light background silhouette and adding darker, more detailed shapes in front.
I always add this to my diy greeting card ideas list because the layered depth is so impressive. I love how using foam dots between each sheet creates incredible visual weight. Trust me, the final reveal feels like a real piece of miniature art.
6. Apply Washi Tape Strips for a Patterned Card
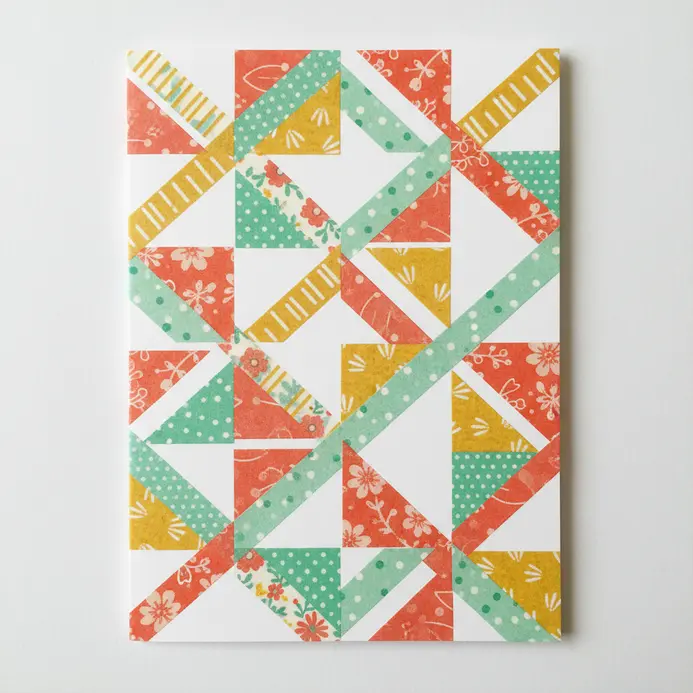
Ever wondered how those perfectly striped cards are made? When I need quick diy greeting card ideas, these patterned tapes save the day. You simply pick a few coordinating washi tape designs and apply them in neat strips across your base, trimming any excess.
I love alternating between solid colors and fun patterns like polka dots or florals to create a lively look. It is so forgiving because you can reposition the tape as you go. Try it and feel the satisfaction when those crisp lines come together!
7. Achieve an Embossed Texture Flourish Wedding Card
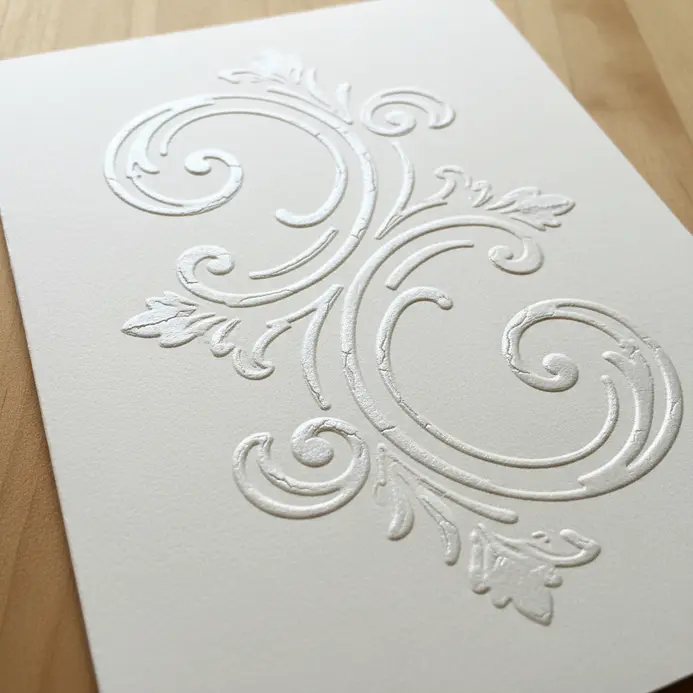
It looks so elegant and complex, but trust me, the process is wonderfully straightforward. This technique often tops my diy greeting card ideas for formal events because it looks incredibly polished. You will need a die-cutting machine and an embossing folder with a lovely flourish pattern.
Place your heavy cardstock inside the folder and run it through. The pressure creates a beautiful raised design that feels as luxurious as it looks. This method is my go-to for adding instant sophistication without any ink.
The subtle, tactile texture makes your wedding card feel incredibly special and memorable. Isn’t that a beautiful touch for a celebration?
8. Make an Interactive Pull Tab Reveal Card
This one looks complex, but it is surprisingly simple to assemble. You will love exploring diy greeting card ideas for playful friends when you see how this works. You create a window in your base card, then slide a decorated panel behind it attached to a pull tab.
When the recipient tugs that tab, your hidden message or picture is revealed. I love how it builds anticipation, making the moment feel truly special. Your friend will get such a kick out of the surprise.
9. Stitch a Handmade Heart Motif Card
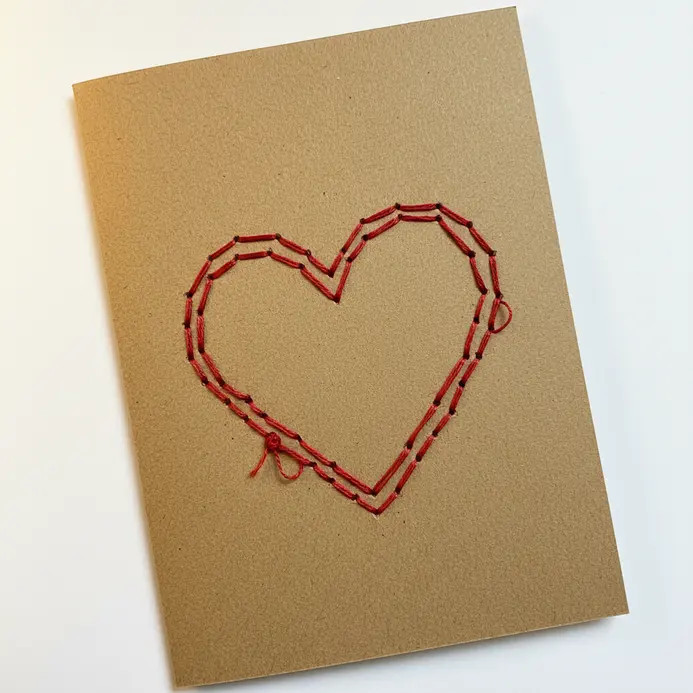
This is definitely my go-to among diy greeting card ideas for romantic gestures or thoughtful notes. You start by piercing a simple heart outline onto a separate cardstock panel using a paper piercer and a foam mat. Then, you stitch through the holes with embroidery floss, creating a lovely textured design.
That tactile, hand-stitched texture instantly conveys thoughtfulness. A neat trick is to use a pre-printed template to keep your holes perfectly spaced. Once your stitched panel is done, adhere it to your card base.
The result is a stunning, dimensional card that feels as special as the occasion. For another way to add a personal touch to gifts, you can learn to decorate flower vases beautifully.
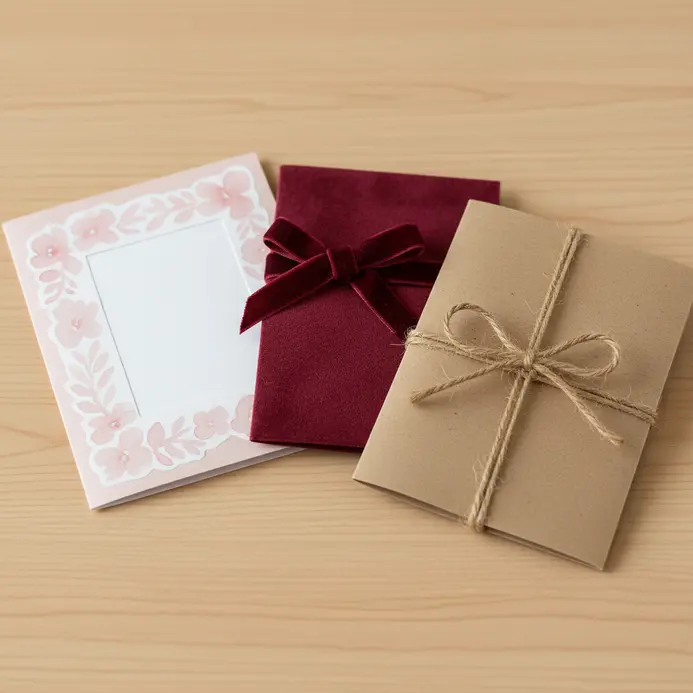
10. Wrap a Velvet Ribbon Bow Gift Card
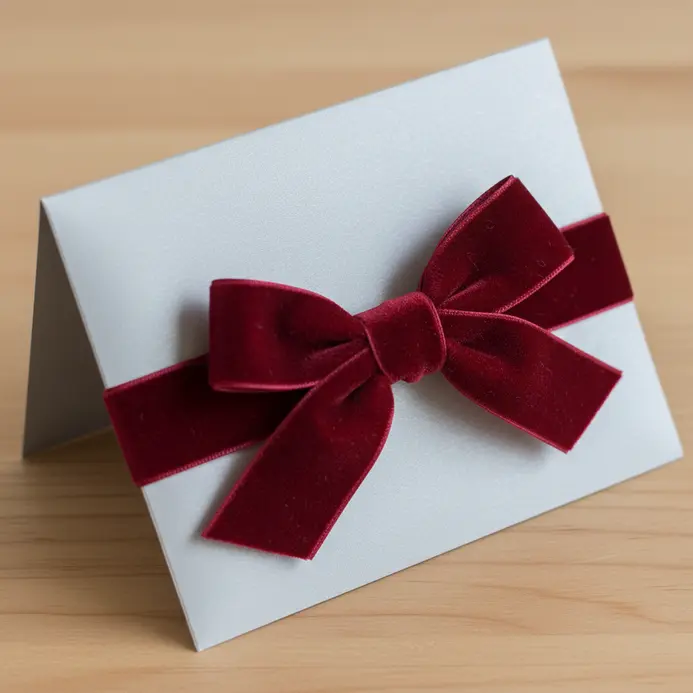
Ever feel like a gift card needs a little extra love? Wrapping it with a velvet ribbon bow transforms it into something truly special. Adding a ribbon is one of those classic diy greeting card ideas that never fails to impress.
You simply center the ribbon on the back, wrap it around to the front, and tie a neat bow. I love how the plush texture adds instant luxury and makes the gift feel more personal. Trust me, the recipient will appreciate the thoughtful touch.
11. Build a Shaker Window Confetti Birthday Card
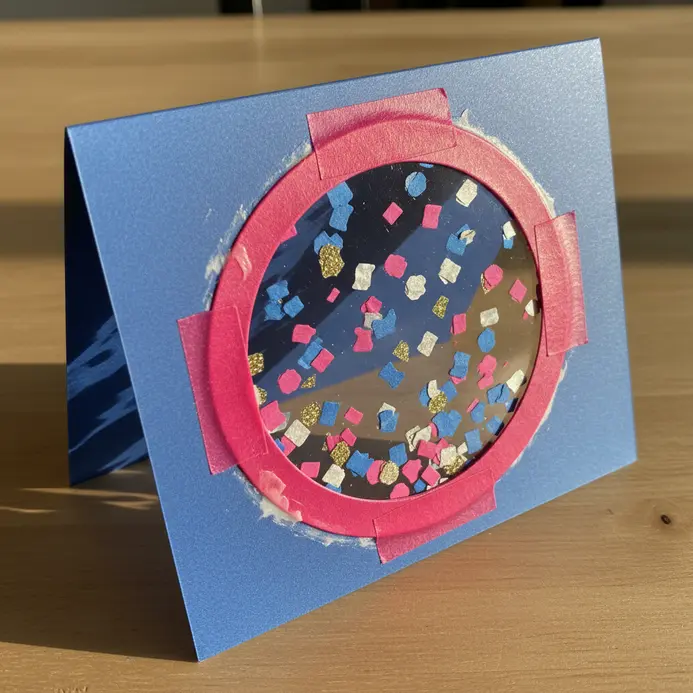
This one looks fancy, but it is surprisingly simple to make. Building a shaker window ranks high on my diy greeting card ideas for birthdays. You will cut a window shape in your front panel and seal a piece of clear acetate behind it.
Then, you build a raised well with foam tape, add your favorite confetti, and seal it all up. The magic is in the movement. When you give it a shake, all those little bits dance around inside, creating a celebratory effect that is pure joy.
Pro tip: Use an anti-static powder tool on the acetate first to stop confetti from sticking. For more handmade inspiration, try these simple rock painting techniques.
12. Make a Kraft Paper Rustic Twine Card
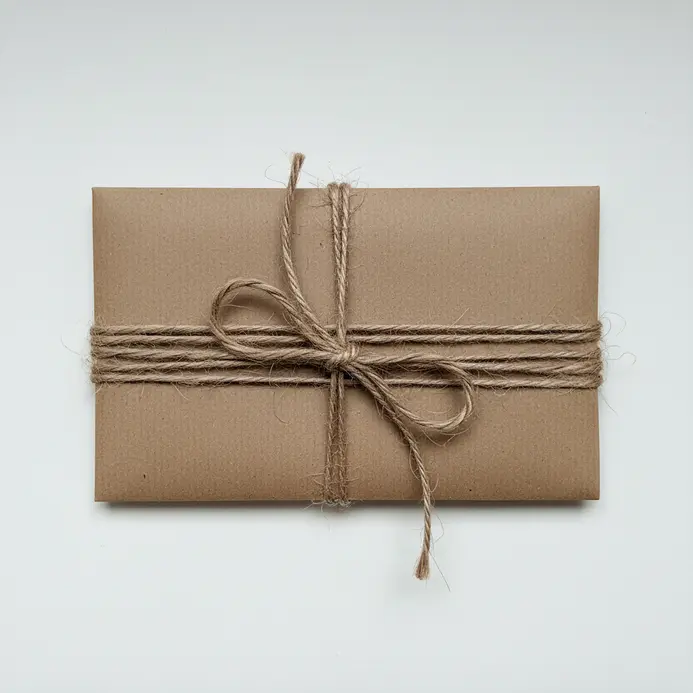
This one surprised me – it looks complex but is one of the simplest ways to create a beautiful, thoughtful card. If you want rustic diy greeting card ideas, this kraft paper approach is absolutely perfect. Start with a sturdy kraft cardstock base, scoring a clean fold for a professional look.
Layer on smaller pieces of brown paper, then wrap or tie natural jute twine around the front. Add a stamped sentiment or a tiny dried flower for the perfect rustic touch. I love this style because it feels genuinely handmade and warm.
Your recipient will feel the personal connection instantly.
13. Use a Negative Space Stencil Spray Card
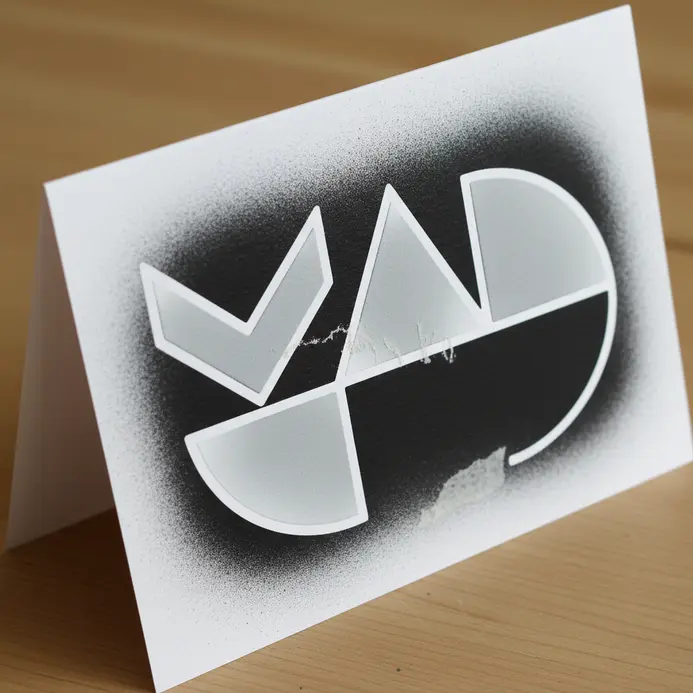
Ever wanted a greeting card that looks professionally printed? This technique is your secret weapon. You spray paint around a stencil, leaving a crisp, unpainted silhouette on your cardstock.
I love how it turns a simple shape into a bold graphic, which makes it one of my top spray-based diy greeting card ideas. The key is using light, misting coats of paint to prevent drips and bleeding.
Always work in a ventilated area and secure your stencil firmly with masking tape. The result is a stunning, high-contrast design that feels incredibly modern. Give it a try and see how impressive your handmade card looks.
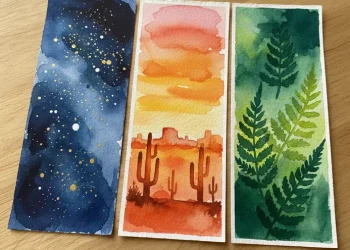
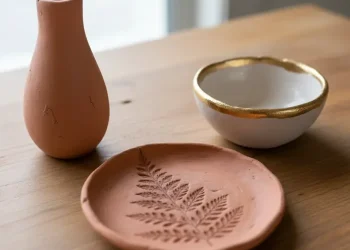
14. Create a Dried Leaf Collage Autumn Card

This one is a beautiful way to bring the season right into your hands. Seasonal diy greeting card ideas let you capture moments in time, exactly like these preserved leaves. Arrange your dried leaves on a sturdy card base, playing with shapes and colors until you love the layout.
Then, use a small paintbrush to apply PVA glue sparingly and press them flat. I love this because each card is a unique, natural work of art you can touch. The result is a heartfelt greeting that feels special to give.
For another project using found natural materials, you can decorate rocks for your garden.
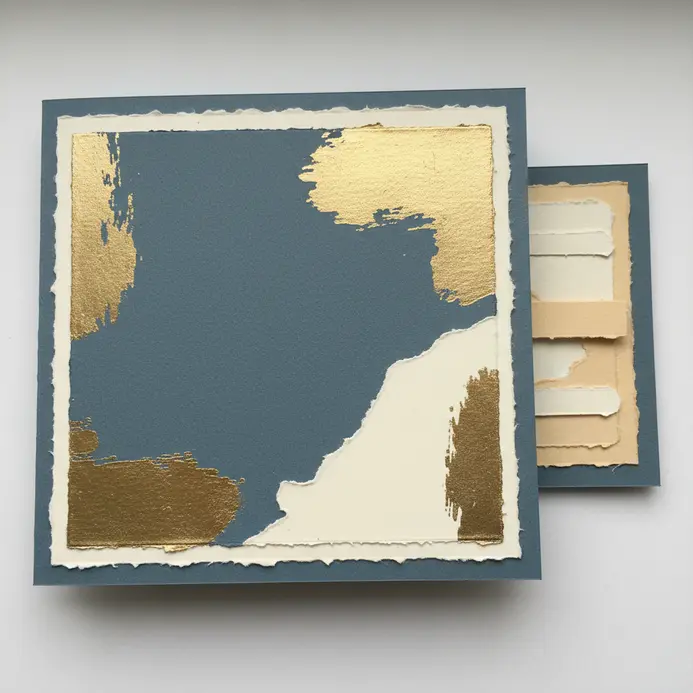
15. Add Metallic Ink Splatter to an Abstract Card
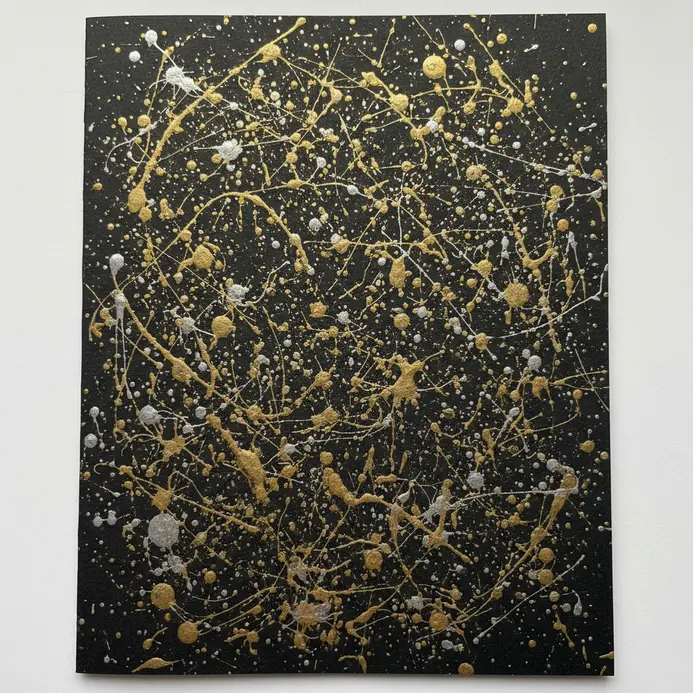
Ever wondered how those gorgeous, shimmery dots end up on a handmade card? Abstract diy greeting card ideas like this splatter technique bring instant energy to your paper. Load a stiff bristle brush with thinned metallic ink, then flick your wrist over the card to create a dynamic pattern of fine specks.
I love this because it introduces a perfect touch of controlled chaos and texture that makes your design feel truly one-of-a-kind. Trust me, the final shimmering payoff is so satisfying.
16. Build a Pop Up Butterfly Garden Card
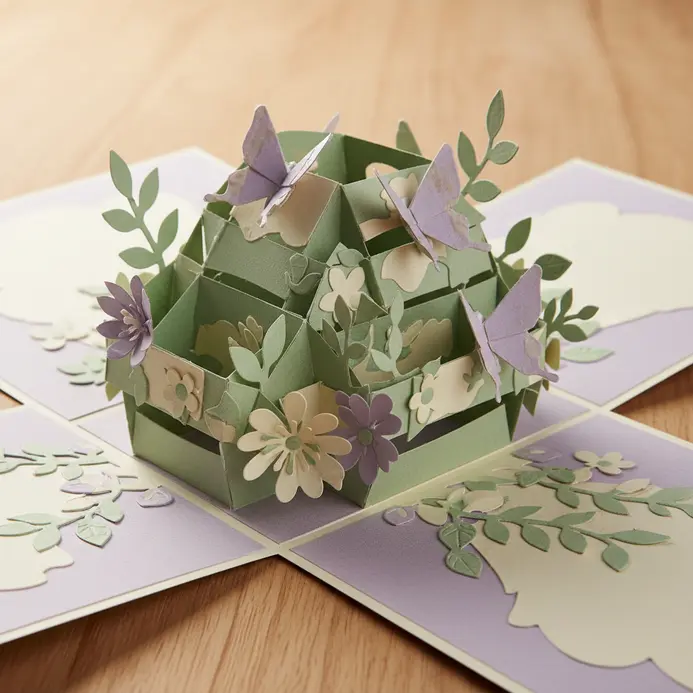
Ever wondered how to make a greeting card that literally pops to life? Pop-up mechanics make wonderful diy greeting card ideas because they literally leap off the page. Start by scoring and folding your main cardstock piece in half for a crisp base.
Then, cut out simple butterfly and flower shapes from your colored scraps and attach them to a smaller inner panel with liquid craft glue, making sure everything folds flat when closed. The real magic happens when your recipient opens it and a vibrant garden springs up in 3D.
It works because that physical surprise creates a moment of pure joy, showing you put in that extra thought. For a fantastic outdoor craft that pairs beautifully with this, you could also decorate rocks for your garden. Feel proud when you see their smile!
17. Make a Quilled Paper Spiral Flower Card
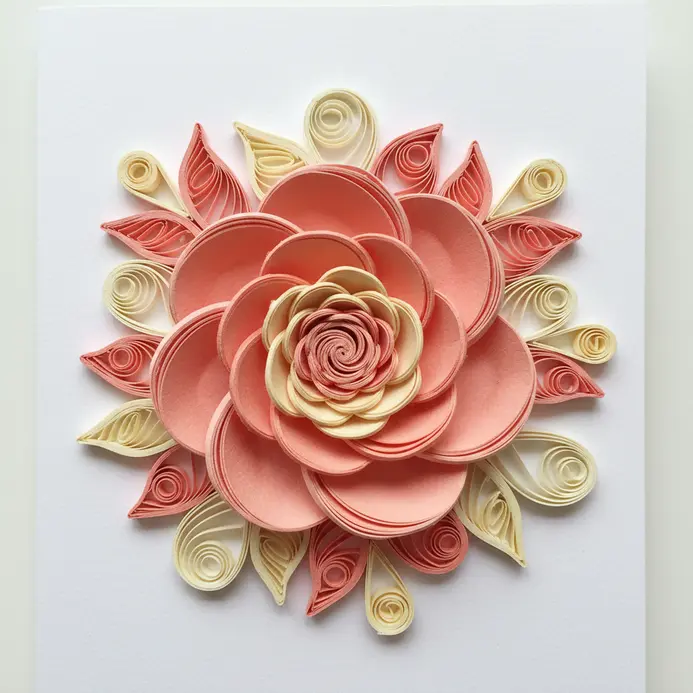
This one looks intricate, but the technique is wonderfully beginner friendly. Quilling might seem advanced, but it definitely belongs on any list of diy greeting card ideas. You roll narrow paper strips into tight coils, let them expand, and then pinch one side to form lovely teardrop-shaped petals.
I love using two shades of the same color for a single strip, giving each petal a gorgeous gradient effect. Once you have five or seven petals, arrange them in a spiral on your cardstock. Isn’t it satisfying to see that delicate, three-dimensional flower come together?
It adds such a premium, handcrafted feel to your personal greeting.
18. Achieve a Typography Focused Block Letter Card

Ever wondered how to make a card with a bold, modern look? Modern diy greeting card ideas often rely on typography to make a strong visual statement. Choose a thick, simple font and print or trace your chosen letter onto heavyweight cardstock.
Carefully cut it out and mount it on a contrasting card base for instant impact. I love this design because it feels so personalized. The secret is keeping the background simple so that beautiful block shape gets all the attention.
Trust me on this one—try using foam adhesive dots to lift the letter off the page for a subtle dimension. Does that not look stunning?
19. Add a Fabric Applique Patchwork Birthday Card
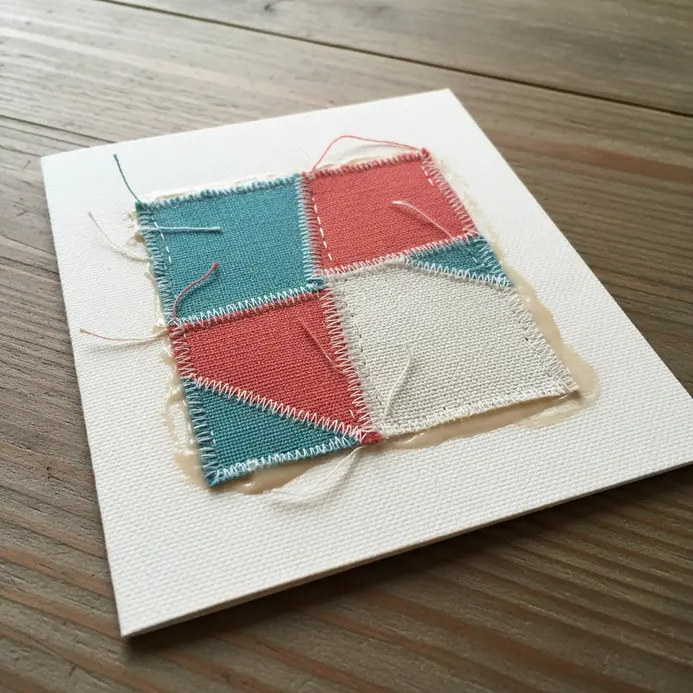
Ever wanted to make a card that feels as special as fabric? This tactile approach uses scraps you might already have, proving it is one of the most practical diy greeting card ideas. First, iron a sheet of fusible web adhesive to the back of your fabric pieces, then cut out your shapes.
Peel and arrange them on cardstock before ironing them down permanently. The result is a wonderfully textured, one-of-a-kind card that feels handmade in the best way. I love how this method turns tiny fabric bits into a beautiful gift.
For another way to use up craft materials, you might enjoy these creative DIY keychain projects.
20. Draw a Black Ink Botanical Contour Card
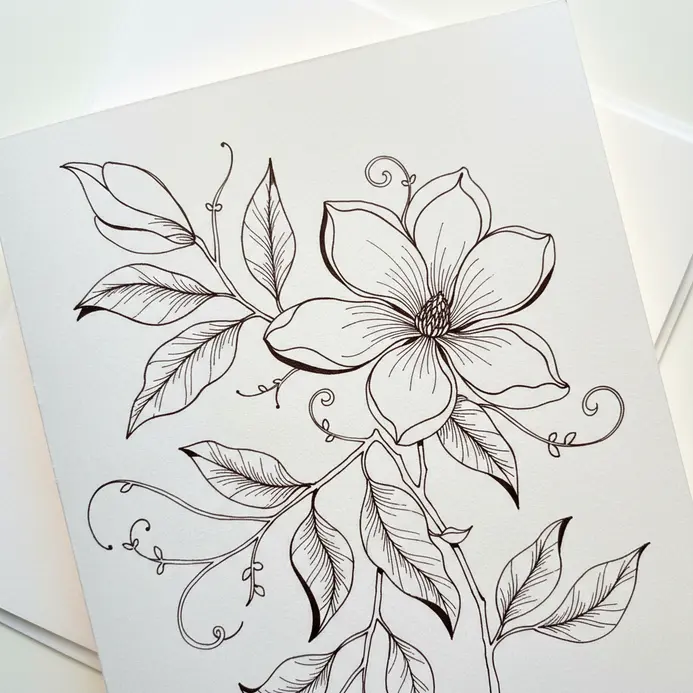
This one looks so elegant, but it is surprisingly simple to draw. Minimalist diy greeting card ideas prove you do not need fancy tools to make an impact. Start with a piece of white or cream cardstock and choose a simple leaf or flower as your subject.
The magic is in using a single, continuous line with a fine-liner pen to trace its outline, never lifting your hand. I love how this approach creates a sophisticated design. Focus on the flow of the plant’s shape as you draw, letting the line wander into the interior details.
The stark contrast of black ink on a light background is what makes this style so striking. Trust me on this one, the result feels incredibly artistic and personal.
21. Apply Glitter to a Constellation Map Card

Ever wanted a card that literally sparkles? Space-themed diy greeting card ideas always get a magical glow from a little extra sparkle. Apply a thin layer of glue just to the star points and constellation lines on your map.
Then, while it is wet, sprinkle your chosen glitter generously. I love using a soft makeup brush to gently dust off the excess, leaving a perfect, shimmering sky. The light catches the glitter, creating magical depth.
Try this and then explore more creative DIY keychain projects for other personalized gifts.
22. Layer a Vintage Lace Doily Overlay Card
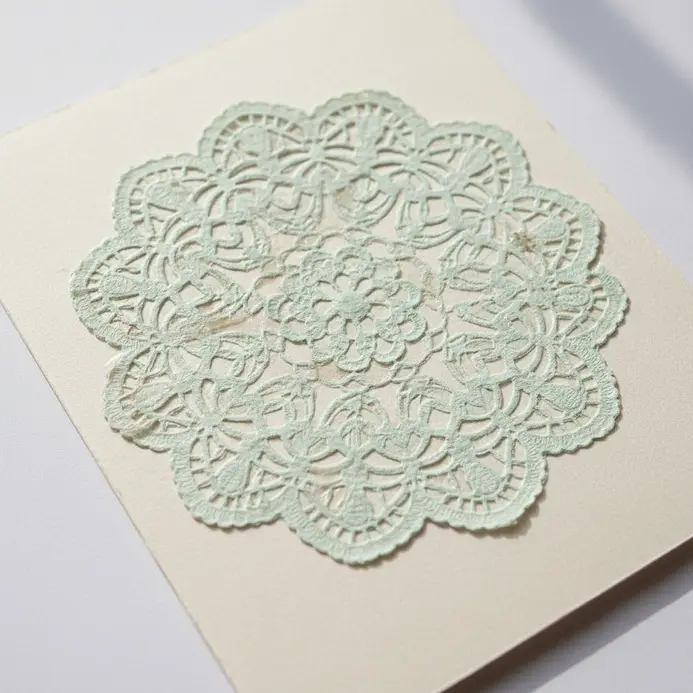
This one looks so elegant, but it is surprisingly simple to put together. Vintage diy greeting card ideas bring a sense of nostalgia to your handmade projects. You start with a sturdy heavy cardstock base in a classic color like cream or ivory.
Then, you carefully adhere a delicate paper or fabric doily right onto the front, creating a beautiful, textured overlay. I love how the intricate pattern shows through. It works because that single layer of lace adds instant charm.
For the best result, use a fine-tip glue pen to avoid any messy seepage through the delicate paper. You will feel so proud when you see that finished, sophisticated look.
23. Create a Die Cut Window Landscape Card
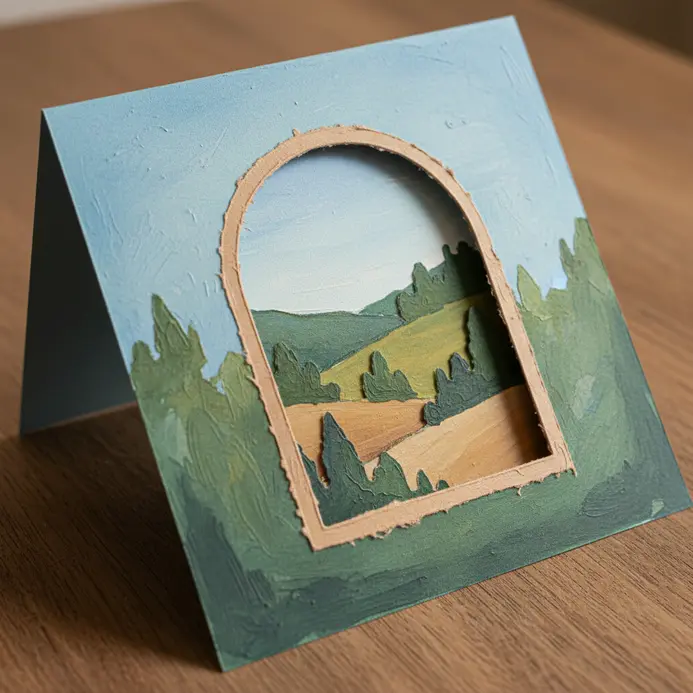
Ever wondered how to add that wow factor to a card? Die-cut windows belong on any list of diy greeting card ideas that aim for a premium finish. You start by cutting a window shape, like a rectangle or circle, from the front of your base using a die-cutting machine.
Then the magic happens inside. You build a tiny scene on a separate panel with die-cut elements like trees or clouds, making sure it aligns perfectly with the opening. Trust me, the moment you close the card and see that framed view is incredibly satisfying. It feels so professional and special.
24. Make a Chalkboard Style Marker Lettering Card
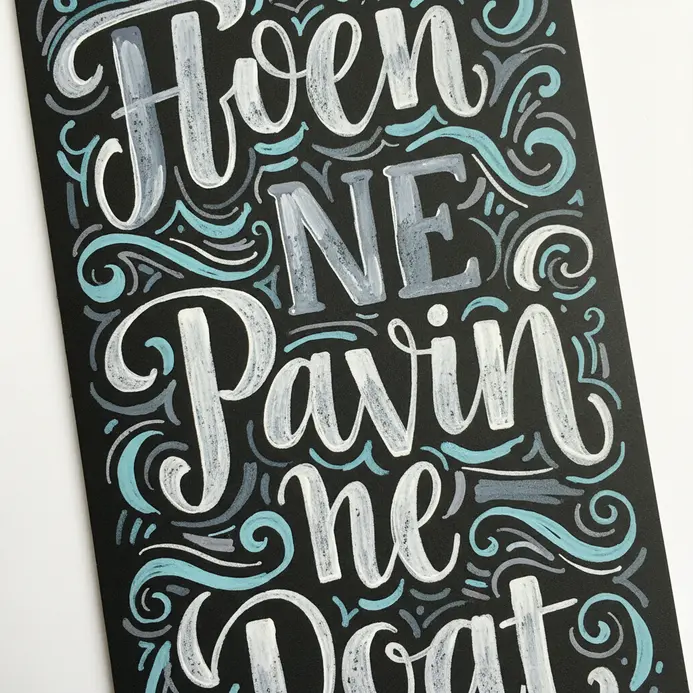
Who would have thought you could create such a rustic, charming look with a few supplies? Chalkboard styling is one of those rustic diy greeting card ideas that feel wonderfully casual. The secret is using dark cardstock as your background and an opaque white marker for your message.
Lightly sketch your design with a colored pencil first, then trace over it to get that perfect chalkboard effect. I love how the high contrast makes your lettering pop with a personal, handmade feel. This technique is fantastic for birthday cards or thank you notes.
It pairs wonderfully with other simple Halloween craft projects for a coordinated handmade look.
25. Weave an Embroidery Floss Pattern Card
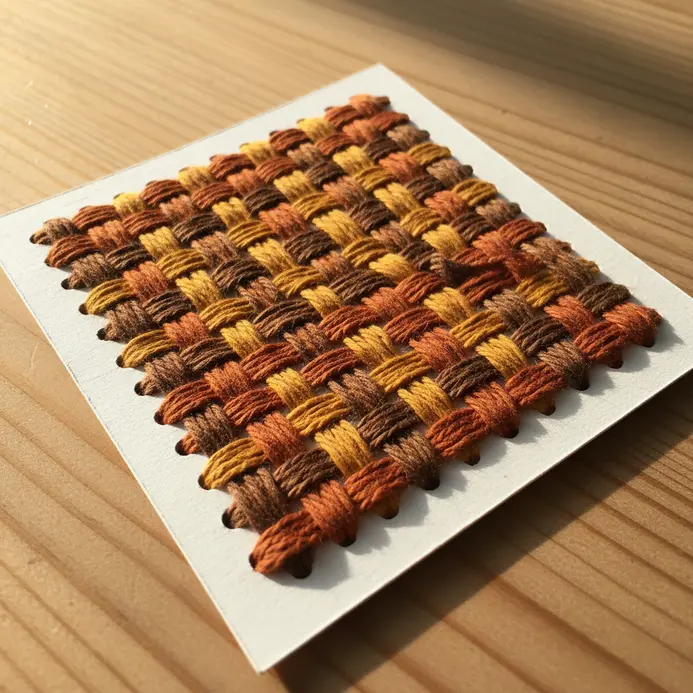
This looks like a pro tool, but it is incredibly simple to make yourself. Thread weaving creates unique paper projects that stand out in the mailbox. You start by cutting slits into a piece of sturdy heavyweight cardstock.
Then, you thread short lengths of your floss through those slits, pulling them taut so they lie flat and show their true color. Next to each sample, you label the brand and color number. It works so well because having a physical swatch is far more accurate than any digital chart.
Use all six strands for the richest, most accurate color display.
26. Build a Button Flower Bouquet Collage Card
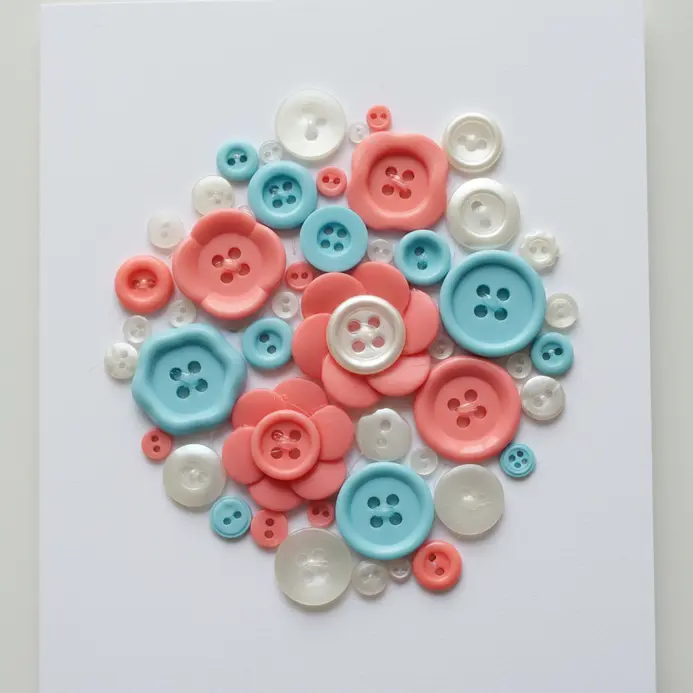
Who would have thought your spare button jar held a whole garden? Upcycling household items offers endless project inspiration, exactly like this cheerful button garden. You simply layer different sized buttons to form flowers, then glue them to a card blank. I love using strong craft glue for a secure hold, adding drawn stems and leaves to connect it all.
The result is a uniquely tactile card that feels extra special. decorate flower vases beautifully.
27. Form a Torn Paper Mosaic Landscape Card
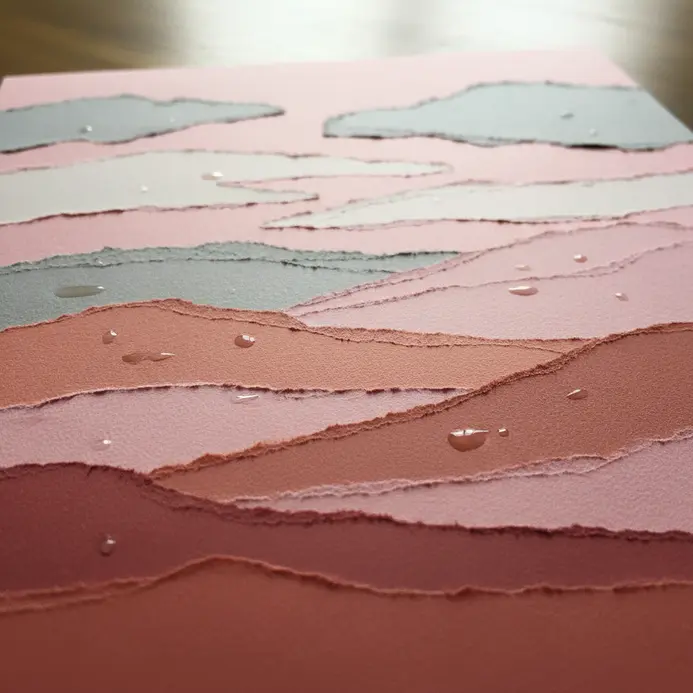
Ever wondered how to create a textured, soft-looking landscape from paper scraps? This technique builds a scene using torn paper pieces layered onto a card. Paper tearing is one of my therapeutic afternoon projects for a relaxing creative session.
You will start with the sky background and add hills or trees in the foreground, letting the feathery edges create a natural, organic feel. I love how forgiving this method is, as the overlapping pieces hide any little gaps beautifully. Try it and feel the artistic satisfaction of your handmade scene.
28. Apply Puffy Paint for Raised Text on a Card
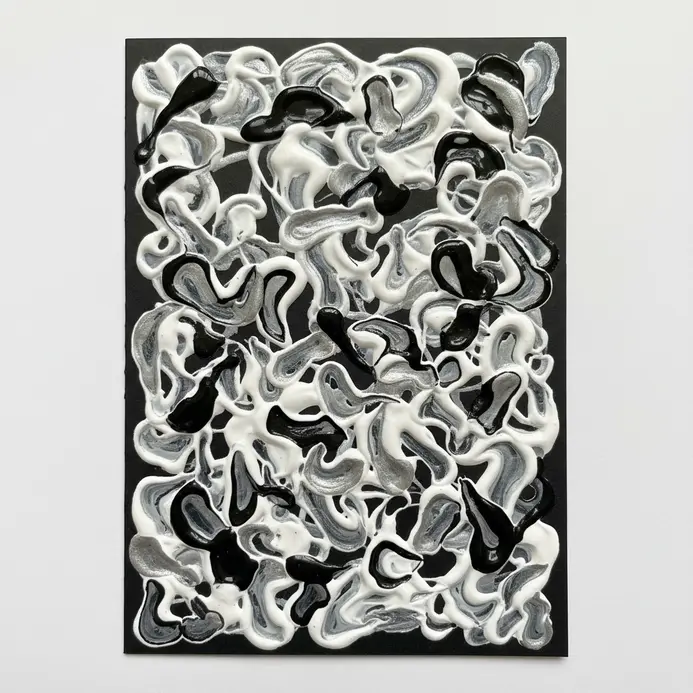
Ever run your fingers over a card and feel that satisfying raised texture? Textured paint adds fun surprises to friends who love tactile details. I love this technique. Lightly sketch your text on sturdy cardstock first. Then, shake your puffy paint bottle well and test the flow on scrap paper. Squeeze gently to follow your lines, holding the bottle straight up for control.
It works because the paint expands as it dries, giving you that cool 3D look. Your recipient gets a greeting they can literally feel. Trust me on this one, seeing your words pop off the page is a total delight.
29. Use a Transparent Acetate Overlay Frame Card
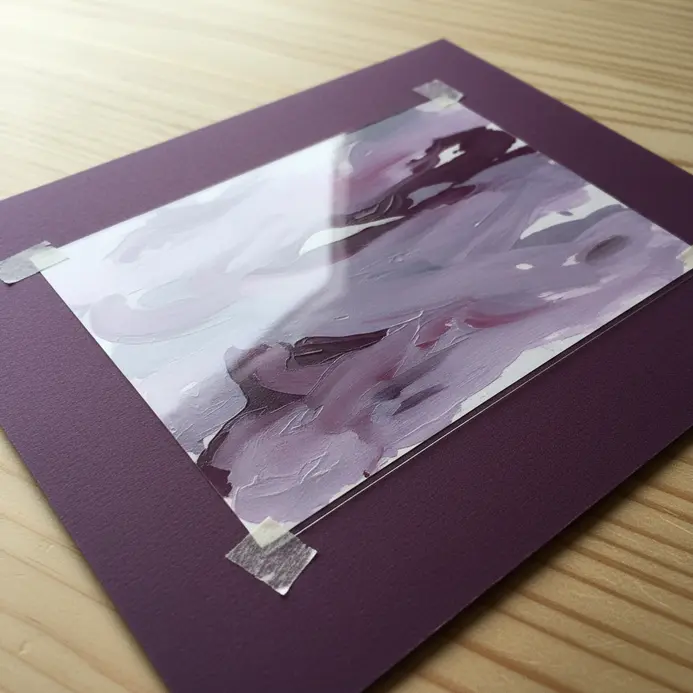
This looks so fancy, but trust me, it is simpler than it appears. Clear overlays belong on any list of premium finishing techniques that elevate your craft. You cut a window into your card front and back it with a piece of clear acetate sheet.
Then you layer a decorative cardstock frame on top, creating a gorgeous little window that shows off your design inside. The magic is in the depth it adds, making your card feel like a miniature piece of framed art.
Always use strong double-sided tape to attach the acetate, as liquid glue can warp it. For a beautiful way to showcase a scene or a special message, this technique is incredibly satisfying. You can even add tiny embellishments behind the window, similar to how you might decorate flower vases beautifully, for a personalized touch.
30. Make a Dried Fruit Slice Holiday Card
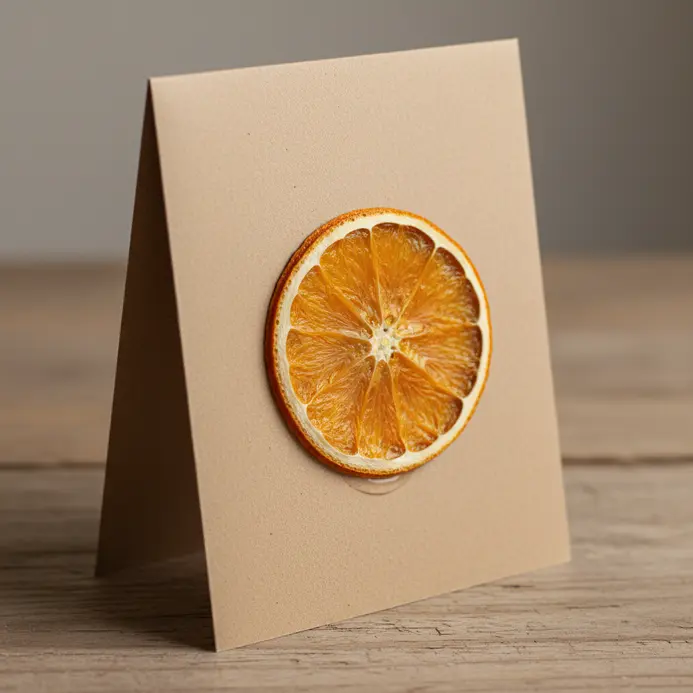
Who would have thought a piece of fruit could become such a stunning card? Natural materials create memorable festive projects, especially when citrus slices add a wonderful scent. You start by slicing citrus thinly and drying it in a low oven until it is firm and translucent. Arrange the slices on a kraft cardstock base and secure them with strong craft glue. I love how this card offers a multi-sensory experience, from its rustic look to its subtle, festive aroma.
Trust me, the recipient will absolutely cherish this unique and thoughtful touch.
Envelope Calibration and Decorative Finishing Touches
Always assemble your finished card and measure its exact thickness before selecting an envelope, or you risk a trip back to the craft store. A standard invitation envelope often cannot handle the beautiful dimension you just built. You need to look for a deep A7 envelope or another style specifically labeled for layered cards.
Once you have the right fit, consider continuing your theme onto the envelope flap with a simple stamped motif or a coordinating washi tape border. This extra step turns the whole package into a cohesive gift. A light spritz of workable fixatif over any chalk or pastel details on the card face will prevent smudging during transit. These final checks ensure your handmade masterpiece arrives as perfect as the moment you finished it.
Conclusion
Handmade cards have a way of making someone feel truly seen, turning a simple message into a cherished keepsake. The best part of these diy greeting card ideas is that they give you a clear path to follow, so you can spend less time planning and more time enjoying the process of making something beautiful. My best advice is to pick one design that speaks to you, gather your favorite papers and tools, and begin working. The real magic is in putting your own personal touch on it, creating something that only you could give.
FAQs
Q: What is the best paper to use for DIY greeting cards?
A: A good quality cardstock is essential for a professional feel. It is thick enough to stand on its own and holds layers of adhesive and embellishment without warping. For a softer look, watercolor paper works beautifully, and vellum adds a lovely translucent layer.
Q: How do I keep layered cards from becoming too bulky?
A: Use thin, double-sided adhesive tape or glue dots instead of thick craft glue. Foam adhesive dots add nice dimension without adding weight. Trimming your layered elements with sharp scissors or a paper cutter also helps keep the edges clean and the profile slim.
Q: Can I make these cards without a lot of specialty tools?
A: Absolutely. Many designs rely on basic supplies like scissors, glue, and paper. Start with ideas that use materials you already have, like washi tape or pressed flowers from your garden. You can always add specialty tools like die-cut machines later as your interest grows.
Q: How do I make sure my handmade card stays closed in the mail?
A: For cards with heavy embellishments, use a sturdy envelope and consider securing the closure with a small sticker. If the card itself is thick or dimensional, it is often best to hand-deliver it or package it in a small box instead of a standard envelope.
Q: What is a good way to add a personal message inside a decorated card?
A: Leave a blank panel on the inside for writing. If the front is busy, keep the interior simple. You can also use a coordinating piece of plain paper as an insert. For a polished finish, practice your handwriting on scrap paper first or use a fine-tip pen you are comfortable with.


