


Essential Materials for Simple Kids Crafts
Successful Mother’s Day projects start with a core kit of safe, washable materials. Prioritize tempera or other non-toxic paints, as these wash easily from skin and clothes. Construction paper in bright, cheerful colors forms the base for most projects. Have glue sticks, child-safe scissors, and chunky washable markers ready. For adding personality, keep basic embellishments like large googly eyes, heart stickers, and short lengths of ribbon on hand. This specific selection supports the fingerprint art, simple collages, and handprint keepsakes common to this niche. These items allow children to work independently with minimal mess, ensuring the focus stays on creating a heartfelt gift rather than managing complicated supplies.
How to Choose Age-Appropriate Mother’s Day Projects
Selecting the right craft depends on matching the project’s demands to the child’s motor skills and attention span. For toddlers aged 2-3, focus on sensory activities with single-step actions, like making a handprint with paint or sticking large pre-cut shapes. Preschoolers 4-5 can handle projects with 2-3 steps, such as basic collage assembly or using a glue stick with supervision. Children 6-8 are ready for more structured tasks involving simple cutting along straight lines or sequenced painting. Always prioritize projects that the child can complete the majority of themselves, as this ownership creates the proud, personal sentiment that makes the gift special. Avoid designs requiring precise gluing or intricate cutting, which lead to frustration.
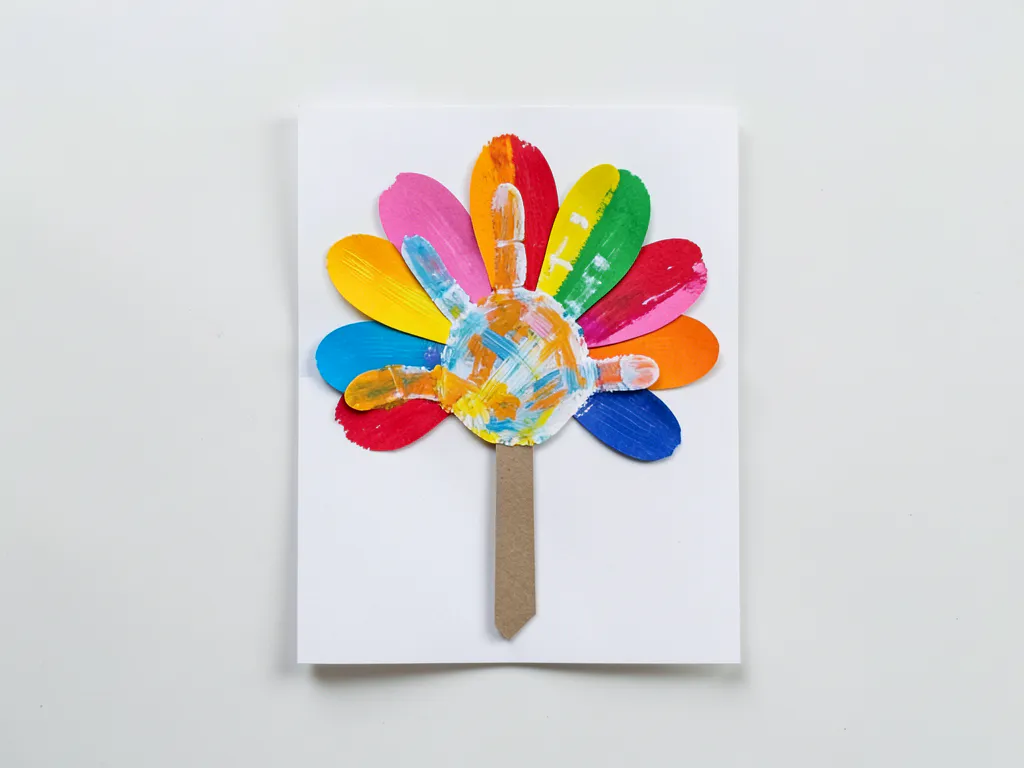
1. Make Painted Handprint Flower Pots in Minutes
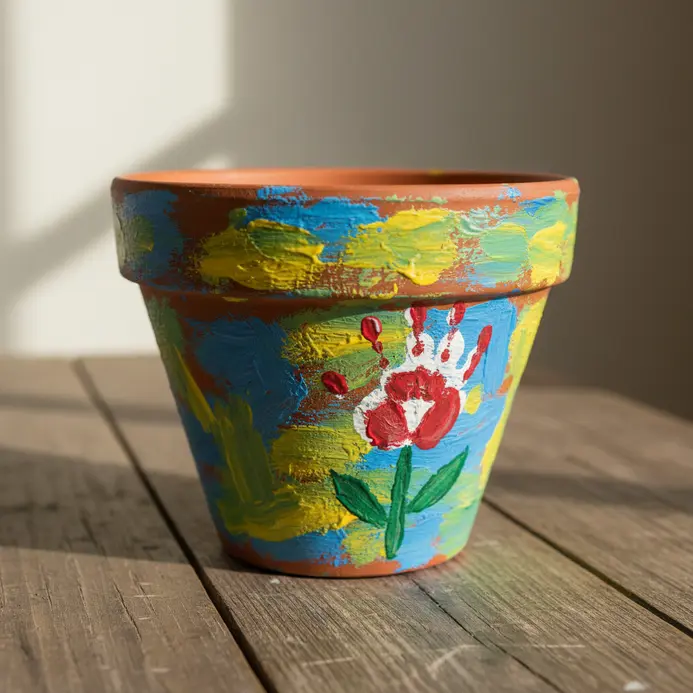
Picture a simple clay pot transformed into a blooming garden of your child’s handprint, ready in about fifteen minutes. This project is a fantastic way to create a heartfelt keepsake that captures a moment in time. You will need a terracotta pot, some non-toxic acrylic paints, and a few brushes. It is a perfect, quick gift that feels wonderfully personal.
The process is simple and fun for little hands. First, paint a solid background on the pot if you like, though the natural terracotta color works beautifully. Then, coat your child’s palm and fingers with a contrasting paint color and press it firmly onto the pot. Once that dries, you can turn those little fingers into flower petals by painting on stems and leaves. For a fun twist, try painting each finger a different color for a rainbow handprint flower.
Everyone loves this craft because it is so fast and the sentimental result is priceless. A great tip is to practice the handprint placement on a piece of paper first to get the pressure right. This technique is a staple in many family craft projects because it is so accessible and memorable.
2. Paper Plate Handprint Wreaths: Display Love on Front Door
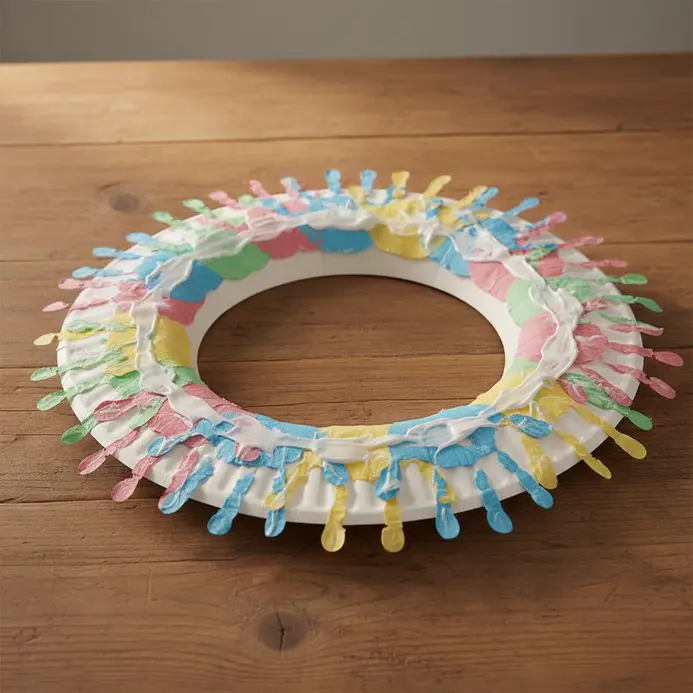
Picture your child’s little handprints turned into a beautiful, heartfelt decoration for the front door. This project uses a simple paper plate as the base, transforming it into a sentimental wreath you’ll treasure. Let’s trace and cut out those handprints from colorful construction paper, then arrange and glue them around the plate ring. It’s a perfect way to create a personalized keepsake that proudly shows off your family’s love.
People adore this craft because it captures a moment in time. Those tiny handprints won’t stay that way forever, so having them displayed is incredibly special. It’s also a fantastic project for building fine motor skills while having fun. For a great variation, try making it a group activity with the whole family for a unique family day craft.
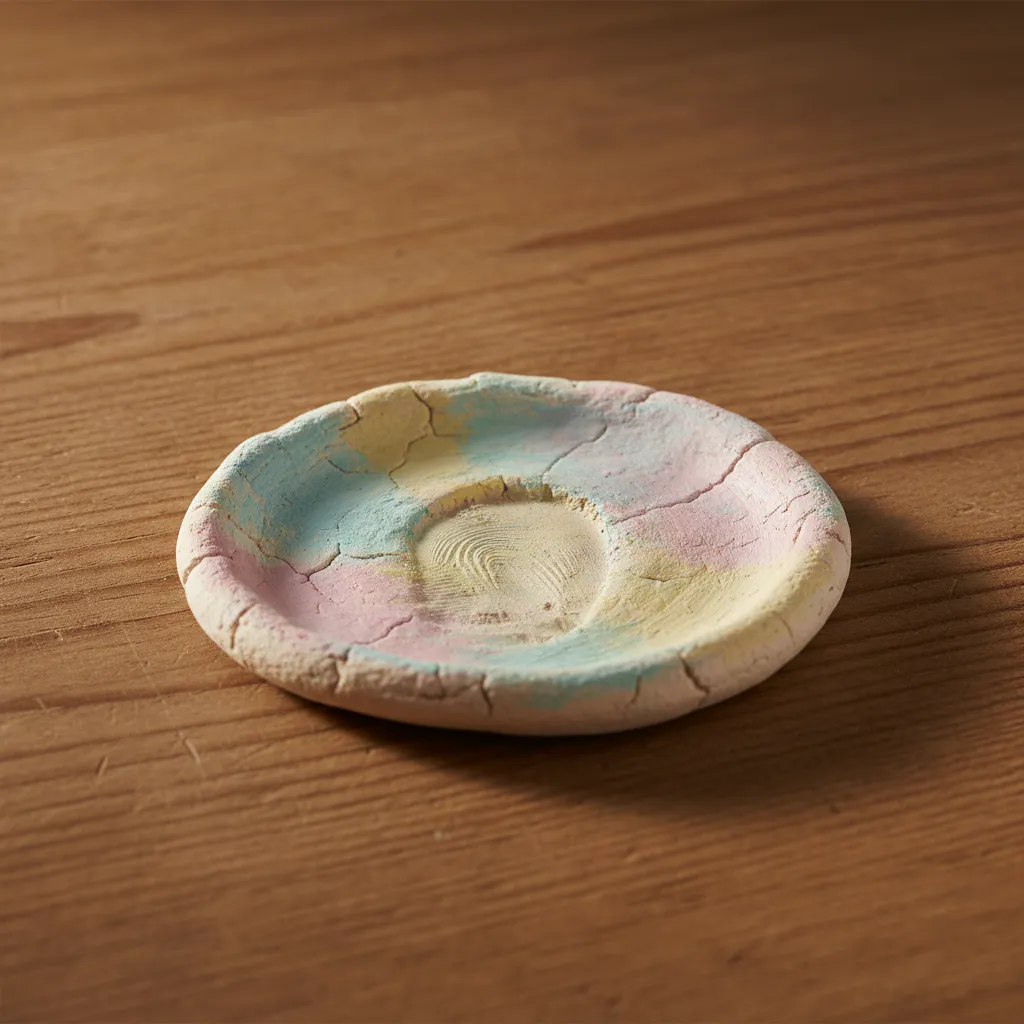
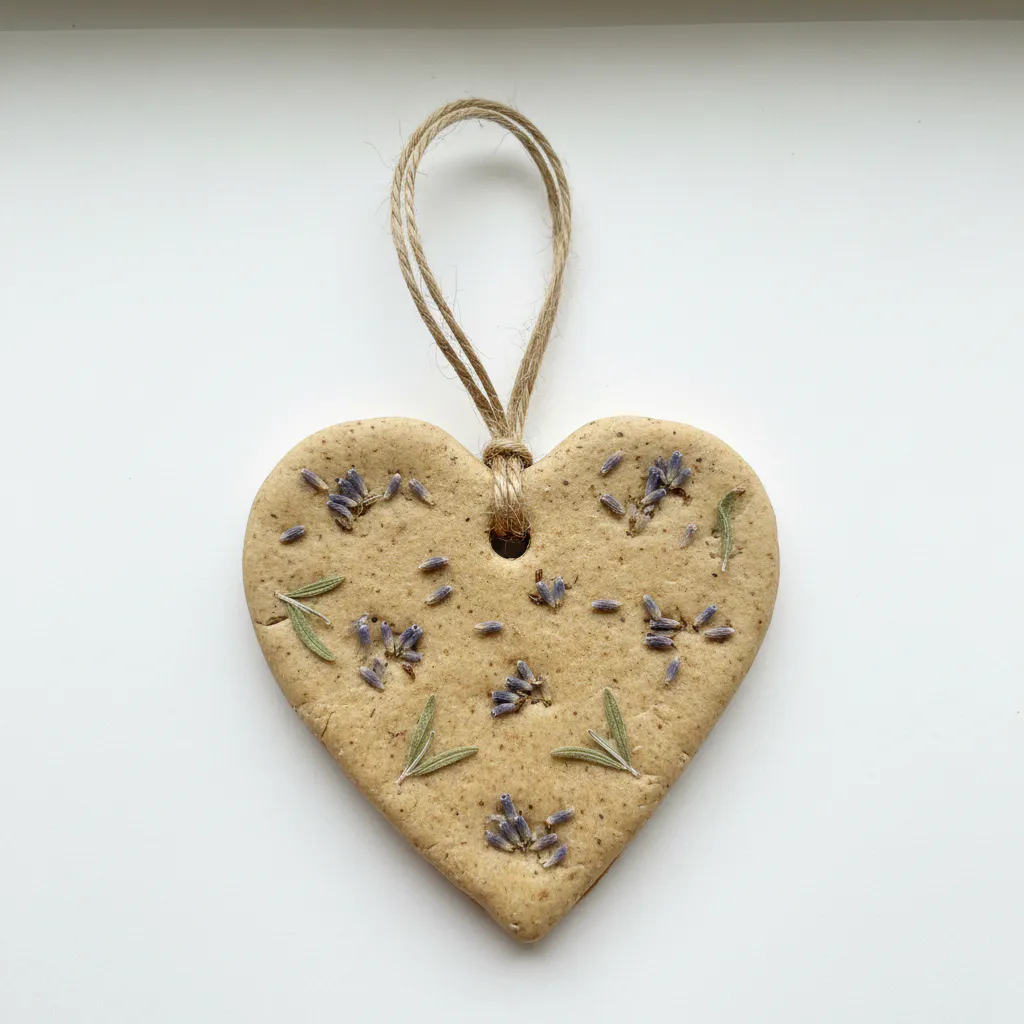
3. What Makes Salt Dough Handprint Ornaments Last for Years?
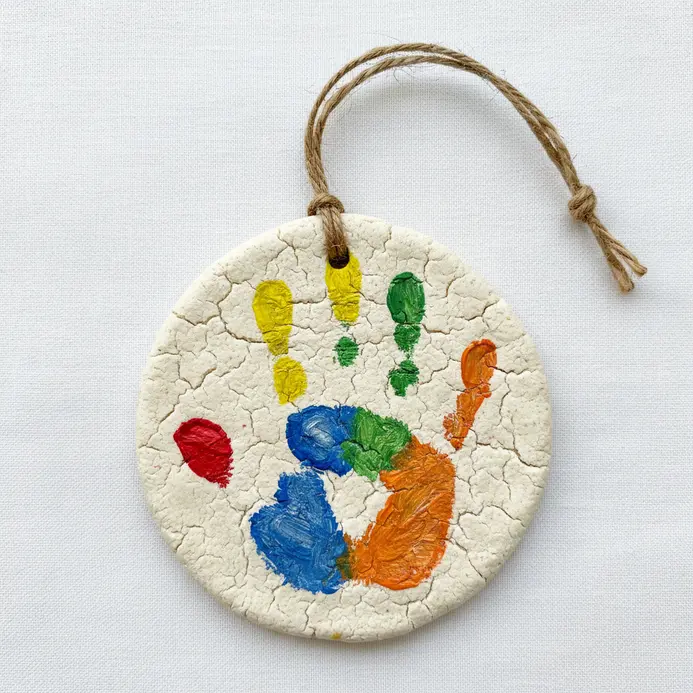
We want these sweet handprints to become family heirlooms, not just seasonal decorations. The secret to their long life is a combination of a strong recipe, complete drying, and a solid protective seal. Think of it like building a tiny fortress around your child’s precious print.
First, your dough needs the right ingredients. A high ratio of fine table salt to flour acts as a natural preservative. Adding a tablespoon of white glue gives the dough flexibility to resist cracking. After you’ve pressed the handprint, drying is the most critical step. You must bake it low and slow, or let it air dry for days, until it’s completely hard and cool all the way through. Any leftover moisture inside will ruin it later. Finally, you seal the deal. Applying multiple thin coats of a clear acrylic sealer, front and back, creates a waterproof barrier. This locks out humidity and protects any paint you add, making the ornament tough enough for years of love. A great sealing technique is just as important for other keepsakes, like making a personalized painted canvas gift.
This careful finishing process is what separates a weekend activity from a true keepsake, and it applies to many other easy mothers day crafts for kids that use paint or paper.
4. Fingerprint Art Heart Cards: Small Prints, Big Sentiment
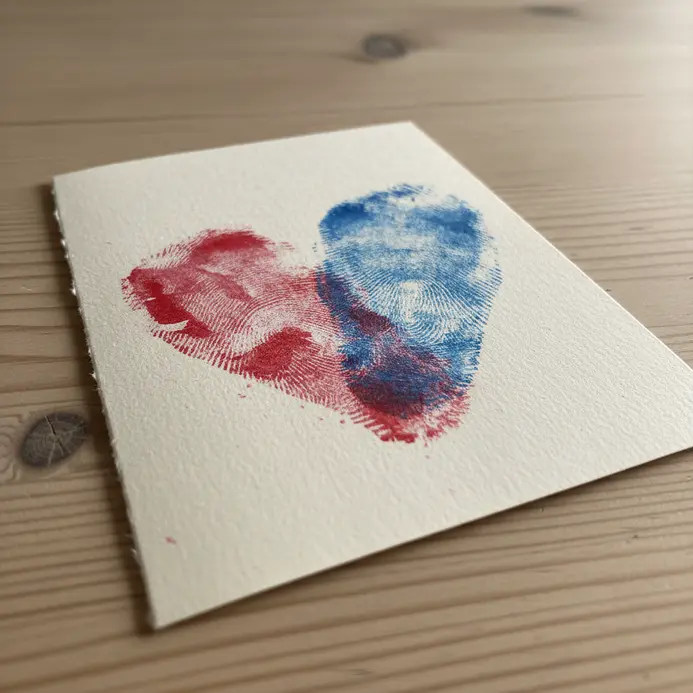
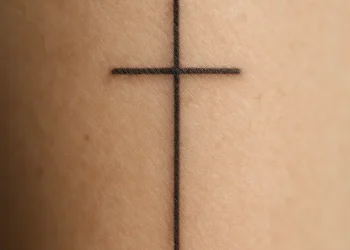
There is something truly magical about turning a simple fingerprint into a lasting symbol of love. This project creates a personalized keepsake card by using thumbprints to form a heart shape. You only need some blank cards, a washable ink pad, and a fine-tip marker. The result is a unique piece of art that carries a child’s literal touch, making it a gift a parent will treasure forever. We love it because it transforms an everyday mark into something with deep sentimental value.
Let’s talk about the classic two-print method. Press a thumb onto the ink pad and make two prints side-by-side, with the bottoms touching. The natural oval shapes create the top curves of a heart. Then, use your marker to draw a ‘V’ shape at the bottom to connect them and complete the heart. Add a sweet message like “I love you” or the date next to it. For a fun twist, try making a whole bouquet of fingerprint flowers inside a heart outline, similar to the colorful approach in many canvas painting ideas. Keep baby wipes handy for quick cleanups between colors.
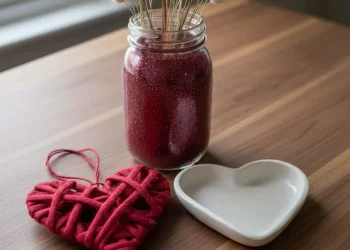
5. Build a Pom-Pom Flower Bouquet With Leftover Yarn

This project turns leftover yarn scraps into a soft, colorful bouquet that Mom will adore. Let’s grab those bits of yarn from the craft bin and make some fluffy pom-pom flowers. You can wrap the yarn around a simple cardboard donut or use a fork for smaller buds. The best part is that no two flowers will look the same, which makes the whole bouquet feel extra special and handmade.
Kids love the sensory experience of winding the yarn and the magic of fluffing a pom-pom into shape. It’s a forgiving craft where imperfect shapes just add more charm. For a fun twist, let your child pick a painted jar or a decorated cup to use as the vase. A small dab of glue secures each pom-pom to a green pipe cleaner or skewer stem, creating a cheerful gift that lasts.
The tactile nature of this project makes it one of our favorite easy mothers day crafts for kids who love working with different textures.
6. Construction Paper Photo Frames: Instant Tabletop Keepsakes

Picture this: a cherished photo of you and mom, displayed in a frame made by your child’s own hands, ready for the table in under half an hour. It’s a fantastic project that delivers that instant ‘wow’ factor. We’re using simple construction paper to create a custom window frame and a clever paper stand. The best part? You likely have all the supplies in your craft drawer right now, making it a perfect last-minute activity.
Let’s start by creating the frame base. Place your photo on a sheet of sturdy construction paper or cardstock and trace around it lightly. Now, draw a larger rectangle around that outline to make a border about two inches wide. Carefully cut out this big rectangle, then cut out the smaller inner one to create your picture window. For a pop of color, I love using a contrasting color for the backing paper.
Why does this craft work so well? It combines personal sentiment with a quick, satisfying build that kids can manage. Tape your photo to the center of the backing sheet, then glue the frame on top. To make it stand, fold a paper strip into a simple accordion or a triangle and glue it to the back. Now comes the fun part: decorating! Let your little artist go wild with markers, stickers, or even other easy crafts for kids supplies like glitter or buttons to personalize the border.
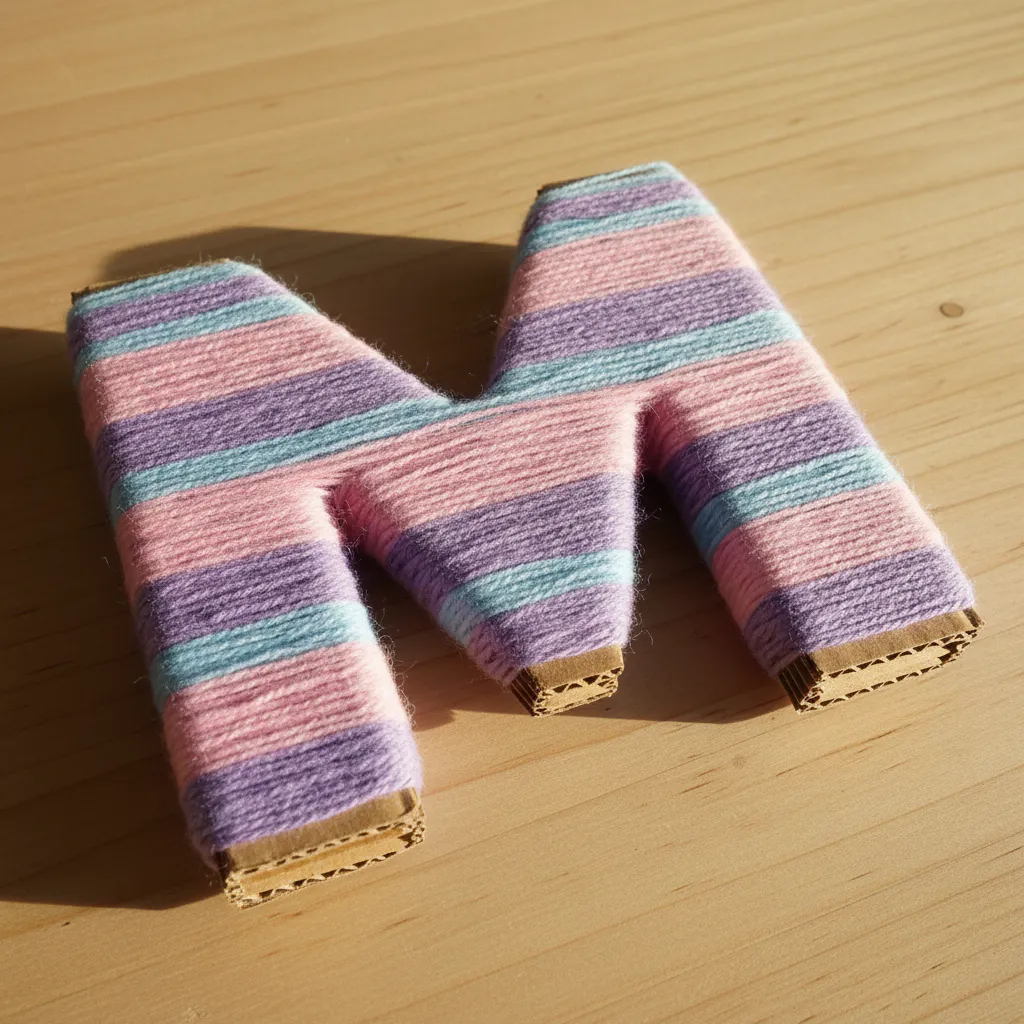
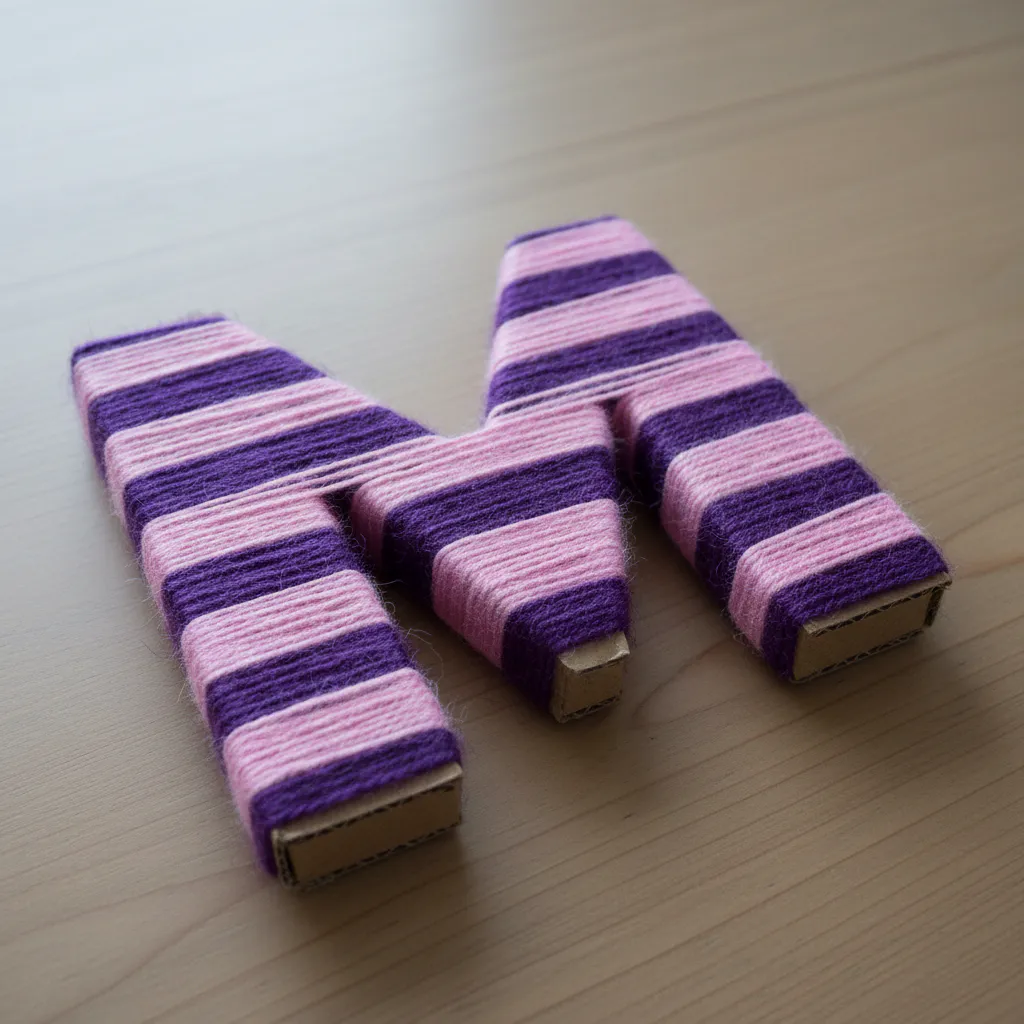
7. Why Choose Yarn-Wrapped Cardboard Letters for Shelf Decor?

Let’s talk about texture. A shelf full of hardback books and smooth ceramics gets a cozy upgrade when you add the soft, fuzzy feel of yarn wrapped letters. This project turns simple cardboard and leftover yarn into a personal touch for any room. It is one of the most budget friendly decor ideas you will find, and it is perfect for crafts to do at home with children. You can spell out a name, a special word, or even just a single initial. The result is a handmade piece that feels warm and inviting.
Why does this work so well for shelves? The scale is just right. These letters stand up nicely without taking over the space, and their lightweight design means you will not damage your shelves. You can lean them casually or arrange them in a neat row. This makes them a fantastic choice for renters or anyone who likes to change their decor often. Plus, the repetitive wrapping is surprisingly calming, making it a great family activity.
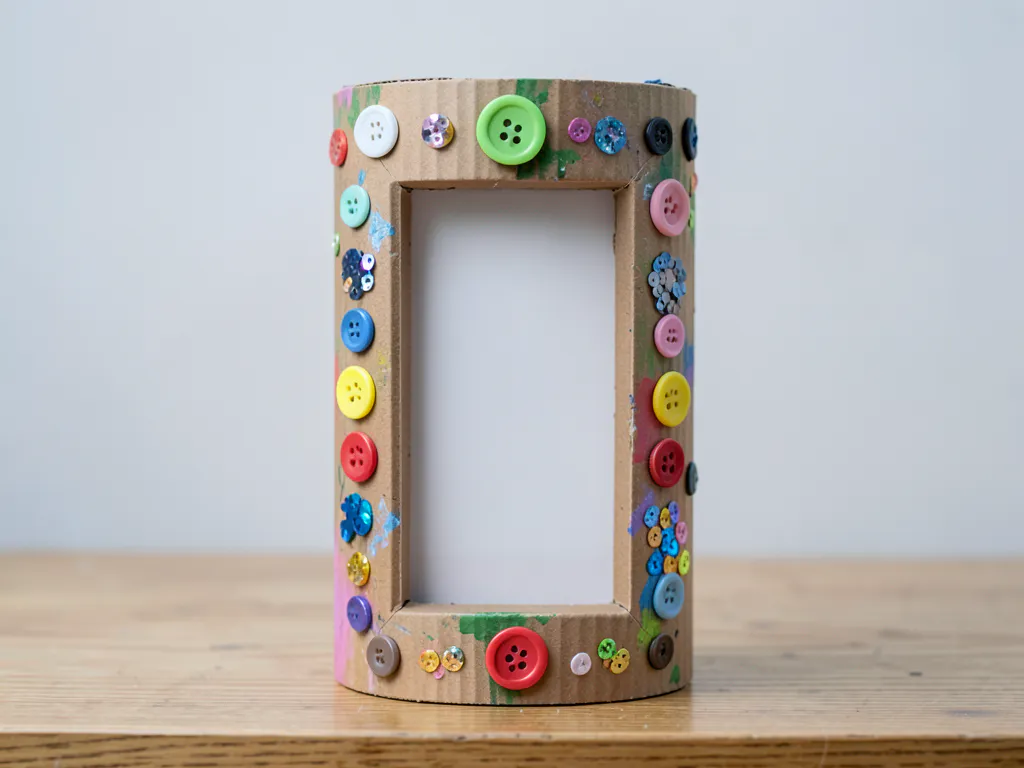
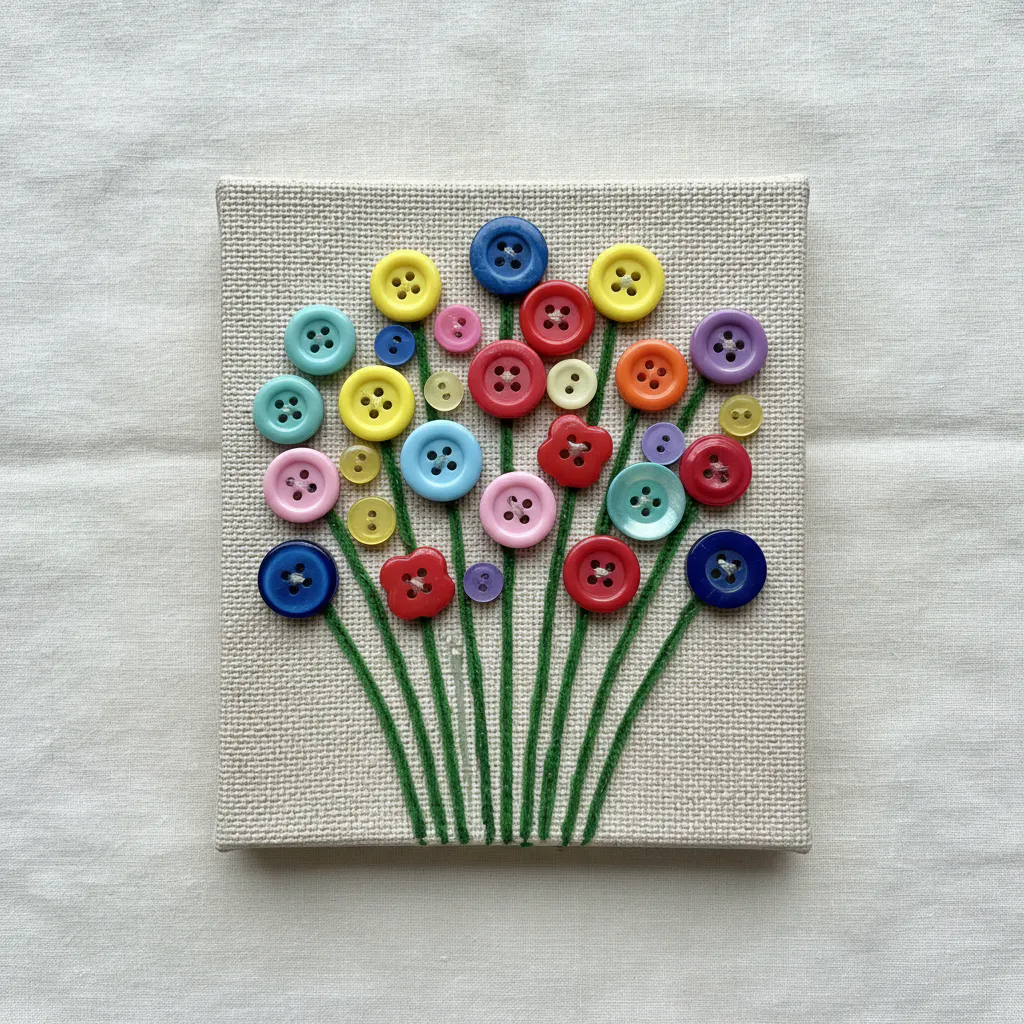
8. Button Art Initial Decor: Colorful Texture for Mom’s Desk
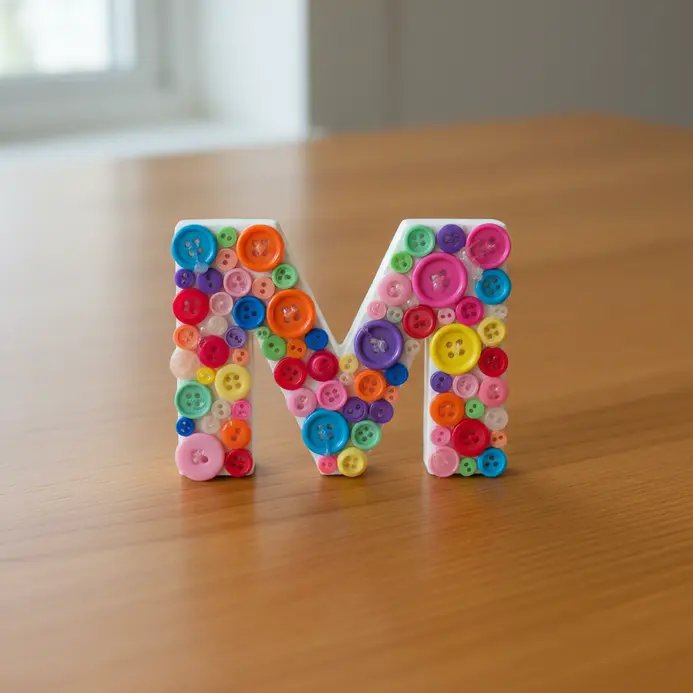
Create a stunning piece of decor that’s both personal and playful with button art initials. We use assorted buttons to form mom’s initial on a wooden plaque or canvas. Mix sizes and colors for a vibrant, textured look, similar to techniques in beginner craft projects at home. Start by sketching the letter and then arrange the buttons, overlapping for depth. Kids enjoy sorting and placing the buttons, making it a fun, hands-on activity that results in a cherished gift. For a quicker set-up, use a hot glue gun, but for permanence, E6000 adhesive is your best bet. Try a floral theme with green and pink buttons for a spring-like feel.
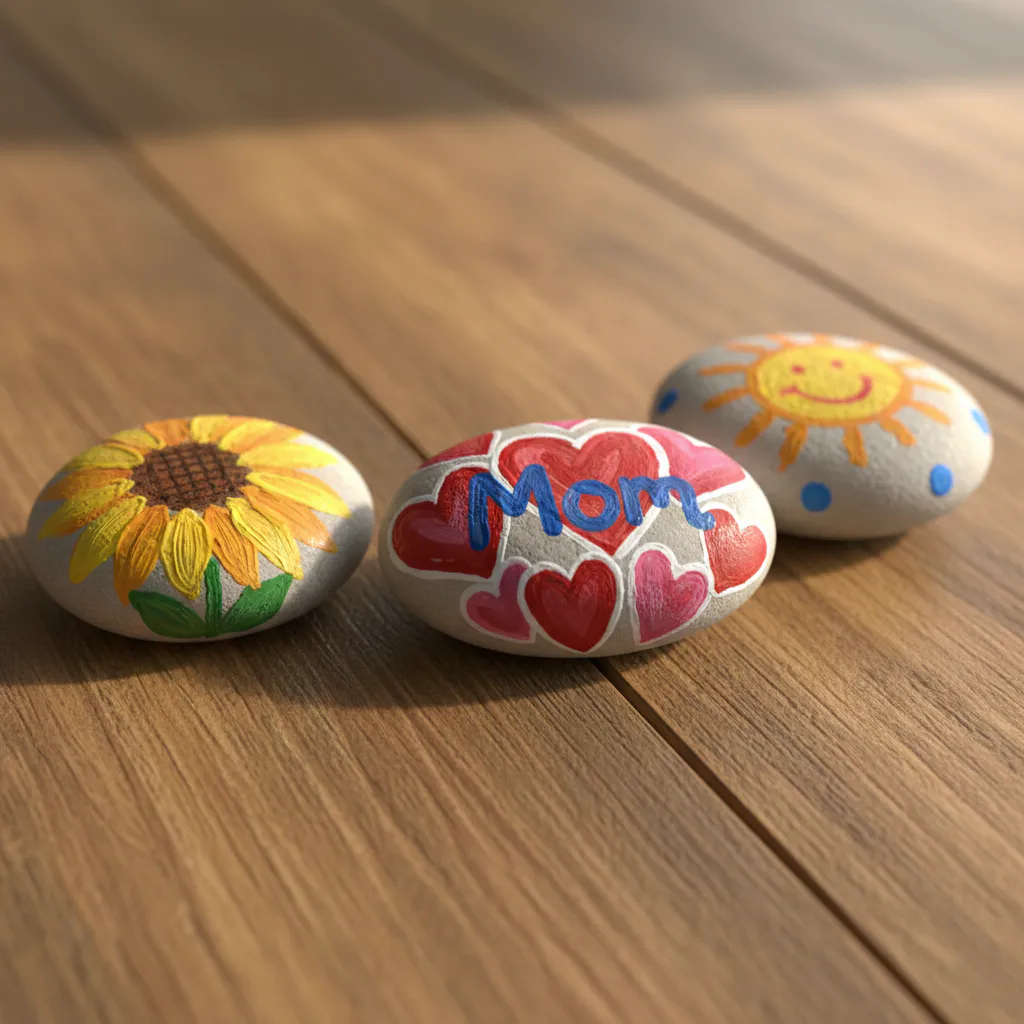
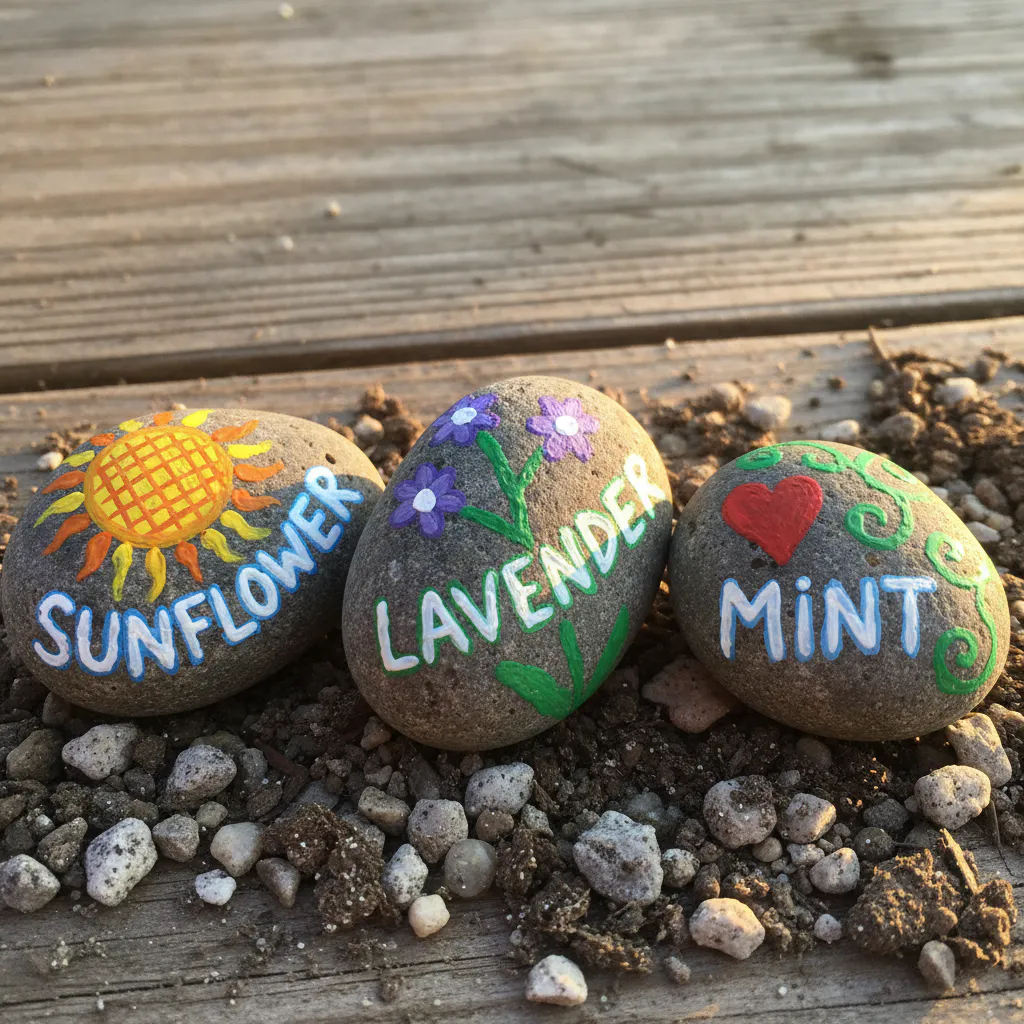
9. Make Painted Rock Paperweights With Cheery Outdoor Scenes
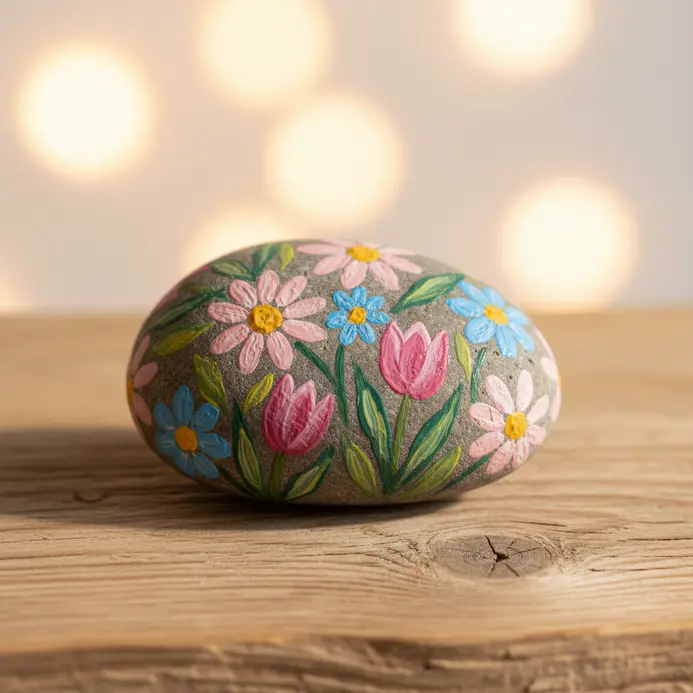
Turn a simple rock into a bright spot of sunshine on Mom’s desk. We transform smooth river stones into miniature landscapes, painting cheerful scenes like sunny meadows or calm beach views. It is a wonderful way to combine a functional paperweight with a little piece of art. Kids love it because it feels like painting a tiny, special world.
Start by washing your rock and applying a white base coat. This makes all your colors pop. Then, lightly sketch your scene. Remember to paint the background first, like the sky, then add hills or trees, and finish with fun details like flowers. Let each layer dry so your colors stay crisp. A great tip is to use a small round brush for those tiny details, like butterfly wings or flower petals.
Why does this work so well? The flat rock surface is a perfect, sturdy canvas for new painters. After your masterpiece dries, seal it with a few coats of clear varnish to protect it. You can even glue a felt pad on the bottom. This craft builds skills you can use in other beginner painting projects too.
10. Tissue Paper Stained Glass: Soft Color for Sunny Windows

Picture your window glowing with soft, beautiful colors, like a gentle sunrise captured in paper. This project lets you create that magical effect using simple materials you probably have at home. You use sticky contact paper as a base, build a frame with black construction paper, and fill it with torn pieces of colorful tissue. The light shining through creates a gorgeous, diffused stained glass look without any real glass.
This is a fantastic option if you want a big, beautiful result with minimal mess. You get to design any shape you like, from simple flowers to geometric patterns. I love how forgiving it is, perfect for little hands that might tear paper a bit unevenly. In fact, that uneven tearing often makes the final piece look more artistic and organic.
Here is a great tip to make your colors pop. Before you cut or tear your tissue paper, hold a piece up to a bright light or a sunny window. This shows you the true color intensity when the light shines through it. Some reds look deep and rich, while some yellows become brilliantly bright. Knowing this helps you plan your color placement for the most stunning effect. This technique is similar to the light play you get with a classic suncatcher craft, but on a larger, more customizable scale.
The glowing result looks especially beautiful during sunrise or sunset, making this one of the most visually rewarding easy mothers day crafts for kids on our list.
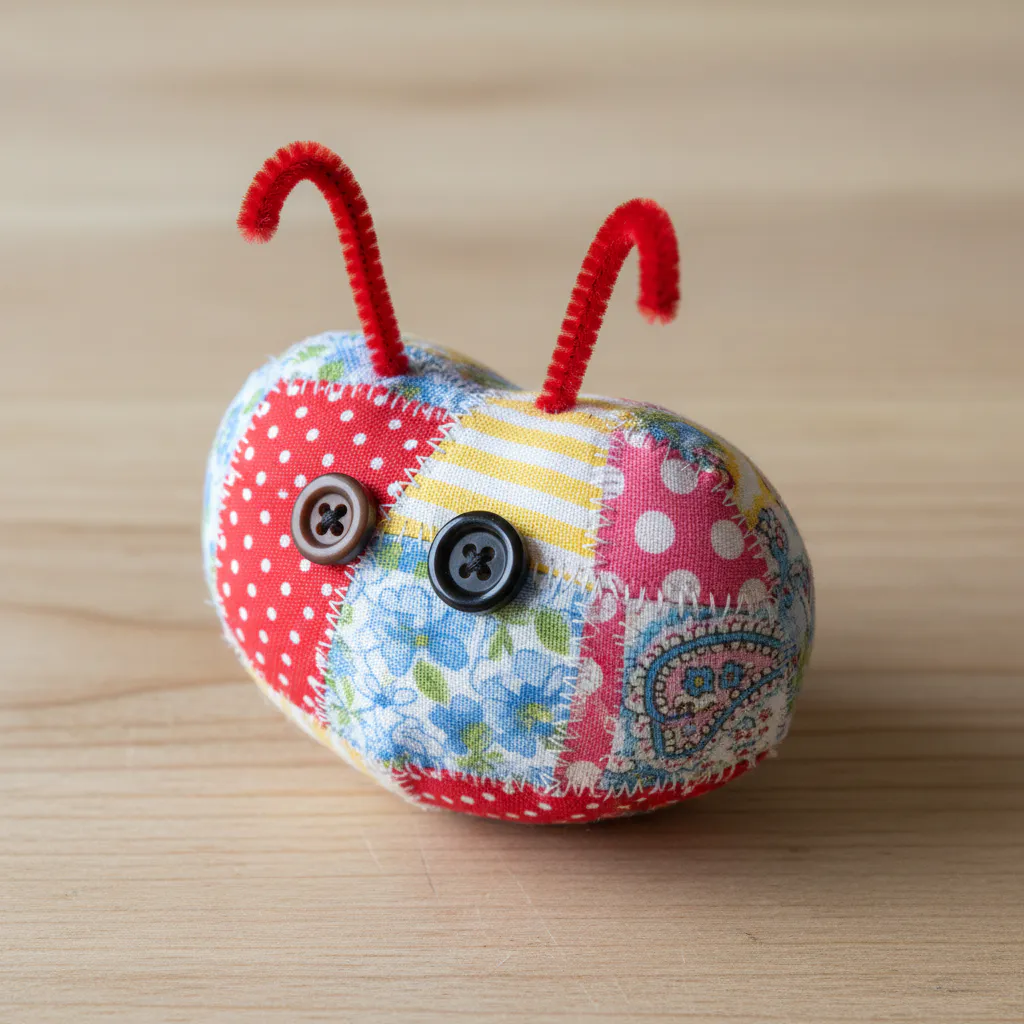
11. What Makes Pipe Cleaner Animal Magnets a Fridge Favorite?

Beyond being cute, these little guys earn their keep by turning your fridge into a dynamic gallery of family creativity. They are incredibly forgiving to make, so a wonky-legged giraffe or a multi-colored dog becomes a point of pride instead of frustration. The real magic is how they blend whimsy with purpose, holding up a cherished drawing or a grocery list with personality. We love them because they give a child’s art a permanent ‘job’ and a place of honor in our daily lives.
Think about the developmental wins, too. Twisting and bending those fuzzy stems is a fantastic workout for fine motor skills. Once the magnet is stuck on the fridge, the fun continues as kids arrange their animals into scenes, sparking imaginative play right in the kitchen. It’s a craft that keeps on giving, much like the joyful simplicity you find in many easy crafts to do at home for kids.
For a quick tip, start with simple shapes like snakes or basic butterflies before tackling more complex creatures. This builds confidence and delivers that instant gratification kids crave.
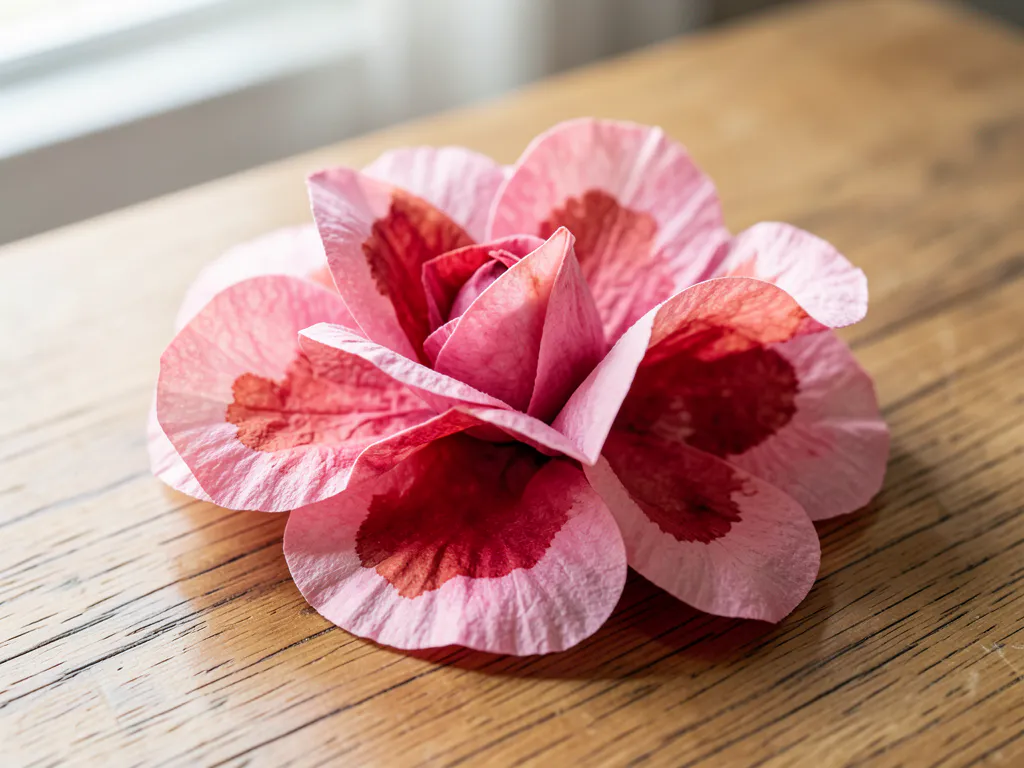
12. Coffee Filter Watercolor Flowers: Gentle Blooms Without Dirt

Picture a vase filled with soft, colorful flowers that your kids painted themselves, and not a speck of dirt in sight. We are turning simple coffee filters into beautiful, watercolor blooms. The filters are wonderfully absorbent, so the paint spreads and blends in a really organic, pretty way. This is a fantastic craft to do at home because it uses items you likely already have.
Why does this work so well? The thin paper of the coffee filter acts like a petal, letting the watercolor create gentle washes of color. You can try two main painting methods. For the flat method, just paint right onto the filter laid on your table. For a more uniform look, try the dipped method where you lightly dip the filter edges into diluted paint.
Once your painted filters are dry, the real fun begins. Stack a few and pinch the center to make a fluffy peony. Or, fold one like a paper snowflake, cut some petal shapes, and unfold it to reveal a symmetrical bloom. If you want stems, a pipe cleaner poked through the center and wrapped with green tape does the trick perfectly. Projects like these highlight why easy mothers day crafts for kids are such a popular choice for meaningful handmade gifts.
13. Build Popsicle Stick Picture Holders for Desk Display

Picture a tiny, handmade frame holding a favorite snapshot, ready to brighten up a desk. This project transforms simple popsicle sticks into a functional display for small photos. It’s a straightforward build that results in a sweet and useful gift. We love it because it’s a perfect way for kids to create a personal keepsake.
Start by building a simple rectangle frame for your photo using four sticks and some wood glue. Use clothespins to hold the corners tight while they dry for about twenty minutes. For a stable stand, attach an A-frame support or a simple angled leg to the back. You can find more simple building ideas in our list of easy crafts to do at home.
Once the frame is sturdy, the real fun begins with decoration. Let the kids paint it with bright colors or decorate it with markers. A little tip? Add a small ledge inside the bottom of the frame to keep the photo from sliding out. After everything dries, you have a charming holder ready for a special picture.
14. Beaded Bracelet Keepsakes: Wearable Love in Every Color

Picture mom wearing a vibrant, beaded bracelet that her child made with love. With elastic cord and a variety of beads, your little one designs a unique piece of jewelry. They create patterns with mom’s favorite colors or add letter beads for a personal touch. This activity turns simple materials into a wearable keepsake. For a secure finish, dab a bit of clear glue on the knot. The stringing technique is similar to perler bead crafts, which also enhance coordination.
15. Why Choose a Footprint Butterfly Canvas for Nursery Walls?

Let’s talk about turning those impossibly tiny baby feet into a piece of art you’ll treasure forever. A footprint butterfly canvas is a beautiful keepsake where your baby’s footprint becomes the body of a butterfly, often personalized with their name and birth details. It captures a fleeting moment in a durable, ready-to-hang format that fits perfectly with soft nursery themes. We love it because it’s a heartfelt piece of their first ‘artwork’ that symbolizes growth and hope. For a successful print, try this tip when your baby is sleepy and their feet are relaxed for the cleanest impression. This project is a wonderful way to create personalized art, much like the approach in many easy canvas painting ideas for kids.
Because the canvas is durable and ready to hang, this project stands out among easy mothers day crafts for kids that double as permanent nursery decor.
16. Recycled Material Robot Sculptures: Eco-Friendly Desk Buddies

Let’s turn your recycling bin into a source of pure character. These little robot buddies are more than just decorations. They are a fun way to spark creativity while giving old bottle caps, broken toys, and spare hardware a charming second life. We love how this project makes environmental thinking feel playful and personal.
You can build your robot from almost anything. Raid the junk drawer for old keys, paper clips, or game pieces. Look in the garage for nuts, bolts, and springs. The best part is designing its personality. Is it a friendly helper or a quirky inventor? A strong adhesive like hot glue is your best friend for assembly. My top tip is to start with a stable base, like a small box or a jar lid, so your creation stands proud on your desk. This is a fantastic project to do alongside other easy crafts to do at home for kids that use everyday items.
17. Make Bubble Wrap Printed Greeting Cards for Textured Fun

Ever want to make a card that feels as special as it looks? Turning bubble wrap into a printing tool gives you those fun, raised dots that are perfect for a handmade greeting. All you need is some scrap bubble wrap, a little paint, and your cardstock. We love this project because it turns something you might toss into a creative tool, and the results always look fantastic. A great tip is to press down firmly with your whole hand instead of sliding the wrap to get a crisp, clean print.
Try cutting your bubble wrap into a heart shape before you paint it for a sweet Mother’s Day design. You can use pastel pinks and greens to create a soft, spring-like feel. This simple technique is a wonderful way to add a professional touch to your easy painting projects at home. Let the paint dry completely before you add a handwritten message inside with a nice marker.
18. Crayon Resist Thank You Notes: Hidden Messages in Bright Wax

There’s something genuinely magical about watching a hidden picture or message appear out of thin air. This technique lets kids create a thank you card with a secret surprise for the recipient. They press down hard with a white or light-colored crayon to draw on paper, then wash watercolor paint over the top. The wax resists the paint, so their drawing pops through like a little miracle. It’s that moment of reveal that makes this craft so memorable and fun.
You only need a few basics: white cardstock, a white crayon, and some watercolor paints. Pressing firmly with the crayon is the key to making sure the wax leaves enough of a barrier. I love using dark blue or purple paint for the most dramatic contrast. You can turn this into a simple craft to do at home with minimal fuss and maximum impact.
The real charm is in the personal touch. A child can draw hearts, their name, or a picture of the gift they received. When the recipient paints over the card, they uncover that special, hidden thank you. It’s a beautiful way to combine art with a heartfelt gesture.
19. What Makes Pasta Noodle Jewelry a Pantry Surprise?

Picture your child’s delight as they transform a simple box of pasta into a vibrant, wearable treasure for Mom. This project is the ultimate pantry surprise because it starts with items you already have at home. You grab some tube or shell pasta, a bit of paint, and some string. In minutes, those plain noodles become the beads for a completely unique necklace or bracelet. The magic is in taking something ordinary and making it extraordinary with just a little creativity.
What I love is how this craft celebrates resourcefulness. Kids get to experiment with color and design while making something truly personal. It’s a fantastic way to turn a quiet afternoon into a creative session that results in a heartfelt gift. For another project that uses common household items, try these easy crafts to do at home. A quick tip: mix a drop of white glue into your acrylic paint. It helps the color stick to the pasta’s slick surface and makes the finished jewelry more durable for wearing.
20. Googly Eye Character Bookmarks: Silly Reading Companions
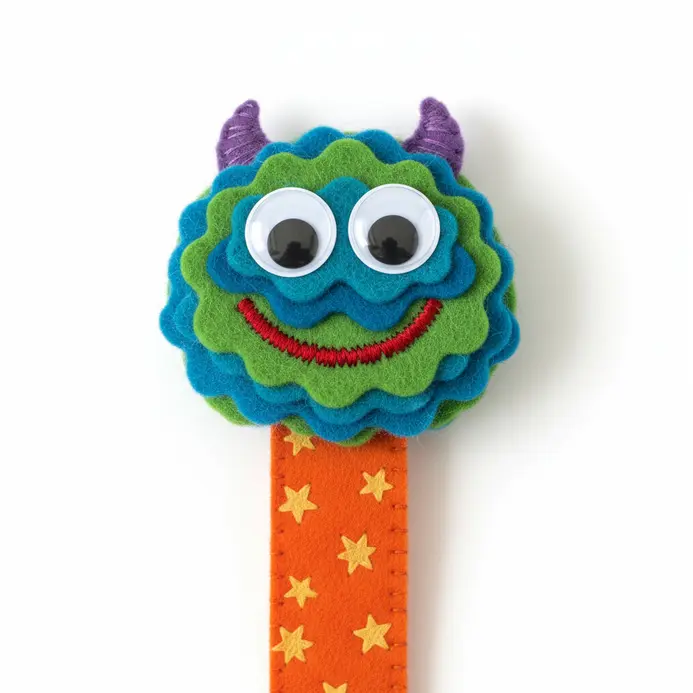
Who says reading can’t be a laugh? These googly-eyed bookmarks are the perfect trick to make any book more fun. You start by cutting a simple character shape, like a monster or a slice of pizza, from sturdy paper. Then you bring it to life with wobbly eyes and a few colorful details. The best part is watching a silly face peek over the pages, turning every chapter into a small adventure.
This project works because it adds a dose of pure playfulness to reading time. Let your child lead the design, picking the colors and deciding if their creature needs three eyes or a pipe cleaner mustache. For a durable finish that lasts, consider laminating your creations. This simple step makes them perfect for repeated use, much like the sturdy projects you find in many easy crafts to do at home with basic supplies.
The creative freedom in designing each character makes these bookmarks a standout choice when you want easy mothers day crafts for kids that encourage both art and literacy.
21. Fold Cupcake Liner Flower Cards in Three Easy Layers

This is one of those simple projects that looks so impressive when you’re done. We’re building a beautiful, textured flower for a card by stacking cupcake liners in three distinct layers. It’s a fantastic way to use those leftover baking supplies for a sweet handmade gift.
Let’s start with the foundation. Fold a piece of cardstock in half to create your card base. Now, the fun part is building the flower. Flatten a few liners, stack them, and make several cuts from the ruffled edge toward the center, leaving a small circle intact. Gently crumple each layer for texture, then stack them with a glue dot in the center, rotating each new layer so the petals don’t line up directly. Once you push the petals up from the bottom, you get a gorgeous, blooming 3D effect.
The magic is in that rotational stacking technique. It creates natural-looking depth and fullness that a flat paper flower just can’t match. It’s perfect for other holiday crafts for kids too. Try using patterned liners for the inner layer and solid colors for the outer ones to make your flower pop even more.
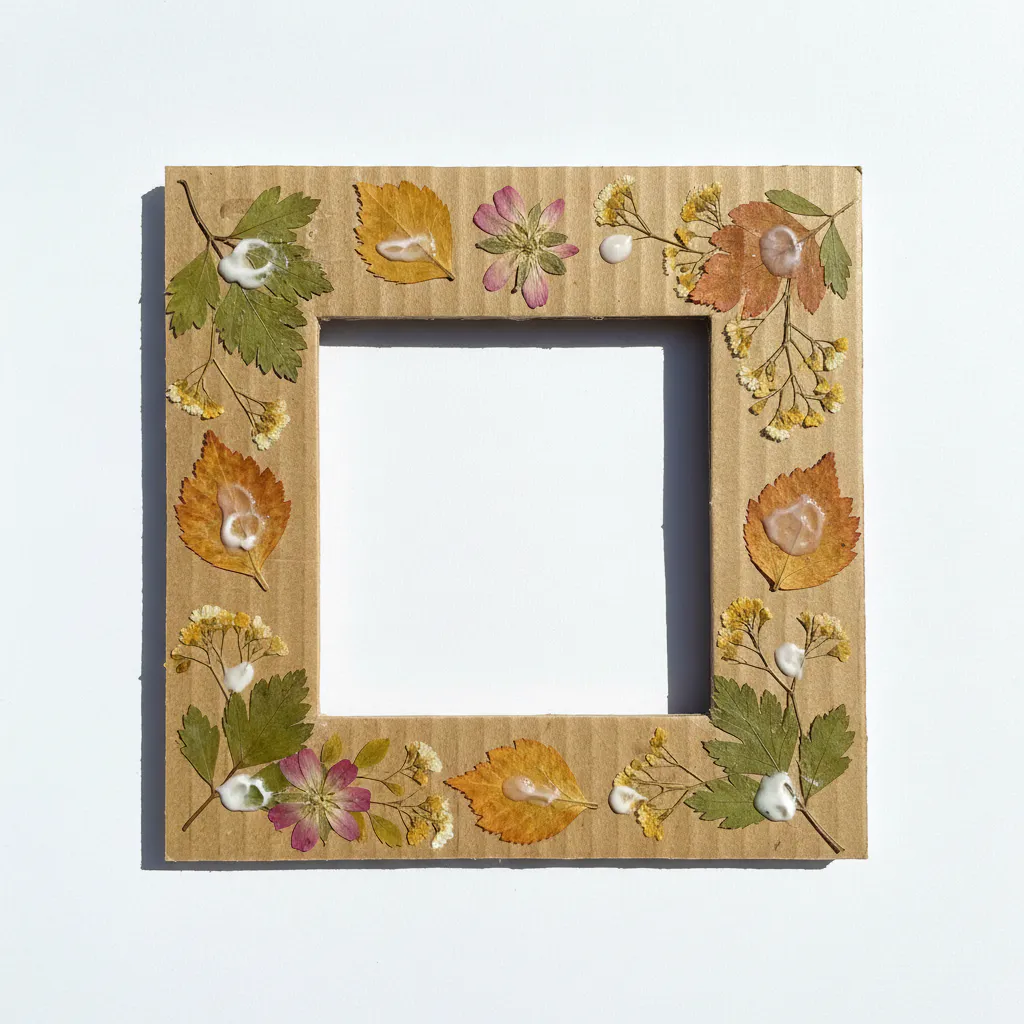
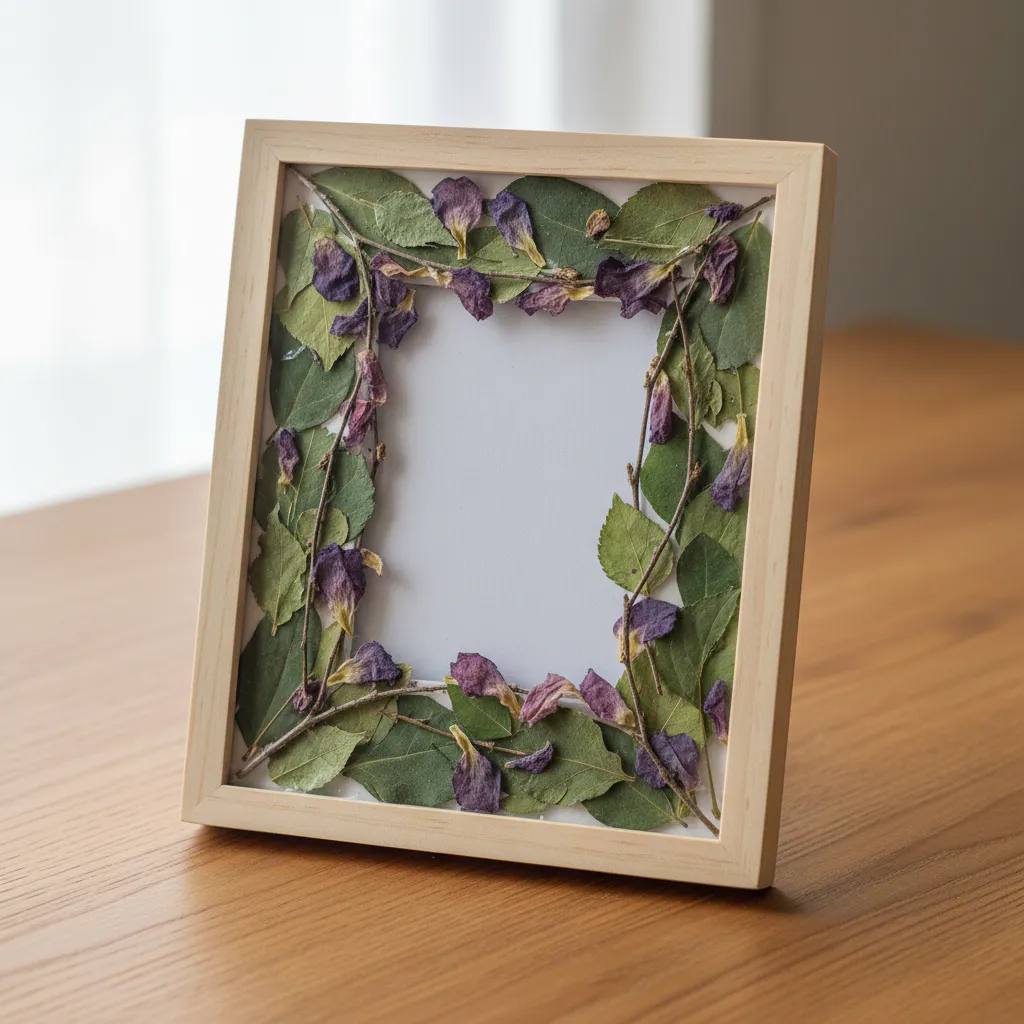
22. Nature Collage Art Boards: Outdoor Texture for Indoor Display

Bring the outdoors in with a nature collage art board that captures the essence of your favorite walks. Gather leaves, bark, feathers, stones, and more with your kids, then arrange them on a wood panel or sturdy canvas board, similar to bases in canvas painting for beginners. Use matte gel medium or wood glue to adhere the pieces and create a textured masterpiece. This project sparks creativity and connects you with nature.
People adore this craft because it turns simple finds into a lasting work of art, perfect for a heartfelt Mother’s Day gift. For a pro tip, create a textural landscape with bark as mountains and moss as grass. Use a clear sealant spray to preserve your collage for indoor display.
23. What Makes Paper Bag Puppet Stories a Stage Hit?

Picture the moment the lights dim and the first puppet pops up. That instant of pure, wide-eyed wonder is what turns a simple craft into a stage hit. The magic happens when you build a complete little world. You start with those big, expressive puppet faces and bright colors so everyone in the back can see. Then, you add a quick painted backdrop on a cardboard box to set the scene, and suddenly, you have a real theater.
The story is the engine. Keep the plot simple, like a search for a lost treasure or a shy dragon finding its voice. Give each puppet a distinct personality with a funny or gruff voice. Why does this formula work so well? It transforms kids from makers into storytellers and performers, building their confidence with every show. A great tip is to use a desk lamp as a spotlight. It focuses all the attention right on your puppets and makes the performance feel extra special, just like many easy crafts to do at home for kids that become full-blown activities.
24. Thumbprint Keychain Charms: Pocket-Sized Prints to Carry Daily

What if you could carry a tiny piece of your favorite person right in your pocket? Thumbprint keychain charms make that possible. These are small metal or resin pendants that hold a loved one’s unique fingerprint. You can attach them to keys or a backpack zipper for a daily dose of connection. People love them because they turn a simple keychain into a personal talisman you can touch anytime.
You can find kits to make these at home, which is a wonderful activity for a family craft day. It’s a special way to create a lasting keepsake together. For a simpler start, try some easy crafts to do at home for kids to build confidence first. A quick tip? Use a washable ink pad or even a pencil smudge to get a clear print without the mess.
25. Paint Clothespin Dragonfly Clips for Sunny Window Decor

These little dragonflies are a fantastic way to catch the sunlight and bring a bit of magic to any window. We transform a simple wooden clothespin into a colorful dragonfly body, then add shimmering wings made from cellophane or plastic. The finished clips are perfect for hanging on a curtain or window frame where the light shines through. You will love how the metallic paints and translucent wings create beautiful light-catching effects.
First, paint your clothespin in bright colors and let it dry completely. Next, cut four wing shapes from colorful cellophane or recycled plastic packaging. Use a simple teardrop shape as your template. The key is to attach the wings in a fan arrangement along the flat top of the clothespin with strong glue. This project is a wonderful way to upcycle materials and makes a thoughtful handmade gift, fitting right in with other clothespin crafts for kids.
Why does this work so well? The functional clothespin design makes them incredibly easy to display and move around. For an extra sparkle, try mixing a little glitter glue into your paint before applying it to the body. This project is also one of the most adaptable easy mothers day crafts for kids because you can change the colors to match any room.
All twenty-five easy mothers day crafts for kids above use materials that are safe, affordable, and easy to find. Whether you made one project or tackled several, each finished piece carries a story of laughter, concentration, and love that mom will recognize instantly.
How to Display and Preserve Finished Mother’s Day Crafts
To protect these sentimental keepsakes, apply a clear sealant suitable for the primary materials. For paper-based crafts decorated with washable paint or marker, a light coat of aerosol acrylic sealer or Mod Podge applied by an adult will prevent colors from smudging and add durability. Allow the craft to dry completely before applying any sealant in a well-ventilated area. For display, consider simple frames without glass to accommodate the three-dimensional nature of many kids’ crafts, or use washi tape to create a rotating gallery on a wall. Storing flat in a large art portfolio or dedicated memory box will prevent creasing and preserve these personal treasures for years, allowing the emotional value of the child’s work to last.
When displaying these easy mothers day crafts for kids, think about spaces where mom will see them daily. A kitchen windowsill, office desk, or bedroom dresser makes the perfect gallery for these handmade treasures. Rotating the display every few weeks keeps the decor fresh and gives every project its moment to shine.
More Easy Mothers Day Crafts For Kids Gallery for Inspiration
Browsing a gallery of finished projects is a wonderful way to spark new ideas and see how other families personalize their creations. Look for variations in color schemes, alternative materials, and creative display ideas that you can adapt to your own home. Every family puts a unique spin on their easy mothers day crafts for kids, and seeing that variety often inspires children to add their own creative twists.


Conclusion
Creating memories with children matters more than perfect results. We hope this collection of easy mothers day crafts for kids gives you plenty of ideas for a happy weekend together. Every painted handprint and folded paper shape carries genuine affection that moms notice immediately. Choose the projects that match the supplies already in your home, set up a clear workspace, and let the children lead the way. Smocks or old shirts keep clothes clean while everyone works. They will beam with pride when they present their own creation to someone they love. The best part is that these activities need no special skills, only a little time and a willingness to get messy. Bright paint on tiny fingers is part of the fun. Pick one project from the list above, gather your paper and paint, and start making heartfelt gifts with your little ones today.
The best easy mothers day crafts for kids are the ones that let children express themselves freely without worrying about perfection. When a child hands over a lopsided card or a paint-smudged pot, they are giving far more than an object. They are giving their time, their focus, and their love. That is the true gift of Mother’s Day.
FAQs
Q: What supplies do I need for these easy mothers day crafts for kids?
A: Most activities use construction paper, washable paint, non-toxic glue, scissors, and items from your recycling bin. Keep beads, yarn, and googly eyes on hand for extra detail.
Q: Are these projects safe for toddlers and preschoolers?
A: Yes. Every idea uses child-safe materials such as washable paints and paper products. Adult help is recommended for cutting or any step involving small pieces.
Q: How far in advance should we start making gifts for Mother’s Day?
A: Most of these ideas take under an hour to complete, so starting the weekend before works well. Drying times for paint, salt dough, or glue add a few extra hours.
Q: Which project works best for a large classroom group?
A: Paper plate wreaths, fingerprint cards, and pom-pom bouquets scale up easily because they need few materials and simple instructions.
Q: How do I protect furniture and clothing while painting?
A: Lay down newspaper or a plastic cloth and have children wear old shirts or aprons. Wet wipes placed nearby make cleanup quick and simple.


