

Body-Safe Pigment Choices For Skin Contact
Use only cosmetic-grade body paint labeled for skin contact, since general craft paint lacks suitability for prolonged wear and sensitive areas, which makes choosing proper materials essential for body painting art projects. Water-based formulas suit broad color fields, dry with a lighter skin feel, and wash away more easily after the event. Cream pigments offer richer coverage, though sweat and friction require careful testing on a small skin area. Products for eyelids, lips, and other delicate zones need explicit approval for those locations, not a general body-use label. Keep fluorescent or UV-reactive colors away from areas without clear cosmetic guidance. Check ingredient lists for fragrance or known personal sensitivities, then ask the model about allergies before planning full coverage. A clean, dry surface helps pigment sit evenly and keeps the final color closer to its test result.
Lighting Tests For Pigment Readability
Test the painted design under the event’s colored lights before committing to full-body coverage, because red, blue, and ultraviolet sources alter contrast, and proper lighting analysis directly improves your body painting art results. A phone camera preview helps reveal pale pigments disappearing against skin, while a gray card gives you a neutral reference for white balance. Keep adjacent hues separated by value, not only by color family, so linework stays readable beneath saturated lighting. Metallic pigments need an angle test because direct glare turns small marks into blank highlights. Ask the lighting operator for a short rehearsal or recreate the venue with colored LED bulbs in a dim room. Photograph shoulders, torso, and limbs while the model moves, since a design readable while still often loses edges during motion. Colored LED bulbs provide a practical home test.
1. Neon Galaxy Nebula Spiral Chest Design
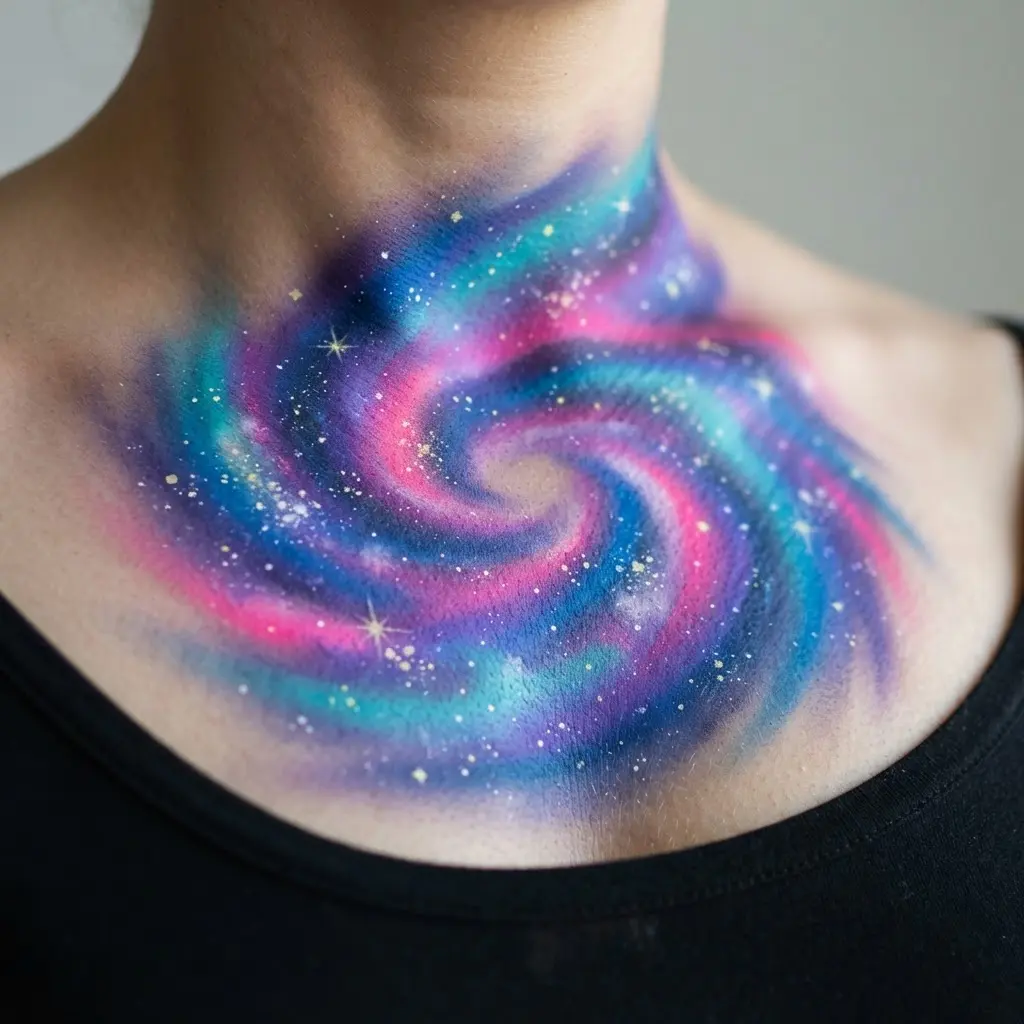
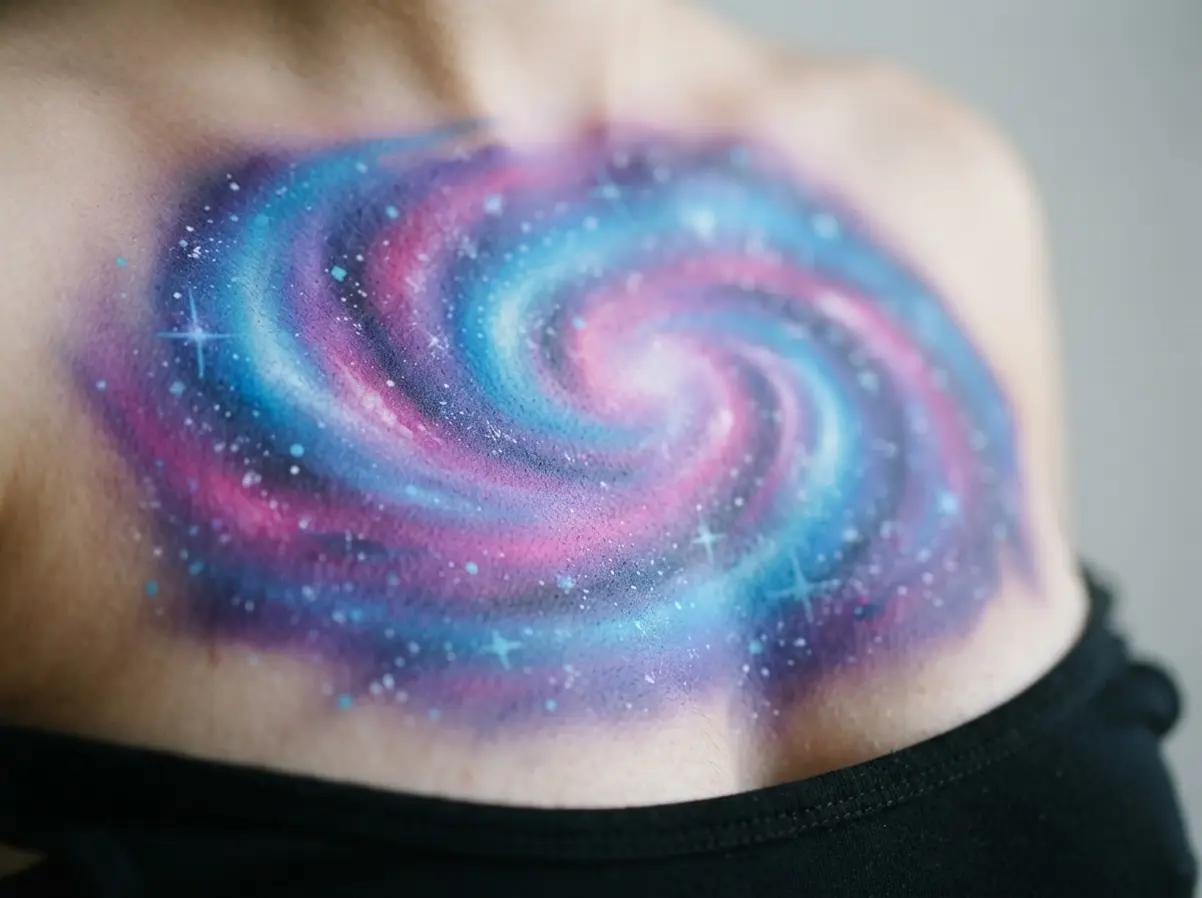
Ever wondered how a chest piece gets its cosmic glow, and does practicing body painting art help clarify the color blending process? Start with an electric-blue centre on the chest, then blend violet outward into soft nebula clouds. Add magenta, cyan, and deep-purple strokes around this bright point so the design feels alive without losing its focus.
Next, sweep the clouds into curved spiral arms following the chest’s natural shape. Scatter tiny stars, constellations, cosmic dust, and luminous gas trails between the curves. I love adding a few fine neon outlines and small lens flares last, since they sharpen the futuristic look without crowding the artwork.
Finish with a dark edge fade around the chest, keeping the centre brighter than every other area. This body painting art idea works beautifully for festivals, photos, and stage settings because the contrast makes each colour stand out. Keep your edges clean, and enjoy the mysterious glow.
2. Gold Leaf Geometric Patterned Shoulders
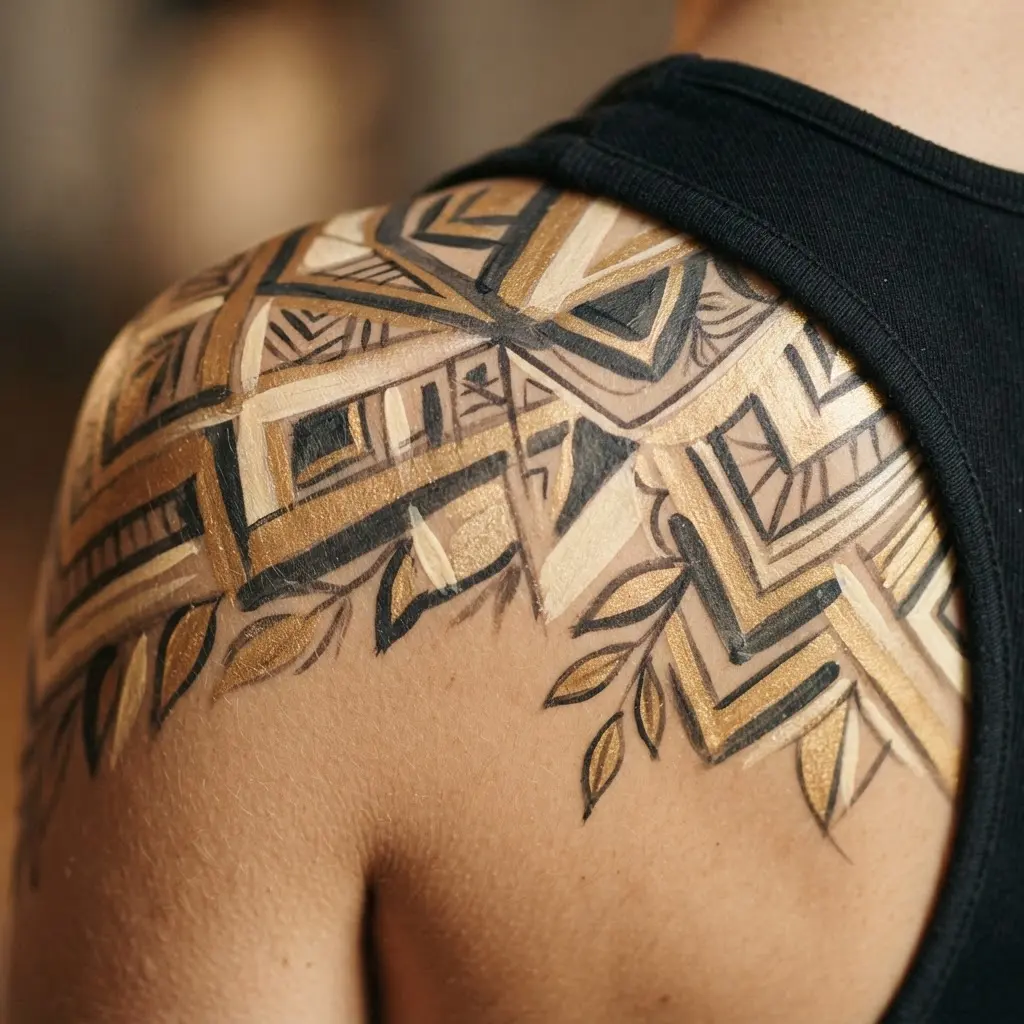
This shoulder design looks polished from the first clean lines. Start by mapping an angular shoulder composition across the skin, keeping the shapes balanced from front to back. Paint the base pattern first, then press small pieces of gold leaf onto chosen sections so the metallic accents guide the eye instead of covering every shape. Sound complicated? It is not, and I love how the architectural layout suits fashion styling, costume presentation, or decorative body painting art. Keep the gold placement even, with enough unpainted space around each accent to preserve the refined finish. Trust me on this one: step back often, since the full shoulder view reveals whether the geometry feels connected. Feel proud when the gold catches the light.
3. Bioluminescent Deep Sea Creature Full Body

This one is my favorite because the finished figure feels alive against black water, and trying a full-coverage approach in body painting art reveals how much light the pigments can hold. Start with a complete centered silhouette, then cover the skin in translucent blue-black tones, keeping every fin, tendril, and appendage visible.
Sound complicated? It is not. Add cyan markings along the torso and limbs, then carry the glow onto the fins and tendrils with cyan glow patterns. Give the large eyes sharp reflective highlights, while faint bubbles and suspended particles fill the space around the figure.
This contrast works because the dark body stays readable while each luminous detail draws attention to the anatomy. Keep the background nearly black, place a cool rim light around the outer edges, and avoid cropping any part of the creature. I love the final effect when the centered pose feels calm, strange, and full of life.
4. Intricate Floral Vine Arm Wrap Design

Soft gray petals curl around the arm, with slender stems crossing in a gentle spiral from wrist to upper arm, which proves how body painting art adapts beautifully to curved surfaces. Sound complicated? It isn’t. Start with a main vine pathway, then add diagonal stems following the arm’s curve. Place one larger rose, peony, or lotus near a focal point, and let smaller blossoms, leaves, and tendrils lead the eye onward.
Leave clean gaps between each form so the black-and-gray body painting art stays airy in photographs and from every angle. Soft shading and stippling give petals depth without hiding the fine lines. I love how varied flower sizes make the wrap feel connected instead of split into separate panels. Pro tip: rotate the arm as you work, checking the spiral flow from the front, side, and back. Keep dots sparse, and let the skin breathe.
5. Cybernetic Circuitry Mechanical Back Art
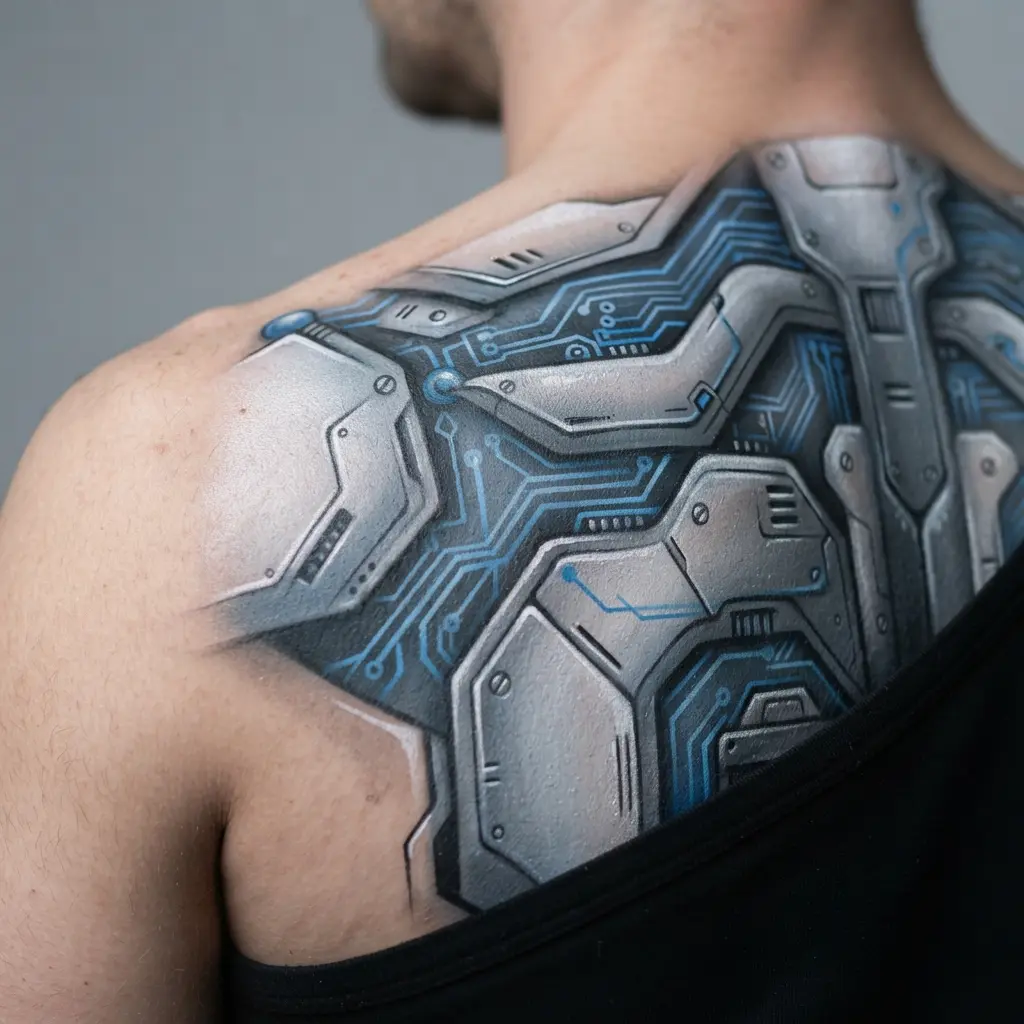
Random circuitry weakens this piece, so start with the central spine axis and build outward, since mapping symmetry first streamlines the body painting art workflow. Sound complicated? It is not: sketch exposed vertebrae down the center, then mirror titanium plates, hydraulic joints, and cable paths toward the shoulder blades and ribs. I love how this layout gives the back a clean, engineered rhythm.
Build depth with dark recesses beneath each plate, using thin lines for fiber-optic cables and small gaps around the joints. Add selective neon accents, keeping the brightest glow near the spine while rim lighting picks up metallic edges. This balance makes the body painting art feel sleek and futuristic instead of flat, and your final reveal will feel wonderfully satisfying. Trust me, restrained light makes every machine detail stand out.
6. Sunset Desert Landscape Silhouette Torso Piece
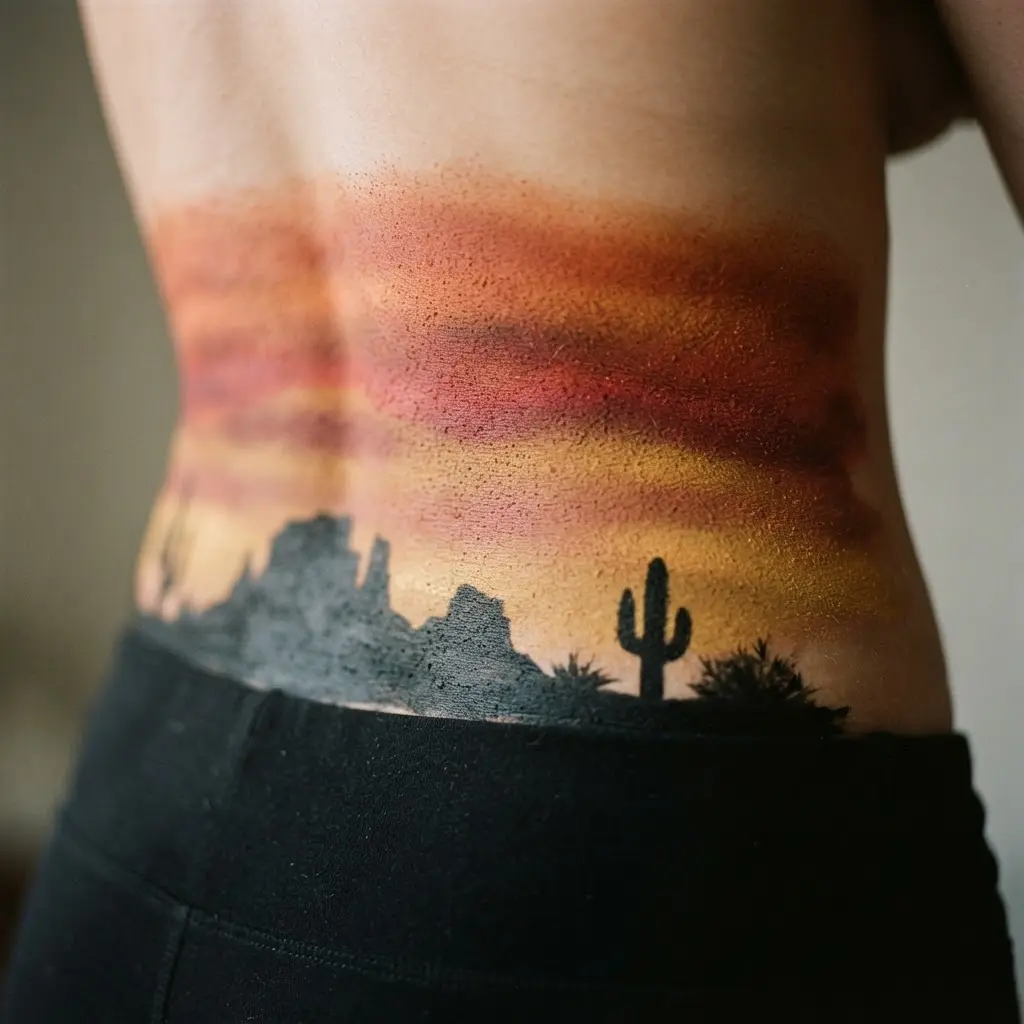
Start with a large circular sun and place it near the torso’s center, letting its lower edge meet the horizon, because landscape themes bring natural pacing to body painting art sessions. Add distant mesas, then sweep across the ribs or abdomen with overlapping dune layers. Use dark silhouettes for cacti, Joshua trees, rocks, and small desert plants. Ever tried a scene with such strong contrast? It gives the desert view a clear focal point from across the room.
I love how the sky feels warm beside those deep black shapes. Use fine-line shading and gentle dot work to suggest the sunset gradient without crowding the scene. Keep birds, stars, or geometric framing sparse, so each layer stays easy to read. Pro tip: plan the full width before painting, since ribs and abdominal curves affect every horizon line. Feel proud when the peaceful desert story settles across your torso.
7. Iridescent Mermaid Scale Neck to Shoulder
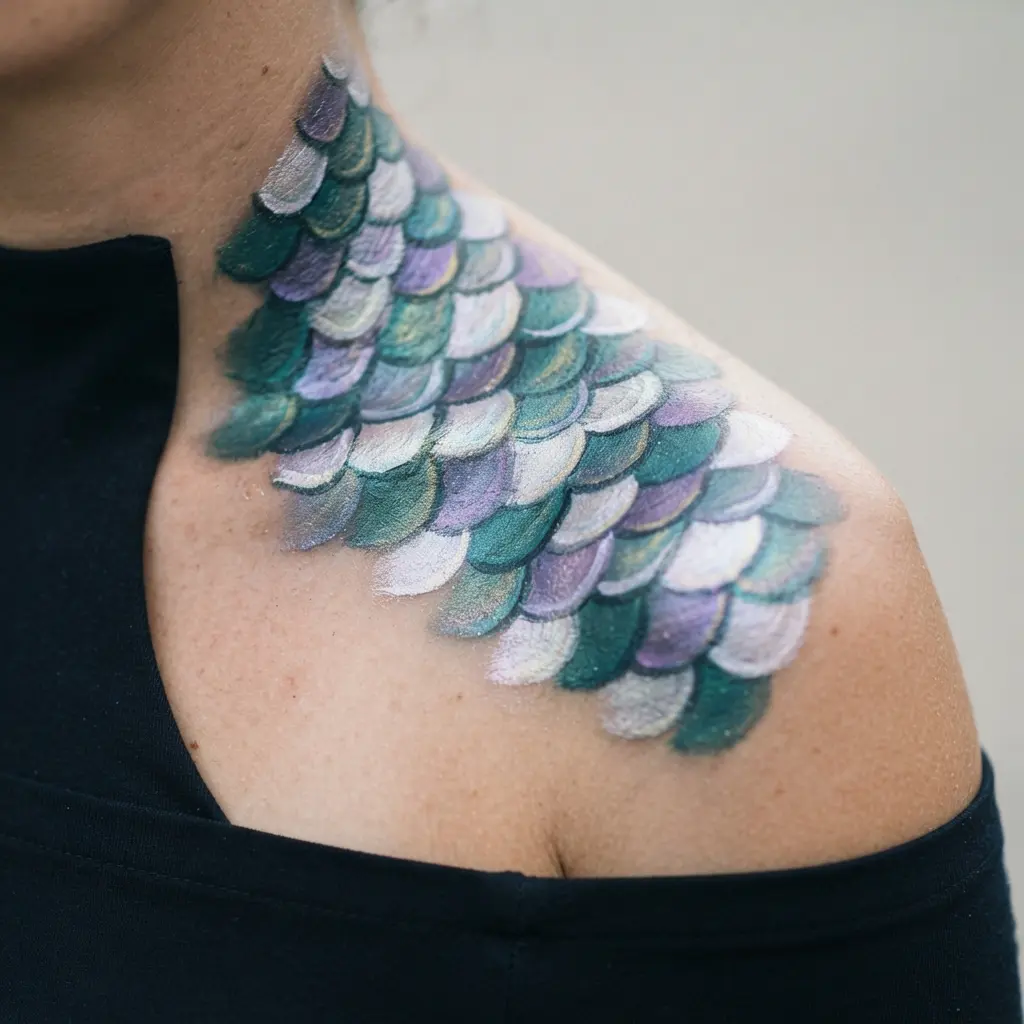
Ever wondered how a shoulder design gets its soft, shifting shine, and does practicing scale patterns help your body painting art workflow? Start with overlapping scale shapes at the side of the neck, keeping each one small near the neckline. Guide the rows along the curve of the neck and collarbone, then let the scales grow wider as they reach the shoulder. I love how this size change gives the piece graceful movement without making the placement feel crowded.
Blend turquoise and teal first, then brush violet, lavender, and pearl through the scales so each section shifts with a holographic glow. Keep the colours blended rather than separated into flat blocks, and leave enough overlap for the pattern to read clearly. Trust me, following the body’s curves is the tip which makes this design feel polished.
8. Abstract Watercolor Splash Full Arm Sleeve
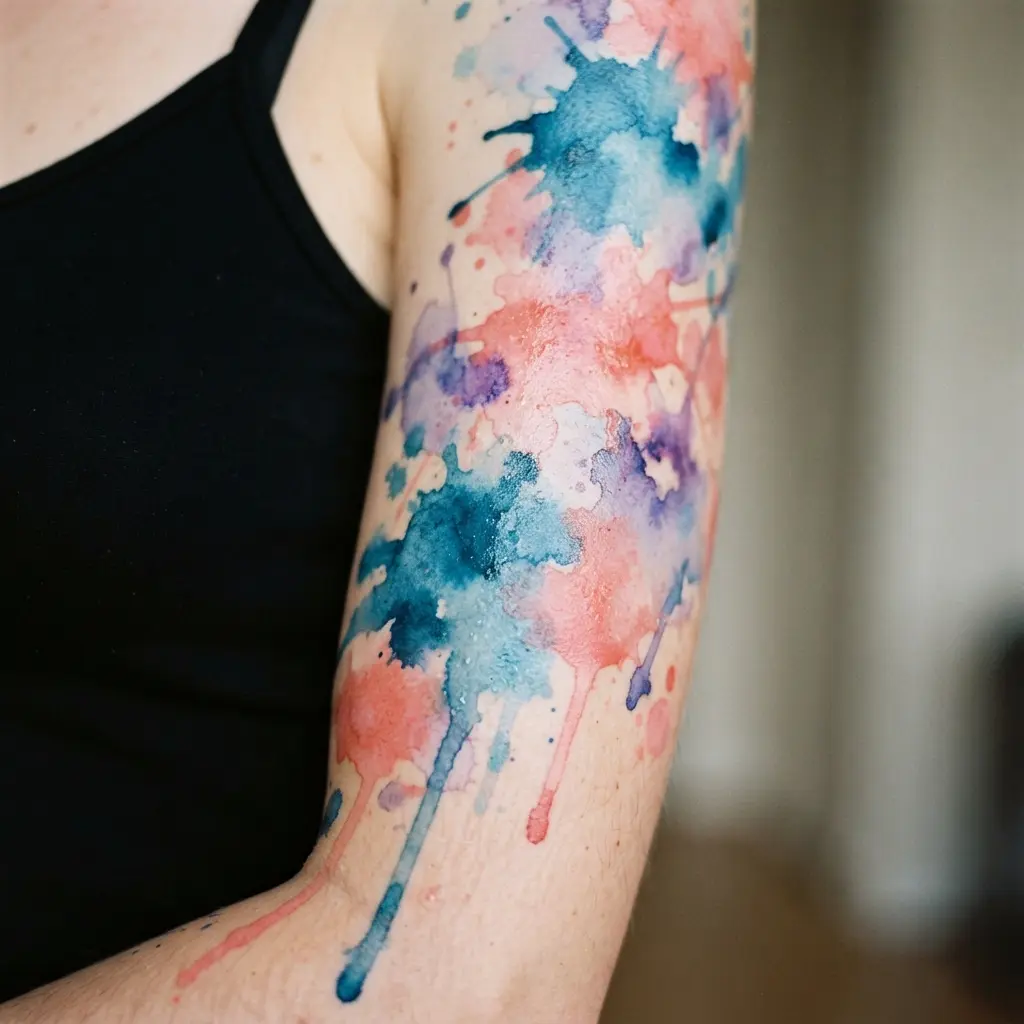
This sleeve looks wild at first, yet its flow becomes easy to plan once you treat the arm as one continuous canvas, which mirrors the free-flow approach in body painting art techniques. Begin with large shoulder color blooms, then carry cobalt blue, turquoise, violet, magenta, coral, and yellow strokes through the bicep toward the wrist. Are rigid rows necessary? Not here, since soft gradients, translucent brush marks, drips, and loose splatter keep the piece spontaneous.
Leave small white-space breaks between saturated areas so the colors stay light and breathable. I love how winding strokes wrap around the arm, while a quiet flower, bird, geometric shape, or animal silhouette hides within the splashes. Trust me, blend nearby colors organically and keep black or gray accents subtle, and you will feel proud when the full sleeve comes together.
9. Monochrome Marble Texture Face and Neck
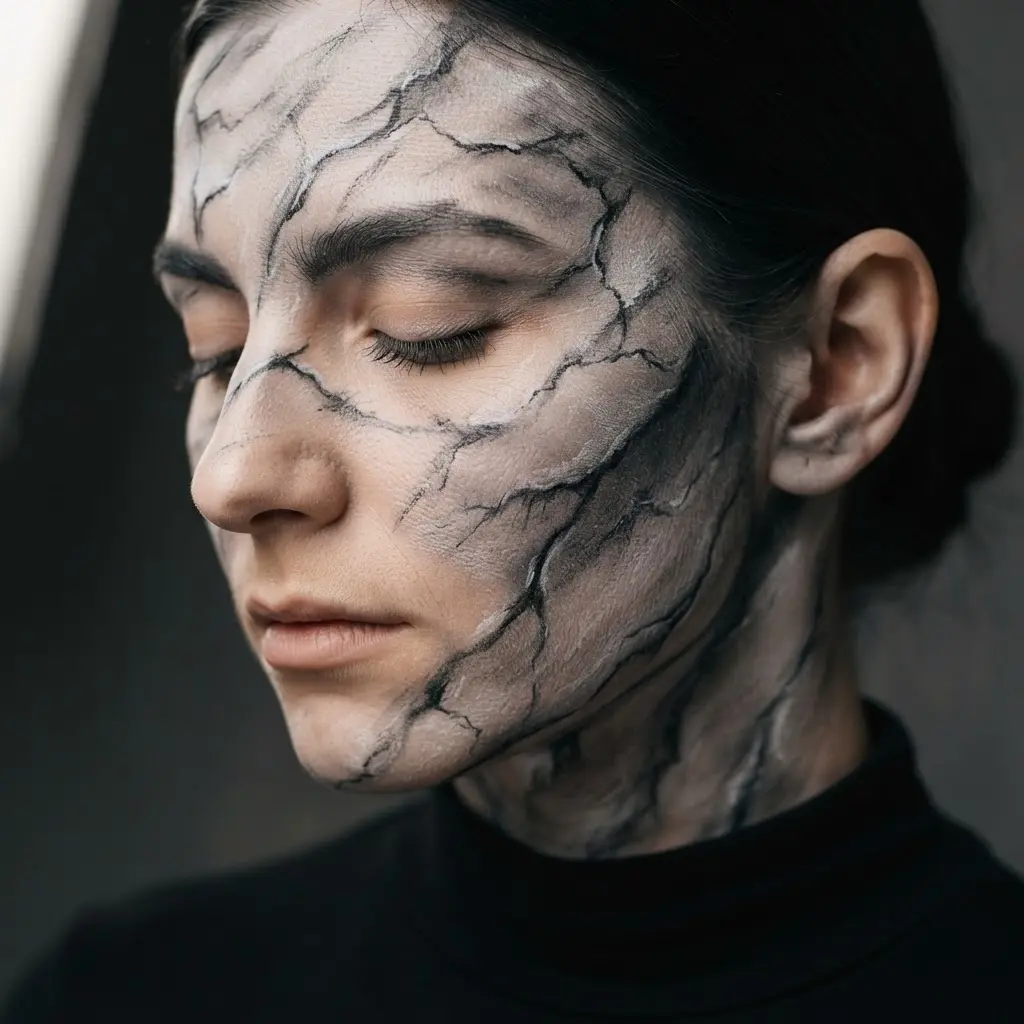
I love this look because it turns a portrait into a polished marble statue without hiding the model’s features, proving how body painting art captures realistic textures effectively. Ever wondered why some versions look flat? Start with an even white face-and-neck base, extending it below the jaw and along the neck.
Add delicate gray veins along the nose, cheekbones, jaw, and neck, following each area’s natural direction instead of drawing random branches. Gentle shading around the contours brings out the sculptural structure, while small highlights keep the surface smooth and stone-like.
Use a dark background with soft directional lighting so the pale paint stands apart and the shadows define every curve. Keep the veins restrained, since refined lines create a more photorealistic finish than heavy marks. Trust me, the centered portrait feels satisfying once the face reads like a museum statue.
10. Forest Moss and Fern Body Integration
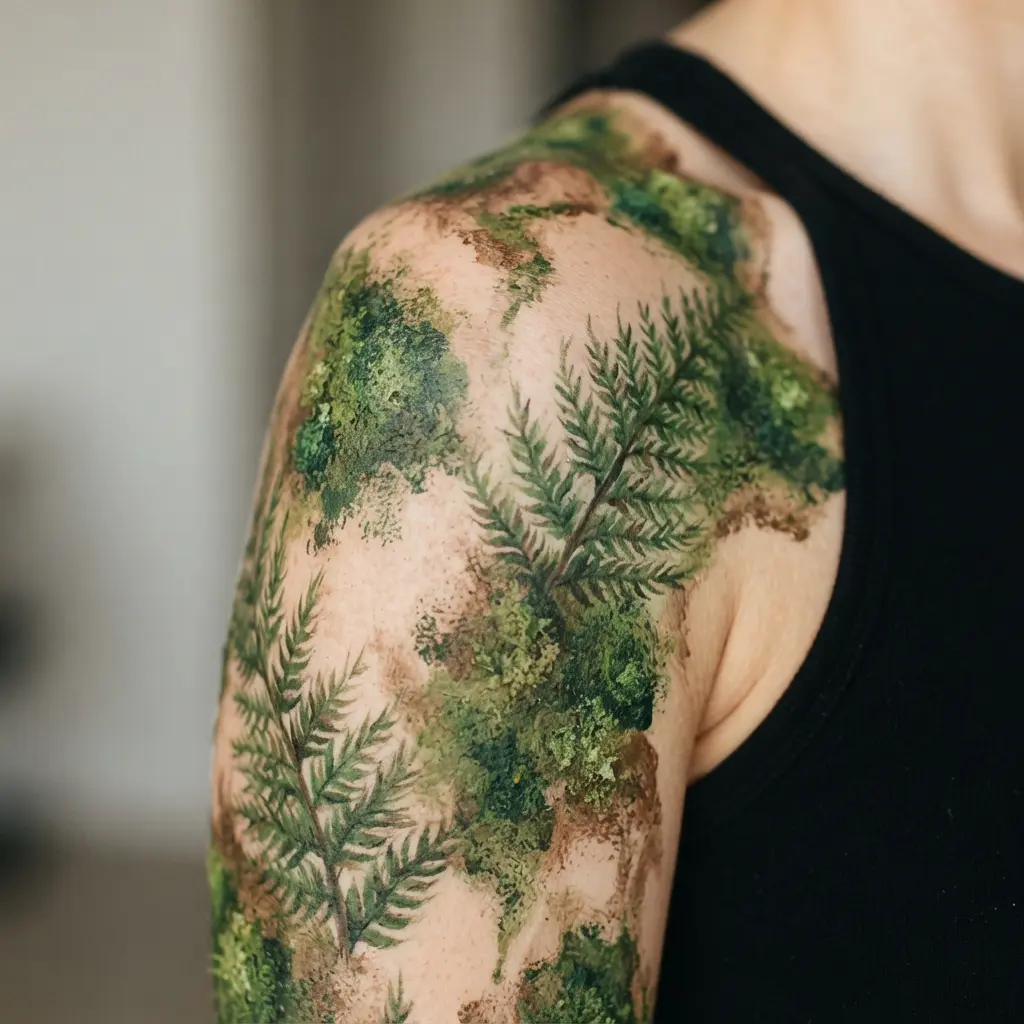
Soft green layers curl across the skin, with fern fronds reaching from the shoulder toward the ribs and tiny moss-like marks filling the gaps, a layout that highlights how body painting art merges with natural anatomy. Sound complicated? It is not. Start with a muted green base, then place darker, curved stems along the body’s natural lines. Add small clustered dots and short strokes around each frond, leaving skin-colored space so the design stays airy.
I love this idea because it follows your shape instead of hiding it, giving body painting art a calm woodland look. Keep the outer edges loose, and vary each leaf rather than repeating one exact pattern. A damp sponge helps soften the base, while a fine brush keeps the veins clean. Pro tip: test every green on a small skin area first, then let each layer dry before adding detail. Feel the freshness when the foliage seems to grow with you.
11. Pop Art Comic Book Style Portraiture

Soft, blended shading might seem like the safest choice, but it weakens this comic-book look, while crisp graphic work aligns with bold body painting art approaches. Start with a close-up pose and an expressive face, then map the features with thick black outlines. Fill each area with red, yellow, blue, and turquoise blocks, keeping the shadows crisp instead of smoothing them away. Doesn’t the face look more expressive once the features grow larger?
Next, place Ben-Day dots in planned patches around the cheeks, forehead, or background, and add a speech bubble without covering the eyes or mouth. I love how the offset-print texture gives the painted figure a vintage panel finish, even across curved skin. Keep the composition open, since crowded accents pull attention from the face. Pro tip: test every line while the model changes position, so the portrait stays clear from each viewing angle.
12. Jeweled Crown and Collarbone Ornamentation

Place a thin jeweled crown outline above the forehead, then guide small painted points toward the temples and down to the collarbones, because precise line placement elevates any body painting art composition. Keep the lines light and spaced, leaving room for each jewel or painted accent to sit clearly. Repeat one shape near each collarbone so the design feels balanced without looking stiff. Sound complicated? It is not. I love this layout because the upper face and shoulders share one graceful rhythm.
Use skin-safe cosmetic color and embellishments made for body use, testing every product on a small area first. A fine brush helps with tiny points, while a stencil offers cleaner repeated shapes. Let each layer dry before adding the next detail, and remove adornments gently after the session. Trust me on this one: a limited palette makes the jewels stand out, so your finished look feels polished and joyful.
13. Celestial Moon Phase Spine Decoration
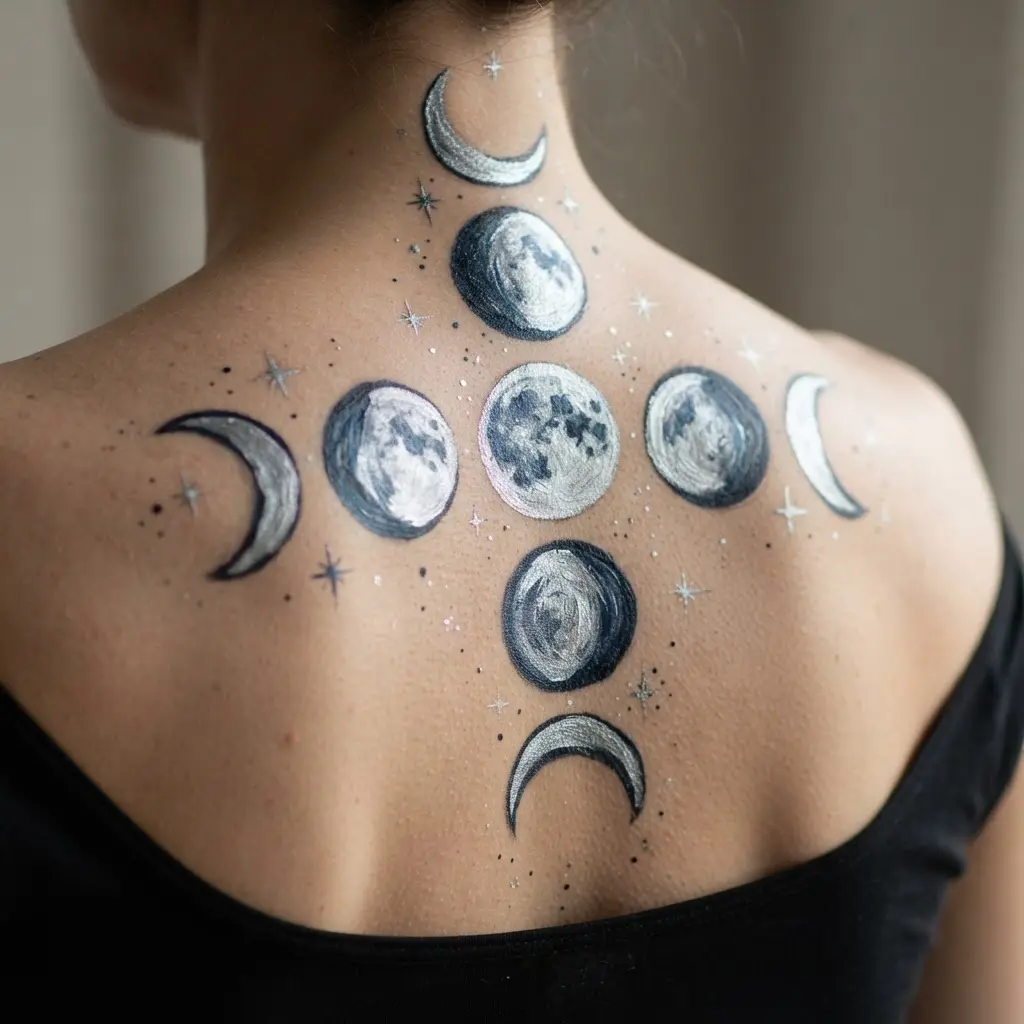
Ever wondered how a full lunar cycle could follow the spine so neatly, and does tracking celestial rhythm help your body painting art layout stay balanced? Start with small crescent moons near the upper back, then place each phase in order until the full moon sits at the center, before returning to a crescent near the lower back. Use fine-line blackwork for crisp outlines, with soft gray shading giving each moon gentle definition.
Leave breathing room between phases, then add tiny stars, a constellation, or a slim celestial vine without crowding the narrow layout. I love the quiet rhythm of this design, especially when restrained white or metallic gold accents catch the light. Keep the arrangement balanced from side to side, since heavy marks or scattered details quickly weaken its delicate feel. Trust me, a clean sequence makes the finished decoration feel polished and serene.
14. Baroque Filigree Hand and Wrist Art

This design feels like a tiny royal adornment, yet it stays friendly to paint, which makes intricate body painting art accessible to newcomers. Treat your fingers, hand, and wrist as one flowing surface, beginning with symmetrical scrollwork across the back of the hand. Let curling filigree travel toward each finger, then add small floral motifs so the pattern feels airy instead of crowded.
Finish the wrist with connected loops resembling an antique bracelet, using gold or silver accents and a few faux gemstones for a jewelry-like glint. Sound complicated? It is not, once you repeat the same curves on both sides. I love how the fine lines bring theatrical elegance without hiding the skin. Keep the metallic touches small, and feel proud when the whole adornment reads as one polished design.
15. Tropical Butterfly Wing Back Masterpiece

I love this design because it turns the whole back into a jewel-toned butterfly with graceful impact, and working with large symmetry improves any body painting art session. Sound complicated? Start with a spine-centered butterfly body, then sketch matching wings toward the shoulders and taper them near the lower back. Fill both sides with turquoise, emerald, cobalt, magenta, orange, and gold, leaving room for eye spots and thin veins. Add rainforest leaves, flowers, hummingbirds, and glowing insects after the symmetry feels steady.
Deep black outlines, layered shadows, and soft iridescent touches give the wings separation and depth. Trust me, matching the eye spots and veins side by side keeps the composition balanced. Use a skin-safe paint suited to fine lines and rich color, then step back often to check both sides. Isn’t it satisfying when the central body pulls every detail together?
16. Minimalist Black Ink Botanical Hip Design
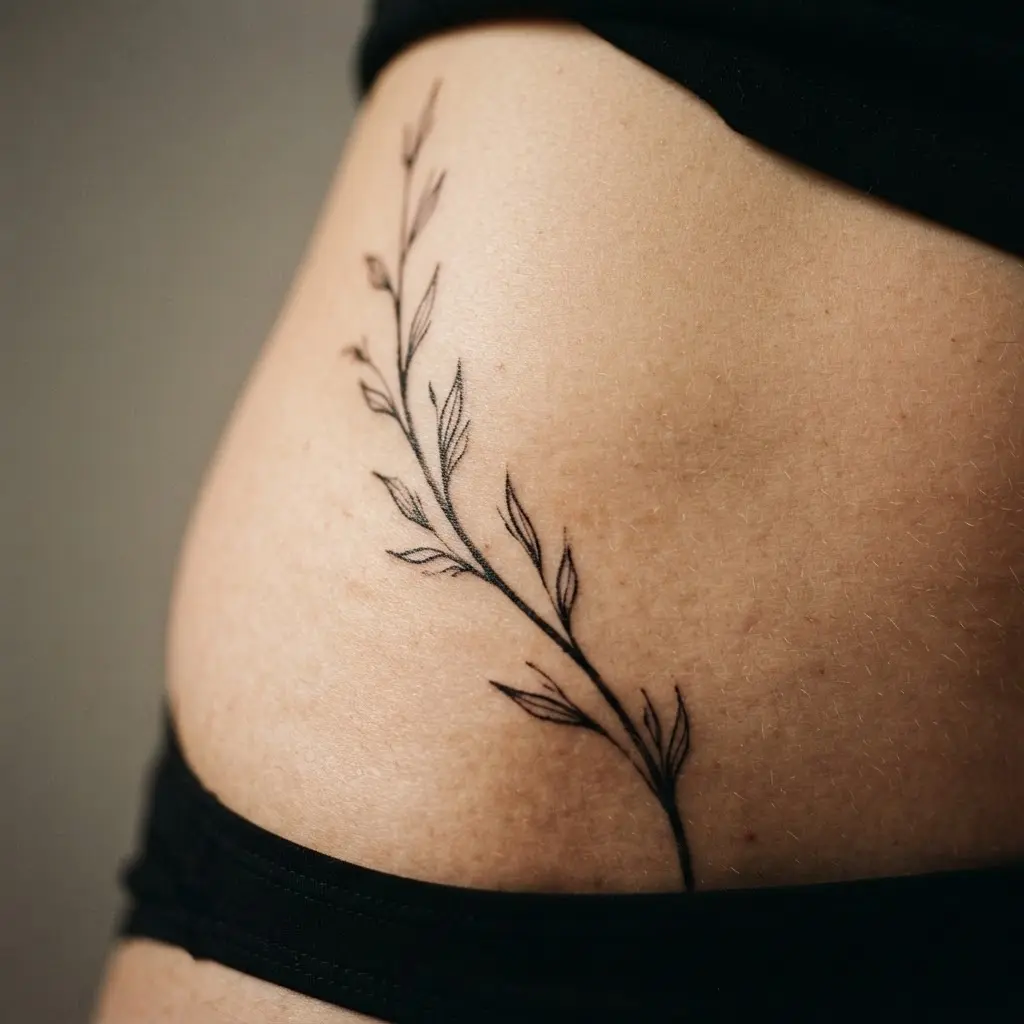
Fine stems sweep along the hip, with slender eucalyptus leaves opening into clean pockets of skin and one small wildflower resting near the curve, a layout that proves how body painting art thrives on simplicity. The piece feels light, crisp, and personal, with black ink only keeping every outline clear without color or shading.
Start with curving stem lines following the hip’s natural shape, then place the leaves with generous gaps and add the flower as a quiet focal detail. Keep the scale small to medium, with gentle asymmetry instead of a mirrored arrangement. I love how open space keeps this botanical design airy, while straight stems, heavy shading, or extra leaves make it feel crowded. Sound complicated? It isn’t. Ask your artist to test the curve on skin first, then enjoy the clean, delicate finish.
17. Surreal Eye Illusion Chest Focal Point

An oversized eye does not work as a flat sticker on the chest, so start by placing its iris at the body’s true center, because perspective mapping strengthens every body painting art piece. Use a chest-centered eye outline, then build the lids, wet highlights, fine veins, and skin-like texture outward across the torso. Add a dim inner glow and keep the surrounding field dark, with mist and tiny fragments well away from the iris. Is that enough to make it feel embedded? I love this concept because strong chiaroscuro turns a painted image into a hypnotic focal point, while restrained cosmic details add an eerie, elegant mood. Keep the brightest paint inside the eye and soften every edge beyond it for a clean body painting art presentation.
18. Copper Metallic Steampunk Gear Body Wrap

Start by mapping a copper metallic base across the torso and limbs, keeping the color rich and even from one section to the next, which establishes a reliable foundation for body painting art projects. Add gear shapes along the wrap, mixing large circles with smaller teeth so the mechanical pattern feels built into the painted surface. Give select edges a raised, sculptural look through layered shading and crisp highlights.
Doesn’t this design feel bold before the first gear is even finished? I love how the metallic finish turns ordinary body contours into industrial steampunk details suited to costumes, performances, festivals, and editorial styling. Keep every gear connected through shared copper tones and repeated texture, so the wrap reads as one complete mechanical form rather than scattered images.
19. Prismatic Prism Color Blocking Leg Art
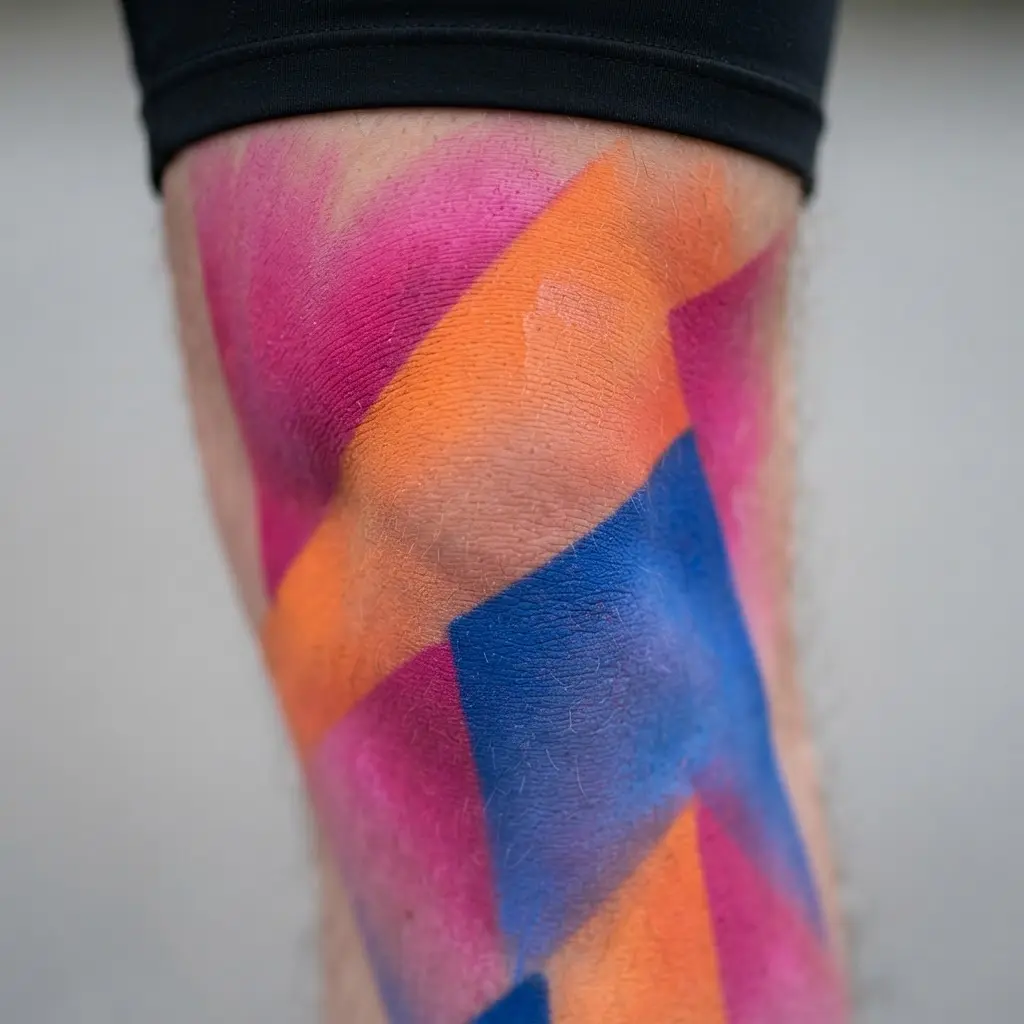
Ever wondered how a leg design gets so much color without looking crowded, and does structured blocking improve your body painting art workflow? Start with a vertical prism layout from thigh to ankle, leaving a few clean skin breaks between clusters. Overlapping triangles and faceted crystal shapes keep the eye moving down the leg.
Fill each section with jewel tones such as electric blue, magenta, violet, emerald, turquoise, amber, and fuchsia. Add deep charcoal outlines before small reflective facets, then use light gradient touches for a stained-glass finish. I love how the dark borders keep every block readable.
Keep neighboring colors far apart in value, and resist filling every open area. Too much blending softens the sharp graphic look, while preserved negative space gives each prism room to stand out. Trust me, outline first and refine the facets last for a cleaner result.
20. Frosted Winter Crystal Shoulder Embellishment

This shoulder piece looks delicate, yet its sparkle comes together with a clear, simple layout, and winter themes add a refreshing tone to body painting art portfolios. Begin with icy crystal accents across the shoulder, placing larger points near the center and smaller ones outward. Add shimmering beads between them, then scatter frosted silver details around the edges for a fresh snow effect. Keep the decoration light rather than opaque, so skin tone and spacing remain part of the look.
Isn’t the cool palette satisfying? I love how this arrangement suits winter gowns, bridal looks, and evening wear without losing its soft finish. Let each cluster follow the shoulder’s natural curve, and check comfort and skin-safe attachment before wearing it for a long event. Trust me, the final sparkle feels polished and graceful.
Photographing Painted Bodies Under Controlled Light
A 50mm lens keeps body proportions closer to life-size than a wide lens when you photograph full-body paint from a moderate distance, which guarantees accurate documentation of your body painting art results. Place the camera at the model’s mid-torso height, since a low viewpoint enlarges legs and a high viewpoint shortens them. Use a plain, low-contrast background so silhouette edges stay clear around arms, fingers, and hair. Soft, even key light preserves broad pigment areas, while a gentle fill prevents dark paint from merging with shadow. Keep white balance fixed across the session, especially when metallic or fluorescent colors need consistent rendering. Ask the model to hold a few natural poses, then photograph transitions as well as still positions. A gray card beside the model supports later color correction without guessing.
Conclusion
Your favorite design might reflect a color you love, a fashion mood you want to express, or a theme tied to a special event, and returning to body painting art regularly builds lasting skill. Body painting art gives you room to experiment without asking every detail to look identical. Look at what you have made, because choosing a concept, placing it across the body, and refining the small details all show real skill. For your next session, test a small color arrangement on clean, moisturized skin before committing to a larger area. Check every product label for cosmetic use, then keep a setting spray nearby for event-day touch-ups. We are building confidence one thoughtful design at a time. Pick the idea still sitting in your mind, set aside an afternoon, and let your next painted look feel fully yours.
FAQs
Q: What paint is safe for body painting?
A: Choose water-based or alcohol-activated pigments labeled for cosmetic use. Check the ingredient list, follow the product directions, and test a small skin area before a full design.
Q: How do I prepare skin before body painting?
A: Wash the skin with a gentle cleanser and let it dry fully. Skip heavy oils and lotions before painting, since a clean, dry surface helps color sit evenly.
Q: How do I keep body paint from cracking?
A: Apply thin layers and let each layer dry before adding more detail. Finish with a skin-safe setting spray, then carry a small touch-up kit for long events.
Q: Is airbrush body painting better than brush painting?
A: Airbrushing suits smooth gradients and broad coverage. Brushes and sponges suit outlines, small details, and controlled color placement, so the best choice depends on the design.
Q: How do I remove body paint after an event?
A: Use warm water with a gentle cleanser for water-based pigment. For alcohol-activated color, follow the product label and use a suitable remover without harsh scrubbing.